MOUNTING INSTRUCTIONS
|
|
|
- Myles Henry
- 6 years ago
- Views:
Transcription

1 NL 2014 EML HARLEY REVERSE GEAR MOUNTING INSTRUCTIONS
2 1 Index 1 The kit(s) 2 2 Strip the bike 3 3 Remove the gear housing 5 3.a Mechanical clutch 6 3.b Hydraulic clutch 7 4 Mount the reverse gear 11 5 Remount the gear housing 26 5.a Mechanical clutch 26 5.b Hydraulic clutch 27 6 Connect the electrical wiring 34 6.a Wiring without CAN bus system 34 6.b Wiring with CAN bus system 35 7 Finish rebuilding the bike 39 8 First time reverse driving procedure 41 8.a Test the Side stand alarm 41 8.b Test side stand alarm with running engine 41 8.c Test driving reverse carefully 41 9 User instructions 42


3 2 1. The kit(s) Reverse gear kit. Year 2013 only! Hydraulic clutch cylinder housing kit. Only necessary if the bike is fitted with an hydraulic clutch. The additional pushing rod is only necessary in 2013 models.


4 3 2. Strip the bike Remove the fairings and the exhaust

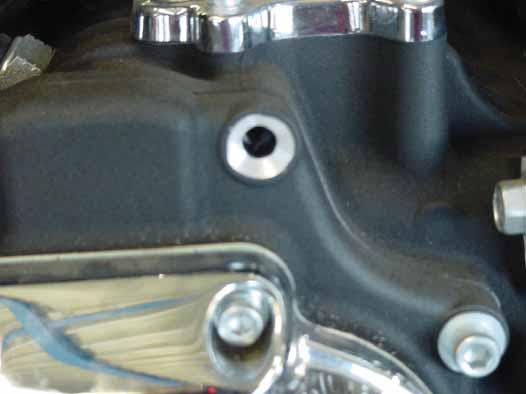
5 4 Remove this bolt Countersink the hole

6 5 Mount the countersunk bolt with a little bit (normal) Loctite. 3. Remove the gear housing The bike can be fitted with an mechanical clutch or an hydraulic clutch. For the mechanical clutch see page 6 For the hydraulic clutch see page 7

7 6 a. Mechanical clutch Remove the housing.


8 7 b. Hydraulic clutch Remove the cover.


9 8 Suck the oil out of the hydraulic operated clutch cylinder. Remove the hydraulic line from the clutch cylinder.


10 9 Remove the clutch cilinder.

11 10 Remove the housing.

12 11 4. Mount the reverse gear Remove the pushing rod and remove the both nuts.


13 12 Remove the chrome cover on the other side of the bike. Remove the springring

14 13 Parts removed.


15 14 Clean the screw-thread with brake cleaner. Mount the sprocket with strong Loctite.

.")
16 15 Use the tool provided to mount the sprocket. Tighten the sprocket up to Nm (47, ft-lb). Use the tool provided for mounting the second sprocket. See pictures.


17 16 Put the earplug inside the shaft as shown in the picture.


18 17 Mount the sprocket with strong Loctite. Tighten the sprocket up to Nm (47, ft-lb).


19 18 Use masking tape to mask the gearbox. So no steel shivers can come into the gearbox! Use a cutter shown in the picture.


20 19 Mill the two holes shown in the pictures.

 with some strong Loctite.")
21 20 Remove the special tool. And remove the steel shivers, which are released by milling the holes, with brake cleaner Mount the pins (shown in the picture) with some strong Loctite. Use the bolt provided to mount the pins in the holes.


22 21 Mount the plate shown in the picture.

")
23 22 Mount the plate with some (normal) Loctite.


24 23 Remount the pushing rod. Mount the bush shown in the picture.

25 24 Remount the other side of the bike.


26 25 Don t forget the spring ring! Remount the cover.

27 26 5. Remount the gear housing The gear housing for the mechanical and hydraulic clutch is slightly different therefore: For mechanical clutch see page 26 For hydraulic clutch see page 27 a. Mechanical clutch Make sure the switch is mounted correctly and functioning when the lever rotates. Mount the gear housing and the original HD cover.


28 27 b. Hydraulic clutch Make sure the switch is mounted correctly and functioning when the lever rotates. If the spring is mounted with this bush, Remove the bolt and bush. And replace with the bolt and bush as shown in the next picture.


29 28 Replace with these. Mount with strong Loctite.


30 29 It should look like this. Remove the piston of the hydraulic operated clutch cilinder.


31 30 Mount the piston in the EML housing using some (normal) Loctite.


32 31 Remount the hydraulic line of the clutch cilinder.


33 32 Mount the bleed nipple and bleed the clutch. Mount the stainless steel cover.


34 33 Mount the chrome cover. It should look like this now.
35 34 6. Connect the electrical wiring Depending on whether or not the bike has CAN bus. The wiring is slightly different. If the bike doesn t have CAN bus see page 34 If the bike does have CAN bus see page 35 a. Wiring without CAN bus system Attach the wiring according to diagram.


36 35 b. Wiring with CAN bus system Attach the wiring according to this description. See page 39 for an drawing of the wiring loom Find the BCM unit on the left side of the bike behind the cover. In the wiring loom is an (Red)/(yellow striped) wire. Attach the red EML wire to this wire. An 3A fuse should be placed in the red EML wire. BCM unit
/(white striped) wire of the")
/(gray striped) wire of")
37 36 ECM unit Find the ECM unit underneath the seat. Attach the green EML wire to the (Red)/(white striped) wire of the white (middle) connector. ECM unit Under the seat find the ECM unit. Attach the yellow wire to the (pale green)/(gray striped) wire of the black connector.


38 37 Mount the relay on the frame. For example mount it behind the rear cylinder to the steel plate in the frame. Neutral switch Attach the brown EML wire to the white wire of the neutral switch
39 38

40 39 7. Finish rebuilding the bike Check the level of the gearbox oil. Remount the exhaust and all the fairings.


41 40 If provided, use the extra exhaust mounting bushes.
42 41 8. First time reverse driving procedure a. Test the Side stand alarm Sit on bike. Sidestand in. Ignition on. don t start! Pull the reverse lever Side stand alarm should go on! If OK. See 9B b. Test side stand alarm with running engine Sit on bike. Start engine. Sidestand in Pull the clutch and hold! Shift the gearbox in first gear Keep the clutch in and hold! Pull the reverse lever carefully The engine should stall! If OK. See 9C c. Test driving reverse carefully Sit on bike. Make sure the gearbox is in Neutral! Start engine Sidestand in Pull the clutch and hold! Pull the reverse lever carefully Release the clutch slightly until the bike starts moving. Let the clutch just touch a little. The bike should drive backwards! If OK. the reverse gear is functioning as it should, and can be used.
43 42 9. User instructions NL: Belangrijk! Instructie voor bestuurder: Bij het inschakelen en tijdens het ingeschakeld hebben van de achteruit versnelling, moet de versnelling van de motorfiets altijd in neutraal staan! Alvorens de achteruit in te schakelen altijd met de koppeling testen of de versnelling daadwerkelijk in vrij staat! Nooit de koppeling volledig loslaten bij het achteruit manoeuvreren. Dan gaat het voertuig te snel. Koppeling alleen iets aan laten lopen! W-Tec BV kan niet aansprakelijk gesteld worden voor schade aan motorfiets of personen, die veroorzaakt kan worden door montage of het gebruiken van de achteruitversnelling! DE: Wichtig! Anweisung für den Fahrer: Beim Einschalten und bei eingeschaltetem Rückwärtsgang, muss das Motorgetriebe immer im Leerlauf sein! Bevor man den Rückwärtsgang betätigt, sollte immer die Kupplung überprüft werden, ob das Getriebe tatsächlich im Leerlauf ist! Niemals der Kupplungshebel völlig lose lassen beim Ruckwerts manövrieren. Nur der Kupplung etwas anlaufen lassen. Sonst ist der rückwärts Geschwindigkeit vom Fahrzeug zu hoch. W-Tec BV kann nicht für etwaige Schäden am Motorrad oder an Personen, die durch die Montage oder dass Benutzen des Rückwärtsganges entstehen können, haftbar gemacht werden. ENG: Attention! Instructions for the driver: Before switching into reverse gear and during having the reverse switched in, always make sure that the engine gearbox is in neutral. Before you switch the reverse gear, always check with you clutch lever if it is in neutral! Never release the clutch completely while manoeuvring backwards. Let the clutch just touch a little. Otherwise the reverse speed of the vehicle is too high! W-Tec BV can not held responsible for damages on the Motorcycle or persons that which are caused by the installation or by using the reverse gear! Schrijffouten voorbehouden Schreibfehler vorbehalten Printing mistakes: reserved Copyright: W-Tec BV Handelsweg 2, 7161 BV Neede, Netherlands
MAKE OF AUTOMOBILE: TYPE: V 70 PISTON DISPLACEMENT: 2521 NUMBER OF VALVES:
 MAKE OF AUTOMOBILE: TYPE: V 70 PISTON DISPLACEMENT: 2521 NUMBER OF VALVES: 20V ENGINE NUMBER: B5254T TRANSMISSION TYPE ( MT / AT ) AT VEHICLE CATEGORIES M or N PASSENGER CAR ( M ) TYPE VSI INJECTOR (COLOUR
S1 Sequential. T56 Magnum. Sequential shifter. Contents and assembly instructions
 S1 Sequential Sequential shifter T56 Magnum Contents and assembly instructions Parts List Sequential shifter x1 Base plate x1 Base spacer x1 Drill Square x1 Shaft fitting x1 Square washer x1 8mm Aluminium
HGS SYSTEM Workshop Manual M103 01
 HGS SYSTEM Workshop Manual M0 0 HGS SYSTEM VERSION.0 EN/0-00 Autobusfabriek BOVA b.v. De Vest 9 5555 XL Valkenswaard The Netherlands Phone: + (0) 40 0846 Fax: + (0) 40 09477 E-mail: basis@bova.nl Website:
BMW-Motorrad Installing LED auxiliary headlights Preparatory work. Core activity
 77 51 001 Installing LED auxiliary headlights + 77 51 502 Equipment trim-level variant: LED auxiliary headlights Note Not all the components contained in the installation kit are necessary for installing
Page. 2. Connection schema.
 4 2. Connection schema 3. Installation Switch off ignition and disconnect sconnect the vehicle s battery! If according to factory rules r disconnecting the battery hass to be avoided, it is usually sufficient
SEQUENTIAL SHIFTING MECHANISM -"SEQSHIFT" below named SQSG
 - 1 - SEQUENTIAL SHIFTING MECHANISM -"SEQSHIFT" below named SQSG "SQSG for Porsche GT3" is intended to SYNCHRO 6 speed transmission GT3, GT2 from year 2006. It is applicable for older, cable operated transmission
Connecting the rear fog light on the A4 Jetta, while keeping the 5 Light Mod
 Connecting the rear fog light on the A4 Jetta, while keeping the 5 Light Mod DISCLAIMER: I'm human and make mistakes. If you spot one in this how to, tell me and I'll fix it This was done on my 99.5 Jetta.
Installing the Dan-Marc and Pingel setup.
 Installing the Dan-Marc and Pingel setup. This is an alternative to the OEM vacuum petcock. It's the setup I use and feel more comfortable with it. Many still like the OEM vacuum petcock and they can continue
RS04 RS16 RS19 RS18 PHOTOETCHED: CAST: DECALS: SCREWS: OTHER: - RS02 RS03 RS04 RS05 RS08 RS09 RS16 RS18 RS19 M23. 8x T03
 PART 2 chapter 3 building steps 2 A1 Engine/gearbox casing Cyanacrylate () sand paper RS19 RS04 RS16 RS02 RS09 RS08 RS05 RS03 Stick together the crankshaft casing as gap-free as possible from the designated
Champion Reverse Gear Harley-Davidson Six Speed Transmissions for FLH 2009 Up
 Champion Reverse Gear s for FLH 2009 Up (Cable or Hydraulic Clutch) Installation Instructions Revision 2 Champion Motorcycle Accessories International, Inc. dba Champion Sidecars 11841 Monarch Street,
Retro it Steering Column
 Retro it Steering Column INSTALLATION INSTRUCTIONS for 1970-74 Cuda/Challenger FOR PART NUMBER S: 1620810010, 1620810020, 1620810051, 1620820010, 1620820020, 1620820051 S I NCE 1986 Instruction # 8000000005
VECTRIX VX-2 SERVICE MANUAL. Version 1.0/May 2011 VECTRIX, LLC
 www.vectrix.com CONTENTS SECTION A: Tools 1 Tools Needed SECTION B: Mechanical Parts 1 Front Fairing 2 Front Console Cover 3 Speedometer Cover 4 Front Vertical Panel Cover-Lower 5 Front Vertical Panel
GROUP SIX LIGHTS. Contents of this group:- Tools required for assembly of this group: - 8mm Spanner K AA TAIL LIGHTS K AB HEAD LIGHTS
 GROUP SIX st Edition LIGHTS Contents of this group:- 6: K360AA TAIL LIGHTS 6: K360AB HEAD LIGHTS 6:3 K3603AB WIRING 6: K3605AB WIRING AND SWITCHES 6:5 K360AA INDICATOR PILOT LIGHTS Tools required for assembly
WARNING: the engine does not come with oil in it. Please fill the oil before starting. The 200cc hardknock requires 9/10 of a quart of oil.
 WARNING: the engine does not come with oil in it. Please fill the oil before starting. The 200cc hardknock requires 9/10 of a quart of oil. Things needed for assembly. -2 tubes of blue loc-tite. I don
TSS Fit Kit Installation Instructions Timbersled Snow Bike System
 TSS Fit Kit Installation Instructions Timbersled Snow Bike System Information needed before you start: Read the entire installation instructions before starting. The instruction sheet is universal for
FLY BABY U.S.MAIL. Radio control model R/C Flugmodell INSTRUCTION MANUAL MONTAGEANLEITUNG U.S.MAIL VERSION SPECIFICATIONS TECHNISCHE DATEN
 Radio control model R/C Flugmodell INSTRUCTION MANUAL MONTAGEANLEITUNG FLY BABY U.S.MAIL VERSION U.S.MAIL Item No. 1600133 SPECIFITIONS Wingspan 1210mm (49in.) Length 880mm (34.6 in.) Electric Motor (See
MAKE OF AUTOMOBILE: TYPE: 508 PISTON DISPLACEMENT: NUMBER OF VALVES: FIRING ORDER: TRANSMISSION TYPE ( MT / AT ) VEHICLE CATEGORIES M or N
 VEHICLE CATEGORIES M or N") MAKE OF AUTOMOBILE: Peugeot TYPE: 508 PISTON DISPLACEMENT: 1600cc NUMBER OF VALVES: 16v ENGINE NUMBER: EP6CDT 115kW FIRING ORDER: 1-3-4-2 TRANSMISSION TYPE ( MT / AT ) MT VEHICLE CATEGORIES M or N M TYPE
MAKE OF AUTOMOBILE: Peugeot TYPE: 508 PISTON DISPLACEMENT: 1600cc NUMBER OF VALVES: 16v ENGINE NUMBER: EP6CDT 115kW FIRING ORDER: 1-3-4-2 TRANSMISSION TYPE ( MT / AT ) MT VEHICLE CATEGORIES M or N M TYPE
SCdefault. 900 Installation instructions
 SCdefault 900 Installation instructions SITdefault Airbag replacement harness MONTERINGSANVISNING INSTALLATION INSTRUCTIONS MONTAGEANLEITUNG INSTRUCTIONS DE MONTAGE Accessories Part No. Group Date Instruction
2013 Road King CVO FLHRSE5 Detachable Fairing w/ Garmin Zumo 665 Installation Instructions
 2013 Road King CVO FLHRSE5 Detachable Fairing w/ Garmin Zumo 665 Installation Instructions 1 1. Turn ignition switch to on position and leave there. This will prevent alarm from going off when you disconnect
Harley Davidson Ultra Fairing Install on a 2003 RoadStar by Bennie Scarbrough (Basshawk84)
") Harley Davidson Ultra Fairing Install on a 2003 RoadStar by Bennie Scarbrough (Basshawk84) There is probably a dozen different ways to go about mounting this fairing on the bike. This is just the way that
Harley Davidson Ultra Fairing Install on a 2003 RoadStar by Bennie Scarbrough (Basshawk84) There is probably a dozen different ways to go about mounting this fairing on the bike. This is just the way that
Rekluse Motor Sports. The z-start Clutch DRZ400 KLX400. Installation Guide Copyright 2002 Rekluse Motor Sports z-start Revision 3.
 Rekluse Motor Sports The z-start Clutch DRZ400 KLX400 Installation Guide Copyright 2002 Rekluse Motor Sports z-start Revision 3.000 RMS160 KLX400 DRZ400 z-start Clutch 191-260 Manual Revision: 103105 Rekluse
Installation instructions, accessories - Fuel driven heater 912-D
 XC90 Section Group Weight(Kg/Pounds) Year Month 8 87 2002 10 XC90 2003 D5244T, XC90 2004 D5244T, XC90 2005 D5244T AW50/51 AWD, XC90 2006 D5244T, XC90 2006 D5244T AW50/51 AWD D5244T R8703687 Page 1 of 20
Rekluse Motor Sports. The z-start Clutch CRF 250X. Installation Guide Copyright 2002 Rekluse Motor Sports z-start Revision RMS116 CRF 250X
 Rekluse Motor Sports The z-start Clutch CRF 250X Installation Guide Copyright 2002 Rekluse Motor Sports z-start Revision 3.000 RMS116 CRF 250X 191-216 Manual Revision: 103105 Rekluse Motor Sports, inc.
Triumph Street Triple VSM Grip Heater Install
 Triumph Street Triple VSM Grip Heater Install Introduction: With winter fast approaching and with painful memories of last winter riding with the club it was time to do something about getting some grip
R O A D S M I T H TRIKE CONVERSIONS BY THE TRIKE SHOP
 R O A D S M I T H TRIKE CONVERSIONS BY THE TRIKE SHOP Please thoroughly review the instructions before and during installation. Keep in mind that this product was designed to be installed by trained dealer
RSR Twin Cam Bonneville Gear Indicator
 RSR Twin Cam Bonneville Gear Indicator First step is to mount the gauge where you can easily see it in normal vehicle operation. A gear position indicator is meant to be used, not just because it is a
MANUFACTURER TYPE F-150 ENGINE DISPLACEMENT NUMBER OF VALVES FIRING ORDER VEHICLE CATEGORIES TRANSMISSION
 MANUFACTURER Ford TYPE F-150 ENGINE DISPLACEMENT 3500cc NUMBER OF VALVES 24v ENGINE CODE / NUMBER - OUTPUT 3.5L EcoBoost 2015 365hp FIRING ORDER 1-4-2-5-3-6 VEHICLE CATEGORIES M TRANSMISSION AT VERSION
Daily Manual for Operators. RAVO 5-Series
 Daily Manual for Operators RAVO 5-Series 1 Adjustment + inspection suction mouth Page 1 2 Adjustment + inspection brush and water system Page 3 3 Optimum RPM during sweeping Page 6 4 Optimum use of the
Superbike Kit
 Superbike Kit www.spieglerusa.com sales@spieglerusa.com Mounting Instructions & Safety Instructions for Honda CBR 1000 RR ABS model year 2017 - Attention Important Safety Instructions: Thank you for purchasing
Twin Air Powerflow Throttle Body Kit
 Twin Air Powerflow Throttle Body Kit Configuration # 1: Can significantly increase horsepower and throttle response in low to midrange. This configuration uses the following parts supplied in the packaging:
Audi A4 Current Flow Diagram No. 50 / 1 Edition
 Page 1 of 8 Audi A4 Current Flow Diagram No. 50 / 1 Edition 12.2003 5-speed automatic gearbox with Tiptronic From model year 2002 Main fuse On battery Fuse box Dash panel, driver's side Fuse colours 30
MAKE OF AUTOMOBILE: ENGINE SET NUMBER 366/
 MAKE OF AUTOMOBILE: TYPE: SORENTO PISTON DISPLACEMENT: 3300 NUMBER OF VALVES: 24 ENGINE NUMBER: G6DB TRANSMISSION TYPE ( MT / AT ) MT VEHICLE CATEGORIES M or N M TYPE VSI INJECTOR ( NUMBER + COLOR ) 180/30340
ST 93 RIPPER INSTALL KIT
 ST 93 RIPPER INSTALL KIT P/N 2883777;2883778;2883779 APPLICATION The Timbersled Ripper ST93 Install Kit is designed to fit all Timbersled ST90 and ST93 Ripper models. This includes; Timbersled Model No.
MAKE OF AUTOMOBILE: 316 / 318i E46 NUMBER OF VALVES:
 MAKE OF AUTOMOBILE: TYPE: 316 / 318i E46 PISTON DISPLACEMENT: 1800 2000 cc NUMBER OF VALVES: 16V ENGINE NUMBER: N42B18A / N42B20A TRANSMISSION TYPE ( MT / AT ) MT VEHICLE CATEGORIES M or N M TYPE VSI INJECTOR
SAISBM V36W Installation Instructions
 The Original Secondary Air Injection System Bypass Kit SAISBM V36W Installation Instructions All Applicable Toyota/Lexus Vehicles Introduction: The Secondary Air Injection System (SAIS) bypass module is
MINI BIKE Set up Instruction Off Road Only!!!
 MINI BIKE Set up Instruction Off Road Only!!! Part I. Check Parts in the Package. 1.1 Screw Package: Bolt M8x16 x6, Locking Nut M8 x1, Bolt M6x12 x2, Bolt M6x16 x3, Flange Nut M6 x3, Washer Φ8 x1. 1.2
Assembly & Exercise Guide. Carefully reading and keeping the operating Instructions before use.
 GB Assembly & Exercise Guide Carefully reading and keeping the operating Instructions before use. GHIBLI Mini - Air Hockey CAUTION! CAREFULLY READING AND KEEPING THE OPERATING INSTRUCTIONS BEFORE USE.
INSTALLATION INSTRUCTIONS FOR THE TOMAHAWK ELECTRIC REVERSE
 INSTALLATION INSTRUCTIONS FOR THE TOMAHAWK ELECTRIC REVERSE LAST UPDATED: April 2018 Thank you for choosing the Motor Trike Electric Reverse. We ask that you read the directions before you start and follow
PARTS LIST
 017.07.31 PARTS LIST TABLE OF CONTENTS Cabinet and control panel VHS 40 IC 1 Cabinet and control panel VHS 40 PC 3 Filter system IC 5 Filter system PC 7 Suction unit L 9 Base_M_L 11 Container 30L 13 Container
MODEL YEAR: SYSTEM APPROVAL NUMBER ( R115 ) R ENGINE SET NUMBER 354/
 R ENGINE SET NUMBER 354/") MAKE OF AUTOMOBILE: MERECEDES TYPE: E200 W211 PISTON DISPLACEMENT: 1796 NUMBER OF VALVES: 16 ENGINE NUMBER: M271 TRANSMISSION TYPE ( MT / AT ) AT VEHICLE CATEGORIES M or N M TYPE VSI INJECTOR ( NUMBER
MAKE OF AUTOMOBILE: MERECEDES TYPE: E200 W211 PISTON DISPLACEMENT: 1796 NUMBER OF VALVES: 16 ENGINE NUMBER: M271 TRANSMISSION TYPE ( MT / AT ) AT VEHICLE CATEGORIES M or N M TYPE VSI INJECTOR ( NUMBER
Champion Reverse Gear Harley-Davidson Six Speed Transmissions for FLH 2007 to 2008 and Softail 2007 up
 Champion Reverse Gear s for FLH 2007 to 2008 and Softail 2007 up (Cable or Hydraulic Clutch) Installation Instructions Revision 11 Champion Motorcycle Accessories International, Inc. dba Champion Sidecars
Teile und Zubehör - Einbauanleitung
 Teile und Zubehör - Einbauanleitung F 36 54 051 Überroll-Schutzsystem für BMW Z3 roadster (E36/7) mit Subwoofer - System Harman Kardon Nicht in Kombination mit starrem/klappbarem Windschutz verbaubar.
Radio control model / RC Flugmodel KAWASAKI. Ki-61 Hien Tony INSTRUCTION MANUAL / MONTAGEANLEITUNG
 Radio control model / RC Flugmodel KAWASAKI Ki-61 Hien Tony INSTRUCTION MANUAL / MONTAGEANLEITUNG SPECIFITIONS Wingspan 1580mm Length 1180mm Electric Motor 870 Watt (PULSAR 60) Glow Engine 7.5cc 2T / 8.5cc
Intelligent Lift Interlock System Installation Instructions
 Intelligent Lift Interlock System Installation Instructions MB 45/55 & International 3200 w/allison 2200/2400 Transmission & Shift Lock Solenoid Allison Generation 3 Controls Part # ILIS801-D 2002-2006
MRAD Universal Measuring Arm System For Optical/Magnetic and Fiber Optic Encoders
 Measuring Wheel Meauring Arm Encoder (Absolute or Incremetnal) Spring-loaded, adjustable measuring arm for universal applications Measuring wheels are utilized in combination with encoders to measure material
Installation of Halo CCFL Rings edited by
 Installation of Halo CCFL Rings edited by www.motorcyclehidlights.com Please use the below installation as an example for your project. Installation is done on a CBR600 however the same procedure will
Installation instruction do88 Performance Radiator for Volvo S60 V70 XC70 S
 Installation instruction do88 Performance Radiator for Volvo S60 V70 XC70 S80 00-09 1. This instruction shows how to replace the OEM radiator with do88 performance radiator. At this type of installation
High-current Transformers
 High-current Transformers Indoor AKA ALG JK-GCT AKQ (7.2 36) kv AKA current transformer Type AKA current transformers are usually used in encased ducts, so-called isolated phase bus ducts (IBPs). The CT
19. LIGHTS/METERS/SWITCHES
 19. LIGHTS/METERS/ES SERVICE INFORMATION 19-1 REAR BRAKE LIGHT 19-6 TROUBLESHOOTING 19-2 CLUTCH 19-6 HEADLIGHT 19-3 HANDLEBAR 19-7 INSTRUMENT CASE 19-4 HORN 19-7 TURN SIGNAL/TAIL LIGHT BULB 19-5 IGNITION
ELECTRIC REVERSE Installation Instructions
 BY 1999 - Current FLHT Series Harley-Davidson ELECTRIC REVERSE Installation Instructions REVISED 1-2016 California Sidecar Parts & Technical Support 434.263.8866 Warnings and considerations: 1. Disclaimer
SR15-6 FLAT DECK MODELS
 SR15-6 FLAT DECK MODELS FLEX WING MOWER Parts Manual (Revised: 01.07.15) IMPORTANT NOTE HERE THE SERIAL NUMBER OF YOUR MACHINE AND ALWAYS QUOTE IT IN ANY COMMUNICATION WITH US OR YOUR DEALER. THIS IS PARTICULARLY
Rekluse Motor Sports. The z-start Clutch CRF 250R. Installation Guide Copyright 2002 Rekluse Motor Sports z-start Revision RMS112 CRF 250R
 Rekluse Motor Sports The z-start Clutch CRF 250R Installation Guide Copyright 2002 Rekluse Motor Sports z-start Revision 3.000 RMS112 CRF 250R 191-212 Manual Revision: 091205 Rekluse Motor Sports, Inc.
Aux. Battery and Isolator
 Aux. Battery and Isolator ISOLATOR MOUNTING ALL YEAR VANAGONS Fig.1 1. Disconnect ground from main battery under passenger seat 2. Remove driver seat 3. Remove driver seat belt buckle from seat pedestal
Sicherheitsschlösser
 Serrures de sécurité S e r r a t u r e d i s i c u r e z z a Sicherheitsschlösser Security locks Cerraduras de seguridad 39X/49X/79X D3532 8 EL46 - EL463 EL26, EL262 EL6, EL62 45 / 5 / 55 / 6 3 / 35 /
RAMPAGE POWER LIFT RAMP
 RAMPAGE POWER LIFT RAMP INSTALLATION AND OPERATING INSTRUCTIONS (3/10/07) The Rampage Power Lift Ramp is the fast, easy, and safe way to load a motorcycle into a truck. One person can load or unload a
Axial piston pump A10V(S)O with electro-hydraulic pressure control ED../ER..
O with electro-hydraulic pressure control ED../ER..") Electric Drives and Controls Hydraulics Linear Motion and Assembly Technologies Pneumatics ervice Axial piston pump A10V()O with electro-hydraulic pressure control ED../ER.. RE 92707/11.10 1/12 Replaces:
Electric Drives and Controls Hydraulics Linear Motion and Assembly Technologies Pneumatics ervice Axial piston pump A10V()O with electro-hydraulic pressure control ED../ER.. RE 92707/11.10 1/12 Replaces:
Fitting Instructions for OCG0014BK Oil Cooler Guard Ducati Monster 1100 / 1100S / 1100EVO & 795/796 '09-
 Fitting Instructions for OCG0014BK Oil Cooler Guard Ducati Monster 1100 / 1100S / 1100EVO & 795/796 '09- In This Kit There Should Be 1x Oil Cooler Guard (OCG0014) 1x M6 x 25mm Long Button Head Bolt 1x
StreetSense LED Street Light - UL for Roadway and Area Illumination
 StreetSense LED Street Light - UL for Roadway and Area Illumination On when it matters most. Products and solutions that protect your business 2 www.dialight.com Dialight_LED_Street_Light_SpecSheet_UL_Jan208
Re-building a Caliper
 Re-building a Caliper by Leslie Henson The pistons in the calipers on the 90 are in very poor condition, and although the brakes work ok, it plays on our mind that the pistons are badly corroded, and it
BRAKE PADS REPLACEMENT
 KLR650 Homepage Contact Me You must remove the "REMOVE-THIS" in my email address for it to work. This is a hobby website dedicated to the Kawasaki KLR650 motorcycle. I make no claim concerning the accuracy
Installation & Operation manual
 Installation & Operation manual TESA Electronic and special devices - via Etiopia 7-65015 Montesilvano PE - ITALY Tel. (0039) 085 4175602 info@tesaitaly.com www.tesaitaly.com Distributed in the U.K. by
USER MANUAL. Line Interactive UPS. Uninterruptible Power System
 USER MANUAL Line Interactive UPS Uninterruptible Power System IMPORTANT SAFETY INSTRUCTIONS SAVE THESE INSTRUCTIONS This manual contains important instructions for models Line Interactive 400, 600, and
VSA. Roof fans. Dachventilatoren. Roof fans
 Dachventilatoren Dachventilatoren, für Abluft bestimmt. Nicht geeignet für die Beförderung von verschmutzter Luft, aggressiven, explosiven Gasen. Laufrad ist rückwärts gekrümmt, aus Kunststoff oder verzinktem
Sunbeam Nova. Installation guide. Universal. Symmetrical THE PROFESSIONAL PV MOUNTING SYSTEM
 THE PROFEIONAL PV MONTING YTEM Installation guide unbeam Nova niversal Page 4-5: : installation of a unbeam niversal system (solar panels facing south). ymmetrical Page 6-7: installation of a unbeam ymmetrical
Owners manual. Öhlins Superbike front fork FG 170
 Owners manual Öhlins Superbike front fork FG 0 Including: Setting up your fork Changing springs and seals Service the fork Trouble shooting Technical info Spare parts & tools Öhlins super bike front fork
SCHUTZLEISTEN FÜR STOSSFÄNGER PROTECTIONS PARE-CHOCS KIT CONTENT - STÜCKLISTE - CONTENU - KIT - INHOUD REAR LHS
 TOYOTA HB & DOOR PARTNUMBER : BUMPER PROTECTORS SCHUTZLEISTEN FÜR STOSSFÄNGER PROTECTIONS PARE-CHOCS BUMPER BESCHERMER KIT CONTENT - STÜCKLISTE - CONTENU - KIT - INHOUD PZ1-E0-01 PZ1-E0-0 PZ1-E0-0 FRONT
Rekluse Motor Sports. The z-start Clutch. Cannondale
 Rekluse Motor Sports The z-start Clutch Cannondale Installation Guide Copyright 2002-2004 Rekluse Motor Sports z-start Revision 3.000 RMS105 Cannondale 191-205 Manual Revision: 091304 Rekluse Motor Sports,
Replacement Parts List: Left Side Components (as if you were sitting on the bike) QTY Price each Part Numbers Descriptions
 QTY Price each Part Numbers Descriptions") CBR300R NO CUT Frame Slider Installation Instructions Part Numbers: 750-3140, 750-3149, 710-3149 715-3149 MADE IN THE USA! Carefully read instructions in their entirety before the install Professional
CBR300R NO CUT Frame Slider Installation Instructions Part Numbers: 750-3140, 750-3149, 710-3149 715-3149 MADE IN THE USA! Carefully read instructions in their entirety before the install Professional
Automatic trunk lid retrofit BMW F10 Bj.2011 by laser21 bimmerfest.com
 Automatic trunk lid retrofit BMW F10 Bj.2011 by laser21 bimmerfest.com lukasko@gmail.com This is a short guide to help you retrofit the option SA316 - automatic trunk lid mechanism into your F10. That
DC TO AC POWER INVERTER
 DC TO AC POWER INVERTER POWER : 600W PI600M for input voltage 12V PI60024 for input voltage 24V ATTENTION OPGELET - ACHTUNG OVERLOADING THIS DEVICE OR CONNECTING IT WITH AN INDUCTIVE LOAD (e.g. refrigerator,
Z8 Engine Start Button Install for the BMW E46 3 Series
 Z8 Engine Start Button Install for the BMW E46 3 Series This write up is a specific installation of a Z8 engine start button on the E46, but it can be used as a general guide for an engine start button
MINI BIKE-2016 MB 200 Set-up Instruction
 MINI BIKE-2016 MB 200 Set-up Instruction 2016-06-01 1. Install rear shocks: open the crate and install the rear shocks with bolt M10x1.25x40 and self-locking nut M10x1.25. The requested torque is 37-44N.m
FUEL PRESSURE REGULATORS. Fig. A. Fig. B. Fig. C. Fig. D MOTORSPORT COMPONENTS
 MOTORSPORT COMPONENTS B FUEL PRESSURE REGULATORS Purpose and Function. The fuel pressure regulator is designed to maintain the differential between fuel rail pressure and intake manifold pressure constant
Sunbeam Nova. Installation guide. Universal. Symmetrical THE PROFESSIONAL PV MOUNTING SYSTEM
 THE PROFEIONAL PV MONTING YTEM Installation guide unbeam Nova niversal Page 4-5: : installation of a unbeam niversal system (solar panels facing south). version with new ballast plates ymmetrical Page
Installation Instructions QUICKSILVER CONSOLE SHIFTER Fits: Chevelle / El Camino
 WORK SAFELY! For maximum safety, perform this installation on a clean, level surface and with the engine turned off. Place blocks or wedges in front of and behind both rear wheels to prevent movement in
v Porsche 928
 1985-86 32v Porsche 928 Toll-Free Tech Hot Line: 877-FOR-928M 877-367-9286 Please do not copy this manual and give copies to your friends. Our ability to bring you this supercharger kit at this price relies
Volkswagen Marine. Bootsmotoren von. Einbauanleitung EA01 Installation Instruction EA01. Anschluss-Kit für Warmwasserboiler/ Motorbetriebene Heizung
 Einbauanleitung EA01 Installation Instruction EA01 Anschluss-Kit für Warmwasserboiler/ Motorbetriebene Heizung Connection kit for hot-water boiler/ engine-driven heating Bootsmotoren von Volkswagen Marine
Defect-search-diagram engine doesn`t start, starter turns
 Defect-search-diagram engine doesn`t start, starter turns starter turns continue with diagram starter doesn`t turn ignition sparks exist signal on contact 1 spark coil exist? check electric power supply
Table of Contents. Bikes with 2 handlebar switches. 12-pin plug for BMW models Installation tips. 15-pin plug for older BMW models Installation tips
 Table of Contents Bikes with 2 handlebar switches SM-5 12-pin plug for BMW models Installation tips 2 3 SM-6 15-pin plug for older BMW models Installation tips Special Features & Functions 4 5 4-Way Emergency
MODEL YEAR: 2009 SYSTEM APPROVAL NUMBER ( R115 ) R ENGINE SET NUMBER 350/
 R ENGINE SET NUMBER 350/") MAKE OF AUTOMOBILE: TYPE: PRIORA 2170 / 2172 PISTON DISPLACEMENT: 1600 NUMBER OF VALVES: 16 ENGINE NUMBER: 21126 TRANSMISSION TYPE ( MT / AT ) MT VEHICLE CATEGORIES M or N M TYPE VSI INJECTOR (COLOR )
MAKE OF AUTOMOBILE: TYPE: PRIORA 2170 / 2172 PISTON DISPLACEMENT: 1600 NUMBER OF VALVES: 16 ENGINE NUMBER: 21126 TRANSMISSION TYPE ( MT / AT ) MT VEHICLE CATEGORIES M or N M TYPE VSI INJECTOR (COLOR )
Operating manual and installation instructions ENGLISH. Electronic engine remote control. Copyright 2001 Vetus den Ouden n.v.
 Operating manual and installation instructions ENGLISH Electronic engine remote control Copyright 00 Vetus den Ouden n.v. Schiedam Holland Contents Introduction... General conditions of use... Operating....
Generator Sets GLX14. Parts catalogue
 Generator Sets GHX GHX GLX GLX GLX Parts catalogue Deze onderdelencatalogus bevat waardevolle informatie voor onderhoud en service aan uw generator. Wij adviseren U, bij vervanging alleen originele onderdelen
***THE OWNER'S MANUAL MUST BE GIVEN TO THE END USE CUSTOMER AFTER COMPLETING THE INSTALLATION.***
 INSTALLATION INSTRUCTIONS FOR THE MOTOR TRIKE HARLEY MECHANICAL REVERSE 1999-2006 FIVE SPEED FLH LAST UPDATED: OCTOBER 2011 AS THE INSTALLER OF THIS MECHANICAL REVERSE, YOU MUST BECOME FAMILIAR WITH PROPER
Installation instructions, accessories. Multimedia monitor with DVD, Dual screen. Multimedia monitor with DVD, Dual screen V1.
 Installation instructions, accessories Instruction No 30756560 Version 1.2 5 Part. No. 30756177 Multimedia monitor with DVD, Dual screen Volvo Car Corporation Multimedia monitor with DVD, Dual screen-
Your G3 buggy is fitted with three switches on the front part of the body:
 CONTENTS Buggy operation... 3 General Maintenance... 5 Technical Maintenance... 6 Front wheel bearing replacement... 6 Rear wheel bearing replacement... 7 Chain replacement... 8 Chain Adjustment... 9 Brake
About Battery charging!
 About Battery charging! Over opladen van de batterij! Een groot misverstand is het laden van een batterij met elektrische energie tot 100% ladingstoestand (SOC) is gelijk aan het vullen van een emmer met
INSTALLATION AND OWNER S MANUAL Side Illumination Lights Z5150 for use with K 1200 LT
 INSTALLATION AND OWNER S MANUAL Side Illumination Lights Z5150 for use with K 1200 LT Read these instructions carefully and thoroughly before beginning work. Before installing the accessory, carefully
BMW 2002 M42 Swap Notes-THIS IS NOT FINISHED
 BMW 2002 M42 Swap Notes-THIS IS NOT FINISHED This document is to help those that want to install an m42 into a BMW 2002. It is based around an e30 engine, trans, and wiring. You can use the e36 block/head/wiring
EVO 2 FAIRING Rev6 18/05/ :40:00 1
 EVO 2 FAIRING Rev6 18/05/2014 20:40:00 1 NOTE : BEFORE COMMENCING WORK ON THE CONVERSION, TAKE TIME TO READ THE INSTRUCTIONS CAREFULLY. ALL WORK CAN BE CARRIED OUT BY A COMPETENT MECHANIC, BUT IF YOU ARE
Instruction Manual. What s In The Box? CANsmart Controller DNL.WHS BMW K1600 Series. Kit Contents DENALIELECTRONICS.COM
 Instruction Manual Instruction Rev0 Thank you for choosing DENALI We know you would rather be riding your bike than wrenching on it, so we go the extra mile to make sure our instructions are clear and
Fitting instructions for Voodoo Fairing - KTM 950/990 Adventure
 Fitting instructions for Voodoo Fairing - KTM 950/990 Adventure Thank you for purchasing the Voodoo fairing. Your fairing kit comes largely completed and includes the following. 1 x Fairing 1x Screen,
INSTRUCTIONS. w w w. h d o n l i n e s h o p. d e SPRINGER AUXILIARY LAMP KIT 1WARNING -J03497 REV General.
 INSTRUCTIONS -J097 REV. 0-0-00 Kit Number 6986-0A General Auxiliary/fog lamps are not included in this kit. The lamps must be purchased separately. HDI (International) motorcycles should only use approved
Throttle Positioning Sensor & Throttle Body Synchronization Suzuki TL1000s By CJ s Garage march 2016
 Throttle Positioning Sensor & Throttle Body Synchronization Suzuki TL1000s 97 01 By CJ s Garage march 2016 Throttle positioning sensor & Throttle body synchronization Bike condition: Tappet clearance should
INTERNATIONAL 3200 AND Freightliner MB
 An ISO 9001:2000 Registered Company INTERNATIONAL 3200 AND Freightliner MB55 2002-2008 Intelligent Lift Interlock System (ILIS701-D) - Installation Instructions International & MB45/55 w/allison 2000 and
INSTRUCTION FOR EFI FUEL PRESSURE GAUGE TOOL
 INSTRUCTION FOR EFI FUEL PRESSURE GAUGE TOOL This gauge is now a must have new tool, as 90% of all Big Twins motorcycles have Electronic Fuel injection. (EFI). If you have a customer that is experiencing
INSTALLATION GUIDE. RMS500, RMS501, RMS502, RMS503, RMS506, RMS507, RMS508, RMS509, -OR Manual Revision:
 REKLUSE MOTOR SPORTS z-start Brake Kit INSTALLATION GUIDE RMS500, RMS501, RMS502, RMS503, RMS506, RMS507, RMS508, RMS509, -OR 196-200 Manual Revision: 051309 2009 Rekluse Motor Sports Rekluse Motor Sports,
MAKE OF AUTOMOBILE: MODEL YEAR: 2007 SYSTEM APPROVAL NUMBER ( R115 ) VSI-LPG 10 ENGINE SET NUMBER 364/
 VSI-LPG 10 ENGINE SET NUMBER 364/") MAKE OF AUTOMOBILE: TYPE: FABIA PISTON DISPLACEMENT: 1400 NUMBER OF VALVES: 16 ENGINE NUMBER: BUD TRANSMISSION TYPE ( MT / AT ) MT VEHICLE CATEGORIES M or N M TYPE VSI INJECTOR ( NUMBER + COLOR ) 180/30410
MAKE OF AUTOMOBILE: TYPE: FABIA PISTON DISPLACEMENT: 1400 NUMBER OF VALVES: 16 ENGINE NUMBER: BUD TRANSMISSION TYPE ( MT / AT ) MT VEHICLE CATEGORIES M or N M TYPE VSI INJECTOR ( NUMBER + COLOR ) 180/30410
MaaS and the Mobility Market Evolution A mobility provider s perspective
 MaaS and the Mobility Market Evolution A mobility provider s perspective 28 November 2017 / Martina Müggler Technical specifications Size of picture: full-page W 33,87 cm x H 19,05 cm equals W 2000 pixel
INSTALLATION INSTRUCTIONS. KAWASAKI Concours Handlebar Risers for ABS & Non-ABS Part # HR04042 & HR04042-NABS
 INSTALLATION INSTRUCTIONS KAWASAKI Concours14 2008-2015 Handlebar Risers for ABS & Non-ABS Part # HR04042 & HR04042-NABS IMPORTANT: PLEASE GIVE CUSTOMER ENCLOSED INFORMATION! Thank you for your purchase
A new Dimension. Advertising
 A new Dimension Advertising The lighter specialist TOM Feuerzeuge Führend in Qualität und Sicherheit TÜV-geprüfte Sicherheit mit GS-Zeichen bei Volumenprodukten * ISO 9001 Zertifizierung der Produktionsstätten