XC60 T W I N E N G I N E
|
|
|
- Mitchell Holland
- 5 years ago
- Views:
Transcription

1 XC60 T W I N E N G I N E QUICK GUIDE
 for smartphones and tablets.")
2 VÄLKOMMEN! This Quick Guide describes a selection of features and functions in your Volvo. Additional owner's information is available in your vehicle, in an app and on the Internet. THE CENTER DISPLAY The Owner's Manual is available in the center display in Top view. MOBILE APP The Owner's Manual is available as an app (Volvo Manual) for smartphones and tablets. The app also contains instructional videos for certain functions. VOLVO'S SUPPORT SITE Go to Volvo Cars' support site (support.volvocars.com) for manuals and instructional videos. Additional assistance and information about your vehicle and owning a Volvo is also available on the support site. PRINTED INFORMATION The glove compartment contains a printed supplement to the Owner s Manual containing information about fuses and specifications as well as a summary of other important and practical information. A complete printed version of the owner's information (or a new Owner's Manual supplement) can be ordered.
3 CONTENT 01. GETTING TO KNOW YOUR VOLVO This chapter gives you information on some of Volvo's systems and services, and an overview of the inside and outside, and the center display. 02. CHARGING This chapter describes the vehicle's charging status, how to handle the charge module, and the meaning of the symbols in the instrument panel. 03. INTERIOR AND CONNECTIONS This chapter provides information about features and functions in the passenger compartment e.g. seat settings and Internet connection. 04. CENTER DISPLAY VIEWS This chapter contains information about the center display's main views, which control many of the vehicle's functions. 05. SMART DRIVING This chapter describes several driver support functions and offers tips on how to drive more economically. 06. VOICE CONTROL This chapter provides a list of commands/phrases you can use with the voice control system. 07. SUPPLEMENTARY INFORMATION Warning, caution and note texts, which must be read. All options and accessories, known at the time of publication, are marked with an asterisk: *.

4 01
5 GETTING STARTED 01 The following functions, concepts and tips are intended to help familiarize you with your Volvo as quickly as possible. Volvo ID Volvo ID is a personal ID that gives you access to a number of services with a single username and password. Some examples are Volvo On Call, navigation* and the opportunity to schedule service and repairs. You can create a Volvo ID via the Volvo On Call app or directly in your vehicle. Sensus Sensus is your vehicle's intelligent interface and includes all of its solutions relating to entertainment, connecting to the Internet, navigation* and information services. Sensus enables communication between you, the vehicle and the digital world around you. Volvo On Call Volvo On Call gives you direct contact with your vehicle and enhanced comfort and assistance 24 hours a day. With the Volvo On Call app, you can see if e.g. any bulbs need replacing and if washer fluid needs to be filled. You can lock and unlock the vehicle, check the fuel level and find your nearest service station. Preconditioning can also be set and started via the vehicle's parking climate or the engine remote start function 1. Download the Volvo On Call app to get started. Volvo On Call also gives you access to roadside assistance, other security services and emergency assistance using the ON CALL and SOS buttons in the ceiling console. Driver profiles Many of the vehicle's settings can be adapted to the driver's personal preferences and saved in one or more driver profiles. Each of the remote keys can be linked to a driver profile. See the section "Top view" in this Quick Guide for more information on driver profiles. Preconditioning before driving Make it a habit to always precondition the vehicle before driving. This can help increase the driving range, reduce wear on the vehicle and maintain a comfortable passenger compartment temperature. From the center display's climate view, select the Parking climate tab or activate the function via the Volvo On Call app. Full preconditioning is only available when the vehicle is connected to an electrical outlet. 1 Available on certain markets and models.
6 01
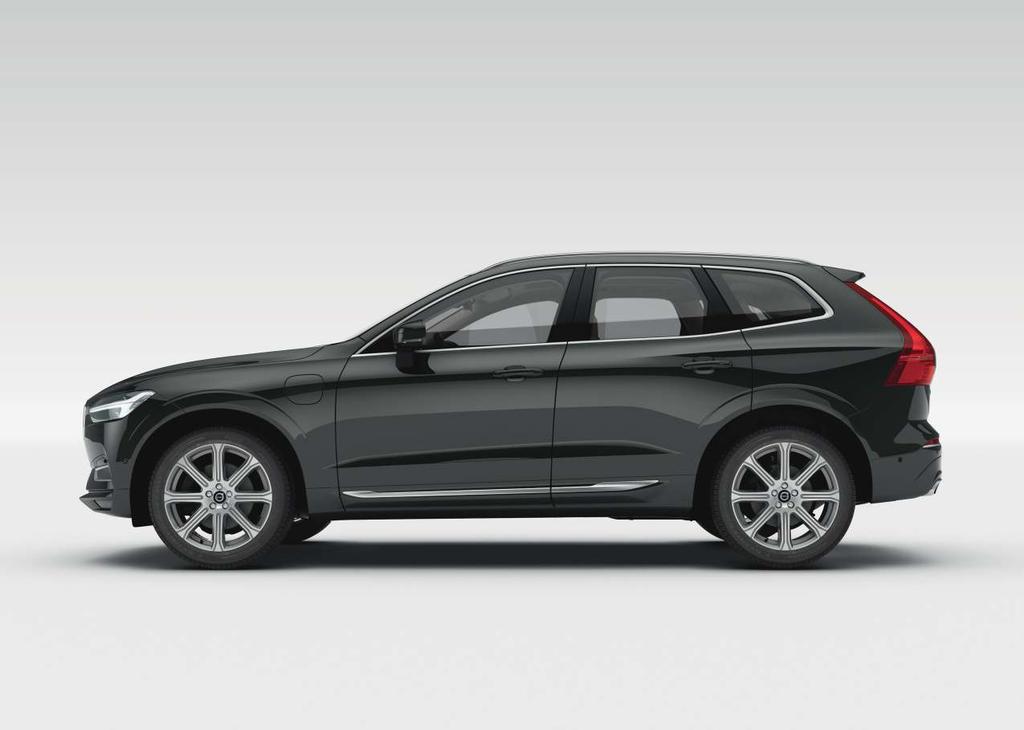
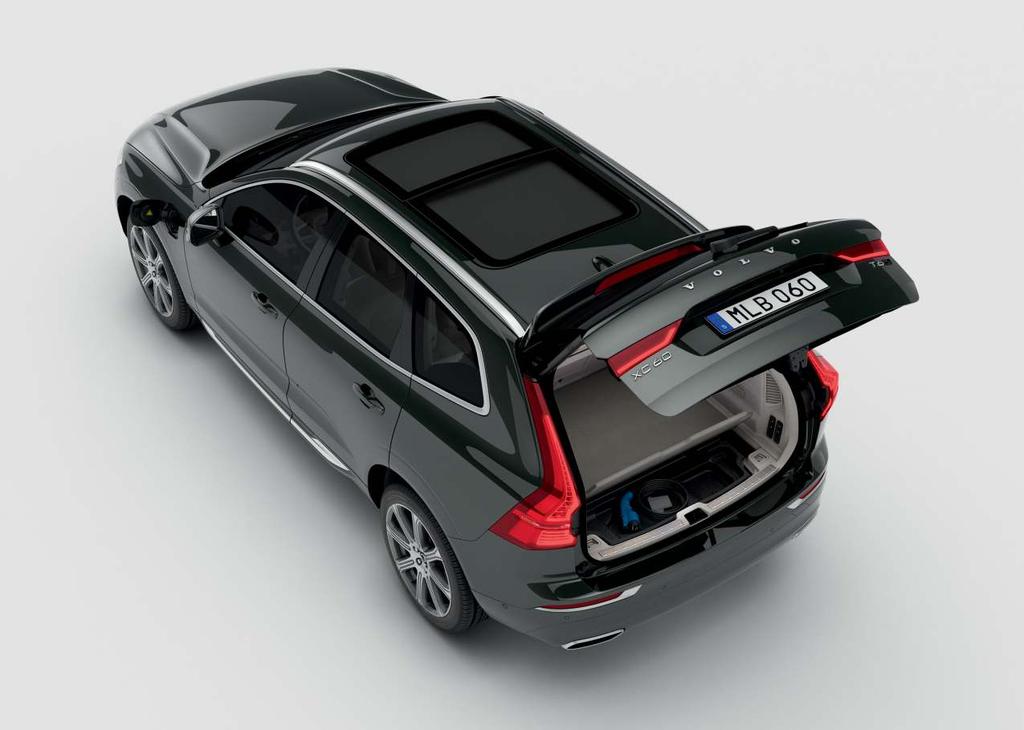
7 EXTERIOR OVERVIEW 01 Checking and calibration of tire pressure (TPMS)* is performed via TPMS in the Car Status app in the center display's app view. If inflation pressure is too low, the symbol will be steadily illuminated in the instrument panel. If inflation pressure is low, check and adjust the inflation pressure in all four tires and tap the calibration button to start TPMS calibration. The Car Status app is used to check engine oil level. You can also view any status-related messages and schedule service and repairs*. Hybrid battery charging is performed via the charging socket. Open the charger door by pressing it lightly. To help maximize driving range, begin each trip with a fully charged battery. Door mirrors can be automatically* tilted down when reverse gear is engaged. When the vehicle is locked/unlocked, the door mirrors can be automatically folded in/out*. Activate these functions under Settings My Car Mirrors and Convenience in the center display's top view. Keyless locking/unlocking* makes it possible to lock or unlock the vehicle simply by having a remote key in your possession, e.g. in a pocket. The remote key must be within approximately 1 meter (3 feet) from the vehicle. To unlock the vehicle, grasp one of the door handles or press the rubberized button under the tailgate's handle. To lock the vehicle, press one of the indentations on the outside of a door handle. Avoid touching both the outside and inside of the door handles at the same time. The panoramic roof* includes an opening glass section and sun shade and can be operated using a control above the rearview mirror when the vehicle is in at least ignition mode I. Open to ventilation position by pressing the control upward and close by pulling the control downward. To fully open the panoramic roof, pull the control rearward twice. Close by pulling the control downward twice. The power operated tailgate* can be opened using the footoperated tailgate function* by means of a slow forward kicking motion under the left-hand part of the rear bumper. Close and lock the tailgate by pressing the button on the lower edge of the tailgate. You can also close the tailgate by moving your foot slowly under the rear bumper. For it to be possible to unlock the tailgate using the foot movement sensor, the vehicle must be equipped with keyless locking/unlocking*. The remote key must be within a range of approximately 1 meter (3 feet) behind the vehicle for foot movement operation to be possible. To prevent the tailgate from e.g. hitting the roof of a garage, a maximum opening height can be programmed. Set a maximum opening height by opening the tailgate to the desired opening position. Then press for at least 3 seconds to store the position.
8 01
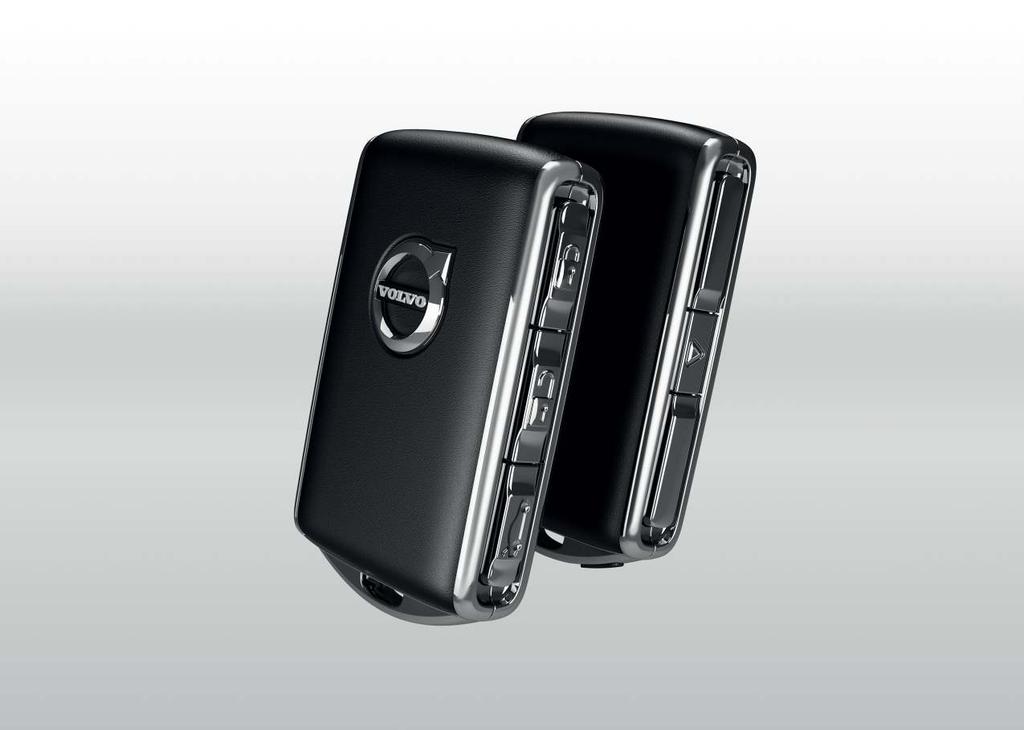
9 LOCKING/UNLOCKING 01 Remote key Press briefly to lock doors, tailgate and fuel filler door and arm the alarm. A long press closes all side windows simultaneously. Press briefly to unlock doors and tailgate and disarm the alarm. Press and hold to open all door windows at the same time. Press briefly to unlock and disarm only the tailgate. Press and hold to open or close the power* tailgate. The panic alarm activates the turn signals and horn to attract attention in emergency situations. To activate, press and hold the button for at least three seconds or press the button twice within three seconds. The function can be switched off using the same button after it has been activated for at least five seconds. Otherwise, it will switch off automatically after three minutes. Charger door Make sure the vehicle is unlocked and the ignition is off before connecting or disconnecting the charging cable. 1. Press the rear section of the door and release. 2. Open the charger door. A pop-up window will appear showing whether the function is activated or deactivated. A four-digit code must be selected each time the function is activated. The first time the function is used, an extra security code must be selected. Locking* the glove compartment is performed manually using the enclosed key which is located inside the glove compartment. The charging cable's coupler will lock into the charging socket when charging has started. Charging is interrupted if the vehicle is unlocked but will restart after a short time if the cable is not disconnected. Private (valet) locking Private locking locks the tailgate, which can be practical when, for example, the vehicle is taken in for service or at a hotel. - In the center display's function view, tap Private Locking to activate/deactivate the function.

10 01
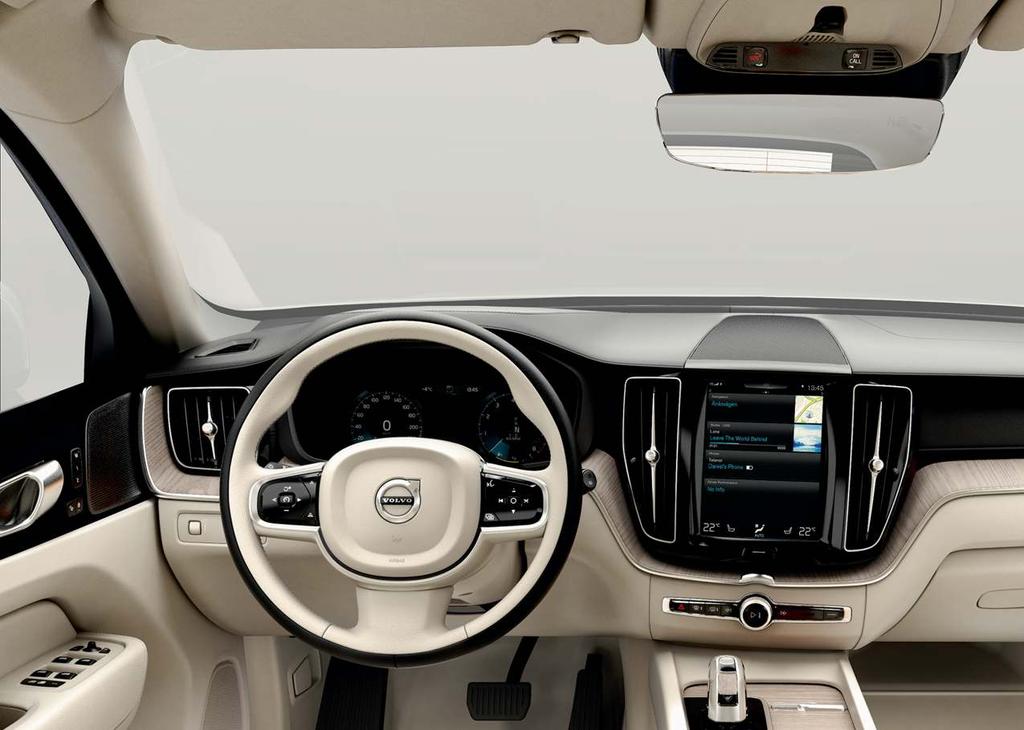
11 INTERIOR OVERVIEW 01 Center display is used to control many of the vehicle's main functions, e.g. media, navigation*, climate control, driver support systems and in-vehicle apps. The instrument panel displays information about driving, e.g. speed, rpm, navigation* and active driver support. You can select which information should be shown in the instrument panel in the app menu, which is opened using the right-hand steering wheel keypad. Settings can also be made via Settings My Car Displays in the center display's top view. The head-up display* supplements the vehicle's instrument panel and projects information on the windshield. It can be activated in the center display's function view. Start knob is used to start the vehicle. Turn clockwise and release into the ignition position I. Hold the brake pedal depressed and turn the start knob clockwise to start the vehicle. Switch off the vehicle by turning the start knob clockwise. Drive modes* are selected using the control in the tunnel console. Press the control and roll it to choose between Hybrid, Pure, Off Road, AWD, Power and Individual in the center display. Confirm by pressing the control. Individual drive mode enables you to customize a drive mode's characteristics to your preferences. To activate individual drive mode, tap Settings My Car Individual Drive Mode in the center display's Top view. The parking brake is activated by pulling up the control. A symbol will appear in the instrument panel. Release it manually by pressing the control down while depressing the brake pedal. Autohold brakes ( ) keep the vehicle stationary when it is stopped, e.g. at a traffic light, even if the brake pedal is not depressed. Before driving the vehicle into a car wash, deactivate the Automatic Braking and Automatic Parking Brake Application functions. Deactivate Automatic Parking Brake Application in the center display's Top view by tapping Settings My Car Parking Brake and Suspension. Passenger airbag: A sensor system determines what is occupying the front passenger seat and activates/deactivates the front passenger side's airbag. See the Owner's Manual for important safetyrelated information regarding this. Storage compartments Your vehicle has a number of different storage compartments. There is a storage compartment under the outboard seating positions in the rear seat that can be used to store objects such as tablets.
12 01
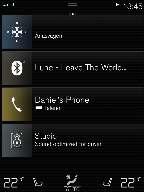
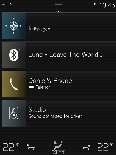
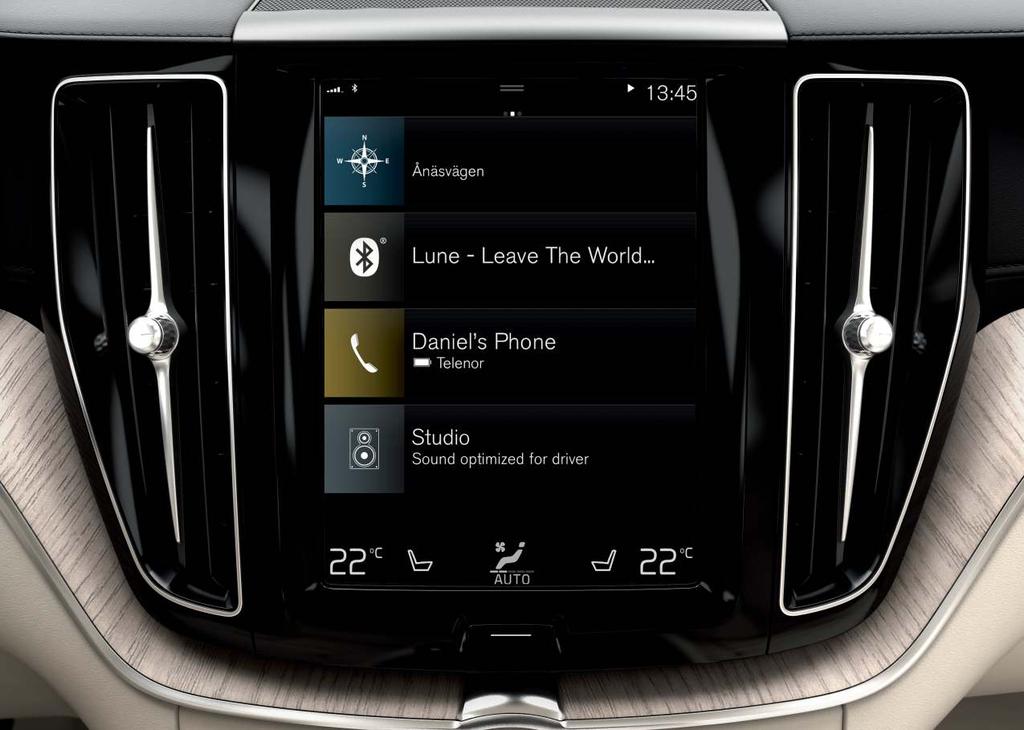
13 CENTER DISPLAY 01 The center display is used to adjust settings and control most of the vehicle's functions. The center display has three main views: home view, function view and app view. You can reach the function view and app view from the home view by swiping right or left. There is also a top view that you can access by swiping down from the top section of the display. Change the appearance of the center display and the instrument panel by choosing a theme in Settings My Car Displays in top view. You can also select a dark or light background for the center display. Return to the home view from another view by means of a short press on the physical home button under the display. The last mode used for the home view will then be shown. A further short press on the home button sets all of the home view's tiles in standard mode. To clean the center display, press and hold the home button under the display to lock the touchscreen function. Press the home button briefly to reactivate the display. The status bar at the top of the display shows the status of current vehicle activities and functions. Shown on the left is network and connection information, with media-related information; the time and background activity indicator shown on the right. In the climate row at the bottom you can set temperature and seat comfort by tapping on the respective icon. Open the climate view by tapping on the center button in the climate row.
14 02
15 CHARGING THE HYBRID BATTERY Your Volvo is equipped with an electric motor that primarily powers the vehicle at low speeds and a combustion engine that powers the vehicle at higher speeds and during more active driving. The time required to charge the hybrid battery depends on the charging current the wall socket can supply. The hybrid battery is also recharged during light braking or engine braking, e.g. on a downslope. All types of charging are indicated in the instrument panel. Storing the charging cable The charging cable is located under the cargo compartment floor. Starting charging The start battery is charged while the hybrid battery is charging and will stop charging when the hybrid battery is fully charged. 1. Connect the charging cable to a wall socket. Never use an extension cord. 2. Open the charger door by pressing it lightly. 3. Push the charging handle all the way into the vehicle's socket. The charging cable will automatically lock into the charging socket and charging will begin within approximately 5 seconds. Stopping charging 1. Press the 2 button on the remote key to unlock the vehicle. Charging will stop. 2. Press the lock button on the charging socket and then remove the charging cable from the vehicle. 3. Close the charger door. 4. Disconnect the charging cable from the wall socket. 5. Replace the charging cable under the cargo compartment floor. If the charging cable is not removed from the socket it will automatically relock into place after a short period after unlocking in order to help maximize charging and driving range and to enable preconditioning of the vehicle before driving. The charging cable can be released from the socket again if the vehicle is unlocked using the remote key. For vehicles with the Passive Entry* system, the vehicle can be locked and unlocked using the door handle. 2 This must be done even if the vehicle's doors are already unlocked. If the vehicle is not unlocked using the unlock button, the charging cable or the system could be damaged. 02

16 02 Flashing green - charging is in progress. Steady green - charging completed (the light will go out after a short time). Steady red - a fault has been detected. Instrument panel The symbol's color indicates the hybrid battery's charging status. Blue light - charging is in progress. Green light - the battery is fully charged. Red light - a fault has occurred. Check that the charging cable is properly connected to the vehicle's charging socket and to the 120/240-volt wall socket. HYBRID BATTERY CHARGE STATUS The hybrid battery's charge status can be checked in the charging socket, via the charge module, in the instrument panel and in the Volvo On Call app. Indicator lamps in the charging module When the charging cable is plugged into a wall socket, the indicator light on the charge module (the device connected to the wall socket) will flash red once. A safety check will be performed. When the charging cable is ready to be used, the indicator light will glow steadily blue. The light will flash blue while charging is in progress. When the light glows steadily blue, charging is complete. Flashing/steady red a fault has been detected. Charging socket indicator lights White - courtesy light. Yellow - standby mode (waiting for charging to begin).

17 HYBRID-RELATED INFORMATION IN THE INSTRUMENT PANEL Various symbols and animations will be displayed in the instrument panel, depending on the drive mode selected. Electrical current and fuel consumption are indicated in a gauge to the right. Consumption is affected by driving style. When the white indicator line passes the white arrow at the top of the gauge, the combustion engine will start. When the indicator line is in the orange section of the gauge, the hybrid battery is being charged, e.g. during light braking. Distance to discharged battery This indicator shows the approximate distance that can be driven before the hybrid battery is discharged. This distance is affected by a number of factors, e.g. driving style, speed and ambient temperature, and may vary during the course of a drive. In normal conditions, you can expect a range of km (10-20 miles). The initial value displayed when the hybrid battery is fully charged shows a maximum possible distance instead of an estimate of the range on electrical power and is adjusted during your drive. When --- is displayed in the instrument panel, there is no guaranteed electrical current remaining in the battery. Symbols in the instrument panel A solid white symbol indicates which power source is being used. A "lightning" symbol indicates that the electric motor is being used and a "drop" symbol indicates the combustion engine is being used. Indicates that the battery is being charged, e.g. during engine braking. This gauge indicates the current charge level in the hybrid battery. Electrical current is also used by the climate system. Indicates that the Charge or Hold functions are active. These are activated from the center display's function view. Charge means that the hybrid battery is being charged if its charge level is low. Hold means that the battery level is being retained for later use. Starting and stopping the combustion engine The vehicle calculates when the combustion engine, electric motor or both need to be used. When running on the electric motor, the vehicle may sometimes need to start the engine automatically due to external factors, e.g. low ambient temperatures. The combustion engine will always start when the hybrid battery has reached its lowest charge level. 02

18 03 2. Switch between the various functions in the center display by turning the control upward/downward. 3. Adjust the setting of the selected function by pressing the upper/ lower/front/rear sections of the control. Storing positions 1. Adjust the seat, door mirrors and head-up display* to the desired positions and press the M button on the door panel. The indicator light in the button will illuminate. 2. Press and hold down memory button 1 or 2 within three seconds. An audible signal will sound and the indicator light in the M button will go out. To use your stored position: With door open - press one of the memory buttons and release. With door closed - press and hold one of the memory buttons until the seat reaches the stored position. POWER* FRONT SEATS Use the controls on the outside of the seat to adjust e.g. seat position and lumbar support*. The two controls that together form the shape of a seat are used to adjust the seat position. The third, the multi-function control*, is used to adjust the comfort functions, e.g. massage*. The seat-shaped controls Use the lower section of the control to adjust the height of the seat cushion or move the entire seat. Use the rear section of the control to adjust backrest tilt. The multifunction control 3 Settings for massage*, side bolsters*, lumbar support* and seat cushion extension* are adjusted using the multifunction control. 1. Turn the multifunction control upward/downward to open the seat settings window in the center display. 3 On vehicles with four-way support*


19 FOLDING DOWN THE REAR SEAT BACKRESTS Make sure that the backrest and head restraint do not come into contact with the back of the seat in front when folding down. The front seats may need to be adjusted in order to fold down the backrests. The backrest can be folded down using the handles in the upper sides of the outboard seats. If the vehicle is equipped with the rear seat electric backrest folding function*, there are also buttons for this in the cargo compartment. Folding down the backrests using buttons in the cargo compartment The vehicle must be stationary and the tailgate must be open before a backrest can be folded down. Make sure there are no people or objects in the rear seat. 1. Fold down the center seat's head restraint manually. 2. Press and hold the L button to fold down the left-side backrest or R to fold down the right-side backrest. > The backrests and head restraints will automatically fold down to the horizontal position. Folding up backrests 1. Move the backrest upward/rearward until it locks into position. 2. Return the head restraint to the upright position manually. 3. If needed, adjust the center seat's head restraint. 03

20 03 STEERING WHEEL Adjusting the steering wheel You can adjust the position of the steering wheel for both height and depth. 1. Push the lever under the steering wheel forward and adjust the steering wheel to the desired position. 2. Pull the lever back to the locked position. Left-side steering wheel keypad Driver support functions are selected in the instrument panel using the and arrow buttons on the left-side steering wheel keypad. When the driver support symbol is white, the function is active. A gray symbol indicates that the function is disabled or in standby mode. Symbols in the instrument panel: Tap Cruise Control helps the driver maintain a set speed. Adaptive Cruise Control* helps the driver maintain a constant speed and a set time interval to the vehicle ahead. Pilot Assist helps keep the vehicle between the traffic lane markings by providing steering assistance, and helps maintain a constant speed and a set time interval to the vehicle ahead. to start or cancel the selected function. Tap / to increase/decrease the set speed by 5 km/h (5 mph). Press and hold the button to change the speed in increments. Release the button when the desired speed is reached. / decreases/increases the distance to the vehicle ahead when using Adaptive Cruise Control and Pilot Assist. Pressing also resumes the stored speed for the selected function.
21 Right-side steering wheel keypad The right-side steering wheel keypad controls the instrument panel. Open/close the app menu. From here, you can control the trip computer, media player, a connected cell phone and the navigation system. Press the left/right arrows to scroll among the apps. Select/deselect or confirm a choice, e.g. select the trip computer's menu or erase a message from the instrument panel. Scroll among a selected app's functions by pressing the up/down arrows. Raise/lower the media volume by pressing or. If no other function is active these buttons serve as volume control. Voice control is activated by pressing the button to give voice commands for e.g. media, navigation* and climate systems. Say e.g. Radio, Raise temperature or Cancel. See the chapter "Voice control" in this Quick Guide for additional voice commands. Trip computer The trip computer shows e.g. mileage, fuel consumption and average speed. You can choose the type of trip computer information that will be displayed in the instrument panel. The trip computer calculates the remaining distance that can be driven on the amount of fuel remaining in the tank or until the hybrid battery is discharged. Use the buttons on the right-side steering wheel keypad to display the various options. When ---- is displayed in the instrument panel, there is no guaranteed electrical current remaining in the battery. 03

22 03 Approach lighting is activated when you unlock the vehicle using the key and provides illumination to help you approach the vehicle safely in the dark. Home Safe Lighting illuminates some of the exterior lights after the vehicle is locked to provide illumination around the vehicle in dark conditions. To activate the function, switch off the ignition and move the left-side steering wheel lever toward the dashboard and release. The length of time home safe lighting remains illuminated can be set in the center display. Resetting the trip odometers Reset all information in the manual trip odometer (TM) by pressing and holding the RESET button. Press the button briefly to reset only the mileage. The automatic trip odometer (TA) resets automatically when the vehicle is switched off for more than 4 hours. LEFT-SIDE STEERING WHEEL LEVER Headlight functions are controlled using the left-side steering wheel lever. If you select AUTO mode, the vehicle will automatically monitor lighting conditions and adjust headlight illumination accordingly, e.g. switch from daytime running lights to low beam when the sun goes down or when you drive into a tunnel. You can also turn the lighting ring on the lever to to switch on the Active High Beam function, which automatically dims the headlights for approaching vehicles. Move the steering wheel lever forward to manually activate high beams. Move the lever rearward to switch back to low beams. Active Bending Lights* are designed to follow the movement of the steering wheel to help provide maximum illumination in turns and intersections. The function is automatically activated when the engine is started and can be deactivated in the center display's function view.

23 RIGHT-SIDE STEERING WHEEL LEVER The right-side steering wheel lever controls the wipers and the rain sensor. Move the lever downward for a single sweep of the windshield. Move the lever upward in steps for intermittent, normal speed and high speed. Use the lever's thumb wheel to adjust intermittent wiping speed. Move the lever toward the steering wheel to start the windshield and headlight washers and toward the dashboard to start the rear window washers. Press the rain sensor button to activate/deactivate the rain sensor. The windshield wiper lever should be in position 0, or in the single swipe position. The rain sensor monitors the amount of water on the windshield and starts the windshield wipers automatically when needed. Turn the thumb wheel upward/downward for higher/lower sensitivity. Press for rear window intermittent wiping. 03 Press for continuous rear window wiper speed. Use the windshield wipers service position when you e.g. replace, wash or lift the wiper blade. Tap Wiper Service Position in the center display's function view to activate or deactivate service position.
24 03
25 PASSENGER COMPARTMENT CLIMATE Climate system functions for the front and rear sections of the passenger compartment are controlled from the center display and from the buttons on the center console and the rear side of the tunnel console*. Some functions can also be controlled using voice commands. The icon for opening Climate view is located at the center of the climate bar at the bottom of the center display. When the Clean Zone text is BLUE, this indicates that the conditions for good air quality in the passenger compartment have been met. Tap AUTO in climate view for automatic control of several climate system functions. Tap for automatic control of air recirculation, air conditioning and air distribution. Press and hold for automatic control of air recirculation, air conditioning and air distribution and to change temperature and blower speed to standard settings: 22 C (72 F) and speed 3. It is possible to change the temperature and blower speed without deactivating automatic climate control. Tap any of the icons in the climate bar at the bottom of the center display to set temperature, seat heating* and blower speed. To synchronize the temperature for all of the vehicle's zones with the driver side's temperature, tap the driver side's temperature icon and then tap Synchronize temperature. Preconditioning Preconditioning can be started from the vehicle's center display or from the Volvo On Call app. Preconditioning helps heat or cool the passenger compartment to a comfortable temperature prior to driving, which can help reduce wear and reduce energy consumption during a trip. Preconditioning can be started directly from the vehicle or set to start automatically using a timer. Preconditioning direct start 1. Open Climate view in the center display. 2. Tap the Parking climate tab, check the boxes for the desired options and then tap Preconditioning. Setting a preconditioning timer 1. Open Climate view in the center display. 2. Select the Parking climate Add timer tab and set a date/day/ time. For preconditioning to have full functionality, the vehicle must be connected to an electrical outlet. Interior Air Quality System IAQS* IAQS is part of the Clean Zone Interior Package* and is a fully automatic system that filters passenger compartment air to help remove air contaminants such as particulates, hydrocarbons, nitric oxides and ground-level ozone. Tap Settings Climate Air Quality Sensor in the center display's top view to activate the function. 03

26 03 CONNECTIONS The vehicle's various types of connections can be used to play or voicecontrol media, send or receive text messages, make or receive phone calls, connect to the Internet, etc. from an external device such as a smartphone. In order to connect your devices to the vehicle, the ignition must be in at least mode I. Vehicle's modem 4 The easiest and most efficient way to connect the vehicle to the Internet is to use its own modem. This provides the highest performance, is activated automatically each time the engine is started and does not require the use of a smartphone. 1. Insert a personal SIM card in the holder in the passenger-side floorwell. 2. Tap Settings Communication Vehicle Modem Internet in top view. 3. Activate by checking the box for Vehicle modem Internet. Sharing Internet connection (tethering) When the vehicle is connected to the Internet via the vehicle's modem, you can share the vehicle's Internet connection (Wi-Fi hotspot) with other devices under Settings in top view. Tap Communication Vehicle Wi-Fi Hotspot. Bluetooth Use Bluetooth as first choice for handling phone calls, text messages and media from your phone to the vehicle's systems. Bluetooth can also be used to connect the vehicle to the Internet. Two Bluetooth devices can be connected at the same time but only one of them can be
27 used to stream media. The two most recently connected phones will connect automatically when the ignition is switched on (if the phone's Bluetooth function is activated). Up to 20 devices are saved in a list to facilitate connecting to these later. 1. Activate Bluetooth in your phone. Also activate tethering/personal hotspot if you would like to connect to the Internet. 2. Open the phone tile in the center display. 3. Tap Add phone or, if a phone is already connected, tap Change and then Add phone. 4. Select the phone to be connected and then follow the steps on the center display and in the phone. Note that in certain phones, the message function is activated. Wi-Fi Wi-Fi connections can be used to connect the vehicle to the Internet at greater speeds than are possible using Bluetooth to stream online services such as web radio and music via apps in the vehicle, download/upload software, etc. A Wi-Fi connection from a smartphone acts as a hotspot for the vehicle and any external devices that may be in the vehicle. 1. Activate your smartphone's tethering/personal hotspot. 2. Tap Settings in the center display's top view. 3. Tap Communication Wi-Fi and activate by checking the box for Wi-Fi connection. Please note that in certain phones, tethering is closed after contact with the vehicle has been broken. The phone's tethering function will then need to be reactivated before it can be used again. USB The USB ports can be used to connect an external device to e.g. play music. You can also use the USB ports for Apple CarPlay* and Android Auto*. Your external device will also be recharged while it is connected to the vehicle. USB ports (type A) are provided in the armrest storage compartment between the seats. Electrical sockets Your vehicle contains the following electrical sockets: 12-volt electrical socket. 12-volt electrical socket and 120-volt electrical socket*. There is also a 12-volt socket* in the trunk/cargo compartment. 4 Only vehicles with Volvo On Call. When the vehicle's modem is used to make the connection, the Volvo On Call services will use the connection. 03

28 USING CONNECTED DEVICES 03 External devices can be connected to e.g. handle phone calls and play media in the vehicle's audio and media systems. Handling phone calls 5 You can make and receive calls from a Bluetooth-connected phone. Making calls using the center display 1. Open the Phone tile in home view. Select to make a call using the list of recent calls or your list of contacts, or enter a number using the keypad. 2. Tap. Making a call using the right-side steering wheel keypad 1. Tap and navigate to Phone by tapping or. 2. Scroll through the list of calls using and select using. You can also handle calls using voice commands. Tap the voice control button ( ) in the right-side steering wheel keypad. For voice commands, see the "Voice control" chapter in this Quick Guide. Playing media In order to listen to audio content from an external device, connect it to the vehicle using the connection of your choice; see the previous section for connection options. Bluetooth-connected device 1. Start playback in the connected device. 2. Open the Bluetooth app in App view in the center display. Playback will begin. USB-connected device 1. Start the USB app in app view. 2. Select a song, track, etc. Playback will begin. 5 For information about which phones are compatible with the vehicle, go to support.volvocars.com.

29 MP3 player or ipod 1. Start playback in the device. 2. Open the ipod or USB app, depending on connection method. For playback from ipod, select the ipod app regardless of connection method. Playback will begin. Apple CarPlay * 6 and Android Auto* CarPlay and Android Auto make it possible to use certain apps in your smartphone via the vehicle to e.g. play music or listen to podcasts. This interaction takes place via the vehicle's center display or your smartphone. If you have an iphone, Siri voice control must be activated before using CarPlay. 1. Connect the phone to the USB port with a white frame. 2. Tap Apple CarPlay or Android Auto in app view to activate. 03 Activate voice control with CarPlay and Android Auto by pressing and holding the button in the right-side steering wheel keypad. Pressing this button briefly will instead activate the vehicle's own voice control system. Bluetooth is deactivated when CarPlay is used. Use Wi-Fi or the vehicle's modem if you would like to connect the vehicle to the Internet. 6 Apple and CarPlay are registered trademarks of Apple Inc.
30 04
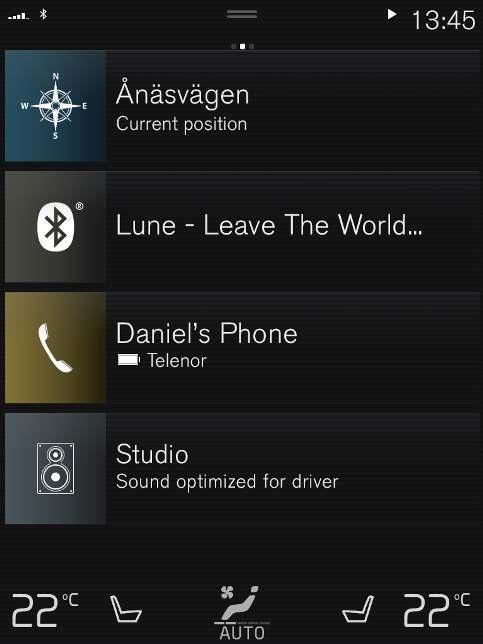
31 HOME VIEW When the center display starts it shows the Home view. From here, you can access the tiles for Navigation, Media and Phone, as well as the last used app or vehicle function. Navigation Tap to access Sensus Navigation*. Entering a destination with a free text search - Expand the toolbar using the down arrow on the left side and tap. The map display will change to a screen where you can search by entering text. Enter a search word/phrase. Entering a destination on the map Tap to maximize the map. Press and hold the location you want to go to and select Go here. Deleting a destination - Tap to open the itinerary. Tap the recycling bin to delete an intermediate destination (waypoint) in the itinerary or tap Clear itinerary to delete the entire itinerary. Map updates 7 - Tap Download Center in app view. Maps shows the number of available map updates. Tap Maps Install to update maps or install a selected map. Maps can also be downloaded from support.volvocars.com to a USB flash drive and then transferred to the vehicle. Media - this shows e.g. your music on an external device or FM radio if you have selected that in app view. Tap the tile to access settings. From here, you can see your music libraries, radio stations, etc. Phone - this provides access to phone functions. Tap the tile to expand it. From here, you can make calls using your list of recent calls or your contact list, or by entering a number using the keypad. When you have selected a number, tap. Last used app or vehicle function - here you can see the last used app or vehicle function that is not shown in any of the other tiles, e.g. Car status or Driver performance. You can also access a recently used function by tapping its tile. 7 The function's availability may vary from market to market. 04

32 04
33 FUNCTION VIEW AND APP VIEW Function view In home view, swipe the screen from left to right 8 to access function view. From here, you can activate/deactivate various vehicle functions, such as Head-up Display*, Park Assist and Lane Keeping Aid. Activate/deactivate a function by tapping its symbol. Some functions open in their own windows. App view In home view, swipe from right to left 8 to access app view. This displays the vehicle's factory-installed apps as well as any apps you have downloaded and installed. Managing and updating apps and systems You can update many of the vehicle's systems in Download Center in app view. The vehicle must be connected to the Internet in order for this to be possible. In Download Center, you can: Download apps - Tap New apps and select the desired app. Select Install to download the app. Update apps - Tap Install all to update all apps. Or tap Application updates to display a list of available updates. Select the desired app and tap Install. Uninstall apps - Tap Application updates and select the desired app. Tap Uninstall to delete the app. Update system software - Tap System updates to display a list of updates that can be installed in the vehicle. Tap Install all at the bottom of the list to update all software or Install to update specific software. If you do not want a list, select Install all near the System updates button. Moving icons The apps and buttons for vehicle functions in app view and function view can be moved to customize these views. 1. Press and hold an app or button. 2. Drag the app or button to the desired location in the view and release it. 8 Applies for left-hand drive vehicles. For right-hand drive vehicles, swipe the opposite way. 04
34 04
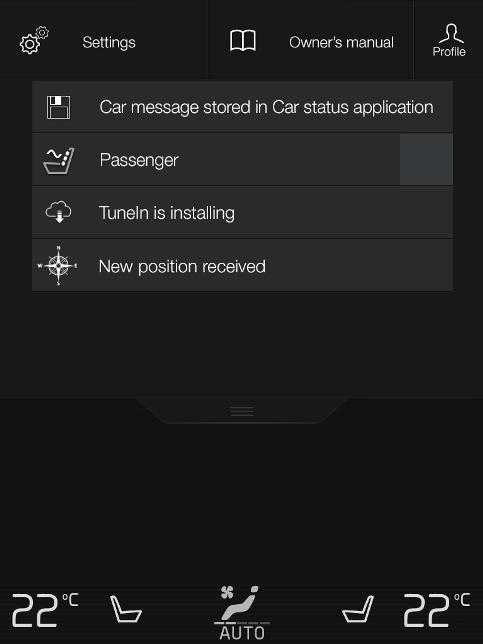
35 TOP VIEW There is a tab in the upper part of the display that you can pull down to access top view. This view provides access to Settings, Owner's manual, Profile and the vehicle's stored messages. Personal settings Many personal settings can be changed under Settings, e.g. displays, mirrors, front seat, navigation*, audio and media systems, language and voice control. Driver profiles If the vehicle is used by more than one driver, each driver can have a personal driver profile. Each time you enter the vehicle, you can select your driver profile where your personal settings are stored. The number of profiles displayed depends on how many keys are detected in the vehicle. The Guest profile is not connected to any specific key. The most recently active driver profile will be activated when the vehicle is unlocked. To change the driver profile, select Profile in top view. Driver profiles can be linked to specific vehicle keys and when the vehicle is unlocked, settings will be automatically adapted to your personal settings. To link a key, tap Settings System Driver Profiles. Select one of the driver profiles (the Guest profile cannot be linked). Home view will reappear. Pull top view down again, repeat the above procedure and select Edit for the selected profile and then Connect key. Individual drive mode To adapt the Hybrid, Pure or Power drive modes to your personal preferences, activate the drive mode by tapping Settings My Car Individual Drive Mode. System volumes To adjust or switch off the volume of system sounds, e.g. screen tap sounds, go to Settings Sound System Volumes. 04
36 05
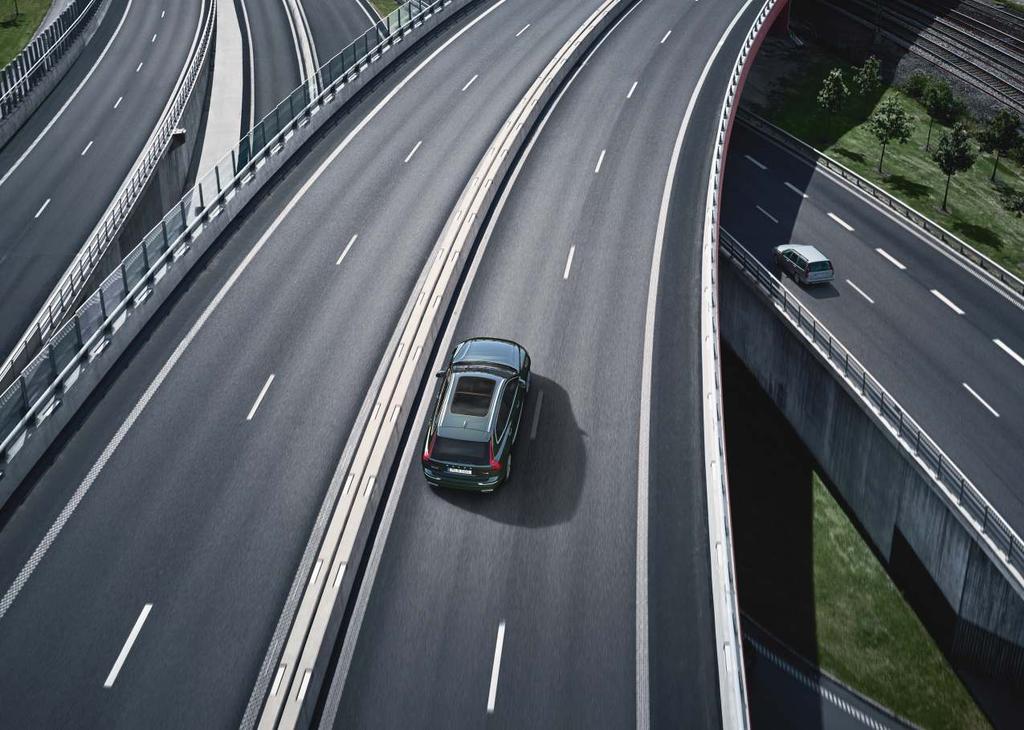
37 DRIVER SUPPORT Your vehicle is equipped with a number of functions to help you drive safely and help prevent accidents. These functions are activated in the center display's function view. Keep in mind that these driver support functions are only aids. The driver always has full responsibility for operating the vehicle in a safe manner. A selection of these is listed below: City Safety City Safety 9 can help assist the driver in critical situations in order to help prevent or mitigate a collision with other vehicles, large animals, pedestrians or cyclists. Visual, acoustic and haptic signals are given to alert the driver of a collision and assist you to act in time to avoid it. If the driver does not react quickly enough and a collision is imminent, the system can automatically apply the brakes. City Safety steering assistance can also strengthen your steering movements if you have begun evasive action and the system detects that the steering movements are not sufficient to avoid a collision. City Safety is activated when the engine is started and cannot be disabled. Blind Spot Information (BLIS)* BLIS can notify the driver of vehicles in your blind spot and of rapidly approaching vehicles in adjacent lanes. Cross Traffic Alert (CTA)* CTA is a supplementary driver support system for BLIS that can alert drivers to crossing traffic behind the vehicle. CTA is activated when reverse gear is engaged or if the vehicle is rolling backward. Lane Keeping Aid Lane Keeping Aid can help the driver reduce the risk of the vehicle unintentionally veering out of the lane. To select the type of assistance that should be provided, select Settings My Car IntelliSafe Lane Keeping Aid Mode in the center display's top view. Steering assistance during collision risks Pilot Assist Steering assistance during collision risks can help the driver reduce the risk of the vehicle unintentionally veering out of the lane and/or colliding with another vehicle/obstacle by actively steering the vehicle back into the lane and/or swerving out of the way. The function consists of the sub-functions Run-Off Mitigation with steering assistance, Steering assistance during collision risks from oncoming traffic and Steering assistance during collision risks from behind*. Pilot Assist 10 is a convenience function that can assist the driver in keeping the vehicle in its own lane and at a set distance to the vehicle ahead. Pilot Assist is selected and activated using the left-side steering wheel keypad. For steering assistance to be possible, certain conditions must be met, e.g. both of the driver's hands must be on the steering wheel and the lane markings must be visible. When steering assistance is active, a GREEN steering wheel symbol will be displayed in the instrument panel. 9 Not available on all markets. 10 Depending on market, this function can be either standard or optional. 05
38 05
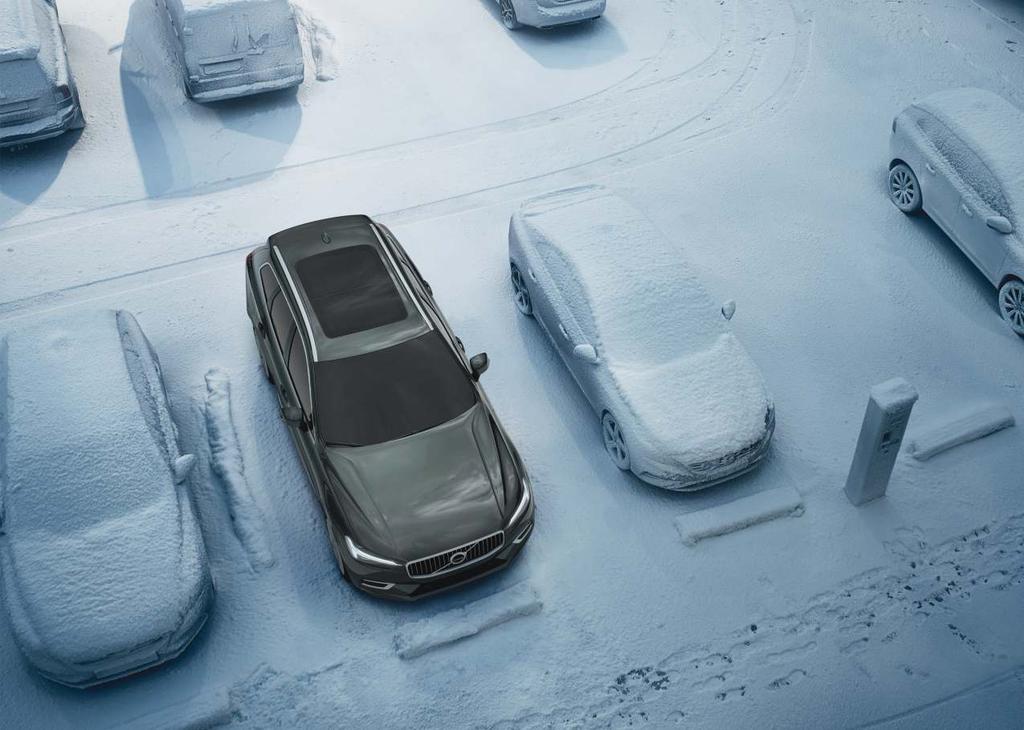
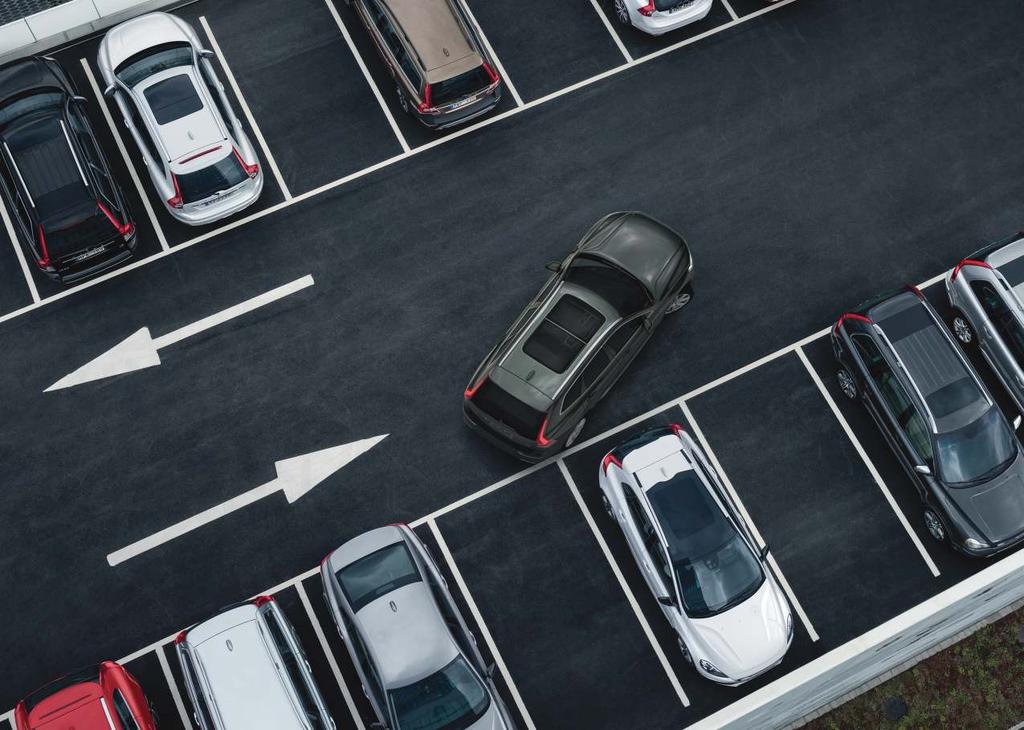
39 PARKING ASSISTANCE SYSTEMS Park Assist Pilot* Park Assist Pilot can help detect if the vehicle will fit into a parking space and then helps guide the vehicle into the space. The driver's task is to check the area around the vehicle, follow the instructions provided in the center display, select the appropriate gear, control the vehicle's speed and be prepared to apply the brakes to stop the vehicle. Parking with Park Assist Pilot 1. The vehicle's speed may not exceed 30 km/h (20 mph) when parallel parking or 20 km/h (12 mph) when perpendicular parking. The distance between the vehicle and the parking space should be about 1 meter (3 feet) when the function is looking for parking. 2. Tap Park In in Function view or Camera view. 3. Stop the vehicle when notified by a graphic and a message in the center display that a suitable parking space has been found. A pop-up window will appear. Pulling out of a parking space with Park Assist Pilot This function can only be used when the vehicle has been parallel parked. Park Assist Camera* 1. Tap Park Out in function view or camera view. 2. Use the turn signals to indicate the direction in which the vehicle will pull out of the parking space. 3. Follow the instructions in the center display. The Park Assist Camera can help the driver detect potential obstacles around the vehicle using a camera image and graphics in the center display. Camera views and guiding lines can be selected in the center display. The Park Assist Camera starts automatically when reverse gear is engaged. It can also be started manually from the center display. Tap the Camera button in function view to manually activate/deactivate the function. 05
40 05
41 PURER DRIVING PLEASURE Planning your trips and driving economically can help increase driving range using the electric motor while simultaneously reducing your environmental impact. The ability to maximize driving range varies depending on the circumstances and conditions in which the vehicle is driven. Some factors you can influence and others you cannot. Greatest range is achieved during very favorable conditions when all factors have a positive impact. Plan your trips by always Charging the hybrid battery before driving. Preconditioning the vehicle. Drive economically by Activating the Pure drive mode. Reducing the temperature in the passenger compartment and reducing blower speed. Maintaining a consistent speed and planning ahead to help minimize braking. Selecting Hold in function view at higher speeds on trips that exceed the hybrid battery's range. Maintaining the recommended tire inflation pressure and checking it regularly. Keeping the windows closed while driving. 05 Factors you cannot influence The traffic situation. Road condition and topography. Ambient temperature and headwinds. See your Owner's Manual for more tips on increasing driving range and driving economically.
42 06 VOICE COMMANDS The voice control system makes it possible to control 11 certain functions in the media player, Bluetooth-connected phones, climate system and the Volvo navigation system* using voice commands. To activate voice control, press the voice control button in the right-side steering wheel keypad. The following commands may always be used: Repeat Cancel Help Cell phone voice commands Call [contact] Call [phone number] Recent calls Read message Message to [contact] Radio and media voice commands Media Play [artist] Play [song title] Play [song title] from [album] Play [radio station] Tune to [frequency] Tune to [frequency] [waveband] Radio Radio FM SiriusXM* CD* USB ipod Bluetooth Similar music Climate system voice commands Climate Set temperature to X degrees Raise temperature/lower temperature Sync temperature Air on feet/air on body Air on feet off/air on body off Set fan to max/turn off fan
43 Raise fan speed/lower fan speed Turn on auto Air condition on/air condition off Recirculation on/recirculation off Turn on defroster /Turn off defroster Turn on max defroster/turn off max defroster Turn on electric defroster/turn off electric defroster* Turn on rear defroster/turn off rear defroster Turn steering wheel heat on/turn steering wheel heat off* Raise steering wheel heat/lower steering wheel heat* Turn on seat heat/turn off seat heat* Raise seat heat/lower seat heat* Turn on seat ventilation/turn off seat ventilation* Raise seat ventilation/lower seat ventilation* Navigation system voice commands* Navigation Take me home Go to [city] Go to [address] Add intersection Go to [zip code] Go to [contact] Search [POI category] Search [POI category] [city] Search [POI name] Change country/change state12, 13 Show favorites Clear itinerary Repeat voice guidance Turn off voice guidance Turn on voice guidance 11 Certain markets only. 12 For European countries, "country" is used instead of "state". 13 For Brazil and India, the search area is changed using the center display. 06
44 07 SUPPLEMENTARY INFORMATION The Owner's Manual and other manuals contain safety instructions and all warning, caution and note texts, which must be read. Some functions only apply to certain markets. WARNING GETTING STARTED Volvo On Call - For vehicles with Volvo On Call, the services only function in areas where the vehicle has adequate cellular coverage and on markets where the service is available. Just as with cellular phones, atmospheric disturbances or areas with fewer transmitters, e.g. sparsely populated rural areas, can make connection impossible. For warning, caution and note texts for Volvo On Call services, see the Owner's Manual and the applicable agreement for the Volvo On Call subscription. Sensus Navigation* - Direct all your attention to the road and make sure that your concentration is focused on driving. Follow applicable traffic laws and use good judgment while driving. Road conditions can be affected by weather or season, which may make certain recommendations less reliable. EXTERIOR OVERVIEW Tailgate bear in mind the risk of pinching when opening/closing the tailgate. Make sure that no one is in the path of the tailgate who could be injured by its movement. Always operate the tailgate with caution. Keyless locking/unlocking Check that children or other passengers are not at risk of crushing when all the windows are closed with keyless closing*. INTERIOR OVERVIEW Passenger airbag Volvo recommends that all occupants (adults and children) shorter than 140 cm (4 foot 7 inches) be seated in the rear seat of any vehicle with a front passenger side airbag and be properly restrained for their height and weight. Occupant Weight Sensor (OWS) No objects that add to the total weight on the seat should be placed on the front passenger's seat. If a child is seated in the front passenger's seat with any additional weight, this extra weight could cause the OWS system to enable the airbag, which might cause it to deploy in the event of a collision, thereby injuring the child. The seat belt should never be wrapped around an object on the front passenger's seat. This could interfere with the OWS system's function. The front passenger's seat belt should never be used in a way that exerts more pressure on the passenger than normal. This could increase the pressure exerted on the weight sensor by a child, and could result in the airbag being enabled, which might cause it to deploy in the event of a collision, thereby injuring the child. Always take the remote key with you when you leave the vehicle. Make sure the ignition is in mode 0, especially if there are children in the vehicle. Always apply the parking brake when parking on an incline. Selecting a gear or putting the automatic transmission in P may not be sufficient to keep the vehicle stationary in all situations. CHARGING THE HYBRID BATTERY Charging the hybrid battery may only be done from approved, grounded 120/240 V outlets (AC, alternating current). If the electrical circuit or electrical socket's capacity is not known, let a licensed electrician inspect the electrical circuit's capacity. Using a charge level that exceeds the electrical circuit's or electrical outlet's capacity may start a fire or damage the electrical circuit. The charging cable must be grounded when in use. It is equipped with a cord with a grounding conductor and a grounding plug. The plug must be inserted into an appropriate outlet that is properly installed and grounded in accordance with all local codes and ordinances and is not damaged in any way. Children should be supervised when in the vicinity of the charging cable when it is plugged in. High voltage is present in your electric meter housing and power distribution service panel. Contact with high voltage can cause death or serious personal injury. Do not use the charging cable if it is damaged in any way. A damaged or malfunctioning charging cable may only be repaired by a workshop an authorized Volvo workshop is recommended. Always position the charging cable so that it will not be driven over, stepped on, tripped over or otherwise damaged, or cause personal injury. Disconnect the charger from the wall outlet before cleaning it. Never connect the charging cable to an extension cord or a multiple plug socket. Avoid visibly worn or damaged electrical outlets since they may lead to fire damage and/or personal injury if used. Also, refer to the manufacturer's instructions for using the charging cable and its components. POWER FRONT SEATS Do not adjust the seat while driving. The seat must be positioned in a way that allows the driver to fully depress the brake pedal. Adjust the seat as far rearward as comfort and control allow. After adjusting the seat, make sure that it is securely locked into position before starting to drive. FOLDING DOWN THE REAR SEAT BACKRESTS Make sure the backrest is correctly engaged before folding up and down and that the head restraint is correctly engaged after folding up. DRIVER SUPPORT The vehicle's driver support systems are designed to offer supplementary assistance to the driver, but cannot handle all situations in all traffic, weather and road conditions. They are never a substitute for the driver's attention and judgment. The driver is always responsible for ensuring the vehicle is driven in a safe manner, at the appropriate speed, with an appropriate distance to other vehicles, and in accordance with current traffic rules and regulations. The driver always has ultimate responsibility for braking and steering the vehicle. Before driving your vehicle, read all sections of the Owner's Manual concerning driver support systems in the vehicle. PARKING ASSISTANCE SYSTEMS Park Assist Pilot is a supplementary driver support but cannot handle all situations. It is only intended to assist the driver when parallel and perpendicular parking. The driver bears full responsibility for parking the vehicle safely and braking when necessary. Objects located far into the parking space may not be detected when scanning. The driver is always responsible for assessing whether the space suggested by Park Assist Pilot is suitable for parking. Park Assist Camera is supplementary driver support intended to assist when parking the vehicle. It is never a substitute for the driver's attention and judgment. The cameras have dead/blind spots where objects cannot be detected. Pay particular attention to people and animals near the vehicle. Objects/obstacles may be closer to the vehicle than they appear on the screen. Before driving your vehicle, read all sections of the Owner's Manual concerning driver support systems in the vehicle. VOICE COMMANDS The driver is always responsible for ensuring that the vehicle is operated in a safe manner and that all applicable traffic regulations are followed. CAUTION INTERIOR OVERVIEW Do not use the OFF ROAD drive mode when towing a trailer without an electrical connection. This could result in damage to the pneumatic suspension system's bellows. The information is projected from a head-up display unit* located in the dashboard. To help prevent damage to the display unit's glass cover, do not place any objects on the glass and prevent objects from falling onto it. CENTER DISPLAY When cleaning the center display, use a microfiber cloth that is free from sand and similar debris. When cleaning the center display, apply only light
XC90 T W I N E N G I N E
 XC90 T W I N E N G I N E QUICK GUIDE VÄLKOMMEN! This Quick Guide describes a selection of features and functions in your Volvo. Additional owner's information is available in your vehicle, in an app and
VÄLKOMMEN! THE CENTER DISPLAY MOBILE APP VOLVO'S SUPPORT SITE PRINTED INFORMATION
 XC60 QUICK GUIDE VÄLKOMMEN! This Quick Guide describes a selection of features and functions in your Volvo. Additional owner's information is available in your vehicle, in an app and on the Internet. THE
VÄLKOMMEN! THE CENTER DISPLAY MOBILE APP VOLVO'S SUPPORT SITE PRINTED INFORMATION
 XC90 QUICK GUIDE VÄLKOMMEN! This Quick Guide describes a selection of features and functions in your Volvo. Additional owner's information is available in your vehicle, in an app and on the Internet. THE
VÄLKOMMEN! THE CENTER DISPLAY MOBILE APP VOLVO'S SUPPORT SITE PRINTED INFORMATION
 S90 QUICK GUIDE VÄLKOMMEN! This Quick Guide describes a selection of features and functions in your Volvo. Additional owner's information is available in your vehicle, in an app and on the Internet. THE
VÄLKOMMEN! THE CENTER DISPLAY MOBILE APP VOLVO'S SUPPORT SITE PRINTED INFORMATION
 XC40 QUICK GUIDE VÄLKOMMEN! This Quick Guide describes a selection of features and functions in your Volvo. Additional owner's information is available in your vehicle, in an app and on the Internet. THE
VÄLKOMMEN! THE CENTER DISPLAY MOBILE APP VOLVO'S SUPPORT SITE PRINTED INFORMATION
 QUICK GUIDE VÄLKOMMEN! This Quick Guide describes a selection of the features and functions in your Volvo. More detailed information is available in the vehicle's center display, in an app and on the Internet.
VÄLKOMMEN! THE CENTER DISPLAY MOBILE APP VOLVO'S SUPPORT SITE PRINTED INFORMATION
 QUICK GUIDE VÄLKOMMEN! This Quick Guide describes a selection of the features and functions in your Volvo. More detailed information is available in the vehicle's center display, in an app and on the Internet.
VÄLKOMMEN! THE CAR'S CENTRE DISPLAY MOBILE APP VOLVO'S SUPPORT SITE PRINTED INFORMATION
 XC40 QUICK GUIDE VÄLKOMMEN! This Quick Guide describes a selection of the functions in your Volvo. More detailed owner's information is available in the car, in the app and on the web. THE CAR'S CENTRE
Quick GUIDE Web Edition
 XC70 Quick GUIDE Web Edition WELCOME TO THE GLOBAL FAMILY OF VOLVO OWNERS! Getting to know your new vehicle is an exciting experience. This Quick Guide provides a brief overview of the most common features
VÄLKOMMEN! THE CAR'S CENTRE DISPLAY MOBILE APP VOLVO'S SUPPORT SITE PRINTED INFORMATION
 XC90 QUICK GUIDE VÄLKOMMEN! This Quick Guide describes a selection of the functions in your Volvo. More detailed owner's information is available in the car, in the app and on the web. THE CAR'S CENTRE
note remote key & key blade
 remote key & key blade Locks the doors and trunk and arms the alarm. If the car is locked with the remote key while the power retractable hard top is down, the double locking feature activates after approximately
XC90 T W I N E N G I N E
 XC90 T W I N E N G I N E QUICK GUIDE VÄLKOMMEN! This Quick Guide describes a selection of the functions in your Volvo. More detailed owner's information is available in the car, in the app and on the web.
WEB EDITION QUICK GUIDE
 WEB EDITION QUICK GUIDE WELCOME TO THE GLOBAL FAMILY OF VOLVO OWNERS! This Quick Guide provides a brief overview of the most common features and functions in your Volvo. The owner s manual and the other
WELCOME TO THE GLOBAL FAMILY OF VOLVO OWNERS!
 QUICK GUIDE WELCOME TO THE GLOBAL FAMILY OF VOLVO OWNERS! This Quick Guide provides a brief overview of the most common features and functions in your Volvo. The owner s manual and the other driver s information
WEB EDITION QUICK GUIDE
 WEB EDITION QUICK GUIDE WELCOME TO THE GLOBAL FAMILY OF VOLVO OWNERS! This Quick Guide provides a brief overview of the most common features and functions in your Volvo. The owner s manual and the other
Quick GUIDE Web Edition
 XC90 Quick GUIDE Web Edition WELCOME TO THE GLOBAL FAMILY OF VOLVO OWNERS! Getting to know your new vehicle is an exciting experience. This Quick Guide provides a brief overview of the most common features
WELCOME TO THE GLOBAL FAMILY OF VOLVO OWNERS!
 QUICK GUIDE WELCOME TO THE GLOBAL FAMILY OF VOLVO OWNERS! This Quick Guide provides a brief overview of the most common features and functions in your Volvo. The owner s manual and the other driver s information
Quick Guide VOLVO S80
 VOLVO S80 Quick Guide WELCOME TO THE GLOBAL FAMILY OF VOLVO OWNERS! Getting to know your new vehicle is an exciting experience. This Quick Guide provides a brief overview of the most common features and
web edition quick guide
 web edition quick guide WELCOME TO THE GLOBAL FAMILY OF VOLVO OWNERS! This Quick Guide provides a brief overview of the most common features and functions in your Volvo. The Owner s Manual and the other
Quick Guide. volvo C30
 volvo C30 Quick Guide WELCOME TO THE GLOBAL FAMILY OF VOLVO OWNERS! Getting to know your new vehicle is an exciting experience. This Quick Guide provides a brief overview of the most common features and
XC70. Quick GUIDE Web Edition
 XC70 Quick GUIDE Web Edition WELCOME TO THE GLOBAL FAMILY OF VOLVO OWNERS! This Quick Guide provides a brief overview of the most common features and functions in your Volvo. The Owner s Manual and the
note remote key & key blade
 remote key & key blade Locks the doors and trunk and arms the alarm. If the car is locked with the remote key while the power retractable hard top is down, the double locking feature activates after approximately
web edition quick guide
 web edition quick guide WELCOME TO THE GLOBAL FAMILY OF VOLVO OWNERS! This Quick Guide provides a brief overview of the most common features and functions in your Volvo. The Owner s Manual and the other
note remote key & key blade
 remote key & key blade Locks the doors and tailgate, and arms the alarm. Unlocks the doors and tailgate A and disarms the alarm. Unlocks (but does not open) the tailgate. key blade Used to lock/unlock
1 Green light: Vehicle is locked. 2 Yellow light: Vehicle is unlocked. 3 Flashing red light: Someone may be in the
 REMOTE KEY WITH PCC* personal car communicator Locks the doors and trunk and arms the alarm. Unlocks the doors and trunk, and disarms the alarm A. Trunk (press once to unlock, press twice to open trunk
volvo s40 Quick Guide
 volvo s40 Quick Guide WELCOME TO THE GLOBAL FAMILY OF VOLVO OWNERS! Getting to know your new vehicle is an exciting experience. Please browse through this Quick Guide to get the full benefits from your
volvo C70 quick guide
 volvo C70 quick guide WELCOME TO THE GLOBAL FAMILY OF VOLVO OWNERS! Getting to know your new vehicle is an exciting experience. Please browse through this Quick Guide to get the full benefits from your
VÄLKOMMEN! THE CAR'S CENTRE DISPLAY MOBILE APP VOLVO'S SUPPORT SITE PRINTED INFORMATION
 QUICK GUIDE VÄLKOMMEN! This Quick Guide describes a selection of the functions in your Volvo. More detailed owner's information is available in the car, in the app and on the web. THE CAR'S CENTRE DISPLAY
WEB EDITION QUICK GUIDE
 WEB EDITION QUICK GUIDE WELCOME TO YOUR NEW VOLVO! This folder contains a selection of the most common functions in your particular car. The owner's manual and other manuals contain safety instructions
Quick Guide. volvo XC90
 volvo XC90 Quick Guide WELCOME TO THE GLOBAL FAMILY OF VOLVO OWNERS! Getting to know your new vehicle is an exciting experience. This Quick Guide provides a brief overview of the most common features and
web edition quick guide
 web edition quick guide WELCOME TO YOUR NEW VOLVO! This folder contains a selection of the most common functions in your particular car. The owner's manual and other manuals contain important information
WELCOME TO YOUR NEW VOLVO!
 QUICK GUIDE WELCOME TO YOUR NEW VOLVO! This folder contains a selection of the most common functions in your car. The owner's manual and other manuals contain safety instructions and all warning, important
web edition quick guide
 web edition quick guide WELCOME TO YOUR NEW VOLVO! This folder contains a selection of the most common functions in your particular car. The owner's manual and other manuals contain important information
QUICK GUIDE WEB EDITION WELCOME TO YOUR NEW VOLVO! VOLVO S60
 VOLVO S60 QUICK GUIDE WEB EDITION WELCOME TO YOUR NEW VOLVO! Getting to know your new car is an exciting experience. Take a look at this Quick Guide to learn some of the most common functions quickly and
XC60. Quick GUIDE Web Edition
 XC60 Quick GUIDE Web Edition WELCOME TO YOUR NEW VOLVO! This folder contains a selection of the most common functions in your particular car. The owner's manual and other manuals contain important information
WELCOME TO YOUR NEW VOLVO!
 QUICK GUIDE WELCOME TO YOUR NEW VOLVO! This folder contains a selection of the most common functions in your car. The owner's manual and other manuals contain safety instructions and all warning, important
VÄLKOMMEN! THE CAR'S CENTRE DISPLAY MOBILE APP VOLVO'S SUPPORT SITE PRINTED INFORMATION
 QUICK GUIDE VÄLKOMMEN! This Quick Guide describes a selection of the functions in your Volvo. More detailed owner's information is available in the car, in the app and on the web. THE CAR'S CENTRE DISPLAY
Quick GUIDE Web edition
 s60 Quick GUIDE Web edition WELCOME TO YOUR NEW VOLVO! Getting to know your new car is an exciting experience. Take a look at this Quick Guide to learn some of the most common functions quickly and easily.
web edition quick guide
 web edition quick guide WELCOME TO YOUR NEW VOLVO! This folder contains a selection of the most common functions in your car. The owner's manual and other manuals contain important information with all
v40 Quick GUIDE Web Edition
 v40 Quick GUIDE Web Edition WELCOME TO YOUR NEW VOLVO! This folder contains a selection of the most common functions in your car. The owner's manual and other manuals contain important information with
S60. Quick GUIDE Web Edition
 S60 Quick GUIDE Web Edition WELCOME TO YOUR NEW VOLVO! This folder contains a selection of the most common functions in your particular car. The owner's manual and other manuals contain important information
QUICK GUIDE WEB EDITION WELCOME TO YOUR NEW VOLVO! VOLVO V70 & XC70
 VOLVO V70 & XC70 QUICK GUIDE WEB EDITION WELCOME TO YOUR NEW VOLVO! Getting to know your new car is an exciting experience. Take a look at this Quick Guide to learn some of the most common functions quickly
Quick Guide WEB EDITION WELCOME TO YOUR NEW VOLVO! VOLVO S80
 VOLVO S80 Quick Guide WEB EDITION WELCOME TO YOUR NEW VOLVO! Getting to know your new car is an exciting experience. Take a look at this Quick Guide to learn some of the most common functions quickly and
XC90 EXCELLENCE SUPPLEMENT
 XC90 EXCELLENCE SUPPLEMENT VÄLKOMMEN! Here you can read about the functions for the rear seat in your Volvo XC90 Excellence. More detailed owner's information is available in the car, in the app and on
VÄLKOMMEN! THE CAR'S CENTRE DISPLAY MOBILE APP VOLVO'S SUPPORT SITE PRINTED INFORMATION
 VÄLKOMMEN! Here you can read about the functions for the rear seat in your Volvo XC90 Excellence. More detailed owner's information is available in the car, in the app and on the web. THE CAR'S CENTRE
WelCOMe TO YOUR new VOlVO! VOLVO V50 QUICK GUIDE
 VOLVO V50 QUICK GUIDE WelCOMe TO YOUR new VOlVO! Getting to know your car is an exciting experience. After looking through this Quick Guide you'll like your new Volvo even more. You can find detailed information
Quick Guide WELCOME TO YOUR NEW VOLVO! VOLVO S80 WEB EDITION
 VOLVO S80 Quick Guide WEB EDITION WELCOME TO YOUR NEW VOLVO! Getting to know your car is an exciting experience. After looking through this Quick Guide you'll like your new Volvo even more. You can find
VÄLKOMMEN! THE VEHICLE S CENTER DISPLAY MOBILE APP VOLVO S SUPPORT SITE PRINTED INFORMATION
 VÄLKOMMEN! This Quick Guide describes the rear seat functions in your Volvo XC90 Excellence. More detailed owner s information is available digitally in the vehicle, in an app and on-line. THE VEHICLE
FORD MONDEO Quick Reference Guide
 FORD MONDEO Quick Reference Guide About This Quick Reference Guide We have created this guide to help you get to know certain features of your vehicle. It only contains basic instructions to get you started
QUICK GUIDE VOLVO XC60 WEB EDITION WELCOME TO YOUR NEW VOLVO!
 VOLVO XC60 QUICK GUIDE WEB EDITION WELCOME TO YOUR NEW VOLVO! Getting to know your car is an exciting experience. After looking through this Quick Guide you'll like your new Volvo even more. You can find
Quick GUIDE Web edition
 v40 Quick GUIDE Web edition WELCOME TO YOUR NEW VOLVO! Getting to know your new car is an exciting experience. Take a look at this Quick Guide to learn some of the most common functions quickly and easily.
KEY FOB. Locking And Unlocking The Doors
 KEY FOB Key Fob Locking And Unlocking The Doors Cargo Vehicle (Canada) Push and release the lock button once to lock all the doors. Push and release the unlock button once to unlock the front two doors.
2011 Infiniti QX Quick Reference Guide
 21 Infiniti QX Quick Reference Guide 06 11 07 08 12 13 04 09 Behind steering wheel on column 11 05 10 03 14 17 18 19 20 21 15 16 INSTRUMENT BRIGHTNESS control SwITcH* HEADLIGHT AND TURN SIGNAL SwITcH windshield
TECHNOLOGY REFERENCE GUIDE
 TECHNOLOGY REFERENCE GUIDE owners.honda.com 2014 Honda CR-V LX, EX, EX-L, and EX-L with RES 31T0AA20 Technology Reference Guide 00X31-T0A-A201 2013 American Honda Motor Co., Inc. All Rights Reserved Printed
TECHNOLOGY REFERENCE GUIDE
 TECHNOLOGY REFERENCE GUIDE owners.honda.com 2015 Honda Accord Sedan LX, Sport, and EX 31T2AA20 Technology Reference Guide 00X31-T2A-A200 2014 American Honda Motor Co., Inc. All Rights Reserved Printed
New for 2019 Bold represents changes from previous version Version 4
 XC60 T5 250 hp, 258 lb. ft. torque, Direct-Injected Turbocharged Engine, 8-speed Geartronic Automatic with Start/Stop & Adaptive Shift Model Trims Destination Charge: $995 Momentum Inscription SAFETY $39,200
EDGE QUICK REFERENCE GUIDE LEARN MORE ABOUT YOUR NEW VEHICLE WARNING
 United States Ford Customer Relationship Center 1-800-392-3673 (FORD) (TDD for the hearing impaired: 1-800-232-5952) fordowner.com @FordService Canada Ford Customer Relationship Centre 1-800-565-3673 (FORD)
Air Recirc. Button. Defrost Button. Mode Buttons
 2009 QUICK REFERENCE GUIDE GRAND CARAVAN Driver Temp. A/C Button Defrost Button Mode Buttons Blower Air Recirc. Button Rear Window Defroster Button Passenger Temp. Rear ContRol Rear Blower Rear Temp. Manual
WELCOME TO YOUR NEW VOLVO!
 QUICK GUIDE WELCOME TO YOUR NEW VOLVO! This folder contains a selection of the most common functions in your car. The owner's manual and other manuals contain safety instructions and all warning, important
XC60 T5 AWD 250 hp, 258 lb. ft. torque, Direct-Injected Turbocharged Engine, 8-speed Geartronic Automatic with Start/Stop & Adaptive Shift
 XC60 T5 AWD 250 hp, 258 lb. ft. torque, Direct-Injected Turbocharged Engine, 8-speed Geartronic Automatic with Start/Stop & Adaptive Shift Model Trims Destination Charge: $995 Momentum Inscription SAFETY
T E C H N O L O G Y R E F E R E N C E G U I D E
 T E C H N O L O G Y R E F E R E N C E G U I D E o w n e r s. h o n d a. c o m 3 1 T R 3 A 1 0 2013 Honda Civic Sedan Technology Reference Guide 00X31- TR3- A100 2012 American Honda Motor Co., Inc. All
2006 QUEST QUICK REFERENCE GUIDE. Shift_convention
 20 QUEST QUICK REFERENCE GUIDE Shift_convention STEERING WHEEL TILT ADJUSTMENT (BEHIND STEERING WHEEL) AUDIO SYSTEM REAR SONAR SWITCH TRIP BUTTON STEERING WHEEL SWITCHES FOR AUDIO CONTROL LIGHTS ON DEMAND
2014 Crosstour EX and EX-L
 T E C H N O L O G Y R E F E R E N C E G U I D E o w n e r s. h o n d a. c o m 2014 Honda Crosstour EX and EX-L 31TP6B40 Technology Reference Guide 00X31- TP6- B400 2013 American Honda Motor Co., Inc. All
Getting to Know Your 2017 Enclave
 Getting to Know Your 2017 Enclave www.buick.com Review this Quick Reference Guide for an overview of some important features in your Buick Enclave. More detailed information can be found in your Owner
Getting to Know Your 2016 Impala.
 Getting to Know Your 2016 Impala www.chevrolet.com Review this Quick Reference Guide for an overview of some important features in your Chevrolet Impala. More detailed information can be found in your
FORD ECOSPORT Quick Reference Guide
 FORD ECOSPORT Quick Reference Guide About This Quick Reference Guide We have created this guide to help you get to know certain features of your vehicle quickly. It only contains basic instructions to
2014 MIRAGE. Owner s Handbook
 2014 MIRAGE Owner s Handbook Please place copies of the following items in the pocket below: 1. Pre-Delivery Inspection Form (Customer Copy) 2. Triple Diamond Delivery Checklist (Customer Copy) 3. Salesperson
2011 ALTIMA HyBRID. Quick Reference Guide
 21 ALTIMA HyBRID Quick Reference Guide 02 03 15 06 04 05 07 09 10 08 16 17 11 12 13 14 02 03 04 05 POWER METER* LOW TIRE PRESSURE WARNING LIGHT HIGH VOLTAGE BATTERY STATUS METER HEADLIGHT AND TURN SIGNAL
2018 ACADIA GETTING TO KNOW YOUR. gmc.com
 GETTING TO KNOW YOUR 2018 ACADIA gmc.com Review this Quick Reference Guide for an overview of some important features in your GMC Acadia. Some optional equipment described in this guide may not be included
2007 VERSA QUICK REFERENCE GUIDE. Shift_space
 2007 VERSA QUICK REFERENCE GUIDE Shift_space 04 05 06 12 13 14 11 07 08 15 09 10 HEADLIGHT AND TURN SIGNAL CONTROL 04 TWIN TRIP ODOMETER 07 INSTRUMENT BRIGHTNESS CONTROL* 10 HOOD RELEASE* 13 AUDIO SYSTEM
All-new 2018 Jeep Wrangler Offers a host of Advanced Technology Features, Including Fourth Generation 8.4-inch Display with Uconnect System
 All-new 2018 Jeep Wrangler TECHNOLOGY All-new 2018 Jeep Wrangler Offers a host of Advanced Technology Features, Including Fourth Generation 8.4-inch Display with Uconnect System New fourth-generation Uconnect
Turn Signal Lever/ Exterior Lamp Controls. Audio Next/Previous Favorite Station Controls (behind steering wheel)
") Review this Quick Reference Guide for an overview of some important features in your Chevrolet Impala. More detailed information can be found in your Owner Manual. Some optional equipmentf described in
Review this Quick Reference Guide for an overview of some important features in your Chevrolet Impala. More detailed information can be found in your Owner Manual. Some optional equipmentf described in
FORD ECOSPORT Quick Reference Guide
 FORD ECOSPORT Quick Reference Guide About This Quick Reference Guide We have created this guide to help you get to know certain features of your vehicle quickly. It only contains basic instructions to
Q QUICK REFERENCE GUIDE
 Q50 08 QUICK REFERENCE GUIDE To view detailed instructional videos, go to www.infinitiownersinfo.mobi/08/q50 or snap this barcode with an appropriate barcode reader. Helpful Resources BELOW IS A LIST OF
2017 INFINITI QX80 QUICK REFERENCE GUIDE
 07 INFINITI QX80 QUICK REFERENCE GUIDE To view detailed instructional videos, go to www.infinitiownersinfo.mobi/07/qx80 or snap this barcode with an appropriate barcode reader. Helpful Resources BELOW
Getting to Know Your 2017 Impala
 Getting to Know Your 2017 Impala www.chevrolet.com Review this Quick Reference Guide for an overview of some important features in your Chevrolet Impala. More detailed information can be found in your
2017 Envision
 Getting to Know Your 2017 Envision www.buick.com Review this Quick Reference Guide for an overview of some important features in your Buick Envision. More detailed information can be found in your Owner
T E C H N O L O G Y R E F E R E N C E G U I D E
 T E C H N O L O G Y R E F E R E N C E G U I D E o w n e r s. h o n d a. c o m 3 1 T R 2 A 1 0 2013 Honda Civic Hybrid Technology Reference Guide 00X31- TR2- A100 2012 American Honda Motor Co., Inc. All
FORD ECOSPORT Quick Reference Guide
 FORD ECOSPORT Quick Reference Guide About This Quick Reference Guide We have created this guide to help you get to know certain features of your vehicle. It only contains basic instructions to get you
Volkswagen Information System. Introduction
 Volkswagen Information System Introduction In this section you ll find information about: Using the instrument cluster menus: Basic version Using the instrument cluster menus: Premium version with multi-function
2007 ARMADA QUICK REFERENCE GUIDE. Shift_scale
 2007 ARMADA QUICK REFERENCE GUIDE Shift_scale 07 HOOD RELEASE* 09 08 STEERING WHEEL TILT ADJUSTMENT* 10 09 CONTROL PANEL DISPLAY 05 06 11 12 10 AUDIO SYSTEM 13 07 08 11 FRONT-PASSENGER AIR BAG STATUS LIGHT
ASTRA THE OPEL PRICES AND OPTIONS models. Prices effective 1 September 2017
 THE OPEL ASTRA PRICES AND OPTIONS 2018 models. Prices effective 1 September 2017 ASTRA RANGE HIGHLIGHTS ASTRA S ASTRA SC Highlights IntelliLink smartphone connectivity Bluetooth audio / mobile phone DAB
Side view. Fig. 1 Vehicle side overview.
 Side view Fig. 1 Vehicle side overview. Key to fig. 1: (1) Fuel filler flap (2) Roof antenna (3) Outside door handles (4) Outside mirror Additional turn signal light (5) Lift points for the jack Front
2017 INFINITI Q70 QUICK REFERENCE GUIDE
 07 INFINITI Q70 QUICK REFERENCE GUIDE To view detailed instructional videos, go to www.infinitiownersinfo.mobi/07/q70 or snap this barcode with an appropriate barcode reader. Helpful Resources BELOW IS
VISUAL INDEX. Steering Wheel and Nearby Controls. Quickly locate items in the vehicle s interior. button*
 VISUAL INDEX VISUAL INDEX Quickly locate items in the vehicle s interior. Steering Wheel and Nearby Controls 10 7 1 8 2 3 4 6 11 5 9 1 Lights/turn signals/lanewatch button* 2 TRIP knob Brightness control
2018 CANYON GETTING TO KNOW YOUR. gmc.com
 GETTING TO KNOW YOUR 2018 CANYON gmc.com Review this Quick Reference Guide for an overview of some important features in your GMC Canyon. Some optional equipment described in this guide may not be included
Q QUICK REFERENCE GUIDE
 Q70 08 QUICK REFERENCE GUIDE To view detailed instructional videos, go to www.infinitiownersinfo.mobi/08/q70 or snap this barcode with an appropriate barcode reader. Helpful Resources BELOW IS A LIST OF
THE BMW i3. STANDARD AND OPTIONAL EQUIPMENT. BMW EfficientDynamics Less emissions. More driving pleasure BMW i3. The Ultimate Driving Machine
 2014 BMW with Range The Ultimate Driving Machine THE BMW. STANDARD AND OPTIONAL EQUIPMENT. BMW EfficientDynamics Less emissions. More driving pleasure. REVISED JANUARY 23, 2014 Standard equipment Optional
Quick Reference Guide
 This Quick Reference Guide is not intended to replace your vehicle Owner s Manual which contains more detailed information concerning the features of your vehicle, as well as important safety warnings
VENZA QUICK REFERENCE GUIDE CUSTOMER EXPERIENCE CENTER Printed in U.S.A. 10/09 08-TCS QRG10-VEN 10%
 CUSTOMER EXPERIENCE CENTER 1-800-331-4331 VENZA 2 0 1 0 QUICK REFERENCE GUIDE Printed in U.S.A. 10/09 08-TCS-03082 Cert no. SGS-COC-005612 10% 00505-QRG10-VEN Doors-Child safety locks Rear door Moving
Quick Reference Guide
 This Quick Reference Guide is not intended to replace your vehicle Owner s Manual which contains more detailed information concerning the features of your vehicle, as well as important safety warnings
GETTING TO KNOW YOUR 2018 CASCADA. buick.com
 GETTING TO KNOW YOUR 2018 CASCADA buick.com Review this Quick Reference Guide for an overview of some important features in your Buick Cascada. Some optional equipment described in this guide may not be
2011 CHRYSLER 300C (Available) $23,450
 $23,450") 2011 CHRYSLER 300C (Available) $23,450 Price $23,450 page 1 / 5 Engine size Transmission Fuel type Mileage Interior Color Exterior Color Doors Features 8 Cylinder Automatic Not specified 57667 miles Black
2011 CHRYSLER 300C (Available) $23,450 Price $23,450 page 1 / 5 Engine size Transmission Fuel type Mileage Interior Color Exterior Color Doors Features 8 Cylinder Automatic Not specified 57667 miles Black
2018 COLORADO GETTING TO KNOW YOUR. chevrolet.com
 GETTING TO KNOW YOUR 2018 COLORADO chevrolet.com Review this Quick Reference Guide for an overview of some important features in your Chevrolet Colorado. Some optional equipment described in this guide
2007 MAXIMA QUICK REFERENCE GUIDE. Shift_exhilaration
 2007 MAXIMA QUICK REFERENCE GUIDE Shift_exhilaration 12 05 13 06 07 08 09 10 14 11 15 HEADLIGHT AND TURN SIGNAL CONTROL STEERING WHEEL SWITCHES FOR AUDIO CONTROL 07 OUTSIDE MIRROR CONTROL SWITCH 10 STEERING
2007 XTERRA QUICK REFERENCE GUIDE. Shift_your limits
 2007 XTERRA QUICK REFERENCE GUIDE Shift_your limits 08 09 10 04 11 12 13 09 CLIMATE CONTROLS 06 14 10 FRONT-PASSENGER AIRBAG STATUS LIGHT 11 E-LOCK SWITCH 07 12 HILL DESCENT CONTROL SWITCH HEADLIGHT AND
2017 Sonic
 Getting to Know Your 2017 Sonic www.chevrolet.com Review this Quick Reference Guide for an overview of some important features in your Chevrolet Sonic. More detailed information can be found in your Owner
Getting to Know Your 2017 Cascada
 Getting to Know Your 2017 Cascada www.buick.com Review this Quick Reference Guide for an overview of some important features in your Buick Cascada. More detailed information can be found in your Owner
Manual Climate Controls
 2009 QUICK REFERENCE GUIDE CharGER Blower Push A/C Button Temp. Push Rear Window Defroster Button Mode Recirc. Manual Climate s Air Recirculation Use recirculation for maximum A/C operation. For window
For your ease and convenience, this guide is intended to find the most essential functions you will need to start experiencing your Infiniti Q30.
 Q30 Quick User Guide For your ease and convenience, this guide is intended to find the most essential functions you will need to start experiencing your Infiniti Q30. Cockpit overview 2 Instrument panel