Material required for drilled well application (indoor use only)
|
|
|
- Carol Lynch
- 6 years ago
- Views:
Transcription
1
2 SAFETY INSTRUCTIONS: This fine pump that you have just purchased is designed from the latest in material and workmanship. Before installation and operation, we recommend the following procedures: A B C D CHECK WITH YOUR LOCAL ELECTRICAL AND PLUMBING CODES TO ENSURE YOU COMPLY WITH THE REGULATIONS. THESE CODES HAVE BEEN DESIGNED WITH YOUR SAFETY IN MIND. BE SURE YOU COMPLY WITH THEM. WE RECOMMEND THAT A SEPARATE CIRCUIT BE LEAD FROM THE HOME ELECTRICAL DISTRIBUTION PANEL PROPERLY PROTECTED WITH A FUSE OR A CIRCUIT BREAKER. WE ALSO RECOMMEND THAT A GROUND FAULT CIRCUIT BE USED. CONSULT A LICENSED ELECTRICIAN FOR ALL WIRING. THE GROUND TERMINAL ON THE THREE PRONG PLUGS SHOULD NEVER BE REMOVED. THEY ARE SUPPLIED AND DESIGNED FOR YOUR PROTECTION. NEVER MAKE ADJUSTMENTS TO ANY ELECTRICAL APPLIANCE OR PRODUCT WITH THE POWER CONNECTED. DO NOT ONLY UNSCREW THE FUSE OR TRIP THE BREAKER, REMOVE THE POWER PLUG FROM THE RECEPTACLE. Material required for drilled well application (indoor use only) Shallow well pump installation Desired length of polyethylene 1 pipe, 100 PSI, CSA or UL approved, to link up from pumping level to pump. 1 1 foot valve ( or P). 1 well seal, as per well casing diameter ( x 1 ). 1 1 well seal elbow (750860). 2 1 male adaptors ( or ). 8 1 stainless steel clamps (750885). plumber s tape. Tank installation Desired length of 1 braided hose (750919) to link up from pump to tank. Keep tank as close as possible from pump. 1 tank T (650651). 1 drain valve (650659) 2 1 female adaptor. 1 1 male adaptor ( or ). 3 1 stainless steel clamps (750885). plumber s tape. Tools Screwdrivers, hacksaw to cut pipe, knife to assist in pipe cutting, round file to smooth pipe ends, pipe wrench, adjustable wrench to tighten fittings, propane torch and welding material. 2
3 APPLICATION This pump is designed for shallow well installation for water level up to 25 feet. CAPACITY AT 20 PSI: 5 (1.5m) 900 US GPH 10 (3m) 750 US GPH 15 (4.5m) 640 US GPH 20 (6m) 560 US GPH 25 (7.5m) 475 US GPH FRICTION LOSS IN PIPE NOT INCLUDED FEATURES 304 stainless steel pump body. Self-priming. Totally enclosed, fan cooled motor, bearing to bearing. Built for a continuous use. Full time connected run capacitor, to eliminate starting wear vs regular motor. Thermal and overload protection. Noryl impeller, built-in injector 3/4 HP, 115/230 V AC, 60 Hz, 9 A, 18 A (when started). INSTALLATION STEPS STEP 1 We recommend that you install your pump in a clean and dry location where there is adequate room for servicing at a later date. Protection from freezing temperatures and good ventilation should be considered as well, to provide the pump an environment for long life. Locating the pump as close as possible to the water source will reduce friction losses encountered in the suction pipe. Friction losses in the suction pipe must be taken into consideration when the horizontal offset is greater than 50 (15m). The suction pipes should be increased from 1 to 1 1/4 ( cm). This will reduce friction losses and allow the pump to give maximum performance. A new well should be checked to determine that it is free from sand. Sand will damage the seal and the impeller. Have your well driller clean the well before your installation. Never run the pump dry. Damage to the seal may occur. Fill pump body and suction pipe with water before turning on the power. THE RUN OF HORIZONTAL PIPE FROM THE TOP OF YOUR WELL INTO THE HOUSE, WHERE YOUR PUMP WILL BE LOCATED, MUST BE INSTALLED IN A TRENCH, BELOW THE FROST LEVEL OF YOUR AREA. 3
4 SHALLOW WELL APPLICATION SEE DIAGRAM ON PAGE 7 STEP 2 STEP 3 STEP 4 Cut the desired length of poly pipe to run from the top of the well to the pumping level. Smooth the pipe cuttings with your round file. (Check that no cut-out parts are left inside of pipe. This may block pump injector or impeller). Tape male adaptor threads with plumber s tape and thread adaptor into the foot valve. Slide 2 stainless steel clamps over one end of pipe and use torch to soften pipe. Insert the male adaptor and foot valve into this pipe end. Tighten clamps with screwdriver when cool. For security against leaks, we suggest to install 2 stainless steel clamps on each adaptor. Insert the well seal elbow through the opening of the seal. Slide 2 stainless steel clamps over the free end of the previously cut pipe and soften pipe with your torch. Attach pipe to the well seal elbow (end protruding at bottom of well seal). Tighten clamps with screwdriver when cool. Install the well seal and piping assembly into your well casing. Tight down the well seal bolts using your adjustable wrench. To facilitate servicing at a later date, you may use a pitless adaptor and a sealed well cap instead of an elbow and a well seal as describe in steps 3 and 4. STEP 5 STEP 6 STEP 7 for sand or well points Install your pump in the house, on a sound foundation, as close as possible to the basement wall. Locate and screw your injector body to your pump body. Locate the suction inlet in the front of the injector. Thread an adaptor into inlet using plumber s tape. Do not over tighten. Cut the desired length of pipe from pump location to the well seal and connect both ends using the previous way, with stainless steel clamps and torch. Do not fill in your trench to the house until you have checked for any leaks in your connections or trouble in your water system. Sand or well points are limited to areas where water bearing sand or gravel lies below the surface, and where there are no boulders or rocks to interfere with the driving into the ground of the point. The amount of water any one well point will supply is usually rather limited. Sometimes, it is necessary to use more than one point to increase the supply of water, entering to the pump s suction. THE IMPORTANT INSTALLATION STEP IN USING WELL POINTS IS THAT A CHECK VALVE MUST BE USED IN THE SUCTION PIPE LEADING TO THE SUCTION INLET, AS CLOSE TO THE PUMP AS POSSIBLE, TO KEEP SUCTION LINE AND PUMP WELL PRIMED. 4 CONTINUE ON PAGE 5 & 6 FOR TANKS AND ELECTRICAL INSTALLATION STEPS
5 TANKS INSTALLATION SEE DIAGRAM ON PAGE 8 STEP 9 for captive air tanks Packaged systems have the pump mounted directly to the tank. The pump to tank plumbing fittings are pre-assembled in factory. You only have to connect the discharge line of your system to your home s plumbing distribution line. When using a separate tank from your pump, we recommend to install a captive air tank as shown in our typical installation diagram, that is air injected into the tank at the factory. This air, which is in addition to atmospheric pressure, increase the ability of the tank to deliver more water between on/off cycles, thus increasing the efficiency of your water system. Connect the pump discharge to the tank T, using adaptors and braided hose, then, connect the other side of tank T to your home s plumbing distribution line. Make sure that the precharged air pressure (before connecting the tank) is 2 PSI less than the starting pressure setted on the pressure switch of your pump. If you adjust the air pressure after the installation, follow these steps: - Check the starting pressure of the pump on the pressure gauge; - Disconnect the power to the pump; - Open nearest faucet to the tank and relieve all pressure in tank, then close the faucet; - Adjust the air pressure of the tank (by pumping or removing air at the snifter valve) 2 PSI below pressure switch ON setting; - Turn power back on to pump. Your tank is now well precharged. Run the pump through a few cycles to verify that it works properly. STEP 9 for epoxy or glass lined tanks Not recommended for galvanized tanks Other types of tanks may be used, as galvanized standard tanks, epoxy or glass-lined tanks. These products do not achieve the benefits of the captive air tanks. Epoxy or glass-lined tanks with float have to be precharged by the installer. Assuming tank is plumbed to pump and all connections are checked for leaks, follow these steps: - Run pump through one complete cycle, until pump shuts off; - Disconnect the power to the pump; - Open nearest faucet to the tank and relieve all pressure in tank, then close the faucet; - Close service line gate valve; - With a car tire pump, inject air into the snifter valve located in tank. Watch pump pressure gauge and stop pumping air when pressure reachs 2 PSI below pressure switch ON setting; - Return power back on to pump; - Run pump through one complete cycle; - Open service line gate valve. Your tank is now well precharged. Run the pump through a few cycles to verify that it works properly. Galvanized standard tanks require an air volume control to be used with jet pump. We do not recommend the installation of this type of tank with your jet pump. This type of galvanized tank is recommended with piston pumps. 5
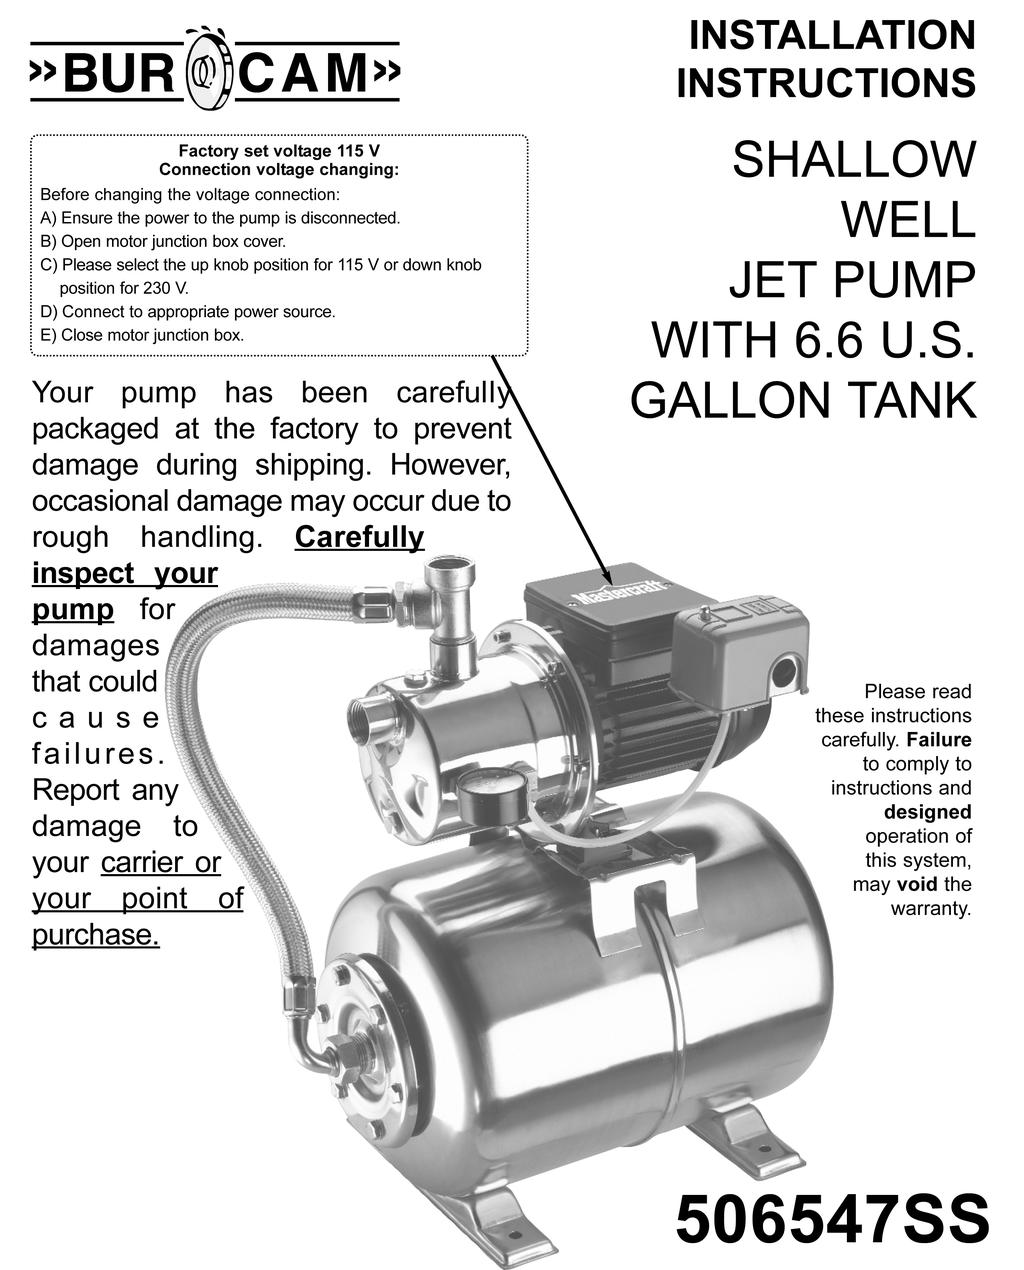
6 ELECTRICAL INSTALLATION STEP VOLTAGE SELECTION SWITCH 1. POWER off 2. Please SELECT the up knob position for 115 V or down knob position for 230 V. Electrical line from home distribution panel. 3. CONNECT to appropriate power source BLACK RED To motor lead GREEN GROUND We recommend that a licensed electrician be employed to do wiring to the pressure switch. Permanently ground the motor in accordance to the electrical codes for your area. Do not use an extension cord to connect your pump to the power source. From your distribution panel to the pressure switch, we recommend a wire gauge not smaller than 14 gauge. Pressure switch setting (start/stop 20/40 or 30/50) has been made in factory. An adjustment may be done to give other operating pressures. Adjustment or modification of start/stop setting of pressure switch have to be done carefully. Turn adjustment nut half turn at a time. Turn nut 1 clockwise to raise start and stop pressure setting. Never turn nut 2. This will change the 20 PSI range between start and stop presssure and may damage your tank s bladder or modify the efficiency of your water system. Check system operation after each adjustment. 6


7 SHALLOW WELL APPLICATION STEP 5 Install your pump and thread an adaptor into inlet. STEP 6 Cut poly pipe and connect both ends. STEP 3 Insert well seal elbow through the seal and attach to pipe. Well point optionnal installation STEP 4 Install well seal and piping into well casing. STEP 7 You may install one or more sand points to increase the supply of water. STEP 2 Cut poly pipe and install the check valve. Check valve, close to pump. 7


8 TANK INSTALLATION Snifter valve to adjust air pressure Pressure switch 1/4 connection Relief valve for pumps with more than 75 PSI of capacity 1/2 connection Pressure gauge 1/4 connection Drain valve 1/2 connection 1 MNPT or 3/4 FNPT connection STEP 9 Connect the pump discharge to the tank T To home s plumbing distribution line From well 8
9 REPAIR PARTS REF ITEM DESCRIPTION REF ITEM DESCRIPTION Pump body Priming / drainage plugs (2) Pressure gauge Pump boby screw (6) Venturi O - Ring Venturi / Diffuser Impeller Washer Mechanical seal Seal plate O-Ring Seal plate Water slinger Motor Capacitor Jonction box cover Motor foot Tube fitting Tube Pressure switch SS version W
10 TROUBLE SHOOTING GUIDE CHECKLIST NEVER MAKE ADJUSTMENTS TO ANY ELECTRICAL APPLIANCE OR PRODUCT WITH THE POWER CONNECTED. DO NOT JUST UNSCREW THE FUSE OR TRIP THE BREAKER, REMOVE THE POWER FROM THE RECEPTACLE. TROUBLE PROBABLE CAUSE Motor does not run. Switch is off position Blown fuse Tripped breaker Dirty pressure switch Defective pressure switch Defective motor ACTION Turn switch to on position Replace Reset Clean Replace Replace Motor runs but no water is delivered. Pump does not deliver to full capacity. Pump does not shut off. Pump starts and stop too often. Air spurts from fawcets. Pump not primed Leaky suction line Foot valve plugged Ejector nozzle clogged Water level below foot valve Suction lift to great Improper voltage Water level below foot valve Ejector nozzle clogged Excessive friction in pipe Improper voltage Leaky discharge line Motor not up to normal speed Improper setting of pressure switch Ejector nozzle clogged Pressure tank waterlogged Leaky foot valve Leaky suction line Foot valve do not close properly Pressure switch out of adjustment Leaky discharge line (toilet etc.) Leaky suction line Gaz in water Airlogged tank (galvanized) Prime with clean water Check pipe and pipe connections Clean Clean Check foot valve level Water level lower than lift capacity Check voltage Check foot valve level Clean Too small or dirty pipe Check voltage Check all pipes for leak Check power cable and voltage Reset or replace Clean Drain tank and restart Replace Check pipe and pipe connections Clean or replace Adjust on/off setting Check all pipes for leak Check pipe and pipe connections Check and consult factory Replace air volume control 10 TO THE END CONSUMER If you have any problems with the product, before advising the store, where you ve purchased the pump, please contact us at , and ask for our sales department, and they will be pleased to help you with any questions you might have, concerning your installation. FOR INFORMATION TEL: FAX:
MODEL SS INSTALLATION INSTRUCTIONS
 WWW.BURCAM.COM 2190 Boul. Dagenais West TEL: 514.337.4415 LAVAL (QUEBEC) FAX: 514.337.4029 CANADA H7L 5X9 info@burcam.com Your pump has been carefully packaged at the factory to prevent damage during shipping.
INSTALLATION INSTRUCTIONS
 www.burcam.com 2190 Dagenais Blvd.West TEL: 514.337.4415 LAVAL (QUEBEC) FAX: 514.337.4029 CANADA H7L 5X9 info@burcam.com INSTALLATION INSTRUCTIONS MODEL 506518SS AND BY-PRODUCTS LIKE Your pump has been
INSTALLATION INSTRUCTIONS
 www.burcam.com 2190 Dagenais Blvd.West TEL: 514.337.4415 LAVAL (QUEBEC) FAX: 514.337.4029 CANADA H7L 5X9 info@burcam.com Your pump has been carefully packaged at the factory to prevent damage during shipping.
Model T Professional Series 1/2HP 2 YEAR WARRANTY SHALLOW WELL JET PUMP
 Model T03121 SHALLOW WELL JET PUMP Professional Series 2 YEAR WARRANTY 1/2HP 916 GPH Head of 25 (7,5 m) US GPH LPH Suction: 1 1/4 NPT Discharge: 1 NPT Maximum Pressure: 65 PSI Stainless steel shaft and
Professional Series 1/2HP 2 YEAR WARRANTY CONVERTIBLE JET PUMP REPAIR PARTS
 Model T033 CONVERTIBLE JET PUMP /HP 900 GPH Suction lift Head of 5 (7.5m) in shallow well mode Professional Series YEAR WARRANTY Suction: /4 Discharge: NPT Maximum pressure: 85 PSI US GPH LPH 5 900 3400
INSTALLATION INSTRUCTIONS MODELS S S SHALLOW WELL & CONVERTIBLE JET PUMPS PAGE 3 PAGE 8
 INSTALLATION INSTRUCTIONS WWW.BURCAM.COM 2190 Blvd. Dagenais West LAVAL (QUEBEC) CANADA H7L 5X9 MODELS 503132S 503332 503232S 503732 TEL : 514.337.4415 FAX : 514.337.4029 info@burcam.com Your pump has
INSTALLATION INSTRUCTIONS MODELS S S S S SSN S SSW SSN SPRINKLER PUMPS
 WWW.BURCAM.COM 2190 Boul. Dagenais West TEL: 514.337.4415 LAVAL (QUEBEC) FAX: 514.337.4029 CANADA H7L 5X9 info@burcam.com Your pump has been carefully packaged at the factory to prevent damage during shipping.
INSTALLATION INSTRUCTIONS MODEL Z Z Z Z 1.5 HP 115/230V Z Z 2.0 HP 115/230V Z Z
 INSTALLATION INSTRUCTIONS 2190 Dagenais Blvd.West Laval (Quebec) Canada H7L 5X9 Tel. : 514.337.4415 Fax : 514.337.4029 info@burcam.com see us at www.burcam.com Your pump has been carefully packaged at
MODEL H INSTALLATION INSTRUCTIONS
 WWW.BURCAM.COM 2190 Boul. Dagenais West TEL: 514.337.4415 LAVAL (QUEBEC) FAX: 514.337.4029 CANADA H7L 5X9 info@burcam.com Your unit has been carefully packaged at the factory to prevent damage during shipping.
MODEL P INSTALLATION INSTRUCTIONS
 WWW.BURCAM.COM 2190 Boul. Dagenais West TEL: 514.337.4415 LAVAL (QUEBEC) FAX: 514.337.4029 CANADA H7L 5X9 info@burcam.com Your pump has been carefully packaged at the factory to prevent damage during shipping.
HALLMARK INDUSTRIES INC
 Performance Part No. HP. CONVERTIBLE JET PUMP USER S MANUAL GPH of Water @ Total Discharge Pressure of 40 psi Max. Pressure Max suction (shallow well) Max Suction (deep well) Max GPM (@0 head) Max Discharge
Professional Séries. Professional Séries. Model T03828 SUBMERSIBLE SUMP DUPLEX SYSTEM SUBMERSIBLE SUMP DUPLEX SYSTEM. 1/3HP 2400 GPH Head of 20 (6 m)
") Model T0828 Primary pump 1/HP 200 GPH Head of 20 (6 m) SUBMERSIBLE SUMP DUPLEX SYSTEM Professional Séries Discharge: 1 1/2 ABS DWV pipe Electric cable: 9 piggyback type Oil cooled Cast iron construction
Model T0828 Primary pump 1/HP 200 GPH Head of 20 (6 m) SUBMERSIBLE SUMP DUPLEX SYSTEM Professional Séries Discharge: 1 1/2 ABS DWV pipe Electric cable: 9 piggyback type Oil cooled Cast iron construction
MODEL INSTALLATION INSTRUCTIONS. 12 Volt UTILITY PUMP
 WWW.BURCAM.COM 2190 Boul. Dagenais West TEL: 514.337.4415 LAVAL (QUEBEC) FAX: 514.337.4029 CANADA H7L 5X9 info@burcam.com Your pump has been carefully packaged at the factory to prevent damage during shipping.
JET PUMP INSTALLATION MANUAL. motralec SHALLOW WELL JET PUMPS
 motralec 4 rue Lavoisier. ZA Lavoisier. 95223 HERBLAY CEDEX Tel. : 01.39.97.65.10 / Fax. : 01.39.97.68.48 Demande de prix / e-mail : service-commercial@motralec.com www.motralec.com JET PUMP INSTALLATION
PRE-PLUMBED SEWAGE SYSTEM
 PRE-PLUMBED SEWAGE SYSTEM Zoeller is a registered trademark of Zoeller Co. All Rights Reserved. MODEL #1910-0009 Español p. 13 ATTACH YOUR RECEIPT HERE Serial Number Purchase Date Questions, problems,
3 FT CORD UL/NEC Models , , , FT CORD w/gfci UL Models , , ,
 POWERLINE XP I Swimming Pool Pump (Light Oak color model) 3 FT CORD UL/NEC Models 0-1295-206, 0-1296-206, 0-1297-206, 0-1298-206 25 FT CORD w/gfci UL Models 0-1295-200, 0-1296-200, 0-1297-200, 0-1298-200
3 FT CORD Models , , , FT CORD W/GFCI Models , , ,
 POWERLINE XP II Swimming Pool Pump (Light Oak color model) With Automatic Timer 3 FT CORD Models 0-1395-226, 0-1396-226, 0-1397-226, 0-1398-226 25 FT CORD W/GFCI Models 0-1395-220, 0-1396-220, 0-1397-220,
Owners Manual: - Pumps
 Owners Manual: - Pumps GENERAL SAFETY RULES 1. The products mentioned in this manual are specially designed for the pre-filtering and re-circulation of water in swimming pools and spas. 2. They are designed
8000 / 10,000 / 12,000
 INSTALLATION AND SERVICE MANUAL Please fill in for future reference: MODEL: SERIAL NUMBER: DATE PURCHASED: EUROXXXXXX-SW S/N: XXXX-XXXXXX WARNING: PLEASE READ COMPLETELY BEFORE YOU INSTALL OR OPERATE YOUR
ESE Series Cast Iron Sewage Pumps
 Owner s Manual ESE Series Cast Iron Sewage Pumps TABLE OF CONTENTS General Safety.................... 2 Specifications..................... 3 Installation.................... 4 & 5 Troubleshooting...................
SHALLOW WELL JET PUMP
 SHALLOW WELL JET PUMP MODEL FJ05S 1/2 HP flintandwalling.com ATTACH YOUR RECEIPT HERE Serial Number Purchase Date 1 FW1642 B TABLE OF CONTENTS Product Specifications...2 Safety Information...2 Package
STAR STOP SHALLOW WELL JET PUMP
 SHALLOW WELL JET PUMP MODEL SJ0S / HP STAR starwatersystems.com STOP Questions, problems, missing parts? Before returning to your retailer, call our customer service department at -800-7-0, 7:0 a.m. -
MODELS 108 and 138 CRAWL SPACE PUMPING SYSTEM PREINSTALLATION CHECKLIST
 NOTICE TO INSTALLER: Instructions must remain with installation. Your Peace of Mind is Our Top Priority Product information presented here reflects conditions at time of publication. Consult factory regarding
Model and Series 115 VAC INDUSTRIAL DIAPHRAGM PUMPS. PumpAgents.com - buy pumps and parts online INDUSTRIAL DIAPHRAGM PUMPS
 Model 31801 and 31800 Series 115 VAC INDUSTRIAL DIAPHRAGM PUMPS INDUSTRIAL DIAPHRAGM PUMPS FEATURES Run Dry Ability Self-Priming Thermal Overload Protected Motor Easy Installation Low Amp Draw Compact
2 Wire Plus Ground 3 Wire Plus Ground IL0655
 4 INCH SUBMERSIBLE WELL PUMP 2 & 3 Wire 2 Wire Plus Ground 3 Wire Plus Ground Español p. 21 For installation videos and other information, scan with your smart phone. Or, visit: starwatersystems.com and
OWNER S MANUAL CONVERTIBLE JET PUMP
 OWNER S MANUAL Model 64011/64023/64033/ 64026/64036 CONVERTIBLE JET PUMP Questions, problems, missing parts? Before returning to the store call AQUAPRO Customer Service 8 a.m. - 5 p.m., EST, Monday-Friday
Centrifugal Pumps (Part Nos. PS2SS PS73SS) PS2SS
 PS2SS") Centrifugal Pumps (Part Nos. PS2SS PS73SS) PS2SS Part No. Serial Number Date Purchased Table of Contents Page Safety Messages...2 Pump Curves...2 Pump End Assembly...3 Disassembly...3 Installation...4
Centrifugal Pumps (Part Nos. PS2SS PS73SS) PS2SS Part No. Serial Number Date Purchased Table of Contents Page Safety Messages...2 Pump Curves...2 Pump End Assembly...3 Disassembly...3 Installation...4
PRESSURE BOOSTER 150
 PRESSURE BOOSTER 150 Owners Manual! WARNING This equipment must be installed and serviced by a qualified technician. Improper installation can create electrical hazards which could result in property damage,
Please contact your supplier (supplying dealer or contractor) if service is necessary or if you have any questions or need further assistance.
 if service is necessary or if you have any questions or need further assistance.") OPERATOR'S MANUAL SUBMERSIBLE PUMP WSP33AA WSP53AA WSP73AA BY: 2003 American Honda Motor Co., Inc. All Rights Reserved 2004 American Honda Motor Co., Inc. All Rights Reserved Thank you for purchasing this
OPERATOR'S MANUAL SUBMERSIBLE PUMP WSP33AA WSP53AA WSP73AA BY: 2003 American Honda Motor Co., Inc. All Rights Reserved 2004 American Honda Motor Co., Inc. All Rights Reserved Thank you for purchasing this
Installation Instructions and Parts Manual CPJ SERIES JET PUMPS. Shallow Well Jet Pumps. Convertible Jet Pumps. Ejectors (Purchase separately)
") Installation Instructions and Parts Manual CPJ SERIES JET PUMPS Shallow Well Jet Pumps /3 - / HP CPJS SHALLOW WELL IL089 3/4 - -/ HP CPJS SHALLOW WELL Convertible Jet Pumps IL090 / HP CPJ CONVERTIBLE IL09
Installation Instructions and Parts Manual CPJ SERIES JET PUMPS Shallow Well Jet Pumps /3 - / HP CPJS SHALLOW WELL IL089 3/4 - -/ HP CPJS SHALLOW WELL Convertible Jet Pumps IL090 / HP CPJ CONVERTIBLE IL09
SEWAGE PUMP MODEL # Zoeller is a registered trademark of Zoeller Co. All Rights Reserved. Español p. 14
 SEWAGE PUMP Zoeller is a registered trademark of Zoeller Co. All Rights Reserved. MODEL #1261-0001 Español p. 14 ATTACH YOUR RECEIPT HERE Serial Number Purchase Date Questions, problems, missing parts?
OWNERS GUIDE TO INSTALLATION AND OPERATION OF 1/2-5 HP, 5, 7, 10, 15, 19 & 27 GPM 4 SUBMERSIBLE PUMPS
 FW0080 0511 Supersedes 0610 OWNERS GUIDE TO INSTALLATION AND OPERATION OF 1/2-5 HP, 5, 7, 10, 15, 19 & 27 GPM 4 SUBMERSIBLE PUMPS IL0632 WARNING IMPORTANT SAFETY INSTRUCTIONS RULES FOR SAFE INSTALLATION
OWNER S MANUAL SUBMERSIBLE UTILITY PUMP
 Model 51101-0 OWNER S MANUAL SUBMERSIBLE UTILITY PUMP Questions, problems, missing parts? Before returning to the store call AQUAPRO Customer Service 8 a.m. - 5 p.m., EST, Monday-Friday 1-844-242-2475
OWNER S MANUAL SELF-PRIMING PORTABLE UTILITY PUMP
 Model 54011-0 OWNER S MANUAL SELF-PRIMING PORTABLE UTILITY PUMP Questions, problems, missing parts? Before returning to the store call AQUAPRO Customer Service 8 a.m. - 5 p.m., EST, Monday-Friday 1-844-242-2475
LAWN SPRINKLER, IRRIGATION PUMP
 LAWN SPRINKLER, IRRIGATION PUMP MODEL #, SP0P, SP5P, SP20P, EL0P, EL5P, EL20P SAFETY INFORMATION Please read and understand this entire manual before attempting to assemble, operate or install the product.
GRINDER PUMP MODEL # Zoeller is a registered trademark of Zoeller Co. All Rights Reserved. Español p. 13
 GRINDER PUMP Zoeller is a registered trademark of Zoeller Co. All Rights Reserved. MODEL #2701-0005 Español p. 13 ATTACH YOUR RECEIPT HERE Serial Number Purchase Date Questions, problems, missing parts?
HALLMARK INDUSTRIES INC. Deep Well Submersible Pumps Operating & Installation Instructions
 Deep Well Submersible Pumps Operating & Installation Instructions WARNING: Read the user s manual thoroughly before installing the pump! A 115V pump is for 115V (or 110V) power! A 230V pump is for 230V
INSTALLATION AND SERVICE MANUAL
 Please fill in for future reference: MODEL: SERIAL NUMBER: DATE PURHASED: * Please fill out the warranty registration card included with this product or online at: www.mdminc.com INSTALLATION AND SERVIE
Matala. VersiFlow Series. Instruction and Maintenance Manual
 VersiFlow Series High Flow Multi-Purpose "Versatile " Pump V-3200 1/5HP 150W / Discharge 2 V-3900 1/3HP 250W / Discharge 2 V-4700 1/2HP 400W / Discharge 2 V-5600 1HP 750W / Discharge 2 Instruction and
DuraMAC LIGHT COMMERCIAL & IRRIGATION WATER PRESSURE BOOSTER SYSTEM INSTALLATION INSTRUCTIONS
 DuraMAC LIGHT COMMERCIAL & IRRIGATION WATER PRESSURE BOOSTER SYSTEM INSTALLATION INSTRUCTIONS The DuraMAC TM Water Pressure Booster System is the first booster pump of its kind to be designed for virtually
Commander Pro 100 SUBMERSIBLE SYSTEM Installation, Operation and Trouble-Shooting Manual
 Commander Pro 100 SUBMERSIBLE SYSTEM Installation, Operation and Trouble-Shooting Manual FW1206 0608 Supersedes NEW Owner Information System Model Number Pump Model / Date Code Pump Serial Number (Silver
GeyserMax-Flow Series
 GeyserMax-Flow Series 115V/60Hz Waterfall Pump GM-3900 1/5HP 150W / Discharge 1-1/2 GM-4700 1/3HP 250W / Discharge 2 GM-5400 1/2HP 400W / Discharge 2 GM-6200 3/4HP 750W / Discharge 2 230V/50Hz GM-3800
Installation Instructions Light Commercial & Irrigation Water Pressure Booster System
 Installation Instructions DuraMAC TM Light Commercial & Irrigation Water Pressure Booster System The DuraMAC TM Water Pressure Booster System is the first booster pump of its kind to be designed for virtually
Installation & Operating Manual
 Installation & Operating Manual 25IPCC-M 7/08 Edition PC Series C E N T R I F U G A L Congratulations On Your Choice In Purchasing This Webtrol Pump Its Quality is unsurpassed in material and workmanship
Pump Installation and Service Manual JB-1 System Sewage Ejector Pump Package
 Pump Installation and Service Manual JB-1 System Sewage Ejector Pump Package NOTE! To the installer: Please make sure you provide this manual to the owner of the pumping equipment or to the responsible
Centrifugal Constant Pressure Control
 Operating Instructions & Parts Manual Please read and save these instructions. Read carefully before attempting to assemble, install, operate or maintain the product described. Protect yourself and others
Installation, Operation and Maintenance Manual Stancor SSD & SL Series Pumps
 Installation, Operation and Maintenance Manual Stancor SSD & SL Series Pumps EI-700-008 Rev -- Table of Contents Safety Guidelines 3 Caution 4 Wiring 4 Maintenance 4 Nameplate format 4 Prior to Operation
SS/SSH Submersible Pump. Owner s Manual
 Est. 1985 www.aquascience.net SS/SSH Submersible Pump Owner s Manual 4 SUBMERSIBLE PUMP INSTALLATION INSTRUCTIONS IMPORTANT: Read this manual carefully before installing or operating the pump. Review instructions
Aqua Ultraviolet Sunami Series Pumps 1/3HP, 3/4HP, 3HP, 4HP, 5HP
 TM 42371 Avenida Alvarado Temecula, CA 92590 TOLL FREE (800) 454-2725 TEL (951) 296-3480 FAX (951) 296-3490 www.aquauv.com Aqua Ultraviolet Sunami Series Pumps 1/3HP, 3/4HP, 3HP, 4HP, 5HP Sunami Warranty
Vertical Jet Pumps. SSJ Series. Call OWNER S MANUAL
 OWNER S MANUAL Vertical Jet Pumps 293 Wright Street, Delavan, WI 53115 SSJ Series Installation/Operation/Parts For further operating, installation, or maintenance assistance: Call 1-262-728-5551 2005,
SUNC1200 / ITEM #40882 SUBMERSIBLE UTILITY PUMP OPERATIONS MANUAL
 SUNC1200 / ITEM #40882 SUBMERSIBLE UTILITY PUMP OPERATIONS MANUAL WWW.SUNRUNNERPOOL.COM Performance Model HP GPH of Water @ Total Feet Of Lift 0 ft. 5 ft. 10 ft. 15 ft. 20 ft. 25 ft. Max. Lift SUNC1200
Submersible Tank Pump
 Submersible Tank Pump Applications: Silent household pressure systems, garden irrigation, or water transfer. Performance Outline Pump Features High efficiency moulded impellers Stainless steel construction,
SUBMERSIBLE SUMP PUMPS
 SUBMERSIBLE SUMP PUMPS Zoeller is a registered trademark of Zoeller Co. All Rights Reserved. MODELS #1073-0001, 1075-0001 Español p. 9 ATTACH YOUR RECEIPT HERE Serial Number Purchase Date Questions, problems,
Models 3305P, 3307P, 3310P
 OWNER S MANUAL Convertible Deep Well Jet umps 293 Wright St., Delavan, WI 53115 hone: 1-800-468-7867 1-800-546-7867 Fax: 1-800-390-5351 5301 0206 Models 3305, 3307, 3310 Installation/Operation For further
Jet Pumps. Convertible Shallow Well. 6/13 Rev (3/14)
") Jet Pumps Convertible Shallow Well 6/13 Rev (3/14) Table of Contents Page General Information...2-4 Nema J Motor Pumps 8100 Series - Shallow Well... 5 8200 Series - Convertible...6-7 Square Flange Motor
Jet Pumps Convertible Shallow Well 6/13 Rev (3/14) Table of Contents Page General Information...2-4 Nema J Motor Pumps 8100 Series - Shallow Well... 5 8200 Series - Convertible...6-7 Square Flange Motor
Owner s Manual Drill and Light Weight Portable Utility Pumps
 Owner s Manual Drill and Light Weight Portable Utility Pumps PUP61 Light Weight Utility Pump PUP62 Drill Pump with Kit PUP63 Drill Pump PUP61DC Light Weight Utility Pump LIMITED WARRANTY This pump is warranted
VADA - V60-J PRODUCT OVERVIEW CONSTRUCTION MOTOR USAGE LIMITATIONS WARRANTY
 PRODUCT OVERVIEW The VADA series of self priming jet pumps combine the functional benefits of centrifugal pumps and the practical and qualitative benefits of self-priming pumps. The Venturi system the
QWIK JON ULTIMA 204 SYSTEMS INSTALLATION INSTRUCTIONS PREINSTALLATION CHECKLIST
 NOTICE TO INSTALLER: Instructions must remain with installation. SECTION: 6.10.065 Your Peace of Mind is Our Top Priority Product information presented here reflects conditions at time of publication.
Installation & Operating Manual
 Installation & Operating Manual 6 WS Series Submersible Turbine Pumps Congratulations On Your Choice In Purchasing This Webtrol Pump 6/11 Edition Its Quality is unsurpassed in material and workmanship
Centrifugal Constant Pressure Control
 Operating Instructions & Parts Manual Please read and save these instructions. Read carefully before attempting to assemble, install, operate or maintain the product described. Protect yourself and others
Installation & Operating Manual
 Installation & Operating Manual VN Series Non-Clog Pumps Congratulations On Your Choice In Purchasing This Webtrol Pump 10/15 Edition Its Quality is unsurpassed in material and workmanship and has been
Installation Operation Parts
 OWNER S MANUAL BATTERY BACKUP SUMP Installation Operation Parts For further operating, installation or maintenance assistance, Call 98-8-05 PRINTED IN U.S.A. M-8 (/9) RULES FOR SAFE INSTALLATION AND OPERATION
WELDING FUME EXHAUSTERS & ARMS
 WELDING FUME EXHAUSTERS & ARMS The Ace 75 Series is our flexible and effective line of welding fume exhausters and extraction arms for shops that elect to exhaust their weld fumes outdoors instead of through
Model &
 PumpAgents.com - Click here for Pricing/Ordering Model 31765-0092 & 31765-0094 Dual Sensor Max VSD WATER PRESSURE SYSTEM AUTOMATIC TWO STAGE WATER SYSTEM WITH PUMPGARD STRAINERS IDEAL FOR PLEASURE AND
SUBMERSIBLE SUMP PUMPS
 SUBMERSIBLE SUMP PUMPS Zoeller is a registered trademark of Zoeller Co. All Rights Reserved. MODEL #1099-0001 Español p. 11 ATTACH YOUR RECEIPT HERE Serial Number Purchase Date Questions, problems, missing
Installation, Operating, Maintenance and Safety Instructions for CW332 Pressurised water system for boats 24 volt d.c.
 24V DC-CW332 DOC531/11 Installation, Operating, Maintenance and Safety Instructions for CW332 Pressurised water system for boats 24 volt d.c. To obtain the best performance from your Pressurised water
Installation & Operating Manual
 Installation & Operating Manual Centrifugal Pump SPC75 & SPC150 Self-Priming / Stainless Steel Congratulations On Your Choice In Purchasing This Webtrol Pump Its Quality is unsurpassed in material and
Pre-Installation 4 Point Checklist. Return Policy
 Base Products Corporation www.basepump.com 800 554 1426 page 1 Installation Instructions for Basepump Models: RB750, HB1000, CB1500 Read all instructions before installation. Complete this page before
DEMA BLEND CENTER MODEL 681GAP-3 INSTALLATION INSTRUCTIONS
 1. PARTS CHECKLIST: A. Blend Center Assembly B. Vinyl Supply Tubing with Foot Valve Assembly C. Ceramic Weight D. Vinyl Outlet Tubing E. Screw and Anchor Kit F. Label Card G. Metering Tip Kit 2. INSTALLATION:
SPECIFICATIONS Horsepower: 1.5 HP Running Maximum PSI: 125 PSI Tank Capacity: 15 Gallons CFM: 6 40 PSI 5 90 PSI
 15 GALLON AIR COMPRESSOR Model: 7678 DO NOT RETURN TO STORE Please call 800-348-5004 for parts and service CALIFORNIA PROPOSITION 65 WARNING: You can create dust when you cut, sand, drill or grind materials
6L Oil-less Air Compressor 53103
 6L Oil-less Air Compressor 53103 Operating Instructions Please read and save these instructions before attempting to assemble, install, operate or maintain the product. Protect yourself and others by observing
GARDEN HOSE UTILITY PUMP
 GARDEN HOSE UTILITY PUMP MODEL #HPP360, HPP12V, 473707 MODEL #HPP360, 473707 MODEL #HPP12V ATTACH YOUR RECEIPT HERE Purchase Date SAFETY INFORMATION Please read and understand this entire manual before
Potable Water Convertible Jet Pumps
 Your Peace of Mind is Our Top Priority Product information presented here reflects conditions at time of publication. Consult factory regarding discrepancies or inconsistencies. Register your Zoeller Pump
Installation, Operation and Maintenance Manual Stancor SE, SV, SS & SC Series Pumps
 Installation, Operation and Maintenance Manual Stancor SE, SV, SS & SC Series Pumps EI-700-005 Rev -- Table of Contents Safety Guidelines 3 Caution 4 Wiring 4 Maintenance 4 Nameplate format 4 Prior to
M-3025CB-AV Fuel Pump
 SAVE THESE INSTRUCTIONS M-3025CB-AV Fuel Pump Owner s Manual TABLE OF CONTENTS General Information... 2 Safety Instructions... 2 Installation... 3 Operation... 4 Maintenance... 4 Repair... 5 Troubleshooting...
S33 Sump Pump INSTRUCTIONS AND SERVICE MANUAL VERTICAL FLOAT SWITCH S33V1 & S33V1C AUTOMATIC S33P1 & S33PC-1 (CONTROL WITH SERIES PLUG) NOT SHOWN
 NOT SHOWN") S33 Sump Pump INSTRUCTIONS AND SERVICE MANUAL VERTICAL FLOAT SWITCH S33V1 & S33V1C AUTOMATIC S33P1 & S33PC-1 (CONTROL WITH SERIES PLUG) NOT SHOWN AUTOMATIC S33A1 & S33A1C WARNING risk of electric shock.
S33 Sump Pump INSTRUCTIONS AND SERVICE MANUAL VERTICAL FLOAT SWITCH S33V1 & S33V1C AUTOMATIC S33P1 & S33PC-1 (CONTROL WITH SERIES PLUG) NOT SHOWN AUTOMATIC S33A1 & S33A1C WARNING risk of electric shock.
SELF PRIMING CHEMICAL SERVICE PUMPS
 SELF PRIMING CHEMICAL SERVICE PUMPS INSTALLATION AND OPERATING INSTRUCTIONS This Manual covers: SELF PRIMING MODEL RANGE J50ECX TO J250ECX STAINLESS STEEL*, and NON METALLIC SEAL PUMP MODEL: SERIAL NO:
PEDESTAL SUMP PUMP. MODEL # Español p. 11. Zoeller is a registered trademark of Zoeller Co. All Rights Reserved.
 PEDESTAL SUMP PUMP Zoeller is a registered trademark of Zoeller Co. All Rights Reserved. MODEL #1084-0001 Español p. 11 ATTACH YOUR RECEIPT HERE Serial Number Purchase Date Questions, problems, missing
4" ENVIRONMENTAL E-SERIES PUMPS OWNER'S MANUAL. DANGER warns about hazards that will cause. WARNING warns about hazards that can cause
 4" ENVIRONMENTAL E-SERIES PUMPS OWNER'S MANUAL BEFORE INSTALLING PUMP, BE SURE TO READ THIS OWNER S MANUAL CAREFULLY. CAUTION Fill pump with water before starting or pump will be damaged. The motor on
NECO Pumping Systems
 INSTALLATION OPERATION & MAINTENANCE INSTRUCTIONS For Your NECO Pumping Systems PACKAGED CIRCULATING SYSTEM THIS COMPLETELY ASSEMBLED, TESTED, PACKAGED CIRCULATING SYSTEM IS OF THE HIGHEST QUALITY AND
Grind Pro Series. Operator Manual. Manufacture by:
 Grind Pro Series Operator Manual Manufacture by: 1 Bench Sander Series INTRODUCTION The Bench Sander series are compact, durable machine designed for fast, complete finishing work. It will deliver efficient,
DEMA BLEND CENTER MODELS: 637GAP-1 and 637GAP-4 INSTALLATION INSTRUCTIONS
 1. PARTS CHECKLIST: ITEM DESCRIPTION QTY. A. Blend Center Assembly 1 B. ¼ ID X 8 Long Vinyl Supply Tubing & Foot Valve Assembly 4 C. Ceramic Weight 1 D. ½ ID X 6 Long Vinyl Outlet Tubing (For 1 GPM Station
INSTALLATION AND OPERATING INSTRUCTIONS REPAIR PARTS LIST
 OWNER S MANUAL 60 CYCLE SELF-PRIMING CENTRIFUGAL PUMPS D SERIES INSTALLATION AND OPERATING INSTRUCTIONS REPAIR PARTS LIST MEDIUM HEAD HIGH HEAD MODELS 1 HP 1-1/2 HP 2 HP 2-1/2 HP DMMG-42L DMG-41L DMMG3-42
User s Manual D-Series Blowers and Exhausters
 User s Manual D-Series Blowers and Exhausters D05-1 ½ HP TEFC 115/230 VOLTS, 1 PH D05-3 ½ HP TEFC 208/230/460 VOLTS, 3 PH D10-1 1 HP TEFC 115/230 VOLTS, 1 PH D10-3 1 HP TEFC 208/230/460 VOLTS, 3 PH D15-1
M o d e l J E U. Self Priming Jet Pump. Operating Instructions, Installation & Maintenance Manual. Ebara Fluid Handling
 M o d e l J E U Self Priming Jet Pump Operating Instructions, Installation & Maintenance Manual Certified to NSF/ANSI 61, ANNEX G * NSF/ANSI 61 Annex G listed Ebara International Corporation Contents Section
08 general Purpose Pumps
 070 08 general Purpose Pumps InTRODuCTIOn Ballast Pumps Today s Wakeboard and Ski tow boats need to be able to take on water ballast to modify their wake formation. A development of our tried and tested
Users Manual Professional Series Direct Drive Pump.25-2 GPM Series Safety, Operating, Installation, and Maintenance Instructions
 Users Manual Professional Series Direct Drive Pump.25-2 GPM Series Safety, Operating, Installation, and Maintenance Instructions 600 S 56 th Street #9 Chandler, AZ 85226 Phone: 480-507-6478 Fax: 480-838-2232
Instruction Sheet. 1/2 HP Portable Electric Pumps SAFETY FIRST. L2062 Rev. F 02/ IMPORTANT RECEIVING INSTRUCTIONS 2.
 Instruction Sheet 1/2 HP Portable Electric Pumps L2062 Rev. F 02/12 Index: English:...................................... 1-7 Français:.................................... 8-14 Deutsch:...................................
OWNER S MANUAL INSTALLATION AND OPERATING INSTRUCTIONS REPAIR PARTS LIST 60 CYCLE SELF-PRIMING CENTRIFUGAL PUMPS D SERIES MODELS
 OWNER S MANUAL INSTALLATION AND OPERATING INSTRUCTIONS REPAIR PARTS LIST 60 CYCLE SELF-PRIMING CENTRIFUGAL PUMPS D SERIES MODELS 1 HP 1-1/2 HP 2 HP 2-1/2 HP DMG-41L DMMG-42L MEDIUM HEAD DMG3-41 DMMG3-42
Cascade Owners Manual
 Cascade Owners Manual Reliable, Energy-Efficient Centrifugal Pumps Discharge Inlet Important Safety Instructions Please read all instructions completely before you install or operate your new pump. Save
MODEL CJ-200E CoilJet Portable HVAC Coil Cleaning System
 MODEL CJ-200E CoilJet Portable HVAC Coil Cleaning System OPERATING AND MAINTENANCE INSTRUCTIONS 404 West Avenue Stamford, CT 06902 (888)700-3540 www.speedclean.com COILJET is a registered trademark of
INSTALLATION INSTRUCTIONS
 INSTALLATION INSTRUCTIONS Universal Air Series!! NOTE!! Covers the following model: 6000 Series 85-0100B-AZ Rev 0 5/07 To ensure that the system is installed properly, provide your electrician with these
SPECIFICATIONS SEWAGE/SUMP DUPLEX SYSTEM ZOELLER COMPANY SUBMERSIBLE SEWAGE OR DEWATERING PUMPS
 Product information presented here reflects conditions at time of publication. Consult factory regarding discrepancies or inconsistencies. MAIL TO: P.O. BOX 16347 Louisville, KY 40256-0347 SHIP TO: 3649
Service Handbook HD /97
 Service Handbook HD 1050 5.905-032 07/97 Foreword HD 1050 Foreword Indispensable prerequisites for the competent execution of service procedures are comprehensive, real-life training workshops for technical
1-BUTTON DISPENSER INSTALLATION INSTRUCTIONS
 R 1-BUTTON DISPENSER INSTALLATION INSTRUCTIONS Model: #91162-00 The Green Earth II 1-button dispenser allows you to dispense one product for mop buckets and automatic scrubbers. The modular design lets
PSW SHALLOW WELL 1 ¼" 1" All pumps are tested at our factory PERFORMANCE CHART B-1
 SHALLOW WELL PSW The PSW injection centrifugal shallow well pump is ideal for a house, a summer cottage or a country house. The diffuser (Polycarbonate) and the impeller (Noryl) precisely molded, assure
Series: PFUEG 1/12HP, 5000 RPM, 60 Hz Utility Pumps
 INSTALLATION MANUAL Series: 1/12HP, 5000 RPM, 60 Hz ISP No: - 6/09 General Safety Information Before installation, read the following instructions carefully. Failure to follow instruction and Safety information
Electric Fuel Pump FPM
 INSTRUCTION MANUAL Electric Fuel Pump FPM S1590, Rev B LISTED MOTOR FPM-12, FPM-24, FPM-115, FPM-220 Congratulations on purchase of this World Class Electric Fuel Pump! Elbow This is an Electric Fuel Pump.
SPECIFICATIONS: Tank Size: 80 gallons PUMP RPMs: 1050 CFM: 40PSI; 90 PSI Max Pressure: 150 PSI Thermal overload protection
 5HP 80 GALLON TWO STAGE COMPRESSOR Models: 51866, 51870 CALIFORNIA PROPOSITION 65 WARNING: You can create dust when you cut, sand, drill or grind materials such as wood, paint, metal, concrete, cement,
SUNC3000 / Item #40885
 SUNC3000 / Item #40885 AUTOMATIC POOL COVER PUMP OPERATIONS MANUAL WWW.SUNRUNNERPOOL.COM 1 . Performance GPH of Water @ Total Feet Of Lift MODEL HP Max. Lift 0 ft. 5 ft. 10 ft. 15 ft. 20 ft. SUNC3000 1/3