Part Number Published 08/ Series Blade. 181 Series Blade
|
|
|
- Theresa Lyons
- 5 years ago
- Views:
Transcription


1 141 SERIES 181 SERIES Published 08/15 Part Number Series Blade 181 Series Blade

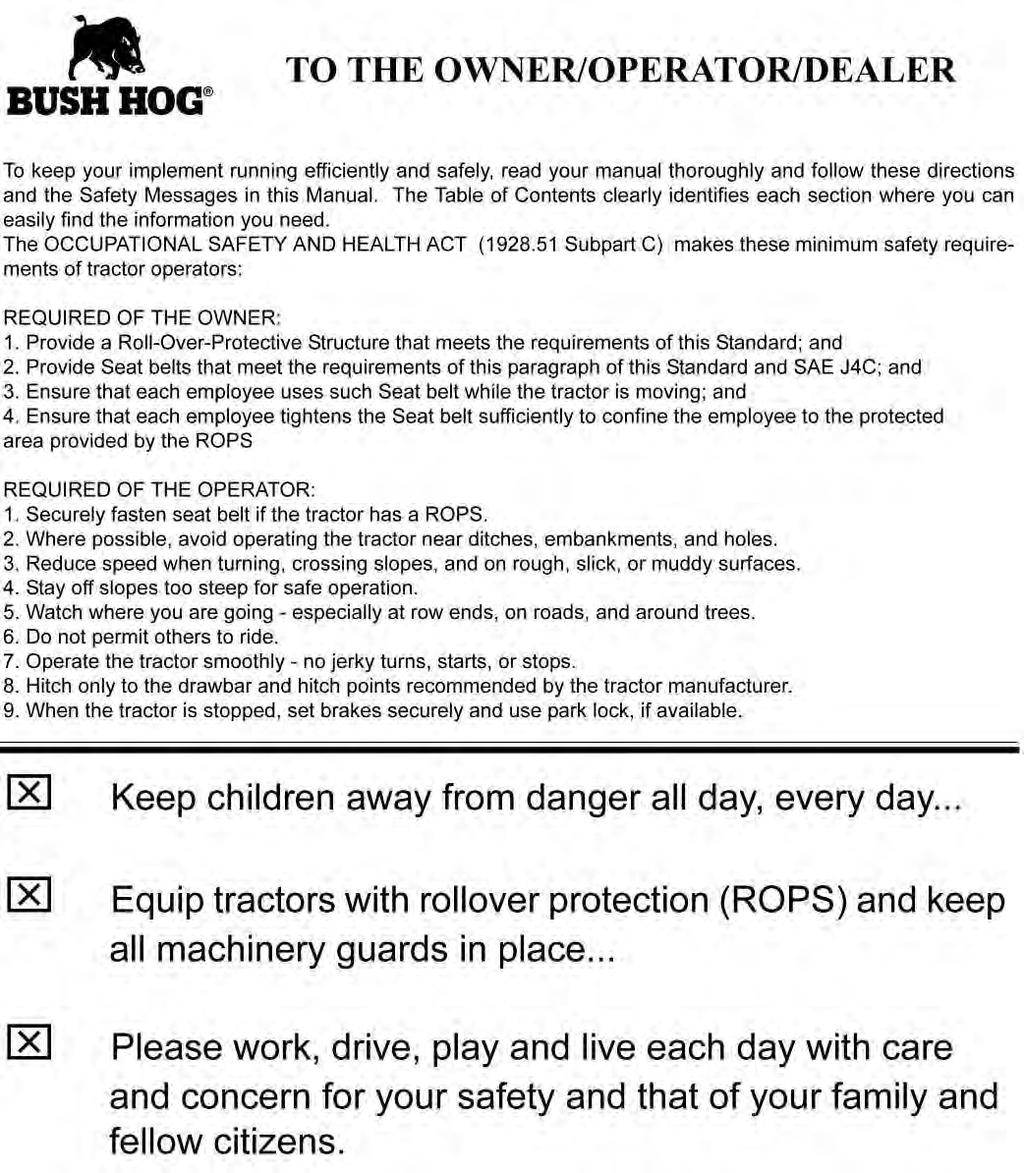
2 To the Owner/Operator/Dealer All implements with moving parts are potentially hazardous. There is no substitute for a cautious, safeminded operator who recognizes the potential hazards and follows reasonable safety practices. The manufacturer has designed this implement to be used with all its safety equipment properly attached to minimize the chance of accidents. BEFORE YOU START! Read the safety messages on the implement and shown in your manual. Observe the rules of safety and common sense! WARRANTY INFORMATION: Read and understand the complete Warranty Statement found in this Manual. Be sure at time of purchase that the Dealer files your Warranty information on line with Bush Hog. Make certain the Model and Serial Number of the Machine is recorded in this manual for future reference. Product: Serial Number: Purchase Date: Dealership: SERIAL NUMBER LOCATION
3 TABLE OF CONTENTS SAFETY SECTION Safety Messages Decal Location Decal Description Federal Laws and Regulations INTRODUCTION SECTION ASSEMBLY SECTION Moldboard Assembly A Frame Assembly Moldboard to Frame Assembly Skid Shoes & Quick Tach End Plates (Extra Equipment) Hydraulic System Hose Holder Hitch Pin Arrangement OPERATION SECTION Standard Equipment and Specifications OPERATOR REQUIREMENTS TRACTOR REQUIREMENTS ROPS and Seat Belt Tractor Horsepower Tractor 3-Point Hitch Front End Weight GETTING ON AND OFF THE TRACTOR Boarding the Tractor Dismounting the Tractor STARTING THE TRACTOR CONNECTING THE REAR BLADE TO THE TRACTOR Connecting the Rear Blade PRE-OPERATION INSPECTION AND SERVICE Tractor Pre-Operation Inspection/Service Blade Pre-Operation Inspection/Service DRIVING THE TRACTOR AND IMPLEMENT Starting the Tractor Brake and Differential Lock Setting Driving the Tractor and Blade OPERATING THE TRACTOR AND IMPLEMENT Operating the Blade Shutting Down the Implement DISCONNECTING THE BLADE FROM THE TRACTOR BLADE STORAGE TRANSPORTING THE TRACTOR AND IMPLEMENT Transporting on Public Roadways Hauling the Tractor and Implement Troubleshooting Guide MAINTENANCE SECTION General Maintenance Lubrication Proper Torque For Fasteners Warranty Page To The Owner / Operator / Dealer Page
4
5 SAFETY SECTION Section 1-1

6 SAFETY SAFETY 141/181 Series Rear Blade Safety Section 1-2

7 SAFETY SAFETY 141/181 Series Rear Blade Safety Section 1-3

8 SAFETY SAFETY 141/181 Series Rear Blade Safety Section 1-4

9 SAFETY SAFETY 141/181 Series Rear Blade Safety Section 1-5
10 SAFETY SAFETY 141/181 Series Rear Blade Safety Section 1-6

11 SAFETY SAFETY 141/181 Series Rear Blade Safety Section 1-7


12 SAFETY SAFETY q w e r o t u u t y t y i 141/181 Series Rear Blade Safety Section 1-8


 SAFETY")
13 SAFETY ITEM PART NO. QTY. LEVEL DESCRIPTION WARNING Hydraulic System Failure WARNING Blade Adjustment & Operation CAUTION To Avoid Serious Injury or Death CANISTER Manual Storage LOGO Bush Hog Decal REFLECTOR Red REFLECTOR Amber MODEL Model Decal MODEL Model Decal MODEL Model Decal MODEL Model Decal * SMV *SMV Placard *(Obtain from Tractor Munufacturer) SAFETY Warning Decal Warning Decal Caution Decal 141/181 Series Rear Blade Safety Section 1-9

14 SAFETY SAFETY 141/181 Series Rear Blade Safety Section 1-10
15 INTRODUCTION SECTION Introduction Section 2-1

16 INTRODUCTION The 141/181 Series Blades are designed with care and built with quality materials by skilled workers. Proper assembly, maintenance, and operating practices, as described in this manual, will help the owner/operator get years of satisfactory service from the machine. The purpose of this manual is to familiarize and instruct. The Assembly Section instructs the owner/operator in the correct assembly of the Blade using standard and optional equipment. INTRODUCTION Careful use and timely service saves extensive repairs and costly downtime losses. The Operation and Maintenance Sections of the manual train the owner/operator how to work the Blade correctly and attend to appropriate maintenance. The Troubleshooting Guide helps diagnose difficulties and offers solution to the problems. Safety is of primary importance to the owner/operator and to the manufacturer. The first section of this manual includes a list of Safety Messages, that, if followed, will help protect the operator and bystanders from injury or death. Many of the Safety Messages will be repeated throughout the manual. The owner/operator/dealer should know these Safety Messages before assembly and be aware of the hazards of operating this blade during assembly, use, and maintenance. The Safety Alert Symbol combined with a Signal Word, as seen below, is intended to warn the owner/operator of impending hazards and the degree of possible injury faced when operating this machine. 141/181 Series Rear Blade Introduction Section 2-2
17 INTRODUCTION 181 Series Shown INTRODUCTION The 141 and 181 Series Blades are available in widths of 8' and 9' for the 141 Series and 9 and 10 for the 181 Series. These blades feature a heavy-duty CAT II-III three-point hitch and quick-hitch. The 8 and 9 models of the 141 Series are rated for up to 140HP (2 WD) & 110 HP (4WD) tractors. The 181 Series with 9 or 10 Blade are rated at 180HP (2WD) and 140HP (4WD) tractors. The Blade is available with either hydraulic or manual mainframe swing, moldboard angle, and moldboard tilt. The Blade can be offset a maximum of 35" (141 Series) and 37 (181 Series) for working outside the dual wheels on larger horsepower tractors. The 4" diameter solid steel kingpin (141 Series) and 5 solid steel kingpin (181 Series) with boxed section reinforced 1/2 x 18" moldboards, and the superior strength of the mainframes ensure dependability. The bolt-on gauge wheels are an excellent feature in helping to control the cutting depth. This is especially critical when trying to leave a smooth finish. Skid shoes, quick-tach end plates. At least 20% of the tractor s weight must be on the front tires with the implement lifted to provide adequate traction for safe steering under good conditions. Slow down on hills, rough terrain, and curves. Front and rear, and left and right are determined by the normal direction of travel (the same as on your automobile). 141/181 Series Rear Blade Introduction Section 2-3

18 INTRODUCTION INTRODUCTION 141/181 Series Rear Blade Introduction Section 2-4
19 ASSEMBLY SECTION Assembly Section 3-1
20 ASSEMBLY The 141 and 181 Series Blades are shipped partially assembled from the factory. Each blade will be shipped on two pallets. The first pallet will contain the A-frame, Back Bone and Swivel Tube assemblies. The second pallet contains the Moldboard assembly. The pins and fasteners used to assemble the blade will be installed at the factory. The removal and reinstallation of these pins and fasteners is required to complete assembly. MOLDBOARD ASSEMBLY 1. Remove the Tilt Pin (3) and install the Swivel tube (1) into the Moldboard assembly (2). 2. Replace the Tilt Pin (3) and secure with the supplied fasteners. ASSEMBLY 3. Attach your 8 Pin jack (4) or cylinder with the supplied 1 cylinder pins (7, 8) and secure with cotter pins. 4. Make sure your Pin Jack or Cylinder is fixed to the center positon so the Swivel Tube is 90 from the Moldboard. If cylinder is used, attach rod end to Moldboard (2). 141/181 Series Rear Blade Assembly Section 3-2
21 ASSEMBLY A FRAME ASSEMBLY 1. Remove A-Frame Pin (3) and install the Back Bone (2) into position. 2. Reinstall A-Frame Pin (3) thru A-Frame (1) and Back Bone (2) and secure with supplied cotter pin. 3. Install Pin Jack (4) or cylinder to left side of the A-Frame (1) and Backbone (2) with the supplied cylinder pins (7, 8) and secure with cotter pins. This Pin Jack controls the blades offset. 4. Use the supplied 1 pin (5, 6) to set the Pin Jack in the middle positon so the Backbone (2) is at 90 to the A-Frame (1). 5. Make sure the Jack Stand (9) is installed in the Jack Stand tube located on the A-Frame. 6. Secure with the supplied pin and hair pin (10, 11). If a Hydraulic Cylinder is used, attach rod end toward Moldboard. ASSEMBLY 141 SERIES SERIES 1 7,8 4 5,6 7, /181 Series Rear Blade Assembly Section ,11
22 ASSEMBLY MOLDBOARD to FRAME ASSEMBLY 1. Remove the King Pin Washer (3) and set it aside. Lower the A-Frame assy. (1) onto the Moldboard assy. (2). 2. The King Pin has a tight fit into the bushing so take care to line it up. A small amount of angle adjustment to the A-Frame makes a huge difference during this process. 3. Once the A-Frame (1) is on the Moldboard Assy. (2), secure the King Pin with the King Pin washer (3) with the supplied fasteners (4,5,6). ASSEMBLY 4. Attach the last 16 Pin Jack (7) with the supplied cylinder pins (8, 9). 5. Lock the Pin Jack in the center position with the supplied 1 pin (10, 11) and secure with a Hair Pin. 6. If Hydraulic Cylinders are used, attach rod end toward Moldboard assy. (2) and run hoses thru A-Frame handle (12) and to tractor. 141 SERIES ,5, , SERIES ,5, , /181 Series Rear Blade Assembly Section 3-4
23 ASSEMBLY Skid Shoe Kit (Optional) Skid Shoe kits contian 2 Skid Shoes, Mounting Brackets and all required fasteners. 1. Attach Skid Shoe Mounting Bracket (3) to Moldboard skid shoe lugs (1) with ¾ x 6 bolts (6) and ¾ Nylock nuts (7). 2. Insert Skid Shoe Weldment (2) into Mounting Bracket (3). 3. Secure Skid Shoe with ¾ bent pin (4) and hair pin(5). 4. Adjust Skid Shoe (2) to desired height. ASSEMBLY End Plate Kit (Optional) End Plate Kit contains two End Plates (L.H. & R.H.) and mounting fasteners. 1. Remove the bolts and nuts from the end hole on both ends of the Moldboards cutting edge item (8). 2. Attach End Plate weldment to the Moldboard item (1) with the smooth side out on both sides of the Moldboard item (7). Use three 5/8 x 2 bolts item (2), six 5/8 Flatwashers item (3) (one on each side to the slotted holes) three 5/8 lockwashers item(4) and three 5/8 hex nuts item (5). 3. In the bottom hole over the cutting edge item (8) use one 5/8 x 2-1/2 bolt item (6), flatwashers, lockwashers and hex nut. 141/181 Series Rear Blade Assembly Section 3-5

24 ASSEMBLY ASSEMBLY Hydraulic Plumbing Installation Diagram 141/181 Series Rear Blade Assembly Section 3-6
25 ASSEMBLY Hose Holder Installlation 1. Remove a bolt, lockwasher and flatwasher from the King Pin items 1, 2 and Place the hole in the Hose Holder (4) to the hole in the King Pin and reinstall items 1, 2 and 3. ASSEMBLY 141/181 Series Rear Blade Assembly Section 3-7
26 ASSEMBLY 3 Point Hitch Attachment Assembly ASSEMBLY Lift Pin Setup for CAT II Lift Pin Setup for CAT III and CAT II / III Quick Hitch 141/181 Series Rear Blade Assembly Section 3-8
27 OPERATION SECTION Operation Section 4-1
28 OPERATION BUSH HOG 160 SERIES REAR MOUNTED BLADE OPERATION INSTRUCTIONS Your Bush Hog 141 /181 Series should now be assembled and inspected for any evidence of defective or damaged parts before use. Any evidence of damage should be reported to your dealer immediately. After Hydraulic Lines have been attached to tractor and 3-Point Hitch attached, carefully remove safety blocks from Moldboard pivot Point. OPERATION This section of the Operator s Manual is designed to familiarize, instruct, and educate safe and proper blade use to the operator. Pictures contained in this section are intended to be used as a visual aid to assist in explaining the operation of a blade. Some pictures may show shields removed for purposes of clarity. NEVER OPERATE this implement without all shields in place and in good operational condition. The operator must be familiar with the blade and tractor operation and all associated safety practices before operating the blade and tractor. Proper operation of the blade, as detailed in this manual, will help ensure years of safe and satisfactory use of the blade. READ AND UNDERSTAND THE ENTIRE OPERATING INSTRUCTIONS AND SAFETY SEC- TION OF THIS MANUAL AND THE TRACTOR MANUAL BEFORE ATTEMPTING TO USE THE TRACTOR AND IMPLEMENT. If you do not understand any of the instructions, contact your nearest authorized dealer for a full explanation. Pay close attention to all safety signs and safety messages contained in this manual and those affixed to the implement and tractor. OPS-U The 141 and 181 Series Blade is compatible with CAT II, CAT III standard hitches plus, CAT II and CAT III quick hitches. The 141 and 181 blade offsets, angles and tilts manually or hydrauliclly depending on the options you ve choosen. The 141 blade is rated for 141 hp on two wheel drive tractors and 110 on four wheel drive tractors. The 181 blade is rated for 181 hp on two wheel drive tractors and 110 on four wheel drive tractors. Once the blade is assemblied, adjusing the offset, blade angle and tilt is simple. If Pin Jacks are used, simply pull the middle pin and select the proper hole to provide the angle desired. If hydraulics are used, use your tractors controls to adjust the blade to the desired angles. 141/181 Series Rear Blade Operation Section 4-2
29 OPERATION STANDARD EQUIPMENT and SPECIFICATIONS 141 SERIES 181 SERIES Over All Height /8 Over All Width 8 and 9 9 and 10 Over All Debth 64-3/ /4 Moldboard Height Weight (Lbs.) 1145 (8 ), 1170 (9 ) 1586 (9 ), 1613 (10 ) Tilt Adjustment Offset Adjustment Angle Adjustment (Forward & Reverse) Adjustment Method Manual or Hydraulic Manual or Hydraulic Lower Hitch Pin Height 24-7/ /8 Horspower (Max) 2wd - 4wd 141-2wd / 110-4wd 181-2wd / 140-4wd Hitch 3Pt. Cat. II & III 3Pt. Cat. II & III Quick Hitch Compatible Quick Hitch Compatible Paint Options Red, Green, Orange, Blue, Yellow Red, Green, Orange, Blue, Yellow Cutting Edge 1/2 x 6 Bolt On 1/2 x 6 Bolt On Skid Shoes Optional Optional End Plate Kit Optional Optional King Pin Dia. 4 5 Hydraulic Cylinder Sizes: Offset and Angle 3.5 Bore x 16 Stroke x 1.75 Rod 3.5 Bore x 16 Stroke x 1.75 Rod Tilt 3 Bore x 8 Stroke x 1.25 Rod 3 Bore x 8 Stroke x 1.25 Rod OPERATION 141/181 Series Rear Blade Operation Section 4-3

30 OPERATION OPERATION 141/181 Series Rear Blade Operation Section 4-4
31 OPERATION Tractor Requirements and Capabilities ASABE approved Roll-Over Protective Structure (ROPS) or ROPS cab and seat belt. Tractor Safety Devices... Slow Moving Vehicle (SMV) emblem, lighting, PTO master shield Tractor Horsepower - 2-Wheel 2 Drive Series & HP, 9 ( HP Max) HP Series - 9 & 10 (181 HP Max) - Front 4 Wheel Wheel Drive Series & 9 HP, (110 HP Max) HP Series - 9 & 10 (140 HP Max) Hitch Point...CAT Hitch...CAT II and III and II-III & and III Quick QH Hitch - Lifting Capacity Series 8 8 ( lbs.; Lbs.), ( Lbs.) lbs Series 9 (1586 Lbs.), 10 (1613 Lbs.) Front End Weights... As needed to maintain As needed 20% weight to maintain on front 20% axle weight on front axle OPERATION Tractor Horsepower The power required to operate a blade is determined by the tractor PTO horsepower. For most operating conditions, the 141 Series rear blade requires a tractor with a maximum of 140 HP for 8 & 9 on 2 wheel drive tractors and a maximum of 110 HP for 8 & 9 on 4 wheel drive Tractors. The 181 Series rear blade requires a tractor with a maximum of 181 HP for 9 & 10 on 2 wheel drive tractors and a maximum of 140 HP for 9 & 10 on 4 wheel drive tractors. Operating the blade with a tractor that does not have adequate power may damage the tractor engine.exceeding the recommended horsepower may cause blade damage by over powering the unit in heavy operating conditions. 141/181 Series Rear Blade Operation Section 4-5
32 OPERATION Tractor 3-Point Hitch The tractor 3-point hitch must be rated to lift at least 1145 lbs. for the 8 and 1170 lbs. for the 9 on the 141 Series Blade and 1586 lbs. for the 9 and 1613 lbs. on the181 Series Blade. OPERATION The 141 and 181 Series can attach to tractor s with either a CAT II or III hitch. Refer to the tractor operator s manual for the category of the tractor used. If the hitch does not conform to the ASABE CAT II or III dimensions, the blade may not fit or raise properly. Consult an authorized dealer for possible modification procedures to mount nonconforming hitches. Use the correct hitch pins for the hitch category being used. For a Cat II hitch, 1-1/8 lower and a 1 upper diameter hitch pins are used and Cat III hitches require 1-7/16 lower and a 1-1/4 upper diameter hitch pins. CAT II Implement / Hitch Specification CAT III Implement/ Hitch Specification Width from outside to outside A-frame /8 Width from outside to outside A-frame Quick Hitch width inside lug to lug /8 Quick Hitch width inside lug to lug /4 Height from bottom hitch pin to top pin...19 Height from bottom hitch pin to top pin Lower pin diameter...1-1/18 Lower pin diameter /16 Upper pin diameter... 1 Upper pin diameter /4 Lynch pin diameter... 15/32 Lynch pin diameter... 15/32 Front End Weight A minimum of 20% total tractor weight must be maintained on the tractor front end at all times. Front end weight is critical to maintain steering control and to prevent the tractor from rearing up while driving. If the front end is too light, add weight until a minimum of 20% total weight is reached on the front tires. Front weights and weight carriers can be purchased through an authorized tractor dealership. OPS-U /181 Series Rear Blade Operation Section 4-6

33 GETTING ON AND OFF THE TRACTOR OPERATION Before getting onto the tractor, the operator must read and completely understand the implement and tractor operator manuals. If any part of either manual is not completely understood, consult an authorized dealer for a complete explanation. OPS-U OPERATION 141/181 Series Rear Blade Operation Section 4-7
34 OPERATION OPERATION 141/181 Series Rear Blade Operation Section 4-8

35 OPERATION OPERATION 141/181 Series Rear Blade Opeartion Section 4-9

36 OPERATION OPERATION 141/181 Series Rear Blade Operation Section 4-10

37 OPERATION OPERATION 141/181 Series Rear Blade Operation Section 4-11
38 OPERATION OPERATION 141/181 Series Rear Blade Operation Section 4-12
39 OPERATION OPERATION 141/181 Series Rear Blade Operation Section 4-13

40 OPERATION OPERATION 141/181 Series Rear Blade Operation Section 4-14

41 OPERATION OPERATION 141/181 Series Rear Blade Operation Section 4-15

42 OPERATION OPERATION 141/181 Series Rear Blade Operation Section 4-16

43 OPERATION OPERATION 141/181 Series Rear Blade Operation Section 4-17

44 OPERATION OPERATION 141/181 Series Rear Blade Operation Section 4-18

45 OPERATION OPERATION 141/181 Series Rear Blade Operation Section 4-19

46 OPERATION OPERATION 141/181 Series Rear Blade Operation Section 4-20

47 OPERATION OPERATION 141/181 Series Rear Blade Operation Section 4-21

48 OPERATION OPERATION 141/181 Series Rear Blade Operation Section 4-22

49 OPERATION OPERATION 141/181 Series Rear Blade Operation Section 4-23
50 OPERATION OPERATION 141/181 Series Rear Blade Operation Section 4-24
51 MAINTENANCE SECTION Maintenance Section 5-1
52 MAINTENANCE General Maintenance MAINTENANCE 1. Grease all grease fittings and lubrication points before each use. 2. Inspect the implement for any worn or damaged parts and replace with a genuine Bush Hog part. 3. Make sure all safety decals are intact and legible. 4. Inspect unit for cracks and chips and repair if necessary. Consult your Bush Hog dealer before any repair is made. Any unauthorized repairs will void the warranty. 5. Replace eccessively worn Grader Blades. A badly worn edge increases the strain on the blade and the tractor and reduces efficiency. 6. Check all bolt and nuts to insure they are properly torque. Consult the torque chart found in this manual for torque values. Proper Torque Chart for Fasteners The chart lists the correct tightening torque for fasteners. When bolts are to be tightened or replaced, refer to this chart to determine the grade of bolts and the proper torque except when specific torque values are assigned in manual text. RECOMMENDED TORQUE IN FOOT POUNDS UNLESS OTHERWISE STATED IN THE MANUAL NOTE: These values apply to fasteners as received from supplier, dry or when lubricated with normal engine oil. They do not apply if special graphite or molydisulphide greases or other extreme pressure lubricants are used. This applies to both UNF fine and UNC coarse threads. 141/181 Series Rear Blade Maintenance Section 5-2
53 MAINTENANCE LUBRICATION The Bush Hog 141 and 181 Series Rear Blades are rugged and dependable and perform satisfactorily with proper preventive maintenance. These series of blades have two grease points and should be greased before the blade is used and every 10 hours of operation. MAITENANCE Grease Points 141 Series Grease Points 181 Series 141/181 Series Rear Blade Maintenance Section 5-3

54 MAINTENANCE MAINTENANCE 141/181 Series Rear Blade Maintenance Section 5-4
55
56
57

58 141 SERIES 181 SERIES REAR MOUNTED BLADES 141 and 181 SERIES 08/15 Printed in USA Part Number
LP1207 LP1208 LP1210 LAND PLANES LP12_5TL15788_06/10
 LP1207 LP1208 LP1210 O P E R A T O R ' S M A N U A L LAND PLANES LP12_5TL15788_06/10 TO THE DEALER: Assembly and proper installation of this product is the responsibility of the Frontier dealer. Read manual
300 Series OPERATOR S MANUAL REAR MOUNTED BLADE BUSH HOG Griffin Ave. Selma, AL
 300 Series Published 09/10 REAR MOUNTED BLADE OPERATOR S MANUAL Part No. 00786978C This Operator's Manual is an integral part of the safe operation of this machine and must be maintained with the unit
4815RR1,4810RR RR1,14810RR1
 4815RR1,4810RR1 14815RR1,14810RR1 This Manual applies to Models: 4815RR1, 4810RR1, 14815RR1, 14810RR1 FLEX-WING ROTARY CUTTERS / SHREDDERS Published 07/16 Part No. 50076491 To the Owner/Operator/Dealer
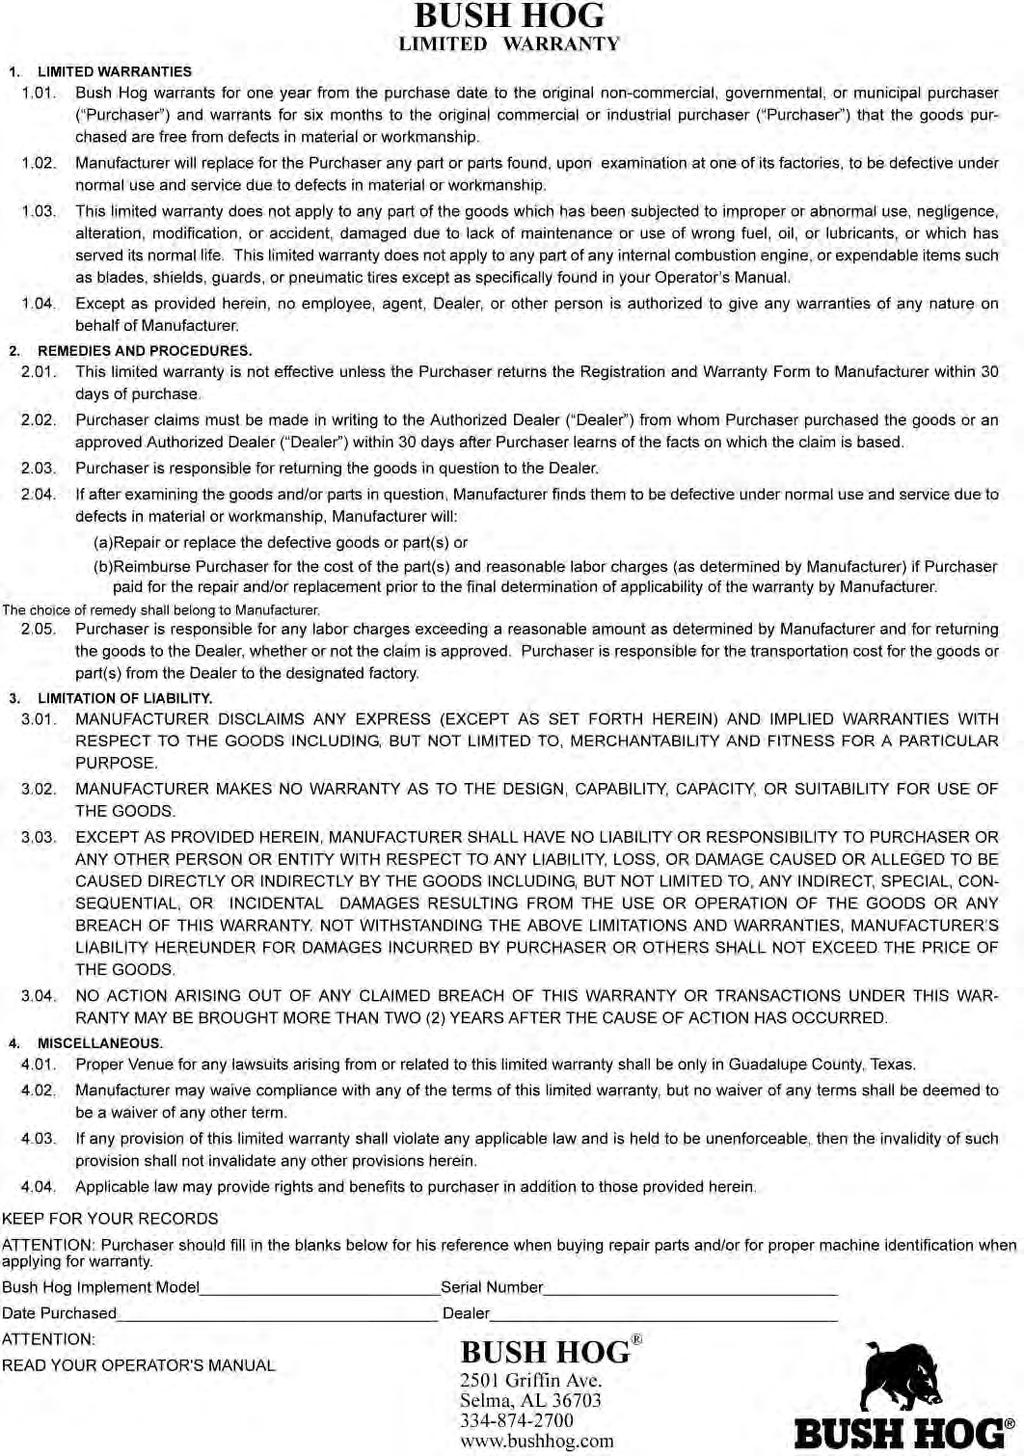
LIMITED WARRANTY DISCLAIMER OF IMPLIED WARRANTIES & CONSEQUENTIAL DAMAGES
 Published 08/15 LIMITED WARRANTY Bush Hog warrants to the original purchaser of any new Bush Hog equipment, purchased from an authorized Bush Hog dealer, that the equipment be free from defects in material
Published 08/12 Part No
 BBX48/60/65/72 BOX BLADE Published 08/12 Part No. 50071569 OPERATOR S MANUAL This Operator's Manual is an integral part of the safe operation of this machine and must be maintained with the unit at all
Published 02/13 Part No
 RG60/72/84 CRG48/60 ROAD GRADER Published 02/13 Part No. 50069588 OPERATOR S MANUAL This Operator's Manual is an integral part of the safe operation of this machine and must be maintained with the unit
AG PRODUCTS, LTD. YOU RE ALWAYS AHEAD... WITH A MODERN BEHIND.
 SUMMER 2016 BADGER DISC HARROW Operator s Manual 011-1156 011-1166 001-1501 001-1501-1 011-1167 001-1501-2 001-1501-3 011-1176 001-1501-4 011-1177 MODERN AG PRODUCTS, LTD. YOU RE ALWAYS AHEAD... WITH A
DISC HARROW PART'S MANUAL DHP8/10/12. RHINO 1020 S. Sangamon Ave. Gibson City, IL
 DISC HARROW DHP8/10/12 Published 03/16 PART'S MANUAL P/N 00789085P An Operator's Manual was shipped with the equipment in the Manual Canister. This Operator's Manual is an integral part of the safe operation
TL SERIES ADJUSTABLE OFFSET TILLER
 R L S E S 995 OPERATION & PARTS MANUAL Please read these instructions carefully before using! Always grease all fittings and be sure to always check and fill with oil before operating! Retain this manual
DISK HARROWS DH1166 DH1176 DH1180 DH11_5TL15191_5/08
 O P E R A T O R ' S M A N U A L DISK HARROWS DH1166 DH1176 DH1180 DH11_5TL15191_5/08 TO THE DEALER: Assembly and proper installation of this product is the responsibility of the Frontier dealer. Read manual
BOX BLADES BB3272 BB3284 BB3296 BB32_5TL15288_07/10
 O P E R A T O R ' S M A N U A L BOX BLADES BB3272 BB3284 BB3296 BB32_5TL15288_07/10 TO THE DEALER: Assembly and proper installation of this product is the responsibility of the Frontier dealer. Read manual
Operator s Manual. Go Galvanized! YOU'RE ALWAYS AHEAD...WITH A MODERN BEHIND.
 SUMMER 2008 C2 tilting grader blade Operator s Manual YOU'RE ALWAYS AHEAD...WITH A MODERN BEHIND. 003-5336 003-5342 003-5531 003-5544 P.O. Box 790 Beaumont, Tx 77704 409.833.2665 1.800.231.8198 Fax: 409.726.8333
PART'S MANUAL. Rear Mounted Blade RHINO
 850 Revised 06-10 PART'S MANUAL Rear Mounted Blade Part No. 00787017P An Operator's Manual was shipped with the equipment in the Manual Canister. This Operator's Manual is an integral part of the safe
BEFORE YOU START!! Read the safety messages on the implement as shown in your manual. Observe the rules of safety and common sense!
 To the Owner/Operator/Dealer All implements with moving parts are potentially hazardous. There is no substitute for a cautious, safe-minded operator who recognizes the potential hazards and follows reasonable
Mulching and Finishing Mowers MP and FP
 Mulching and Finishing Mowers MP and FP Parts Manual Locke Turf 0 Highway E, Opp, Alabama, () -00 Transport Wheel, Tire & Spindle MP and FP ALPHABETICAL INDEX CONTENTS PAGE 00 Hydraulic Cylinder (Rear)
BH200 SERIES ROTARY CUTTER
 Revised Published01/19 BH200 SERIES ROTARY CUTTER PARTS MANUAL SECTION 121 MODELS BH215, BH216, BH217 An Operator s Manual was shipped with the equipment. The Operator s Manual is an integral part of the
Operator s/parts Manual
 Operator s/parts Manual 3-Point Solid Stand Drills Pull Hitch Package Manufacturing, Inc. P.O. Box 5060 Salina, Kansas 67402-5060! Read the operator s manual entirely. When you see this symbol, the subsequent
LAND GRADER 5 & 6 OWNER S OPERATION & PARTS MANUAL. Bad Boy, Inc. 102 Industrial Drive Batesville, Arkansas 72501
 5 & 6 LAND GRADER OWNER S OPERATION & PARTS MANUAL For additional information, please see us at www.badboymowers.com Bad Boy, Inc. 0 Industrial Drive Batesville, Arkansas 750 08-6 TO THE DEALER Assembly,
OPERATION MANUAL DBW Bale Wagon DFW Feeder Wagon
 OPERATION MANUAL DBW Bale Wagon DFW Feeder Wagon To the Owner/Operator/Dealer All implements with moving parts are potentially hazardous. There is no substitute for a cautious, safe-minded operator who
W & A 12 ROW TOP LEVELING STACKER LEVEL BANDER
 W & A 12 ROW TOP LEVELING STACKER LEVEL BANDER NO. 3640 OPERATOR S MANUAL TO THE OWNER: Congratulations on your purchase of a new W & A Top Leveling Stacker Level Bander. Your selection is an indication
OPERATOR S MANUAL REPAIR PARTS CATALOG. Models: SCP-51 & SCP-71 SCP-52 & SCP-72 SCP-91 & SCP-111 SCP-92 & SCP-112 BRILLION FARM EQUIPMENT
 OPERATOR S MANUAL REPAIR PARTS CATALOG Subsoil Chisel Plow Models: SCP-51 & SCP-71 SCP-52 & SCP-72 SCP-91 & SCP-111 SCP-92 & SCP-112 IMPORTANT! Repairs cannot be purchased retail direct from factory. Order
Walker Loader Bucket OPERATOR S AND PARTS MANUAL
 Walker Loader Bucket OPERATOR S AND PARTS MANUAL Please Read and Save These Instructions For Safety, Read all Safety and Operation Instructions Prior To Operating Machine P/N 6690 TABLE OF CONTENTS Introduction
LAND MAINTENANCE REPAIR PARTS MANUAL BUSH HOG MODEL: 307 SECTION: 16
 BUSH HOG LAND MAINTENANCE REPAIR S MANUAL MODEL: 0 SECTION: P.O. Box 0 Selma, AL 0-0 () - () -00 Parts Ordering -00-0- Fax -00-- www.bushhog.com BUSH HOG / LAND MAINTENANCE REPAIR S MANUAL SEPTEMBER, 0
PARTS MANUAL 8600A TRACTOR MOUNTED SNOWBLOWER
 TRACTOR MOUNTED SNOWBLOWER PARTS MANUAL Teamco, Inc. 27065 Kerslake Pl. Tea, SD 57064 Phone: 1-605-498-0610 Fax: 1-605-498-0609 Email: teamco@teamco-inc.com TO THE OWNER/OPERATOR/DEALER All implements
REAR BLADES RB2307 RB2308 RB2309 RB2310 THIS MANUAL IS ALSO APPLICABLE TO FRONTIER REAR BLADES WITH MODEL NUMBERS ENDING IN A C
 O P E R A T O R S M A N U A L REAR BLADES RB0 RB0 RB09 RB0 THIS MANUAL IS ALSO APPLICABLE TO FRONTIER REAR BLADES WITH MODEL NUMBERS ENDING IN A C TMC0900K (Rev. 0/9/0) TO THE DEALER: Assembly and proper
Post Hole Digger. Operation Manual MODEL
 Post Hole Digger MODEL 107798 Operation Manual This safety alert symbol identifies important safety messages in this manual. Failure to follow this important safety information may result in serious injury
MODELS EWR820, EWR1023, EWR1227 PULL TYPE HAY RAKES PARTS MANUAL SECTION 19
 EWR MODELS EWR820, EWR1023, EWR1227 PULL TYPE HAY RAKES Published 04/11 PARTS MANUAL SECTION 19 MATERIAL HANDLING PARTS MANUAL PARTS ORDERING GUIDE The following instructions are offered to help eliminate
BUSH HOG LAND MAINTENANCE REPAIR PARTS MANUAL MODEL: TD-1100 SECTION: 66
 BUSH HOG LAND MAINTENANCE REPAIR S MANUAL MODEL: TD-00 SECTION: 0 Griffin Ave. Selma, AL 0 () - () -00 Parts Ordering -00-0- Fax -00-- www.bushhog.com BUSH HOG/ LAND MAINTENANCE REPAIR S MANUAL JUNE, 00
Operator s Manual. Go Galvanized! YOU'RE ALWAYS AHEAD...WITH A MODERN BEHIND.
 fall 2010 3pt & quick attach Bale spears & 3pt bale carrier Operator s Manual YOU'RE ALWAYS AHEAD...WITH A MODERN BEHIND. 318-1006-i 318-1005-i 020-1500 020-1502 P.O. Box 790 Beaumont, Tx 77704 409.833.2665
Post Hole Diggers Compact Standard Heavy Duty
 Post Hole Diggers Compact Standard Heavy Duty MODEL 90 / MODEL 100 / MODEL 110 # 100623 # 100498 # 100624 Operation Manual This safety alert symbol identifies important safety messages in this manual.
Operator s Manual. Go Galvanized! YOU'RE ALWAYS AHEAD...WITH A MODERN BEHIND.
 SUMMER 2008 rock & landscape rake Operator s Manual 003-7445 003-7450 003-7460 003-7440 003-7445 003-7450 YOU'RE ALWAYS AHEAD...WITH A MODERN BEHIND. P.O. Box 790 Beaumont, Tx 77704 409.833.2665 1.800.231.8198
BUSH HOG LAND MAINTENANCE REPAIR PARTS MANUAL MODEL: 405 / 406 SECTION: 17
 BUSH HOG LAND MAINTENANCE REPAIR S MANUAL MODEL: 0 / 0 SECTION: 0 Griffin Ave. Selma, AL 0 () - () -00 Parts Ordering -00-0- Fax -00-- www.bushhog.com BUSH HOG/ LAND MAINTENANCE REPAIR S MANUAL SEPTEMBER,
CPHD POST HOLE DIGGER Operator s/parts Manual. Table of Contents
 CPHD POST HOLE DIGGER Operator s/parts Manual Table of Contents Warranty Information... -3 Dealer Checklist... 4 Safety Precautions... 5-6 Federal Laws and Regulations... 7 Torque Specifications... 8 Important
OPERATOR S MANUAL REPAIR PARTS CATALOG. with ONE & TWO SHANKS BRILLION FARM EQUIPMENT
 OPERATOR S MANUAL REPAIR PARTS CATALOG Subsoil Chisel Plow with ONE & TWO SHANKS MODELS: SCP-1 SCP-2 IMPORTANT! Repairs cannot be purchased retail direct from factory. Order through your Brillion dealer.
Rotary Brush Cutter. Model Number RBV. Serial Number. Serial Number and Greater. Maximum Flow Rate gpm. Phone: RBV
 Rotary Brush Cutter Model Number RBV. Serial Number. Serial Number 75 and Greater Maximum Flow Rate gpm. Phone: 0--700 0/5/0 Revised // RBV Features of Virnig Mfg. Inc. Rotary Brush Cutter include: diameter
BUSH HOG SERIES 91 REAR MOUNTED BLADE
 BUSH HOG SERIES 91 REAR MOUNTED BLADE Operator s Manual ASSEMBLY l OPERATION l MAINTENANCE 12/08 $4.00 50064420 CONGRATULATIONS! You have invested in the best implement of its type on the market today.
Two-Stage Snow Blower For 4WD Pick Up Trucks. Operator s Manual
 Two-Stage Snow Blower For 4WD Pick Up Trucks Operator s Manual Distrubuted by: Metal Fabricating LLC P.O. Box 831 Brodheadsville, PA 18322 Phone: 570-992-9989 SnowVac.com WARRANTY POLICY Metal Fabricating
OPERATOR'S MANUAL Drawn Box Scraper LL1208 LL1210 LL1212 LL1 2_ 5DDP00538_5_1_09
 OPERATOR'S MANUAL Drawn Box Scraper LL1208 LL1210 LL1212 LL1 2_ 5DDP00538_5_1_09 TO THE DEALER: Assembly and proper installation of this product is the responsibility of the Frontier dealer. Read manual
PARTS MANUAL 10800A TRACTOR MOUNTED SNOWBLOWER
 TRACTOR MOUNTED SNOWBLOWER PARTS MANUAL Teamco, Inc. 27065 Kerslake Pl. Tea, SD 57064 Phone: 1-605-498-0610 Fax: 1-605-498-0609 Email: teamco@teamco-inc.com TO THE OWNER/OPERATOR/DEALER All implements
ROTARY TILLER. Operation, Service & Parts Manual For "AS" Series. FORM: ASTillerBook.QXD
 ROTARY TILLER Operation, Service & Parts Manual For "AS" Series FORM: ASTillerBook.QXD April 2002 TABLE OF CONTENTS Preparation......................................1 Assembly Instructions.............................2
Broadcast Seeder/Spreader
 OWNER S/ OPERATOR S MANUAL MODEL NO. s CS-694 CS-1094 CSP-1094 CAUTION For Safe Operation Read Rules And Instructions Carefully SINO LEEINGLES, PIDA AYUDA A AIGUIEN QUE SI LO LEA PARA QUE LE TRADUZCA LAS
BUSH HOG LAND MAINTENANCE REPAIR PARTS MANUAL MODEL: 3414 SECTION: 67
 BUSH HOG LAND MAINTENANCE REPAIR S MANUAL MODEL: SECTION: 0 Griffin Ave. Selma, AL 0 () - () -00 Parts Ordering -00-0- Fax -00-- www.bushhog.com BUSH HOG/ LAND MAINTENANCE REPAIR S MANUAL July, 0 ROTARY
ProLine. 44 Mower. for 120 Traction Unit. Model No & Up. Operator s Manual
 FORM NO. 9 ProLine Mower for 0 Traction Unit Model No. 05 99000 & Up Operator s Manual IMPORTANT: Read this manual carefully. It contains information about your safety and the safety of others. Also become
Models 2308 ROTARY MOWER
 2308 SERIES Models 2308 ROTARY MOWER Rigid Deck / Multi Spindle Publish Date 10//15 Manual Part No. 50075993 This Operator's Manual is an integral part of the safe operation of this machine and must be
Operator s Manual and Assembly
 Operator s Manual and Assembly Published: Mar 24, 2017 Manual Part No. AH02-00-MAN Gatco Manufacturing Inc. www.gatcomfg.com Location: 2524 South Service Road West, Swift Current, SK, Canada Mail: Box
Rotary Brush Cutter (Standard Flow)
") Rotary Brush Cutter (Standard Flow) Model Number RBV. Serial Number. Serial Number 6795-0050 Maximum Flow Rate gpm. For and 5 GPM Max Models Phone: 0-9-700 0/5/0 Revised // RBV Features of Virnig Mfg.
Rotary Brush Cutter (Standard Flow) Model Number RBV. Serial Number. Serial Number 6795-0050 Maximum Flow Rate gpm. For and 5 GPM Max Models Phone: 0-9-700 0/5/0 Revised // RBV Features of Virnig Mfg.
Model 462 IC/H/PRO/EL. Operating and Assembly Manual Midwest Equipment Manufacturing, Inc Serum Plant Road Thorntown, IN
 Model 462 IC/H/PRO/EL Operating and Assembly Manual Midwest Equipment Manufacturing, Inc. 5225 Serum Plant Road Thorntown, IN 46071 03-08-12 SAFETY RULES Remember, any power equipment can cause injury
BOX BLADES PART'S MANUAL SBX/MBX/RO. RHINO 1020 S. Sangamon Ave. Gibson City, IL
 Published 03/6 BOX BLADES PART'S MANUAL SBX/MBX/RO P/N 0078930P An Operator's Manual was shipped with the equipment in the Manual Canister. This Operator's Manual is an integral part of the safe operation
HT419H BUSH HOG. 2501Griffin Ave. Selma, Al Published 11/15 Part No
 Published Part No. 50076695 BUSH HOG 2501Griffin Ave. Selma, Al 36703 www.bushhog.com Read and understand the complete Warranty Statement Found in this Manual. Be sure at time of purchase your Dealer has
BUSH HOG LAND MAINTENANCE REPAIR PARTS MANUAL MODEL: 280 SERIES SECTION: 59
 BUSH HOG LAND MAINTENANCE REPAIR S MANUAL MODEL: 0 SERIES SECTION: P.O. Box 0 Selma, AL 0-0 () - () -00 Parts Ordering -00-0- Fax -00-- www.bushhog.com BUSH HOG/ LAND MAINTENANCE REPAIR S MANUAL JUNE,
Wheel Horse 48 Blade for 5xi Garden Tractors
 Form No. -9 Wheel Horse 8 Blade for 5xi Garden Tractors Model 7955 0000000 Operator s Manual Domestic English (EN) Contents Page Introduction................................ Installation.................................
Case STX/NH TJ
 Case STX/NH TJ 0-0 Tractors MANUAL Case STX/NH TJ 0-0 Tractors Blades, pivot frames Tractor fit-up Dlock, mounting Hydraulics Operation, maintenance Safety, warranty Industrial Drive, Box 0 Regina, Sask.
DURABILT INDUSTRIES, LLC
 DURABILT INDUSTRIES, LLC Pocahontas, AR 72455 Phone: 870-892-4501 www.durabiltindustries.com 1 To the Owner/Operator/Dealer All implements with moving parts are potentially hazardous. There is no substitute
LWR24 LWL48 & LWR48 LWL511 &LWL511
 LWR24 LWL48 & LWR48 LWL511 &LWL511 THREE POINT WHEEL RAKE Published 09/10 Part No. 50068760C OPERATOR S MANUAL This Operator's Manual is an integral part of the safe operation of this machine and must
John Deere TLS TLS Tractors MANUAL
 John Deere 600-00 6-6 TLS - TLS Tractors MANUAL 00 John Deere 600-00 6-6 TLS - TLS Tractors Blade, pivot frame Hydraulics Tractor fit-up, mounting Operation, maintenance Previous hydraulic system Attachments
OPE R AT O R S MANU A L QUICK-HITCH ADAPTER. 5BP (Field conversion kit)
") OPE R AT O R S MANU A L 5BP006750 (Field conversion kit) Manual 5BP97378B Date 06/8/05 SAFETY Take note! This safety alert symbol found throughout this manual is used to call your attention to instructions
OPE R AT O R S MANU A L 5BP006750 (Field conversion kit) Manual 5BP97378B Date 06/8/05 SAFETY Take note! This safety alert symbol found throughout this manual is used to call your attention to instructions
Wheel Horse. 48 Snow/Dozer Blade. Model No & Up. Operator s Manual
 FORM NO. 9 878 Rev A Wheel Horse 8 Snow/Dozer Blade for 5xi Lawn and Garden Tractors Model No. 7955 890000 & Up Operator s Manual IMPORTANT: Read this manual, and your tractor manual, carefully. They contain
OPERATOR S MANUAL. 20-bu 3-Point Hitch Material Collection System. LP65048 Supplier ST /07/2017 English. North American Edition Printed in USA
 OPERATOR S MANUAL 20-bu 3-Point Hitch Material Collection System LP65048 Supplier ST48289 11/07/2017 English North American Edition Printed in USA Introduction Using Your Operator s Manual Read this entire
2720/12720 PARTS MANUAL 72A SECTION FLEX WING ROTARY MOWER
 0/0 This Manual applies to models 0 and 0 that use a blade pan which measures. blade hole center to blade hole center. Also blades measure 8. from hole center to blade tip. See Section if these dimensions
QUICK ATTACH SNOW PUSHER OPERATION AND ASSEMBLY MANUAL
 QUICK ATTACH SNOW PUSHER OPERATION AND ASSEMBLY MANUAL INTRODUCTION TO THE OWNER: Read this manual before operating your equipment. Keep this manual handy for ready reference. Require all operators to
Planting Components. Operator s/parts Manual Heavy Duty Fertilizer Coulter
 Operator s/parts Manual Heavy Duty Fertilizer Coulter Planting Components Read the operator manual entirely. When you see this symbol, the subsequent instructions and warnings are serious - follow without
OPERATOR'S MANUAL & PARTS CATALOG 12 TON RUNNING GEAR
 Unverferth Grain Handling Systems OPERATOR'S MANUAL & PARTS CATALOG 1 TON RUNNING GEAR Model RGE- Unverferth Manufacturing Co., Inc. Box 7 Kalida, OH 8 Part No. 00 PH: 1-- FAX: 1--8 www.unverferth.com
REAR BLADES RB1060 RB1072 RB WPMAN0147 (Rev. 2/16/2009)
") O P E R A T O R S M A N U A L REAR BLADES RB1060 RB1072 RB1084 5WPMAN0147 (Rev. 2/16/2009) TO THE DEALER: Assembly and proper installation of this product is the responsibility of the Frontier dealer.
O P E R A T O R S M A N U A L REAR BLADES RB1060 RB1072 RB1084 5WPMAN0147 (Rev. 2/16/2009) TO THE DEALER: Assembly and proper installation of this product is the responsibility of the Frontier dealer.
Art s-way LS900, LS1200, and LS1400 Grader Illustrated Parts List Set Up Instructions and Operating Instructions Art's-Way Manufacturing Co., Inc.
 Art s-way LS900, LS1200, and LS1400 Grader Illustrated Parts List Set Up Instructions and Operating Instructions Art's-Way Manufacturing Co., Inc. 493290 (C) 05/08 ii TO THE OWNER Congratulations on the
PARTS MANUAL SECTION. Models 295, 296, 297, 1297 ROTARY MOWER
 0 Series Models,,, ROTARY MOWER Published 0/ PARTS MANUAL SECTION An Operator s Manual was shipped with the equipment. The Operator s Manual is an integral part of the safe operation of this machine and
New Holland TM CASE MXM
 New Holland TM - 90 CASE MXM - 90 Tractors MANUAL New Holland TM - 90 CASE MXM - 90 Tractors Blade, pivot frame Hydraulics Tractor fit-up, mounting Operation, maintenance 9 Previous hydraulic system Attachments
STOP 42" HIGH SPEED LAWNSWEEPER. Owner's Manual. Model No's Safety Assembly Operation Maintenance Parts
 Owner's Manual STOP 42" HIGH SPEED LAWNSWEEPER Model No's. 486.242223 DO NOT RETURN TO STORE For Missing Parts or Assembly Questions Call 1-866-576-8388 CAUTION: Before using this product, read this manual
STOP. 44" High Speed Sweeper. Operator's Manual. Model No Safety Assembly Operation Maintenance Parts
 Operator's Manual STOP 44" High Speed Sweeper Model No. 486.029 DO NOT RETURN TO STORE For Missing Parts or Assembly Questions Call 1-866-576-8388 CAUTION: Before using this product, read this manual and
EverythingAttachments.com
 EverythingAttachments.com 60 Xtreme Duty Brush Cutter Owner s Manual SAFETY GENERAL SAFETY INSTRUCTIONS AND PRACTICES A careful operator is the best operator. Safety is of primary importance to the manufacturer
BUSH HOG LAND MAINTENANCE REPAIR PARTS MANUAL MODEL: 280 SERIES SECTION: 59
 BUSH HOG LAND MAINTENANCE REPAIR S MANUAL MODEL: 0 SERIES SECTION: 0 Griffin Ave. Selma, AL 0 () () 00 Parts Ordering 00 0 Fax 00 www.bushhog.com BUSH HOG/ LAND MAINTENANCE REPAIR S MANUAL October, 0 0
Reel Mower TRM Parts Manual. Locke Turf 307 Highway 52E, Opp, Alabama 36467, (334)
") Reel Mower TRM-0 Parts Manual Locke Turf 0 Highway E, Opp, Alabama, () -00 General Information Mower Layout Please note that Left and Right are determined by standing at eh rear of the mower and facing
Reel Mower TRM-0 Parts Manual Locke Turf 0 Highway E, Opp, Alabama, () -00 General Information Mower Layout Please note that Left and Right are determined by standing at eh rear of the mower and facing
OPERATOR S MANUAL BUSH HOG RT60G, RT72G, RT84G RT60GR, RT72GR, RT84GR Griffin Avenue Selma, Al
 RTG SERIES TILLERS (ROTO HOG) MODELS RT60G, RT72G, RT84G RT60GR, RT72GR, RT84GR Published 05/16 Revised 02/18 Part No. 50075234 OPERATOR S MANUAL This Operator's Manual is an integral part of the safe
W & A 12 ROW TOP LEVELING STACKER LEVEL BANDER
 W & A 12 ROW TOP LEVELING STACKER LEVEL BANDER NO. 3640 OPERATOR S MANUAL TO THE OWNER: Congratulations on your purchase of a new W & A Top Leveling Stacker Level Bander. Your selection is an indication
Planting Components. Operator s/parts Manual. Row Cleaner VIII. Terra-Tine
 Operator s/parts Manual Terra-Tine Row Cleaner VIII Planting Components! Read the operator s manual entirely. When you see this symbol, the subsequent instructions and warnings are serious - follow without
CAUTION. IMPORTANT SAFETY INFORMATION Please stay alert for these signs.
 For safe operation, read rules and instructions carefully. The following safety precautions should be thoroughly understood before attempting to begin the assembly of this machine. 1. Select an area for
RB1172 RB1184 RB1196 REAR BLADES. 5WPMAN0148 (Rev. 2/16/2009)
") O P E R A T O R S M A N U A L RB1172 RB1184 RB1196 REAR BLADES 5WPMAN0148 (Rev. 2/16/2009) TO THE DEALER: Assembly and proper installation of this product is the responsibility of the Frontier dealer.
O P E R A T O R S M A N U A L RB1172 RB1184 RB1196 REAR BLADES 5WPMAN0148 (Rev. 2/16/2009) TO THE DEALER: Assembly and proper installation of this product is the responsibility of the Frontier dealer.
MODEL M400 POST HOLE DIGGER
 MODEL M400 POST HOLE DIGGER MANUAL, OPERATORS & S THIS SAFETY ALERT SYMBOL IDENTIFIES IMPORTANT SAFETY MESSAGES IN THIS MANUAL. FAILURE TO FOLLOW THIS IMPORTANT SAFETY INFORMATION MAY RESULT IN SERIOUS
Agri-Fab OWNERS MANUAL. Model No " ROUGH CUT TRAILMOWER. CAUTION: Read Rules for Safe Operation and Instructions Carefully
 Agri-Fab OWNERS MANUAL Model No. 45-03071 45-0361 CAUTION: Read Rules for Safe Operation and Instructions Carefully Safety Assembly Operation Maintenance Parts 42" ROUGH CUT TRAILMOWER the fastest way
3 PT. BOX SCRAPER CAUTION OWNER S/ OPERATOR S MANUAL. MODEL NO. s SBX-4 SBX-5 SBX-5 1 /2 SBX-6 SBX-7 SBX-8 CAUTION
 OWNER S/ OPERATOR S MANUAL MODEL NO. s SBX-4 SBX-5 SBX-5 1 /2 SBX-6 SBX-7 SBX-8 CAUTION For Safe Operation Read Rules And Instructions Carefully 3 PT. BOX SCRAPER SINO LEEINGLES, PIDA AYUDA A AIGUIEN QUE
THANK YOU FOR PURCHASING THIS PRODUCT
 Grader Blades Hardware Kit 80900210 THANK YOU FOR PURCHASING THIS PRODUCT Congratulations on your purchase. Behlen Country has been in the business of providing quality equipment to landowners for more
LP1160 LP1172 LP1184 LP1196 LAND PLANES LP11_5TL15614_05/08
 LP1160 LP1172 LP1184 LP1196 O P E R A T O R ' S M A N U A L LAND PLANES LP11_5TL15614_05/08 TO THE DEALER: Assembly and proper installation of this product is the responsibility of the Frontier dealer.
GROUNDSMASTER. 52 Recycler. for 120 Traction Unit. Model No & UP. Operator s Manual
 FORM NO. 8-980 Rev A GROUNDSMASTER 5 Recycler for 0 Traction Unit Model No. 077 79000 & UP Operator s Manual IMPORTANT: Read this manual carefully. It contains information about your safety and the safety
ENGINE DRIVEN ROTARY MOWER
 ENGINE DRIVEN ROTARY MOWER Operation, Service & Parts Manual For Models ERM-413, 416, & 617 April 2009 Form: ERMHydMower TABLE OF CONTENTS SECTION DESCRIPTION...PAGE 1 Introduction... 1 2 Preparation...2
Operating and Assembly Manual
 Model 455-IC/PRO/H Operating and Assembly Manual Midwest Equipment Manufacturing, Inc. 5225 Serum Plant Road Thorntown, IN 46071 03-08-12 SAFETY RULES Remember, any power equipment can cause injury if
Tube-Line Techno-Bale 960. Operator's Manual
 Tube-Line Techno-Bale 960 Operator's Manual One- Year Manufacturer's Warranty For Normal Use With The Exception Of Tires If the Equipment does not function properly, or if a piece is defective due to a
BACKHOE SUBFRAME KIT 65A, 75 & 85 BACKHOE CUB CADET AND KIOTI TRACTORS
 ASSEMBLY MANUAL 2-7343 Keep With Operator's Manual BACKHOE SUBFRAME KIT 65A, 75 & 85 BACKHOE CUB CADET AND KIOTI TRACTORS Make Model ROPS Cub Cadet 8454 x Kioti DK45, DK50, DK55 x BACKHOE AND SUBFRAME
DURABILT INDUSTRIES, LLC
 DURABILT INDUSTRIES, LLC Pocahontas, AR 72455 Phone: 870-892-4501 www.durabiltindustries.com 1 To the Owner/Operator/Dealer All implements with moving parts are potentially hazardous. There is no substitute
HT210 HAY TEDDER BUSH HOG Griffin Ave. Selma, AL Published 09/10 Part No C OPERATOR S MANUAL
 HT210 Published 09/10 Part No. 50068746C OPERATOR S MANUAL HAY TEDDER This Operator's Manual is an integral part of the safe operation of this machine and must be maintained with the unit at all times.
ROTARY TILLER. Operation, Service & Parts Manual For P-P/C Series. November 1996 (Rev. 4-05) FORM: PTillerBook.QXD
 FORM: PTillerBook.QXD") ROTARY TILLER Operation, Service & Parts Manual For P-P/C Series FORM: PTillerBook.QXD November 1996 (Rev. 4-05) TABLE OF CONTENTS Preparation......................................1 Assembly Instructions.............................2
ROTARY TILLER Operation, Service & Parts Manual For P-P/C Series FORM: PTillerBook.QXD November 1996 (Rev. 4-05) TABLE OF CONTENTS Preparation......................................1 Assembly Instructions.............................2
BUSH HOG LAND MAINTENANCE REPAIR PARTS MANUAL MODELS: RPM & RPM SECTION: 79
 BUSH HOG LAND MAINTENANCE REPAIR S MANUAL MODELS: -0 RPM & -000 RPM SECTION: 9 0 Griffin Ave. Selma, Al. 0 () - () -00 Parts Ordering -00-0- Fax -00-- www.bushhog.com April, 0 BUSH HOG/ LAND MAINTENANCE
SECTION V ASSEMBLY CAUTION THE FOLLOWING SAFETY PRECAUTIONS SHOULD BE THOROUGHLY UNDERSTOOD BEFORE ATTEMPTING MACHINE ASSEMBLY.
 SECTION V ASSEMBLY CAUTION THE FOLLOWING SAFETY PRECAUTIONS SHOULD BE THOROUGHLY UNDERSTOOD BEFORE ATTEMPTING MACHINE ASSEMBLY. 1. Wear personal protective equipment such as, but not limited to protection
CAM-LIFT WHEEL MOVE KIT 1500-SERIES S-DRIVE STANDARD CONVEYORS ASSEMBLY MANUAL
 CAM-LIFT WHEEL MOVE KIT ASSEMBLY MANUAL This manual applies to the following models: 1565, 1575, 1585, 1590, 15100 ORIGINAL INSTRUCTIONS Read this manual before using product. Failure to follow instructions
Quiet Collector. Model No & Up
 FORM NO. -8GB Rev A Quiet Collector Model No. 795-890000 & Up Operator s Manual IMPORTANT: Read this manual, and your tractor manual, carefully. They contain information about your safety and the safety
Operating and Assembly Manual
 Model 455-IC/PRO/H Operating and Assembly Manual Palmor Products Inc. 5225 Serum Plant Road Thorntown, IN 46071 03-08-12 SAFETY RULES Remember, any power equipment can cause injury if operated improperly
Operator s Manual & Repair Parts Manual. Do Not Use or Operate This Equipment Until You Have Read and Understand This Manual
 Operator s Manual & Repair Parts Manual Do Not Use or Operate This Equipment Until You Have Read and Understand This Manual The purpose of this manual is to explain maintenance requirements and adjustments
Model 452-DIC/DH. Operating and Assembly Manual
 . Model 452-DIC/DH Operating and Assembly Manual Palmor Products Inc. 5225 Serum Plant Road Thorntown, IN 46071 02-14-12 SAFETY RULES Remember, any power equipment can cause injury if operated improperly
KONGSKILDE 9200 DF Vertical Tillage - Assembly/Parts
 KONGSKILDE 9200 DF Vertical Tillage - Assembly/Parts Kongskilde 9200 *Model may not be exactly as shown. Kongskilde reserves the right to make changes to product designs and specifications without notice
ALAMO INDUSTRIAL WARRANTY REGISTRATION INFORMATION
 TEAR TEAR TEAR TEAR TEAR TEAR TEAR TEAR TEAR TEAR TEAR TEAR TEAR TEAR TEAR TEAR TEAR TEAR TEAR TEAR TEAR TEAR TEAR TEAR TEAR 1. PRINT FIRMLY. 2. REMOVE WHITE COPY FOR CUSTOMER RECORDS. 3. REMOVE YELLOW
EURO REEL
 Date Purchased Machine Serial No. Options The key number system in this parts book is arranged as follows: Please order parts by number - Key numbers with two circles denotes main assemblies. - Key numbers
Smart-Till. Models ST101, ST151, ST203, and ST303. HCC, inc st Avenue Mendota, IL
 Owners Manual Smart-Till Models ST101, ST151, ST203, and ST303 HCC, inc. 1501 1st Avenue Mendota, IL 61342 815-539-9371 www.hccincorporated.com C-1159 May 2010 Safety Most work related accidents are caused