<< FEATURES AND BENEFITS >>
|
|
|
- Gilbert Wiggins
- 5 years ago
- Views:
Transcription


1 PISTOL SLIDE MANUAL
2 TABLE OF CONTENTS FEATURES AND BENEFITS... 2 ASSEMBLY AND INSTALLATION INSTALLING TRIJICON RMR PLATE... 5 IMPORTANT SAFETY INFORMATION... 6 LIMITED WARRANTY

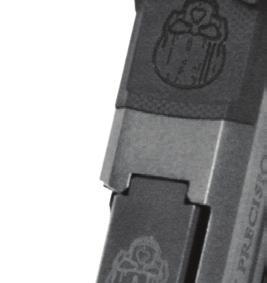
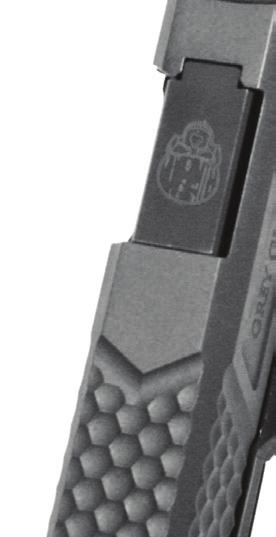
3 << FEATURES AND BENEFITS >> CONGRATULATIONS ON PURCHASING A GGP SLIDE The Grey Ghost Precision 19/17 Slide is a truly aftermarket slide engineered to increase accuracy and enhance functionality of your sidearm. We started with a billet of American made 17-4 stainless steel and machined the slide to our own specifications. Critical tolerances are held within for improved accuracy and performance without compromising the reliability and function that GLOCK pistols are known for. The slides are then finished with Black Nitride for outstanding corrosion resistance. The GGP 19/17 slide comes in two distinct patterns: V1 has uniquely designed angled serrations in the front and rear for improved slide manipulation. V2 has raised diamond checkering in front and rear for more aggressive grip texture. ACCURACY Our slides were designed specifically to enhance performance and increase accuracy when using a match grade barrel and quality ammunition. The key to accuracy is consistency. In order to achieve the best possible results, we recommend using high quality factory loaded ammunition along with proper assembly and maintenance of your firearm. 2
4 << ASSEMBLY AND INSTALLATION >> ASSEMBLY AND INSTALLATION INSTRUCTIONS You will need to field strip your Glock in order to install this slide. For instructions on disassembly, see your Glock Owners Manual. BEFORE FIELD STRIPPING YOUR GLOCK, ENSURE THE MAGAZINE IS REMOVED AND THE CHAMBER IS UNLOADED. VISUALLY VERIFY THE CHAMBER IS EMPTY! 3 To assemble a stripped slide, you will need the following parts (not included) Firing Pin & Spring Spring Cups Safety Plunger & Spring Complete Extractor with LCI Extractor Depressor Plunger Assembly Channel Liner Slide Cover Plate Recoil Spring and Guide Rod Assembly Front and Rear Sights Barrel
5 << ASSEMBLY AND INSTALLATION >> 1. With spring inserted into safety plunger, install into hole in underside of GGP slide. Depress plunger, ensuring it moves up and down unimpeded in it s pocket. 2. While depressing plunger, insert extractor into the slot with claw facing chamber. Release plunger and verify extractor is now secured into place. 3. Install Channel Liner fully into large channel in back of slide. 4. Install Firing Pin Assembly into same channel, firing pin facing toward chamber. 5. Install Extractor Depressor Plunger Assembly into smaller channel in rear of slide. 6. Install backplate by depressing the Firing Pin Assembly s spacer sleeve with a tool while sliding backplate into rear groove, until backplate overcomes the sleeve. 7. Depress Extractor Depressor Plunger Assembly with tool while pushing backplate into position. It will make a positive snap sound when installation is complete. 8. Install barrel and recoil spring assembly into the GGP slide. Barrel should drop in freely. Reassemble GGP slide onto your pistol frame, and verify operation by cycling slide and dry fire testing WITH AN UNLOADED CHAMBER. 4
6 5 << INSTALLING A TRIJICON RMR MOUNT PLATE >> YOU MUST USE THE 3/8 SCREWS PROVIDED WHEN MOUNTING AN RMR TO THE SLIDE OR DAMAGE TO INTERNALS MAY OCCUR! Depending on the model, the Grey Ghost Precision slide is provided with two sets of mounting screws. The two short screws (1/4 long) are used to install the Grey Ghost Precision RMR cover plate. The two longer screws (3/8 ) are used to mount the Trijicon RMR to the slide. The screws provided must be used or damage to the slide internals may occur. DO NOT USE THE SCREWS INCLUDED WITH THE TRIJICON RMR OPTIC! It is recommended to use a drop of medium hold thread locking compound such as Loctite 242 to keep the screws from backing out over time. CAUTION overtightening screws may result in thread damage. Torque screws to 9 in/lbs. Installing the Trijicon RMR may require some shaving of the optic to create a tight fit to the slide. ALL MICRO RED DOT OPTICS HAVE VERY SLIGHT VARIANCES IN MANUFACTURING TOLERANCES. GGP SLIDES WITH RMR CUTS ARE PRECISELY MACHINED FOR THE AVERAGE RMR FOOTPRINT. IF YOUR RMR DOESN T FIT, YOUR SLIDE MAY REQUIRE HAND FITTING. CONTACT GGP FOR SERVICE AT OR SERVICE@GREYGHOSTPRECISION.COM
7 << IMPORTANT SAFETY INFORMATION >> CAREFULLY READ THIS INSTRUCTION MANUAL PRIOR TO INSTALLING THIS SLIDE AND FIRING YOUR PISTOL. If unfamiliar with firearms, seek further advice through safe handling courses run by your local gun clubs, NRA approved instructor, or similar qualified organizations. CARELESS HANDLING COULD RESULT IN PROPERTY DAMAGE, INJURY OR DEATH. ALWAYS TREAT ANY FIREARM AS IF IT IS LOADED. Use only clean, dry, high quality commercially manufactured ammunition in good condition which is appropriate to the caliber of your chosen firearm. We do not recommend the use of remanufactured or hand loaded ammunition because it may damage your firearm. Use of improper ammunition will invalidate your warranty. ALWAYS KEEP THE GUN POINTED IN A SAFE DIRECTION NEVER LOAD THE GUN UNTIL READY TO USE KEEP YOUR FINGER OFF THE TRIGGER UNTIL READY TO SHOOT. 6
8 7 << LIMITED WARRANTY >> FOR OWNERS WITHIN THE UNITED STATES GREY GHOST PRECISION, LLC - FORM OF LIMITED WARRANTY Standard Conditions of Sale All Grey Ghost Precision Products, hereafter referred to as products sold by Grey Ghost Precision (hereafter referred to as the Company ) are subject to these terms and conditions of sale. The Company warrants that its Grey Ghost Precision Products, if properly stored, transported and used, will be free from defects in materials and workmanship during the warranty period. Warranty Period Labor - One (1) year. Parts - For the lifetime of the original purchaser. Warranty Service To obtain warranty service, the purchaser must deliver the Grey Ghost Precision Product to the point of purchase and submit a written service request. A written service request must include: (1) proof of purchase; (2) a copy of these terms and conditions of sale; and (3) an explanation of the problem.
9 Extent of Limited Warranty If the Grey Ghost Precision Product which is the subject of this Limited Warranty fails during the warranty period for reasons covered by this Limited Warranty, and the purchaser submits the written service request required under these terms and conditions of sale, at its option, the Company will: REPAIR THE GREY GHOST PRECISION PRODUCT OR REPLACE THE GREY GHOST PRECISION PRODUCT WITH A GREY GHOST PRECISION PRODUCT THAT IS FUNCTIONALLY AT LEAST EQUAL TO THAT OF THE GREY GHOST PRECISION PRODUCT BEING REPLACED. This Limited Warranty does not cover damages due to external causes including, but not limited to, accidents, misuse, neglect, alteration, repair, improper maintenance, or normal wear. Any usage or care not in accordance with this manual voids this warranty, and any damage caused by such usage or care is not covered under this warranty. This warranty is limited to the original purchaser and is not transferable. 8
10 Warranty Limitations and Exclusions Exhibit E - Grey Ghost Precision Limited Warranty for Owners Within the United States THESE WARRANTIES REPLACE ALL OTHER WARRANTIES, EXPRESS OR IMPLIED INCLUDING, BUT NOT LIMITED TO, THE IMPLIED WARRANTIES OF MERCHANTABILITY AND FITNESS FOR A PARTICULAR PURPOSE. THE COMPANY MAKES NO EXPRESS WARRANTIES BEYOND THOSE STATED HEREIN. THE COMPANY DISCLAIMS ALL OTHER WARRANTIES, EXPRESS OR IMPLIED, INCLUDING, WITHOUT LIMITATION, THE IMPLIED WARRANTIES OF MERCHANTABILITY AND FITNESS FOR A PARTICULAR PURPOSE. SOME LAWS DO NOT ALLOW THE EXCLUSION OF IMPLIED WARRANTIES SO THIS LIMITATION MAY NOT APPLY TO YOU. IF THESE LAWS APPLY, THEN ALL EXPRESS AND IMPLIED WARRANTIES ARE LIMITED IN DURATION TO THE LIMITED WARRANTY PERIOD. NO WARRANTIES APPLY AFTER THAT PERIOD. SOME LAWS DO NOT ALLOW LIMITATIONS ON HOW LONG AN IMPLIED WARRANTY LASTS, SO THIS LIMITATION MAY NOT APPLY TO YOU. The use of any sample or model during the negotiations leading to the purchase of this Grey Ghost Precision Product serves merely to indicate a type of product that will be tendered to the purchaser. These samples or models create no warranty that the product will conform to the samples or models. 9
11 Limitations of Liability THE COMPANY S RESPONSIBILITY UNDER THIS, OR ANY OTHER WARRANTY, IMPLIED OR EXPRESSED, IS LIMITED TO REPAIR OR REPLACEMENT, AS SET FORTH ABOVE. THIS REMEDY IS THE SOLE AND EXCLUSIVE REMEDY FOR ANY BREACH OF WARRANTY. THE COMPANY IS NOT RESPONSIBLE FOR CLAIMS FOR INDIRECT, SPECIAL, INCIDENTAL, OR CONSEQUENTIAL DAMAGES RESULTING FROM ANY BREACH OF WARRANTY OR UNDER ANY OTHER LEGAL THEORY, INCLUDING, BUT NOT LIMITED TO, LOST PROFITS, DOWN TIME, AND ANY DAMAGE TO OR REPLACEMENT OF EQUIPMENT AND PROPERTY. SOME JURISDICTIONS DO NOT ALLOW THE EXCLUSION OR LIMITATION OF INCIDENTAL OR CONSEQUENTIAL DAMAGES, SO THE ABOVE LIMITATIONS OR EXCLUSIONS MAY NOT APPLY TO THIS LIMITED WARRANTY GIVES YOU SPECIFIC LEGAL RIGHTS, AND YOU MAY ALSO HAVE OTHER RIGHTS THAT VARY FROM JURISDICTION TO JURISDICTION. Assumptions of Risk Purchaser assumes all risk and liability for loss. Company shall not be responsible for injuries to person or property arising out of the use or misuse of the Grey Ghost Precision Products. To obtain a replacement manual, send an to: service@greyghostprecision.com GLOCK is a federally registered trademark of Glock, Inc. and is one of many trademarks owned by Glock, Inc. or Glock Ges.m.b.H. Grey Ghost Precision is not affiliated with nor endorsed by Glock, Inc. or Glock Ges.m.b.H. 10
12 GREY GHOST PRECISION LLC TH STREET SOUTH, LAKEWOOD WA CUSTOMER SERVICE: GREYGHOSTPRECISION.COM
ACP ADAPTIVE CARBINE PLATFORM
 ACP ADAPTIVE CARBINE PLATFORM Universal Pistol-to-Carbine Adapter OWNER S MANUAL ADAPTIVE CARBINE PLATFORM Universal Pistol-to-Carbine Adapter The Adaptive Carbine Platform is a universal, aircraft-grade
SHOTLOCK OWNER S MANUAL TABLE OF CONTENTS -3-
 SHOTLOCK OWNER S MANUAL Thank you for purchasing a ShotLock Solo Vault. Now, you can enjoy peace-of-mind knowing your personal defense shotgun is always close, secure and ready. When the first-responder
Do not install and/or operate this safety product unless you have read and understand the safety information contained
 Installation and Operation Instructions ED3766 TRI Color Directional LED Available in various color combinations, the ED3766 Directional LED is a surface mount, tri-color warning light that is ideal for
PLEASE ENSURE THE JUMP STARTER IS FULLY CHARGED PRIOR TO FIRST USE.
 PLEASE ENSURE THE JUMP STARTER IS FULLY CHARGED PRIOR TO FIRST USE.. (1) RG1000 EMERGENCY JUMP STARTER PORTABLE POWER SUPPLY (1) 3-IN-1 USB CABLE (1) RG1000 EMERGENCY JUMP STARTER PORTABLE POWER SUPPLY
Model AS-RC3260 TV Cart. Rolling Cart for Audio Mount System & Flat Panel TVs
 Model AS-RC3260 TV Cart Rolling Cart for Audio Mount System & Flat Panel TVs GETTING STARTED Introduction Congratulations on the purchase of your new Helios AS-RC3260 Rolling Cart. For maximum benefit,
PVI 1800/PVI Residential/Commercial Grid-Tied Photovoltaic Inverter WARRANTY MANUAL. Subject to Change REV , Solectria Renewables
 PVI 1800/PVI 2500 WARRANTY MANUAL Residential/Commercial Grid-Tied Photovoltaic Inverter 2009, Solectria Renewables Subject to Change REV 10.09 1 Product Warranty & RMA Policy 1.1 Warranty Policy The Solectria
TERMS OF USE TERMS AND CONDITIONS. Plumbing and Heating Products (PL-WR)
") TERMS OF USE 1. Watts pricing and product data is subject to change without notice and such changes supersede all previous versions. 2. Watts data is to be used as provided. Watts is not responsible for
TERMS OF USE 1. Watts pricing and product data is subject to change without notice and such changes supersede all previous versions. 2. Watts data is to be used as provided. Watts is not responsible for
EQUIPMENT Instructions. Loctite Pneumatic 300 ml Cartridge Dispenser Part Number
 EQUIPMENT Instructions Loctite Pneumatic 300 ml Cartridge Dispenser Part Number 1294304 1. Unpacking and Inspection Carefully unpack the Loctite Pneumatic 300 ml Cartridge Dispenser and examine the items
User Instruction Manual
 RAIL LOCK SPRING COMPRESSOR User Instruction Manual For Spring and Gas Piston Rifles and Pistols V1 03/16 Contents Parts of the Rail Lock compressor...3 Disassembling your rifle or pistol...4-6 Assembling
PVI 60KW, PVI 82KW, PVI 95KW
 PVI 60KW PVI 82KW PVI 95KW WARRANTY MANUAL Commercial, Grid-Tied Photovoltaic Inverters 2008, Solectria Renewables LLC Subject to Change DOC-020099 rev 024 1 1 Product Warranty & RMA Policy Warranty Policy
MLS KICK-OFF TABLETOP SOCCER TABLE ASSEMBLY INSTRUCTIONS
 MLS KICK-OFF TABLETOP SOCCER TABLE ASSEMBLY INSTRUCTIONS NGD1028 1 THANK YOU! Thank you for your purchase of this Harvil product. We work around the clock and around the globe to ensure that Harvil products
Watts Series CSM-61. Flow Measurement/Balancing Valves Sizes: 1 1 4", 1 1 2", 2", 2 1 2", and 3" (32, 40, 50, 65 and 80mm) Installation Instructions
 Installation Instructions") Watts Series CSM-61 Measurement/Balancing Valves Sizes: 1 1 4", 1 1 2", 2", 2 1 2", and 3" (32, 4, 5, 65 and 8mm) Installation Instructions IS-CSM-61-L Watts Measurement/Balancing Valves are available
Watts Series CSM-61 Measurement/Balancing Valves Sizes: 1 1 4", 1 1 2", 2", 2 1 2", and 3" (32, 4, 5, 65 and 8mm) Installation Instructions IS-CSM-61-L Watts Measurement/Balancing Valves are available
Model:M5B/M5W/M5N. Installation Guide. Specifications Desktop Weight Capacity Keyboard Tray Weight Capacity Height Adjustable Range
 Model:M5B/M5W/M5N Installation Guide Website: www.flexispot.com Tel: 1-855-421-2808 Specifications Desktop Weight Capacity Keyboard Tray Weight Capacity Height Adjustable Range 33 Ibs (15 KG) 4.4 Ibs (2
Installation Instructions
 85-4209 rev. 05 11-18 Installation Instructions Thank you for purchasing this anti-sway bar kit. Please read through these instructions before installation. Factory Replacement Anti-Sway Bar Kit part #1129-135
Model T2642 Wall Mount. Television Wall Mount with Tilt Option
 Model T2642 Wall Mount Television Wall Mount with Tilt Option Getting Started Introduction Congratulations on the purchase of your new Audio Solutions T2642 Television Wall Mount. For maximum benefit,
SUNTURA SOLAR TRACKER
 WindyNation SUNTURA SOLAR TRACKER SOT-TRKS-NF User s Manual Page 1 of 10 WindyNation 08/09/2012 Table of Contents 1 Introduction... 3 1.1 Limited Warranty... 3 1.2 Restrictions... 3 1.3 Warranty Claims
Model AS-FM64 Wall Mount. Full Motion Television Wall Mount
 Model AS-FM64 Wall Mount Full Motion Television Wall Mount Getting Started Introduction Congratulations on the purchase of your new Audio Solutions AS-FM64 Television Wall Mount. For maximum benefit, please
NEW GEN OWNER S MANUAL
 NEW GEN OWNER S MANUAL For Models: LT-ELP223Q LT-ELP116Q 1 2! Turn off the light when not in use to conserve battery power. CAUTION! If you need to mount the flashlight onto a firearm, make sure firearm
Installation Instructions
 85-3511 rev. 04 11-15 Installation Instructions Polyurethane Bushing Kit for Ford F-53 (Front) (replaces OE bushings and brackets) part #4139-127 1-5/8 diameter INTRODUCTION Thank you for purchasing this
INSTALL GUIDE Silverado/Sierra L/6.2L
 INSTALL GUIDE 2014-2017 Silverado/Sierra 1500 5.3L/6.2L TABLE OF CONTENTS 3 GETTING STARTED 3 PARTS LIST 4 INSTALLATION INSTRUCTIONS 4 REMOVING THE STOCK INTAKE ASSEMBLY 7 INSTALLING THE AIR FILTER 8 INSTALLING
Model FM2642 Wall Mount. Full Motion Television Wall Mount
 Model FM2642 Wall Mount Full Motion Television Wall Mount Getting Started Introduction Congratulations on the purchase of your new Audio Solutions FM2642 Television Wall Mount. For maximum benefit, please
20250 Module Installation Guide
 20250 Module Installation Guide 2013.5-2017 RAM 6.7L Cummins Up to 90HP Gain 1-3 MPG Fuel Savings AgDieselSolutions.com Adjustable switch connector Power +12 volts (Red wire) & Ground (Black wire) Injector
Installation and Operation Instructions Safety Director Arrow
 Installation and Operation Instructions Safety Director Arrow! WARNING! Failure to install or use this product according to manufacturers recommendations may result in property damage, serious bodily/personal
INSTALL GUIDE Dodge/RAM 5.7L HEMI
 INSTALL GUIDE 2009-2017 Dodge/RAM 5.7L HEMI TABLE OF CONTENTS 3 GETTING STARTED 3 PARTS LIST 4 INSTALLATION INSTRUCTIONS 4 REMOVING THE STOCK INTAKE ASSEMBLY 6 INSTALLING THE AIR FILTER 7 INSTALLING THE
Installation Instructions
 85-3195 rev. 12 04-18 Installation Instructions Thank you for purchasing this antisway bar kit. Please read through these instructions before installation. Part #1139-117 Rear Anti-Sway Bar Kit 1½ diameter
MLS DEFENDER SOCCER TABLE ASSEMBLY INSTRUCTIONS
 MLS DEFENDER SOCCER TABLE ASSEMBLY INSTRUCTIONS NGD1032 THANK YOU! Thank you for your purchase of this Harvil product. We work around the clock and around the globe to ensure that Harvil products maintain
ASSEMBLY / OPERATION INSTRUCTIONS. Low Profile Motorcycle Dolly
 ASSEMBLY / OPERATION INSTRUCTIONS 1,500LB CAPACITY Low Profile Motorcycle Dolly Model: 03-CG1500-01(B1) WARNING BEFORE USE PLEASE READ ALL WARNINGS AND INSTRUCTIONS TO PREVENT SERIOUS INJURY Drop-Tail
INSTALLATION & OPERATING INSTRUCTIONS: REVOLUTION SPINEBOARD ATTACHMENT WARNING
 INSTALLATION & OPERATING INSTRUCTIONS: REVOLUTION SPINEBOARD ATTACHMENT LOAD CAPACITY: 500 LBS [227 kg] MANDATORY: LEAVE THIS MANUAL WITH LIFT OWNER WARNING 1. READ AND FOLLOW ALL INSTRUCTIONS. LIFT SAFETY
Slimline Duals Installation Instructions Harley-Davidson Touring Models 2009-Current
 Slimline Duals Installation Instructions Harley-Davidson Touring Models 2009-Current Thank you for buying a Rinehart Racing exhaust system. We are committed to providing premium products that with proper
PART NUMBER: F-706RLSS REVOLUTION LIFT: SLING-SEAT OPTION
 PART NUMBER: F-706RLSS REVOLUTION LIFT: SLING-SEAT OPTION 500 LB. [227 kg] MAXIMUM CAPACITY MANDATORY LEAVE THIS MANUAL WITH LIFT OWNER - WARNING- IMPORTANT SAFETY INSTRUCTIONS 1. READ AND FOLLOW ALL INSTRUCTIONS.
LT-EL138 LED Flashlight
 LT-EL138 LED Flashlight 1 2! CAUTION! If you need to mount the flashlight onto a firearm, make sure firearm is not loaded before installation. Remove magazine and examine chamber. Use safe handling procedures
Read and follow all instructions. Safety can only be ensured if the walker is assembled and operated according to these instructions.
 Aqua Walker 9889 Garrymore Ln Missoula, MT 59808 888-687-3552 +1-406-549-0769 www.aquacreek.com Manual PART #: F-605UW 300 LB. [136 kg] MAXIMUM WEIGHT CAPACITY MANDATORY LEAVE THIS MANUAL WITH WALKER OWNER
Do not install and/or operate this safety product unless you have read and understand the safety information contained in this manual.
 Installation and Operation Instructions MR Tri- Light Available in various color combinations, the MR Directional LED surface mount, tri-color warning light is ideal for a wide variety of auxiliary warning
Female Plug. connecting to Fuel Quantity
 **Ag Diesel Solutions recommends replacing the Transorb/Suppressor Diode before the installation of this module*** Red wire = 12V Constant power. Male Plug connecting to Fuel Quantity Valve Black wire
SUNTURA HD SOLAR TRACKER
 WindyNation SUNTURA HD SOLAR TRACKER SOT-TRKS-NFHD User s Manual Page 1 of 11 WindyNation 08/09/2012 Table of Contents 1! Introduction... 3! 1.1! Limited Warranty... 3! 1.2! Restrictions... 3! 1.3! Warranty
Straight-Bore Clutch LSCC-32, 44, 54
 Straight-Bore Clutch LSCC-32, 44, 54 1 In accordance with Nexen s established policy of constant product improvement, the specifications contained in this manual are subject to change without notice. Technical
MaxLite LED Linear HighBay Fixtures
 Operating Instructions MaxLite LED Linear HighBay Fixtures General Safety Information To reduce the risk of death, personal injury or property damage from fire, electric shock, falling parts, cuts/abrasions,
EZ-R7 T-Plug. Universal 7-Pin Heavy Duty Plug For Vehicles equipped with 7-Way Trailer Connectors. Installation Instructions and Product Warranty
 EZ-R7 T-Plug Universal 7-Pin Heavy Duty Plug For Vehicles equipped with 7-Way Trailer Connectors Installation Instructions and Product Warranty Professional Installation Required Thank you for purchasing
37SCENE 46SCENE 79SCENE
 Installation and Operation Instructions LED SCENE LIGHT LED SCENE LIGHT 37SCENE 46SCENE 79SCENE 37SCENE 46SCENE Introduction The 37SCENE, 46SCENE, 79SCENE LED Scene Lights are designed for the emergency
7.3L POWERSTROKE BANJO BOLT KIT Fits L Powerstroke Diesel. Installation Guide
 7.3L POWERSTROKE BANJO BOLT KIT Fits 94-03 7.3L Powerstroke Diesel Installation Guide INSPECT CONTENTS OF THIS KIT THOROUGHLY BEFORE STARTING THE INSTALLATION PROCESS! IF YOU FIND A PROBLEM WITH YOUR PACKAGE:
DAP-625S and DAP-875S
 AIR CHAMP PRODUCTS DAP-625S and DAP-875S (i) FORM NO. L-20078-B-0501 In accordance with Nexen s established policy of constant product improvement, the specifications contained in this manual are subject
SOLAR DASH CHARGING SYSTEM USER GUIDE
 SOLAR DASH CHARGING SYSTEM Doc 1.01 INST049 INSTALLATION STEP 1 Place 20 watt solar panel in the dash of the vehicle facing up. Note: For ideal results position the vehicle in a manner in which the solar
INSTALL GUIDE Ford F L
 INSTALL GUIDE 2011-2014 Ford F-150 5.0L TABLE OF CONTENTS 3 GETTING STARTED 3 PARTS LIST 4 INSTALLATION INSTRUCTIONS 4 REMOVING THE STOCK INTAKE ASSEMBLY 5 INSTALLING THE AIR FILTER 6 INSTALLING THE HOUSING
Users Guide for Ac-sync
 Problem solved. Users Guide for Ac-sync Thank you for choosing Anywhere Cart! The AC-SYNC is designed to sync, charge and store 1-36 ipads or tablets. Adjustable device divider bays allow fitment of any
Installation Instructions
 1 Installation Instructions SharkBite Connection System The SharkBite System The SharkBite connection system uses an advanced push-fit design that works in two stages. When the tube is inserted into the
Read all instructions before installing and using. Installer: This manual must be delivered to the end user.
 Installation Instructions Vacuum / Magnet Mount Kits IMPORTANT! Read all instructions before installing and using. Installer: This manual must be delivered to the end user.! WARNING! Failure to install
WARNING. Laser light is extremely bright and can potentially cause permanent eye damage or interfere with critical operations if improperly used.
 TG7630G / TG7630R TRUGLO, Inc. 525 International Parkway RICHARDSON, TEXAS 75081 MADE IN CHINA Green Laser: POWER OUTPUT
Model Beretta Tactical Light. Users Manual. Beretta 1200 PF 12 Gauge Shotgun Protected by US. Patent 4,856,218 Revision D 7_1_97
 Model 306 606 Beretta Tactical Light Users Manual Beretta 1200 PF 12 Gauge Shotgun Protected by US. Patent 4,856,218 Revision D 7_1_97 Introduction The Model 306 & 606 Tactical Lights provide a rugged
1955 & 1956 CHEVROLET CAR INSTALLATION INSTRUCTIONS
 650-587-00 Rev. B 955 & 956 CHEVROLET CAR Contents of Package # Component Picture Qty. #6 x 5/6, Screw Base Plate 5.3 #6, Lock washer Bezel 5.5 5.6 Light bulb and socket, blue Lower Steering Column Cover
IMPROVED BUTTON CONTROLS NEW TOMAHAWK USER MANUAL
 NEW IMPROVED BUTTON S TOMAHAWK USER MANUAL MC TABLE OF CONTENTS SPECIFICATIONS Specifications... 1 FL1 STANDARD MAX HIGH MEDIUM LOW Components... 4 Battery Installation... 4 Basic Functions... 5 Lockout/Ready
RipTide. Brewing Pump. Assembly, Operation, & Maintenance
 RipTide Brewing Pump Assembly, Operation, & Maintenance Congratulations on your purchase, and thank you for selecting the RipTide brewing pump from Blichmann Engineering. We are confident that it will
WARRANTY POLICY. Grid-Tied Photovoltaic Inverters. Revision D. 2014, Solectria Renewables, LLC DOCIN
 WARRANTY POLICY Revision D 2014, Solectria Renewables, LLC DOCIN-070360 1 Product Warranty & RMA Policy 1. Warranty Policy Warranty Registration: It is important to have updated information about the inverter
Installation Instructions
 85-4341 rev. 04 10-15 Installation Instructions Thank you for purchasing this antisway bar kit. Please read through these instructions before installation. Rear Anti-Sway Bar Kit for Chevy 2500/3500/4500
Frekote Adjustable Spray Applicator 6 Extension Extension Extension EQUIPMENT Operation Manual
 Frekote Adjustable Spray Applicator 6 Extension 98183 12 Extension 98184 24 Extension 98185 EQUIPMENT Operation Manual 1 Please Observe The Following 1.1 Emphasized Sections Warning! Refers to safety regulations
30100 Module Installation Guide L
 30100 Module Installation Guide 1997-2006 12.0L Mack Engines Up to 30% HP Gain 10-20% Fuel Savings AgDieselSolutions.com 1997-2006 Mack 12.0L Engine Module +12 volts red wire. Ground black wire Injector
CONGRATULATIONS. on your purchase of a Viridian Grip Laser, the most advanced sighting device available.
 GRIP LASER MANUAL CONGRATULATIONS on your purchase of a Viridian Grip Laser, the most advanced sighting device available. IF YOU HAVE TECHNICAL OR SERVICE ISSUES WITH THIS LASER, DO NOT RETURN TO PRODUCT
Installation Power Management Unit Battery Cables and Battery Harness
 Installation Power Management Unit Battery Cables and Battery Harness Important Safety Messages SAVE THESE INSTRUCTIONS - This manual contains important instructions that should be followed during installation
Penguin Gentoo 600B Cordless Sprayer User s Manual
 Penguin Gentoo 600B Cordless Sprayer User s Manual Please read before use. Serial Number: Date of Purchase: Distributor: LIMITED WARRANTY POLICY Masterclean Products, LLC endeavors to provide high quality
Model 617 Benelli Tactical Light. Users Manual. Benelli Shotgun M1 Super Gauge Serial No. M and later Protected by US.
 Model 617 Benelli Tactical Light Users Manual Benelli Shotgun M1 Super 90 12 Gauge Serial No. M104801 and later Protected by US. Patent 4,856,218 Revision D 7-1_99 Introduction The Model 617 Tactical Light
Operator s Manual. Light & Laser Sight. GripSense
 Light & Laser Sight WITH TM GripSense ACTIVATION Operator s Manual RUGER LC9S LC9 LC380 CF-LC9-C-R CF-LC9-C-G S&W M&P SHIELD TM 9mm.40 S&W CF-SHIELD-C-R CF-SHIELD-C-G S&W M&P SHIELD TM.45 CF-SHIELD45-C-R
TABLE OF CONTENTS. Important Safety Information 3. Parts List 4
 1 TABLE OF CONTENTS Important Safety Information 3 Parts List 4 Assembling THERACK 5 7 How To Unfold THERACK 8 How To Fold THERACK 9 THERACK Levels 10 Warranty 11 2 IMPORTANT SAFETY INFORMATION IMPORTANT:
Watts Series CSM-91. Grooved/Flanged Flow Measurement/Balancing Valves. Installation and Operating Instructions. Table of Contents. 1.
 Watts Series CSM-9 Grooved/Flanged Flow Measurement/Balancing Valves Installation and Operating Instructions IS-CSM-9 Table of Contents Item Description Page. Installation of Valve Angle Design 2. Installation
ASSEMBLY / OPERATION INSTRUCTIONS. Low Profile / Stand-Up Motorcycle Dolly
 ASSEMBLY / OPERATION INSTRUCTIONS 1,500LB CAPACITY Low Profile / Stand-Up Motorcycle Dolly Model: 03-CGPR1500-01(C) WARNING BEFORE USE PLEASE READ ALL WARNINGS AND INSTRUCTIONS TO PREVENT SERIOUS INJURY
INVERTER HARNESS INSTALLATION FOR FREIGHTLINER CASCADIA
 FOR FREIGHTLINER CASCADIA Part #: P808 1004FC 08/05/2014 Doc 1.04 INST065 Page 1 Step 1: Unpack the plate assembly and both positive and negative cables. INSTALLATION INSTRUCTIONS Step 2: Insert the negative
Installation Instructions BULL BAR (Part # 51033&51034) SIERRA 1500 / SILVERADO 1500
 SIERRA 1500 / SILVERADO 1500") PARTS LIST: 1 Bull Bar 2 12-1.75mm x 140mm Hex Head Bolts 1 Driver/Left Mounting Bracket 3 s 1 Passenger/Right Mounting Bracket 5 12m ID x 29mm OD x 3mm Flat Washers 1 12-1.75mm x 35mm Bolt Plate 3 s 4
PARTS LIST: 1 Bull Bar 2 12-1.75mm x 140mm Hex Head Bolts 1 Driver/Left Mounting Bracket 3 s 1 Passenger/Right Mounting Bracket 5 12m ID x 29mm OD x 3mm Flat Washers 1 12-1.75mm x 35mm Bolt Plate 3 s 4
AltRider DualControl Brake System for BMW R1200GSW INSTALLATION INSTRUCTIONS
 made in USA AltRider DualControl Brake System for BMW R00GSW INSTALLATION INSTRUCTIONS The most up to date instructions can be downloaded from the product page at altrider.com, under the instructions tab.
Mercedes MBE 906/ L & 7.2L Engine Module. Part # Installation Instructions
 1999-2006 Mercedes MBE 906/926 6.4L & 7.2L Engine Module Part # 15000 Installation Instructions 15000_revC 1999-2006 Mercedes 6.4L & 7.2L Engine Module +12 volts red wire. Ground black wire Injector Terminals
HURRICANE 54-IN FOOSBALL TABLE ASSEMBLY INSTRUCTIONS
 HURRICANE 54-IN FOOSBALL TABLE ASSEMBLY INSTRUCTIONS Please Do Not Hesitate to Contact Our Consumer Hotline at 800-759-0977 with Any Questions That May Arise During Assembly or Use of This Product! NG1033F
PERMANENTLY BONDED IN,
 Supplied with your new frame are the following components: #1) One roll pin to secure the rubber rear grip insert to the frame, #2) a new style takedown bar spring, and #3) a Buffer Technologies polymer
Installation & Operators Manual
 Installation & Operators Manual Model Serial Number Purchase Date 2007-2008 SegVator, LLC Patent Pending All Rights Reserved Important Safety Information Make sure the vehicle has a properly installed
ATTENTION: PLEASE READ AND UNDERSTAND ALL INSTRUCTIONS AND WARNINGS BEFORE ASSEMBLING, INSTALLING OR USING THIS PRODUCT.
 INSTALLATION MANUAL PROMASTER MOUNTING CHANNEL KIT (2115-0-01) ATTENTION: PLEASE READ AND UNDERSTAND ALL INSTRUCTIONS AND WARNINGS BEFORE ASSEMBLING, INSTALLING OR USING THIS PRODUCT. 1/2 in Wrench/ Socket
User s Manual TX MHz Powercaster TM Transmitter
 PRODUCT DESCRIPTION The Powercast TX91501 Powercaster transmitter is specially designed to provide both power and data to end devices containing the Powercast P2110 or P1110 Powerharvester receivers. The
COVER PAGE CUSTOM QUICK INSTALL MOUNTING KIT NOTE!
 COVER PAGE NOTE! Prior to installing product, please visit one of our websites to assure your kit contains the most recent revision to installation instruction and verify vehicle application. www.reeseproduct.com
Fifth Wheel Power Hitch Operations Manual
 Fifth Wheel Power Hitch Operations Manual ITD1253 Fifth Wheel Power Hitch 208 587 7960 www.intheditch.com This page is intentionally left blank. Operations Manual 1 TABLE OF CONTENTS TABLE OF CONTENTS...
INSTALL GUIDE Jeep Wrangler JK 3.6L V6
 INSTALL GUIDE 2012-2017 Jeep Wrangler JK 3.6L V6 TABLE OF CONTENTS 3 GETTING STARTED 3 PARTS LIST 4 INSTALLATION INSTRUCTIONS 4 REMOVING THE STOCK INTAKE ASSEMBLY 6 INSTALLING THE HOUSING 7 INSTALLING
Electric Pilot System
 Electric Pilot System Assembly, Operation & Maintenance Congratulations on your purchase, and thank you for selecting the Pro Pilot System from Blichmann Engineering. We are confident that it will provide
ValveSentry USER S MANUAL PLEASE READ CAREFULLY AND SAVE
 ValveSentry USER S MANUAL IMPORTANT! PLEASE READ CAREFULLY AND SAVE This user s manual contains important information about your ValveSentry device s operation. If you are installing this ValveSentry device
JDCR2000 Module Installation Guide
 Up to 30% More Horsepower 10-20% Fuel Savings John Deere 4.5L, 8.1L & 9.0L Tier III Denso Common Rail Engines JDCR2000 Module Installation Guide AgDieselSolutions.com FEMALE FUEL PRESSURE CONNECTOR (FPC)
15100 Module Installation Guide Mercedes EPA07 w/dpf
 15100 Module Installation Guide 2007-2009 Mercedes EPA07 w/dpf 7.2L Engines Up to 30% HP Gain 10-20% Fuel Savings AgDieselSolutions.com 2007-2009 Mercedes 7.2L Engine Module +12 volts red wire. Ground
Woolich Racing. Bike Harness Installation Instructions Hayabusa Gen 2 (08+)
") Woolich Racing Bike Harness Installation Instructions Hayabusa Gen 2 (08+) 1) Introduction To connect your Woolich Racing product to the ECU ( Engine Control Unit or computer) in your bike you need to
Woolich Racing Bike Harness Installation Instructions Hayabusa Gen 2 (08+) 1) Introduction To connect your Woolich Racing product to the ECU ( Engine Control Unit or computer) in your bike you need to
BC Brake Caliper. (i) MEX (55) QRO (442) MTY (81) DIST. AUTORIZADO
 MEX (55) QRO (442) MTY (81) DIST. AUTORIZADO") MEX (55) 5 6 QRO (44) 95 7 60 MTY () 54 0 BC Brake Caliper (i) FORM NO. L-0066-B-040 In accordance with Nexen s established policy of constant product improvement, the specifications contained in this
MEX (55) 5 6 QRO (44) 95 7 60 MTY () 54 0 BC Brake Caliper (i) FORM NO. L-0066-B-040 In accordance with Nexen s established policy of constant product improvement, the specifications contained in this
LED 3rd Brake Light Ring
 RING_OF_FIRE_A4.qxp_A4 1/18/18 12:19 PM Page 1 LED 3rd Brake Light Ring with Y Adapter For 2007-2018 JK & JKU Wrangler Vehicles: #12052.0904 PARTS LIST: LED 3rd Brake Light Ring - QTY 1 Y Adapter Wiring
Installation Instructions Receiver Rack (Part # 7700) Universal Application
 Universal Application") NOTE: Carefully read entire instructions thoroughly before attempting to install this part. Parts Included Qty Tools Needed 2 Draw Bar 1 Ratchet Racks 2 Socket Set Curved Support Bars 2 Wrench Set Connecting
NOTE: Carefully read entire instructions thoroughly before attempting to install this part. Parts Included Qty Tools Needed 2 Draw Bar 1 Ratchet Racks 2 Socket Set Curved Support Bars 2 Wrench Set Connecting
JD2800 Module Installation Guide
 Up to 30% More Horsepower 10-20% Fuel Savings John Deere 9.0L Tier III Denso Common Rail Engines JD2800 Module Installation Guide AgDieselSolutions.com Ground Terminal Power (+12V constant) Terminal Injector
Parts Manual. Spray Gun Series Master II. Issue /09/2017 Ref. NR ENG
 Spray Gun Series Master II Issue 3.2 27/09/2017 Ref. NR-00020-ENG Before starting or carrying out maintenance work on the MASTER II gun, please carefully read all the technical and safety documentation
Installation manual. Front leveling kit. Part # Part # Important customer information: Ram WD Ram WD
 Installation manual Front leveling kit 2014-2018 Ram 2500 4WD 2013-2018 Ram 3500 4WD Part # 32909 sj10182013rev.02 Part # 32909 2014-2018 Ram 2500 4WD 2013-2018 Ram 3500 4WD Front leveling kit Part # Description
Installation manual. 2 front / 1 rear spacer kit Jeep Wrangler JK 2 & 4 door Part # 42005
 Part # 42005 2007-2015 Jeep Wrangler JK 2 & 4 door 2 front / 1 rear spacer kit Parts list: Part # Description Qty. 42005-01 Front coil spring spacers 2 42005-02 Rear coil spring spacers 2 42005INST Instruction
Installation Instructions
 85-4592 rev. 08 02-18 Installation Instructions Thank you for purchasing our sway bar kit. Please read through these instructions before installation. Auxiliary Rear Anti-Sway Bar Kit for Ford F53 part
LIFT NAME PART NUMBER SETBACK (min) SETBACK (max)
 SETBACK (max)") Revolution 9889 Garrymore Ln Missoula, MT 59808 888-687-3552 +1-406-549-0769 www.aquacreek.com Wheelchair Attachment PART #: F-705S3 WEIGHT CAPACITY: 350 POUNDS - STANDARD REVOLUTION 300 POUNDS - DEEP
Revolution 9889 Garrymore Ln Missoula, MT 59808 888-687-3552 +1-406-549-0769 www.aquacreek.com Wheelchair Attachment PART #: F-705S3 WEIGHT CAPACITY: 350 POUNDS - STANDARD REVOLUTION 300 POUNDS - DEEP
Single-Position Detent Clutch DC Series. (i) MTY (81) MEX (55) QRO (442)
 MTY (81) MEX (55) QRO (442)") Single-Position Detent Clutch DC Series (i) FORM NO. L-2017-A-001 In accordance with Nexen s established policy of constant product improvement, the specifications contained in this manual are subject
Single-Position Detent Clutch DC Series (i) FORM NO. L-2017-A-001 In accordance with Nexen s established policy of constant product improvement, the specifications contained in this manual are subject
ASM Maxi Poles. Instruction-Parts B Series. For the application of architectural paints and coatings.
 Instruction-Parts ASM Maxi Poles 312483B For the application of architectural paints and coatings. 3400 Series 4050 psi (27.92 MPa, 280 bar) Maximum Working Pressure Important Safety Instructions Read
BX Jeep Liberty Renegade 2012 Jeep Liberty Sport Installation Instructions
 Attachment Tab Height: 17.5 Attachment Tab Width: 24 Serial Number Please read BOTH these and the General Instructions prior to installing or operating this equipment. 1. Blue Ox towing products and accessories
END USER TERMS OF USE
 END USER TERMS OF USE The following is the End Users Terms of Use as it currently appears in the Mobileye User Manual and Warranty information. This is here for your review and information; it is subject
Installation Instructions
 85-3910 rev. 03 01-18 Installation Instructions Thank you for purchasing the antisway bar kit. Please read through these instructions before installation. Rear Anti-Sway Bar Kit for Ford F-250/F-350 part
WiFi Tank Level Monitor Installation Instructions
 WiFi Tank Level Monitor Installation Instructions COMPATIBILITY To install the Tank Utility remote level monitor, you will need the following: A WiFi connection at your tank site An Apple or Android smartphone
Cummins N14 Celect & Celect Plus Engine Module. For Agricultural Applications Only. Part # 31200
 1994-2003 Cummins N14 Celect & Celect Plus Engine Module For Agricultural Applications Only Part # 31200 31200_revA Adjustable Switch Agricultural Cummins N14 Engine Module Power and Ground terminals Timing
Remote Vehicle Control System. Keyless Entry and Convenience System
 1 Remote Vehicle Control System PC 6100 TM Owner's Manual Keyless Entry and Convenience System IMPORTANT NOTE: The operation of the Power Code as described in this manual is applicable to most vehicles.
Installation Instructions Soft Top Replacement Hardware, Wrangler
 Installation Instructions Soft Top Replacement Hardware, 87-95 Wrangler IMPORTANT NOTICE: Carefully read instructions before attempting to install this product. Rampage is in no way responsible for any
Installation Instructions
 85-3909 rev. 01 09-09 Installation Instructions Thank you for purchasing this anti-sway bar kit. Please read through these instructions before installation. Rear Anti-Sway Bar Kit for Chevrolet G30 part
TECHNICAL MANUAL. FOR BLAST 2 (Bright Light Aiming System Tactical 2) For Rifles and Pistols Equipped with MIL-SPEC-1913 and Picatinny Rails
 For Rifles and Pistols Equipped with MIL-SPEC-1913 and Picatinny Rails") TECHNICAL MANUAL FOR BLAST 2 (Bright Light Aiming System Tactical 2) For Rifles and Pistols Equipped with MIL-SPEC-1913 and Picatinny Rails 2 Harris Court, Suite A-4 Monterey, CA 93940 U.S.A. Ph: 831-373-0701
TECHNICAL MANUAL FOR BLAST 2 (Bright Light Aiming System Tactical 2) For Rifles and Pistols Equipped with MIL-SPEC-1913 and Picatinny Rails 2 Harris Court, Suite A-4 Monterey, CA 93940 U.S.A. Ph: 831-373-0701