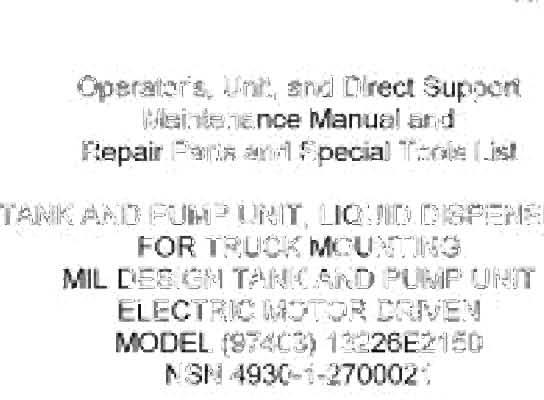
TECHNICAL MANUAL OPERATOR'S, UNIT, AND DIRECT SUPPORT MAINTENANCE MANUAL AND REPAIR PARTS AND SPECIAL TOOLS LIST
|
|
|
- Joy Lewis
- 6 years ago
- Views:
Transcription
1 TECHNICAL MANUAL OPERATOR'S, UNIT, AND DIRECT SUPPORT MAINTENANCE MANUAL AND REPAIR PARTS AND SPECIAL TOOLS LIST This copy is a reprint which includes current pages from Changes 1 through 3. OPERATING INSTRUCTIONS PAGE OPERATOR PREVENTIVE MAINTENANCE CHECKS AND SERVICES PAGE 2-5 OPERATOR MAINTENANCE INSTRUCTIONS PAGE 3-1 UNIT MAINTENANCE INSTRUCTIONS PAGE 4-1 UNIT TROUBLESHOOTING PAGE 4-10 TANK AND PUMP UNIT, LIQUID DISPENSING; FOR TRUCK MOUNTING MIL DESIGN TANK AND PUMP UNIT ELECTRIC MOTOR DRIVEN MODEL (97403) 13226E2150 NSN DIRECT SUPPORT MAINTENANCE INSTRUCTIONS PAGE 5-1 DIRECT SUPPORT TROUBLESHOOTING I PAGE 5-1 ALPHABETICAL INDEX PAGE INDEX-1 Approved for public release; distribution is unlimited. HEADQUARTERS, DEPARTMENT OF THE ARMY 30 AUGUST 1991
2
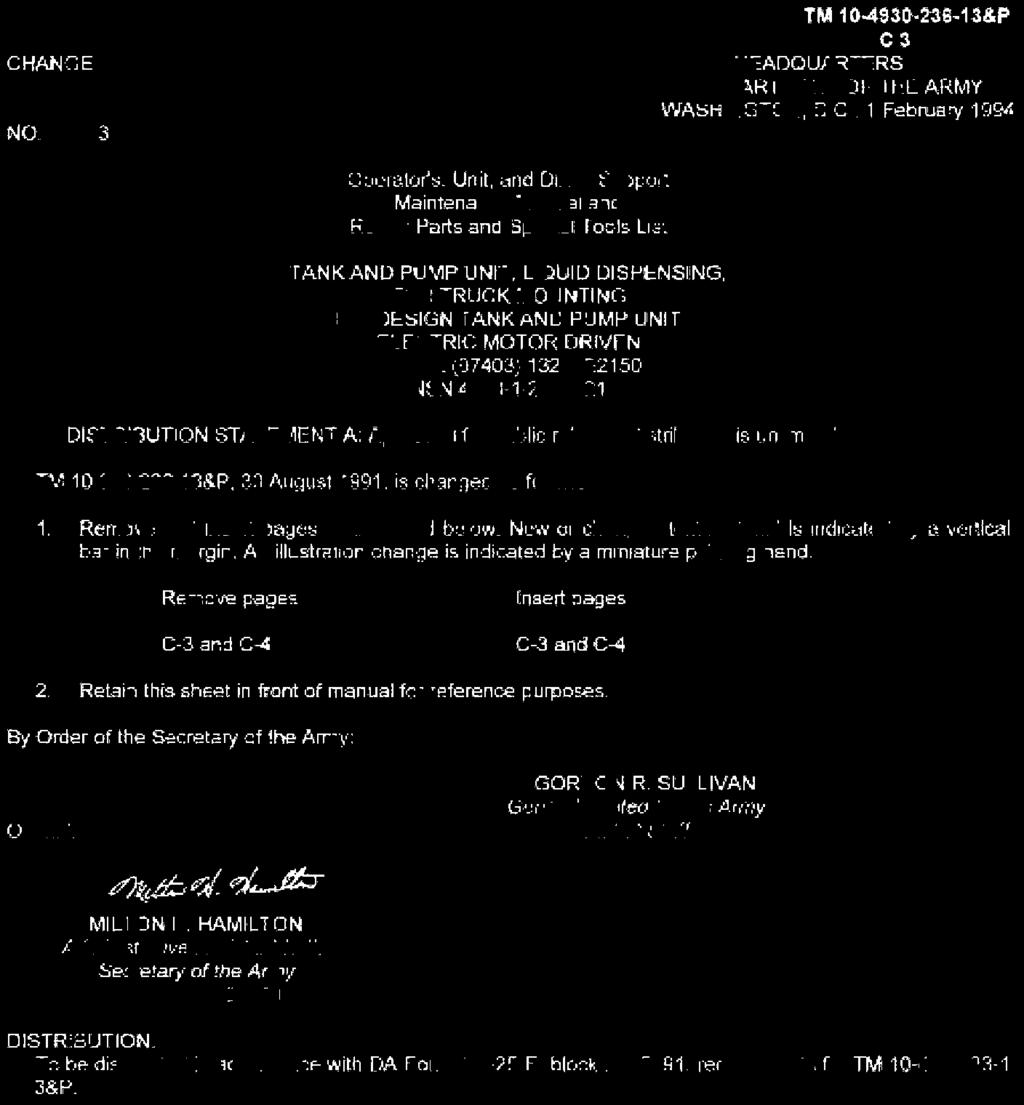
3 C2 CHANGE NO. 2 HEADQUARTERS DEPARTMENT OF THE ARMY WASHINGTON, D.C., 16 SEPTEMBER 1992 OPERATOR'S, UNIT, AND DIRECT SUPPORT MAINTENANCE MANUAL AND REPAIR PARTS AND SPECIAL TOOLS LIST TANK AND PUMP UNIT, LIQUID DISPENSING, FOR TRUCK MOUNTING MIL DESIGN TANK AND PUMP UNIT ELECTRIC MOTOR DRIVEN MODEL (97403) 13226E2150 NSN Approved for public release; Distribution is unlimited TM &P, 30 August 1991 is changed as follows: 1. Remove and insert pages as indicated below. New or changed text material is indicated by a vertical bar in the margin. An illustration change is indicated by a miniature pointing hand. Remove pages Insert pages C-3 and Cod C-3 and Cod 2. Retain this sheet in front of manual for reference purposes. By Order of the Secretary of the Army: Official: GORDON R. SULLIVAN General, United States Army Chief of Staff MILTON H. HAMILTON Administrative Assistant to the Secretary of the Army DISTRIBUTION: To be distributed in accordance with DA Form E, block 5291, Operator, Unit and Direct Support Maintenance requirements for TM &P.
4 C1 CHANGE HEADQUARTERS DEPARTMENT OF THE ARMY NO. 1 WASHINGTON, D.C., 27 APRIL 1992 OPERATOR'S, UNIT, AND DIRECT SUPPORT MAINTENANCE MANUAL AND REPAIR PARTS AND SPECIAL TOOLS LIST TANK AND PUMP UNIT, LIQUID DISPENSING, FOR TRUCK MOUNTING MIL DESIGN TANK AND PUMP UNIT ELECTRIC MOTOR DRIVEN MODEL (97403) 13226E2150 NSN Approved for public release; Distribution is unlimited TM &P, 30 August 1991 is changed as follows: 1. Remove and insert pages as indicated below. New or changed text material is indicated by a vertical bar in the margin. An illustration change is indicated by a miniature pointing hand. Appendix F. Unit and Direct Support Maintenance Repair Parts and Special Tools List (RPSTL), has been revised in its entirety, therefore, no change bars/hands are used. Remove pages Insert pages i through iii/(iv blank) i through iii/(iv blank) F-1 through F-7/(F-8 blank) F-1 through F Retain this sheet in front of manual for reference purposes. By Order of the Secretary of the Army: Official: GORDON R. SULLIVAN General, United States Army Chief of Staff MILTON H. HAMILTON Administrative Assistant to the Secretary of the Army DISTRIBUTION: To be distributed in accordance with DA Form 12-25E, (qty rqr block nos. 1726, 1727 and 1728).
5 WARNINGS Give particular attention to specific WARNINGS and CAUTIONS throughout this manual. DEATH or serious Injury may result It personnel tall to observe safety precautions. Dry cleaning solvent, PD-680A, used to clean parts Is potentially dangerous to personnel and property. Avoid repeated or prolonged skin contact. Do not use near open flame or excessive heat. Flash point of solvent Is F (38-60 C). Do not smoke or use open name within 50 feet (15.34 meters) of tank and pump unit. Make sure fire extinguishers and fire fighting equipment are available In the immediate area. Be extremely careful when using fire extinguisher In an enclosed area. Provide adequate ventilation. Do not drain fuel from the unit on the ground. Drain fuel Into a container that can be closed, otherwise a fire hazard or environmental contamination could result. Use protective equipment to prevent skin and eye contact with fuel. Use rubber fuel resistant gloves when replacing filter elements due to toxic effects of some fuel additives. Dispose of filter elements In accordance with local policy. A static discharge could Ignite the fuel or cause an explosion of the fuel vapor. Do not operate the tank and pump unit until It has been connected to suitable ground. To prevent serious Injury or death to personnel or, equipment damage, use a lifting device with a lifting capacity of at least three tons to handle tanks or pump unit. Do not allow units to swing back and forth while hanging In the air. For artificial respiration, refer to FM DEATH or SERIOUS INJURY may result It personnel fall to follow Safety Precautions for welding. Prior to welding, read welding Instructions contained In Chapter 5, on repair of the Tank Assembly. Applying heat or flame to a fuel tank containing residue may result in a violent explosion, causing injury or death to personnel. If conditions require fuel tank repairs by welding or other methods Involving heat or flame, be sure that all fumes are purged from the tank or fill tank with water before commencing the repair. It possible, tank should be filled with water prior to welding after being thoroughly purged of fumes. Personnel engaged In purging operations will not wear static electricity generating clothing. No metal buttons or fittings will be worn. All contents will be removed from pockets. The tank being purged must have a static ground during all operations. Precautions should be taken with all tools and metal objects around the tank to ensure no spark will be made. Conduct a combustible vapor test reading after to purging the tank using an acceptable explosive meter. a
6 TM &P WARNINGS Only personnel thoroughly instructed In the proper handling and reading of the combustion vapor tester will conduct vapor tests. Conduct a combustible vapor test reading Immediately after purging. Under no circumstances will repair of the tank begin until declared safe by safety personnel. Discontinue all operations It an electrical storm Is threatening or In progress. Eliminate conditions that could cause explosions. Skin may stick to metal In cold conditions. Do not touch metal parts with bare skin during cold weather. Low voltage can cause Severe Shock or Death. Disconnect power cable from vehicle NATO slave receptacle before replacing or repairing motor or electrical components. When connecting power cable be sure Remote ON-OFF switch Is in -OFF" position. Serious burns and electrical shock can result from contact with exposed electrical wires or connectors. Turn off all power switches before making electrical connections or disconnections. CAUTION Place switch In "OFF position before connecting Remote ON-OFF switch cable. b
7 Technical Manual TM &P HEADQUARTERS DEPARTMENT OF THE ARMY Washington, DC, 30AUGUST1991 OPERATOR'S, UNIT, AND DIRECT SUPPORT MAINTENANCE MANUAL AND REPAIR PARTS AND SPECIAL TOOLS LIST TANK AND PUMP UNIT, LIQUID DISPENSING; FOR TRUCK MOUNTING MIL DESIGN TANK AND PUMP UNIT ELECTRIC MOTOR DRIVEN MODEL (97403) 13226E2150 NSN Current as of 14 August Approved for public release; distribution is unlimited. REPORTING ERRORS AND RECOMMENDING IMPROVEMENTS You can help improve this manual. If you find any mistake or if you know of a way to improve the procedures, please let us know. Mail your letter, DA Form 2028 (Recommended Changes to Publications and Blank Forms), or DA Form located in the back of this manual direct to: Commander, U.S. Army Troop Support Command, ATTN: AMSTR-MMTS, 4300 Goodfellow Boulevard, St. Louis, MO t798. A reply will be furnished directly to you. CHAPTER 1. INTRODUCTION Section I. General Information Section II. Equipment Description and Data Section III. Technical Principles of Operation CHAPTER 2. OPERATING INSTRUCTION Section I. Description and Use of Operator's Controls and Indicators Section II. Operator Preventive Maintenance Checks and Services (PMCS) Section lil. Operation Under Usual Conditions Section IV. Operation Under Unusual Conditions Page i
8 TM &P CHAPTER 3. OPERATOR MAINTENANCE INSTRUCTIONS Section I. Lubrication Instructions Section II. Troubleshooting Section III. Maintenance Procedures CHAPTER 4. UNIT MAINTENANCE INSTRUCTIONS Section I. Repair Parts, Special Tools, TMDE and Support Equipment Section II. Service Upon Receipt Section III. Preventive Maintenance Checks and Services Section IV. Troubleshooting Section V. Maintenance Procedures Section Vl. Preparation for Shipment or Storage CHAPTER 5. DIRECT SUPPORT MAINTENANCE INSTRUCTIONS Section I. Repair Parts, Special Tools, TMDE and Support Equipment Section II. Troubleshooting Section III.. Maintenance Procedures APPENDIX A. REFERENCES... A-1 APPENDIX B. MAINTENANCE ALLOCATION CHART... B-1 Section I. Introduction... B-1 Section II. Maintenance Allocation Chart... B-4 Section III.. Tools and Test Equipment Requirements... B-7 Section IV. Remarks... B-8 APPENDIX C. COMPONENTS OF END ITEM LIST (COEIL)... C-1 APPENDIX D. ADDITIONAL AUTHORIZATION LIST (ML)... D-1 APPENDIX E. EXPANDABLE/DURABLE SUPPLIES AND MATERIALS LIST... E-1 APPENDIX F. REPAIR PARTS AND SPECIAL TOOLS LIST... F-1 PAGE FIGURE NO. Section I. Introduction... F-1 Section II. Repair Parts List... F-1 Group 01. Pump Unit, Liquid Dispensing 0101 Hoses and Static Reel... F Fuel Dispensing Nozzle Assembly... F Reel Assembly, Liquid Dispensing RH and LH... F Filter Separator... F EMD Pump Assembly... F Junction Box Assembly... F Pump Assembly... F Electric Motor With Frame and Bracket... F Valve Operating Lever Assembly... F Quick Disconnect Adapter Half... F Change 1 ii
9 PAGE FIGURE NO Bottom Loading Manifold... F Frame... F Group 02. Tie Down Assembly Tie Down Assembly... F Group 03. Hoses, Tank to Manifold Hoses, Tank to Manifold... F Group 04. Tank Group 0401 Tank, Liquid Storage... F Manhole Cover... F Jet Level Sensor and Bottom Load Valve... F Group 05. Coupling Half Quick Disconnect Coupling Half... F Group 06. Bulk Material... F-53 Section III. Special Tools (Not Applicable) Section IV. Cross Reference Indexes National Stock Number Index... F-55 Part Number Index... F-57 Figure and Item Number Index... F-66 APPENDIX G ILLUSTRATED LIST OF MANUFACTURED ITEMS... G-1 INDEX ALPHABETICAL INDEX... Index1 Change 1 iii/(iv blank)
10 HOW TO USE THIS MANUAL Spend a few minutes looking through this manual. It has a new look that is very different from the manuals you've been using. You'll find the new look is a lot easier to use, and you can find what you're looking for a lot faster. Each chapter begins with an index that lists each paragraph or section in the chapter. Each section in the maintenance chapter also has an index that lists the procedures in the section and gives page numbers. Or you can look for the information you want in the alphabetical subject index at the back of this manual. We got rid of as many words as we could and put in lots of illustrations to show just about everything you'll be doing to maintain your equipment. The text is keyed to the illustration with callous numbers (sometimes words). The callous numbers are in parentheses in the text. So, HOW DO YOU USE THIS MANUAL? Like This: 1. Suppose the electric motor won't operate and you want to troubleshoot the unit. 2. Look at the cover and you'll see index boxes near the right-hand edge with subject tittles in them. You'll find UNIT TROUBLESHOOTING 4-9. You can skip over to page 4-9. OR 3. Bend the pages a bit and look at the edges. You'll see black bars on some of the pages that are lined up with the index boxes on the cover. 4. If you put your thumbnail on the black bar that is lined up with the box on the cover for UNIT TROUBLESHOOTING and open the manual, you'll be on page On page 4-9, you'll find Section IV, TROUBLESHOOTING. 6 Turn to page 4-10 and find the symptom ELECTRIC MOTOR WON'T OPERATE. 7 As you do the tests and corrective actions in the order listed, you will get to replace power cable. Refer to paragraph Turn to paragraph 4-15 and look at the procedure. The NITIAL SETUP" section tells you what tools, materials, and parts are needed to do this task. It also tells you anything you must do before starting this task and it gives general warnings about hazards that can exist while you do this task. 9. The procedure itself has a picture to show you where to look and what to look at, plus the steps you will do to perform the task. 10. Notice the numbered arrows. These are the callous numbers. As you read each step, we tell you where to look by including the callous number (in parentheses) after the name of each thing we call out. 11. Do the procedure, then check to see if you have corrected the fault symptom.
11 1-0 TM &P
12 CHAPTER 1 INTRODUCTION Page - Section I. General Information Section II. Equipment Description and Data Section lil. Technical Principles of Operation SECTION I. GENERAL INFORMATION Paragraph Page 1-1 Scope Maintenance Forms and Records Hand Receipt (-HR) Manual Reporting Equipment Improvement Recommendations (EIR) Destruction of Army Material to Prevent Enemy Use Preparation for Storage or Shipment Warranty Information Scope. a. Type of Manual This manual provides Operator's, Unit, Direct Support Maintenance Manual, and Repair Parts and Special Tools List for the Tank and Pump Unit, Liquid Dispensing: for Truck Mounting, MIL Design Tank and Pump Unit, Electric Motor Driven Model 13226E2150. b. Purpose of Equipment The purpose of the tank and pump unit is to provide mobile refueling unit for dispensing fuel to military vehicles Maintenance Forms and Records. Department of the Army forms and procedures used for equipment maintenance will be those prescribed by DA PAM The Army Maintenance Management System (TAMMS) Hand Receipt (-HR) Manual. This manual has a companion document with a TM number followed by - HR (which stands for Hand Receipt) The TM1O-g HR consists of preprinted hand receipts (DA Form 2062) that list end item related equipment (i.e. COEI, BIL, and ML) you must account for As an aid to property accountability, additional -HR manuals may be requisitioned from the following source in accordance with procedures in AR Reporting Equipment Improvement Recommendations (EIR). If your tank and pump unit needs improvement, let us know Send us an EIR You, the user, are the only one who can tell us what you don't like about your equipment. Let us know why you don't like the design or performance Put it on an SF 368, Quality Deficiency Report Mail it to us at Commander, US Army Troop Support Command, ATTIC AMSTR-MOF, 4300 Goodfellow Blvd., St. Louis, Missouri We will send you a reply Destruction of Army Material to Prevent Enemy Use. Demolition of material to prevent enemy use will be in accordance with the requirements of TM , Procedures for Destruction of Equipment to Prevent Enemy Use Preparation for Storage or Shipment. Refer to Chapter 4, Section Vl to place equipment into storage and for procedures to place equipment into administrative storage. 1-1
13 1-7. Warranty Information. The Tank and Pump Unit is not covered by warranty. SECTION II. EQUIPMENT DESCRIPTION AND DATA Paragraph Page 1-8 Equipment Characteristics, Capabilities and Features Location and Description of Major Components Equipment Data Safety, Care and Handling Equipment Characteristics, Capabilities and Features. a. Characteristics. The tank and pump unit consists of one electric motor driven 50 gpm (189 liters per minute) pumping assembly, two 500-gallon ( liter) tanks and related items. It is designed for use with M- 34, M-3S, M-36, M-41, M-54, M-55, M-135, M-211, M-923, M-924, M-925 and M-926 vehicles. b. Capabilities and Features. (1) Self priming pump. (2) All weather operational. (3) Used to convert cargo truck to bulk fuel carrier/dispenser. (4) Automatic fuel shutoff during bottom loading refilling Location and Description of Major Components. The following paragraphs contain a functional description of the major components of the tank and pump unit. The location and appearance of the major components are illustrated. The numbers following the nomenclature of the major component correspond to the index numbers in the illustration. a. A-FRAME (1). Provides a housing and supports for the assembled components of the pumping unit. The base of the frame is designed to facilitate loading, transporting, and unloading the pumping unit with a forklift. b. INTERVEHICLE POWER CABLE (2). Provides electrical connection between the NATO slave receptacle on the vehicle and the electric motor for driving the pump. c. VEHICLE NATO SLAVE RECEPTACLE (3). This receptacle is mounted on the back of the truck cab. It provides a means for connecting the truck electrical system to the pumping unit. d. NATO ADAPTER (4). Used to make a compatible connection between the intervehicle power cable and the vehicle NATO slave receptacle. e. HOSE REEL (5). There are two hose reels on the pumping unit. The hose reels are used to retain the hoses in a stowed position, when the pumping unit is not in operation. 1-2
14 TM P f. DISPENSING NOZZLE (6). There are two dispensing nozzles Fuel can be dispensed from either, or both nozzles, as desired. g. HOSE REEL HOSES (7). There are two hoses. Each hose supplies fuel from the hose reel to the dispensing nozzle. h. FILTER/SEPARATOR (8). The filter/separator removes contaminates from the fuel as the fuel flows from the pump to the dispensing nozzles. Any solid impurities and water in the fuel being pumped is trapped in the filter elements. The elements hold the solid particles and the water collects and settles to the bottom where it can be removed periodically through the draincock. The main components are as follows: (1) Four Cannisters (2) Four Filter Elements (3) One Differential Pressure Gauge (4) One Water Level Sight Gauge (5) One Draincock i. ON-OFF CABLE ASSEMBLY (9). When connected to the junction box, controls operation of the electric motor which drives the pump. (May be exchanged for Item (i1).) When the control cable is connected to the junction box, moving the ON-OFF switch (10) to the ON position starts the electric motor and pump assembly. Moving the switch to the OFF position stops the electric motor. j. TOGGLE SWITCH ASSEMBLY (11). Auxiliary control switch mounts directly to junction box. Operates the same as ON-OFF SWITCH (10). (May be used instead of Item (9).) 1-3
.")
15 I. TANK CONTROL LEVERS (12). Each lever manually operates the bottom loading valve of one tank. Pull levers up to open bottom loading valves, push levers down to close bottom loading valves. m. QUICK DRY DISCONNECT ADAPTER (13). Provides an alternative attachment point for fuel hoses when bottom loading coupling cannot be used. n. BOTTOM LOADING PORT (14). Provides a connection point for fueling hoses to allow tanks to be filled through button loading valves. o ELECTRIC MOTOR (16). Drives the pump. p. PUMP (17). Pumps fuel when the electric motor is operated. The pump is a self-priming pump, and driven directly from the electric motor armature shaft. The pump/motor assembly is mounted in the sub-frame (15). q. JUNCTION BOX (18). Provides a protective enclosure for electrical connections between the receptacle J1, the electric motor and receptacle J2. r. J1 RECEPTACLE (19). Electrical receptacle for connecting the ON-OFF cable assembly or toggle switch assembly. s. J2 RECEPTACLE (20). Electrical receptacle for connecting the intervehicle power cable. t. INLET ELBOW (21). Elbow with quick-disconnect fitting for connecting the hose from the bottom loading manifold to the inlet side of the pump. u. PRIMING PORT (22). Provides a means for priming the pump, if for some reason the self-priming pump fails to prime itself. v. OUTLET ELBOW (23). Elbow is designed to accept a quick-disconnect fitting on the hose from the outlet side of the pump. w. STATIC DISCHARGE REEL (24). The static ground cable on the static discharge reel is used to ground the pumping unit when the system is in operation. The reel is spring loaded and will rewind the cable automatically. 1-4
16 x. FUEL TANK (25). There are two 500 gallon fuel tanks. The tanks are mounted on skids to facilitate loading and unloading from the transport vehicle. y. ACCESS PORT (26). The plug can be removed from the access port to dipstick the fuel tank. The access port can also be used to pump fuel from the fuel tank with a hand pump. z. MANHOLE (27). The manhole is equipped with a fill cover that can be opened if the fuel tank is to be filled through the manhole. The entire manhole can be removed for access to the interior of the tank. aa. BOTTOM LOADING VALVE (28). Each fuel tank is equipped with a bottom loading valve. As the tanks are being filled through the bottom loading port, the valves will open automatically when fuel pressure is applied. Each valve will be closed automatically by the jet level sensor when the tank is full Equipment Data. a. Pumping Assembly. Model/PN Length Width Height Weight Rating 13226E in. ( cm) 27 in. (67.88 cm) 44 in. ( cm) 870 Ibs. (395 kg) 50 gpm (189 liters per minute) b. Tanks. Model/PN Capacity Length Width Height Weight 13226E gal. ( liters) 56 in. ( cm) 72 in. ( cm) 39 in. (99.06 cm) 500 Ibs. (227 kg) (empty) 1-5
17 TM &P c. Electric Motor Model/PN 13217E7131 to Length in. (42.11 cm) Width 5.59 in. (14.46 cm) Height 6.34 in. (16.10 cm) Weight 86.5 lb. (39.32 kg) Input 24 Vdc Rated current (at 1.5 hp load) 55A Rated Speed (with motor at 35oC) 3600 rpm Operating speed 3100 rpm Safety, Care and Handling. Observe all WARNINGS, CAUTIONS and NOTES in this manual. This equipment can be extremely dangerous if these instructions are not followed. SECTION III. TECHNICAL PRINCIPLES OF OPERATION 1-12 Principles of Operation. Once the bottom loading valves are opened, the pump draws fuel from the tanks and sends it to the filter/separator. The filter separator removes contaminants and water then fuel flows to hose reels and fueling nozzles to be dispensed into vehicles needing refueling. Auxiliary fuel supply hose is connected to the bottom loading port to refuel tanks. A jet level sensor in the top of each tank senses when tanks are full and automatically shuts bottom loading valve to stop fuel flow into tank. 1-6
18 CHAPTER 2 OPERATING INSTRUCTIONS OVERVIEW Section I. Operator's Controls and Indicators Section II. Operator's Preventive Maintenance Checks and Services (PMCS) Section III. Operation Under Usual Conditions Section IV. Operation Under Unusual Conditions OVERVIEW This chapter covers operator controls and indicators, operator PMCS, and the operation of the filter/separator under usual and unusual conditions. SECTION I. OPERATOR'S CONTROLS AND INDICATORS Page Paragraph Page 2-1 General Operator's Controls and Indicators General. The tank and pump unit is equipped with controls to start and stop the flow of fuel as well as indicators to show the condition of the filter/separator elements Operator's Controls and Indicators. The controls and indicators for operation of the tank and pump unit are illustrated and described in Table 2-1. Table 2-1. Controls and Indicators KEY 1 CONTROL OR INDICATOR Draincock FUNCTION Drains water from the filter/separator. 2 Sight Gauge Indicates water level inside the filter/separator. 2-1
19 Table 2-1. Controls and Indicators - CONT CONTROL OR KEY INDICATOR FUNCTION 3 Instruction Plate Provides information for replacement of the filter elements in the filter/separator 4. Differential Pressure Indicates the difference in pressure between the inlet and outlet of Switch Gage the filter/separator in PSID (Pounds per Square Inch Differential). The PSID indicating arc on the gauge is colored to coincide with the information on the instruction plate 2-2
20 Table 2-1. Controls and Indicators - CONT CONTROL OR KEY INDICATOR FUNCTION 5 Dispensing Nozzle There are two dispensing nozzles. Each nozzle has a ground cable. The cable is attached to a clamp and a plug to ensure that the nozzle can be grounded to the equipment being fueled. 6 Static Discharge Reel The ground cable on the reel has an alligator clamp for grounding the pumping unit during fueling operations. The reel is spring loaded to rewind the cable onto the reel 7 Rear Tank Valve Control Lever 8 Front Tank Valve Control Lever Pushing the lever to the OFF position closes the valve in the bottom of the rear fuel tank. Pulling the lever to the ON position opens the valve. Lever is shown in the ON position Pulling the lever to the ON position opens the valve in the bottom of the fuel tank. Pushing the lever to the OFF position closes the valve. This lever controls the valve in the (front) TANK. The lever is shown in the ON position. 2-3
21 TM P Table 2-1. Controls and Indicators - CONT CONTROL OR KEY INDICATOR 9 Adapter for Water Detector Kit Sample 10 Probe for Water Detector Kit Sample FUNCTION The adapter is furnished as a means of obtaining a sample of fuel to be tested. The adapter can be coupled to the filter/separator outlet elbow without any additional fittings. The probe is used to extract samples of fuel for testing. The probe is installed on the adapter (Key 9). When the adapter is coupled to the filter/separator outlet, a fuel sample may be obtained 11 Pressure Vent Valve Manually operated pressure vent valve is used to release pressure within fueling system 2-4
22 TM &P Table 2-1. Controls and Indicators - CONT CONTROL OR KEY INDICATOR FUNCTION 12a Pump Motor ON-OFF The switch is located at the end of the operator control cable Switch/Cable Assembly The ON position applies power to the electric motor to operate the pump. The OFF position stops the motor This switch operates the same as Item 12, however, this switch attaches directly to the electrical junction box 12b Auxiliary Pump Motor ON-OFF Switch 13 Suction Loading Coupling This coupling is installed for bottom loading of the fuel tanks from a non-pressurized fuel source. The pump assembly on board the truck is used to fill the fuel tanks. 14 Dipstick The dipstick is graduated in US GALLONS on one side, and LITERS on the other. It is used to measure the quantity of fuel in the tanks through DIPSTICK/HAND PUMP access pump. SECTION II. OPERATOR'S PREVENTIVE MAINTENANCE CHECKS AND SERVICES (PMCS) Paragraph Page 2-3 General Purpose of PMCS Tablle Explanation of Columns Equipment is Not Ready If Column Reporting Deficiencies Special Instructions General. Operator PMCS are performed to ensure that the tank and pump unit is ready for operation at all times. Perform the checks and services at the specified intervals. a. Before you operate, perform your before (B) PMCS. Observe all CAUTIONS and WARNINGS. b. While you operate, perform your during (D) PMCS. Observe all CAUTIONS and WARNINGS. 2-5
23 TM &P c. After you operate, be sure to perform your after (A) PMCS. d. If your equipment fails to operate, refer to Unit Maintenance Purpose of PMCS Table. The purpose of the PMCS table is to provide a systematic method of inspecting and servicing the equipment. In this way, small defects can be detected early before they become a major problem causing the equipment to fan to complete as mission. The PMCS table is arranged with the individual PMCS procedures listed in sequence under assigned intervals. The most logical time (before, during, or after operation) to perform each procedure determines the interval to which H is assigned. Make a habit of doing the checks in the same order each time and anything wrong will be seen quickly. See paragraphs 2-5 and 2-6 for an explanation of the columns in table Explanation of Columns. The following is a list of the PMCS table column headings with a description of the information found in each column. a. Item No. This column shows the sequence in which the checks and services are to be performed, and is used to identify the equipment area on the Equipment Inspection and Maintenance Worksheet, DA Form b. Interval. This column shows a dot when each check is to be done. c. Item to be Inspected/Procedures. This column identifies the general area or specific part where the check or service is to be done, and explains how to do them. d. Equipment is Not Readv/Available If. See paragraph Equipment is Not Ready/Available It. This column lists conditions that make the equipment unavailable for use because it is unable to perform its mission, or because it would represent a safety hazard. Do not accept or operate equipment with a condition in the Equipment is Not Ready/Available If" column. NOTE The terms ready/available and mission capable refer to the same status: Equipment is on hand and is able to perform its combat mission. Refer to DA Pam Reporting Deficiencies. If any problem with the equipment is discovered during PMCS or while it is being operated that cannot be corrected at the operator/crew maintenance level, it must be reported. Refer to DA Pam and report the deficiency using the proper forms Special Instructions. Preventive maintenance is not limped to performing the checks and services listed in the PMCS table. WARNING Drycleaning solvent PD-680 used to clean parts is potentially dangerous to personnel and property. Avoid repeated and prolonged skin contact. Do not use near open flame or excessive heat. Flash point of solvent is F (38-60 C). a. Keep it clean. Dirt, grease, oil and debris get in the way and may cover up a serious problem. Clean as you work and as needed. Use drycleaning solvent on all metal surfaces. Use soap and water to clean rubber or plastic material. 2-6
24 TM &P b. Bolts. Nuts. and Screws. Check them all for obvious looseness, missing, bent, or broken condition. You can't try them all with a tool, but took for chipped paint, bare metal, or rust around boltheads. If you find one you think is loose, tighten it, or report it to unit maintenance rf you can't tighten it. c. Fluid Lines. Look for wear, damage and leaks. Make sure clamps and frostings are tight. Wet spots and stains around a fitting or connector can mean a leak. If a leak comes from a loose connector, tighten it. If something is broken or worn out, report it to unit maintenance. d. Leakage Definitions. It is necessary for you to know how fluid leakage affects the status of your equipment. The following are definitions of the types/classes of leakage you need to know to be able to determine the status of your equipment. Learn and be familiar with them. When in doubt, NOTIFY YOUR SUPERVISOR! Leakage Definitions: Class I Class II Class lil Seepage of fluid (as indicated by wetness or discoloration) not great enough to form drops. Leakage of fluid great enough to form drops but not enough to cause drops to drip from item being checked/inspected. Leakage of fluid great enough to form drops that fall from the item being checked/inspected. CAUTION Equipment operation is allowable with minor leakage (Class I or 11) of any fluid except fuel. Of course, consideration must be given to the fluid capacity in the item being checked/inspected. When in doubt, notify your supervisor. When operating with Class I or II leaks, continue to check fluid level more often than required in the PMCS. Class lil leaks should be reported to your supervisor or unit maintenance. a. Painting. Touch-up filter/separator as needed. Refer to TM for specific painting procedures. NOTE Within designated intervals, these checks are to be performed in the order listed. If the equipment must be kept in continuous operation, check and service only those items that can be checked and serviced without disturbing the operation. Make the complete checks and services when the equipment can be shut down. 2-7
25 Table 2-2. Operator Preventive Maintenance Checks and Services OPERATOR PREVENTIVE MAINTENANCE CHECKS AND SERVICE B - Before D - During A - After W - Weekly M - Monthly INTERVAL PROCEDURES EQUIPMNET IS ITEM ITEM TO BE CHECK FOR AND HAVE REPAIRED NOT READY/ NO B D A W M INSPECTED OR ADJUST AS NECESSARY AVAILABLE IF: WARNING A spring loaded mechanism can. cause injury if released in an uncontrolled manner. The rewind spring is under high tension when the dispensing hose is extended. This may cause reel to rapidly rotate in reverse. 1 Hoses and Visually inspect hoses for damage, Evidence of Fittings cracking, and signs of leakage. Inspect fuel leakage. fittings and couplings for secure connections, damage, and signs of leakage. Extend fueling hoses fully for inspection. Notify next higher level of maintenance for repairs or replacement of defective parts. WARNING A spring loaded mechanism can cause injury if released in an uncontrolled manner. The rewind spring is under high tension when the dispensing hose is extended. This may cause reel to rapidly rotate in reverse. 2 Hose Reels Visual and operational inspection. Check Either Spring and operation of hose dispensing reels. dispensing. Ratchet Wheels Extend hoses and inspect as per Item 1. hose is Check that ratchet wheel will hold reel leaking. from rotating. Notify next higher level of maintenance if hose reels need repair. 3 Nozzle Checks nozzles for proper operation and Both nozzles leakage. Check screen for foreign inoperative or matter. Notify next higher level of either nozzle maintenance H nozzle needs repair. is leaking 2-8
26 OPERATOR PREVENTIVE MAINTENANCE CHECKS AND SERVICES B - Before D - During A - After W - Weekly M - Monthly INTERVAL PROCEDURES EQUIPMNET IS ITEM ITEM TO BE CHECK FOR AND HAVE REPAIRED NOT READY/ NO B D A W M INSPECTED OR ADJUST AS NECESSARY AVAILABLE IF: WARNING A spring loaded mechanism can cause injury if released in an uncontrolled manner. The rewind spring is under high tension when the ground cable is extended. This may cause reel to rapidly rotate in reverse. 4 * * * Static Check for broken clamp, cable or cable Broken cable, Discharge coating. Refer to next higher level of coating or Reel maintenance for repairs. clamp that would not allow a proper ground. 5 * * * Filter/Separator Refer to TM &P for Water Detector procedures to inspect filter/separator. Kit 6 * * * EMD Pump Check pump and components for proper Evidence of operation, damage or leakage. Notify fuel leakage. next higher level of maintenance for repair. WARNING Low voltage can cause Severe Shock or Death. Disconnect power cable from vehicle NATO slave receptacle before replacing or repairing electrical components. 7 * * Junction Box Check for damaged cables, loose Damaged connections, switch, or connectors. connectors, Check junction box for defective cover switch cables seal. Tighten connections if required. (that could cause sparks), Notify next higher level of maintenance or cover seal. for repair. 2-9
27 OPERATOR PREVENTIVE MAINTENANCE CHECKS AND SERVICES B - Before D - During A - After W - Weekly M - Monthly INTERVAL PROCEDURES EQUIPMNET IS ITEM ITEM TO BE CHECK FOR AND HAVE REPAIRED NOT READY/ NO B D A W M INSPECTED OR ADJUST AS NECESSARY AVAILABLE IF: 8 * * * Electric Motor Inspect for loose or missing mounting Electric motor bolts. Check for proper operation. Notify is inoperable. next higher level of maintenance if motor is inoperable. Tighten mounting bolts. 9 * * Power Cable and Check for loose or damaged cable or Cable Plug connectors. Notify next higher level of damaged maintenance for replacement of sufficiently to defective parts. cause sparks. 10 * * Valve Operating Check for proper operation. Check that Cables have Assembly the cables are securely connected. loosened. Notify next higher level of maintenance if repairs are needed. 11 * * * Adapter Half Inspect for secure connections, damage, Evidence of and signs of leakage. Notify next higher fuel leakage level of maintenance for replacement of exists. defective parts. 12 * * * Bottom Loading Inspect for missing components, secure Evidence of Manifold damage and signs of fuel leakage leakage. Notify next higher level of exists. maintenance for replacement of defective parts. 13 * * * Frame and Inspect frame for cracks, loose and Hardware or Storage Box missing hardware or components. Notify components next higher level of maintenance for necessary for repairs or replacement of missing parts. operations are missing. 14 * * * Tie Down Inspect tie down assemblies for Two or more Assembly looseness, cracked welds and thread tank tie-down damage. Tighten loose turnbuckles. assemblies, or Notify next higher level of maintenance one pump unit for repair or replacement of defective tie-down parts. assembly is missing. 15 * * * Hose, Tank to Visually inspect hose for damage, Evidence of Manifold cracking and signs of leakage. Inspect fluid leakage couplings for secure connections, exists. damage and signs of leakage. Refer to next higher level of maintenance for replacement of defective hose. 2-10
28 OPERATOR PREVENTIVE MAINTENANCE CHECKS AND SERVICES B - Before D - During A - After W - Weekly M - Monthly INTERVAL PROCEDURES EQUIPMENT IS ITEM ITEM TO BE CHECK FOR AND HAVE REPAIRED NOT READY/ NO B D A W M INSPECTED OR ADJUST AS NECESSARY AVAILABLE IF: 16 * * * Tank Assembly Visual inspection to check for damage or Evidence of signs of leakage. Check for proper leakage or operation of bottom loading valve. Refer bottom to higher level of maintenance for repair loading valve or replacement of defective parts. will not open. 17 * * Manhole Check for damage and proper location Evidence of of manhole cover gasket, and secure fuel leakage manhole latches. Check the location of exists. vent valve under handle, close to hinge. Refer to next higher level of maintenance for repairs. 18 * * * Coupling Half Check for signs of leakage around the Evidence of valve handle shah. Check coupling leakage. gasket for cracks. Inspect coupling for secure connection. Test coupling half by observing the internal valve mechanism as the handle is moved to ensure handle operates valve. Refer to next higher level of maintenance for repairs or replacement if necessary. 19 * * Grounding Rod Check for missing or damaged ground Ground rod rod. missing. 2-11
29 Paragraph Section III OPERATION UNDER USUAL CONDITIONS TM &P Page 2-3 Grounding Procedures Operating Procedures Preparation for Movement Operating Instructions on Decals and Instruction Plates Grounding Procedures. WARNING Failure to properly ground unit prior to operation could allow a static discharge (spark) which could ignite fuel or cause an explosion of fuel vapor. a. Unwind the grounding cable and clamp from the static reel. b. Attach clamp to established ground. If established ground is not available, remove grounding rod from pump unit frame. c. Use slide hammer to drive grounding rod 3 feet into ground then attach clamp to grounding rod. d. Once fueling operations are completed, disconnect clamp from grounding rod and guide cable back on reel. e. Use slide hammer to withdraw grounding rod from ground then place it in storage position on A-Frame and secure with attaching straps. 2-12
30 2-4. Operating Procedures. TM &P a. Filling Tanks Through Bottom Loading Port. (1) Refer to paragraph 2-3 and perform grounding procedures. WARNING Fire hazard exists when handling fuel. Do not smoke or use open flame within 50 feet (15.34 meters) of tank and pump unit. (2) Open manhole latch and fill cap on both tanks. CAUTION Tank valve levers must be in off position for bottom loading. If not in OFF position shut off system will not function. (3) Position both tank valve levers in "OFF (tank valves closed) position. WARNING Manhole fill cap must be open during bottom loading operation. Failure to open manhole will cause a pressure build-up within tanks that could cause tanks to rupture or explode. (4) Remove the cover from the bottom loading port and attach filling pump nozzle to bottom loading port. (5) Operate filling pump nozzle to load fuel. Refer to manual covering nozzle being used. (6) When filling operation is completed, disconnect nozzle and install cover on bottom loading port. (7) Close and latch both manhole fill caps. (8) Disconnect and stow grounding equipment as explained in paragraph
31 b. Manually Priming Pump. (1) Place ON-OFF switch to OFF. (2) Remove pump priming port cap. (3) Pour approximately five gallons of fuel into priming port. (4) Install pump priming port cap. 2-14
32 c. Dispensing Fuel. (1) Park transport vehicle adjacent to equipment to be fueled. (2) Refer to paragraph 2-3 and perform grounding and safety procedures. (3) Connect ON-OFF switch/cable assembly to junction box. WARNING Low voltage can cause severe shock or death. (4) Connect intervehicular power cable and adapter, if required, to junction box receptacle and vehicle NATO slave receptacle. (5) Grasp either dispensing nozzle and unwind enough hose for nozzle to reach fuel tank to be serviced. (6) Connect nozzle ground clamp or nozzle ground plug to equipment being serviced, whichever is compatible. 2-15
 Insert dispensing nozzle into tank being fueled and squeeze the nozzle lever.")
33 (7) Pull either or both tank valve control levers to the ON position. WARNING An overheated pump creates a potential fire hazard and will cause pump damage. Do not- allow pump to run longer than one minute with nozzles closed. Do not run pump with tank valves closed. (8) Insert dispensing nozzle into tank being fueled and squeeze the nozzle lever. (9) Move ON-OFF-Switch to ON position. (10) When tank is-full, release nozzle lever. (11) Move ON-OFF switch to OFF position and store cable on truck. (12) Remove dispensing nozzle from tank, disconnect nozzle ground clamp or plug and rewind hose onto hose reel. (13) Dipole tank valve control levers to OFF position. (14) Lead safety equipment and disconnect static ground as per paragraph
34 c. Obtaining a Fuel Sample. (1) With ON/OFF switch set to the OFF" position, disconnect outlet hose from the filter/separator outlet. (2) Attach sample probe adapter to filter/separator outlet then connect outlet hose to sample probe adapter. NOTE The fuel sample must be obtained while the unit is operating to receive the most accurate representation of the fuel being pumped. (3) Refer to paragraph 2-4b. and perform necessary procedures to dispense fuel. While fuel is being dispensed, remove cap from probe and extract fuel sample. (4) Install cap on probe. (5) Move ON/OFF switch to OFF position. (6) Squeeze dispensing nozzle lever to release any built-up fuel pressure. WARNING Fuel spills create a potential fire hazard When disconnecting outlet hose, some fuel within outlet hose and sample probe adapter will be released. Use drip pan to catch fuel. (7) Provide a suitable container to catch drainings then, disconnect outlet hose to outlet. (8) Remove sample probe adapter from filter/separator outlet, then connect outlet hose to outlet. 2-17
35 2-18 TM &P
36 d. Shutdown. (1) Check to see both fuel dispensing hoses are fully wound onto hose reels. (2) Check that static ground cable is fully wound onto static reel. (3) Check that both fill caps on manholes are closed securely. (4) Remove dipstick from A-Frame. (5) Remove plug from each tank's access port and use dipstick to measure quantity of fuel remaining in each fuel tank. NOTE If there is insufficient fuel in the fuel tanks for continued operation, or the unit is to be idle for an extended period of time, fill the fuel tanks to prevent condensation from forming and contaminating fuel. (6) Install the plugs in the access ports and return the dipstick to its stowed position on the A-Frame. (7) Make certain ON/OFF switch cable is in OFF. position, coiled and secured to unit or stowed in tool box (8) Move both tank valve control levers to OFF position. (9) Make certain ground rod is secured in its stowed position on A-Frame. (10) Open draincock on filter/separator to release water from filter/separator. Once water has drained, close draincock. NOTE It may be necessary to open vent valve to drain water completely. 2-19
37 2-5. Preparation for Movement. a. Refer to paragraph 2-4d and perform shutdown procedures. b. Disconnect intervehicular power cable and adapter from NATO slave receptacle and coil the cable inside the truck bed. CAUTION Tighten turnbuckles HAND tight only. c. Check that all ten tie down straps are securely attached to tie down brackets and shackles and that all eight turnbuckles are tight. WARNING To prevent possible fuel spillage and potential fire hazard, manhole must be closed and locked before transporting. d. Make certain manholes are closed, latched and locked. e. Vehicle is ready for movement. 2-20
38 2-6. Operating Instructions on Decals and Instruction Plates. The location of warning, caution, instruction, and identification plates, decals, and stencils are shown in the following illustrations. Illustrations of the plates, decals, 2-21
39 2-22 TM &P
40 2-23 TM &P
41 2-24 TM &P
42 SECTION IV. OPERATION UNDER UNUSUAL CONDITIONS Paragraph Page 2-7 Operation in Extreme Cold Operation in Extreme Heat Operation in Dusty or Sandy Areas Operation in Rainy or Humid Conditions Operation in Salt Water Areas Operation at High Altitudes Emergency Operation Operation In Extreme Cold. The procedures for operating the tank and pump unit are the same as under usual conditions except for the following special precautions. a. Check sight glass and drain water more frequently than usual and at each shut down to avoid freezing. b. Provide shelter to prevent snow or ice from entering unit when opened for servicing. c. If possible provide a heated shelter. d. Check differential pressure gage regularly to be sure that pressure limits are not being exceeded Operation In Extreme Heat. The procedures for operating the tank and pump unit are the same as under usual conditions except for the following special precautions. a. Erect a screen or shelter to provide shade. b. Check differential pressure gage regularly to be sure that the pressure limits are not being exceeded. c. Vent filter/separator when not in operation, and collect the discharge of the liquid Operation In Dusty or Sandy Areas. The procedures operating the tank and pump unit are the same as under usual conditions except for the following special precautions: a. Under dusty or sandy conditions, filter elements must be replaced more frequently. b. Select a work site protected by natural barriers or erect screens of dustproof material. c. Keep the unit free of dust and dirt, especially when the unit is open for servicing or repair. d. Check the differential pressure gage regularly to make sure that pressure limits are not being exceeded. e. Ensure inlet plug and outlet cap are installed when hoses are removed Operation in Rainy or Humid Conditions. The procedures for operating the tank and pump unit are the same as under usual conditions except for the following special precautions. a. Water must be drained through the water drain valve more often than under normal conditions. b. Erect a shelter to prevent the entrance of rain into the interior of the unit when it is opened for servicing. c. Check differential pressure gage regularly to be sure that pressure limits are not exceeded. 2-25
43 2-11. Operation in Salt Water Areas. The procedures for starting and stopping the tank and pump unit are the same as under usual conditions except for the following special precautions. a. Water must be drained through the water drain valve more often than under normal conditions. b. Wipe down the tank and pump unit with a lightly oiled rag to prevent corrosion Operation at High Altitudes. The procedures for starting and stopping the tank and pump unit are the same as under usual conditions Emergency Procedures. In a situation where clean filtered fuel is needed but the correct hose coupling to connect to bottom loading port is not available, it will be necessary to fill tanks through the manholes. Perform the following procedures to refuel tanks through manhole fill openings. a. Refer to paragraph 2-3 and perform grounding procedures. b. Attach nozzle grounding clamp to fuel tank being serviced. c. Open latch and fill cap. d. Insert fuel supply nozzle into fill tube of tank and fill tank. e. When tank is full, withdraw fuel nozzle, close fill cap and latch then disconnect nozzle grounding clamp. f. Repeat steps b, c, d and e for remaining tank. g. Once both tanks are full, disconnect static ground cable and rewind the cable onto static reel. h. If ground rod was used, return it to its stowed position on A-Frame. 2-26
44 CHAPTER 3 OPERATOR'S MAINTENANCE INSTRUCTIONS Section I. LUBRICATION INSTRUCTIONS Section II. TROUBLESHOOTING Section III. OPERATOR MAINTENANCE PROCEDURES SECTION I. LUBRICATION INSTRUCTIONS 3-1. Lubrication. There are no lubrication requirements for the tank and pump unit Introduction. SECTION II. TROUBLESHOOTING Page a. Table 3-1 lists the common malfunctions which you may find during the operation or maintenance of the tank and pump unit or its components. You should perform the tests/inspections and corrective actions in the order listed. b. This manual cannot list all malfunctions that may occur, nor all tests or inspections and corrective actions. If a malfunction is not listed or is not corrected by listed corrective actions, notify your supervisor. Table 3-1. Troubleshooting MALFUNCTION TEST OR INSPECTION CORRECTIVE ACTION 1 PUMP FAILS TO DISPENSE FUEL. Step 1. Check fuel level in the fuel tanks. Fill tanks, if empty. Step 2. Check position of tank valve control levers. Pull levers to the ON position. Step 3. Check differential pressure gauge on filter separator to determine if filters are clogged. Notify Unit Maintenance to replace filter elements. Step 4. Check nozzle screen for foreign material. Clean as necessary. 3-1
45 MALFUNCTION TEST OR INSPECTION CORRECTIVE ACTION Table 3-1. Troubleshooting-CONT TM &P 2 PUMP LOSES PRIME. Step 1. Check for kinked hoses. Straighten hoses. Step 2. Check for faulty tank valve operating linkage. Notify Unit Maintenance for repair of valve operator linkage. 3 PUMP OPERATES, BUT DOES NOT PRIME. Step 1. Check for kinked hoses. Straighten hoses. Step 2. Check for faulty tank valve operating linkage; Notify Unit Maintenance for repair of valve operator linkage. Step 3. Prime the pump manually (paragraph 2-4). 4 ELECTRIC MOTOR WILL NOT OPERATE. Step 1. Check to see if intervehicular power cable is properly connected. Ensure cable is properly connected. Step 2. Check to see if control cable is properly connected. Ensure cable is properly connected or connect auxiliary ON-OFF switch. Step 3. Check truck power supply for proper charging rate. a. If not, notify Unit Maintenance. b. If charging rate is sufficient, notify Unit Maintenance to inspect electric motor. 5 UNABLE TO BOTTOM LOAD EITHER TANK Step 1. Check for inadequate supply pressure. Notify officer in charge. Step 2. Bottom loading port obstructed. Disconnect nozzle and check port for foreign material. 3-2
46 Table 3-1. Troubleshooting - CONT MALFUNCTION TEST OR INSPECTION CORRECTIVE ACTION Step 1. If problem still exists: Refer to Unit Maintenance. 6 FUEL FLOW WILL NOT STOP WHEN TANK IS FULL Step 1. Check for valve operator lever in ON position. Step 2. If malfunction still exists: Move lever to CLOSE position. Shut off flow, then refer to Unit Maintenance. SECTION III. MAINTENANCE PROCEDURES 3-3 GENERAL. Operator maintenance on tank and pump unit consists of only those tasks and procedures stated in the Operator Preventive Maintenance Checks and Services (PMCS) Chart. Refer to the Operator's PMCS Chart and perform all tasks outlined at the intervals stated in the chart. 3-3/(3-4blank)
47 CHAPTER 4 UNIT MAINTENANCE INSTRUCTIONS Section I. Repair Parts, Special Tools, TMDE and Support Equipment Section II. Service Upon Receipt Section III. Preventive Maintenance Checks and Services (PMCS) Section IV. Troubleshooting Section V. Unit Maintenance Instructions Section VI. Preparation for Shipment or Storage Page 4-1. GENERAL. SECTION I. REPAIR PARTS, SPECIAL TOOLS, TMDE AND SUPPORT EQUIPMENT a. No special tools are required for maintenance of the equipment. Test, Measurement and diagnostic equipment (TMDE) and support equipment include standard test equipment found in any unit maintenance shop. b. Repair parts are listed and illustrated in the Repair Parts and Special Tools List (RPSTL), Appendix F. covering unit and direct support maintenance for this equipment. SECTION II. SERVICE UPON RECEIPT Paragraph Page 4-2 Inspection Installation Preparation for Movement INSPECTION. a. Inspect the equipment for damage incurred during shipment. If the equipment has been damaged, report the damage on SF 364, Report of Discrepancies. b. Check the equipment against the packing slip to see if the shipment is complete. Report all discrepancies in accordance with the instructions of DA PAM INSTALLATION. a. Equipment Required. WARNING Serious injury can occur when lifting. When an item cannot be lined with ease, use two or more people or a lifting device to prevent injury. (1) Each fuel tank is equipped with four lifting shackles. Hoisting equipment, with a sling attachment, will be required to load the tanks onto the truck using the lifting shackles. 4-1
48 NOTE The tanks must be oriented with the bottom loading valve toward the rear of the truck bed. (2) If the tanks are on a loading dock that is approximately the same height as the truck on which the tanks are to be loaded, the tanks can be skidded onto the truck bed. The tiedown links, on the ends of the tank skids, can be used to assist in skidding the tanks onto the truck bed. CAUTION Do not attempt to skid the pumping unit onto the truck. if the A-frame tips over, it could damage components mounted on the A-Frame. (3) The A-Frame is designed to be handled with a forklift. Use a forklift or other suitable device and lift the pumping unit onto the truck bed. b. Installation Instructions. CAUTION Load tanks on truck before filling. Extreme caution should be taken in filling tanks to avoid exceeding cross-country payload limits of transporting vehicle. (1) Position a tank assembly (1) on the truck bed near cab, with the dowels (2) toward the rear of the truck. NOTE Bottom load valve must face rear. (2) Install washer (4) on longer tank valve control cable (5) next to end ball then insert cable (5) through one of holes in bottom loading valve lever (6) and through bushing (7). Apply grease to bushing. (3) Connect the longer tank-to-pump unit hose (8) to the bottom loading valve (3). (4) Position the other tank assembly (1) on the truck bed. Make sure the dowel holes in the skids (9) mesh with the dowels (2) on previously installed tank assembly. (5) Using the shorter bottom loading valve control cable (5), connect as in step 2 above for the rear tank bottom loading valve. 4-2
49 (6) Connect the shorter tank-to-pump unit hose (8) to the bottom loading valve (3). (7) Position the pumping unit on the truck with nozzles toward rear of truck. Slowly push the pumping unit into position, making sure the dowels on the rear tank skids enter the dowel holes in the A-Frame. Insert the hoses and bottom loading valve cables through the holes in the A-Frame base. 4-3
50 NOTE Four tiedown assemblies are used on each tank and two tiedown assemblies are used on the pumping assembly. Turnbuckles are not used on the pumping assembly. NOTE The turnbuckles must be only hand tight. Periodically check tiedown assemblies for tightness. Straps have a tendency to loosen when becoming damp or wet. (8) Position the tie-down bracket (9) on the truck bed, and connect the turnbuckle (10) between the tiedown bracket (9) and the tie-down link (11) on the tank skid. Tighten the turnbuckles (10) hand tight. (9) Connect the hook of the tie-down strap (12) to the shackle (13) on the fuel tank (14). (10) To unlock or release ratchet (15) of tiedown strap assembly (12), press release in ratchet handle. Hold release, pull handle down until side cams engage, and push static ratchet locks up from ratchet dogs. This allows center ratchet spool to rotate in either direction. (11) Connect the ratchet to the tie-down bracket (9). Operate the ratchet handle until the tie-down strap (12) is tight. Push the ratchet handle to the lock position. 4-4
 Use tiedown strap assembly (12) to attach a tiedown bracket (9) between each side of truck and tiedown link at top of pumping assembly A-Frame (16).")
51 (12) Repeat above steps for each of the other tie downs on tanks. (13) Use tiedown strap assembly (12) to attach a tiedown bracket (9) between each side of truck and tiedown link at top of pumping assembly A-Frame (16). NOTE When connecting the tank valve cables to the tank valve control levers, make sure the front tank valve control cable is connected to the control lever on the left. (14) Remove the nut (17) from the cable adjusting bolt (18) on the front tank valve control lever (19) (15) Maneuver the cables (20) through the hole in the A-Frame (16) then through the bushings (21). (16) Push the valve control lever (19) forward to the OFF (tank valve closed) position. (17) Slide the nut (17) over the tank valve cable (20). Pull the cable (20) taut, and position the cable (20) in the groove in the cable adjusting bolt (18). Hold the cable (20) in position, and screw the nut (17) onto the cable adjusting bolt (18), tightly enough to ensure that the cable (20) does not slip. (18) Connect the tank valve control cable from the rear tank valve to the rear tank valve control lever (22) by repeating steps 14 thru 17. (19) Connect the hose from the forward tank valve to the forward tank connection (23) on the bottom loading manifold (25), then connect the hose from the rear tank valve to the rear tank connection (24) on the bottom loading manifold (25). 4-5
52 (20) Remove the dust cap (26) from receptacle J2 (27) on the junction box (37). Connect plug (28) on the intervehicle power cable (29) to receptacle J2 (27). Connect the plug (30) on the other end of cable (29) to receptacle (31) on rear of truck cab. (21) Remove dust cap (32) from receptacle J1 (33). Make sure that ON-OFF switch (34) is set to OFF, then connect plug (36) at other end of cable (35) to receptacle J1 (33) 4-4. PREPARATION FOR MOVEMENT. a. Short Distance Movement. The tank and pump unit is truck mounted and does not require dismantling for short distance movement. Move the tank and pump unit to the new worksite with the vehicle. b. Long Distance Movement. Provide suitable blocking and tiedowns to prevent the unit from shifting during transport. 4-6
53 SECTION III. UNIT PREVENTIVE MAINTENANCE CHECKS AND SERVICES (PMCS) TM &P 4-5. INTRODUCTION. To ensure the tank and pump unit is ready for operation at all times, it must be inspected systematically so that defects may be discovered, and corrected before they result in serious damage or failure. The necessary preventive maintenance checks and services are listed in Table 4-1. Defects discovered during operation of the system shall be noted for future correction to be made as soon as operation has ceased. Stop operation immediately if a deficiency is noted during operation, which would damage the equipment if operation were continued. If the equipment fails to operate, troubleshoot with the proper equipment. Report any deficiencies using the proper forms (See DA Pam ). a. Item Number. The number appearing in this column indicates the chronological order of the checks and services. The numbers in the item number column shall be used as a source for numbers to be entered in the TM Number Column on DA Form 2404, Equipment Inspection and Maintenance Worksheet in recording results of - PMCS. b. Item To Be Inspected. This column contains an entry, which identifies the item to be inspected. c. Procedures. This column contains a brief description of the checks to be performed. Table 4-1. Unit Preventive Maintenance Checks and Services Monthly Schedule Item No. Item To Be Inspected Procedures 1 Hoses and Fittings WARNING A spring loaded mechanism can cause injury if released in an uncontrolled manner. The rewind spring is under high tension when the dispensing hose is extended. This may cause reel to rapidly rotate in reverse. Visually inspect hoses for damage, cracking, and signs of leakage. Inspect fittings and couplings for secure connections, damage, and signs of leakage. Extending fueling hoses for inspection. Replace defective parts (para. 4-8). 4-7
54 Item No. Item To Be Inspected 2 Hose Reels, Spring and Ratchet Wheels Procedures WARNING A spring loaded mechanism can cause injury if a released in an uncontrolled manner. The rewind spring is under high tension when the dispensing hose is extended. This may cause reel to rapidly rotate in reverse. Visual and operational inspection. Check operation of dispensing hose reels. Extend hoses and inspect as per item 1. Check that ratchet wheel will hold reel from rotating. Notify next higher level of maintenance if hose reels need repair. 3 Nozzle Check nozzles for proper operation and leakage. Check screen for foreign matter. Repair or replace defective nozzles (para. 4-10). 4 Static Discharge Reel WARNING A spring loaded mechanism can cause injury if released in an uncontrolled manner. The rewind spring is under high tension when the cable is extended. Always take care when working with the mechanism. Check for broken clamp, cable or cable coating. Replace defective reel (para. 4-9). 5 Filter/Separator and Refer to TM &P for procedures. Water Detector Kit 6 EMD Pump Check pump and components for proper operation, damage or leakage. Refer to Table 4-2 to troubleshoot. 7 Junction Box WARNING Low voltage can cause severe shock, burns or death. Disconnect power cable from NATO slave receptacle before replacing or repairing electrical components. Check for damaged cables, loose connections, switch or connectors. Check for damaged receptacles, housing, or cover gasket. Inspect relay switch and connections inside the junction box for loose connections and corrosion. Clean corroded connections, replace defective parts and tighten loose connections. Refer to para for maintenance. 4-8
55 Item No. Item To Be Inspected Procedures TM &P 8 Electric Motor Inspect for loose or missing mounting bolts. Check for proper operation. Tighten loose hardware. Notify next higher level if motor is inoperable. 9 Intervehicle Power Cable and Plug Check for loose or damaged cable or connectors. Test for continuity (para. 4-15). 10 Valve Operating Assembly Check for proper operation. Check that cables are securely connected. Tighten loose cables (para. 4-17). 11 Adapter Half, Quick Disconnect Inspect for secure connections, damage and signs of leakage. Disconnect Refer to para for maintenance. 12 Bottom Loading Manifold Inspect for secure connections, damage and signs of leakage. Refer to para for repair. 13 Frame and Storage Box Inspect frame for cracks, loose and missing hardware or components. Tighten loose hardware. Notify next higher level for repairs. 14 Tie Down Assembly Inspect tie down assemblies for looseness, cracked welds and thread damage. Check for frayed, missing, or loose straps and turnbuckles. Replace defective assemblies (para. 4-21). Tighten loose turnbuckles hand tight. 15 Tank Assemblies Inspect for damage or signs of leakage. Inspect for damaged or missing shackles and tie down links. Inspect skids for damage. Inspect the bottom loading valve for leaks. If the tank is damaged or leaking, replace the tank (para. 4-23). Refer to next level for repair to tank or bottom loading valve. 16 Manhole CAUTION When pumping operation is in progress blockage of the vent valve can cause the tanks to rupture or collapse. in freezing weather, especially during freezing precipitation, ensure the vent valve in the manhole is protected by being located under the Fill Plug Hinge. Check the manhole gasket for damage, and replace if necessary. Ensure that the manhole mounting hardware is tight. Check to see that the manhole cover hinge and cam close tightly. 17 Coupling Half Check for signs of leakage around the valve handle shaft. Check coupling gasket for cracks. Inspect coupling for secure connection. Test coupling half by observing the internal valve mechanism as the handle is moved to ensure handle operates valve. Refer to para for maintenance procedure. 4-9
56 SECTION IV. TROUBLESHOOTING 4-6. GENERAL a. Table 4-2 lists the common malfunctions which you may find during the operation or maintenance of the tank and pump unit. You should perform the tests/inspections and corrective actions in the order listed. b. This manual cannot list all malfunctions that may occur, nor all tests or inspections and corrective actions. If a malfunction is not listed or is not corrected by listed corrective actions, notify your supervisor. MALFUNCTION TEST OR INSPECTION CORRECTIVE ACTION Table 4-2. Unit Maintenance Troubleshooting 1 FUEL WILL NOT BEGIN TO FLOW Fusible link of valve operator control cable apart or control cable pulled loose. Reconnect control cable to valve operator mechanism. (Para. 4-17) 2 FUEL FLOW SLOWS OR STOPS DURING OPERATION Step 1. Inspect for defective nozzle. Repair defective nozzle. (Para. 4-10) imp Step 2. Check for clogged filter elements. Replace filter elements. (Refer to TM &P, 3 ELECTRIC MOTOR WILL NOT OPERATE Step 1. Check vehicle power supply. Check that vehicle charging system is operating properly. (Refer to manual for vehicle.) Step 2. Check power and control cables. '' Check continuity of intervehicle and OFF-ON switch control cables. Replace defective cables. (Para. 4-15, 4-16) Step 3. Check electric motor. Notify next higher level of maintenance. 4 PUMP WILL NOT OPERATE AT RATED CAPACITY Step 1. Check differential pressure gauge on filter/separator to determine if filter elements are clogged or dirty. Replace clogged or dirty filter elements. (Refer to TM &P) 4-10
57 MALFUNCTION TEST OR INSPECTION CORRECTIVE ACTION 4 PUMP WILL NOT OPERATE AT RATED CAPACITY - CONT Step 2. Check for kinked or damaged hoses. Replace kinked or damaged hoses. (Para. 4-8) Step 3. Check for defective nozzle assembly. Repair defective nozzle. (Para. 4-10) Step 4. Check that bottom loading valves are opening properly, when valve control levers are pulled to the ON position. Adjust bottom loading valve control linkage. (Refer to Para. 4-3.) Step 5. Check for leaks in suction hoses, and for leaking gaskets. Replace defective hose or gasket. (Para. 4-22) 5 FUEL FLOW WILL NOT STOP WHEN TANK IS FULL Bottom loading valve malfunction. Drain tank and refer to next level of maintenance. 6 TANK WILL NOT BOTTOM LOAD Step 1. Inspect jet level sensor to see if fuel is present in drain tube. If fuel is present: Refer to next level of maintenance. Step 2. Inspect jet level sensor to see if fuel is present in drain tube. If fuel is not present: a. Repair or replace jet level sensor (Para. 4-25). b. Remove and check manifold to tank hose (Para. 4-22). 4-11
58 SECTION V. UNIT MAINTENANCE INSTRUCTIONS Paragraph Page 4-7 Pump Unit Replacement Hose Replacement Static Discharge Reel Maintenance Dispensing Nozzle Maintenance Filter Separator Maintenance Junction Box Maintenance Pump and Electric Motor Maintenance Centrifugal Pump Maintenance Intervehicle Power Cable ON-OFF Cable Assembly Valve Operating Lever Assembly Maintenance Adapter Half Maintenance Bottom Loading Manifold Maintenance Storage Box Maintenance Tie Down Assembly Maintenance Tank Hose Maintenance Tank Maintenance Manhold Maintenance Jet Level Sensor Maintenance Coupling Half Maintenance PUMP UNIT REPLACEMENT. This task consists of: a. Removal b. Installation INITIAL SETUP Tools Required General Mechanics Tool Kit (Appendix B, Section III, Item 3) Materials/Parts Required None Equipment Condition Shut Down General Safety Instructions REMOVAL WARNING Do not smoke within 50 feet (15.34 meters) of the Tank and Pump Unit. WARNING Do not smoke or use open flame within 50 feet (15.34 meters) of the Tank and Pump Unit. a. Park on hard level surface. b. Disconnect intervehicular power cable (1). 4-12
59 c. Release pump unit tiedowns (2). d. Loosen nuts (3) and disconnect cables (4) from adjusting bolts (5). e. Pull out on cam lock levers (6) on manifold (7) to release tank hoses (8). f. Insert fork lift forks into slots (9) in A-Frame base. g. Lift pump unit and back away from truck. INSTALLATION a. Use fork lift to place pump unit on truck. b. Refer to paragraph 4-3 to complete installation. 4-13
60 4-8. HOSE REPLACEMENT This task consists of: a. Removal b. Installation INITIAL SETUP Tools Required General Mechanic Tool Kit (Appendix B, Section III, Item 3) Materials/Parts Required Lockwire (Appendix F) Suitable Container Drip Pan Equipment Condition Shut Down Personnel Required Two (2) General Safety Instructions REMOVAL WARNING Do not smoke within 50 feet (15.34 meters) of Tank and Pump Unit. Spring loaded mechanisms can cause injury. Fuel spills create a potential fire hazard. WARNING Do not smoke or use open flame within 50 feet (15.34 meters) of tank and pump unit. a. Perform safety procedures. b. Move tank levers (1) to OFF. c. Position a suitable container downhill of pump unit. WARNING A spring loaded mechanism can cause injury if released in an uncontrolled manner. The rewind spring is under high tension when the dispensing hose is extended. This may cause reel to rapidly rotate in reverse. d. Unwind reel hose (2) full length and place nozzle (3) over container. Operate lever (4) and drain fuel from reel hose. Repeat procedure for other reel hose. e. To remove reel hose (2), remove lockwire (5) and pull out on cam lock arms (6). Pull out on cam lock arms (7) to separate the hose (2) from nozzle (3). 4-14
61 4-15 TM &P
62 f. Provide a suitable container beneath the filter/separator drain hose (8), open drain valve (9) and drain fuel from filter/separator (10) and hoses (11, 12,13 and 14). WARNING Fuel spills create a potential fire hazard. Use a drip pan beneath hoses when disconnecting. g. To remove any of hoses (11, 12 or 13), pull out on cam lock arms (15) and disconnect hose. h. To remove hoses (14 and 16), pull out on cam lock arms (17) to disconnect hoses at filter/separator and manifold, then refer to paragraph 4-13 and remove the EMD Pump Assembly (18). i. Pull out on cam lock arms (19) and disconnect hoses (14 and 16). j. Remove any of the gaskets (20) that require replacement. INSTALLATION a. Make sure each female coupling has a good gasket (20) installed. b. Connect hoses (14 and 16) to EMD Pump Assembly (18) and close cam lock arms (19). Refer to paragraph 4-13 and install pump assembly. c. Connect hoses (14 and 16} at filter/separator and manifold and close cam lock arms (17). d. Install hoses (11, 12 and 13) and close cam lock arms (15). WARNING A spring loaded mechanism can cause injury if released in an uncontrolled manner. The rewind spring is under high tension when the dispensing hose is extended. This may cause reel to rapidly rotate in reverse. e. Connect reel hoses (2) and close cam lock arms (6). Install lockwire (5) and wind hose onto reel. f. Connect nozzle (3) to hose (2) and close cam lock arms (7). g. Make sure that drain valve (9) is closed. 4-16
63 4-17 TM &P
64 4-9. STATIC DISCHARGE REEL MAINTENANCE This task consists of: a. Removal b. Installation INITIAL SETUP Tools Required General Mechanic Tool Kit (Appendix 8, Section III, Item 3) Torque wrench (Appendix B, Section III, Item 2) Materials/Parts Required Lockwasher (2) (Appendix F) General Safety instructions REMOVAL WARNING Spring loaded mechanisms can cause injury. WARNING A spring loaded mechanism can cause injury if released in an uncontrolled manner. The rewind spring is under high tension when the dispensing hose is extended. This may cause reel to rapidly rotate in reverse. NOTE Discard mandatory replacement parts. a. Remove nuts (1), lockwashers (2), screws (3) and flat washers (4). b. Remove static discharge reel assembly (5) from frame (6). INSTALLATION a. Position static reel assembly (5) on frame (6) and aline mounting holes. b. Install screws (3), flat washers (4), lockwashers (2) and nuts (1). Torque to ft.-lbs. ( Nm). c. Pull cable (7) all the way out and check to see that it rewinds fully. onto static discharge reel (5). 4-18
65 4-10. DISPENSING NOZLE MAINTENANCE This task consists of: a. Removal b. Disassemby c. Repair d. Assembly e. Installation INITIAL SETUP Tools Required General Mechanic Tool Kit (Appendix B, Section III, Item 3) Pipe Wrench (Appendix B, Section III, Item 2) Materials/Parts Required Drycleaning Solvent (Appendix E, Section II. Item 1) Silicone Compound (Appendix E, Section II, Item 5) Sealing Compound (Appendix E, Section II, Item 6) Rags, Wiping (Appendix E, Section II, Item 13) Suitable Container O-Ring Packing (1) (Appendix F) Gasket (1) (Appendix F) Equipment Condition Pumping Unit Shutdown General Safety Instructions REMOVAL WARNING Drycleaning solvent is potentially dangerous to personnel and property. Using compressed air can be dangerous. Silicone compound is toxic to skin, eyes and respiratory tract. a. Position a suitable container beneath nozzle (1), remove cap (2) and operate nozzle lever (3) to drain any fuel from nozzle. b. Pull out on cam lock arms (4) of coupling half (5) and disconnect nozzle (1) from reel hose (6). 4-19
66 DISASSEMBLY a. Unscrew spout (1) and remove O-ring packing (2), gasket (3) and strainer element (4) from body (5). NOTE Further disassembly should only be performed to the extent required for parts replacement. b. Unscrew and remove coupling half (6). If gasket (7) is damaged, remove gasket from coupling half. c. Unscrew contact (9) from body (5) and remove static discharger (8). Hold nut (10) and unscrew plug (11) from nut. Pull nut (10) from cable (12) only if it requires replacement. d. To remove chain (15) and/or spring (16), spread open e-hooks (17) and disconnect chain (15) and spring (16) e. Spread open the other end of e-hooks (17) to remove them from the body (5) and cap (18). REPAIR WARNING Drycleaning solvent, P-D-680A, used to clean parts is potentially dangerous to personnel and property. Avoid repeated and prolonged contact. Do not use near open flame or excessive heat. Flash point of solvent is 100 degrees F -138 degrees F (38 degrees C-59 degrees C). a. Clean all metal parts with drycleaning solvent and dry thoroughly. 4-20
67 b. Inspect nozzle body (5) and spout (1) for damage. Check free operation of lever (20). c. Inspect coupling half (6) for any damage. Check the gasket (7) and replace if damaged. TM &P d. Check grounding wires (12 and 14) for breaks, fraying and broken or missing covering. Make sure clip (13) jaws close firmly and inspect plug (11) and nut (10) for any damage. If clip (13) or wire (12) are defective, replace complete static discharger (8). NOTE Do not shorten grounding wire to less than 18 inches between contact and clip. e. If grounding wire (14) is broken or frayed at the contact (9) it may be repaired. Hold nut (19) and unscrew contact (9). Pull nut from wire (14) and cut off the frayed portion of the wire. Trim plastic cover from the end of wire and slide nut (19) over the end of wire (14), allowing approximately 1/4 inch of wire to extend through nut. Use a punch, or similar toot, to spread the end of wire (14) slightly, then screw contact (9) onto nut (19). f. If nut (10) was removed, use the same procedure as above to install it on wire (12). WARNING Compressed air used for cleaning can create airborne particles that may enter the eyes. Pressure will not exceed 30 psig. Eye protection required. g. Use low pressure compressed air to dry strainer element (4) and remove any trapped particles. Replace the strainer element if there is damage to the screen. h. Replace any other parts that are damaged. Use a new O-ring packing (2) and gasket (3) at assembly. ASSEMBLY WARNING Silicone compound, MIL-S-8660, is toxic to skin, eyes and respiratory tract. Skin and eye protection required. Avoid repeated or prolonged contact. Good general ventilation is normally adequate. a. Apply silicone compound to O-ring packing (2) and install it on strainer element (4). b. Install strainer element (4) and gasket (3) on spout (1) and screw spout into nozzle body (5), hand tight. c. Screw plug (11) onto nut (10) and install the static discharger (8) by screwing contact (9) into nozzle body (5) d. Connect chain (15) and spring (16) to e-hooks (17) and squeeze the e-hook closed. Connect the s- hooks to the body (5) and cap (18) and squeeze closed. Install the cap (18) on spout (1). e. Apply sealing compound to threads of coupling half (6) and screw coupling half into body (5). Install gasket (7). 4-21
68 INSTALLATION a. Install nozzle (1) on reel hose (6). b. Close cam lock arms (4) on coupling half (5). 4-22
69 4-11. FILTER/SEPARATOR MAINTENANCE This task consists of: a. Removal b. Installation INITIAL SETUP Tools Required General Mechanic Tool Kit (Appendix B, Section III, Item 3) Torque Wrench "Appendix B, Section III, Item 2) Materials/Parts Required Lockwasher (a) (Appendix F) Equipment Condition Pumping Unit Shutdown Hoses Removed from Filter/Separator (Paragraph 4-8) Personnel Required Two (2) General Safety Instructions REMOVAL WARNING Do not smoke within 50 feet (15.34 meters) of the Tank and Pump Unit. Lifting heavy equipment can cause injury. NOTE Discard all mandatory replacement parts. a. Pull out on cam lock arms (1) and remove adapter had (2) from manifold (3). 4-23
70 b. Remove six nuts (4), lockwashers (5), screws (6) and flat washers (7). WARNING Lifting heavy equipment can cause injury. When an item cannot be lifted with ease, use two or more people to prevent injury. c. Remove the filter/separator (8) from the A-Frame (9). d. Refer to TM &P for repair of the filter/separator. INSTALLATION a. Position filter/separator (8) on A-frame (9) and aline mounting holes. b. Install flat washers (7), screws (6), lockwashers (5) and nuts (4). Torque to ft.-lbs. ( Nm). c. Refer to paragraph 4-8 and install hoses to filter/separator. d. install adapter half (2) in manifold (3) and close cam lock arms (1). 4-24
71 4-12. JUNCTION BOX MAINTENANCE This task consists of: a. Test b. Repair c. Removal d. Installation INITIAL SETUP Tools Required General Mechanic Tool Kit (Appendix B, Section III, Item 3) Multimeter (Appendix B, Section III, item 11) Soldering Iron (Appendix B, Section III, Item 12) Materials/Parts Required Silicone Compound (Appendix E, Section II, Item 5) Solder (Appendix E, Section II, Item 3) Heat Shrink Insulation (Appendix E, Section II, Item 10) O-Ring Packing (1) (Appendix F) Lockwashers (Appendix F) Equipment Condition Pumping Unit Shutdown General Safety Instructions TEST a. K1 Relay Test Procedure. WARNING Low Voltage can cause injury or death. Silicone Compound is toxic to skin, eyes and respiratory tract. Avoid fumes Generated by soldering. (1) Place ON-OFF switch in OFF position. (2) Disconnect power cable from J2. (3) Unscrew and remove. cover (1) with O-ring packing (2) from junction box (3). 4-25
72 NOTE Failure of motor thermostatic switch can prevent relay operation. (4) The X circuit of the relay is grounded through the thermostatic switch in the motor. To check continuity, put probe on "X2 terminal of relay, and the other probe on negative (-) of the J2 connector. CAUTION The following tests require the power cable be connected as in normal pumping procedure. Exercise care in use of multimeter test probes. (5) Connect power cable to J2 and to vehicle NATO slave connector. (6) Hold negative (-) probe of multimeter on inner threaded portion of junction box for ground. reading. (7) Touching positive (+) probe of multimeter to A1 terminal of relay should give volt (8) All other terminals should have zero readings. (9) Place ON-OFF switch in ON position. (10) Ground negative (-) probe of multimeter as above. reading. reading. (11) Touching positive (+) probe of multimeter to "X1" terminal of relay should give volt (12) Touching positive (+) probe of multimeter to "A1" terminal of relay should give volt (13) Touching positive (+) probe of multimeter to A2 terminal should give volt reading. (14) Switch ON-OFF switch to the OFF position. 4-26
73 REPAIR a. Replacement of K1 Relay. NOTE Discard all mandatory replacement parts. (1) Disconnect power cable from receptacle J2 and remove cover (1) and O-ring packing (2). (2) Tag each of the leads (3-7) connected to the relay (13), then remove nuts (8), lockwashers (9) and disconnect leads. (3) Remove screws (10), lockwashers (11) and flat washers (12). (4) Remove K1 relay (13) with bracket (14) from the junction box (15). (5) Remove nuts (16), star washers (17), screws (18) and flat washers (19) to separate the relay (13) from bracket (14). (6) Mount new relay (13) to bracket (14) with screws (18), flat washers (19), star washers (17) and nuts (16). (7) Install the relay and bracket in the junction box (15) and aline the mounting holes. (8) Install flat washers (12), lockwashers (11) and screws (10). 4-27
74 CAUTION Do not over-tighten nuts. Equipment damage can result from over tightening. (9) Connect leads (3-7) and install lockwashers (9) and nuts (8). WARNING Silicone compound, MIL-S-8660, is toxic to skin, eyes and respiratory tract. Skin and eye protection required. Good general ventilation is normally adequate. (10) Apply silicone compound to O-ring packing (2) and install on cover (1). Install cover (1) and connect power cable at receptacle J2. b. Removal of RF1 Filter. (1) Remove K1 relay (paragraph a. above). (2) Tag and disconnect the three leads (1) by removing nuts (2) and star washers (3). (3) Remove two screws (4), lockwashers (5) and flat washers (6). 4-28
75 (4) Move the RF1 filter (7) toward the center of opening in junction box (8), then remove screws (9) and cover (10). (5) Make sure the leads from motor are marked as in wiring diagram, then remove nuts (11), star washers (12) and six motor leads (13). Remove the RF1 filter (7). c. Testing RF1 Filter. Test the RF1 filter for continuity across terminals 4-1; 5-2; and 6-3. If there is not continuity at all three points, the RF1 filter is defective. d. Installation of the RF1 Filter. (1) Remove screws (9) and cover (10), and position RF1 filter (7) in the junction box (8). CAUTION Do not over-tighten nuts. Equipment damage can result from over-tightening. (2) Put the six motor leads (13) through the hole in back of RF1 filter and connect to terminals with star washers (12) and nuts (11). (Refer to wiring diagram for connections.) (3) Install cover (10) and screws (9), then move RF1 filter (7) into position with mounting holes alined. Install flat washer (6), lockwashers (5) and screws (4). (4) Connect three leads (1) with star washers (3) and nuts (2). (5) Refer to paragraph a. above and install K1 relay. 4-29
76 REMOVAL OF JUNCTION BOX a. Disconnect power cable and ON-OFF cable from junction box receptacles. b. Refer to procedures above to remove the K1 relay and RF1 filter. c. Unscrew coupling nut (1) from coupling (2) to release elbow (3). d. Remove nuts (4), lockwashers (5), flat washers (6) and screws (7). e. Lift junction box (8) from bracket carefully while withdrawing the motor leads. f. Remove screws (9), lockwashers (10), flatwashers (11), dust cap (12) and receptacle J1 (13) with leads (14 and 15). g. Remove screws (16), lockwashers (17), flat washers (18), dust cap (19) and receptacle J2 (20) with leads (21 and 22). h. Remove screws (23), washers (24) and leads (21 and 22). i. Remove coupling (2) and vent plugs (25) from junction box (8). 4-30
77 INSTALLATION a. Install using new parts as required. b. Install leads (21, 22), washers (24) and screws (23) on receptacle (20). c. Insert leads (21, 22) through mounting hole and install receptacle (20), dust cap (19), flat washers (18), lockwashers (17) and screws (16). Attach dust cap using screw (16) at lower right of receptacle. WARNING Avoiding breathing fumes generated by soldering. Eye protection is required. Good general ventilation is normally adequate. Ensure good ventilation. d. Install heat shrink insulation on wire, then solder leads (14 and 15) to terminals of receptacle (13). Move heat shrink into position and apply heat. Install receptacle (13), dust cap (12), flat washers (11), lockwashers (10) and screws (9). Use screw (9) at lower right of receptacle to attach dust cap (12). e. Install vent plugs (25) and coupling (2). Place the junction box (8) on the bracket and insert the motor leads through the coupling (2). Screw the coupling nut (1) onto coupling (2). f. Install screws (7), flat washers (6), lockwashers (5) and nuts (4). g. Refer to procedures above and install the K1 relay and RF1 filter. h. Connect power cable and ON-OFF cable to junction box receptacles. 4-31
78 4-13. ELECTRIC MOTOR DRIVEN (EMD) PUMP ASSEMBLY MAINTENANCE This task consists of: a. Removal b. Installation INITIAL SETUP Tools Required General Mechanic Tool Kit (Appendix B, Section III, Item 3) Torque Wrench (Appendix B, Section III, Item 2) Materials/Parts Required Lockwashers (4) (Appendix F) Equipment Condition Pumping Unit Shutdown Power Cable Disconnected Hoses Removed (Paragraph 4-8) Personnel Required Two (2) General Safety Instructions WARNING Lifting heavy equipment can cause injury. 4-32
79 REMOVAL NOTE Discard all mandatory replacement parts. a. Remove nuts (1), lockwashers (2), bevel washers (3), flat washers (5) and screws (4). b. Drain fuel from pump by removing plug (6). Install plug. WARNING When an item cannot be lifted with ease, use two or more people to prevent injury. c. Remove the EMD pump assembly (7) from the pump unit A-Frame. INSTALLATION a. Set the EMD pump assembly (7) on pump unit A-Frame. b. Install screws (4), flat washers (5), bevel washers (3), lockwashers (2) and nuts (1). Torque to ft.-lbs. ( Nm). c. Refer to paragraph 4-8 to install hoses. d. Connect power cable and ON-OFF cable to junction box. e. Operate pump to check for proper operation. 4-33
80 4-14. CENTRIFUGAL PUMP MAINTENANCE This task consists of: a. Repair INITIAL SETUP Tools Required General Mechanic Tool Kit (Appendix B, Section III, Item 3) Materials/Parts Required Check Valve Assembly (Appendix F) Equipment Condition Pump Unit Shutdown General Safety Instructions REPAIR WARNING Do not smoke within 50 feet (15.34 meters) of the Tank and Pump Unit. a. Remove nuts (1) and disconnect flange (2) with elbow and hose attached. b. Remove the check valve assembly (3) from the studs (4). Discard check valve assembly. c. Place new check valve assembly (3) on studs (4). d. Position flange (2) on studs (4) and install nuts (1) 4-34
81 4-15. INTERVEHICLE POWER CABLE This task consists of: a. Removal b. Test c. Installation INITIAL SETUP Tools Required Multimeter (Appendix B, Section lil, Item 11) Materials/Parts Required None Equipment Condition Pumping Unit Shutdown General Safety Instructions REMOVAL WARNING Low voltage can cause injury or death. Disconnect power cable (1) from vehicle NATO slave receptacle (2) and junction box receptacle (3). TESTING Use multimeter to check both negative and positive sides of the cable connectors. There should be a zero to 5 ohms resistance reading. If greater than 5 ohms, replace cable. INSTALLATION Connect power cable to junction box receptacle (3) and Vehicle NATO slave receptacle (2). 4-35
82 4-16. ON-OFF CABLE ASSEMBLY This task consists of: a. Removal b. Test c. Disassembly d. Repair e. Assembly f. Installation INITIAL SETUP Tools Required General Mechanic Tool Kit (Appendix B, Section III, Item 3) Soldering Gun (Appendix B, Section III, Item 12) Materials/Parts Required Solder (Appendix E, Section II, Item 3) Equipment Condition Pumping Unit Shutdown General Safety Instructions REMOVAL TEST Disconnect cable (1) from junction box (2). WARNING Avoid breathing fumes generated by soldering. Test for continuity with switch in ON position. If reading is more than 5 Ohms, replace the cable or defective connector. DISASSEMBLY a. Loosen screws (3) and unscrew body (4) from alinement barrel (7). b. Slide body (4), metal collar (5) and plastic collar (6) back on cable. c. Pull off alinement barrel (7) and rubber isolator (8). d. Tag and unsolder leads (9) from pins (10). REPAIR a. Inspect the cable for breaks or cuts. If the cable is damaged near the connector, cut the cable above the damage and trim back the outer insulation approximately 1/2 inch. Trim insulation on each lead to expose approximately 1/4 inch of wire. b. Inspect the connector components (3-8) for damage. Replace connector if damaged. ASSEMBLY a. Slide body (4), metal collar (5) and plastic collar (6) onto cable, if removed. 4-36
83 b. Solder pins (10) to leads (9). WARNING Avoid breathing fumes generated by soldering. Eye protection is required. Good general ventilation is normally adequate. c. Push pins (10) completely through rubber isolator (8). d. Install plastic collar (6) over rubber isolator (8). e. Push pins (10) into alinement barrel (7) as far as possible by hand, then pull pins through with needle nose pliers until pins seat within barrel. f. Slide plastic collar (6) fully into alinement barrel (7). g. Position metal collar (5) onto alinement barrel (7) and screw body (4) on alinement barrel. h. Tighten screws (3). 4-37
84 4-17. VALVE OPERATING LEVER ASSEMBLY This task consists of: a. Removal b. Disassembly c. Repair d. Assembly e. Installation INITIAL SETUP Tools Required General Mechanic Tool Kit (Appendix B, Section III, Item 3) Materials/Parts Required Grease "Appendix E, Section II, Item 8) Dry Cleaning Solvent (Appendix E, Section II, Item 1) Rags, Wiping (Appendix E, Section II, Item 13) Lockwashers (4) (Appendix F) Spring Pin (1) (Appendix F) Equipment Condition Pumping Unit Shutdown General Safety Instructions REMOVAL WARNING Do not smoke within 50 feet (15.34 meters) of the Tank and Pump Unit. Dry cleaning solvent is potentially dangerous to personnel and property. NOTE Discard all mandatory replacement parts. a. Loosen nuts (1) to disconnect cables (2) from the adjusting bolts (3). b. Remove the nuts (1) and withdraw cables (2) through bushings (4). c. Remove screws (5) and lockwashers (6) to remove lever assembly (7) from pumping unit. 4-38
85 DISASSEMBLY a. Remove spring pin (10) and shaft (11). b. Remove roll pins (8) and yokes (9). c. Remove spacer (12), control levers (13 and 14) and trip lever (15) from container (18). d. Remove fuse nuts (16), adjusting bolts (3) and nuts (17) from yokes (9). 4-39
86 REPAIR WARNING Dry cleaning solvent, P-D-680, used to clean parts is potentially dangerous to personnel and property. Avoid repeated and prolonged skin contact. Do not use near open flame or excessive heat. Flash point of solvent is 100 degrees F-138 degrees F (38 degrees C-59 degrees C). a. Clean all parts with dry cleaning solvent and dry thoroughly. b. Inspect all parts for wear and damage. Check levers and yokes for cracks or breaks. c. Replace all worn or damaged parts. 4-40
87 ASSEMBLY a. Thread nuts (17) on adjusting bolts (3). Install fuse nuts (16) and adjusting bolts (3) in yokes (9). Attach yokes to control levers (14 and 13) with roll pins (8). b. Install trip lever (15) in container (18) and insert shaft (11). Install spacer (12) and control levers (13 and 14) as shaft (11) is pushed into place. Make sure hole in shaft is alined with hole in container boss. c. Install spring pin (10). INSTALLATION a. Position lever assembly (7) on A-Frame, aline holes and install screws (5) and lockwashers (6). b. Move levers (13 and 14) forward to OFF position. c. Insert cable (2) from front tank valve through bushing (4) on left side and install nut (1) on cable. Pull cable taut and install in groove of adjusting bolt (3). Screw nut (1) onto adjusting bolt (3) tight enough that cable (2) does not slip. d. Insert cable (2) from rear tank valve through right side bushing (4) and connect as above. 4-41
88 4-18. ADAPTER HALF MAINTENANCE TM &P This task consists of: a. Removal b. Disassembly c. Repair d. Assembly. e. Installation INITIAL SETUP Tools Required General Mechanic Tool Kit (Appendix B, Section III, Item 3) Spanner Wrench (Appendix B, Section III, Item 8) Vise (Appendix B, Section III, Item 2) Materials/Parts Required Drycleaning Solvent (Appendix E, Section II, Item 1) Sealing Compound (Appendix E, Section II, Item 6) Tape, Anti-seize (Appendix E, Section II, Item 4) Rags, Wiping (Appendix E, Section II, Item 13) Seal (1) (Appendix F) Equipment Condition Pumping Unit Shutdown Fuel Evacuated from Lines and Manifold General Safety Instructions REMOVAL WARNING Do not smoke within 50 feet (15.34 meters) of the Tank and Pump Unit. Dry cleaning solvent is potentially dangerous to personnel and property. a. Pull out on cam lock handles (1) on bottom loading manifold coupling half (2). b. Remove the adapter half (3) from the manifold coupling half (2). DISASSEMBLY NOTE Discard all mandatory replacement parts. a. Pull out on cam lock handles (4) of dust cap (5) and remove dust cap with gasket (6). b. Unscrew and remove coupling half (7). c. Remove pipe end (8), seal (9) and spring (10) from adapter end (11). d. Remove the disc assembly (12). e. Unscrew stem (13) and remove spacer (14), washer (15) and disc (16) from holder (17). REPAIR a. Cleaning and Inspection. 4-42
89 WARNING Dry cleaning solvent, P-D-680, used to clean parts is potentially dangerous to personnel and property. Avoid repeated and prolonged skin contact. Do not use near open flame or excessive heat. Flash point of solvent is 100 degrees F-138 degrees F (38 degrees C-59 degrees C). (1) Clean all metal parts with dry cleaning solvent and dry thoroughly. (2) Inspect all parts for wear or damage. If stem (13), washer (15), or holder (17) are damaged, replace complete disc assembly (12). ASSEMBLY (3) Inspect gasket (6) in dust cap (5). If it is damaged or broken, replace gasket. (4) Check resilience of spring (10). (5) Replace all worn or damaged parts. Use a new seal (9) at assembly. a. Apply sealing compound to male pipe threads. 4-43
90 b. Assemble disc (16), washer (15) and spacer (12) to holder (17). Install stem (13). c. Place disc assembly (12) in adapter end (11 ) and install spring (10) over stem (13). d. Install seal (9) and pipe end (8). TM &P e. Thread coupling half (7) into pipe end (8) and install dust cap (5), with gasket (6) on adapter end (11). Close cam lock handles (4) on dust cap. INSTALLATION a. Install assembled adapter half (3) in manifold coupling half (2). b. Close cam lock handles (1) on coupling half (2). c. Refer to paragraph 2-4 to return equipment to operational status. 4-44
 Helicoil I and Removal Tool (Appendix B, Section III, Item 2) Materials/Parts Required")
91 4-19. BOTTOM LOADING MANIFOLD MAINTENANCE TM &P This task consists of: a. Removal b. Disassembly c. Repair d. Assembly. e. Installation INITIAL SETUP Tools Required General Mechanic Tool Kit (Appendix B, Section III, Item 3) Helicoil I and Removal Tool (Appendix B, Section III, Item 2) Materials/Parts Required Drycleaning Solvent (Appendix E, Section II, Item 1) Rags, Wiping (Appendix E, Section II, Item 13) Lockwashers (4) (Appendix F) Equipment Condition Pumping Unit Shutdown Fuel Evacuated from Manifold EMD Pump Assembly Removed (paragraph 4-13) Valve Control Cables Disconnected (paragraph 4-17) Personnel Required Three (3) General Safety Instructions REMOVAL WARNING Do not smoke within 50 feet (15.34 meters) of the Tank and Pump Unit. Dry cleaning solvent is potentially dangerous to personnel and property. Lifting heavy equipment can cause injury. a. Loosen tie downs (1) securing pump unit (2). NOTE Discard all mandatory replacement parts. 4-45
92 b. Pull out on cam lock handles (3) on manifold (6). WARNING When an item cannot be lifted with ease, use two or more people to prevent injury. c. Move pump unit (2) back away from tank to disconnect hoses (4 and 5). d. Remove nuts (7), lockwashers (8), screws (9) and flat washers (10). DISASSEMBLY a. Pull out on cam lock handles (11) and remove adapter half (12). b. Remove screws (13), service adapter (14) and O-ring packing (15). c. Remove cap (16) and lanyard (17). REPAIR WARNING Dry cleaning solvent, P-D-680, used to clean parts is potentially dangerous to personnel and property. Avoid repeated and prolonged skin contact. Do not use near open flame or excessive heat. Flash point of solvent is 100 degrees F-138 degrees F (38 degrees C-69 degrees C). a. Clean manifold and service adapter with dry cleaning solvent and dry thoroughly. b. Examine manifold for cracks or other damage. Check gaskets (18) in coupling halves for damage. Replace as required. c. Inspect thread inserts (19). If they are damaged, extract them and install new inserts. d. Inspect service adapter for damage. Inspect fit of cap and check O-ring for damage. Replace as required. ASSEMBLY a. Install O-ring packing (15) on service adapter (14) and assemble to manifold (6). Install screws (13). Attach lanyard (17) with screw at lower left position. b. Install cap (16) and lanyard (17) on service adapter (14). INSTALLATION a. Position manifold (6) within pump unit (2) frame and install flat washers (10), screws (9), lockwashers (8) and nuts (7). Torque to ft. Ibs. ( Nm). b. Make sure gaskets (18) are in place. Guide tank hoses (4 and 6) into place as pump unit (2) is pushed forward into position. Close cam lock handles (3). 4-46
93 c. Install adapter half (12) in manifold (6) and close cam lock handles (11). d. Refer to paragraph 4-17 and install valve control cables. e. Refer to paragraph 4-13 and install EMD pump assembly. f. Refer to paragraph 4-3 and install tie downs to pump unit. 4-47
94 4-20. STORAGE BOX MAINTENANCE TM &P This task consists of: a. Inspection b. Repair INITIAL SETUP Tools Required General Mechanic Tool Kit (Appendix B, Section III, Item 3) Materials/Parts Required Dry Cleaning Solvent (Appendix E, Section II, Item 1) Adhesive (Appendix E, Section II, Item 9) Rags, Wiping (Appendix E, Section II, Item 13) Gasket Material (Appendix F) INSPECTION a. Inspect the exterior of storage box (1) for dents or scratches. b. Open storage box door (2) and check for torn or missing gaskets (3). REPAIR a. Knock out any minor dents. b. Cut gaskets (3) from bulk gasket material. Clean surface of box with dry cleaning solvent. Apply adhesive to rubber gasket and attach to box. 4-48
95 4-21. TIE DOWN ASSEMBLY TM &P This task consists of: a. Repair REPAIR This task authorizes repair by replacement of parts found worn or damaged. 4-49
96 4-22. TANK HOSE MAINTENANCE TM &P This task consists of: a. Removal b. Installation INITIAL SETUP Tools Required General Mechanic Tool Kit (Appendix B, Section III, Item 3) Suitable Lifting Device Materials/Parts Required Drip Pans Rags, Wiping (Appendix E, Section ll. Item 13) Hose, Tank to Pump (Appendix F) Equipment Condition Fuel Evacuated from Lines and Manifold Rear Tank Empty Valve Control Cables Disconnected (paragraph 4-17) Personnel Required Two (2) General Safety instructions WARNING Do not smoke within 50 feet (15.34 meters) of the Tank and Pump Unit. Do not drain fuel from the unit on the ground. Use protective equipment to prevent skin and eye contact with fuel. Use a lifting device with a lifting capacity of at least three tons to handle tanks or pump unit. REMOVAL a. Remove tie down straps (1) from both ends of pump unit (2) and rear tank (3). b. Pull out on cam lock handles (4) on manifold couplings (5) and disconnect tank to manifold hoses (6 and 7) c. Move pump unit (2) back to tailgate (8). d. Pull out on cam lock handles (9) and remove rear hose (6). e. Slide the rear tank (3) back to pump unit (2). f. Pull out on cam lock handles (10) and remove front hose (7) from front tank (11). 9. Pull hose (7) out through pump unit (2) frame. 4-50
97 4-51 TM &P
98 INSTALLATION a. Push front tank hose (7) through pump unit (2) frame and past rear tank (3). b. Connect hose (7) to front tank (11) and close cam lock handles (10). c. Slide rear tank (3) forward to front tank (11). d. Push rear tank hose (6) through pump unit (2) frame. e. Connect hose (6) to rear tank (3) and close cam lock handles (9). f. Guide tank hoses (6 and 7) into couplings (5) as pump unit (2) is pushed forward into position. Close cam lock handles (4). 9. Refer to paragraph 4-3 and install tie downs to rear tank and pump unit. h. Refer to paragraph 4-17 and connect valve control cables. 4-52
99 4-53 TM &P
100 4-23. TANK MAINTENANCE TM &P This task consists of: a. Removal b. Installation INITIAL SETUP Tools Required General Mechanic Tool Kit (Appendix B, Section III, Item 3) Suitable Lifting Device Materials/Parts Required Replacement Tank(s) (Appendix F) Equipment Condition Fuel Tanks Emptied (paragraph 2-4) Hoses Removed (paragraph 4-22) Pump Unit Removed (paragraph 4-7) Personnel Required Two (2) General Safety Instructions REMOVAL WARNING Use a lifting device with a lifting capacity of at least three tons to handle tanks or pump unit. WARNING To prevent serious injury or death to personnel, or damage to equipment, use a lifting device with a lifting capacity of at least three tons to handle tanks or pump unit. Do not allow units to swing back and forth while handing in the air a. Attach a suitable lifting device to the four lifting/tie down shackles (1) on the rear tank (2) and lift the tank from truck bed. NOTE If only the rear tank is being replaced, perform installation at this point. If front tank is being replaced, go to step b. b. Remove the four tie downs (3) for the front tank (4), attach lifting device as above and lift front tank from truck bed. INSTALLATION Refer to paragraph 4-3 to install tanks and return the tank and pump unit to operational status. 4-54
101 4-24. MANHOLE MAINTENANCE TM &P This task consists of: a. Removal b. Disassembly c. Repair d. Assembly e. Installation INITIAL SETUP Tools Required General Mechanic Tool Kit (Appendix B, Section III, Item 3) Spanner Wrench (Appendix B, Section III, Item 8) Materials/Parts Required Dry Cleaning Solvent (Appendix E, Section II, Item 1) Silicone Compound (Appendix E, Section II, Item 5) Rags, Wiping (Appendix E, Section II, Item 13) Gasket (4) (Appendix F) Washer Nuts (4) (Appendix F) Locknuts (4) (Appendix F) Cotter Pins (6) (Appendix F) Equipment Condition Pumping Unit Shutdown Tank 1/2 Full or Less General Safety Instructions WARNING Do not smoke within 50 feet (15.34 meters) of the Tank and Pump Unit. Silicone Compound is toxic to skin, eyes and respiratory tract. Dry cleaning solvent is potentially dangerous to personnel and property. REMOVAL a. Open the manhole cover (1) and note the offset position of the fill tube (2). b. Unscrew the wing nuts (3) far enough for the hook clamps (4) to clear the manhole ring (5) welded to the tank. c. Rotate the hook clamps (4) to position the hooks toward the center of the manhole. d. Remove the manhole (6), with the fill tube (2) attached, from the fuel tank. e. Remove the gasket (7) from the groove in the manhole (6). Discard gasket. 4-55
102 DISASSEMBLY WARNING Dry cleaning solvent, P-D-680, used to clean parts is potentially dangerous to personnel and property. Avoid repeated and prolonged skin contact. Do not use near open flame or excessive heat. Flash point of solvent is 100 degrees F-138 degrees F (38 degrees C-59 degrees C). NOTE Discard all mandatory replacement parts. a. Fill cover. (1) Thoroughly clean the exterior of the manhole assembly with dry cleaning solvent. (2) Open cam (8). (3) Remove washer nuts (9), hinge pin (10) and fill cover assembly (11). (4) Remove nut (12), washer (13), capscrew (14), spacer (15) and hinge (16). (5) Remove nut (17), fuse plug (18) and gasket (19). (6) Remove nut (20), vent (21) and gasket (22). (7) Separate plug (23) from gasket retainer (24) and remove gasket (25). 4-56
103 b. Cover and Fill Tube. ' (1) Remove locknuts (23), flat washers (24), capscrews (25), flat washers (26) and fill tube (27). (2) Remove locknuts (28), capscrews (29), flat washers (30) and brackets (31). (3) Remove washer nuts (32), hinge pin (33) and cam (34). (4) Remove cotter pins (35), wing nuts (36), lockwashers (37), hook clamps (38) and en bolts (39) from cover (40). REPAIR WARNING Dry cleaning solvent, P-D-80, used to clean parts is potentially dangerous to personnel and property. Avoid repeated and prolonged skin contact. Do not use near open flame or excessive heat. Flash point of solvent is 100 degrees F-138 degrees F (38 degrees C-59 degrees C). a. Clean all metal parts with dry cleaning solvent and dry thoroughly. b. Inspect parts for damage and replace parts as required. 4-57
104 ASSEMBLY a. Cover and Fill Tube. (28). (1) Position brackets (31) on the cover (40), and install flat washers (30), capscrews (29) and locknuts (2) Position cam (34) on the cover (40), and install hinge pin (33) and washer nuts (32). (3) Install ell bolts (39), hook clamps (38), lockwashers (37), wing nuts (36) and cotter pins (35). NOTE Make certain the fill tube is in same position as noted at removal. (4) Position the fill tube (27) on brackets (31), and install flat washers (26), capscrews (25), flat washers (24) and nuts (23). 4-58
105 b. Fill Cover. (1) Position gasket (25) between plug (23) and gasket retainer (24), and install gasket (22), vent (21) and nut (20). (2) Install gasket (19), fuse plug (18) and nut (27). (3) Position hinge (16) and spacer (15) on plug (23) and install capscrew (14), washer (13) and nut (12). (4) Position fill cover assembly (11) on the cover (40) and install hinge pin (10) and washer nuts (9) 4-59
106 INSTALLATION WARNING Silicone compound, MIL-S-8660, is toxic to skin, eyes and respiratory tract. Skin and eye protection required. Good general ventilation is normally adequate. a. Apply silicone compound to gasket (7) and install in groove in manhole (6). b. Place manhole (6) and fill tube (2) in position on the manhole ring (5). c. Rotate the hook clamps (4) so that the grooves in the hook clamps will straddle the manhole ring (5) welded to the tank. d. Tighten the wing nuts (3). e. Close and latch the manhole cover (1). 4-60
107 4-25. JET LEVEL SENSOR MAINTENANCE. This task covers: a. Removal b. Repair c. nstallation INITIAL SETUP : Tools Required General Mechanic Tool Kit (Appendix B, Section III, Item 3) Materials/Parts Required Dry Cleaning Solvent (Appendix E, Section II, Item 1) Sealing Compound (Appendix E, Section II, Item 6) Rags, Wiping (Appendix E, Section II, Item 13) Lockwashers (b) (Appendix F) Equipment Condition Pumping Unit Shutdown Tank 1/2 Full or Less General Safety Instructions WARNING Do not smoke within 50 feet (15.34 meters) of the Tank and Pump Unit. Dry cleaning solvent is potentially dangerous to personnel and property. REMOVAL a. Open manhole (1), remove capscrews (2) and lockwashers (3). b. Maneuver sensor (6) out for access, then disconnect sensor tubes (4). Note which tube is inlet and outlet. Clean tube and apply tape to prevent tube nuts (5) from falling back down tubes (4). Do not allow tubes (4) to fall into tank. c. Remove jet level sensor (6) from tank. d. Loosen hose clamp (7) and disconnect hose (8). e. Remove capscrews (9), lockwashers (10) and remove the jet level sensor (6) with deflector shield (11) from bracket (12). f. Remove screws (13) and flat washers (14) to release tray (15) from sensor (16). 4-61
108 REPAIR WARNING Dry cleaning solvent, P-D-680, used to clean parts is potentially dangerous to personnel and property. Avoid repeated and prolonged skin contact. Do not use near open flame or excessive heat. Flash point of solvent is 100 degrees F-138 degrees F (38 degrees C-59 degrees C). a. Clean all metal parts with dry cleaning solvent and dry thorough 9. b. Inspect parts for damage and replace parts as required. c. Inspect fuel passage for obstructions. INSTALLATION a. Install tray (15) on sensor (16) and install flat washers (14) and screws (13). b. Assemble deflector shield (11) to sensor (16) and position on bracket (12) with mounting holes alined. c. Install lockwashers (10) and capscrews (9) d. Connect hose (8) with clamp (7). e. While holding jet level sensor (6) in manhole (1), note the tube (4) marked inlet! then attach inlet tube to jet level sensor inlet. Attach remaining tube (4). f. Position jet level sensor (6) within tank and secure with capscrews (2) and lockwashers (3). g. Close and latch manhole (1). 4-62
109 4-26. COUPLING HALF MAINTENANCE. This task covers: a. Removal b. Repair c. Assembly INITIAL SETUP : Tools Required General Mechanic Tool Kit (Appendix B, Section lil, Item 3) Materials/Parts Required Dry Cleaning Solvent (Appendix E, Section II, Item 1) Silicone Compound (Appendix E, Section II, Item 5) Rags, Wiping (Appendix E, Section II, Item 13) O-Ring Packing (4) (Appendix F) Gasket (1) (Appendix F) Cotter Pin (3) (Appendix F) General Safetv Instructions WARNING Parts under spring tension can cause serious injury. Dry cleaning solvent is potentially dangerous to personnel and property. Silicone compound is toxic to skin, eyes and respiratory tract. NOTE The coupling is stored in storage box. DISASSEMBLY a Remove drive pin (1) and lever (2). b. Remove stuffing box (3), packing (4), packing (5) and stem (6). 4-63
110 c. Remove cotter pins (7), nylon washer (8), nylon bushing (9) and camshaft (10). d. Remove flat washer (11) and bushing (12). WARNING Parts under spring tension can cause serious injury. Take extreme care when releasing parts under spring tension. e. Position the coupling with dust plug (13) downward. Apply pressure to hold dust plug against work surface, then open cam lock handles (29) to remove dust plug (13). f. Remove cylinder (14), guide (15) and spring (16). g. Remove gasket (17) and gasket (18). h. Remove screw (19) and O-ring packing (20). 4-64
111 i. Remove cotter pin (21), clevis pin (22) and link (23). j. Remove yoke (24), setscrew (25) and poppet (26) from the guide (27). k. Using drift on solid end of pin (28), remove pin and cam lock handles (29) from body (30). REPAIR WARNING Dry cleaning solvent, P-D-680, used to clean parts is potentially dangerous to personnel and property. Avoid repeated and prolonged skin contact. Do not use near open flame or excessive heat. Flash point of solvent is 100 degrees F-138 degrees F (38 degrees C-59 degrees C). a. Clean all metal surfaces with dry cleaning solvent and dry thoroughly. b. Inspect all parts for damage or wear, and replace parts as required. Discard all mandatory replacement parts. ASSEMBLY a. Position gasket (17) in body (30). WARNING Silicone compound, MIL-S-8660, is toxic to skin, eyes and respiratory tract. Skin and eye protection required. Good general ventilation is normally adequate. NOTE Apply silicone compound to packings prior to installation. b. Position cam lock handles (29) on body (30) and install pins (28). Use drift on open end of pins (28). c. Position yoke (24) in link (23) and install clevis pin (22) and cotter pin (21). d. Position poppet (26) in guide (27) and install setscrew (25). Install poppet and guide (26 and 27) on the yoke (24).Tighten setscrew (25). e. Install packing (20) and screw (19). f. Position assembled items in cylinder (14) and install spring (16), guide (15) and cylinder (14) in body (30). Install dust cap (13) to hold items in place. g. Install bushing (12) and flat washer (11). b. Install camshaft (10) through link (23), then install nylon bushing (9), nylon washer (8) and cotter pins (7). i. Turn the camshaft (7) so that its curve is toward open end of body (30). 4-65
112 j. Install stem (6). Place packings (4 and 5) on stuffing box (3) and install stuffing box on stem. Tighten stuffing box. k. Position handle end of lever (2) toward dust plug end of body (30) and install lever on stem (6). I. Install drive pin (1). 4-66
113 Section Vl. PREPARATION FOR SHIPMENT OR STORAGE Paragraph Page 4-27 Short Term Storage Intermediate Storage Administrative Storage of Equipment Preparation for Shipment SHORT TERM STORAGE a. Drain fuel from tanks, lines and manifold. b. Store loose components and cables in storage box. c. Secure grounding rod and dipstick with straps provided INTERMEDIATE TERM STORAGE. Refer to the following documents for information relative to storing the tank and pump unit. a. TM Preservation and Packing of Military Equipment. b. AR Army Materiel Maintenance Policy and Retail Maintenance Operations ADMINISTRATIVE STORAGE. a. Placement of equipment in administrative storage should be for short periods of time when a shortage of maintenance effort exists. Items should be in mission readiness within 24 hours or within the time factors as determined by the directing authority. During the storage period appropriate maintenance records will be kept. b. Before placing equipment in administrative storage, current preventive maintenance checks and services (PMCS) should be completed, shortcomings and deficiencies should be corrected, and all modification work orders (MWO's) should be applied. c. Storage site selection. Inside storage is preferred for items selected for administrative storage. If inside storage is not available, trucks, vans, conex containers and other containers may be used PREPARATION FOR SHIPMENT. Refer to TM Preservation and Packing of Military Equipment. 4-67/(blank 4-68)
114 CHAPTER 5 DIRECT SUPPORT MAINTENANCE INSTRUCTIONS Page Section I. Repair Parts, Special Tools, TMDE, and Support Equipment Section II. Troubleshooting Section III Maintenance Procedures GENERAL. SECTION I. REPAIR PARTS, SPECIAL TOOLS, TMDE, AND SUPPORT EQUIPMENT. a. For authorized common tools and equipment, refer to the Modified Table of Organization and Equipment (MTOE) applicable to your unit. b. Test, Maintenance, and Diagnostic Equipment (TMDE) and support equipment include electrical test equipment, standard pressure and vacuum gages, vacuum pumps, and charging manifolds found as standard equipment in any direct support maintenance shop. c. Repair parts are listed and illustrated in the Repair Parts and Special Tools List, (RPSTL), Appendix F.covering unit and direct support maintenance for this equipment GENERAL. SECTION II. TROUBLESHOOTING a. Table 5-1 lists the common malfunctions which you may find during the operation or maintenance of the tank and pump unit. You should perform the tests/inspections and corrective actions in the order listed. b. This manual cannot list all malfunctions that may occur, nor all tests or inspections and corrective actions. If a malfunction is not listed or is not corrected by listed corrective actions, notify your supervisor. Table 5-1. Direct Support Maintenance Troubleshooting MALFUNCTION TEST OR INSPECTION CORRECTIVE ACTION WARNING Disconnect intervehicle power cable from vehicle before maintaining or replacing electrical components. 5-1
115 Table 5-1. Direct Support Maintenance Troubleshooting-CONT MALFUNCTION TEST OR INSPECTION CORRECTIVE ACTION 1 ELECTRIC MOTOR WILL NOT RUN Step 1. Check for foreign material in volute housing that would prevent the impeller from turning. (Para. 5-4) Remove foreign material. Step 2. Check electric motor for proper operation. Replace motor. (Para. 5-4) 2 PUMP IS NOISY Step 1. Check for foreign material in volute housing. (Para. 5-4) Remove foreign material. Step 2. Check for loose impeller. Tighten impeller or replace defective parts. (Para. 5-4) 3 PUMP LEAKS Step 1. Inspect for defective gaskets, O-rings and seals or mounting screw compression inserts. Replace defective parts. (Para. 5-4) 4 TANKS WILL NOT BOTTOM LOAD Bottom loading valve malfunction. Remove and repair bottom loading valve (Para. 5-8) 5 FUEL FLOW WILL NOT STOP WHEN TANK IS FULL Bottom loading valve malfunction. Remove and repair bottom loading valve. (Para. 5-8) 5-2
116 SECTION III. MAINTENANCE PROCEDURES Paragraph Page 5-3 Hose Reel Maintenance Centrifugal Pump and Electric Motor Maintenance Frame and Bracket Maintenance Frame Maintenance Tank Maintenance Bosom Load Valve Maintenance HOSE REEL MAINTENANCE. This task covers: a. Removal b. Repair c. Assembly INITIAL SETUP : Tools Required General Mechanic Tool Kit (Appendix B, Section III, Item 4) Torque Wrench (Appendix B, Section lil, Item 7) Materials/Parts Required Dry Cleaning.Solvent (Appendix E, Section II, Item 1) Rags, Wiping (Appendix E, Section II, Item 13) Lockwashers Equipment Condition Pumping Unit Removed (paragraph 4-7) Reel Supply Hose and Dispensing Hose Removed (paragraph 4-8) Personnel Required Two (2) General Safetv Instructions WARNING A spring loaded mechanism can cause injury. Dry cleaning solvent is potentially dangerous to personnel and property. The two hose reels have recoil tension springs to wind the 40-foot discharge hoses on the reels. REMOVAL NOTE Maintenance procedures are identical for both hose reels. WARNING A spring loaded mechanism can cause injury if released in an uncontrolled manner. Always take care while working with a spring loaded mechanism. NOTE Discard all mandatory replacement parts. 5-3
117 a. Release spring tension on reel by carefully releasing locking pawl, then turning reel backwards nine turns to a neutral position. b. Remove swivel and coupling (1). ' WARNING A spring loaded mechanism can cause injury H released in an uncontrolled manner. Be sure spring recoil tension has been released before removing reel. c. Remove nuts (2), lockwashers (3), capscrews (4) and flat washers (5) to remove spring casing (6). d. Remove nuts (7), lockwashers (8), capscrews (9), flat washers (10) and hose guide (11). e. Remove nuts (12), lockwashers (13), capscrews (14) and fiat washers (15). f. Remove strap (16) and link (17). g. Remove nuts (18), lockwashers (19), capsr,rews (20) and flat washers (21). h. Remove outer A-Frame (22). i. Remove reel (23) from inner A-frame (24). j. Remove ball bearing (25) from reel (23). REPAIR a. Cleaning and Inspection. NOTE If ball bearing will not pull off shaft easily, remove rough edges with crocus cloth to allow bearing removal. WARNING Dry cleaning solvent, P-D-680, used to clean parts is potentially dangerous to personnel and property. Avoid repeated and prolonged skin contact. Do not use near open flame or excessive heat. Flash point of solvent is 100 degrees F-138 degrees F (38 degrees C-59 degrees C). (1) Clean all metal parts with dry cleaning solvent and dry thoroughly. (2) Inspect spring housing (6) for broken welds, dents, distortion and other damage. (3) Inspect the reel for leakage, distortion, dents and other damage ' (4) Inspect ratchet (27) and pawl (31) for wear. Check pawl spring (28) tension. (5) Inspect free roll of bearing (25). 5-4
118 b. Disassembly. Perform steps as necessary to replace worn or damaged parts. (1) Remove four screws (26) and ratchet (27) from reel (23). Mark outside of ratchet. (2) Unhook pawl spring (28) and remove screw (29), pawl cap (30) and pawl (31) from outer A- Frame (22). c. Assembly. (1) Install screw (29), pawl cap (30) and pawl (31) on outer A-Frame (22). Attach pawl spring (28). (2) Position ratchet (27) on reel (23) and install screws (26). (3) Install bearing (25) onto reel (23). 5-5
119 INSTALLATION a. Assemble reel (23) to inner A-Frame (24). b. Lubricate reel hub bearing (25) surface. c. Assemble outer A-Frame (22) to hose reel (23) and inner A-Frame (24), and install flat washers (15, 21), capscrews (14, 20), link (17), strap (16), iockwashers (13,19) and nuts (12,18). Torqueto 50-55ft. Ibs. ( Nm). d. Position spring casing (6) on reel shaft and aline mounting holes. e. Install capscrews (4), fiat washers (5), lockwashers (3) and nuts (2). Torque to ft. Ibs. ( Nm). f. Position the hose guide (11) on A-Frame (24 and 22) and install capscrews (9), flat washers (10), lockwashers (8) and nuts (7). Torque to ft. Ibs. ( Nm). g. Turn reel forward nine turns to load spring tension. h. Refer to paragraph 4-8 and install reel supply hose and dispensing hose. 5-6
120 5-4. ELECTRIC MOTOR DRIVEN (EMD) PUMP ASSEMBLY MAINTENANCE This task covers: a. Removal b. Repair c. Assembly INITIAL SETUP : Tools Required General Mechanic Tool Kit (Appendix B, Section III, Item 4) Materials/Parts Required Cleaning Solvent (Appendix E, Section II, Item 1) Silicone Compound (Appendix E, Section II, Item 5) Rags, Wiping (Appendix E, Section III, Item 13) O-Ring Packing (2) (Appendix F) Self-Sealing Screws (4) Seal Assembly (Appendix F) Lockwashers (4) (Appendix F) Suitable Container (Appendix F) Equipment Condition EMD Pump Assembly Removed (Paragraph 4-13) Junction Box Removed (Paragraph 4-12) Flange and Check Valve removed (Paragraph 4-14) General Safety Instructions WARNING Do not smoke within 50 feet (15.34 meters) of the Tank and Pump Unit. Dry cleaning solvent is potentially dangerous to personnel and property. Silicone compound is toxic to skin, eyes and respiratory tract. REMOVAL NOTE Discard all mandatory replacement parts. a. Unscrew coupling nut (1) and remove elbow (2). b. Remove nuts (3), lockwashers (4), flat washers (5), screws (6), spacers (7) and pump/motor (8) from frame and bracket (9). 5-7
121 DISASSEMBLY a. Remove nuts (10), flat washers (11), volute(12) and O-ring packings (13 and 14). b. Remove plug (15) from rear of motor (29) and insert flat blade screwdriver to hold motor from turning. c. Remove capscrew (16) and washer (17), then withdraw impeller (18) with parts (19 through 24) attached. d. Clamp the shaft adapter (24) in a soft jawed vise and unscrew impeller (18). Remove impeller (18), spring seat (19), spring (20) and shims (21 and 22). Pull seal (23) from shaft adapter (24). e. Remove screws (25) and wear plate (26). NOTE The spring seat and spring are part of the seal assembly. f. Remove self-sealing screws (27) and separate pump housing (28) from electric motor (29). g. Remove key (30). REPAIR a. Cleaning and Inspection. WARNING Dry cleaning solvent, P-D-680, used to clean parts is potentially dangerous to personnel and property. Avoid repeated and prolonged skin contact. Do not use near open flame or excessive heat. Flash point of solvent is 100 degrees F-138 degrees F (38 degrees C-59 degrees C). (1) Clean metal parts with dry cleaning solvent and dry thoroughly. (2) Inspect volute (12), impeller (18) and wear plate (26) for dents, cracks or worn surfaces. (3) Inspect housing (28) for dents, cracks or other damage. (4) Inspect studs (31 and 32), inserts (33), plug (34) and bushing (35) for thread damage. b. Repair. (1) If any of the studs (31, 32) are replaced, the associated inserts (36, 37) shall be extracted and new inserts installed. (2) Replace any worn or damaged parts. ASSEMBLY a. Install key (30) in motor (29) shaft. b. Assemble pump housing (28) to motor (29) and install sealing screws (27). c. Install seal (23) on shaft adapter (24) then install adapter on motor shaft. 5-8
122 d. Install wear plate (26) and screws (25). e. Install shims (21, 22), spring (20), spring seat (19), impeller (18), capscrew (16) and washer (17). Insert flat blade screwdriver through hole in rear of motor (29) to prevent shaft from turning and tighten capscrew (16). f. Using a feeler gage, check the clearance between the impeller (18) and wear plate (26) at a location where the impeller is closest to the wear plate. This distance shall be inch ( mm). Add or remove shims (21, 22) as required to attain this clearance. WARNING Silicone compound, MIL-S-8660, is toxic to skin, eyes and respiratory tract. Skin and eye protection required. Good general ventilation is normally adequate. g. Apply silicone compound to O-ring packings (13, 14) and their contacting surfaces. h. Install O-ring packing (14) in housing and O-ring packing (13) on volute (12). i. Install volute (12), washers (11) and nuts (10). j. If removed, apply sealing compound to threads and install bushing (35) and plug (34). k. Refer to paragraph 4-14 and install flange and check valve. 5-9
123 INSTALLATION a. Place pump/motor (8) on bracket and frame (9) and install spacers (7). b. Install screws (6), flat washers (5), lockwashers (4) and nuts (3). c. Insert motor leads (10) through elbow (2) then place elbow on coupling (11) and tighten coupling nut (1). d. Refer to paragraph 4-12 and install the junction box. e. Refer to paragraph 4-13 and install the EMD pump assembly. 5-10
124 5-5. FRAME AND BRACKET MAINTENANCE This task covers: a. Disassembly b. Inspection c. Repair e. Assembly INITIAL SETUP : Tools Required General Mechanic Tool Kit (Appendix B, Section lil, Item 4) Shop Equipment, Welding (Appendix B, section lil, Item 6) Materials/Parts Required Lockwashers (4) (Appendix F) Equipment Condition EMD Pump Assembly Removed (Paragraph 4-13) Junction Box Removed (Paragraph 4-12) Pump/Motor Removed (Paragraph 5-4) General Safetv Instructions WARNING Welding operations produce heat, highly toxic fumes, injurious radiation, metal slag and airborne particles. Protective equipment required. DISASSEMBLY NOTE Discard mandatory replacement parts. a. Remove nuts (1), lockwashers (2), flat washers (3) and screws (4). b Separate brackets (5) from frame (6) INSPECTION a. Inspect for cracks, dents, corrosion or other damage. b. Make certain the frame (6) and bracket (5) are free of dirt, grease, oil, grease or other foreign matter and bare metal is exposed for welding. Refer to TM for cleaning. 5-11
125 REPAIR a. Repair cracks or breaks by welding. Refer to TM Material is 6061 aluminum. b. Treat and paint surface in accordance with TM ASSEMBLY a. Position bracket (5) on frame (6). b. Install screws (4), flat washers (3), lockwashers (2) and nuts (1). c. Refer to paragraph 5-4 and install pump/motor. d. Refer to paragraph 4-12 and install junction box. e. Refer to paragraph 4-13 and install EMD pump assembly. 5-12
126 5-6. FRAME MAINTENANCE This task covers: a. Disassembly b. Repair c. Assembly INITIAL SETUP : Tools Required General Mechanic Tool Kit (Appendix B, Section lil, Item 4) Shop Set, Welding (Appendix B, Section lil, Item 6) Materials/Parts Required Dry Cleaning Solvent (Appendix Ej Section il. Item 1) Rags, Wiping (Appendix E, Section II, Item 13) Lockwashers (7) (Appendix F) Equipment Condition Pumping Unit Removed (Paragraph 4-7) Hoses Removed (Paragraph 4-8) Static Reel Removed (Paragraph 4-9) Filter-Separator Removed (Paragraph 4-11) EMD Pump Assembly Removed (Paragraph 4-13) Valve Operating Lever Assembly Removed (Paragraph 4-17) Bottom Loading Manifold Removed (Paragraph 4-19) Hose Reels Removed (Paragraph 5-3) General Safety Instructions WARNING Dry cleaning solvent is potentially dangerous to personnel and property. DISASSEMBLY a. Remove nuts (1), lockwashers (2), flat washers (3), u-bolts (4) and tee (5). b. Remove nuts (6), lockwashers (7), screws (8) and cable guide (9) from center frame (10). 5-13
127 REPAIR WARNING Dry cleaning solvent, P-D-680, used to clean parts is potentially dangerous to personnel and property. Avoid repeated and prolonged skin contact. Do not use near open flame or excessive heat. Flash point of solvent is 100 degrees F degrees F (38 degrees C - 59 degrees C). a. Clean all metal surfaces with dry cleaning solvent to remove dirt, oil and grease. b. Examine welds for cracks, breaks or other damage. c. Repair any cracked or broken welds by welding. Refer to TM Material is 6061 aluminum. d. Inspect latch, strike and hinge on storage box for damage. 5-14
128 TM &P e. Replace rivets (11), latch (12), strike (13) or hinge (14) as necessary. f. Treat and paint metal surfaces as required. Refer to TM g. Replace any damaged or illegible instruction plates. ASSEMBLY a. Position cable guide (9) in frame (10) and install screws (8), lockwashers (7) and nuts (6). b. Position tee (5) and attach with u-bolts (4), flat washers (3), lockwashers (2) and nuts (1). c. Refer to paragraph 5-3 and install hose reels. d. Refer to paragraph 4-19 and install bottom loading manifold. e. Refer to paragraph 4-17 and install valve lever assembly. f. Refer to paragraph 4-13 and install EMD pump assembly. g. Refer to paragraph 4-11 and install filter-separator. h. Refer to paragraph 4-9 and install static reel. i. Refer to paragraph 4-8 and install hoses. I. Refer to paragraph 4-7 and install pumping unit. 5-15
129 5-7. TANK MAINTENANCE This task covers: a. Repair INITIAL SETUP : Tools Required General Mechanic Tool KH (Appendix B, Section lil, Item 4) Shop Set, Welding "Appendix B, Section lil, Item 6) Compressed Air Supply and air hose to reach depth of tank. Tester, Combustion Vapor (Appendix B, Section lil, Item 5) Materials/Parts Required Dry Cleaning Solvent (Appendix E, Section II, Item 1) Detergent, General Purpose (Appendix E, Section II, Item 2) Trisodium-Phosphate (TSP) Adequate water supply with large diameter hose. Rags, Wiping (Appendix E, Section II, Item 13) Equipment Condition Tank Removed (Paragraph 4-23) Manhole Removed (Paragraph 4-24) Personnel Required Two (2) General Safetv Instructions WARNING Do not smoke within 50 feet (15.34 meters) of the Tank and Pump Unit. Trisodium-Phosphate is toxic to eyes, skin and respiratory tract. Dry cleaning solvent is potentially dangerous to personnel and property. Tanks used to store flammable liquids must be purged before welding. Compressed air can create airborne particles that may enter the eye. REPAIR WARNING Dry cleaning solvent, P-D-680, used to clean parts is potentially dangerous to personnel and property. Avoid repeated and prolonged skin contact. Do not use near open flame or excessive heat. Flash point of solvent is 100 degrees F -138 degrees F (38 degrees C - 59 degrees C). Trisodium-Phosphate is toxic to eyes, skin and respiratory tract. Skin and eye protection required. Use only in a well ventilated area. Applying heat or flame to a fuel tank containing residue may result in a violent explosion, causing injury or death to personnel. Tanks used to store flammable liquids must be purged in accordance with the safety precautions set forth in this paragraph before welding. 5-16
130 a. Cleaning Exterior. Wash all exterior surfaces with a solution of trisodium-phosphate and water; rinse thoroughly and dry. Parts removed during disassembly may be cleaned by immersing in or wiping with dry cleaning solvent. b. Safetv Precautions. (1 ) The tank being purged must have a static ground during all operations. Caution should be taken with all tools and metal objects around the tank to ensure no spark will be made. (2) Conduct a combustible vapor test reading prior to purging the tank, using a combustion vapor tester. (3) Only personnel thoroughly instructed in the proper handling and reading of the combustion vapor tester will conduct vapor tests. (4) Conduct a combustible vapor test reading immediately after purging. Under no circumstances will repair of the tank begin untli declared safe by safety personnel. (5) Discontinue all operations if an electrical storm is threatening or in progress. (6) Eliminate conditions that could cause explosions. c. Safety precautions for personnel. (1) Personnel engaged in purging operations will not wear wool, nylon, silk, rayon or other similar static electricity generating clothing. (2) Clean cotton clothing with no metal buttons or fittings will be worn. All contents will be removed from pockets. (3) Rubber boots will be worn. (4) Cotton rags will be used for cleaning. Material that may generate static electricity will not be used d. Purging procedures. (1) Completely drain all liquid from the tank to be purged. Be sure the drained liquid is removed from the area where work will be performed. Remove all flammable liquid from the floor and liquid-soaked waste from the area. (2) Remove all accessory items that might entrap liquid and close or seal all drains. (3) Fill the tank and overflow with cold water for five minutes. Drain the tank completely. (4) Conduct a combustible vapor test reading to determine if the tank is safe to repair. If combustible vapor test reading indicates tank is not safe, repeat purging procedure until safety personnel determine tank is safe to repair. e. Inspection of the Tank Assembly. (1) Check the tank for the condition of the paint. (2) Check the tank for dents that require repairs. Check dents on welds for breaks in the weld seam Check for any damage or wear that has caused a rupture or leak. (3) Check the interior of the tank for general cleanliness and the presence of contaminants. 5-17
131 WARNING When using compressed air, wear safety goggles or glasses and ensure air blast is not directed at another person. Do not direct compressed air against the skin. (4) When testing tank, completely dry and clean the interior and exterior of the tank of all foreign matter. When the tank is completely dry and clean, close all openings such as valves and fill cap, plug and fill cap vent, and subject the tank to a constant internal air pressure of 3 to 5 pounds per square inch gage (PSIG).Apply liquid detergent conforming to P-D-223 over the entire exterior surface of the tank at a pressure of not less than 70 PSIG (hand sprayer). Applying the liquid detergent by brush or other means is not acceptable. Observe the exterior of the tank. Leaks as evidenced by fizzing or bubbling of the liquid detergent, surface rupture, deformation, or broken hardware shall constitute failure. f. Repair of the Tank Assembly. WARNING Applying heat or flame to a fuel tank containing residue may result in a violent explosion, causing injury or death to personnel. lf conditions require fuel tank repairs by welding or other methods involving heat or flame, take care to assure that all fumes are purged from the tank or fill tank with water before commencing the repair. If possible, tank should be filled with water prior to welding after being thoroughly purged of fumes. (1) Repair all dents, cracks, breaks, and holes in the tank. Weld ruptured weld seams and other damage. Replace badly damaged parts. Refer to TM (2) if welding repairs are required near the bottom loading valve, refer to Paragraph 5-8 to remove the bottom loading valve. (3) Treat and paint the exterior of the tank in accordance with TM
132 5-8. BOTTOM LOAD VALVE MAINTENANCE This task covers: a. Removal b. Disassembly c. Repair d. Assembly e. Installation INITIAL SETUP : Tools Required General Mechanic Tool Kit (Appendix B, Section lil, Item 4) Torque Wrench (Appendix B, Section lil, Item 7) Soft-Jaw Vise Materials/Parts Required Dry Cleaning Solvent (Appendix E, Section II, Item 1) Silicone Compound (Appendix E, Section II, Item 5) Sealing Compound (Appendix E, Section II, Item 6) Grease "Appendix E, Section II, Item 8) Pilot Valve (1) (Appendix F) Gasket (2) (Appendix F) Retaining Ring (3) (Appendix F) Seal (2) (Appendix F) Garter Spring (1) (Appendix F) Seal and Retainer (1) (Appendix F) O-Ring Packing (1) (Appendix F) Cotter in (1) (Appendix F) Hair Pin (1 ) (Appendix F) Lockwasher (8) (Appendix F) Equipment Condition Tank Removed (Paragraph 4-23) Tank Drained and Purged (Paragraph 5-7) General Safetv Instructions WARNING Parts under spring tension can cause serious injury. Dry cleaning solvent is potentially dangerous to personnel and property. NOTE Discard all mandatory replacement parts. 5-19
133 REMOVAL a. Disconnect tubes (1) at jet level sensor. b. Withdraw cable (2) from lever (3) and bushing (4). c. Remove nuts (5), lockwashers (6), flat washers (7), bottom loading valve (8) and gasket (9). d. Disconnect tubes (1) and remove connectors (10). e Reach through mounting hole and lift retainer (11) up and away from gasket (12). Remove gasket through hole. DISASSEMBLY a Remove screws (13), plug (14) from SECONDARY port and pilot assembly (153 from PRIMARY port. WARNING Parts under spring tension can cause serious injury. Take extreme care when releasing parts under spring tension. b. Remove screws (16) and lift off cap (17). c. Remove garter spring (18), seal (19) and spring (20). d. Remove retaining ring (21) and seal assembly (22) from cap (17). e. Remove screen (23), spring (24), pin (25) and lever (26). f. Unscrew gland (27) and remove gland and shah (28). g. Remove O-ring packing (29) and seal/retainer assembly (30) from gland (27). h. Pins (31) may remain in shaft (28) unless they must be replaced due to damage. i. Remove shaft (32) from valve body (33) with parts attached to shaft. j. Remove hair pin (34), pin (35) and cam (36). k. Depress shaft (32) into piston (44) then remove cotter pin (37), washer (38), limit pin (39), links (40), spring (41) and orifice (42). 5-20
134 i. Remove retaining ring (43) to separate piston (44) from shaft (32) and remove retaining ring (45). m. Remove tubes (46 and 47) and plug (48). n. Do not remove bushing (49) or pin (50) unless they need replacement. REPAIR a. Cleaning and Inspection. WARNING Dry cleaning solvent, P-D-680, used to clean parts is potentially dangerous to personnel and property. Avoid repeated and prolonged skin contact. Do not use near open flame or excessive heat. Flash point of solvent is 100 degrees F degrees F (38 degrees C - 59 degrees C). (1) Clean metal parts with dry cleaning solvent and dry thoroughly. (2) Inspect all parts carefully for damage or wear. (3) Check resilience of springs (20 and 41). (4) Replace parts as required. Install new pilot valve (15), garter spring (18), seals (19) and 23), O-ring packing (29), seal assembly (30), retaining rings (22, 43 and 45), hair pin (34) and cotter pin (37) at assemblv. ASSEMBLY a. Assemble links (40) to cam (36) and install pin (35) and hair pin (34). b. Position orifice (42) at opposite end of links (28) and install limit pin (39). c. Install retaining ring (45) on shaft (32). d. Position spring (41) over orifice (42), then insert end of shaft (32) into orifice and install washer (38) and cotter pin (37). 5-21
135 e. Insert shaft (32) through piston (44) and install retaining ring (43). f. Lower assembled parts into valve body (33) making sure that cam (36) goes to the rear of body. g. Insert shaft (28) with pins (31) through opening in body and into the cam (36). WARNING Silicone compound, MIL-S-8660, is toxic to skin, eyes and respi ratory tract. Good general venti lation is normally adequate. h. Apply silicone compound to O-ring packing (29) and install O-ring on gland (27). i Install gland (27) over shaft (28) and screw gland into body (33). j Install seal/retainer assembly (30) in gland and install lever (26) and pin (25). k Install spring (24) between lever (26) and body (33), then operate lever by hand to make sure that spring (26) pulls piston (44) firmly into place. I. Install tubes (46 and 47) and screen (23). m Install seal (22) and retaining ring (21) in cap (17). WARNING Parts under spring tension can cause serious injury. Take extreme care when releasing parts under spring tension. n. Place spring (20) over shaft (32) and install seal (19), garter spring (18), cap (17) and screws (16). o. Position pilot assembly (15) on PRIMARY port and plug (14) on SECONDARY port of cap (17) and install screws (13). p. Apply sealing compound to threads of plug (48) and install plug in valve body (33). 5-22
136 TM &P INSTALLATION a. Insert gasket (12) through hole in tank and position in place with holes alined. b Working through mounting hole, in stall retainer (11). c Install connectors (10) and gasket (9) on bottom loading valve (8). d. Lower tubes (1) through manhole to extend far enough through mounting hole for connection to valve (8). e. Install the valve (8) in tank and fasten with flat washers (7), lockwashers (6) and nuts (5). Torque to ft. Ibs. ( Nm). f Make certain tubes (1) are clear of obstructions prior to connection. g. Connect tubes (1) at jet level sensor. h Check that washer (51) is on cable (2) and insert cable through lever (3) and bushing (4). Apply grease to bushing. i Refer to paragraph 4-23 to install tank and return the tank and pump unit to operational status. 5-23/(5-24 blank)
137 APPENDIX A REFERENCES A-1. SCOPE This appendix lists all forms, field manuals, technical manuals, and miscellaneous publications referenced in this manual. A-2. FORMS Recommended Changes to Publications and Blank Forms... DA Form 2028 Equipment Inspection and Maintenance Worksheet... DA Form 2404 Quality Deficiency Report... SF 368 A-3. FIRST AID First Aid for Soldiers... FM A-4. PAINTING Treatment and Painting of Material... MIL-STD-704R Painting Instructions for Army Material... TM A-5. MAINTENANCE Elimination of Combustiles in Fuel Tanks... TB ORD The Army Maintenance Management System (TAMMS)... DA PAM Welding Theory and Application... TM Operator's and Unit Maintenance Manual (Including RPSTL) for Filter Separator, Liquid Fuel, 50 GPM... TM &P A-6. SHIPMENT AND STORAGE Administrative Storage of Equipment.-... TM Preservation, Packaging, and Packing of Military Supplies and Equipment... TM Army Material Maintenance Policy and Retail Maintenance Operations... AR A-7. DEMOLITION Procedures for Destruction of Equipment to Prevent Enemy Use... TM A-1/(A-2 blank)
138 APPENDIX B MAINTENANCE ALLOCATION CHART SECTION I. INTRODUCTION B-1. GENERAL a. This section provides a general explanation of all maintenance and repair functions authorized at various maintenance categories. b. The Maintenance Allocation Chart (MAC) in Section II designates overall authority and responsibility for the performance of maintenance functions on the identified end item or component. The implementation of the maintenance functions upon the end item or component will be consistent with the assigned maintenance functions. c. Section lil lists the special tools and test equipment required for each maintenance function as referenced from Section Il. d. Section IV contains supplemental instructions and explanatory notes for a particular maintenance function. B-2. MAINTENANCE FUNCTIONS Maintenance functions will be limited to and defined as follows: a. Inspect. To determine the serviceability of an item by com paring its physical, mechanical, and/or electrical characteristics with established standards through examination. b. Test. To verify serviceability by measuring the mechanical or electrical characteristics of an item and comparing those characteristics with prescribed standards. c. Service. Operations required periodically to keep an item in proper operating condition, i.e., to clean (includes decontaminate, when required), to preserve, to drain, to paint, or to replenish fuel, lubricants, chemical fluids, or gases. d. Adjust. To maintain, within prescribed limits, by bringing into proper or exact position, or by setting the operating characteristics to specified parameters. e. Aline. To adjust specified variable elements of an item to bring about optimum or desired performance. f. Calibrate. To determine and cause corrections to be made or to be adjusted on instruments or test, measuring, and diagnostic equipment used in precision measurement. Consists of comparisons of two instruments, one of which is a certified standard of known accuracy, to detect and adjust any discrepancy in the accuracy of the instrument being compared. g. Remove/lnstall. To remove and install the same item when required to perform service or other maintenance functions. Install is the act of emplacing, seating, or fixing into position an item, part, or module (component or assembly) in a manner to allow the proper functioning of an equipment or system. h. Replace. To remove an unserviceable item and install a serviceable counterpart in its place. "Replace" is authorized by the MAC and is shown as the ad position code of the SMR code. B-1
139 B-2. MAINTENANCE FUNCTIONS - Continued i. Repair. The application of maintenance services' or other maintenance actions2 to restore serviceability to an item by correcting specific damage, fault, malfunction, or failure in a part, subassembly, module (component or assembly), end item, or system. j. Overhaul. That maintenance effort (service/action) necessary to restore an item to a completely serviceable/operational condition as prescribed by maintenance standards in appropriate technical publications i.e., DMWR). Overhaul is normally the highest degree of maintenance performed by the Army. Overhaul does not normally return an item to like new condition. k. Rebuild. Consists of those services/actions necessary for the restoration of unserviceable equipment to a like new condition in accordance with original manufacturing standards. Rebuild is the highest degree of material maintenance applied to Army equipment. The rebuild operation includes the act of returning to zero those age measurements (hour/miles, etc.) considered in classifying Army equipment components. B-3. EXPLANATION OF COLUMNS IN THE MAC, SECTION II a. Column 1, Group Number. Column 1 lists functional group code numbers, the purpose of which isto identify components, assemblies, subassemblies, and modules with the next higher assembly. b. Column 2, Component/Assembly. Column 2 contains the names of components, assemblies, subassemblies, and modules for which maintenance is authorized. c. Column 3, Maintenance Function. Column 3 lists the functions to be performed on the item listed in Column 2. (For detailed explanation of these functions, see paragraph B-2). d. Column 4, Maintenance Category. Column 4 specifies, by the listing of a work time figure in the appropriate subcolumn(s), the category of maintenance authorized to perform the function listed in Column 3. This figure represents the active time required to perform that maintenance function at the indicated category of maintenance. If the number or complexity of the tasks within the listed maintenance function vary at different maintenance categories, appropriate work time figures will be shown for each category. The work time figure represents the average time required to restore an item (assembly, subassembly, component, module, end item, or system) to a serviceable condition under typical field operating conditions. This time includes preparation time (including any necessary disassembly/assembly time), troubleshooting time, and quality assurance/quality control time in addition to the time required to perform the specific tasks identified for the maintenance functions authorized in the maintenance allocation chart. The symbol designations for the various maintenance categories are as follows:' C...Operator or crew. O... Organizational maintenance. F... Direct support maintenance. H... General support maintenance. D...Depot maintenance. e. Column 5, Tools and Equipment. Column 5 specifies, by code, those common tool sets (not individual tools) and special tools, TMDE, and support equipment required to perform the designated function. f. Column 6, Remarks. This column shall, when applicable, contain a letter code, in alphabetical order, which shall be keyed to the remarks contained in Section IV. 1 Services - inspect, test, service, adjust, aline, calibrate, or replace. 2 Actions - welding, grinding, riveting, straightening, facing, remachining, or resurfacing. B-2
140 B-4. EXPLANATION OF COLUMNS IN TOOL AND TEST EQUIPMENT REQUIREMENTS, SECTION lil a. Column 1, Reference Code. The tool and test equipment reference code correlates with a code used in the MAC, Section II, Column 5. b. Column 2, Maintenance Category. The lowest category of maintenance authorized to use the tool or test equipment. c. Column 3, Nomenclature. Name or identification of the tool or test equipment. d. Column 4, National Stock Number. The National Stock Number of the tool or test equipment. e. Column 5, Tool Number. The manufacturer's part number. B-5. EXPLANATION OF REFERENCE CODES, SECTION IV a. Column 1, Reference Code. The code recorded in column 6, Section II. b. Column 2, Remarks. This column lists information pertinent to the maintenance function being performed as indicated in the MAC, Section II. B-3
141 SECTION II MAINTENANCE ALLOCATION CHART (CONTINUED) TM &P (1) (2) (3) (4) (5) (6) GROUP COMPONENT/ MAINT. MAINTENANCE LEVEL TOOLS & NUMBER ASSEMBLY FUNCTION C O F H D EQUIP. REMARKS 01 Pump Unit, Liq Dspnsg Remove 0.5 Install 0.5 Hose, Separator to Reel Inspect 0.2 Replace Hose, Manifold to Pump Inspect 0.2 Replace Hose, Pump to Separator Inspect 0.2 Replace Hose, Reel Inspect 0.2 Replace Reel, Static Discharge Inspect 0.2 Replace Nozzle Assembly, Inspect 0.2. Fuel Dispensing Replace Repair 2.0 2, 3 A, G 0103 Reel Assembly, Inspect 1.5 Fuel Dispensing Replace 2.6 1,4. Repair 2.0 1,4 G Spring Inspect 0.3 Replace 1.5 1, 4 Wheel Ratchet Inspect 0.4 Replace 2.0 1, Filter Separator Refer to TM &P 0105 Pump Assy EMD Junction Box Assembly Inspect 0.1 Test 0.5 H. I, L, J. F Replace 1.0 2, 3 Repair 1.0 2, 3 Relay, K1 Test 1.0 2, 3 H. I, K, L Replace 1.0 2, 3 RF Filter, F1 Test 1.0 2, 3 H. I, K, L Replace 1.0 2, 3 Pump Inspect 0.5 Replace 0.5 1, 4 Repair , 3, 4 B-4
142 (1) (2) (3) (4) (5) (6) TOOLS GROUP COMPONENT/ASSEMBLY MAIN MAINTENANCE LEVEL & NUMBER FUNCTION C O F H D EQUIP REMARKS Electric Motor Inspect 0.5 Replace 0.5 1,4 Intervehicle Power Inspect 0.1 Cable and Plug Assy Test H, I, L Replace 0.1 On-Off Switch Insect 0.1 Cable Assembly Test H, I, L Replace 0.1 2, 3 Repair 1.0 Frame and Bracket Inspect 0.5 Repair 1.0 E 0106 Valve Operator Inspect 0.1 Lever Assy Replace Repair Adapter, Half, Inspect 0.2 Quick Disconnect Replace Repair A, G 0108 Manifold Bottom Inspect 0.2 Loading Replace Repair 1.0 A 0109 A Frame Assy Inspect 0.5 Replace , 4 Repair 6.0 1, 4 G, E Storage Box Inspect 0.2 Repair E, G 02 Tie Down Assembly Inspect 0.2 Repair Hoses, Tank to Inspect 0.2 Manifold Replace Tank Group 0401 Tank Assembly Inspect 0.2 Replace Tank Inspect 0.2 Replace Repair 4.0 1, 4, 5 E Manhole Inspect 0.2 Replace Repair G 0402 Sensor, Jet Fuel Level Inspect 0.2 Replace Repair A, G B-5
143 (1) (2) (3) (4) (5) (6) GROUP COMPONENT/ MAIN. MAINTENANCE LEVEL TOOLS & NUMBER ASSEMBLY FUNCTION C O F H D EQUIP. REMARKS 0403 Valve, Bottom Loading Inspect 0.2 Replace Repair G Test Coupling Half Inspect 0.2 Service 0.2 Test 0.5 k Replace Repair A, C, G B-6
144 SECTION III TOOL AND TEST EQUIPMENT REQUIREMENTS MAINTENANCE ALLOCATION CHART (1) (2) (3) (4) (5) Tool/ Test EqptMaintenance National/NATO Tool Ref Code Category Nomenclature Stock Number Number TM &P 1 F Shop Equipment, Automotive SC CL- Maintenance and Repair: Field A 31 Maintenance, Basic Less Power (19204) 2 O Shop Equipment, Automotive SC CL- Maintenance, and Repair: A 74 Organizational Maintenance, Common No. 1 Less Power 3 O Tool Kit, General Mechanics, SC Automotive CL-N26 4 F Tool Kit, Master Mechanics SC CL-N05 5 F Tester, Combustion Vapor F Shop Equipment, Welding: SC Field Maintenance: CL-B19-HR 7 O Wrench, Torque: Deflecting SC CL- Frame End DR Style A74 Mech. ½ Male Sq. Drive 8 O Wrench, Spanner: Adj Hook Type, SC CL- Fixed Pivot Point, 3/4 inch and 2 max A74 circ. 10 O Wrench, Pipe: Adj Jaw Style, 1-½ SC CLinch to 2-½ inch A74 11 O Multimeter, Digital AN/PSM-45, 3-½ SC CLinch A74 12 O Solder Gun: AC 60Hz, SGL-PH, Loop SC SCL- Tip, Removable Pistol Grip A74 13 O PAN, Drain; 4 Gal Cap, W/Push-Pull SC CL- HDL and Lifting Handles A74
145 TM &P Section IV. REMARKS FOR MAINTENANCE ALLOCATION CHART Reference code A B C E F G H I J K L REMARKS Replace Gaskets Replace Defective Hose Assembly Replace Seal Assembly Weld Insulation Breakdown Continuity Test Repair by Replacing Defective Components Test for Opens, Grounds, and Shorts Continuity Test Repair by Replacing Defective Wire Operational Test Test for Known Voltage B-8
146 TM &P APPENDIX C COMPONENTS OF END ITEM AND BASIC ISSUE ITEMS LISTS SECTION I. INTRODUCTION B-1. SCOPE This appendix lists components of end item and basic issue items for the Tank and Pump Unit to help you inventory items required for safe and efficient operation. B-2. GENERAL The Components of End Item and Basic Issue Items Lists are divided into the following sections: a. Section II. Components of End Item. This listing is for informational purposes only, and is not authority to requisition replacements. These items are part of the end item, but are removed and separately packaged for transportation or shipment. As part of the end item, these items must be with the end item whenever it is issued or transferred between property accounts. Illustrations are furnished to assist you in identifying the items. b. Section lil. Basic Issue Items. These are the minimum essential items required to place the Tank and Pump Unit in operation, to operate it, and to perform emergency repairs. Although shipped separately packaged, Bll must be with the Tank and Pump Unit during operation and whenever it is transferred between property accounts. The illustrations will assist you with hard-to-identify items. This manual is your authority to request/requisition replacement Bll, based on TOE/MTOE authorization of the end item. B-3. EXPLANATION OF COLUMNS The following provides an explanation of columns found in the tabular listings: a. Column (1)-Illustration Number (Illus. Number). This column indicates the number of the illustration in which the item is shown. b. Column (2)-National Stock Number. Indicates the National stock number assigned to the item and will be used for requisitioning purposes. c. Column (3)-Description. Indicates the Federal item name and, if required, a minimum description to identify and locate the item. The last line for each item indicates the FSCM (in parentheses) followed by the part number. d. Column (4)-Unit of Measure (U/M). Indicates the measure used in performing the actual operation all maintenance function. This measure is expressed by a two-character alphabetical abbreviation (e.g., ea. in, pr). e. Column (5)-Quantity required (Qty rqr). Indicates the quantity of the item authorized to be used with/on the equipment. C-1
147 TM &P SECTION II. COMPONENTS OF END ITEM (1) (2) (3) (4) (5) Illus/ National Stock Description Usable Qty Item No Number FSCM and Part Number On Code U/M rqr Pumping Unit (97403) 13226E2148 Ea Nozzle Assembly (81349) MIL-N Ea Adapter Assembly (97403) 13220E Ea Probe Assembly, Water Detector (97403) 13220E Ea Cable Assembly, Power Ea 1 (19207) Cable Assy, ON-OFF (97403) 13217E2964 Ea 1 7 Gauge Stick. Petroleum E2591 Ea 1 C-2
148 (1) (2) (3) (4) (5) Illus. National Stock Description Usable Qty Item No. Number FSCM and Part Number On Code U/M rqr Strap Assembly Ea 2 (97403) 13220E Strap Assembly Ea 1 (97403) 13220E Tank Assembly, Liquid Storage Ea 2 (97403) 13226E Tie-Down Assembly, Cargo Truck Ea 10 (97403) 13217E Switch Assembly, Toggle Ea 1 (97403) 13222E Adapter, Connector Ea 1 (19206) Coupling Halt Ea 1 (97403) D13226E Coupling Half Ea 1 (97403) D13217E Hose and Hose Assembly Ea 1 (81349) Mil-H-370 M370-B06B2A Hose and Hose Assembly Ea 1 (81349) Mil-H-370 M370-B06B2A Cable Ball End Ea 1 (97403) C 13217E Cable Ball End Ea 1 (97403)C13217E Ground Rod (97403) (13219E0462 Ea 1 21 (81349) MIL-F Filter Elements Ea 4 Change 3 C-3
149 SECTION III. BASIC ISSUE ITEMS (1 ) (2) (3) (4) (5) Illus. National Stock DESCRIPTION Usable U/M Qty Item No. Number FSCM and Part Number On Code rqr Fire Extinguisher Type 2, Ea 1 Class 2, w/bracket 2 DELETED Bag Pamphlet Ea 1 ( ) DEELETED 5 TM &P Ea 1 6 DELETED Change 3 C-4
150 APPENDIX D ADDITIONAL AUTHORIZATION LIST SECTION I. INTRODUCTION C-1. SCOPE This appendix lists additional items you are authorized for the support of the Tank and Pump Unit. C-2. GENERAL This list identifies items that do not have to accompany the Tank and Pump Unit and that do not have to be turned in with it. These items are all authorized to you by CTA, MTOE, TDA, or JTA. C-3. EXPLANATION OF LISTING National stock numbers, descriptions, and quantities are provided to help you identify and request the additional items you require to support this equipment. The items are listed in alphabetical sequence by item name under the type document (i.e., CTA, MTOE, TDA, or JTA) which authorizes the item(s) to you. D-1
151 TM &P Section II. ADDITIONAL AUTHORIZATION LIST (1) (2) (3) (4) NATIONAL DESCRIPTION STOCK QTY NUMBER FSCM & PART NUMBER USABLE ON CODE U/M AUTH Tie Down Assembly Vehicle (Hinge Side used with 5 ton dropside vehicle) EA 10 D-2
152 TM &P APPENDIX E EXPENDABLE/DURABLE SUPPLIES AND MATERIALS LIST SECTION I. INTRODUCTION D-1. SCOPE This appendix lists expendable supplies and materials you will need to operate and maintain the Tank and Pump Unit. This listing is for informational purposes only and is not authority to requisition the listed items. These items are authorized to you by CTA , Expendable/Durable Items (Except Medical, Class V, Repair Parts, and Heraldic Items), or CTA 8-100, Army Medical Department Expendable/Durable Items. D-2. EXPLANATION OF COLUMNS a. Column(1)-Item number. This number is assigned to the entry in the listing and is referenced in the narrative instructions to identify the material. b. Column (2)-Level. This column identifies the lowest level of maintenance that requires the listed item. O-Unit Maintenance F-Direct Support Maintenance c. Column (3)-National Stock Number. This is the National Stock number assigned to the item; use it to request or requisition the item. d. Column (4)-Description. Indicates the Federal item name and, if required, a description to identify the item. The last line for each item indicates the Federal Supply Code for Manufacturer (FSCM) in parentheses followed by the part number. e. Column (5)-Unit of Measure (U/M). Indicates the measure used in performing the actual maintenance function. This measure is expressed by a two-character alphabetical abbreviation (e.g., ea. in, pr). If the unit of measure differs from the unit of issue, requisition the lowest unit of issue that will satisfy your requirements. E-1
153 TM &P SECTION II. EXPENDABLE SUPPLIES AND MATERIALS LIST (1) (2) (3) (4) (5) NATIONAL ITEM STOCK NUMBER LEVEL NUMBER DESCRIPTION U/M 1 O Dry Cleaning Solvent GAL 2 O Detergent General GAL Purpose Liquid s gal Pail 3 O Solder, Tin Alloy LB (81349) QQ-S-571 SN 60 WRAP O Tape Anti-Seize RL 11-½ x 260" (18876) O Silicone Compound EA (81349) -MIL-S O Sealing Compound LB (81349) MIL-S F Adhesive Sealant Silicone EA RTV-Type I (81349) MIL-A O Grease, Wire Rope and Exposed Gear AR AR (81349) MIL-G O Adhesive, Rubber Base, General Purpose (81348) MMM-A-1617, Type III EA 10 O Insulation Sleeving, EA Electrical, Heat Shrink (81349) MlL-T-23053fi 11 O Padlock, Key Operated EA (96906) MS F Varnish EA (81349) MIL-V O Rags BE E-2
154 TM &P UNIT AND DIRECT SUPPORT MAINTENANCE REPAIR PARTS AND SPECIAL TOOLS LIST SECTION I. INTRODUCTION 1. SCOPE. This RPSTL lists and authorizes spares and repair parts; special tools; special test, measurement, and diagnostic equipment (TMDE); and other special support equipment required for performance of unit and direct support maintenance of the Tank and Pump Unit. It authorizes the requisitioning, issue, and disposition of spares, repair parts and special tools as indicated by the source, maintenance and recoverability (SMR) codes. 2. GENERAL. In addition to this section, Introduction, this Repair Parts and Special Tools List is divided into the following sections: a. Section II. Repair Parts List. A list of spares and repair parts authorized by this RPSTL for use in the performance of maintenance. The list also includes parts which must be removed for replacement of the authorized parts. Parts lists are composed of functional groups in ascending alphanumeric sequence, with the parts in each group listed in ascending figure and item number sequence. Bulk materials are listed in item name sequence. Repair parts kits are listed separately in their own functional group within Section II. Repair parts for repairable special tools are also listed in this section. Items listed are shown on the associated illustration(s)/figure(s). b. Section III. Special Tools List. A list of special tools, special TMDE, and other special support equipment authorized by this RPSTL (as indicated by Basis of Issue (BOI) information in DESCRIPTION AND USABLE ON CODE column) for the performance of maintenance. c. Section IV. Cross-references Indexes. A list, in National Item Identification Number (NIIN) sequence, of all National stock numbered items appearing in the listing, followed by a list in alphanumeric sequence of all part numbers appearing in the listings. National stock numbers and part numbers are cross referenced to each illustration figure and item number appearance. The figure and item number index lists figure and item number in alphanumeric sequence and cross references NSN, CAGEC and part number. 3. EXPLANATION OF COLUMNS (SECTIONS II AND lii). a. ITEM NO. (Column (1)). Indicates the number used to identify items called out in the illustration. b. SMR Code (Column (2)). The Source, Maintenance, and Recoverability (SMR) code is a 5-position code containing supply/requisitioning information, maintenance category authorization criteria, and disposition instruction, as shown in the following breakout: Change 1 F-1
155 *Complete Repair: Maintenance capacity, capability, and authority to perform all corrective maintenance tasks of the "Repair" function in a use/user environment in order to restore serviceability to a failed item. (1) Source Code. The source code tells you how to get an item needed for maintenance, repair, or overhaul of an end item/equipment. Explanations of source codes follows: Code Explanation Stocked items; use the applicable NSN to request/requisition items with these source codes. They are authorized to the category indicated by the code entered in the 3rd position of the SMR code. **NOTE: Items coded PC are subject to deterioration. Items with these codes are not to be requested/requisitioned individually. They are part of a kit which is authorized to the maintenance category indicated in the 3rd position of the SMR code. The complete kit must be requisitioned and applied. Items with these codes are not to be requested/requisitioned individually. They must be made from bulk material which is identified by the part number in the DESCRIPTION and USABLE ON CODE (UOC) column and listed in the Bulk Material group of the repair parts list in this RPSTL. If the item is authorized to you by the 3rd position code of the SMR code, but the source code indicates it is made at a higher level, order the item from the higher level of maintenance. Items with these codes are not to be requested/requisitioned individually. The parts that make up the assembled item must be requisitioned or fabricated and assembled at the level of maintenance indicated by the source code. If the 3rd position code of the SMR code authorizes you to replace the item, but the source code indicates the items are assembled at a higher level, order the item from the higher level of maintenance. XA-Do not requisition XA -coded item. Order its next higher assembly. (Also, refer to the NOTE below.) XB-If an XB item is not available from salvage, order it using the CAGEC and part number given. XC-Installation drawing, diagram, instruction sheet, field service drawing, that is identified by Reciprocating Compressor manufacturer's part number. XD-Item is not stocked. Order an XD -coded item through normal supply channels using the CAGEC and part number given if no NSN is available. Change 1 F-2
156 NOTE Cannibalization or controlled exchange, when authorized, may be used as a source of supply for items with the above source codes, except for those source coded "XA" or those aircraft support items restricted by requirements of AR (2) Maintenance Code. Maintenance codes tells you the level(s) of maintenance authorized to USE and REPAIR support items. The maintenance codes are entered in the third and fourth positions of the SMR code as follows: (a) The maintenance code entered in the third position tells you the lowest maintenance level authorized to remove, replace, and use an item. The maintenance code entered in the third position will indicate authorization to one of the following levels of maintenance. Code Application/Explanation C-Crew or operator maintenance done within organizational or aviation unit maintenance. O-Organizational or aviation unit category can remove, replace, and use the item. F-Direct support or aviation intermediate level can remove, replace, and use the item. H-General support level can remove, replace, and use the item. L-Specialized repair activity can remove, replace, and use the item. D-Depot level can remove, replace, and use the item. (b) The maintenance code entered in the fourth position tells whether or not the item is to be repaired and identifies the lowest maintenance level with the capability to do complete repair (i.e., perform all authorized repair functions.) NOTE: Some limited repair may be done on the item at a lower level of maintenance, if authorized by the Maintenance Allocation Chart (MAC) and SMR codes. This position will contain one of the following maintenance codes. Code Application/Explanation O-Organizational or aviation unit is the lowest level that can do complete repair of the item. F-Direct support or aviation intermediate is the lowest level that can do complete repair of the item. H-General Support is the lowest level that can do complete repair of the item. L-Specialized repair activity is the lowest level that can do complete repair of the item. D-Depot is the lowest level that can do complete repair of the item. Z-Nonreparable. No repair is authorized. B-No repair is authorized. (No parts or special tools are authorized for the maintenance of a Coded item). However, the item may be reconditioned by adjusting, lubricating, etc., at the user level. (3) Recoverability Code. Recoverability codes are assigned to items to indicate the disposition action on unserviceable items. The recoverability code is entered in the fifth position of the SMR Code as follows: Change 1 F-3
157 Recoverability Codes Application/Explanation Z-Nonreparable item. When unserviceable, condemn and dispose of the gem at the level of maintenance shown in ad position of SMR Code. O-Reparable item. When not economically reparable, condemn and dispose of the item at organizational or aviation unit level F-Reparable item. When uneconomically reparable, condemn and dispose of the item at the direct support or aviation intermediate level H-Reparable item. When uneconomically reparable, condemn and dispose of the item at the general support level. D-Reparable item. When beyond lower level repair capability, return to depot. Condemnation and disposal of item not authorized below depot level. L-Reparable item. Condemnation and disposal not authorized below specialized repair activity (SRA). A-Item requires special handling or condemnation procedures because of specific reasons (e.g., precious metal content, high dollar value, critical material, or hazardous material). Refer to appropriate manuals/directives for specific instructions. c. CAGEC (Column (3)). The Commercial and Government Entity Code (CAGEC) is a Digit numeric code which is used to identify the manufacturer, distributor, or Government agency, etc., that supplies the item. d. PART NUMBER (Column (4)). Indicates the primary number used by the manufacturer, (individual, company, firm, corporation, or Government activity), which controls the design and to characteristics of the item by means of its engineering drawings, specifications standards, and inspection requirements to identify an item or range of items. NOTE When you use an NSN to requisition an item, the item you receive may have a different part number from the part ordered. e. DESCRIPTION AND USABLE ON CODE (UOC) (Column (5)). This column includes the following information: (1 ) The Federal item name and, when required, a minimum description to identify the item. (2) The physical security classification of the item is indicated by the parenthetical entry, e.g., Phy Sec C1 (C)- Confidential, Phy Sec C1 (S)-Secret, Phy See C1 (T)-Top Secret. (3) Items that are included in kits and sets are listed below the name of the kit or set. (4) Spare/repair parts that make up an assembled item are listed immediately following the assembled item line entry. (5) Part numbers for bulk materials are referenced in this column in the line item entry for the item to be manufactured/fabricated. (6) When the item is not used with all serial numbers of the same model, the effective serial ;: numbers are shown on the last line(s) of the description (before UOC). Change 1 F-4
158 TM &P (7) The usable on code, when applicable (see paragraph 5, Special Information). (8) In the Special Tools List section, the basis of issue (BOI) appears as the last line(s) in the entry for each special tool, special TMDE, and other special support equipment. When density of equipment s supported exceeds density spread indicated in the basis of issue, the total authorization is increased proportionately. (9) The statement END OF FIGURE appears just below the last item description in Column 5 for a given figure in both Section II and Section III. (10) The indenture, shown as dots appearing before the repair part, indicates that the item is a repair part of the next higher assembly. f. QTY (Column (6)). The QTY (quantity per figure column) indicates the quantity of the item used in the breakout shown on the illustration figure, which is prepared for a functional group, subfunctional group, or an assembly. A V appearing in this column in lieu of a quantity indicates that the quantity is variable and may vary from application to application. 4. EXPLANATION OF COLUMNS (SECTION IV). a. NATIONAL STOCK NUMBER (NSN) INDEX. (1) STOCK NUMBER column. This column lists the NSN by National item identification number (NIIN) sequence. The NIIN consists of the last nine digits of the NSN, i.e. NSN NIIN When using this column to locate an item, ignore the first 4 digits of the NSN. However, the complete NSN should be used when ordering items by stock number. (2) FIG. column. This column lists the number of the figure where the item is identified/located. The figures are in numerical order in Section II and Section III. (3) ITEM column. The item number identifies the item associated with the figure listed in the adjacent FIG. column. This item is also identified by the NSN listed on the same line. b. PART NUMBER INDEX. Part numbers in this index are listed by part number in ascending alphanumeric sequence (i e., vertical arrangement of letter and number combination which places the first letter or digit of each group in order A through Z. followed by the numbers 0 through 9 and each following letter or digit in like order). (1) CAGEC column. The Commercial and Government Entity Code (CAGEC) is a 5-digit numeric code used to identify the manufacturer, distributor, or Government agency, etc., that supplies the item. (2) PART NUMBER column. Indicates the primary number used by the manufacturer j. (individual, firm, corporation, or Government activity), which controls the design and characteristics of the item by means of its engineering drawings, specifications standards, and inspection requirements to identify an item or range of items. (3) STOCK NUMBER column. This column lists the NSN for the associated part number and manufacturer identified in the PART NUMBER and CAGEC columns to the left. Change 1 F-5
159 III. (4) FIG. column. This column lists the number of the figure where the item is identified/located in Sections II and (5) ITEM column. The item number is that number assigned to the item as it appears in the figure referenced in adjacent figure number column. c. FIGURE AND ITEM NUMBER INDEX. III. (1 ) FIG. column. This column lists the number of the figure where the item is identified/located in Section II and (2) ITEM column. The item number is that number assigned to the item as it appears in the figure referenced in the adjacent figure number column. (3) STOCK NUMBER column. This column lists the NSN for the item. (4) CAGEC column. The Commercial and Government Entity Code (CAGEC) is a Digit numeric code used to identify the manufacturer, distributor, or Government agency, etc., that supplies the item. (5) PART NUMBER column. Indicates the primary number used by the manufacturer (individual, firm, corporation, or Government activity), which controls the design and characteristics of the item by means of its engineering drawings, specifications standards, and inspection requirements to identify an item or range of items. 5. SPECIAL INFORMATION. a. USABLE ON CODE. The usable on code appears in the lower corner of the Description column heading. Usable on codes are shown as UOC: in the Description Column Justified left) on the last line applicable item description/nomenclature. Uncoded items are applicable to all models. b. ASSOCIATED PUBLICATIONS. NOT APPLICABLE. 6. HOW TO LOCATE REPAIR PARTS. a. When National Stock Number or Part Number is NOT Known. (1) First. Using the table of contents, determine the assembly group or subassembly group to which the item belongs. This is necessary since figures are prepared for assembly groups and subassembly groups, and listings are divided into the same groups. (2) Second. Find the figure covering the assembly group or subassembly group to which the item belongs. Change 1 F-6
160 TM &P (3) Third. Identify the item on the figure and note the item number. (4) Fourth. Refer to the Repair Parts List for the figure to find the part number for the item number noted on the figure. (5) Fifth. Refer to the Part Number Index to find the NSN, if assigned. b. When National Stock Number or Part Number Is Known. (1) First. Using the Index of National Stock Numbers and Part Numbers, find the pertinent National Stock Number or Part Number. The NSN index is in National Item Identification Number (NIIN) sequence (see c-a.(1)). The part numbers in the Part Number index are listed in ascending alphanumeric sequence (see paragraph c-.b). Both indexes cross-reference you to the illustration figure and item number of the item you are looking for. (2) Second. After finding the figure and item number, verify that the item is the one you are looking for, then locate the item number in the repair parts list for the figure. 7. ABBREVIATIONS. Abbreviations used in this manual are listed in MIL-STD-12. Change 1 F-7
161 TM &P Figure 1. Hoses and Static Reel Change 1 F-8
162 SECTION II TM &P (1) (2) (3) (4) (5) (6) ITEM SMR PART NO CODE CAGEC NUMBER DESCRIPTION AND USABLE ON CODES (UOC) QTY GROUP 01 PUMP UNIT, LIQUID FIG. F-1. HOSES AND STATIC REEL PFOFF E2148 PUMP UNIT, LIQUID DI PAOZZ M370-A05B2A290.HOSE ASSY TEE TO FILTER/REEL PAOZO MS GASKET PBOZZ E7125.COUPLING HALF, QUICK PBOZZ E6306.COUPLING HALF, QUICK PAOZZ MS NUT, PLAIN, HEXAGON PAOZZ MS WASHER, LOCK PAOZO Ms27183-i4.WASHER, FLAT PAOZA E7123.BOLT, U XBOZZ E7122.COUPLING HALF PAOZZ M370-B06B2A104.HOSE ASSEMBLY, NONME MANIFOLD TO... 1 PUMP PAOZO MS GASKET PAOZZ M370-A05B2A385.HOSE ASSY PUMP TO FILTER-SEPARATOR MOOZZ MS20995F32-10.WIRE, SAFETY MAKE FROM P/N... 1 MS20995F32, 10 IN. REQ PAOZZ M370-A05B2A4800.HOSE ASSEMBLY, NONME PAOZZ MS COUPLING HALF, QUICK PAOZZ MS NUT, PLAIN, HEXAGON PAOZO MS WASHER, LOCK PAOZZ MS SCREW, CAP, HEXAGON H PAOZO MS WASHER, FLAT PAOZZ E7596.REEL, STATIC DISCH... 1 Change 1 F-9 END OF FIGURE
163 TM &P Figure 2. Fuel Dispensing Nozzle Assembly Change 1 F-10
164 SECTION II TM &P (1) (2) (3) (4) (5) (6) ITEM SMR PART NO CODE CAGEC NUMBER DESCRIPTION AND USABLE ON CODES (UOC) QTY GROUP 01 FIG. F-2. PUMP UNIT, LIQUID DISPENSING FUEL DISPENSING NOZZLE ASSEMBLY 1 PAOZZ MS COUPLING HALF, QUICK PAOZO MS GASKET PAOOF G(B104).NOZZLE ASSY, FUEL PBOZZ CA15/8..CAP ASSEMBLY, DUST XAOZZ H-3804-AG...CAP XAOZZ H-3673M...HOOK, CHAIN, S XAOZZ H-9209-M...SPRING, COMPRESSION XAOZZ H-9597-RB...CHAIN, NOZZLE XBOZZ C-32631½..SPOUT ASSY PAOZZ H-7766-M...GASKET PBOZZ H7670M..PACKING, PREFORMED XBOZZ ELEMENT, STRAINER XAOZZ D1554-AG..BODY, NOZZLE PBOZZ W..DISCHARGER, ELECTROS XAOZZ H5482M...CLIP, ELECTRICAL XAOZZ RS...WIRE XAOZZ MS CONTACT, ELECTRICAL XAOZZ MS PLUG, TIP XAOZZ MS NUT, COMPRESSION... 1 Change 1 F-11 END OF FIGURE
165 TM &P Figure 3. Reel Assembly, Fuel Dispensing, RH and LH Change 1 F-12
166 SECTION II TM &P (1) (2) (3) (4) (5) (6) ITEM SMR PART NO CODE CAGEC NUMBER DESCRIPTION AND USABLE ON CODES (UOC) QTY GROUP 01 FIG. F-3. PUMP UNIT, LIQUID DISPENSIN'G REEL ASSEMBLY, FUEL DIS PENSING, RH AND LH 1 PAOZZ MS NUT, PLAIN, HEXAGON PAOZZ MS WASHER, LOCK PAOZO MS SCREW, CAP, HEXAGON H PAOZO MS WASHER, FLAT XBOZZ E2590.GUIDE, HOSE PAFZZ MS NUT, PLAIN, HEXAGON PAFZZ MS WASHER, LOCK PAFZZ MS SCREW, CAP, HEXAGON H PAFZO MS WASHER, FLAT PBFZZ MS SCREW, SELF-LOCKING PBFFF REEL ASSY, HOSE, RH PBFFF REEL ASSY, HOSE, LH PBFZZ R..SPR POCKET ASSY RIGHT HAND ASSY PBFZZ L..SPR POCKET ASSY LEFT HAND ASSY PBFZZ PAWL ASSY XAFZZ CAP, PAWL XAFZZ SPRING, PAWL PBFZZ PIPE FITTING, SWIVEL PAFZZ MS NUT, PLAIN, HEXAGON PAFZO MS WASHER, LOCK PAFZZ MS SCREW, CAP, SOCKET HE XBFZZ WHEEL, RATCHET PBFZZ BEARING, BALL XAFZZ JFB14RH..REEL, HOSE, RH RIGHT HAND ASSY XAFZZ JFB14LH..REEL, HOSE, LH LEFT HAND ASSY... 1 Change 1 F-13 END OF FIGURE
167 TM &P Figure 4. Filter Separator Change 1 F-14
168 SECTION II TM &P (1) (2) (3) (4) (5) (6) ITEM SMR PART NO CODE CAGEC NUMBER DESCRIPTION AND USABLE ON CODES (UOC) QTY GROUP 01 FIG. F-4. PUMP UNIT, LIQUID DISPENSING FILTER SEPARATOR 1 PADZZ MS NUT, PLAIN.HEXAGON PAOZZ MS WASHER, LOCK PAOZZ MS SCREW, CAP, HEXAGON H PAOZO MS WASHER, FLAT PBOOO E7140.FILTER-SEPARATOR, LI (REFER TO... 1 TM &P FOR PARTS... BREAKDOWN)... Change 1 F-15 END OF FIGURE
169 TM &P Figure 5. EMD Pump Assembly Change 1 F-16
170 SECTION II TM &P (1) (2) (3) (4) (5) (6) ITEM SMR PART NO CODE CAGEC NUMBER DESCRIPTION AND USABLE ON CODES (UOC) QTY GROUP 01 FIG. F-5. PUMP UNIT, LIQUID DISPENSING END PUMP ASSEMBLY 1 PAOZZ MS NUT, PLAIN, HEXAGON PAOZZ MS WASHER, LOCK PBOZZ E WASHER, BEVEL PAOZZ MS SCREW, CAP, HEXAGON H PAOZO MS WASHER, FLAT PBOFH E7135.PUMP UNIT, CENTRIFUG... 1 END OF FIGURE Change 1 F-17/(F-18 blank)
171 Figure 6. Junction Box Assembly (Sheet 1 of 2) Change 1 F-19
172 Figure 6. Junction Box Assembly (Sheet 2 of 2) Change 1 F-20
173 SECTION II TM &P (1) (2) (3) (4) (5) (6) ITEM SMR PART NO CODE CAGEC NUMBER DESCRIPTION AND USABLE ON CODES (UOC) QTY GROUP 01 FIG. F-6 PUMP UNIT, LIQUID DISPENSING JUNCTION BOX ASSEMBLY 1 PAOZZ MS NUT,PLAIN,HEX PAOZZ MS WASHER,LOCK PAOZO MS WASHER,FLAT PAOZZ MS SCREW,CAP XBOZZ E7166..ELBOW,90 DEG XBOZZ UNY105SA..CPLG,ELEC CONDUIT XBOOF E6652..JUNCTION BOX ASSY XBOOO E JUNCTION BOX XBOZZ GUB COVER,CONDUIT OUTLE PAOZZ GASK925...PACKING,PREFORMED PAOZO MS SCREW,MACHINE PAOZO MS WASHER,LOCK PAOZO MS WASHER,FLAT PAOZZ MS NUT,PLAIN,HEXAGON PBOZZ A4497A...FILTER,RADIO FREQUE PAOZZ RELAY 200 AMP, 24 VDC XBOZZ E BRACKET,MOUNTING PBOZZ MS CONNECTOR,PLUG,ELEC... 1 INTERVEHICLE POWER CABLE XBOZZ CAP,PROTECTIVE,DUST PAOZO MS SCREW,MACHINE PAOZO MS WASHER,LOCK PAOZZ MS WASHER,FLAT PBOZZ MS3452W165-4S...CONNECTOR,RECEPTACL XBOZZ MS DA...COVER,ELECTRICAL CO XBOZZ M286755B03...FITTING,DRAIN AOOZZ E LEAD,ELECTRICAL J1-A TO K1-A MOOZZ E WIRE,ELECTRICAL...MAKE FROM BULK 1 WIRE P/N MIL-W-16878/5TYPE EE-16,... 6IN RQ PAOZO MS TERMINAL,LUG AOOZZ E LEAD,ELECTRICAL J1-B TO K1-X MOOZZ E WIRE,ELECTRICAL MAKE FROM BULK... 1 WIRE P/N MIL-W-16878/5TYPE EE-16, 6IN RQ PAOZZ MS TERMINAL,LUG AOOZZ E LEAD,ELECTRICAL K1-A2 TO RF MOOZZ E WIRE,ELECTRICAL MAKE FROM BULK... 1 WIRE P/N MIL-W-16878/5TYPE EE-8,6IN REQ PAOZZ MS TERMINAL,LUG PAOZZ MS TERMINAL,LUG AOOZZ E LEAD,ELECTRICAL K1-X2 TO RF MOOZZ E WIRE,ELECTRICAL MAKE FROM BULK... 1 WIRE P/N... MIL-W-16878/5TYPE EE-16, 6IN RQ PAOZZ MS TERMINAL,LUG Change 1 F-21
174 SECTION II TM &P (1) (2) (3) (4) (5) (6) ITEM SMR PART NO CODE CAGEC NUMBER DESCRIPTION AND USABLE ON CODES (UOC) QTY 39 PAOZZ MS TERMINAL,LUG AOOZZ E LEAD,ELECTRICAL J2(-) TO RF MOOZZ E WIRE,ELECTRICAL MAKE FROM BULK... 1 WIRE P/N MIL-W-16878/5TYPE EE-8,6IN... REQ PAOZZ MS TERMINAL,LUG PAOZZ MS TERMINAL,LUG AOOZO E LEAD,ELECTRICAL J2(+) TO K1-A MOOZZ E WIRE,ELECTRICAL MAKE FROM BULK... 1 WIRE P/N MIL-W TYPE EE-8,6IN... REQ PAOZZ MS TERMINAL,LUG PAOZZ MS TERMINAL,LUG... 1 Change 1 F-22 END OF FIGURE
175 Figure 7. Pump Assembly Change 1 (F-23 blank)/f-24
176 SECTION II TM &P (1) (2) (3) (4) (5) (6) ITEM SMR PART NO CODE CAGEC NUMBER DESCRIPTION AND USABLE ON CODES (UOC) QTY GROUP 01 FIG. F-7 PUMP UNIT, LIQUID DISPENSING PUMP ASSEMBLY 1 PAOZZ E7129..COUPLING HALF.QUICK PAOZZ E6306..COUPLING HALF,QUICK PAOZZ MS X..BUSHING,PIPE PAOZO MS CAP,QUICK DISCONNEC PAOZO MS GASKET PAOZZ MS COUPLING HALF QUICK PBOFF E7170..PUMP ASSEMBLY PAOZZ MS C...PLUG,PIPE PAOZZ MS C...BUSHING,PIPE PAOZZ MS NUT,PLAIN,HEX XBOZZ E FLANGE,PIPE PBOOO E DISK,VALVE PAOZO MS SCREW,MACHINE XDOZZ E WEIGHT,CHECK VALVE, PAOZZ E WEIGHT,CHECK VALVE XAOZO E GASKET PAFZO MS NUT,PLAIN,HEXAGON PAFZO MS WASHER,FLAT XBFZZ E VOLUTE,PUMP PAFZO MS PACKING,PREFORMED PAFZZ MS PACKING,PREFORMED PAFZF MS BOLT,MACHINE PAFZZ E RETAINER,PACKING XBFZZ E IMPELLER PBFZO E SHIM PBFZZ E WASHER,FLAT PAFZO SEAL ASSEMBLY PUMP XDFZZ E SHAFT,SHOULDERED PBFZZ MS SCREW,MACHINE XBFZZ E VEAR,PLATE PAFZO MS KEY,WOODRUFF XDFZZ SAF-LOK SOCKET...SCERW,SELF-SEALING PAOZZ MS STUD,PLAIN PAOZZ MS STUD XBFZZ E HOUSING,LIQUID PUMP PBFZZ MS INSERT,SCREW THR PBFZZ MS INSERT,SCREW THREAD PBFZZ MS INSERT,SCRE THREAD... 3 Change 1 F-25 END OF FIGURE
177 Figure 8. Electric Motor with Frame and Bracket Change 1 F-26
178 SECTION II TM &P (1) (2) (3) (4) (5) (6) ITEM SMR PART NO CODE CAGEC NUMBER DESCRIPTION AND USABLE ON CODES (UOC) QTY GROUP 01 FIG. F-8 PUMP UNIT, LIQUID DISPENSING ELECTRIC MOTOR WITH FRAME AND BRACKET 1 PAOZZ MS NUT,PLAIN,HEX PAOZZ MS WASHER,LOCK PAOZO MS WASHER,FLAT PAOZZ MS SCREW,CAP,HEXAGON H PAFZZ MS NUT,PLAIN,HEXAGON PAFZO MS WASHER,LOCK PAOZZ MS WASHER,FLAT PAOZZ MS BOLT,MACHINE PBFZZ E7131..MOTOR,DIRECT CURREN PAOZZ MS TERMINAL,LUG PAOZZ MS TERMINAL,LUG XBOZZ E9858..SPACER,MOTOR XBOZZ E7136..BRACKET,MOT MOUNT PAOZH MS20600AD6W4..RIVET,BLIND XBOZZ E7137..PLATE,IDENT XBFZZ E7121..BASE,PUMP ENGINE MO PAOZZ E STRAP,WEBBING (SECURES CABLE... 1 ASSEMBLY SWITCH) PBOFO E2964..CABLE ASSY SWITCH (JUNCTION BOX... 1 ON-OFF SWITCH) XAOZZ C0-02-MG-F-(2/16...CABLE,ELECTRICAL... 1 ) PBOZA MS3456W165-4P...CONNECTOR,PLUG,ELEC PBOZZ CABLE ASSY, POWER (VEHICLE TO... 1 JUNCTION BOX) PBOZZ E9859..SWITCH ASSY,TOGGLE (AUXILIARY ON OFF) XBOZZ ADAPTER,CONNECTOR (NATO TO PRONG)... 1 Change 1 F-27 END OF FIGURE
179 Figure 9. Valve Operating Lever Assembly Change 1 F-28
180 SECTION II TM &P (1) (2) (3) (4) (5) (6) ITEM SMR PART NO CODE CAGEC NUMBER DESCRIPTION AND USABLE ON CODES (UOC) QTY GROUP 01 FIG. F-9 PUMP UNIT, LIQUID DISPENSING VALVE OPERATING LEVER ASSEMBLY 1 PAOZO MS SCREW,MACHINE PAOZZ MS WASHE2,LOCK PBOOF F VALVE OPR,2-LEVER XBOZZ PIN,ROLL XBOZZ SHAFT XBOZZ SPACE2,SLEEVE XBOZZ PIN ROLL XBOZZ HANDLE,LEVER,RH XBOZZ HANDLE,LEVER,LH XBOZZ FUSE-NUT XBOZZ NUT,ADJUSTING,HEX XBOZZ BOLT,CABLE ADJUST XBOZZ NUT,PLAIN,HEX XBOZZ YOKE,HANDLE XBOZZ LEVER XBOZZ BUSHING XBOZZ CONTAINER,2 COMPT... 1 Change 1 F-29 END OF FIGURE
181 Figure 10. Quick Disconnect Adapter Half Change 1 F-30
182 SECTION II TM &P (1) (2) (3) (4) (5) (6) ITEM SMR PART NO CODE CAGEC NUMBER DESCRIPTION AND USABLE ON CODES (UOC) QTY GROUP 01 FIG. F-10 PUMP UNIT, LIQUID DISPENSING QUICK DISCONNECT ADAPTER HALF 1 PAOZZ MS CAP,QDISC PAOZZ MS GASKET PAOZZ MS HOOK,CHAIN,S PAOZZ MS COUPLING HALF,QUICK PAOOO A-2.ADAPTER HALF,QDISC XBOZZ C-1122-A..PIPE END XBOZZ H-4239-M..GASKET XBOZZ H-4903-M..SPRING XBOZZ H DISC ASSY XBOZZ H-4233-RE...STEM XBOZZ H M...SPACER XBOZZ H-5549-M...WASHER,DISC XDOZZ H-4234-M...DISC XBOZZ H-4235-RA...HOLDER,DISC XBOZZ C-1121-A..ADAPTER END... 1 Change 1 F-31 END OF FIGURE
183 Figure 11. Bottom Loading Manifold Change 1 F-32
184 SECTION II TM &P (1) (2) (3) (4) (5) (6) ITEM SMR PART NO CODE CAGEC NUMBER DESCRIPTION AND USABLE ON CODES (UOC) QTY GROUP 01 FIG. F-11 PUMP UNIT, LIQUID DISPENSING BOTTOM LOADING MANIFOLD 1 PAOZZ MS NUT,PLAIN,HEXAGON PAOZZ MS WASHER,LOCK PAOZZ MS SCREW,CAP,HEXAGON H PAOZO MS WASHER,FLAT PBOZZ MS CAP,FILLER OPENING PAOZZ MS24693-S273.SCREW,MACHINE XBOZZ MS ADAPTER,PRESS FS PAOZZ MS PACKING,PREFORMED PAOZO MS GASKET XBOZZ E8408.MANIFOLD,BOT LOAD PBOZZ MS21209F1-20P..INSERT,SCREW THREAD... 6 Change 1 F-33 END OF FIGURE
185 Figure 12. Frame Change 1 F-34
186 SECTION II TM &P (1) (2) (3) (4) (5) (6) ITEM SMR PART NO CODE CAGEC NUMBER DESCRIPTION AND USABLE ON CODES (UOC) QTY GROUP 01 FIG. F-12 PUMP UNIT, LIQUID DISPENSING FRAME 1 PAOZZ M NUT,PLAIN,HEXAGON PAOZZ MS WASHER,LOCK PAOZZ MS SCREW,CAP,HEXAGON H PAOZO MS WASHER,FLAT PBOZZ E7093.STQAP,RETAINING PBOZZ E7094.LINK,CHAIN,END PAOZZ MS SCREW,CAP,HEXAGON H XBFZZ E2588.A-FRAME,OUTER LEFT XBFZZ E2589.A-FRAME,OUTER RIGHT PAOZH MS20600AD6W4.RIVET,BLIND XBOZZ E3185.PLATE,IN'STR XBOZZ E9680.PLATE,INSTR XBOZZ E9679.PLATE,CAUTION XBOZZ E9678.PLATE,INSTR XBOZZ E7179.PLATE,INFORMATION XBOZZ E7127.PLATE,IDENT PAOZO M NUT,PLAIN,HEXAGON PAOZZ MS WASHER,LOCX PAOZO M SCREW,MACHINE XDOZZ E7149.GUIDE,CABLE XBFFF E2151.FRAME ASSY XAFZZ E FRAME PAFZZ MS10470B4-7..RIVET,SOLID XBFZZ M STRIKE,CATCH PAFZZ MS20470B4-16..RIVET,SOLID XBFZZ M LATCH PAFZZ MS20470B4-6..RIVET,SOLID PAFZZ MS20600B4W3..RIVET,BLIND XBFZZ MS A..HINGE,BUTT MOOZZ E GASKET,RUBBER MAKE FROM P/N MIL R-6855,CLASS 1,GRADE 40,7-1/2 IN. REQ MOOZZ E GASKET,RUBBER MAKE FROM P/N MIL R-6855,CLASS 1,GRADE 40,12-3/4 IN REQ XBFZZ E DOOR,BOX PBOZZ E STRAP,WEBBING PBOZZ E2591.DIPSTICK PBOZZ E0462.ROD,GROUND PBOZO E3930.CABLE ASSEMBLY,POWE PAOZH MS20600AD6W4 RIVET,BLIND XBOZZ E7101 PLATE,IDENTIFICATIO... 1 Change 1 F-35 END OF FIGURE
187 Figure 13. Tie Down Assembly Change 1 F-36
188 SECTION II TM &P (1) (2) (3) (4) (5) (6) ITEM SMR PART NO CODE CAGEC NUMBER DESCRIPTION AND USABLE ON CODES (UOC) QTY GROUP 02 FIG. F-13 TIE DOWN ASSEMBLY TIE DOWN ASSEMBLY PAOOZ E7150 TIEDOWN,CARGO,VEHIC XBDZZ E7152.BRACKET,TIE DOWN PAOZZ E7151.STRAP,WEBBING XBOZZ MS BOLT,HOOK PAOZZ MS NUT,PLAIN,HEXAGON XBOZZ MS TURNBUCKLE BODY XBOZZ MS NUT,PLAIN,HEXAGON LEFT HAND THREAD XBOZZ MS BOLT,HOOK,TRNBKL,LH... 1 Change 1 F-37 END OF FIGURE
189 Figure 14. Hoses - Tank to Manifold Change 1 F-38
190 SECTION II TM &P (1) (2) (3) (4) (5) (6) ITEM SMR PART NO CODE CAGEC NUMBER DESCRIPTION AND USABLE ON CODES (UOC) QTY GROUP 03 FIG. F-14 HOSES, TANK TO MANIFOLD HOSES, TANK TO MANIFOLD 1 PADZZ M370-B06B2A890 HOSE ASSY FWD TANK TO MANIFOLD PAOZO MS GASKET PAOZZ M370-B06B2A260 HOSE ASSY REAR TANK TO MANIFOLD PAOZO MS GASKET... 1 Change 1 F-39 END OF FIGURE
191 Figure 15. Tank, Liquid Storage Change 1 F-40
192 SECTION II TM &P (1) (2) (3) (4) (5) (6) ITEM SMR PART NO CODE CAGEC NUMBER DESCRIPTION AND USABLE ON CODES (UOC) QTY GROUP 04 FIG. F-15 TANK GROUP TANK, LIQUID STORAGE PDOFD E2146 TANK,LIQUID STORAGE METAL,PETRO... 2 PROD,HORIZ... 1 PBOZZ PPP-P-420.PLUG PAOZZ MIL-G-432.GASKET PAOZZ MS SCREW,CAP,HEXAGON H PAOZZ MS WASHER,LOCK XBOZZ E7093.STRAP,RETAINING XBOZZ E7094.LINK,CHAIN,END PAOZO MS WASHER,FLAT XBOZZ E7092.BRACKET,SHACKLE PAOZO MS PIN,COTTER PAOZZ MS NUT,PLAIN,SLOTTED,H PAOZO MS WASHER,FLAT PAOZZ MS SCREW,CAP,HEXAGON H XBOZZ E7085.SHACKLE XBOZZ E PLUG,PIPE XAFFH E2147.TANK,LIQ STORAGE... 1 Change 1 F-41 END OF FIGURE
193 Figure 16. Manhole Cover Change 1 F-42
194 SECTION II TM &P (1) (2) (3) (4) (5) (6) ITEM SMR PART NO CODE CAGEC NUMBER DESCRIPTION AND USABLE ON CODES (UOC) QTY GROUP 04 FIG. F-16 TANK GROUP MANHOLE COVER 1 PBOOO L-542..MANHOLE,OVAL LOW PROFILE PAOZZ NUT,PLAIN,EXTENDED XBOZZ PIN,HINGE XBOZZ CAM,LOCKING XDOZZ DECAL,WARNING XBOZZ PIN,HOLLOW XBOZZ NUT,RETAINER XBOZZ WASHER,RETAINER XBOZZ BOLT,RETAINER XBOZZ HINGE XBOZZ SPACER XBOZZ NUT XBOZZ CAP,VENT,FUEL XDOZZ GASKET XBOZZ PLUG,FUSE XDOZZ GASKET XDOZZ GASKET PBOZZ GASKET XBOZZ PLUG XAOZZ COVER,OVAL PBOZZ GASKET XBOZZ PIN,COTTER XBOZZ NUT,WING XBOZZ WASHER,LOCK XBOZZ CLAMP,HOOK XBOZZ BOLT,ELL PAOZZ MS NUT,SELF-LOCKING,HE PAOZO MS WASHER,FLAT PAOZO MS SCREW,CAP,HEXAGON H XBOZZ E TUBE,RECIRC FILL PAOZZ MS NUT,SELF-LOCKING,HE PAOZZ MS SCREW,CAP PAOZZ MS WASHER,FLAT XBOZZ E3249.BRACKET... 2 END OF FIGURE Change 1 F-43/(F-44 blank)
195 Figure 17. Jet Level Sensor and Bottom Load Valve (Sheet 1 of 2) Change 1 F-45
196 Figure 17. Bottom Load Valve (Sheet 2 of 2) Change 1 F-46
197 SECTION II TM &P (1) (2) (3) (4) (5) (6) ITEM SMR PART NO CODE CAGEC NUMBER DESCRIPTION AND USABLE ON CODES (UOC) QTY GROUP 04 FIG. F-17 TANK GROUP JET LEVEL SENSOR AND BOTTOM LOAD VALVE 1 PAOZO MS SCREW,CAP,HEXAGON H PAOZZ MS WASHER,LOCK XDOZZ E TUBE,NONMETALLIC PAOZZ E CONN,MALE,AIR BRAKE PAOZO MS CLAMP,HOSE XDOZZ E TUBING,FLEXIBLE XDOZZ WW-P-471.PLUG,PIPE PAOZO MS BOLT,MACHINE PAOZO MS WASHER,LOCK XBOZZ E7156.BRACKET PBOFF F613D.SENSOR,JET LEVEL XBOZZ SHIELD PAOZZ MS SCREW,MACHINE XBOZZ AN960C10..WASHER,FLAT XBOZZ F613..JET SENSOR XBOZZ SS PLUG,BUTTON PAOZF MS PACKING,PREFORMED XBOZZ CAN,COLLECTOR PAOZZ MS NUT,PLAIN,HEX PAOZZ MS WASHER,LOCK PAOZO MS WASHER,FLAT XBOZZ E7082.RETAINER,PACKING PAOZZ E7084.GASKET PAOZO MS CAP,QUICK DISCONNEC PAOZO MS GASKET PBOZZ MS HOOK,CHAIN,S PBFFF F668.VALVE ASSY,BOT LOAD XBFZZ SCREW XBFZZ PLUG PBFZZ PILOT ASSY XBFZZ CAP XBFZZ RING,RETAINING PBFZZ SEAL PBFZZ SPRING,GARTER PBFZZ SEAL XBFZZ SPRING XBFZZ SCREEN PAFZZ MS20470A4-4..RIVET,SOLID XBFZZ SPRING PAFZZ MS PIN,SPRING XBFZZ LEVER XBFZZ GLAND XBFZZ SHAFT PBFZZ BD121..PACKING,PREFORMED PBFZZ SEAL ASSY PAFZZ MS PIN,SPRING XBFZZ SHAFT... 1 Change 1 F-47
198 SECTION II TM &P (1) (2) (3) (4) (5) (6) ITEM SMR PART NO CODE CAGEC NUMBER DESCRIPTION AND USABLE ON CODES (UOC) QTY 48 XBFZZ A034..PIN,HAIR XBFZZ A159..PIN,STRAIGHT,THREAD XBFZZ CAM PAFZZ MS PIN,COTTER XBFZZ WASHER,RETAINER XBFZZ PIN,LIMIT XBFZZ LINK XBFZZ SPRING XBFZZ ORIFICE PAFZZ MS RING,RETAINING PBFZZ PISTON XDFZZ RSN-50..RING,RETAINING XDFZZ TUBE XBFZZ TUBE XBFZZ PLUG XBFZZ BUSHING,MACHINE XAFZZ BODY,VALVE PAFZZ MS PIN,SPRING PBOZZ E CABLE,BALL END FRONT TANK PBOZZ E CABLE,BALL END REAR TANK PAOZO MS WASHER,FLAT... 2 Change 1 F-48 END OF FIGURE
199 TM &P Figure 18. Quick Disconnect Coupling Half Change 1 (F-49 blank)/f-50
200 SECTION II TM &P (1) (2) (3) (4) (5) (6) ITEM SMR PART NO CODE CAGEC NUMBER DESCRIPTION AND USABLE ON CODES (UOC) QTY GROUP 05 COUPLING HALF FIG. F-18 QUICK DISCONNECT COUPLING HALF 1 PBOZZ MS PLUG,DUST PAOZO MS GASKET XBOZZ E7129 COUPLING HALF,QUICK PBOOF E2177 CPLG HALF,QDISC DRY PBOZZ MS PLUG,DUST XAOOF D-2.CPLG HALF,QDISC DRY XBOZZ H M..PIN,GROOVE XBOZZ C DI..LEVER XBOZZ H-7724-M..BOX,STUFFING PBOZZ H-7725-M..PACKING,PREFORMED PBOZZ H-6281-M..PACKING,PREFORMED XBOZZ C RE..STEM XDOZZ H-4981-M..PIN,COTTER XDOZZ H-4626-M..WASHER,FLAT XDOZZ H-4273-H..BEARING XBOZZ H-9778-RE..SHAFT,CAM XDOZZ H-4278-M..BUSHING XBOZZ H CYLINDER ASSY XBOZZ H-4275-M..GUIDE XBOZZ H-4274-M..SPRING PAOZO MS GASKET PBOZZ H-6223-M..PACKING,PREFORMED XBOZZ H-4468-M..SCREW PBOZZ H-2149-M..PACKING,PREFORMED XBOZZ H RE..RIVET XBOZZ H-4255-M..LINK SUBASSY XBOZZ H-4257-RE..YOKE XBOZZ H-4310-M..SETSCREW XBOZZ H-4471-RA..POPPET X30ZZ H-4470-M..GUIDE,POPPET XBOZZ H-9770-RE..PIN XBOZZ C M..CAM XAOZZ D-506-A..BODY... 1 END OF FIGURE Change 1 F-51/(F-52 blank)
201 SECTION II TM &P (1) (2) (3) (4) (5) (6) ITEM SMR PART NO CODE CAGEC NUMBER DESCRIPTION AND USABLE ON CODES (UOC) QTY GROUP 06 BULK MATERIAL FIG. BULK 1 PAOZZ MIL-W TYP WIRE,ELECTRICAL... V E EE-8 2 PAOZZ MIL-W TYP WIRE,ELECTRICAL... V E EE-16 3 PAOZZ MIL-R-6855,CLASS SYNTHETIC RUBBER... V 1,GRADE40 4 PAOZZ MS20995F32 WIRE,NONELECT2ICAL... V END OF FIGURE Change 1 F-53/(F-54 blank)
202 TM &P SECTION III. SPECIAL TOOLS LIST (Not Applicable) Change 1 F-55/(F-56 blank)
203 SECTION IV CROSS-REFERENCE INDEXES TM &P NATIONAL STOCK NUMBER INDEX STOCK NUMBER FIG. ITEM STOCK NUMBER FIG. ITEM BULK Change 1 F-57
204 SECTION IV CROSS-REFERENCE INDEXES TM &P NATIONAL STOCK NUMBER INDEX STOCK NUMBER FIG. ITEM STOCK NUMBER FIG. ITEM Change 1 F-58
205 SECTION IV TM &P CROSS-REFERENCE INDEXES PART NUMBER INDEX CAGEC PART NUMBER STOCK NUMBER FIG. ITEM AN960C A4497A C DI C RE C-1121-A C-1122-A C C-3378-M C0-02-MG-F-( ) D-506-A D1554-AG F F F613D F GASK GUB H RE H M H M H-2149-M H-3673M H-3804-AG H-4233-RE H-4234-M H-4235-RA H-4239-M H-4255-M H-4257-RE H-4273-H H-4274-M H-4275-M H-4278-M H-4310-M H-4468-M H-4470-M H-4471-RA H H-4626-M H-4903-M H H-4981-M H-5549-M H-6223-M H-6281-M H-7724-M H-7725-M H-7766-M H-9209-M H-9597-RB 2 8 Change 1 F-59
206 SECTION IV TM &P CROSS-REFERENCE INDEXES PART NUMBER INDEX CAGEC PART NUMBER STOCK NUMBER FIG. ITEM H-9770-RE H-9778-RE H5482M H7670M JFB14LH JFB14RH MIL-G MIL-R-6855,CLASS BULK 3 1,GRADE MIL-W TYP BULK 2 E EE MIL-W TYP BULK 1 E EE MS10470B MS MS MS MS X MS MS MS MS MS MS MS MS MS MS MS MS MS20470A MS20470B MS20470B MS20600AD6W MS20600B4W MS20995F BULK MS20995F MS MS21209F1-20P MS MS MS MS MS MS MS M Change 1 F-60
207 SECTION IV TM &P CROSS-REFERENCE INDEXES PART NUMBER INDEX CAGEC PART NUMBER STOCK NUMBER FIG. ITEM MS MS MS MS MS DA MS MS MS MS MS MS MS MS MS MS MS MS MS MS MS MS MS MS MS MS MS MS Change 1 F-61
208 SECTION IV TM &P CROSS-REFERENCE INDEXES PART NUMBER INDEX CAGEC PART NUMBER STOCK NUMBER FIG. ITEM MS MS MS3452',416S-4S MS34561!16S-4P MS MS MS MS MS MS MS M MS MS MS MS MS MS MS MS MS MS MS MS MS MS A MS MS MS MS MS C MS C M MS MS MS MS Change 1 F-62
209 SECTION IV TM &P CROSS-REFERENCE INDEXES PART NUMBER INDEX CAGEC PART NUMBER STOCK NUMBER FIG. ITEM MS MS MS MS MS MS MS MS MS MS MS MS MS MS MS MS MS MS MS MS MS M286755B M370-A05B2A M370-A05B2A M370-A05B2A M370-B06B2A M370-B06B2A M370-B06B2A PPP-P RSN SAF-LOK SOCKET SS UNY105SA WW-P E E E E E Change 1 F-63
210 SECTION IV TM &P CROSS-REFERENCE INDEXES PART NUMBER INDEX CAGEC PART NUMBER STOCK NUMBER FIG. ITEM E E E E E E E E E E E E E E E E E E E E E E E E E E E E E E E E E E E E E E E E E E E E E E E Change 1 F-64
211 SECTION IV TM &P CROSS-REFERENCE INDEXES PART NUMBER INDEX CAGEC PART NUMBER STOCK NUMBER FIG. ITEM E E E E E E E E E E E E E E E E E E E E E E E E E E E E E E E E E E E E E E A D G(B104) Change 1 F-65
212 SECTION IV TM &P CROSS-REFERENCE INDEXES PART NUMBER INDEX CAGEC PART NUMBER STOCK NUMBER FIG. ITEM BD CA L R Change 1 F-66
213 SECTION IV TM &P CROSS-REFERENCE INDEXES PART NUMBER INDEX CAGEC PART NUMBER STOCK NUMBER FIG. ITEM RS W L A A Change 1 F-67
214 SECTION IV CROSS-REFERENCE INDEXES TM &P FIGURE AND ITEM NUMBER INDEX FIG. ITEM STOCK NUMBER CAGEC PART NUMBER BULK MIL-W TYP E EE-8 BULK MIL-W TYP E EE-16 BULK MIL-R-6B55,CLASS 1, GRADE40 BULK MS20995F E M370-A05B2A MS E E MS MS MS E E M370-B06B2A MS M370-A05B2A MS20995F M370-A05B2A MS MS j MS MS MS E MS MS G(B104) CA1 5/ H-3804-AG H-3673M H-9209-M H-9597-RB C / H-7766-M H7670M D1554-AG N H5482M RS MS MS MS MS MS ' MS MS Change 1 F-68
215 SECTION IV CROSS-REFERENCE INDEXES TM &P FIGURE AND ITEM NUMBER INDEX FIG. ITEM STOCK NUMBER CAGEC PART NUMBER E MS MS MS MS MS L R MS MS MS JFB14LH JFB14RH MS MS MS MS E MS MS E MS MS E MS MS MS MS E UNY1055A E E GUB GASK MS MS MS MS A4497A E MS Change 1 F-69
216 SECTION IV CROSS-REFERENCE INDEXES TM &P FIGURE AND ITEM NUMBER INDEX FIG. ITEM STOCK NUMBER CAGEC PART NUMBER MS MS MS MS3452W16S :MS DA M286755B E E MS E E MS E :E MS MS E714i E MS MS E E MS MS i E E MS MS E E MS X MS MS MS E MS C MS C MS E E MS E E E MS MS E MS MS MS E8802 Change 1 F-70
217 SECTION IV CROSS-REFERENCE INDEXES TM &P FIGURE AND ITEM NUMBER INDEX FIG. ITEM STOCK NUMBER CAGEC PART NUMBER E E E E MS E MS SAF-LOK SOCKET MS MS E MS MS MS MS MS MS M MS MS MS MS E MS MS E E MS20600hDGW E E E E C0-02-MG-F-(2/16 ) MS3456W165-4P E MS MS F Change 1 F-71
218 SECTION IV CROSS-REFERENCE INDEXES TM &P FIGURE AND ITEM NUMBER INDEX FIG. ITEM STOCK NUMBER CAGEC PART NUMBER D MS MS MS MS A C-1122-A H-4239-M H-4903-M H H-4233-RE H M H-5549-M H M H-4235-RA C-1121-A MS MS MS MS V MS MS MS MS MS E MS21209F1-20P MS MS MS MS E E MS E E MS20600AD6W E E E E E E MS MS MS E7149 Change 1 F-72
219 SECTION IV CROSS-REFERENCE INDEXES TM &P FIGURE AND ITEM NUMBER INDEX FIG. ITEM STOCK NUMBER CAGEC PART NUMBER E E MS10470B MS MS20470B MS MS20470B MS2060OB4W MS A E E E E E E E MS20600AD6W E E E E MS MS MS MS MS M370-B06B2A MS M370-B06B2A MS E PPP-P MIL-G MS MS E E MS E MS MS MS MS E E E L Change 1 F-73
220 SECTION IV CROSS-REFERENCE INDEXES TM &P FIGURE AND ITEM NUMBER INDEX FIG. ITEM STOCK NUMBER CAGEC PART NUMBER ' MS MS MS E MS MS MS E MS MS E E MS E WW-P MS MS E F613D MS AN960C F MS MS MS MS E7082 Change 1 F-74
221 SECTION IV CROSS-REFERENCE INDEXES TM &P FIGURE AND ITEM NUMBER INDEX FIG. ITEM STOCK NUMBER CAGEC PART NUMBER E MS MS MS F MS20470A MS BD MS A A MS MS RSN MS E E MS MS MS E E MS Change 1 F-75
222 SECTION IV CROSS-REFERENCE INDEXES TM &P FIGURE AND ITEM NUMBER INDEX FIG. ITEM STOCK NUMBER CAGEC PART NUMBER D H M C DI H-7724-M H-7725-M B H-6281-M C RE H-4981-M H-4626-M H-4273-H H-9778-RE H-4278-M H H-4275-M H-4274-M MS H-6223-M H-4468-M H-2149-M H RE H-4255-M H-4257-RE H-4310-M H-4471-RA H-4470-M H-9770-RE C-337B-M D-506-A Change 1 F-76
223 TM &P APPENDIX G ILLUSTRATED LIST OF MANUFACTURED ITEMS G-1 INTRODUCTION a. This appendix includes complete instructions for making item authorized to be manufactured or fabricated at unit maintenance. b. A part number index in alphanumeric order is provided for cross-referencing the part number of the item to be manufactured to the figure which covers fabrication criteria. c. All bulk materials needed for manufacture of an item are listed by part number or specification number in a tabular list on the illustration. G-2 PART NUMBER INDEX The following part numbers are illustrated in this appendix. PART NO. FIGURE NO E G E G-1 G-1
224 TM &P NOTES: 1. FABRICATE FROM SYNTHETIC RUBBER, PART NO. MIL-R-6855, CLASS 1, GRADE DIMENSIONS ARE IN INCHES. J Figure G-1. Rubber Gasket G-2
225 INDEX TM &P Subject Paragraph, Table, Number Adapter Half Maintenance Bottom Loading Manifold Maintenance Bottom Load Valve Maintenance Centrifugal Pump Maintenance Coupling Half Maintenance Destruction of Army Material to Prevent Enemy Use Dispensing Nozzle Maintenance Electric Motor Driven (EMD) Pump Assembly Maintenance, Unit Motor Driven (EMD) Pump Assembly Maintenance, Direct Support Emergency Procedures, Operation Equipment Characteristics, Capabilities and Features Equipment Data F Filter/Separator Maintenance Frame Maintenance Frame and Bracket Maintenance Grounding Procedures A B C D E G Index 1
226 Hand Receipt (-HR) Manual 1-3 Hose Reel Maintenance 5-3 Hose Replacement 4-8 Intervehicle Power Cable Jet Level Sensor Maintenance Junction Box Maintenance Location and Description of Major Component Lubrication H I J L M Maintenance Forms and Records Manhole Maintenance On-Off Cable Assembly Operating Instructions on Decals and Instruction Plates Operating Procedures Operation in Dusty or Sandy Areas Operation in Extreme Heat Operation in Rainy or Humid Conditions Operation at High Altitudes Operation in Salt Water Areas Operation in Extreme Cold Operator's Preventive Maintenance Checks and Services (PMCS) Operator's Controls and Indicators... T2-1 Preparation for Shipment Preparation for Storage or Shipment Preparation for Movement Preparation for Movement Principles of Operation Pump Unit Replacement Reporting Equipment Improvement Recommendations (EIR) Reporting Deficiencies O P R Index 2
227 S Safety, Care and Handling Special Instructions, Operator Static Discharge Reel Maintenance Storage , 4-28, Storage Box Maintenance Tank Hose Maintenance Tank Maintenance, Direct Support Tank Maintenance, Unit Tie Down Assembly Troubleshooting, Direct Support... T5-1 Troubleshooting, Operator... T3-1 Troubleshooting, Unit... T4-2 Unit Preventive Maintenance Checks and Services (PMCS)... T4-5 Valve Operating Lever Assembly Warranty Information T U V W Index-3 (Index-4 blank)
228 By Order of the Secretary of the Army: GORDON R. SULLIVAN General, United States Army Chief of Staff Official: PATRICIA P. HICKERSON Brigadier General, United States Army The Adjutant General DISTRIBUTION To be distributed in accordance with DA Form 12-25A, (qty rqr block no. 1726, 1727 and 1728). U.S. GOVERNMENT PRINTING OFFICE: (42080)
229
230
231 PIN:

232 This fine document... Was brought to you by me: Liberated Manuals -- free army and government manuals Why do I do it? I am tired of sleazy CD-ROM sellers, who take publicly available information, slap watermarks and other junk on it, and sell it. Those masters of search engine manipulation make sure that their sites that sell free information, come up first in search engines. They did not create it... They did not even scan it... Why should they get your money? Why are not letting you give those free manuals to your friends? I am setting this document FREE. This document was made by the US Government and is NOT protected by Copyright. Feel free to share, republish, sell and so on. I am not asking you for donations, fees or handouts. If you can, please provide a link to liberatedmanuals.com, so that free manuals come up first in search engines: <A HREF= Military and Government Manuals</A> Sincerely Igor Chudov Chicago Machinery Movers
TECHNICAL MANUAL OPERATOR'S AND UNIT MAINTENANCE MANUAL (INCLUDING REPAIR PARTS AND SPECIAL TOOLS LIST)
") *TM 10-4330-232-12&P TECHNICAL MANUAL OPERATOR'S AND UNIT MAINTENANCE MANUAL (INCLUDING REPAIR PARTS AND SPECIAL TOOLS LIST) FILTER/SEPARATOR, LIQUID FUEL, TYPE I FRAME MOUNTED, 50 GPM CAPACITY (MODEL
*TM 10-4330-232-12&P TECHNICAL MANUAL OPERATOR'S AND UNIT MAINTENANCE MANUAL (INCLUDING REPAIR PARTS AND SPECIAL TOOLS LIST) FILTER/SEPARATOR, LIQUID FUEL, TYPE I FRAME MOUNTED, 50 GPM CAPACITY (MODEL
TECHNICAL MANUAL OPERATOR S, ORGANIZATIONAL AND DIRECT SUPPORT MAINTENANCE MANUAL TANK AND PUMP UNIT, LIQUID DISPENSING
 TECHNICAL MANUAL OPERATOR S, ORGANIZATIONAL AND DIRECT SUPPORT MAINTENANCE MANUAL TANK AND PUMP UNIT, LIQUID DISPENSING FOR TRUCK MOUNTING (UNITED MANUFACTURING AND ENGINEERING CORP. MODEL STYLE 1) NSN
TECHNICAL MANUAL. Operator's, Organizational and Direct Support Maintenance Manual (Including Repair Parts and Special Tools List) for
 for") TECHNICAL MANUAL Operator's, Organizational and Direct Support Maintenance Manual (Including Repair Parts and Special Tools List) for CONVERTER ASSEMBLY, VAPOR RECOVERY PART NUMBER F428A NSN 2590-01-090-7659
TECHNICAL MANUAL Operator's, Organizational and Direct Support Maintenance Manual (Including Repair Parts and Special Tools List) for CONVERTER ASSEMBLY, VAPOR RECOVERY PART NUMBER F428A NSN 2590-01-090-7659
TM TECHNICAL MANUAL UNIT, INTERMEDIATE DIRECT SUPPORT AND INTERMEDIATE GENERAL SUPPORT MAINTENANCE INSTRUCTIONS
 TECHNICAL MANUAL UNIT, INTERMEDIATE DIRECT SUPPORT AND INTERMEDIATE GENERAL SUPPORT MAINTENANCE INSTRUCTIONS MAIN REDUCTION GEAR FOR LANDING CRAFT UTILITY (LCU) NSN 1905-01-154-1191 INTRODUCTION 1-1 UNIT
TECHNICAL MANUAL OPERATOR, AVIATION UNIT, AND AVIATION INTERMEDIATE MAINTENANCE MANUAL WITH REPAIR PARTS AND SPECIAL TOOLS LIST CHAPTER 1 INTRODUCTION
 EXTENDED RANGE FUEL SYSTEM ARMY MODEL CH-47 HELICOPTER TECHNICAL MANUAL OPERATOR, AVIATION UNIT, AND AVIATION INTERMEDIATE MAINTENANCE MANUAL WITH REPAIR PARTS AND SPECIAL TOOLS LIST CHAPTER 1 INTRODUCTION
HEADQUARTERS, DEPARTMENT OF THE ARMY
 TECHNICAL MANUAL OPERATOR'S, UNIT AND DIRECT SUPPORT MAINTENANCE MANUAL INCLUDING REPAIR PARTS AND SPECIAL TOOLS LIST EQUIPMENT DESCRIPTION 1-3 PRINCIPLES OF OPERATION 1-6 DESCRIPTION AND USE OF OPERATOR'S
FILTER/ SEPARATOR, LIQUID FUEL 15 GPM, ALUMINUM, SKID MOUNTED (NSN )
") *TM 10 4330 230-12&P TECHNICAL MANUAL OPERATOR S AND UNIT MAINTENANCE MANUAL (INCLUDING REPAIR PARTS AND SPECIAL TOOLS LIST) FOR FILTER/ SEPARATOR, LIQUID FUEL 15 GPM, ALUMINUM, SKID MOUNTED (NSN 4330-00-438-1460)
*TM 10 4330 230-12&P TECHNICAL MANUAL OPERATOR S AND UNIT MAINTENANCE MANUAL (INCLUDING REPAIR PARTS AND SPECIAL TOOLS LIST) FOR FILTER/ SEPARATOR, LIQUID FUEL 15 GPM, ALUMINUM, SKID MOUNTED (NSN 4330-00-438-1460)
TECHNICAL MANUAL OPERATOR'S, ORGANIZATIONAL, DIRECT SUPPORT AND GENERAL SUPPORT MAINTENANCE MANUAL
 TECHNICAL MANUAL OPERATOR'S, ORGANIZATIONAL, DIRECT SUPPORT AND GENERAL SUPPORT MAINTENANCE MANUAL COMPRESSOR, ROTARY; AIR, SKID MOUNTED; DIESEL ENGINE DRIVEN, 125 CFM, 100 PSIG (DAVEY MODEL 6M125) NSN
DISTRIBUTION STATEMENT A. Approved for public release; distribution is unlimited.
 TECHNICAL MANUAL OPERATOR'S, UNIT, DIRECT SUPPORT AND GENERAL SUPPORT MAINTENANCE MANUAL FOR POWER SUPPLY, HYDRAULIC MODEL 9305 NSN 1730-01-342-2184 EIC YX6 TM 5-1730-245-14 OPERATING INSTRUCTIONS 2-1
TM &P TECHNICAL MANUAL
 TECHNICAL MANUAL OPERATOR S, UNIT AND DIRECT SUPPORT MAINTENANCE MANUAL INCLUDING REPAIR PARTS AND SPECIAL TOOLS LIST FOR HEMTT TANKER AIRCRAFT REFUELING SYSTEM MODEL HTARS100 NSN: 4930-01-365-2771 HOW
TECHNICAL MANUAL OPERATOR'S AND UNIT MAINTENANCE MANUAL INCLUDING REPAIR PARTS AND SPECIAL TOOLS LIST
 TM 10-4930-239-1 2&P TECHNICAL MANUAL OPERATOR'S AND UNIT MAINTENANCE MANUAL INCLUDING REPAIR PARTS AND SPECIAL TOOLS LIST FUEL SYSTEM SUPPLY POINT MODEL LAB 6891 NSN 4930-01-347-4793 INTRODUCTION OPERATING
TM TECHNICAL MANUAL OPERATOR S, ORGANIZATIONAL, AND DIRECT SUPPORT MAINTENANCE MANUAL
 TM 5-4930-230-13 TECHNICAL MANUAL OPERATOR S, ORGANIZATIONAL, AND DIRECT SUPPORT MAINTENANCE MANUAL TANK AND PUMP UNIT, LIQUID DISPENSING: FOR TRUCK MOUNTING MIL DESIGN TANK AND PUMP UNITS GASOLINE ENGINE
TECHNICAL MANUAL M149A2. This manual supersedes TM &P, dated February 1981, and all changes.
 TECHNICAL MANUAL TM 9-2330-267-14&P OPERATOR S, ORGANIZATIONAL, DIRECT SUPPORT, AND GENERAL SUPPORT MAINTENANCE MANUAL (INCLUDING REPAIR PARTS AND SPECIAL TOOLS LISTS) FOR TRAILER, TANK, WATER: 400 GALLON,
TECHNICAL MANUAL OPERATOR'S, UNIT, DIRECT SUPPORT AND GENERAL SUPPORT MAINTENANCE MANUAL (INCLUDING REPAIR PARTS AND SPECIAL TOOLS LIST)
") TECHNICAL MANUAL OPERATOR'S, UNIT, DIRECT SUPPORT AND GENERAL SUPPORT MAINTENANCE MANUAL (INCLUDING REPAIR PARTS AND SPECIAL TOOLS LIST) INTRODUCTION 1-1 OPERATING INSTRUCTIONS 2-1 OPERATOR MAINTENANCE
TECHNICAL MANUAL OPERATOR'S, UNIT, DIRECT SUPPORT AND GENERAL SUPPORT MAINTENANCE MANUAL (INCLUDING REPAIR PARTS AND SPECIAL TOOLS LIST) INTRODUCTION 1-1 OPERATING INSTRUCTIONS 2-1 OPERATOR MAINTENANCE
THIS MANUAL SUPERSEDES TM DATED 30 MAY 1994, INCLUDING ALL CHANGES. TECHNICAL MANUAL
 THIS MANUAL SUPERSEDES TM 9-2330-385-14 DATED 30 MAY 1994, INCLUDING ALL CHANGES. TECHNICAL MANUAL OPERATOR S, UNIT, DIRECT SUPPORT AND GENERAL SUPPORT MAINTENANCE MANUAL INTRODUCTION 1-1 OPERATING INSTRUCTIONS
TECHNICAL MANUAL OPERATOR S, UNIT AND DIRECT SUPPORT MAINTENANCE MANUAL FOR 40,000 GALLON WATER STORAGE AND DISTRIBUTION SYSTEM
 *TM 10-4610-234-13 TECHNICAL MANUAL OPERATOR S, UNIT AND DIRECT SUPPORT MAINTENANCE MANUAL FOR 40,000 GALLON WATER STORAGE AND DISTRIBUTION SYSTEM MODEL WSDS40K NSN: 4610-01-114-1451 MODEL 40KWSDS NSN:
TM HEMTT TANKER AVIATION REFUELING SYSTEM (HTARS) NSN MODEL NUMBER TECHNICAL MANUAL OPERATOR S MANUAL
 NSN MODEL NUMBER TECHNICAL MANUAL OPERATOR S MANUAL") TECHNICAL MANUAL OPERATOR S MANUAL TM5-4930-237-10 HEMTT TANKER AVIATION REFUELING SYSTEM (HTARS) NSN 4930-01-269-2273 MODEL NUMBER 50-0051 Approved for public release. Distribution is unlimited. HEADQUARTERS,
TECHNICAL MANUAL OPERATOR S MANUAL TM5-4930-237-10 HEMTT TANKER AVIATION REFUELING SYSTEM (HTARS) NSN 4930-01-269-2273 MODEL NUMBER 50-0051 Approved for public release. Distribution is unlimited. HEADQUARTERS,
OPERATOR'S MANUAL CARRIER, CARGO, TRACKED, 1 /2 TON, M973 SMALL UNIT SUPPORT VEHICLE (SUSV) (NSN )
 (NSN )") OPERATOR'S MANUAL TABLE OF CONTENTS PAGE i EQUIPMENT DESCRIPTION PAGE 1-1 OPERATING INSTRUCTIONS PAGE 2-1 PREVENTIVE MAINTENANCE PAGE 2-6 CARRIER, CARGO, TRACKED, 1 /2 TON, M973 SMALL UNIT SUPPORT VEHICLE
OPERATOR'S MANUAL TABLE OF CONTENTS PAGE i EQUIPMENT DESCRIPTION PAGE 1-1 OPERATING INSTRUCTIONS PAGE 2-1 PREVENTIVE MAINTENANCE PAGE 2-6 CARRIER, CARGO, TRACKED, 1 /2 TON, M973 SMALL UNIT SUPPORT VEHICLE
TECHNICAL MANUAL OPERATOR'S, UNIT, DIRECT SUPPORT, AND GENERAL SUPPORT MAINTENANCE MANUAL (INCLUDING REPAIR PARTS AND SPECIAL TOOLS LISTS) FOR
 FOR") TECHNICAL MANUAL OPERATOR'S, UNIT, DIRECT SUPPORT, AND GENERAL SUPPORT MAINTENANCE MANUAL (INCLUDING REPAIR PARTS AND SPECIAL TOOLS LISTS) Operating Instructions 2-1 FOR DISTRIBUTOR, WATER, SEMITRAILER
TECHNICAL MANUAL OPERATOR'S, UNIT, DIRECT SUPPORT, AND GENERAL SUPPORT MAINTENANCE MANUAL (INCLUDING REPAIR PARTS AND SPECIAL TOOLS LISTS) Operating Instructions 2-1 FOR DISTRIBUTOR, WATER, SEMITRAILER
US ARMY TM US MARINE CORPS TM 08580B-1 0/1 TECHNICAL MANUAL OPERATOR S MANUAL TABLE OF CONTENTS
 US ARMY TM 10-4610-239-10 US MARINE CORPS TM 08580B-1 0/1 TECHNICAL MANUAL OPERATOR S MANUAL WATER PURIFICATION UNIT, REVERSE OSMOSIS, 600 GPH TRAILER MOUNTED FLATBED CARGO, 5 TON 4 WHEEL TANDEM MODEL
UNIT MAINTENANCE INSTRUCTIONS PAGE 2-1 DIRECT SUPPORT
 TECHNICAL MANUAL TABLE OF CONTENTS PAGE i INTRODUCTION PAGE 1-1 UNIT, DIRECT SUPPORT AND GENERAL SUPPORT MAINTENANCE MANUAL UNIT MAINTENANCE INSTRUCTIONS PAGE 2-1 DIRECT SUPPORT MAINTENANCE INSTRUCTIONS
TM &P TECHNICAL MANUAL
 TECHNICAL MANUAL TM 9-2330-376-14&P OPERATOR S, ORGANIZATIONAL, DIRECT SUPPORT AND GENERAL SUPPORT MAINTENANCE MANUAL (INCLUDING REPAIR PARTS AND SPECIAL TOOLS LISTS) FOR CHASSIS, TRAILER: 5-TON, 4-WHEEL,
EMERGENCY GENERATOR SET
 TECHNICAL MANUAL UNIT, INTERMEDIATE DIRECT SUPPORT AND INTERMEDIATE GENERAL SUPPORT MAINTENANCE INSTRUCTIONS EMERGENCY GENERATOR SET FOR LANDING CRAFT UTILITY (LCU) NSN 1905-01-154-1191 INTRODUCTION 1-1
TM OPERATOR S MANUAL HEADQUARTERS, DEPARTMENT OF THE ARMY 1 SEPT 87
 OPERATOR S MANUAL LOADER, SCOOP TYPE, DED 4x4, ARTICULATED FRAME STEER, 2-1/2 CUBIC YARD (J.I.CASE MODEL MW24C) (NSN 3805-01-150-4814) HEADQUARTERS, DEPARTMENT OF THE ARMY 1 SEPT 87 d MW24C Loader Technical
TECHNICAL MANUAL OPERATOR S, UNIT, DIRECT SUPPORT, AND GENERAL SUPPORT MAINTENANCE MANUAL FOR
 TECHNICAL MANUAL OPERATOR S, UNIT, DIRECT SUPPORT, AND GENERAL SUPPORT MAINTENANCE MANUAL FOR SEMITRAILER, TANK: 5000 GALLON, (POTABLE WATER DISPENSING) XM1098 (NSN 2330-01-330-2779) Approved for public
TECHNICAL MANUAL OPERATOR, UNIT, AND DIRECT SUPPORT MAINTENANCE MANUAL (INCLUDING REPAIR PARTS AND SPECIAL TOOLS LIST)
") TECHNICAL MANUAL OPERATOR, UNIT, AND DIRECT SUPPORT MAINTENANCE MANUAL (INCLUDING REPAIR PARTS AND SPECIAL TOOLS LIST) POWER UNIT, DIESEL ENGINE DRIVEN, 1 TON TRAILER MOUNTED, 5 kw, 60 Hz, PU-797 (NSN
TECHNICAL MANUAL OPERATOR, UNIT, AND DIRECT SUPPORT MAINTENANCE MANUAL (INCLUDING REPAIR PARTS AND SPECIAL TOOLS LIST) POWER UNIT, DIESEL ENGINE DRIVEN, 1 TON TRAILER MOUNTED, 5 kw, 60 Hz, PU-797 (NSN
TECHNICAL MANUAL ORGANIZATIONAL MAINTENANCE MANUAL VOLUME 1 OF 3
 TECHNICAL MANUAL ORGANIZATIONAL MAINTENANCE MANUAL VOLUME 1 OF 3 This copy is a reprint which includes current pages from Change 1. TRACTOR, WHEELED (DED) LOADER BACKHOE W/HYDRAULIC IMPACT TOOL AND WIHYDRAULIC
MAIN PROPULSION ENGINE INTERMEDIATE GENERAL FOR MAINTENANCE INSTRUCTIONS 3-1 LANDING CRAFT UTILITY (LCU) INDEX-1
 INDEX-1") TECHNICAL MANUAL UNIT, INTERMEDIATE DIRECT INTRODUCTION 1-1 SUPPORT AND INTERMEDIATE GENERAL SUPPORT UNIT MAINTENANCE 2-1 MAINTENANCE INSTRUCTIONS INSTRUCTIONS MAIN PROPULSION ENGINE INTERMEDIATE GENERAL
TECHNICAL MANUAL UNIT, INTERMEDIATE DIRECT INTRODUCTION 1-1 SUPPORT AND INTERMEDIATE GENERAL SUPPORT UNIT MAINTENANCE 2-1 MAINTENANCE INSTRUCTIONS INSTRUCTIONS MAIN PROPULSION ENGINE INTERMEDIATE GENERAL
DISTRIBUTION STATEMENT A: Approved for public release; distribution is unlimited.
 TECHNICAL MANUAL OPERATOR'S, UNIT, AND DIRECT SUPPORT, MAINTENANCE MANUAL OPERATING INSTRUCTIONS 2-1 OPERATOR PREVENTIVE MAINTENANCE CHECKS AND SERVICES (PMCS) 2-9 OPERATOR TROUBLESHOOTING PROCEDURES 3-1
OPERATOR S, UNIT, DIRECT SUPPORT AND GENERAL SUPPORTMAINTENANCE MANUAL INCLUDING REPAIR PARTS AND SPECIAL TOOLS LISTS FOR ( )
") OPERATOR S, UNIT, DIRECT SUPPORT AND GENERAL SUPPORTMAINTENANCE MANUAL INCLUDING REPAIR PARTS AND SPECIAL TOOLS LISTS FOR SEMITRAILER, TANK, FUEL, 7500 GALLON, (2330-01-275-7475) M1062 Fruehauf Corporation
OPERATOR S, UNIT, DIRECT SUPPORT AND GENERAL SUPPORTMAINTENANCE MANUAL INCLUDING REPAIR PARTS AND SPECIAL TOOLS LISTS FOR SEMITRAILER, TANK, FUEL, 7500 GALLON, (2330-01-275-7475) M1062 Fruehauf Corporation
FPU SYSTEMS OPERATION MANUAL (INCLUDING REPAIR PARTS & SPECIAL TOOL LIST) BOH CONTAINERIZED LATRINES BOH FPU Field Pack-up Units
 BOH CONTAINERIZED LATRINES BOH FPU Field Pack-up Units") FPU SYSTEMS OPERATION MANUAL (INCLUDING REPAIR PARTS & SPECIAL TOOL LIST) BOH CONTAINERIZED LATRINES BOH FPU Field Pack-up Units CHAPTER 4 OPERATOR MAINTENANCE INSTRUCTIONS 2016 BOH Environmental LLC This
FPU SYSTEMS OPERATION MANUAL (INCLUDING REPAIR PARTS & SPECIAL TOOL LIST) BOH CONTAINERIZED LATRINES BOH FPU Field Pack-up Units CHAPTER 4 OPERATOR MAINTENANCE INSTRUCTIONS 2016 BOH Environmental LLC This
OPERATOR, UNIT AND INTERMEDIATE (DIRECT AND GENERAL SUPPORT) MAINTENANCE MANUAL LANDING CRAFT, MECHANIZED STEEL, DED, OVERALL LENGTH 74 FEET,
 MAINTENANCE MANUAL LANDING CRAFT, MECHANIZED STEEL, DED, OVERALL LENGTH 74 FEET,") TECHNICAL MANUAL OPERATOR, UNIT AND INTERMEDIATE (DIRECT AND GENERAL SUPPORT) MAINTENANCE MANUAL LANDING CRAFT, MECHANIZED STEEL, DED, OVERALL LENGTH 74 FEET, MOD 1, MARK VIII, NAVY DESIGN LCM-8 INTRODUCTION
TECHNICAL MANUAL OPERATOR, UNIT AND INTERMEDIATE (DIRECT AND GENERAL SUPPORT) MAINTENANCE MANUAL LANDING CRAFT, MECHANIZED STEEL, DED, OVERALL LENGTH 74 FEET, MOD 1, MARK VIII, NAVY DESIGN LCM-8 INTRODUCTION
TM THIS MANUAL SUPERSEDES TM DATED 25 FEB 1994, INCLUDING ALL CHANGES.
 THIS MANUAL SUPERSEDES TM 9-2320-364-10 DATED 25 FEB 1994, INCLUDING ALL CHANGES. OPERATOR S MANUAL HOW TO USE THIS MANUAL iii EQUIPMENT DESCRIPTION 1-9 OPERATOR S CONTROLS AND INDICATORS 2-3 PREVENTIVE
TECHNICAL MANUAL OPERATOR'S, UNIT, DIRECT SUPPORT, AND GENERAL SUPPORT MAINTENANCE (INCLUDING REPAIR PARTS AND SPECIAL TOOLS LIST)
") TECHNICAL MANUAL OPERATOR'S, UNIT, DIRECT SUPPORT, AND GENERAL SUPPORT MAINTENANCE (INCLUDING REPAIR PARTS AND SPECIAL TOOLS LIST) OPERATING INSTRUCTIONS PAGE 2-1 OPERATOR PMCS PAGE 2-2 OPERATOR MAINTENANCE
TECHNICAL MANUAL OPERATOR'S, UNIT, DIRECT SUPPORT, AND GENERAL SUPPORT MAINTENANCE (INCLUDING REPAIR PARTS AND SPECIAL TOOLS LIST) OPERATING INSTRUCTIONS PAGE 2-1 OPERATOR PMCS PAGE 2-2 OPERATOR MAINTENANCE
1 1/2-TON, 2-WHEEL, M332 PAGE B1 (NSN ) REPAIR PARTS AND SPECIAL TOOLS LIST PAGE F-1
 REPAIR PARTS AND SPECIAL TOOLS LIST PAGE F-1") TECHNICAL MANUAL OPERATOR'S, ORGANIZATIONAL, DIRECT SUPPORT, AND GENERAL SUPPORT MAINTENANCE (INCLUDING REPAIR PARTS AND SPECIAL TOOLS LIST) OPERATING INSTRUCTIONS PAGE 2-1 OPERATOR PMCS PAGE 2-4 OPERATOR
TECHNICAL MANUAL OPERATOR'S, ORGANIZATIONAL, DIRECT SUPPORT, AND GENERAL SUPPORT MAINTENANCE (INCLUDING REPAIR PARTS AND SPECIAL TOOLS LIST) OPERATING INSTRUCTIONS PAGE 2-1 OPERATOR PMCS PAGE 2-4 OPERATOR
HARD TIME INTERVALS APPLY. DISTRIBUTION STATEMENT A
 LUBRICATION ORDER LO 9-2805-262-12 17 September 1991 (Supersedes LO 9-2805-203-12, 15 February 1990) ENGINE, GASOLINE 6 HP, MILITARY STANDARD MODELS (MODEL 4A032-1, NSN 2805-00-776-0483) (MODEL 4A32-2,
TECHNICAL MANUAL UNIT MAINTENANCE MANUAL FOR TRUCK, TRACTOR, LINE HAUL 52,000 GVWR, 6 X 4, M915A2 (NSN )
") TECHNICAL MANUAL TM 9-2320-363-20-1 VOLUME NO. 1 UNIT MAINTENANCE MANUAL FOR TRUCK, TRACTOR, LINE HAUL 52,000 GVWR, 6 X 4, M915A2 (NSN 2320-01-272-5029) I TABLE I HOW OF CONTENTS TO USE THIS MANUAL I iii
TECHNICAL MANUAL TM 9-2320-363-20-1 VOLUME NO. 1 UNIT MAINTENANCE MANUAL FOR TRUCK, TRACTOR, LINE HAUL 52,000 GVWR, 6 X 4, M915A2 (NSN 2320-01-272-5029) I TABLE I HOW OF CONTENTS TO USE THIS MANUAL I iii
HEADQUARTERS, DEPARTMENT OF THE ARMY
 TECHNICAL MANUAL UNIT, DIRECT SUPPORT AND GENERAL SUPPORT MAINTENANCE MANUAL ROLLER, VIBRATORY, SELF-PROPELLED, Type II CATERPILLAR MODEL CS-563D NSN 3895-01-456-2735 (Type II) Contract No. DAAE07-98-C-S007
LUBRICATION ORDER LO
 LUBRICATION ORDER LO 9-2320-289-12 1 May 1992 (Supersedes LO 9-2320-289-12, dated 16 June 1986) TRUCK, CARGO, TACTICAL, 1-1/4 TON, 4X4, M1008 (2320-01-123-6827) TRUCK, CARGO, TACTICAL, 1-1/4 TON, 4X4,
DEPARTMENT OF THE ARMY TECHNICAL MANUAL TECHNICAL MANUAL OPERATOR AND ORGANIZATIONAL MAINTENANCE MANUAL PUMP, CENTRIFUGAL, SELF-PRIMING,
 DEPARTMENT OF THE ARMY TECHNICAL MANUAL TECHNICAL MANUAL OPERATOR AND ORGANIZATIONAL MAINTENANCE MANUAL PUMP, CENTRIFUGAL, SELF-PRIMING, GASOLINE ENGINE DRIVEN, WHEEL MOUNTED, 6-INCH, 1500 GPM CAPACITY
ARMY TM MARINE CORPS TM 09295A-14/1 TECHNICAL MANUAL
 ARMY TM 9-2330-381-14 MARINE CORPS TM 09295A-14/1 TECHNICAL MANUAL OPERATOR'S, UNIT, DIRECT SUPPORT, AND GENERAL SUPPORT MAINTENANCE MANUAL FOR HEAVY EQUIPMENT TRANSPORTER SEMITRAILER 70 TON, M1000 NSN
BULLDOZER, EARTH MOVING: TANK MOUNTING, M9 ( )
") TECHNICAL MANUAL OPERATOR, ORGANIZATIONAL, DIRECT SUPPORT, AND GENERAL SUPPORT MAINTENANCE MANUAL (INCLUDING REPAIR PARTS AND SPECIAL TOOLS LIST) FOR BULLDOZER, EARTH MOVING: TANK MOUNTING, M9 (2590-00-708-3563)
TECHNICAL MANUAL OPERATOR, ORGANIZATIONAL, DIRECT SUPPORT, AND GENERAL SUPPORT MAINTENANCE MANUAL (INCLUDING REPAIR PARTS AND SPECIAL TOOLS LIST) FOR BULLDOZER, EARTH MOVING: TANK MOUNTING, M9 (2590-00-708-3563)
DEPARTMENT OF THE ARMY TECHNICAL MANUAL OPERATOR S, UNIT, INTERMEDIATE DIRECT SUPPORT AND INTERMEDIATE GENERAL SUPPORT MAINTENANCE
 TM 9-2330-380-14 & P DEPARTMENT OF THE ARMY TECHNICAL MANUAL OPERATOR S, UNIT, INTERMEDIATE DIRECT SUPPORT AND INTERMEDIATE GENERAL SUPPORT MAINTENANCE (INCLUDING REPAIR PARTS AND SPECIAL TOOLS LISTS)
TECHNICAL MANUAL CHASSIS, TRAILER: GENERAL PURPOSE, 3-1/2 TON, 2-WHEEL, M353 (NSN )
") TECHNICAL MANUAL OPERATOR S, ORGANIZATIONAL, DIRECT SUPPORT, AND GENERAL SUPPORT MAINTENANCE MANUAL (INCLUDING REPAIR PARTS AND SPECIAL TOOLS LISTS) FOR CHASSIS, TRAILER: GENERAL PURPOSE, 3-1/2 TON, 2-WHEEL,
TECHNICAL MANUAL OPERATOR S, ORGANIZATIONAL, DIRECT SUPPORT, AND GENERAL SUPPORT MAINTENANCE MANUAL (INCLUDING REPAIR PARTS AND SPECIAL TOOLS LISTS) FOR CHASSIS, TRAILER: GENERAL PURPOSE, 3-1/2 TON, 2-WHEEL,
TECHNICAL MANUAL OPERATOR'S, AVIATION UNIT, AND INTERMEDIATE MAINTENANCE MANUAL (INCLUDING REPAIR PARTS AND SPECIAL TOOLS LIST) FOR
 FOR") TECHNICAL MANUAL OPERATOR'S, AVIATION UNIT, AND INTERMEDIATE MAINTENANCE MANUAL (INCLUDING REPAIR PARTS AND SPECIAL TOOLS LIST) FOR TESTER, PITOT AND STATIC SYSTEM P/N: 3400-0003 NSN: 4920-01-182-1972
TECHNICAL MANUAL OPERATOR'S, AVIATION UNIT, AND INTERMEDIATE MAINTENANCE MANUAL (INCLUDING REPAIR PARTS AND SPECIAL TOOLS LIST) FOR TESTER, PITOT AND STATIC SYSTEM P/N: 3400-0003 NSN: 4920-01-182-1972
TECHNICAL MANUAL OPERATOR'S, ORGANIZATIONAL, DIRECT SUPPORT, and GENERAL SUPPORT MAINTENANCE MANUAL (INCLUDING REPAIR PARTS AND SPECIAL TOOLS LIST)
") TM 5-4210-229-14&P TECHNICAL MANUAL OPERATOR'S, ORGANIZATIONAL, DIRECT SUPPORT, and GENERAL SUPPORT MAINTENANCE MANUAL (INCLUDING REPAIR PARTS AND SPECIAL TOOLS LIST) for TWIN AGENT 4x4 FIREFIGHTING TRUCK
TM 5-4210-229-14&P TECHNICAL MANUAL OPERATOR'S, ORGANIZATIONAL, DIRECT SUPPORT, and GENERAL SUPPORT MAINTENANCE MANUAL (INCLUDING REPAIR PARTS AND SPECIAL TOOLS LIST) for TWIN AGENT 4x4 FIREFIGHTING TRUCK
TECHNICAL MANUAL UNIT, DIRECT SUPPORT AND GENERAL SUPPORT MAINTENANCE INSTRUCTIONS
 TECHNICAL MANUAL UNIT, DIRECT SUPPORT AND GENERAL SUPPORT MAINTENANCE INSTRUCTIONS DIESEL ENGINE MODEL 4039T 4 CYLINDER 3.9 LITER NSN: 2815-01-350-2208 This copy is a reprint which includes current pages
TECHNICAL MANUAL OPERATOR, UNIT, DIRECT AND GENERAL SUPPORT MAINTENANCE MANUAL (INCLUDING REPAIR PARTS AND SPECIAL TOOLS LISTS)
") *TM 9-6115-653-14&P TECHNICAL MANUAL OPERATOR, UNIT, DIRECT AND GENERAL SUPPORT MAINTENANCE MANUAL (INCLUDING REPAIR PARTS AND SPECIAL TOOLS LISTS) POWER UNIT PU-732/M (NSN 6115-00-260-3082) MEP-113A 15
*TM 9-6115-653-14&P TECHNICAL MANUAL OPERATOR, UNIT, DIRECT AND GENERAL SUPPORT MAINTENANCE MANUAL (INCLUDING REPAIR PARTS AND SPECIAL TOOLS LISTS) POWER UNIT PU-732/M (NSN 6115-00-260-3082) MEP-113A 15
POWER PLANT AN/MJQ-15 (NSN ) (2) MEP-113A 15 KW 400 HZ GENERATOR SETS (2) M200A1 2-WHEEL, 4-TIRE, MODIFIED TRAILERS
 (2) MEP-113A 15 KW 400 HZ GENERATOR SETS (2) M200A1 2-WHEEL, 4-TIRE, MODIFIED TRAILERS") TECHNICAL MANUAL OPERATOR, UNIT, INTERMEDIATE DIRECT SUPPORT AND GENERAL SUPPORT MAINTENANCE MANUAL (INCLUDING REPAIR PARTS AND SPECIAL TOOLS LISTS) POWER PLANT AN/MJQ-15 (NSN 6115-00-400-7591) (2) MEP-113A
TECHNICAL MANUAL OPERATOR, UNIT, INTERMEDIATE DIRECT SUPPORT AND GENERAL SUPPORT MAINTENANCE MANUAL (INCLUDING REPAIR PARTS AND SPECIAL TOOLS LISTS) POWER PLANT AN/MJQ-15 (NSN 6115-00-400-7591) (2) MEP-113A
POWER PLANT AN/MJQ-25 (NSN ) (2) MEP-112A 10 KW 400 HZ GENERATOR SETS M103A3 2-WHEEL, 2-TIRE, MODIFIED TRAILER
 (2) MEP-112A 10 KW 400 HZ GENERATOR SETS M103A3 2-WHEEL, 2-TIRE, MODIFIED TRAILER") TECHNICAL MANUAL OPERATOR, UNIT, DIRECT AND GENERAL SUPPORT MAINTENANCE MANUAL (INCLUDING REPAIR PARTS AND SPECIAL TOOLS LISTS) POWER PLANT AN/MJQ-25 (NSN 6115-01-153-7742) (2) MEP-112A 10 KW 400 HZ GENERATOR
TECHNICAL MANUAL OPERATOR, UNIT, DIRECT AND GENERAL SUPPORT MAINTENANCE MANUAL (INCLUDING REPAIR PARTS AND SPECIAL TOOLS LISTS) POWER PLANT AN/MJQ-25 (NSN 6115-01-153-7742) (2) MEP-112A 10 KW 400 HZ GENERATOR
TM TECHNICAL MANUAL UNIT, INTERMEDIATE DIRECT SUPPORT AND INTERMEDIATE GENERAL SUPPORT MAINTENANCE INSTRUCTIONS
 TECHNICAL MANUAL UNIT, INTERMEDIATE DIRECT SUPPORT AND INTERMEDIATE GENERAL SUPPORT MAINTENANCE INSTRUCTIONS MAIN REDUCTION GEAR FOR LANDING CRAFT UTILITY (LCU) NSN 1905-01-154-1191 INTRODUCTION 1-1 UNIT
ARMY TM &P AIR FORCE TO 36A
 ARMY TM 9-2330-213-14&P AIR FORCE TO 36A11-1-461 TECHNICAL MANUAL OPERATOR S, UNIT, DIRECT SUPPORT, AND GENERAL SUPPORT MAINTENANCE MANUAL (INCLUDING REPAIR PARTS AND SPECIAL TOOLS LISTS) FOR TRAILER,
TM TECHNICAL MANUAL OPERATOR'S, UNIT, AND INTERMEDIATE DIRECT SUPPORT MAINTENANCE MANUAL SAFETY WARNING TABLE OF CONTENTS INTRODUCTION
 TECHNICAL MANUAL OPERATOR'S, UNIT, AND INTERMEDIATE DIRECT SUPPORT MAINTENANCE MANUAL SAFETY WARNING TABLE OF CONTENTS INTRODUCTION OPERATING INSTRUCTIONS UNIT MAINTENANCE INSTRUCTIONS INTERMEDIATE DIRECT
LUBRICATION ORDER LO JULY 1990 (Supersedes LO , July 1985)
") LUBRICATION ORDER LO 9-2350-261-12 10 JULY 1990 (Supersedes LO 9-2350-261-12, July 1985) CARRIER, PERSONNEL, FULL TRACKED, ARMORED, M113A2: 2350-01-068-4077 CARRIER, COMMAND POST, LIGHT, TRACKED, M577A2:
LUBRICATION ORDER LO 9-2350-261-12 10 JULY 1990 (Supersedes LO 9-2350-261-12, July 1985) CARRIER, PERSONNEL, FULL TRACKED, ARMORED, M113A2: 2350-01-068-4077 CARRIER, COMMAND POST, LIGHT, TRACKED, M577A2:
TECHNICAL MANUAL OPERATOR, UNIT, DIRECT SUPPORT, GENERAL SUPPORT MAINTENANCE MANUAL
 *ARMY TM 9-2805-259-14 TECHNICAL MANUAL OPERATOR, UNIT, DIRECT SUPPORT, GENERAL SUPPORT MAINTENANCE MANUAL ENGINE, GASOLINE, 20 HP, MILITARY STANDARD MODELS (MODEL 4A084-2, NSN 2805-00-952-3926) (MODEL
OPERATOR S, UNIT, DIRECT SUPPORT AND GENERAL SUPPORT MAINTENANCE MANUAL FOR ADVANCED AVIATION FORWARD AREA REFUELING SYSTEM (AAFARS) MODEL M100A1
 MODEL M100A1") TECHNICAL MANUAL OPERATOR S, UNIT, DIRECT SUPPORT AND GENERAL SUPPORT MAINTENANCE MANUAL FOR ADVANCED AVIATION FORWARD AREA REFUELING SYSTEM (AAFARS) MODEL M100A1 NSN 4930-01-495-0024 DISTRIBUTION STATEMENT
TECHNICAL MANUAL OPERATOR S, UNIT, DIRECT SUPPORT AND GENERAL SUPPORT MAINTENANCE MANUAL FOR ADVANCED AVIATION FORWARD AREA REFUELING SYSTEM (AAFARS) MODEL M100A1 NSN 4930-01-495-0024 DISTRIBUTION STATEMENT
POWER UNIT PU-753/M (NSN ) MEP-003A 10 KW 60 HZ GENERATOR SET M116A2 2-WHEEL, 2-TIRE, MODIFIED TRAILER
 MEP-003A 10 KW 60 HZ GENERATOR SET M116A2 2-WHEEL, 2-TIRE, MODIFIED TRAILER") TECHNICAL MANUAL OPERATOR'S, UNIT, INTERMEDIATE DIRECT SUPPORT AND INTERMEDIATE GENERAL SUPPORT MAINTENANCE MANUAL (INCLUDING REPAIR PARTS AND SPECIAL TOOLS LISTS) POWER UNIT PU-753/M (NSN 6115-00-033-1389)
TECHNICAL MANUAL OPERATOR'S, UNIT, INTERMEDIATE DIRECT SUPPORT AND INTERMEDIATE GENERAL SUPPORT MAINTENANCE MANUAL (INCLUDING REPAIR PARTS AND SPECIAL TOOLS LISTS) POWER UNIT PU-753/M (NSN 6115-00-033-1389)
ARMY TM AIR FORCE TO 38G NAVY NAVFAC P E
 TECHNICAL MANUAL OPERATOR, UNIT, DIRECT SUPPORT, GENERAL SUPPORT MAINTENANCE MANUAL ENGINE, GASOLINE, 3 HP, MILITARY STANDARD MODELS (MODEL 2A016-1, NSN 2805-00-601-5127) (MODEL 2A016-2, NSN 2805-00-714-8553)
1 1/2-TON, 2-WHEEL, M332 PAGE B1 (NSN ) REPAIR PARTS AND SPECIAL TOOLS LIST PAGE F-1
 REPAIR PARTS AND SPECIAL TOOLS LIST PAGE F-1") TECHNICAL MANUAL OPERATOR'S, ORGANIZATIONAL, DIRECT SUPPORT, AND GENERAL SUPPORT MAINTENANCE (INCLUDING REPAIR PARTS AND SPECIAL TOOLS LIST) OPERATING INSTRUCTIONS PAGE 2-1 OPERATOR PMCS PAGE 2-4 OPERATOR
TECHNICAL MANUAL OPERATOR'S, ORGANIZATIONAL, DIRECT SUPPORT, AND GENERAL SUPPORT MAINTENANCE (INCLUDING REPAIR PARTS AND SPECIAL TOOLS LIST) OPERATING INSTRUCTIONS PAGE 2-1 OPERATOR PMCS PAGE 2-4 OPERATOR
*ARMY TM AIR FORCE TO 38G NAVY NAVFAC P E
 *ARMY TM 9 2805 258 14 AIR FORCE TO 38G2-89 21 NAVY NAVFAC P 8-614-14E TECHNICAL MANUAL OPERATOR, UNIT, DIRECT SUPPORT, GENERAL SUPPORT MAINTENANCE MANUAL ENGINE, GASOLINE, 10 HP, MILITARY STANDARD MODELS
TM Manual Provided by emilitary Manuals -
 TM 9-2320-289-10 ARMY TM 9-2320-289-10 AIR FORCE TO 36A12-1A-2081 MARINE CORPS TM 2320-10/1 Supersedes Copy Dated April 1983 See Page i For Details 4 JULY 1986 TM 9-2320-289-10 TO 36A12-1A-2081 TM 2320-1011
M48A5 TANK CHASSIS, TRANSPORTING: FOR BRIDGE, ARMORED-VEHICLE-LAUNCHED SCISSORING TYPE,CLASS 60 (NSN )
") TECHNICAL MANUAL ORGANIZATIONAL MAINTENANCE This copy is a reprint which includes current pages from Changes 1 through 3. M48A5 TANK CHASSIS, TRANSPORTING: FOR BRIDGE, ARMORED-VEHICLE-LAUNCHED SCISSORING
TECHNICAL MANUAL ORGANIZATIONAL MAINTENANCE This copy is a reprint which includes current pages from Changes 1 through 3. M48A5 TANK CHASSIS, TRANSPORTING: FOR BRIDGE, ARMORED-VEHICLE-LAUNCHED SCISSORING
AVIATION UNIT AND AVIATION INTERMEDIATE TROUBLESHOOTING MANUAL CH-47D HELICOPTER
 TECHNICAL MANUAL AVIATION UNIT AND AVIATION INTERMEDIATE TROUBLESHOOTING MANUAL CH-47D HELICOPTER This copy is a reprint which includes current pages from Changes 1 through 10. HEADQUARTERS, DEPARTMENT
AVIATION UNIT AND AVIATION INTERMEDIATE TROUBLESHOOTING MANUAL CH-47D HELICOPTER
 TECHNICAL MANUAL AVIATION UNIT AND AVIATION INTERMEDIATE TROUBLESHOOTING MANUAL CH-47D HELICOPTER This copy is a reprint which includes current pages from Changes 1 through 17. HEADQUARTERS, DEPARTMENT
POWER UNIT PU-405A/M (NSN ) MEP-004A 15 KW 60 HZ GENERATOR SET M200A1 2-WHEEL, 4-TIRE, MODIFIED TRAILER
 MEP-004A 15 KW 60 HZ GENERATOR SET M200A1 2-WHEEL, 4-TIRE, MODIFIED TRAILER") TECHNICAL MANUAL OPERATOR S, UNIT, INTERMEDIATE DIRECT SUPPORT AND GENERAL SUPPORT MAINTENANCE MANUAL (INCLUDING REPAIR PARTS AND SPECIAL TOOLS LISTS) POWER UNIT PU-405A/M (NSN 6115-00-394-9577) MEP-004A
TECHNICAL MANUAL OPERATOR S, UNIT, INTERMEDIATE DIRECT SUPPORT AND GENERAL SUPPORT MAINTENANCE MANUAL (INCLUDING REPAIR PARTS AND SPECIAL TOOLS LISTS) POWER UNIT PU-405A/M (NSN 6115-00-394-9577) MEP-004A
TECHNICAL MANUAL UNIT AND DIRECT SUPPORT MAINTENANCE REPAIR PARTS AND SPECIAL TOOLS LIST (INCLUDING DEPOT MAINTENANCE REPAIR PARTS AND SPECIAL TOOLS)
") *TM 10-4610-234-23P UNIT AND DIRECT SUPPORT MAINTENANCE REPAIR PARTS AND SPECIAL TOOLS LIST (INCLUDING DEPOT MAINTENANCE REPAIR PARTS AND SPECIAL TOOLS) 40, 000 GALLON WATER STORAGE AND DISTRIBUTION SYSTEM
*TM 10-4610-234-23P UNIT AND DIRECT SUPPORT MAINTENANCE REPAIR PARTS AND SPECIAL TOOLS LIST (INCLUDING DEPOT MAINTENANCE REPAIR PARTS AND SPECIAL TOOLS) 40, 000 GALLON WATER STORAGE AND DISTRIBUTION SYSTEM
TECHNICAL MANUAL ORGANIZATIONAL, DIRECT SUPPORT, AND GENERAL SUPPORT MAINTENANCE MANUAL WITH REPAIR PARTS AND SPECIAL TOOLS LIST
 TECHNICAL MANUAL ORGANIZATIONAL, DIRECT SUPPORT, AND GENERAL SUPPORT MAINTENANCE MANUAL WITH REPAIR PARTS AND SPECIAL TOOLS LIST BITUMINOUS DISTRIBUTOR BODY M918, MODEL D-63 NSN 3895-01-028-4390 E.D. ETNYRE
POWER PLANT AN/MJQ-18 (NSN ) (2) MEP-003A 10 KW 60 HZ GENERATOR SETS MODIFIED TRAILER HEADQUARTERS, DEPARTMENT OF THE ARMY
 (2) MEP-003A 10 KW 60 HZ GENERATOR SETS MODIFIED TRAILER HEADQUARTERS, DEPARTMENT OF THE ARMY") TM5-6115-633-14&P TECHNICAL MANUAL OPERATOR, UNIT, INTERMEDIATE DIRECT SUPPORT AND GENERAL SUPPORT MAINTENANCE MANUAL (INCLUDING REPAIR PARTS AND SPECIAL TOOLS LISTS) POWER PLANT AN/MJQ-18 (NSN 6115-00-033-1398)
TM5-6115-633-14&P TECHNICAL MANUAL OPERATOR, UNIT, INTERMEDIATE DIRECT SUPPORT AND GENERAL SUPPORT MAINTENANCE MANUAL (INCLUDING REPAIR PARTS AND SPECIAL TOOLS LISTS) POWER PLANT AN/MJQ-18 (NSN 6115-00-033-1398)
TECHNICAL MANUAL OPERATOR'S, AVIATION UNIT, AND INTERMEDIATE MAINTENANCE MANUAL (INCLUDING REPAIR PARTS AND SPECIAL TOOLS LIST) FOR
 FOR") TECHNICAL MANUAL OPERATOR'S, AVIATION UNIT, AND INTERMEDIATE MAINTENANCE MANUAL (INCLUDING REPAIR PARTS AND SPECIAL TOOLS LIST) FOR TRUCK, HAND (HIGH PRESSURE NITROGEN SERVICING CART) P/N FPNC-01 NSN:
TECHNICAL MANUAL OPERATOR'S, AVIATION UNIT, AND INTERMEDIATE MAINTENANCE MANUAL (INCLUDING REPAIR PARTS AND SPECIAL TOOLS LIST) FOR TRUCK, HAND (HIGH PRESSURE NITROGEN SERVICING CART) P/N FPNC-01 NSN:
POWER PLANT AN/MJQ-16 (NSN ) (2) MEP-002A 5 KW 60 HZ GENERATOR SETS M103A3 2-WHEEL, 2-TIRE, MODIFIED TRAILER
 (2) MEP-002A 5 KW 60 HZ GENERATOR SETS M103A3 2-WHEEL, 2-TIRE, MODIFIED TRAILER") TECHNICAL MANUAL OPERATOR, UNIT, INTERMEDIATE DIRECT SUPPORT AND GENERAL SUPPORT MAINTENANCE MANUAL (INCLUDING REPAIR PARTS AND SPECIAL TOOLS LISTS) POWER PLANT AN/MJQ-16 (NSN 6115-00-033-1395) (2) MEP-002A
TECHNICAL MANUAL OPERATOR, UNIT, INTERMEDIATE DIRECT SUPPORT AND GENERAL SUPPORT MAINTENANCE MANUAL (INCLUDING REPAIR PARTS AND SPECIAL TOOLS LISTS) POWER PLANT AN/MJQ-16 (NSN 6115-00-033-1395) (2) MEP-002A
Voltmaster Centrifugal Trash Pumps
 Voltmaster Centrifugal Trash Pumps Model TSP2, TSP3 and TSP4 Owner s Manual February 2011 Table of Contents 1 Introduction............................ 1 1.1 Read before using..................... 1 1.2
OPERATOR, UNIT MAINTENANCE, AND DIRECT SUPPORT MAINTENANCE MANUAL (INCLUDING REPAIR PARTS AND SPECIAL TOOLS LIST) FOR EARTH AUGER ASSEMBLY
 FOR EARTH AUGER ASSEMBLY") OPERATOR, UNIT MAINTENANCE, AND DIRECT SUPPORT MAINTENANCE MANUAL (INCLUDING REPAIR PARTS AND SPECIAL TOOLS LIST) FOR EARTH AUGER ASSEMBLY MODEL 1650EH-MS LOWE Manufacturing Company NSN 2590-01-384-6857
OPERATOR, UNIT MAINTENANCE, AND DIRECT SUPPORT MAINTENANCE MANUAL (INCLUDING REPAIR PARTS AND SPECIAL TOOLS LIST) FOR EARTH AUGER ASSEMBLY MODEL 1650EH-MS LOWE Manufacturing Company NSN 2590-01-384-6857
DEPARTMENT OF THE ARMY TECHNICAL MANUAL TECHNICAL MANUAL DIRECT AND GENERAL SUPPORT MAINTENANCE MANUAL TRUCK, LIFT, FORK EMD, SOLID RUBBER TIRED
 DEPARTMENT OF THE ARMY TECHNICAL MANUAL TM 10-3930-631-34 TECHNICAL MANUAL DIRECT AND GENERAL SUPPORT MAINTENANCE MANUAL TRUCK, LIFT, FORK EMD, SOLID RUBBER TIRED WHEELS, 4000LB. CAPACITY 144 and 180 INCH
CLEANER, STEAM, HIGH PRESSURE, HOT AND COLD WATER JET, TRAILER MOUNTED ( )(EIC: 2BC)
(EIC: 2BC)") TECHNICAL MANUAL TM 9-4940-531-24P UNIT, DIRECT SUPPORT, AND GENERAL SUPPORT MAINTENANCE FOR CLEANER, STEAM, HIGH PRESSURE, HOT AND COLD WATER JET, TRAILER MOUNTED (4940-01-025-9856)(EIC: 2BC) DISTRIBUTION
TECHNICAL MANUAL TM 9-4940-531-24P UNIT, DIRECT SUPPORT, AND GENERAL SUPPORT MAINTENANCE FOR CLEANER, STEAM, HIGH PRESSURE, HOT AND COLD WATER JET, TRAILER MOUNTED (4940-01-025-9856)(EIC: 2BC) DISTRIBUTION
TM &P TECHNICAL MANUAL
 TECHNICAL MANUAL OPERATOR S, ORGANIZATIONAL, DIRECT SUPPORT, AND GENERAL SUPPORT MAINTENANCE MANUAL (INCLUDING REPAIR PARTS AND SPECIAL TOOLS LISTS) FOR SEMITRAILER, TANK: FUEL, 5000 GALLON, 4 WHEEL, M131A4
TM &P TRAILER, BOLSTER: 4-TON, 4-WHEEL, GENERAL PURPOSE M796 (NSN ) AND M796A1 (NSN )
 AND M796A1 (NSN )") TECHNICAL MANUAL OPERATOR S, ORGANIZATIONAL, DIRECT SUPPORT, AND GENERAL SUPPORT MAINTENANCE (INCLUDING REPAIR PARTS AND SPECIAL TOOLS LIST) TRAILER, BOLSTER: 4-TON, 4-WHEEL, GENERAL PURPOSE M796 (NSN
TECHNICAL MANUAL OPERATOR S, ORGANIZATIONAL, DIRECT SUPPORT, AND GENERAL SUPPORT MAINTENANCE (INCLUDING REPAIR PARTS AND SPECIAL TOOLS LIST) TRAILER, BOLSTER: 4-TON, 4-WHEEL, GENERAL PURPOSE M796 (NSN
HEADQUARTERS, DEPARTMENT OF THE ARMY AND THE AIR FORCE 30 DECEMBER 1994
 TECHNICAL MANUAL OPERATOR, UNIT, AND DIRECT SUPPORT MAINTENANCE MANUAL (INCLUDING REPAIR PARTS AND SPECIAL TOOLS LIST) FOR AN/MJQ-1612 60kW 50/60 Hz POWER PLANT, DIESEL ENGINE DRIVEN, 5 TON TRAILER MOUNTED
FPU SYSTEMS OPERATION MANUAL BOH PORTABLE DRAWER MODULE (PDM) (INCLUDING REPAIR PARTS & SPECIAL TOOL LIST) BOH FPU Field Pack-up Units CHAPTER 4
 (INCLUDING REPAIR PARTS & SPECIAL TOOL LIST) BOH FPU Field Pack-up Units CHAPTER 4") FPU SYSTEMS OPERATION MANUAL BOH PORTABLE DRAWER MODULE (PDM) (INCLUDING REPAIR PARTS & SPECIAL TOOL LIST) BOH FPU Field Pack-up Units CHAPTER 4 OPERATOR MAINTENANCE INSTRUCTIONS 2016 BOH Environmental
FPU SYSTEMS OPERATION MANUAL BOH PORTABLE DRAWER MODULE (PDM) (INCLUDING REPAIR PARTS & SPECIAL TOOL LIST) BOH FPU Field Pack-up Units CHAPTER 4 OPERATOR MAINTENANCE INSTRUCTIONS 2016 BOH Environmental
TRANSPORTABLE (NSN ) LIFT, M720 DOLLY SET, SHELTER, 3-TON TM &P/TO 36A
 LIFT, M720 DOLLY SET, SHELTER, 3-TON TM &P/TO 36A") OPERATOR, ORGANIZATIONAL, DIRECT SUPPORT, AND GENERAL SUPPORT MAINTENANCE MANUAL (INCLUDING REPAIR PARTS AND SPECIAL TOOLS LISTS) DOLLY SET, SHELTER, 3-TON LIFT, M720 TRANSPORTABLE (NSN 2330-00-912-4251)
OPERATOR, ORGANIZATIONAL, DIRECT SUPPORT, AND GENERAL SUPPORT MAINTENANCE MANUAL (INCLUDING REPAIR PARTS AND SPECIAL TOOLS LISTS) DOLLY SET, SHELTER, 3-TON LIFT, M720 TRANSPORTABLE (NSN 2330-00-912-4251)
TANK, FABRIC, COLLAPSIBLE, FUEL STORAGE
 TM 10-5430-242-12&P TECHNICAL MANUAL OPERATOR AND UNIT MAINTENANCE MANUAL (INCLUDING REPAIR PARTS AND SPECIAL TOOLS LIST) TANK, FABRIC, COLLAPSIBLE, FUEL STORAGE 3,000 GALLON, MODEL GTA-3KF/RCF-3-K-F-OB/
TM TECHNICAL MANUAL
 TECHNICAL MANUAL AVIATION UNIT AND AVIATION INTERMEDIATE MAINTENANCE MANUAL ENGINE ASSEMBLY MODE L T63-A-5A NSN 2840-00-923-6023 MODEL T63-A-700 NSN 2840-00-179-5536 HEADQUARTERS DEPARTMENT OF THE ARMY
TECHNICAL MANUAL UNIT, DIRECT SUPPORT AND GENERAL SUPPORT MAINTENANCE REPAIR PARTS AND SPECIAL TOOLS LIST
 *TM 5-4930-28-24P TECHNICAL MANUAL UNIT, DIRECT SUPPORT AND GENERAL SUPPORT MAINTENANCE REPAIR PARTS AND SPECIAL TOOLS LIST (INCLUDING DEPOT MAINTENANCE REPAIR PARTS AND SPECIAL TOOLS) LUBRICATING AND
TECHNICAL MANUAL AVIATION UNIT AND AVIATION INTERMEDIATE MAINTENANCE MANUAL ENGINE, GAS TURBINE MODEL T55-L-714 NSN
 TECHNICAL MANUAL AVIATION UNIT AND AVIATION INTERMEDIATE MAINTENANCE MANUAL ENGINE, GAS TURBINE MODEL T55-L-714 NSN 2840-01-353-7635 DISTRIBUTION STATEMENT A: Approved for public release; distribution
OPERATOR'S MANUAL FOR
 OPERATOR'S MANUAL FOR CRUSHER, JAW: DIESEL AND ELECTRIC DRIVEN, WHEEL MOUNTED, PNEUMATIC TIRES, 75 TON PER HOUR EAGLE CRUSHER MODEL 5157 AND 5157A (NSN 3820-00-783-7311) EAGLE CRUSHER MODEL 5157B (NSN
DEPARTMENT OF THE ARMY TECHNICAL MANUAL DEPARTMENT OF THE AIR FORCE TECHNICAL ORDER TECHNICAL MANUAL
 DEPARTMENT OF THE ARMY TECHNICAL MANUAL DEPARTMENT OF THE NAVY PUBLICATION DEPARTMENT OF THE AIR FORCE TECHNICAL ORDER * TO-35C2-3-463-4 TECHNICAL MANUAL Organizational, Intermediate (Field) (Direct and
TM &P TECHNICAL MANUAL
 TECHNICAL MANUAL OPERATOR S, ORGANIZATIONAL, DIRECT SUPPORT, AND GENERAL SUPPORT MAINTENANCE MANUAL (INCLUDING REPAIR PARTS AND SPECIAL TOOLS LISTS) FOR TM 9-2330-359-14&P SEMITRAILER, FLATBED: BREAKBULK/CONTAINER
TM &P OPERATOR AND FIELD LEVEL MAINTENANCE MANUAL INCLUDING REPAIR PARTS AND SPECIAL TOOLS LIST (RPSTL) FOR
 FOR") TM 10-5430-55-13&P TECHNICAL MANUAL OPERATOR AND FIELD LEVEL MAINTENANCE MANUAL INCLUDING REPAIR PARTS AND SPECIAL TOOLS LIST (RPSTL) FOR DRUM, FABRIC, COLLAPSIBLE, FUEL, 500 GALLON CAPACITY MODEL GTA500F
TM 10-5430-55-13&P TECHNICAL MANUAL OPERATOR AND FIELD LEVEL MAINTENANCE MANUAL INCLUDING REPAIR PARTS AND SPECIAL TOOLS LIST (RPSTL) FOR DRUM, FABRIC, COLLAPSIBLE, FUEL, 500 GALLON CAPACITY MODEL GTA500F
TECHNICAL MANUAL OPERATOR S MANUAL
 TECHNICAL MANUAL OPERATOR S MANUAL INTRODUCTION AND GENERAL INFORMATION 1-1 OPERATING INSTRUCTIONS 2-1 OPERATOR MAINTENANCE 3-1 REFERENCES A-1 COMPONENTS OF END ITEM AND BASIC ISSUE ITEMS LIST B-1 ADDITIONAL
OPERATOR'S MANUAL COMPONENT OF CRUSHING AND SCREENING PLANT: DIESEL AND ELECTRIC DRIVEN, WHEEL MOUNTED, 75 TON PER HOUR
 OPERATOR'S MANUAL FOR CRUSHER, ROLL: DIESEL AND ELECTRIC DRIVEN, WHEEL MOUNTED, PNEUMATIC TIRES, 75 TON PER HOUR EAGLE CRUSHER MODEL 5230B AND 5230C (NSN 3820-00-788-5999) EAGLE CRUSHER MODEL 5230D (NSN
OPERATOR S MANUAL. DISTRIBUTION STATEMENT A. Approved for public release; distribution is unlimited. HEADQUARTERS, DEPARTMENT OF THE ARMY
 OPERATOR S MANUAL PREVENTIVE MAINTENANCE CHECKS AND SERVICES PAGE 2-18 OPERATION UNDER USUAL CONDITIONS PAGE 2-49 OPERATION UNDER UNUSUAL CONDITIONS PAGE 2-108 TROUBLESHOOTING PROCEDURES PAGE 3-3 MAINTENANCE
TECHNICAL MANUAL OPERATOR'S, ORGANIZATIONAL, DIRECT SUPPORT AND GENERAL SUPPORT MAINTENANCE MANUAL (INCLUDING REPAIR PARTS AND SPECIAL TOOLS LIST)
") TECHNICAL MANUAL OPERATOR'S, ORGANIZATIONAL, DIRECT SUPPORT AND GENERAL SUPPORT MAINTENANCE MANUAL (INCLUDING REPAIR PARTS AND SPECIAL TOOLS LIST) OPERATING INSTRUCTIONS PAGE 2-1 OPERATOR PMCS PAGE 2-6
TECHNICAL MANUAL OPERATOR'S, ORGANIZATIONAL, DIRECT SUPPORT AND GENERAL SUPPORT MAINTENANCE MANUAL (INCLUDING REPAIR PARTS AND SPECIAL TOOLS LIST) OPERATING INSTRUCTIONS PAGE 2-1 OPERATOR PMCS PAGE 2-6
Airless Spray Gun INSTRUCTIONS DP psi (345 bar) Maximum Working Pressure
 Maximum Working Pressure") INSTRUCTIONS DP-6376 Airless Spray Gun 5000 psi (345 bar) Maximum Working Pressure INSTRUCTIONS This manual contains important warnings and information. READ AND KEEP FOR REFERENCE. Table of Contents Warnings......................................
INSTRUCTIONS DP-6376 Airless Spray Gun 5000 psi (345 bar) Maximum Working Pressure INSTRUCTIONS This manual contains important warnings and information. READ AND KEEP FOR REFERENCE. Table of Contents Warnings......................................
TP300 INDUSTRIAL TRASH PUMP OPERATOR S MANUAL
 TP300 INDUSTRIAL TRASH PUMP OPERATOR S MANUAL IT IS EXTREMELY IMPORTANT TO READ AND UNDERSTAND THE ENTIRE CONTENTS OF THIS OPERATOR S MANUAL BEFORE ATTEMPTING TO OPERATE THE PRODUCT. THIS EQUIPMENT IS
HEADQUARTERS, DEPARTMENT OF THE ARMY
 TECHNICAL MANUAL OPERATOR S, ORGANIZATIONAL, DIRECT SUPPORT AND GENERAL SUPPORT MAINTENANCE MANUAL (INCLUDING REPAIR PARTS AND SPECIAL TOOLS LIST) DRUMS, FABRIC COLLAPSIBLE NON-VENTED; 500 GALLON, LIQUID
TM TECHNICAL MANUAL
 TECHNICAL MANUAL OPERATOR S, ORGANIZATIONAL, DIRECT SUPPORT, AND GENERAL SUPPORT MAINTENANCE MANUAL FOR SEMITRAILER, TANK: FUEL, 5000 GALLON, 4-WHEEL M131A4 (NSN 2330-00-994-9459) M131A5 (NSN 2330-00-226-6079)
ENGINE, AIRCRAFT, GAS TURBINE MODEL T63-A-720 P/N NSN
 TM 55-2840-241-23 TECHNICAL MANUAL AVIATION UNIT AND AVIATION INTERMEDIATE MAINTENANCE MANUAL ENGINE, AIRCRAFT, GAS TURBINE MODEL T63-A-720 P/N6887191 NSN 2840-01-013-1339 HEADQUARTERS, DEPARTMENT OF THE
This manual supersedes TM &P, dated 17 December 1987, and LO , dated 12 June 1986.
 TECHNICAL MANUAL OPERATOR'S, ORGANIZATIONAL, DIRECT SUPPORT, AND GENERAL SUPPORT MAINTENANCE MANUAL (INCLUDING REPAIR PARTS AND SPECIAL TOOLS LISTS) FOR SEMITRAILER, FLATBED: RADAR SET AND LAUNCHING STATION
TECHNICAL MANUAL OPERATOR S, ORGANIZATIONAL, DIRECT SUPPORT AND GENERAL SUPPORT MAINTENANCE MANUAL (INCLUDING REPAIR PARTS AND SPECIAL TOOLS LIST)
") TECHNICAL MANUAL OPERATOR S, ORGANIZATIONAL, DIRECT SUPPORT AND GENERAL SUPPORT MAINTENANCE MANUAL (INCLUDING REPAIR PARTS AND SPECIAL TOOLS LIST) SEMITRAILER, VAN: ELECTRONIC 10-TON, 4 WHEEL XM574 (2330-00-086-7406)
TECHNICAL MANUAL OPERATOR S, ORGANIZATIONAL, DIRECT SUPPORT AND GENERAL SUPPORT MAINTENANCE MANUAL (INCLUDING REPAIR PARTS AND SPECIAL TOOLS LIST) SEMITRAILER, VAN: ELECTRONIC 10-TON, 4 WHEEL XM574 (2330-00-086-7406)
TM TECHNICAL MANUAL DIRECT SUPPORT AND GENERAL SUPPORT MAINTENANCE
 TECHNICAL MANUAL DIRECT SUPPORT AND GENERAL SUPPORT MAINTENANCE LOADER, SCOOP TYPE, DED 4x4, ARTICULATED FRAME STEER, 2-1/2 CUBIC YARD (J. I. CASE MODEL MW24C) (NSN 3805-01-150-4814) Approved for public
TM UNIT MAINTENANCE VOLUME II PALLETIZED LOAD SYSTEM MODEL M1074/M1075 TECHNICAL MANUAL NSN NSN
 THIS MANUAL SUPERSEDES DATED 31 MAR 1994, INCLUDING ALL CHANGES. TECHNICAL MANUAL UNIT MAINTENANCE VOLUME II ATEC TROUBLESHOOTING 2-811 ENGINE TROUBLESHOOTING 2-935 FUEL SYSTEM TROUBLESHOOTING 2-1012 PALLETIZED