ON DEMAND MAINTENANCE GUIDE
|
|
|
- Chad Robbins
- 6 years ago
- Views:
Transcription


1 ON DEMAND MAINTENANCE GUIDE
2 2 GENERAL INFORMATION Redesigned icons in the typical Bayer SeedGrowth style This manual contains technical information regarding Bayer SeedGrowth Equipment. Please read and understand these instructions completely before proceeding to install and operate the equipment. Bayer reserves the right to change specifications, models, components, or materials at any time without notice. For additional equipment information contact us at Please have this manual available when contacting Bayer. This manual uses signal words and symbols to help avoid personal injury. Danger, Warning, and Caution are signal words used to identify the level of hazard. Danger alerts that an extreme hazard will cause serious injury or death if operators or installers do not follow the recommended precautions. Warning alerts that a hazard may cause serious injury or death if operators or installers do not follow the recommended precautions. Caution alerts that a hazard may cause minor or moderate injury if operators or installers do not follow the recommended precautions. Always use caution and common sense when working with any chemical. Read the product label and SDS carefully and follow their instructions exactly as described. Optimal operating conditions for this piece of equipment requires an ambient temperature 32 F to +104 F (0 C to +40 C), relative humidity less than 90% (minimum condensation). Make necessary provisions to protect this piece of equipment against excessive dust, particles containing iron, moisture and against corrosive and explosive gases. Our technical information is based on Tip: calls attention to special information. extensive testing and is, to the best of our current knowledge, true and accurate but Note: emphasizes general information worthy of attention. given without warranty as the conditions of use and storage are beyond our control. Variables, such as humidity, temperature, Example: gives a problem or exercise that illustrates a method or principle. change in seed size or variety and viscosity of chemical products can all affect the accuracy of the chemical application and seed coverage. To ensure the desired application rate and optimum seed coverage, check the calibration periodically throughout the day, and make adjustments as needed. Bayer Crop Science Division 1451 Dean Lakes Trail Shakopee, Minnesota USA Phone: Toll Free: equipment@bayer.com Web: Bayer SeedGrowth TM and the Bayer Cross are registered trademarks of Bayer. SGRONDEMANDMAINTENANCEGUIDE


3 CONTENTS 3 In order to give a better overview the sub chapters have been added to the content page CONTENT #1 MAINTENANCE 04 RH Head Assembly 04 Drum Assembly 05 Pump Stations 06 Control Panels 11 Gear Motor 15 PM Checklist 16 TOUCH TO ADVANCE


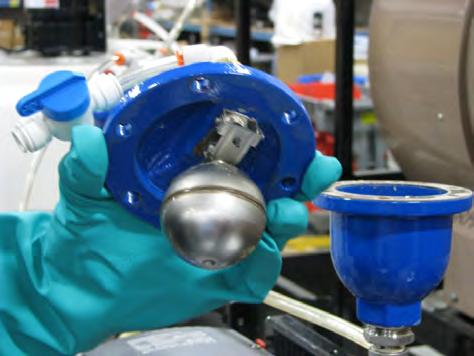
4 4 MAINTENANCE - RH HEAD RH HEAD ASSEMBLY Warning! Exercise extreme caution when working with chemicals! Refer to the Exposure Control Guide on page 15. Seed Transition Quick Clean out Step 1: Place one hand on the transition and use the other to unlatch the three clamps holding the transition onto the bottom of the Atomizer section. Remove the Seed Transition. Regarding the typography: the headlines are set in capital letters (Bold, Subhead as in chapter 1 are set in bold, 14pt Subhead II are set in bold at 11 pt with 14 p Copy text has a defined font size of 9 pt, rom Accentuations within the copy are bold. Step 3: Remove the atomizer with a wrench. Use a rag to thoroughly clean the atomizer and atomizer housing. This is recommended after each treating session, to avoid unnecessary chemical and seed buildup, as shown below. Replace the atomizer on the shaft. Push it up on the shaft until it touches the chemical tube, then back it off a little. Tighten the nut. Step 4: Replace the clean Transition under the Atomizer Housing. Align the Transition to the back lip of the Housing and ensure each clamp is in line with the grooves on the transition. Close each Clamp to securely fasten the transition in place. Step 2: Use a rag to wipe down inside the Seed Transition and a putty knife to scrape any residue build-up. Note: Seed Wheel (Reducer) factory fill of Glygoyle 460 lubricant does not require changing after break-in and is satisfactory for the full service life of the reducer.


 to lower the Drum angle to its moat flat position.")

5 MAINTENANCE - DRUM ASSEMBLY 5 DRUM ASSEMBLY 44pt and 44pt line spaceing). with 17 pt line spacing. t line spaceing. an at 12,75 pt line spaceing. Regarding the typography in warning and caution boxes: Copytext is set in bold at 9 pt at 12,75 pt line spaceing. Grease Zerk Step 4: Fasten the Drum Guards in place and tighten securely. Step 1: Use a 7/16 wrench to loosen the four bolts that hold the Drum Guard in place. Remove Drum Guards from both sides of the Drum. Step 2: There are nine pillow block bearings, five on the drive shaft side and four on the idler side. Use a grease gun to lubricate each bearing zerk. Drum Clean-out Step 1: Use a wrench (on all thread bolt 3/4-10 SQ Nut) to lower the Drum angle to its moat flat position. Step 3: Align the drum guard properly with the channel in the middle of the drum guard groove, as shown below. Step 2: Fill the Drum with hot water. Step 3: Run the VFD Drum Drive FORWARD for 30 minutes or so to clean the drum to the metal. Step 4: An option is to add discard seed and letting that mix either with or without the hot water to clean the drum to the metal. Step 5: Dispose of water and seed responsibly, according to state and local regulations. DO NOT RUN RINSE WATER DOWN THE DRAIN!


6 6 MAINTENANCE - PUMP STATIONS PUMP STATIONS Line Rinse Step 1: If there is chemical in the lines, run the pump in reverse and recover product. Remove the Keg from the Scale. Remove the Plumbing Assembly from the Keg: unlock by pulling the Handle UP, then Twist and pull the Assembly out of the Keg. Step 4: Push in the orange fitting and pull out the tubing to disconnect the treatment line from the Chemical Inlet Assembly. Step 5: This will require two people! Hold the Treatment Line in a 5 gallon bucket. On the MAIN SCREEN, touch the Pump Station graphic icon that requires rinsing: navigates to the STATION 2 PUMP DETAIL SCREEN. Step 2: Twist the Rinsing Socket onto the end of the Plumbing Assembly, then lock down the handle (push DOWN). Treatment Line in pail Touch Pump Station 2 Step 6: Touch and hold PRIME LINE button icon on the STATION 2 PUMP DETAIL SCREEN until all of the water from the Tank fills the 5 gallon pail. Repeat steps 1-6 for each Pump Station used. Step 3: Fill a 5 gallon pail with clean water and place the Plumbing Assembly in the pail, as shown below. Inventory will not be affected as long as the bucket is NOT sitting on the scale when priming the line. Warning! The rinse water (gray water) in the pail may be saved and used with the next slurry mix or disposed of properly, according to state and local regulations.


7 MAINTENANCE - PUMP STATIONS 7 Complete Line Rinse Step 1: Remove the 2 screws that holds the Chemical Inlet on the Treating Head. Place the Chemical Inlet Assembly (connected to the Treatment Line) in a 5 gallon pail, as shown. Regarding the typography in warning and caution boxes: Copytext is set in bold at 9 pt at 12,75 pt line spaceing. Step 4: Use a wrench to remove the nut on the end of the Chemical Inlet Assembly. Use a factory supplied tube brush to thoroughly clean the inside of the Chemical Inlet Assembly. Replace nut on the Chemical Inlet Assembly. Step 5: Replace the Chemical Inlet Assembly on the Treating Head. Tighten screws. Step 2: On the MAIN SCREEN, touch the Pump Station graphic icon that requires rinsing: navigates to the STATION 2 PUMP DETAIL SCREEN. Step 6: Open the Pump Head lever when the Pump is not in use, to avoid forming flat spots in the element. Step 3: Touch and hold PRIME LINE button icon on the STATION 2 PUMP DETAIL SCREEN until all of the water from the Tank fills the 5 gallon pail. Repeat steps 1-6 for each Pump Station used.


.")


8 8 MAINTENANCE - PUMP STATIONS Air Release Valve Step 1: Approximately once a year clean out the Air Release Valve on all Pump Stations. Use 1/2 wrench to loosen six bolts and washers on top of the Air release Valve. Step 4: Use a rag to thoroughly clean out the Air release valve housing. Inspect gasket for cracks and wear. Replace if needed. Step 5: Replace the cover and tighten the six bolts on the cover. Torque to 30 Ft-lbs. evenly. Step 2: Use a screwdriver to carefully pry the cap off the housing (use protrusions). Do not damage the gasket! Remove the cover. Step 3: Clean and inspect the cover, especially the small rubber washer for wear (see insert photo). FREEZING WILL CAUSE PUMP DAMAGE! When storing the Pump in subfreezing temperatures, flush with products that prevent freezing; such as RV Antifreeze or diluted windshield washer fluid. Warning! Failure to clean the Pump properly or completely drain all liquid from the pump and lines after use, may damage the Pump and void any warranties expressed or implied!


, as shown.")
9 MAINTENANCE - PUMP STATIONS 9 Pump Element Replacement Step 1: Pump Elements should be replaced annually. Open the Pump Head Assembly, using the Pump Head Handle (down position), as shown. Regarding the typography in warning and caution boxes: Copytext is set in bold at 9 pt at 12,75 pt line spaceing. Step 4: Insert the other end of the factory supplied Pump Element into the orange Fitting Receptacle on the In-line Strainer Vibration Mount, as shown. Step 2: Use the correct element with the right Pump: LS uses 15 (small), IP uses 73 (large) Insert one end of the factory supplied Pump Element into the orange Fitting Receptacle on the Pump Treatment Valve Vibration Mount, as shown. Step 5: Close Pump Head (up position), as shown. Step 3: Insert the Pump Element onto the Pump Head Rollers, as shown. Ensure Pump Element fits behind Pump Head Clips!

.")


10 10 MAINTENANCE - IN-LINE FILTER In-line Filter Step 1: Periodically remove, inspect and clean out the in-line filter assembly on the Pump Station. Step 4: Replace the filter inside the Filter basket and hand tighten the Basket back onto the In-line Filter.. Ensure filter basket is tight (very important). Step 2: Place a drip pan or bucket beneath the filter and unscrew the Basket from the cap. Remove the filter from the basket and clean thoroughly. Failure to clean the treating system (including all accessories) properly, or failure to completely drain all liquid chemicals from the Pump and Treatment lines after use, may cause damage to the equipment and void the warranty! Step 3: Ensure the gasket is seated correctly within the groove.


11 MAINTENANCE - CONTROL PANELS 11 CONTROL PANELS Regarding the typography in warning and caution boxes: Copytext is set in bold at 9 pt at 12,75 pt line spaceing Control Panel Periodically remove, inspect and clean out air filters. Grasp the top of the filter frame and pull away from the panel, as shown below. Remove the filter and clean with a vacuum cleaner or replace the filter. Repeat for the air filter on the other top side of the Controller. Main Control Panel & HMI At end of treating season, turn OFF the Main Control Power Lever, as shown below. Step 2: Turn OFF the HMI Control according to the instructions on the following pages Warning! Power cord for HMI must remain plugged in to a live outlet at all times. Battery back up system in HMI will need to be replaced if left unplugged for extended period!

12 12 MAINTENANCE - HMI SHUT-DOWN 1 MAIN SCREEN Step 1: Touch the Setup button icon: navigates to the System Configuration Screen

13 MAINTENANCE - HMI SHUT-DOWN 13 Regarding the typography in warning and caution boxes: Copytext is set in bold at 9 pt at 12,75 pt line spaceing 1 SYSTEM CONFIGURATION SCREEN Step 1: Touch the Shutdown button icon: navigates to the Shutdown Screen


14 14 MAINTENANCE - HMI CONTROL 1 SYSTEM CONFIGURATION SCREEN - SHUT DOWN WARNING POP-UP Step 1: Touch the Yes button icon: HMI will exit the application program and turn the computer off.
.")

15 MAINTENANCE - GEAR MOTOR 15 GEAR MOTOR Regarding the typography in warning and caution boxes: Copytext is set in bold at 9 pt at 12,75 pt line spaceing Bevel Helical Gear Motor After 100 hours of the initial operation of the Gear Motor, the housing should be thoroughly drained. After the initial break-in, the oil should be changed every six months or 2,500 operating hours (whichever comes first). Step 2: Use a 6mm Allen Wrench to remove the oil drain plug, located on the bottom of the Gear Motor. An access hole is provided on the Motor Mount to gain access to the oil drain plug without having to remove the entire Gear Motor. Drain thoroughly, then replace the oil drain plug. Lubrication Standard (mineral): CLP 460 Suitable for ambient temperatures from 32º to 104º F. Life is 16,000 hours or three years when operating temperatures are between 158º and 176º F. Additional lubricants available upon request Synthetic: GH6-680 Extended temperature range -32º to 122º F. Food Grade: CLP-H1220 Registered USDA-H1. Biodegradable: CLP-E320 Water pollution class O. Warning! The gear motor has been tested and adjusted at the factory. Dismantling or replacement of components must be done by the manufacturer to maintain the warranty! OIL DRAIN PLUG ACCESS Step 3: Use an 8mm Allen Wrench to remove both the fill and oil level plugs, located on the top and side of the Gear Motor. Fill the Gear Motor with Standard (mineral): CLP 460 motor lubricant until oil comes out of the oil level plug on the side of the Gear Motor. Do not mix compounded oil and synthetic oil in the Gear Motor! OIL FILL PLUG Step 1: After 100 hours of the initial operation of the Gear Motor, the housing should be thoroughly drained while the oil is warm. New oil should be added to fill the housing to the oil level plug. OIL LEVEL PLUGS Required maintenance tools 9/16 Wrenches (2) 6mm Allen Wrench 8mm Allen Wrench Oil Pan Step 4: Use an 8mm Allen Wrench to replace both the fill and oil level plugs. Tighten snug and secure.
16 16 MAINTENANCE - PM CHECKLIST PM CHECKLIST Preventive Maintenance check list for in season and end of season treating. END OF DAY: Lift valve lever to lock lines and prevent losing prime. Release pump element lever to prevent damage to pump element. HMI and Main Control panel can remain on during treating season. Clean drum if needed. Kegs may remain connected and on the scales. START OF DAY: Close pump pressure levers (ensure proper placement of pump element). Open valve lever. Jog lines as needed to top up prime. WEEKEND SHUTDOWN: Reverse pumps to clear all product from lines. Release pump element lever to prevent damage to element. HMI and Main Control panel may remain on. Clean drum if needed. Kegs may remain connected and on the scales.
17 MAINTENANCE - PM CHECKLIST 17 END OF SEASON: Reverse pumps to clear all product from lines. Remove kegs from scales. Remove Manifold from treating head and insert in bucket. Install rinsing socket and flush lines with water till clear. Clean manifold. Remove filters on pump stations and clean. Replace all pump elements - ensure proper size of replacements: (73 for IP pump and 15 for LS pump). Replace chemical lines to treater as needed. Remove transition chute and clean atomizer and chamber. Clean Air release valves. Clean Drum. Grease pillow block bearings. Clean air filters on main panel. Power down main panel and HMI (HMI Must remain plugged in to a live outlet at all times). Regarding the typography in warning and caution boxes: Copytext is set in bold at 9 pt at 12,75 pt line spaceing

18 Bayer Crop Science Division 1451 Dean Lakes Trail Shakopee, Minnesota USA For fast and easy access to our website scan the code with your smartphone and an appropriate app.
RH800 & 2000 MAINTENANCE GUIDE
 RH800 & 2000 MAINTENANCE GUIDE PICTOGRAMS Each Signifier displayed here is specific to this User Manual. Menu Previous Advance Note Tip Example Rotary Heads Drum & Frame In-Line Filter Control Panels Gearmotors
INOCULATION TANKS 15 GALLON # GALLON #
 INOCULATION TANKS 15 GALLON #79230745 30 GALLON #79894651 2 General information This manual contains technical information regarding Bayer SeedGrowth Equipment. Please read and understand these instructions
UNITIZED batching INSTaLLaTION guide
 UNITIZED batching INSTALLATION GUIDE 2 General information This manual contains technical information regarding Bayer SeedGrowth Equipment. Please read and understand these instructions completely before
CBT25, 50 & 100 driveshaft
 CBT25, 50 & 100 driveshaft replacement 2 CBT driveshaft REPLACEMENT Revision History rev. level 01_03.13.2014 NOTE: due to the fact that a new machine (never exposed to seed treatment) was used to demonstrate
ON DEMAND INSTALLATION GUIDE
 ON DEMAND INSTALLATION GUIDE PICTOGRAMS Each Signifier displayed here is specific to this User Manual. Menu Previous Advance Note Tip Example Barcode Scanner Rotary Heads Drum & Frame Pump Stations Control
Ford Racing Performance Improvement Intake Manifold (96-04 GT) Time Necessary: Approximately 4 hours
 Time Necessary: Approximately 4 hours") Ford Racing Performance Improvement Intake Manifold (96-04 GT) Time Necessary: Approximately 4 hours Tools Required: Ratchet and socket set Torque wrench Large adjustable wrench Needle nose pliers A dozen
Ford Racing Performance Improvement Intake Manifold (96-04 GT) Time Necessary: Approximately 4 hours Tools Required: Ratchet and socket set Torque wrench Large adjustable wrench Needle nose pliers A dozen
The Original Trapper
 INSTALLATION INSTRUCTIONS FOR STEP 1 Wrap Gasket Around Threads US Patent #8,127,838; 8,342,237; 8,365,817 pollutioncontrolcorp.com For colder climates, antifreeze can be added to prevent freezing of fluid
Falcon 5250 complete repair kit
 Towing and Suspension Solutions 855010-02 08-14 Falcon 5250 complete repair kit part number 910003-55 This kit contains the components to replace the Falcon 5250 Autowlok button assemblies, collar shoulder
INSTALLATION INSTRUCTIONS
 INSTALLATION INSTRUCTIONS 89-95 Toyota Pickup Front Winch Bumper P/N 68450 Your safety, and the safety of others, is very important. To help you make informed decisions about safety, we have provided installation
OWNER S MANUAL. Model: LG-30-TRL ( ) (30 Gallon Lawn & Garden Trailer Sprayer)
 (30 Gallon Lawn & Garden Trailer Sprayer)") OWNER S MANUAL Model: LG-30-TRL (5302317) (30 Gallon Lawn & Garden Trailer Sprayer) Technical Specifications 30 Gal. Corrosion-Resistant Polyethylene Tank 12 Volt Diaphragm Pump, 2.1 g.p.m. 60 psi 15 Ft.
OWNER S MANUAL Model: LG-30-TRL (5302317) (30 Gallon Lawn & Garden Trailer Sprayer) Technical Specifications 30 Gal. Corrosion-Resistant Polyethylene Tank 12 Volt Diaphragm Pump, 2.1 g.p.m. 60 psi 15 Ft.
SERIES G3DB/AG3DB ELEVATOR
 TM INSTRUCTIONS AND PARTS LIST SERIES G3DB/AG3DB ELEVATOR WARNING This manual, and GENERAL INSTRUCTIONS MANUAL, CA-1, should be read thoroughly prior to pump installation, operation or maintenance. SRM00059
NILFISK BA 500 Service Manual
 NILFISK BA 500 Service Manual Model 66324400 12/94 Form Number 043023 TABLE OF CONTENTS Batteries...21 Brush Drive Belt Adjustment Or Replacement...7 Brush Drive Motor - Carbon brush Inspection... 8 Brush
OWNER S MANUAL. Model: TR-40-GAS ( ) (40 Gallon Lawn & Garden Trailer Sprayer w/5-nozzle Boom Assembly) Technical Specifications
 (40 Gallon Lawn & Garden Trailer Sprayer w/5-nozzle Boom Assembly) Technical Specifications") OWNER S MANUAL Model: TR-40-GAS (5301339) (40 Gallon Lawn & Garden Trailer Sprayer w/5-nozzle Boom Assembly) Technical Specifications 40 Gal. Corrosion-Resistant Polyethylene Tank 5.5 HP Briggs & Stratton
OWNER S MANUAL Model: TR-40-GAS (5301339) (40 Gallon Lawn & Garden Trailer Sprayer w/5-nozzle Boom Assembly) Technical Specifications 40 Gal. Corrosion-Resistant Polyethylene Tank 5.5 HP Briggs & Stratton
WARNING Carefully Read These Instructions Before Use
 DO NOT RETURN THIS SPRAYER TO STORE Call: 1-800-950-4458 Backpack Sprayer Use and Care Manual Manufactured for Northern Tool + Equipment Co., Inc. WARNING Carefully Read These Instructions Before Use Model
INSTALLATION INSTRUCTIONS FOR
 For high temperature wells STEP 1 Clean Stuffing Box F8 & F8H Tools required: ratchet with 9/16 socket, 9/16 wrench, 3/32 Allen wrench, wire brush, cleaner/solvent, rags. DUAL PACK Dual Pack Stuffing Box
1 MECHANICAL FUEL METER
 1 MECHANICAL FUEL METER USER S MANUAL WARNING: Read carefully and understand all INSTRUCTIONS before operating. Failure to follow the safety rules and other basic safety precautions may result in serious
Fuel Tank Sweeper #9049 OPERATOR S MANUAL
 Fuel Tank Sweeper #9049 OPERATOR S MANUAL Innovative Products of America Incorporated 888-786-7899 www.ipatools.com 234 Tinker Street, Woodstock, NY 12498 DO NOT USE WITH GASOLINE! Transfers, filters and
PRESSURIZED DIATOMACEOUS EARTH FILTER SYSTEM
 PRESSURIZED DIATOMACEOUS EARTH FILTER SYSTEM This filter system is designed for use with aboveground and semi-inground swimming pools. DO NOT operate this filter system without adding D.E. as it will cause
Centrifugal PTO Pumps. 2 nd Edition
 Centrifugal PTO Pumps 2 nd Edition MAN072 November 2005 2005 Centrifugal PTO pumps are manufactured by AMADAS Industries. You can find us on the Web at: www.amadas.com or e-mail us at: amadas@amadas.com
Airless Spray Gun INSTRUCTIONS DP psi (345 bar) Maximum Working Pressure
 Maximum Working Pressure") INSTRUCTIONS DP-6376 Airless Spray Gun 5000 psi (345 bar) Maximum Working Pressure INSTRUCTIONS This manual contains important warnings and information. READ AND KEEP FOR REFERENCE. Table of Contents Warnings......................................
INSTRUCTIONS DP-6376 Airless Spray Gun 5000 psi (345 bar) Maximum Working Pressure INSTRUCTIONS This manual contains important warnings and information. READ AND KEEP FOR REFERENCE. Table of Contents Warnings......................................
MiTek Machinery Division. Service Bulletin
 MiTek Machinery Division Service Bulletin Machinery Affected: Document: Title: Applies To: Distribution: RoofGlider Press SB198 Redesigned Push Bar Push Bars Manufactured With Gas Spring and Clamp-Style
XpressFill XF4400/XF2200
 XpressFill XF4400/XF2200 ii XPRESSFILL Systems LLC Congratulations on the purchase of your XpressFill Can Filling Machine Thank you for choosing our handcrafted can filler as the technology to Bottle
Written By: David Hodson
 2008-Present Scion xb Oil Change Second generation Scion xb oil change. Written By: David Hodson ifixit CC BY-NC-SA www.ifixit.com Page 1 of 19 INTRODUCTION Change the oil in your 2008 or newer Scion xb
CENTRAL SLURRY SYSTEMS Model 911
 CENTRAL SLURRY SYSTEMS Model 911 Installation and Operating Instructions Revised 6/04/08 PRACTICAL SYSTEMS, INC. 11617 Prospect Road Odessa, FL 33556 (800) 237-8154 Fax (800) 330-3800 (727) 376-7900 Fax
WORKHORSE. Assembly / Operation Instructions / Parts
 WORKHORSE S P R A Y E R S Assembly / Operation Instructions / Parts by, a Division of Green Leaf, Inc ATV 2522 MODEL # ATV 2522 DELUXE ATV 2 NOZZLE SPRAYER GENERAL INFORMATION WARRANTY / PARTS / SERVICE
Falcon 2 & BlackHawk complete repair kit
 Falcon 2 & BlackHawk complete repair kit part number 910003-60 Towing and Suspension Solutions This kit contains the components to replace the Falcon 2 or BlackHawk Autowlok button assemblies, collar shoulder
AutoDose Automatic Dispensing System
 AutoDose Automatic Dispensing System The AutoDose TM is a battery or A/C-powered peristaltic pumping dispenser that runs automatically at preset times as programmed with an electronic timer / control.
DEFENDER SERIES. 5 Gallon, Double Walled, Field Replaceable Spill Container Model Series INSTALLATION, OPERATION, & MAINTENANCE
 DEFENDER SERIES 5 Gallon, Double Walled, Field Replaceable Spill Container Model 705-550 Series INSTALLATION, OPERATION, & MAINTENANCE Franklin Fueling Systems 3760 Marsh Rd. Madison, WI 53718 USA Tel:
CAT PUMPS (7.5 HP) Pump Stations DU PS1901C-PG & DU PS1901CPG2 DU PS1903C-PG & DU PS1903CPG2
 Pump Stations DU PS1901C-PG & DU PS1901CPG2 DU PS1903C-PG & DU PS1903CPG2") CAT PUMPS (7.5 HP) Pump Stations DU PS1901C-PG & DU PS1901CPG2 DU PS1903C-PG & DU PS1903CPG2 Serial Number: Owner s Manual #0806 120710 Installation Date: Please read and understand this manual. Store
CAT PUMPS (7.5 HP) Pump Stations DU PS1901C-PG & DU PS1901CPG2 DU PS1903C-PG & DU PS1903CPG2 Serial Number: Owner s Manual #0806 120710 Installation Date: Please read and understand this manual. Store
HYDRAULICS. TX420 & & lower. Hydraulic Tandem Pump Removal. 4. Remove the LH side panel (Fig. 0388).
.") TX420 & 425 240000299 & lower 4. Remove the LH side panel (Fig. 0388). Hydraulic Tandem Pump Removal Note: Cleanliness is a key factor in a successful repair of any hydraulic system. Thoroughly clean all
TX420 & 425 240000299 & lower 4. Remove the LH side panel (Fig. 0388). Hydraulic Tandem Pump Removal Note: Cleanliness is a key factor in a successful repair of any hydraulic system. Thoroughly clean all
ASSEMBLY INSTRUCTIONS / OWNERS MANUAL AIR BIKE AB-1
 AIR BIKE AB- ASSEMBLY INSTRUCTIONS / OWNERS MANUAL IMPORTANT : READ ALL ASSEMBLY INSTRUCTIONS AND SAFETY PRECAUTIONS BEFORE USING THIS PRODUCT. REFERENCE ALL SAFETY GUIDELINES AND WARNING LABELS. RETAIN
PowerFlo Parts List/Assembly Instructions/Users Guide ***PLEASE READ ALL INSTRUCTIONS CAREFULLY AND THOROUGHLY***
 PowerFlo Parts List/Assembly Instructions/Users Guide ***PLEASE READ ALL INSTRUCTIONS CAREFULLY AND THOROUGHLY*** Owners Manual (Please check to make sure to locate all parts before assembly.) 11/12/2008
Backpack Sprayer. Use and Care Manual
 Backpack Sprayer Use and Care Manual BACKPACK SPRAYER CAUTION: Read and follow all instructions Do Not Return This Backpack To The Store For Help, Information or Parts, Call : 1-800-311-9903 The Fountainhead
Single Pump Station with Delay, 10HP/1PH DU PS2001C-PG
 Single Pump Station with Delay, 10HP/1PH DU PS2001C-PG Owner s Manual #0810 Customer Number: Model Number: Serial Number: Installation Date: Please read and u n d e r s t a n d t h i s manual. Store in
OWNER S MANUAL. Model: LG-25-BL-QR ( ) (25 Gallon ATV Dual Nozzle Sprayer) ***IMPORTANT REMINDER*** Technical Specifications
 (25 Gallon ATV Dual Nozzle Sprayer) ***IMPORTANT REMINDER*** Technical Specifications") OWNER S MANUAL Model: LG-25-BL-QR (5302323) (25 Gallon ATV Dual Nozzle Sprayer) Technical Specifications 25 Gal. Corrosion-Resistant Polyethylene Tank 12 Volt Diaphragm Pump, 3.8 g.p.m. 45 psi Deluxe Pistol
OWNER S MANUAL Model: LG-25-BL-QR (5302323) (25 Gallon ATV Dual Nozzle Sprayer) Technical Specifications 25 Gal. Corrosion-Resistant Polyethylene Tank 12 Volt Diaphragm Pump, 3.8 g.p.m. 45 psi Deluxe Pistol
180 Lake Ave North Paynesville, MN Phone: (320) MASTER MANUFACTURING MASTER GARDNER
 MASTER MANUFACTURING MASTER GARDNER") 180 Lake Ave North Paynesville, MN 56362 Phone: (320) 340-6464 www.master-mfg.com MASTER MANUFACTURING MASTER GARDNER Part Number PCD-E3-009B-MM July 2017 Note: Do not return product to the distributor/dealer
180 Lake Ave North Paynesville, MN 56362 Phone: (320) 340-6464 www.master-mfg.com MASTER MANUFACTURING MASTER GARDNER Part Number PCD-E3-009B-MM July 2017 Note: Do not return product to the distributor/dealer
Owner smanual. Banks Ram-Air Intake System Chevrolet 6.6L (LML) Duramax Turbo-Diesel Pickups. with Installation Instructions
 Duramax Turbo-Diesel Pickups. with Installation Instructions") with Installation Instructions Owner smanual Banks Ram-Air Intake System 2015 Chevrolet 6.6L (LML) Duramax Turbo-Diesel Pickups THIS MANUAL IS FOR USE WITH KIT 42250 & 42250-D Gale Banks Engineering 546
with Installation Instructions Owner smanual Banks Ram-Air Intake System 2015 Chevrolet 6.6L (LML) Duramax Turbo-Diesel Pickups THIS MANUAL IS FOR USE WITH KIT 42250 & 42250-D Gale Banks Engineering 546
OWNER S MANUAL. Model: FS-ATV-15 ( ) (15 Gallon Lawn & Garden/ATV Sprayer) Technical Specifications. Assembly Instructions. General Information
 (15 Gallon Lawn & Garden/ATV Sprayer) Technical Specifications. Assembly Instructions. General Information") OWNER S MANUAL Model: FS-ATV-15 (5301169) (15 Gallon Lawn & Garden/ATV Sprayer) Technical Specifications 15 Gal. Corrosion-Resistant Polyethylene Tank 12 Volt Diaphragm Pump, 1.8 g.p.m. 60 psi Spot Sprayer
OWNER S MANUAL Model: FS-ATV-15 (5301169) (15 Gallon Lawn & Garden/ATV Sprayer) Technical Specifications 15 Gal. Corrosion-Resistant Polyethylene Tank 12 Volt Diaphragm Pump, 1.8 g.p.m. 60 psi Spot Sprayer
Owner smanual. Banks Ram-Air Intake System Chevrolet 6.6L (LML) Duramax Turbo-Diesel Pickups. with Installation Instructions
 Duramax Turbo-Diesel Pickups. with Installation Instructions") with Installation Instructions Owner smanual Banks Ram-Air Intake System 2013-2014 Chevrolet 6.6L (LML) Duramax Turbo-Diesel Pickups THIS MANUAL IS FOR USE WITH KIT 42230 & 42230-D Gale Banks Engineering
with Installation Instructions Owner smanual Banks Ram-Air Intake System 2013-2014 Chevrolet 6.6L (LML) Duramax Turbo-Diesel Pickups THIS MANUAL IS FOR USE WITH KIT 42230 & 42230-D Gale Banks Engineering
Booster Car Seat. User Guide. in location on bottom of base. IS0174E_ Artsana USA, Inc. 01/19
 Booster Car Seat User Guide For future use, STORE USER GUIDE in location on bottom of base. IS0174E_03 2019 Artsana USA, Inc. 01/19 www.chiccousa.com TABLE OF CONTENTS If you have any problems with your
Safety Precautions. Please be sure to closely follow all safety precautions and warnings. Danger. Warning. Caution
 Contents Specifications...4 List of Contents...4 Installation Instructions...5 Operating Instructions...6 Maintenance Instructions...7 Warranty Provisions...9 Disposal Method...9 Safety Precautions Please
OWNER S MANUAL Model: TR-40-EX ( ) (40 Gallon Lawn & Garden Trailer Sprayer w/5-nozzle Boom Assembly)
 (40 Gallon Lawn & Garden Trailer Sprayer w/5-nozzle Boom Assembly)") OWNER S MANUAL Model: TR-40-EX (5301338) (40 Gallon Lawn & Garden Trailer Sprayer w/5-nozzle Boom Assembly) Technical Specifications 40 Gal. Corrosion-Resistant Polyethylene Tank 12 Volt Diaphragm Pump,
OWNER S MANUAL Model: TR-40-EX (5301338) (40 Gallon Lawn & Garden Trailer Sprayer w/5-nozzle Boom Assembly) Technical Specifications 40 Gal. Corrosion-Resistant Polyethylene Tank 12 Volt Diaphragm Pump,
E-200 O-rings Service Kit
 Instruction Sheet E-00 O-rings Service Kit. Introduction These instructions describe how to replace the o-rings in the E-00 gun module. It is necessary to remove and disassemble the module when replacing
High Pressure Pump Units featuring CAT PUMPS DUPM550 & DUPM570
 High Pressure Pump Units featuring CAT PUMPS DUPM550 & DUPM570 Serial Number: Owner s Manual #0789 122315 Installation Date: Please read and understand this manual. Store in safe location for future reference.
Geo-Prime Tank U.S. Patent Number 8,544,282
 www.geo-flo.com Geothermal and Hydronics Specialists Installation, Operating, and Maintenance Manual Part # 3487 Rev. 03JUL2014 Geo-Prime Tank U.S. Patent Number 8,544,282 Geo-Flo Products Corporation
Owner smanual. Banks Ram-Air Intake System Ford 5.4L F150 Trucks. with Installation Instructions THIS MANUAL IS FOR USE WITH KIT 41806
 Owner smanual with Installation Instructions Banks Ram-Air Intake System 2004-2008 Ford 5.4L F150 Trucks THIS MANUAL IS FOR USE WITH KIT 41806 Gale Banks Engineering 546 Duggan Avenue Azusa, CA 91702 (626)
OWNER S MANUAL. Model: UTL-60-12V ( ) (60 Gallon Lawn & Garden Utility Sprayer w/5-nozzle Boom)
 (60 Gallon Lawn & Garden Utility Sprayer w/5-nozzle Boom)") OWNER S MANUAL Model: UTL-60-12V (5301347) (60 Gallon Lawn & Garden Utility Sprayer w/5-nozzle Boom) Technical Specifications 60 Gal. Corrosion-Resistant Polyethylene Tank Deluxe Pistol-Grip Handgun w/25
OWNER S MANUAL Model: UTL-60-12V (5301347) (60 Gallon Lawn & Garden Utility Sprayer w/5-nozzle Boom) Technical Specifications 60 Gal. Corrosion-Resistant Polyethylene Tank Deluxe Pistol-Grip Handgun w/25
Disassembly and Assembly
 K EN R 623 2-00 August 2006 Disassembly and Assembly 2506-15 Industrial Engine M G A (Engine) MGB (Engine) M G D (Engine) Important Safety Information Most accidents that involve product operation, maintenance
MECHANICAL FUEL METER. FM-100 and FM-200 Series Owner s Manual
 MECHANICAL FUEL METER FM-100 and FM-200 Series Owner s Manual To the owner Congratulations on receiving your GPI Mechanical Fuel Meter. We at GPI are pleased to provide you with a fuel meter designed to
OWNER S MANUAL Model: LG ( ) (15 Gallon Lawn & Garden Trailer Sprayer)
 (15 Gallon Lawn & Garden Trailer Sprayer)") OWNER S MANUAL Model: LG-1500-304 (5301439) (15 Gallon Lawn & Garden Trailer Sprayer) Technical Specifications 15 Gallon Corrosion-Resistant Polyethylene Tank 12 Volt Diaphragm Pump, 2.1 g.p.m. 60 psi
OWNER S MANUAL Model: LG-1500-304 (5301439) (15 Gallon Lawn & Garden Trailer Sprayer) Technical Specifications 15 Gallon Corrosion-Resistant Polyethylene Tank 12 Volt Diaphragm Pump, 2.1 g.p.m. 60 psi
THIS PRODUCT IS FOR PROFESSIONAL LABORATORY USE ONLY USER'S MANUAL. WELLS ENGINE UNIT 230 VOLT Product No. U905, U906, U907, U908
 DENTAL, INC. TECHNICAL BULLETIN U807-022510 5860 FLYNN CREEK ROAD READ ALL INSTRUCTIONS P.O. BOX 106 BEFORE PROCEEDING COMPTCHE, CALIFORNIA, U.S.A. 95427 SAVE THIS FOR FUTURE REFERENCE THIS PRODUCT IS
ROYAL Cyclone 1 Extruder Operators Instruction Manual
 ROYAL Cyclone 1 Extruder Operators Instruction Manual Read and understand the instructions in this Manual before using this machine! Keep this Manual with the Cyclone Extruder at all times. It is the Cyclone
2013 IMPCO Technologies, Inc. Page 1 of 20 EPR Repair Kit Instructions (PPI-122, Rev-B)
") EPR Repair Kit Instructions PPI-122 (Rev-B) A. Introduction: This document covers the repair of the Electronic Pressure Regulator (EPR) used on Spectrum III series fuel systems. These instructions will
EPR Repair Kit Instructions PPI-122 (Rev-B) A. Introduction: This document covers the repair of the Electronic Pressure Regulator (EPR) used on Spectrum III series fuel systems. These instructions will
OWNER S MANUAL. Model: ATV ( ) ***IMPORTANT REMINDER*** Technical Specifications. Assembly Instructions. General Information
 ***IMPORTANT REMINDER*** Technical Specifications. Assembly Instructions. General Information") OWNER S MANUAL Technical Specifications 25 Gal. Corrosion-Resistant Polyethylene Tank 12 Volt Diaphragm Pump, 2.1 g.p.m. 60 psi 15 Ft. Handgun Hose (3/8 I.D.) 15 Ft. Vertical throw, 30 Ft. Horizontal Throw
OWNER S MANUAL Technical Specifications 25 Gal. Corrosion-Resistant Polyethylene Tank 12 Volt Diaphragm Pump, 2.1 g.p.m. 60 psi 15 Ft. Handgun Hose (3/8 I.D.) 15 Ft. Vertical throw, 30 Ft. Horizontal Throw
180 Lake Ave North Paynesville, MN Phone: MASTER MANUFACTURING MASTER GARDNER
 180 Lake Ave North Paynesville, MN 56362 Phone: 1-800-864-1649 www.master-mfg.com MASTER MANUFACTURING MASTER GARDNER Part Number PCD-E3-009B-MM Rev 2 Dec. 2012 Note: Do not return product to the distributor/dealer
#TL T EA888 GEN 3 FUELING SYSTEM/ INSTALLATION INSTRUCTIONS
 #TL100069 2.0T EA888 GEN 3 FUELING SYSTEM/ INSTALLATION INSTRUCTIONS Notes: These instructions were written for a North American specification MkVII GTI. Other models, like the Golf R, are similar. When
INSTALLATION INSTRUCTIONS
 INSTALLATION INSTRUCTIONS Trans4mer Grille Guard/Winch Mount For 2007 Toyota Tundra Kit 76380 (Black) and 76381 (Stainless) Your safety, and the safety of others, is very important. To help you make informed
#71225 SAND FILTER & PUMP. TOOLS REQUIRED Phillips Screwdriver Flat Head Screwdriver O-Ring Lube
 #71225 Swimline SAND FILTER & PUMP TOOLS REQUIRED Phillips Screwdriver Flat Head Screwdriver O-Ring Lube PARTS FOR #71225 SAND FILTER See breakdown on following page for model specific parts list Filter
D-04/G-04 Maintenance
 D-04/G-04 Maintenance NOTE: The numbers in parentheses are the Ref. Nos. on the illustrations in the Parts Manual. Daily Check the oil level and the condition of the oil. The oil level should be 1/4 in.
OWNER S MANUAL D.E. CARTRIDGE. Installation Operation Parts. Models PCDE-30 PCDE-40
 D.E. CARTRIDGE OWNER S MANUAL Installation Operation Parts Models PCDE-30 PCDE-40 2200 East Sturgis Road, Oxnard, CA 93030 Ph. (805) 981-0262 Fax (805) 981-9403 www.waterwayplastics.com waterway@waterwayplastics.com
Installation, Operation & Maintenance Manual
 Installation, Operation & Maintenance Manual Picture may differ from your specific application For Pro-Fill kits with part numbers beginning in BG BL-175 9-20-13 General Information & Precautions This
pplication Note (Revision A) Original Instructions Replacing the ST-125 Engine Control with an L-Series Speed Controller
 Original Instructions Replacing the ST-125 Engine Control with an L-Series Speed Controller") Application Note 51285 (Revision A) Original Instructions Replacing the ST-125 Engine Control with an L-Series Speed Controller 8404-5003 DEFINITIONS This is the safety alert symbol. It is used to alert
Application Note 51285 (Revision A) Original Instructions Replacing the ST-125 Engine Control with an L-Series Speed Controller 8404-5003 DEFINITIONS This is the safety alert symbol. It is used to alert
Owner's Manual. Model: ( ) (150 Gallon, 5.5 HP Skid Sprayer) Technical Specifications. General Information. Warranty/Parts/Service
 (150 Gallon, 5.5 HP Skid Sprayer) Technical Specifications. General Information. Warranty/Parts/Service") Owner's Manual Model: -0 (00) (0 Gallon,. HP Skid Sprayer) Technical Specifications General Information Thank you for purchasing this product. The purpose of this manual is to assist you in operating and
Owner's Manual Model: -0 (00) (0 Gallon,. HP Skid Sprayer) Technical Specifications General Information Thank you for purchasing this product. The purpose of this manual is to assist you in operating and
Owner smanual. Banks Ram-Air Intake System Chevrolet 6.6L Duramax Turbo-Diesel Pickups. with Installation Instructions
 Owner smanual with Installation Instructions Banks Ram-Air Intake System 2001-2005 Chevrolet 6.6L Duramax Turbo-Diesel Pickups THIS MANUAL IS FOR USE WITH KITS 42132, 42135, 42132-D, 42135-D Gale Banks
Pug Mill NRA-04 NRA-04S
 91345B Pug Mill Instruction Manual NRA-04 NRA-04S Please make sure to read the entire instruction manual thoroughly before initial set-up, operation, maintenance and inspection to ensure proper use. Please
* * * * 8 Maintenance Plan 10.1,10.2, ,4 7.1/7.2/7.3
 Maintenance 8 Maintenance Plan * * * * * GB 10.1,10.2,10.3 6.1 12.2 12.1 11.2 12.1 7,4 7.1/7.2/7.3 1.1/1.2/1.3 3.1/3.2/3.3/3.4/4.1/11.1 5.1 5.2 4.2 5.1 5.2 2.1/2.2/2.3/2.4/2.5/2.6/4.1 Item Designation
OWNER S MANUAL Model: LG ( ) (25 Gallon Lawn & Garden Trailer Sprayer)
 (25 Gallon Lawn & Garden Trailer Sprayer)") OWNER S MANUAL Model: LG-2500-304 (5301440) (25 Gallon Lawn & Garden Trailer Sprayer) Technical Specifications 25 Gallon Corrosion-Resistant Polyethylene Tank 12 Volt Diaphragm Pump, 2.1 g.p.m. 60 psi
OWNER S MANUAL Model: LG-2500-304 (5301440) (25 Gallon Lawn & Garden Trailer Sprayer) Technical Specifications 25 Gallon Corrosion-Resistant Polyethylene Tank 12 Volt Diaphragm Pump, 2.1 g.p.m. 60 psi
LG-60-3PT-WP-309-BL-TSC
 55 Model No: LG-0-PT-WP-0-BL-TSC 0 Gallon Point Lawn & Garden Sprayer W/Pump & Coupler & Boomless Boom Assembly / Operation Instructions / Parts ASSEMBLY Most of the sprayer has been assembled at the factory..
SAFETY NOTICES INSTALLATION MANUAL SAFETY NOTICES / 1. Safety notices are one of the primary ways to call attention to potential hazards.
 SAFETY NOTICES Safety notices are one of the primary ways to call attention to potential hazards. This Safety Alert Symbol identifies important safety messages in this manual When you see this symbol,
Banks Ram-Air Intake System
 Banks Ram-Air Intake System 1997-2006 Jeep 4.0L THIS MANUAL IS FOR USE WITH KITS 41816 Gale Banks Engineering 546 Duggan Avenue Azusa, CA 91702 (626) 969-9600 Fax (626) 334-1743 Product Information & Sales:
AutoFarm GPS AutoSteer Hardware Installation Guide
 AutoFarm GPS AutoSteer Hardware Installation Guide Supported Models: John Deere 7220 John Deere 7320 John Deere 7420 John Deere 7520 PN: 602-0022-02 Special Requirements Tools This list consists of special
MODEL CJ-95 CoilJet Portable HVAC Coil Cleaning System
 MODEL CJ-95 CoilJet Portable HVAC Coil Cleaning System OPERATING AND MAINTENANCE INSTRUCTIONS CJ-95 Manual 2009 All Rights Reserved 07/2009 Table of Contents Warranty... 1 Important Safety Instructions...
BA440 PISTON. Hydraulic Air Compressor
 P M BA440 PISTON Hydraulic Air Compressor This manual must be read carefully before using your Boss Industries, LLC BA440 PISTON. Store in a safe and convenient location for future reference. http://www.bossair.com
GoFitTM. Booster Car Seat User Guide. in location on bottom of base. IS0147E_ Artsana USA, Inc. 01/19
 GoFitTM Booster Car Seat User Guide For future use, STORE USER GUIDE in location on bottom of base. IS047E_04 209 Artsana USA, Inc. 0/9 www.chiccousa.com TABLE OF CONTENTS If you have any problems with
BA EN.=A. Ä.=A.ä. Operating Instructions. Gearbox. Type 12. / 52.
 BA 12.0028 EN.=A. Ä.=A.ä Operating Instructions Gearbox Type 12. / 52. Product key Gearboxes 1 2... Product group Product family Gearbox size Design Geared motors 1 2... Product group Product family Gearbox
OPERATOR S MANUAL PARTS IDENTIFICATION _REV_F 11/2016 YETTER MANUFACTURING CO. FOUNDED 1930
 2920-012 DISC SEALER 12 SMOOTH 2920-015 DISC SEALER 13 RESIDUE WHEEL 2920-016 DISC SEALER 16 SMOOTH 2920-016-N DISC SEALER NOTCHED 2920-016-ST DISC SEALER SHARK TOOTH 2920-021 DISC SEALER FOR 2995/2996
H2000 Hydraulic Chute
 00-55000 H000 Hydraulic Chute Owner s Manual Powder River Inc. PROVO, UTAH www.powderriver.com 800-45-58 400-05 0/04 Safety Symbols POWDER RIVER DANGER WARNING DANGER indicates a hazardous situation which,
Binks MODELS & AGITATOR DRIVE UNITS
 Binks MODELS 31-393 & 31-394 AGITATOR DRIVE UNITS for Agitator Equipped Drum MODEL 31-393 Includes the following items: 1, 2, and 3. 1 MODEL 31-394 shown. 17 4 3 2 12 13 14 15 2 3 8 5 9 11 8 10 6 7 17
20 TONNE HYDRAULIC PRESS MODEL NO: CSA20FBT
 20 TONNE HYDRAULIC PRESS MODEL NO: CSA20FBT PART NO: 7614058 OPERATION & MAINTENANCE INSTRUCTIONS WARNING: Read these instructions before using the press GC0516 INTRODUCTION Thank you for purchasing this
Installation Instructions JASMINE Spread Lavatory Faucet with the EverClean Finish & Speed Connect Drain
 Installation Instructions JASMINE 80. Spread Lavatory Faucet with the EverClean Finish & Speed Connect Drain Congratulations on purchasing your American Standard faucet with the EverClean finish and Speed
R T SERIES ROTARY TILLER
 R T SERIES ROTARY TILLER Operating and Maintenance Manual TABLE OF CONTENTS 1. PRODUCT WARRANTY. 3 2. CHECKLIST Dealer s File Copy. 4 Customer s File Copy.. 5 3. INTRODUCTION 6 4. SPECIFICATIONS.. 7 5.
Booster Car Seat User Guide
 Booster Car Seat User Guide For future use, STORE USER GUIDE in location on bottom of base. IS0133.E 2015 Artsana USA, Inc. If you have any problems with your Chicco Booster Seat, or any questions regarding
Operating Manual. High Performance Vacuum Pump Models and 15600
 Operating Manual High Performance Vacuum Pump Models 15400 and 15600 CoolTech High Performance Vacuum Pumps Congratulations on purchasing one of Robinair s top quality CoolTech vacuum pumps. Your pump
Service Manual #67. Installation and Service Instructions 6000, 7000 & 8000 Series Magnetically Coupled Pumps
 Service Manual #67 Installation and Service Instructions 6000, 7000 & 8000 Series Magnetically Coupled Pumps Table of Contents Section Description Page 1 General Description 4 2 The Pumping Principle 5
Trailer Axle Beam Replacement SERVICE MANUAL
 Trailer Axle Beam Replacement SERVICE MANUAL September 20, 2017 Trailer Axle Beam Service Manual TABLE OF CONTENTS System Information 2 Safety Information 2 Required Resources 2 Hub Removal 3 Axle Beam
CARTRIDGE FILTER SYSTEMS OWNER S MANUAL
 CARTRIDGE FILTER SYSTEMS OWNER S MANUAL Installation Operation Parts Designed, Engineered & Manufactured in the USA. 2017 Waterway Plastics 2200 East Sturgis Road, Oxnard CA 93030 Phone 805.981.0262 Fax
Blue Jay Rodless Cylinder BC MS. Track Repair Manual 1996 & 2012 THE EASTMAN EASTMAN. All End Caps Black for Models
 EASTMAN 1996 & 2012 THE EASTMAN Blue Jay Rodless Cylinder BC-40224-MS Track Repair Manual All End Caps Black for 1996-2012 Models IMPORTANT Disconnect this equipment from pneumatic pressure lines before
A1062 & A1072 AUGER ASSEMBLY MANUAL. Read & understand all instructions pertaining to this auger prior to use!
 A1062 & A1072 AUGER ASSEMBLY MANUAL Read & understand all instructions pertaining to this auger prior to use! Safety Alert Watch for this ALERT Symbol. It identifies potential hazards to Personal SAFETY
Kit. Hydraulic Kit Installation Guide REV B Table 1 Component List. Item Component Part Number Qty
 Hydraulic Kit Installation Guide Table 1 Component List Item Component Part Number Qty 1. Hose 5/8 X 36-8F X -12F 90 DEG ORFS F451TC-JSJ9081210-36 2 2. HOSE ASSY. 1/4" X 36" -4F X -6F ORFS F451TC-JCJC040604-36
Maintenance Information
 16573370 Edition 2 February 2014 Air Grinder 99V Series Maintenance Information Save These Instructions Product Safety Information WARNING Failure to observe the following warnings, and to avoid these
CENTRAL SLURRY SYSTEMS Model 915
 CENTRAL SLURRY SYSTEMS Model 915 Installation and Operating Instructions 08/02/18 PRACTICAL SYSTEMS, INC. 11617 Prospect Road Odessa, FL 33556 (800) 237-8154 Fax (800) 330-3800 (727) 376-7900 Fax (727)
Model G14SD Vapor Management System
 Instruction Manual Model G14SD Vapor Management System (For Models: DSD and SSD 110/115v) Manufactured in USA for Medivators Reprocessing Systems by: PCI Medical Inc. 12 Bridge Street, PO Box 188 Deep
Allen-Bradley Parts. CENTERLINE 2500 Motor Control Centers Installing, Joining and Splicing Columns. Installation Instructions. Catalog Number 2500
 Installation Instructions CENTERLINE 2500 Motor Control Centers Installing, Joining and Splicing Columns Catalog Number 2500 Topic Page Important User Information 2 Location Planning 3 Environment 3 Removal
Geo-Prime Tank. Table of Contents. Installation, Operation & Maintenance Instructions AFCG1PT Revision: 7/3/14. Replacing a Pump 12
 Geo-Prime Tank Installation, Operation & Maintenance Instructions AFCG1PT Revision: 7/3/14 Table of Contents General Description 3 Installation 4 Flushing and Purging 7 Initial Start-up 9 Replacing a Pump
Bulk Feeder Model nd Edition
 Bulk Feeder Model 858 2 nd Edition MAN066 November 2005 2005 Bulk Feeders are manufactured by AMADAS Industries. You can find us on the Web at: www.amadas.com or e-mail us at: amadas@amadas.com You can
STOP CITY PRESSURE BOOSTER PUMP INSTRUCTION MANUAL
 CITY PRESSURE BOOSTER PUMP INSTRUCTION MANUAL MODEL #VP05, VP10 C US NSF/ANSI 372 255405 For loose, missing or damaged parts, or if the unit does not seem to be operating properly, please call before returning
MAINTENANCE - LPX PORTABLE TREATER
 MAINTENANCE - LPX PORTABLE TREATER Proper maintenance of the Portable LPV Treater is critical for peak performance, reliability and accuracy of this system. The following is a guideline for the type of
OMIX-ADA EXHAUST MANIFOLD
 OMIX-ADA EXHAUST MANIFOLD Installation Time: 240 Minutes Tools Required: 3/8 ratchet 3/8 3 extension 10 mm socket 13mm socket 9/16 socket Flashlight 9/16 box end wrench Pocket screw driver Can of brake
GoFitTM. Booster Car Seat User Guide. in location on bottom of base. IS0147.2E Artsana USA, Inc.
 GoFitTM Booster Car Seat User Guide For future use, STORE USER GUIDE in location on bottom of base. IS047.2E 207 Artsana USA, Inc. www.chiccousa.com TABLE OF CONTENTS If you have any problems with your
EN Operating manual. Motorised zone valve. Three-way, 22 mm & 28 mm 3PV2, 3PV8 & VRMH3
 EN Operating manual Motorised zone valve Three-way, 22 mm & 28 mm 3PV2, 3PV8 & VRMH3 This manual ensures safe and efficient use of the 3PV2 or 3PV8 force-actuated three-way valve with spring-loaded return