HALLMARK INDUSTRIES INC
|
|
|
- Jemima Park
- 5 years ago
- Views:
Transcription
1
2 Performance Part No. HP. CONVERTIBLE JET PUMP USER S MANUAL GPH of Total Discharge Pressure of 40 psi Max. Pressure Max suction (shallow well) Max Suction (deep well) Max GPM (@0 head) Max Discharge psi MA0462CJ-05 1/2 25 ft 49 ft 10 gpm 99 ft 40 MA0462CJ-07 3/4 25 ft 65 ft 12 gpm 115 ft 49 MA0462CJ ft 82 ft 14 gpm 135 ft 58 Safety Information Warranty WARNING: This is a dual voltage 115/230V pump. VOLTAGE SELECTOR INSIDE PRESET TO 230V. For 115V selection, please set the switch to the proper voltage. All wiring should be performed by a qualified electrician. WARNING: Failure to comply with the instruction and designed operation of this unit may void the warranty. ATTEMPTING TO USE A DAMAGED PUMP can result in property damage, serious personal injury, and/or death. WARNING: The pump should be connected to a 230V/115V GFCI outlet protected with a 10 amp (230V)/20 amp(115v) fuse or circuit breaker The manufacturer warrants the products to be free from defects in materials and workmanship for a period of one year from date of purchase. This warranty applies only to the original consumer purchaser and only to products used in normal use and service. If within one year this product is found upon examination by the manufacturer to be defective in materials or workmanship, the manufacturer s only obligation, and your exclusive remedy, is the repair or replacement of the product at the manufacturer s discretion, provided that the product has not been damaged through misuse, abuse, accident, modifications, alterations, neglect or mishandling. Your original receipt of purchase is required to determine warranty eligibility. The purchaser must pay all labor and shipping charges necessary to replace the product covered by this warranty. This Limited Warranty does not cover products which have been damaged as a result of an accident, misuse, abuse, negligence, alteration, improper installation or maintenance, or failure to operate in accordance with the instructions supplied with the products, or operational failures caused by corrosion, rust, or other foreign materials in the system. Requests for service under this warranty shall be made by returning the defective product to the manufacturer as soon as possible after the discovery of any alleged defect. The manufacturer will subsequently take corrective action as promptly as reasonably possible. The manufacturer does not warrant and especially disclaims any warranty, whether express or implied, of fitness for a particular purpose, other than the warranty contained herein. This is the exclusive remedy and any liability for any and all indirect or consequential damages or expenses whatsoever is excluded. Some states do not allow the exclusion or limitation of incidental or consequential damages or limitations on how long an implied warranty lasts, so the above limitations or exclusions may not apply to you. This warranty gives you specific legal rights and you may also have other rights which vary from state to state. Contact the Customer Service Team at , or support@hallmarkind.com


 Liquid temp. range 32 F to 77 F (0-25 C) Discharge size 1 in. FNPT Suction size 1-1/4 in.")
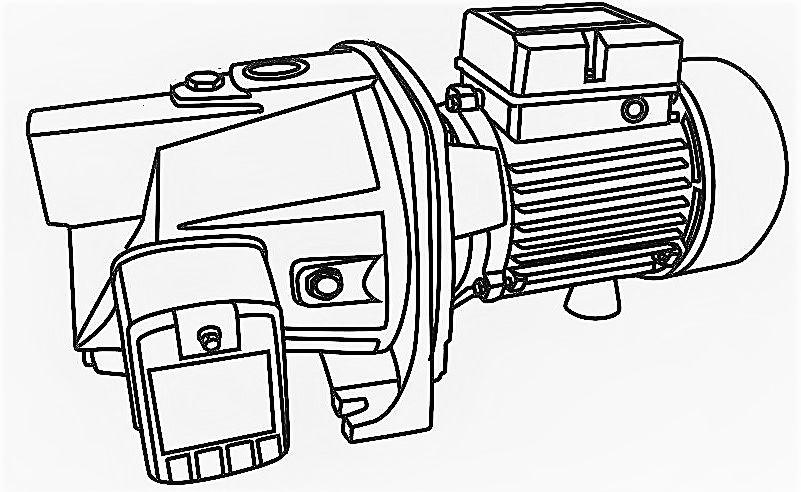
3 Pre-Installation APPLICATION This unit is a convertible jet pump designed for pumping water where the water level is less than 70 ft. deep. If the water level to the pump is deeper than 70 ft., a deep well submersible pump should be selected. A pressure switch pre-set at 30 psi on / 50 psi off has been installed on the pump. The pressure switch will automatically turn the pump on and off based on the system pressure. PACKAGE CONTENTS E - Pressure switch (included) SPECIFICATIONS Safety goggles Tape Measure Thread Tape Power supply 115V/230V, 60 HZ., 20/10 Amp Circuit (factory 230V) Liquid temp. range 32 F to 77 F (0-25 C) Discharge size 1 in. FNPT Suction size 1-1/4 in. FNPT (with 1 in FNPT) TOOLS REQUIRED Flathead Screwdriver Phillips Screwdriver Part A B C D E Wrench Description Pump Venturi tube (for deep well) Nozzle (#02) (pre-installed) O Ring (pre-installed) Pressure switch WARNING This pump is for indoor use only. This pump is not to be exposed to outdoor and weather conditions! 2
4 Pre-Installation (continued) DETERMINE THE DEPTH OF YOUR WELL Tie a small but heavy weight such as a fishing weight to the end of a piece of cotton string. Lower the weight into the well until it reaches the bottom of the well. Make a mark on the string at ground level. Pull the weight out of the well and measure from the bottom of the weight to the ground level mark. This is the depth of your well. Subtract 5 ft. from the depth of your well. If this number is less than 25 ft., shallow well installation should be taken. If this number is more than 25 ft. and less than 70 ft., deep well installation should be taken. If this number is more than 70 ft., a deep well submersible pump should be selected. Measure the ground level mark to the mark where the cotton string is wetted. This number is your well s water level. It should also be at least 10 ft. below the well s water level while the pump is running in order to prevent the pump from sucking air due to water level drawdown. LOCATION OF THE PUMP Decide on the area for the pump installation. Select a pump location with adequate space for future pump maintenance. It can be located in the basement or utility room of the house, at the well, or between the house and the well. If installed outside of the house, it should be protected by a pump house with auxiliary heat to prevent possible freezing. Protect the pump against flooding and excess moisture. The well also should be protected for sanitary reasons. Mount the pump as close to the well as possible. TANKS - PRE-CHARGED STORAGE For best performance of the pump, it is recommended that you use a diaphragm pressure tank (sold separately). It is best to have this in place before installing the pump. A pre-charged storage tank has a flexible bladder or diaphragm that acts as a barrier between the compressed air and water. This barrier prevents the air from being absorbed into the water and allows the water to be acted on by compressed air at initially higher than atmospheric pressures (pre-charged). More usable water is provided than with a conventional type tank. CAUTION: In order for the pump and tank to operate properly, the pressure tank needs to be drained of all water BEFORE INSTALLING THE NEW PUMP. After draining, if you are using the supplied 30/50 psi pressure switch at the pre-set settings, add or adjust the air pressure in the tank to 28 psi of pressure BEFORE startup. For wells 25 ft or less in depth, shallow well installations should be adapted. The shallow well installation does not need the Venturi tube. MATERIALS REQUIRED (NOT INCLUDED) One can PVC cement & primer (read instructions carefully) One can thread compound (read instructions carefully) Thread tape Rigid pipe Check valve Flexible plastic pipe/clamps Elbow Nipple One well seal with vent plug Foot valve Priming tee and plug Relief valve Adaptor Tank Tank tee WARNING: All joints and connections must be AIRTIGHT. A single leak will prevent the proper operation of the pump. Wrap thread tape clockwise on all threaded connections. For all non-threaded connections, you must use PVC purple primer and PVC cement to ensure airtight seals. Measure all pipe lengths before attaching. NOTE: The ejector kit from the factory is for shallow well application. For deep well installation, the venturi tube (B) (J32P-18/#11) and nozzle (C) (#02) have to be installed. 3
")
 on the nozzle (C) (#02) and screw the nozzle (C)")
 (J32P-18/#11) with the nozzle (C) and")

 with thread tape (sold separately).")


 to the ejector.")
5 1 DEEP WELL INSTALLATION (for 4 OR LARGER WELL) Attaching the nozzle and venturi to the ejector 2 Wrap the threads of the venturi tube (B) with thread tape. Attach the O-ring (D) on the nozzle (C) (#02) and screw the nozzle (C) (#02) into the venturi tube (B) (J32P-18/#11). Attach the venturi tube (B) (J32P-18/#11) with the nozzle (C) and O-ring (D) to the Ejector. 3 C B D Connecting the foot valve to the ejector Wrap both ends of a 1-1/4 in. x 3 in. nipple (sold separately) with thread tape (sold separately). Thread the nipple into 1-1/4 in. foot valve (sold separately). Thread the other end of the nipple into the bottom of the ejector. Hand tighten, and then tighten 1-1/2 turn with a pipe wrench. Connecting the rigid pipe to the Sliding the pipe assembly into ejector 4 the well Connect two pipes (1 in. drive, 1-1/4 in suction) to the ejector. NOTE: If use PVC pipe to connect, a 1 in. x 3 in. nipple is required. Before sliding the pipe assembly into the well, firmly clamp the assembly with a pipe clamp (not included) to prevent the assembly from sliding down into the well. Keep the 1 in. pipe 2 in. shorter than the 1-1/4 in. pipe. 4

 to the pipes extending from the well seal. Attach rigid pipes to 1 in. elbow and 1-1/4 in. tee separately.")
 to the pump body. NOTE: If using PVC pipe to connect, a 1 in. x 3 in. nipple is required. Connect a flexible plastic pipe (1-1/4 in.) to the 1-1/4 in. rigid pipe.")
6 5 Sliding a well seal over the rigid Attaching an elbow & tee to pipe 6 the rigid pipes Remove the pipe clamp and slide a well seal (sold separately) over the rigid pipes and onto the well casing. The rigid pipe should extend approximately 12 in. from the well seal, depending on the height of the pump. 7 NOTE: DO NOT allow the assembly to slide down into the well. Tighten the well seal until rubber gaskets are tight against the well casing and the rigid pipes. Attach a 1 in. elbow and a 1-1/4 in. tee (both facing the pump) to the pipes extending from the well seal. Attach rigid pipes to 1 in. elbow and 1-1/4 in. tee separately. Connecting rigid pipe to the pump Connecting two flexible plastic body 8 pipes Mount the pump as close to the well as possible. Attach two section of rigid pipes (1 in. drive, 1-1/4 in suction) to the pump body. NOTE: If using PVC pipe to connect, a 1 in. x 3 in. nipple is required. Connect a flexible plastic pipe (1-1/4 in.) to the 1-1/4 in. rigid pipe. Connect a flexible plastic pipe (1 in.) to the 1 in. rigid pipe. Connect the other end of the plastic pipes to the rigid pipes extending from the well seal. Tighten the flexible plastic pipe two ends with clamps. Ensure the pipe slopes slightly toward the well (to prevent air trapping in the pipe). 5
 to the elbow insert hole")


7 9 Removing the elbow insert from Connecting the pressure the pump body gauge (or switch) to the elbow insert hole Pull out the pressure tube from the 90 elbow insert. Unthread and remove the elbow insert from the pump body. 12 Priming the pipe & pump 13 Fill the pipe with water until water overflows. Replace the plug back to the tee. Fill the pump with water until water overflows. NOTE: It may take several minutes to fill the pipes and the pump completely. NOTE: If the pump does not hold its prime, inspect all pipes and connections for leaks, and repair the leaks. Wrap the threads of the 1/4 in. pressure gauge (included) with thread tape and thread it in the elbow insert hole. Cut off the expanded portion of the pressure tube. Connecting the pressure switch to the pump Wrap thread tape around the threads of a 1 in. pressure regulator (E). Using a pipe wrench, thread the 1 in. pressure regulator (E) into the top of the pump. NOTE: This pressure regulator is a normally-closed valve installed at the discharge of the pump to provide an obstruction to flow and thereby regulate the pump pressure and provide back pressure for the ejector. Failure to use this item may result in a loss of prime and/or a low pressure. 6


 or another necessary size tee into the pressure tank.")
 and install a pressure gauge (sold separately) on the other outlet on top of the tank tee. Thread two 1 in.")
 to the front of the tank tee.")
8 14 Connecting the brass elbow to Connecting the PVC adaptor to the pressure regulator 15 the pressure regulator Thread the 1/4 in. disassembled elbow insert into the 1/4 in. hole on the side of the pressure regulator. Slide the pressure tubing (attached with the pump pressure switch or included in regulator kit) over the 1/4 in. brass elbow and the pressure switch connector. 16 Wrap thread tape around the threads of a 3/4 in. MNPT x 1 in. slip PVC adaptor (sold separately). Thread the adaptor into the pressure regulator. Connecting a tank tee to the Checking the pressure in the pressure tank 17 tank Wrap all threads with thread tape. In order for the pump and the pressure tank (sold separately) to operate properly, the pressure tank needs to be drained of all water BEFORE INSTALLING IT TO THE PUMP. Thread a 10 in. tank tee (sold separately) or another necessary size tee into the pressure tank. Plug one outlet on top of the tank tee with a 1/4 in. plug (sold separately) and install a pressure gauge (sold separately) on the other outlet on top of the tank tee. Thread two 1 in. female PVC adaptors (sold separately) onto the two inlet sides of tank tee. Thread a 1/2 in. relief valve and a 1/2 in. drain valve (both sold separately) to the front of the tank tee. Air pressure in the tank must be 2 psi lower than the "cut-in" of the pressure switch. NOTE: The pump has a 30/50 psi pressure switch, which means the "cut-in" is 30 psi; therefore, the tank needs to be set to 28 psi. To check the pressure in the tank, use a tire pressure gauge (not included). If more air is needed, add air to the tank with a tire pump or air compressor. If less is needed, bleed out some air. 7
.")
 as needed to connect the other 1 in.")


9 18 Connecting the pump with the water system CAUTION: Never install a shut-off valve between the pump and the tank, as this can cause excessive friction loss and can damage the pressure switch and/or pump. If necessary, only install a fully open gate valve (sold separately). Using PVC purple primer and PVC cement, attach a section of 1 in. PVC pipe (sold separately) as needed to connect the 3/4 in. MNPT x 1 in. slip PVC adaptor in the pressure regulator. Attach another section of 1 in. PVC pipe (sold separately) as needed to connect the other 1 in. female PVC adaptor on the tank tee to the water system from the house. 20 Setting pressure regulator Turn the regulator adjustment screw down tight. Turn on pump. If the pump is properly primed, a high pressure will immediately show on the pressure gauge. With the pump operating at high pressure, slowly unscrew the adjusting screw until maximum water flow is obtained without pressure dropping to zero. If pressure falls completely, retighten the screw and readjust it. If no pressure shows, stop the pump, remove the pressure regulator from pump, add more water, and try again. After the adjusted bolt is set up, lock the screw nut on the bolt. The pump is ready for use. NOTE: The pressure regulator screw is very tight. A big screw driver needed. 19 Voltage setting WARNING: All electrical work should be performed by a licensed electrician. This pump is pre-wired at 230 volts. If the power source is 115 volts, find the voltage switch on the electric box Flip the switch to 115 volts. Proceed to the Pressure Switch Assembly Instructions section on page 9 of this manual. 8


10 Troubleshooting Do Remove the drain plug (located on the front of the pump close to the inlet hole) and air plug (located on the top of the pump close to the outlet hole) to vent the system. Drain all piping to a point below the freeze line. NOTE: While this will drain the pump, it will not necessarily drain all the unprotected parts of the piping system. To drain the tank, disconnect the piping at the tank outlet. Do Not Do not disassemble the motor housing. This motor has NO repairable internal parts, and disassembly may cause dangerous electrical wiring issues. Problem Possible Cause Corrective Action The pump does not start or run. The pump does not prime. 1. The power is off. 2. There is a blown fuse or tripped breaker. 3. The pressure switch is faulty. 4. The motor overload tripped. 5. The wires are not connected correctly. 6. The motor shaft stuck. 1. There is not enough water. 2. Air is trapped in the pipe. 3. The water level in the well is below the foot valve. 4. The foot valve is plugged or leaks. 1. Turn the power on or call the power company. 2. Replace the fuse or reset the circuit breaker. 3. DISCONNECT THE POWER and then clean the switch contacts or replace the switch. 4. Allow the pump to cool. Overload will automatically reset. 5. Follow the instructions for wiring the pump. 6. Please use a flat head screw driver to turn the motor shaft through the center hole on the motor cap. Then restart the pump. 1. Stop the motor. Remove the pressure gauges or prime plug. Fill the housing pipes with water. 2. Adjust the pump's height so that the pipe slopes away from the pump. 3. Lower the suction pipe. If the water level is more than 25 ft., you need a deep well pump. 4. Replace the foot valve or dig the well deeper. 9

11 Problem Possible Cause Corrective Action The pump operates but pumps little or no water. The pump starts and stops too often. The pump does not shut off. 1. The water level is below the pump intake. 2. The discharge was not vented while priming. 3. There is a leak in the piping on the well side of the pump. 4. The well screen or inlet strainer is clogged. 5. The foot valve may be clogged or stuck closed. 6. The pump is not fully primed. 7. The water level is below the maximum lift specification. 8. The piping is undersized. 9. The voltage is not correct. 1. The incorrect tank was pre-charged. 2. There is a ruptured diaphragm/bladder (precharged tank). 3. There is a leak in the house piping. 4. The foot or check valve is stuck open. 5. The pressure switch does not match the tank pressure. 1. There is a leak in the house piping. 2. The water level is lower than the estimate. 3. The pressure switch is not properly set. Part list (For reference only) 1. Lower the suction pipe further into the well. 2. Open the faucet and repeat the priming procedure. 3. Repair the piping as needed. 4. Clean or replace as necessary. 5. Clean or replace as necessary. 6. Follow the priming instructions. 7. Return the pump and purchase a deep well jet pump. 8. Increase the pipe size to a min. 1-1/4 in.. 9. Check the voltage switch. 1. Empty water from the tank. Add or release air as needed to reach 28 psi. 2. Replace the tank. 3. Locate and repair the leak or reconnect. 4. Remove and replace. 5. Readjust or replace the switch. Call customer service. 1. Locate and repair (usually a leaky toilet or faucet). 2. Use a deep well jet pump if the water level is greater than 25 ft. 3. Reset or replace the pressure switch.
OWNER S MANUAL CONVERTIBLE JET PUMP
 OWNER S MANUAL Model 64011/64023/64033/ 64026/64036 CONVERTIBLE JET PUMP Questions, problems, missing parts? Before returning to the store call AQUAPRO Customer Service 8 a.m. - 5 p.m., EST, Monday-Friday
SUNC1200 / ITEM #40882 SUBMERSIBLE UTILITY PUMP OPERATIONS MANUAL
 SUNC1200 / ITEM #40882 SUBMERSIBLE UTILITY PUMP OPERATIONS MANUAL WWW.SUNRUNNERPOOL.COM Performance Model HP GPH of Water @ Total Feet Of Lift 0 ft. 5 ft. 10 ft. 15 ft. 20 ft. 25 ft. Max. Lift SUNC1200
ESE Series Cast Iron Sewage Pumps
 Owner s Manual ESE Series Cast Iron Sewage Pumps TABLE OF CONTENTS General Safety.................... 2 Specifications..................... 3 Installation.................... 4 & 5 Troubleshooting...................
SHALLOW WELL JET PUMP
 SHALLOW WELL JET PUMP MODEL FJ05S 1/2 HP flintandwalling.com ATTACH YOUR RECEIPT HERE Serial Number Purchase Date 1 FW1642 B TABLE OF CONTENTS Product Specifications...2 Safety Information...2 Package
STAR STOP SHALLOW WELL JET PUMP
 SHALLOW WELL JET PUMP MODEL SJ0S / HP STAR starwatersystems.com STOP Questions, problems, missing parts? Before returning to your retailer, call our customer service department at -800-7-0, 7:0 a.m. -
Material required for drilled well application (indoor use only)
") SAFETY INSTRUCTIONS: This fine pump that you have just purchased is designed from the latest in material and workmanship. Before installation and operation, we recommend the following procedures: A B C
SAFETY INSTRUCTIONS: This fine pump that you have just purchased is designed from the latest in material and workmanship. Before installation and operation, we recommend the following procedures: A B C
Installation Manual DIAPHRAGM WELL TANK
 Installation Manual DIAPHRAGM WELL TANK IN-LINE SERIES: 2-5 & 7 GALLON VERTICAL SERIES: 14-20-25-32-36-52-65-86-96-119 GALLON HORIZONTAL SERIES: 7-14 & 20 GALLON NO LEAD NO LEAD: The weighted average of
Professional Series 1/2HP 2 YEAR WARRANTY CONVERTIBLE JET PUMP REPAIR PARTS
 Model T033 CONVERTIBLE JET PUMP /HP 900 GPH Suction lift Head of 5 (7.5m) in shallow well mode Professional Series YEAR WARRANTY Suction: /4 Discharge: NPT Maximum pressure: 85 PSI US GPH LPH 5 900 3400
OWNER S MANUAL SELF-PRIMING PORTABLE UTILITY PUMP
 Model 54011-0 OWNER S MANUAL SELF-PRIMING PORTABLE UTILITY PUMP Questions, problems, missing parts? Before returning to the store call AQUAPRO Customer Service 8 a.m. - 5 p.m., EST, Monday-Friday 1-844-242-2475
SUNC3000 / Item #40885
 SUNC3000 / Item #40885 AUTOMATIC POOL COVER PUMP OPERATIONS MANUAL WWW.SUNRUNNERPOOL.COM 1 . Performance GPH of Water @ Total Feet Of Lift MODEL HP Max. Lift 0 ft. 5 ft. 10 ft. 15 ft. 20 ft. SUNC3000 1/3
GRINDER PUMP MODEL # Zoeller is a registered trademark of Zoeller Co. All Rights Reserved. Español p. 13
 GRINDER PUMP Zoeller is a registered trademark of Zoeller Co. All Rights Reserved. MODEL #2701-0005 Español p. 13 ATTACH YOUR RECEIPT HERE Serial Number Purchase Date Questions, problems, missing parts?
SEWAGE PUMP MODEL # Zoeller is a registered trademark of Zoeller Co. All Rights Reserved. Español p. 14
 SEWAGE PUMP Zoeller is a registered trademark of Zoeller Co. All Rights Reserved. MODEL #1261-0001 Español p. 14 ATTACH YOUR RECEIPT HERE Serial Number Purchase Date Questions, problems, missing parts?
OWNER S MANUAL SUBMERSIBLE UTILITY PUMP
 Model 51101-0 OWNER S MANUAL SUBMERSIBLE UTILITY PUMP Questions, problems, missing parts? Before returning to the store call AQUAPRO Customer Service 8 a.m. - 5 p.m., EST, Monday-Friday 1-844-242-2475
Model T Professional Series 1/2HP 2 YEAR WARRANTY SHALLOW WELL JET PUMP
 Model T03121 SHALLOW WELL JET PUMP Professional Series 2 YEAR WARRANTY 1/2HP 916 GPH Head of 25 (7,5 m) US GPH LPH Suction: 1 1/4 NPT Discharge: 1 NPT Maximum Pressure: 65 PSI Stainless steel shaft and
PRE-PLUMBED SEWAGE SYSTEM
 PRE-PLUMBED SEWAGE SYSTEM Zoeller is a registered trademark of Zoeller Co. All Rights Reserved. MODEL #1910-0009 Español p. 13 ATTACH YOUR RECEIPT HERE Serial Number Purchase Date Questions, problems,
MODEL SS INSTALLATION INSTRUCTIONS
 WWW.BURCAM.COM 2190 Boul. Dagenais West TEL: 514.337.4415 LAVAL (QUEBEC) FAX: 514.337.4029 CANADA H7L 5X9 info@burcam.com Your pump has been carefully packaged at the factory to prevent damage during shipping.
INSTALLATION INSTRUCTIONS
 www.burcam.com 2190 Dagenais Blvd.West TEL: 514.337.4415 LAVAL (QUEBEC) FAX: 514.337.4029 CANADA H7L 5X9 info@burcam.com INSTALLATION INSTRUCTIONS MODEL 506518SS AND BY-PRODUCTS LIKE Your pump has been
INSTALLATION INSTRUCTIONS
 www.burcam.com 2190 Dagenais Blvd.West TEL: 514.337.4415 LAVAL (QUEBEC) FAX: 514.337.4029 CANADA H7L 5X9 info@burcam.com Your pump has been carefully packaged at the factory to prevent damage during shipping.
INSTALLATION INSTRUCTIONS MODELS S S SHALLOW WELL & CONVERTIBLE JET PUMPS PAGE 3 PAGE 8
 INSTALLATION INSTRUCTIONS WWW.BURCAM.COM 2190 Blvd. Dagenais West LAVAL (QUEBEC) CANADA H7L 5X9 MODELS 503132S 503332 503232S 503732 TEL : 514.337.4415 FAX : 514.337.4029 info@burcam.com Your pump has
SUBMERSIBLE SUMP PUMPS
 SUBMERSIBLE SUMP PUMPS Zoeller is a registered trademark of Zoeller Co. All Rights Reserved. MODELS #1073-0001, 1075-0001 Español p. 9 ATTACH YOUR RECEIPT HERE Serial Number Purchase Date Questions, problems,
OWNERS MANUAL INSTALLATION AND OPERATING INSTRUCTIONS REPAIR PARTS LIST. Centrifugal Pump Primer MODEL 6D, HAN-DEE PRIMER
 OWNERS MANUAL INSTALLATION AND OPERATING INSTRUCTIONS REPAIR PARTS LIST Centrifugal Pump Primer 383 0893 MODEL 6D, HAN-DEE PRIMER IMPORTANT For best possible performance continuous, satisfactory operation,
SUBMERSIBLE SUMP PUMPS
 SUBMERSIBLE SUMP PUMPS Zoeller is a registered trademark of Zoeller Co. All Rights Reserved. MODEL #1099-0001 Español p. 11 ATTACH YOUR RECEIPT HERE Serial Number Purchase Date Questions, problems, missing
PEDESTAL SUMP PUMP. MODEL # Español p. 11. Zoeller is a registered trademark of Zoeller Co. All Rights Reserved.
 PEDESTAL SUMP PUMP Zoeller is a registered trademark of Zoeller Co. All Rights Reserved. MODEL #1084-0001 Español p. 11 ATTACH YOUR RECEIPT HERE Serial Number Purchase Date Questions, problems, missing
4" ENVIRONMENTAL E-SERIES PUMPS OWNER'S MANUAL. DANGER warns about hazards that will cause. WARNING warns about hazards that can cause
 4" ENVIRONMENTAL E-SERIES PUMPS OWNER'S MANUAL BEFORE INSTALLING PUMP, BE SURE TO READ THIS OWNER S MANUAL CAREFULLY. CAUTION Fill pump with water before starting or pump will be damaged. The motor on
GARDEN HOSE UTILITY PUMP
 GARDEN HOSE UTILITY PUMP MODEL #HPP360, HPP12V, 473707 MODEL #HPP360, 473707 MODEL #HPP12V ATTACH YOUR RECEIPT HERE Purchase Date SAFETY INFORMATION Please read and understand this entire manual before
STOP CITY PRESSURE BOOSTER PUMP INSTRUCTION MANUAL
 CITY PRESSURE BOOSTER PUMP INSTRUCTION MANUAL MODEL #VP05, VP10 C US NSF/ANSI 372 255405 For loose, missing or damaged parts, or if the unit does not seem to be operating properly, please call before returning
OWNERS MANUAL INSTALLATION AND OPERATING INSTRUCTIONS REPAIR PARTS LIST
 OWNERS MANUAL INSTALLATION AND OPERATING INSTRUCTIONS REPAIR PARTS LIST Horizontal Multi-Stage Jet Pumps HMS-1FL Series MODELS 3/4 HP 1 HP 1-1/2 HP HMSD-1FL HMSE-1FL HMSF-1FL STA-RITE INDUSTRIES 293 Wright
AUTOMATIC SUBMERSIBLE UTILITY PUMP
 AUTOMATIC SUBMERSIBLE UTILITY PUMP Zoeller is a registered trademark of Zoeller Co. All Rights Reserved. MODEL #1043-0006 Español p. 9 ATTACH YOUR RECEIPT HERE Serial Number Purchase Date Questions, problems,
QWIK JON ULTIMA 204 SYSTEMS INSTALLATION INSTRUCTIONS PREINSTALLATION CHECKLIST
 NOTICE TO INSTALLER: Instructions must remain with installation. SECTION: 6.10.065 Your Peace of Mind is Our Top Priority Product information presented here reflects conditions at time of publication.
LAWN SPRINKLER, IRRIGATION PUMP
 LAWN SPRINKLER, IRRIGATION PUMP MODEL #, SP0P, SP5P, SP20P, EL0P, EL5P, EL20P SAFETY INFORMATION Please read and understand this entire manual before attempting to assemble, operate or install the product.
Artesian2 Owners Manual
 Artesian2 Owners Manual Energy-Efficient, Self Priming Centrifugal Pumps Discharge Inlet Important Safety Instructions Please read all instructions completely before you install or operate your new pump.
StormPro BA Series Sump Pump
 Page 1 of 8 Marks & Meanings DANGER: Keep the pump equipment out of the reach of children! Warns that the failure to follow the directions given could cause serious risk to individuals or objects. WARNING:
FP0S2300X FP0S3000X. Submersible Waterfall/Utility Pumps OWNER S MANUAL. Call Installation/Operation/Parts. English...
 P.O. Box 342, Delavan, WI 53115 Phone: 1-800-365-6832 Fax: 1-800-526-3757 E-Mail: info@flotecwater.com Web Site: http://www.flotecwater.com OWNER S MANUAL Submersible Waterfall/Utility Pumps 3384 0399
SPECIFICATIONS Horsepower: 1.5 HP Running Maximum PSI: 125 PSI Tank Capacity: 15 Gallons CFM: 6 40 PSI 5 90 PSI
 15 GALLON AIR COMPRESSOR Model: 7678 DO NOT RETURN TO STORE Please call 800-348-5004 for parts and service CALIFORNIA PROPOSITION 65 WARNING: You can create dust when you cut, sand, drill or grind materials
TALCO FIRE SYSTEMS. LSF Start-Up Instructions. 1) IMPORTANT: Inspect the unit for damage. Report any damage to the freight carrier immediately.
 IMPORTANT: Inspect the unit for damage. Report any damage to the freight carrier immediately.") LSF Start-Up Instructions 1) IMPORTANT: Inspect the unit for damage. Report any damage to the freight carrier immediately. 2) PRE-START-UP: Be sure there is water in the pump. Bleed air at all high points
LSF Start-Up Instructions 1) IMPORTANT: Inspect the unit for damage. Report any damage to the freight carrier immediately. 2) PRE-START-UP: Be sure there is water in the pump. Bleed air at all high points
QUICK START GUIDE OWNER S MANUAL AL50 SERIES SAND FILTRATION TECHNOLOGY PLEASE CALL DO NOT RETURN TO STORE
 QUICK START GUIDE OWNER S MANUAL SAFETY, INSTALLATION, OPERATION & PARTS AL50 SERIES SAND FILTRATION TECHNOLOGY PLEASE CALL 877-278-2797 DO NOT RETURN TO STORE! WARNING This equipment must be installed
OWNER S MANUAL EVOLUTION 3500, 4500, 5500, & 8500 SERIES PUMPS
 OWNER S MANUAL EVOLUTION 3500, 4500, 5500, & 8500 SERIES PUMPS IMPORTANT SAFETY INSTRUCTIONS When installing and using this electrical equipment, basic safety precautions should always be followed, including
StormPro BCV400 Sewage Ejector Pump
 Page 1 of 8 Marks & Meanings DANGER: Keep the pump equipment out of the reach of children! Warns that the failure to follow the directions given could cause serious risk to individuals or objects. WARNING:
Model: PFUPPP M10. 1/4 HP 3450 RPM 60 Hz Submersible Utility Pump OWNER S MANUAL. Power-Flo Pumps & Systems PUMPS
 OWNER S MANUAL Model: PFUPPP2528251M10 1/4 HP 3450 RPM 60 Hz Submersible Utility Pump ISP No: PFUPPP25-8/01/15 General Safety Information Before installation, read the following instructions carefully.
JET PUMP INSTALLATION MANUAL. motralec SHALLOW WELL JET PUMPS
 motralec 4 rue Lavoisier. ZA Lavoisier. 95223 HERBLAY CEDEX Tel. : 01.39.97.65.10 / Fax. : 01.39.97.68.48 Demande de prix / e-mail : service-commercial@motralec.com www.motralec.com JET PUMP INSTALLATION
Owner s Manual GLASSLINED PUMP TANK
 Owner s Manual GLASSLINED PUMP TANK ANSI/NSF 61 Annex G Thank You for purchasing a pump tank. Properly installed and maintained, it should give you years of trouble free service. If you should decide that
Use and Care Guide.
 Model # Part # 53301111 L-40-802-SV-N-BZ 53301112 L-40-802-SV-N-W Use and Care Guide LED OUTDOOR RE LIGHT Questions, problems, missing parts? Call ETi SSL Customer Service 8:30 a.m. 5 p.m., EST, Monday
SUPER PUMP OUT SYSTEM
 Congratulations on your purchase of the SUPER PUMP OUT SYSTEM. This instruction/parts manual is a guide for operating and servicing your BLUELINE SUPER PUMP OUT SYSTEM. Proper operation and service are
OWNER S MANUAL Series: PFSPPPP33 1/3 HP 3450 RPM 60 Hz Series: PFSPCPC50 1/2 HP 3450 RPM 60 Hz Submersible Sump Pumps
 OWNER S MANUAL Series: PFSPPPP33 1/3 HP 3450 RPM 60 Hz Series: PFSPCPC50 1/2 HP 3450 RPM 60 Hz PFSPPPP Series PFSPCPC Series ISP No: PFSP33_50-4/2016 PFSPPPP33 / PFSPCPC50 Series General Safety Information
QUALITY MISTING PUMPS
 TOTALLY ENCLOSED DIRECT DRIVE 60030KH, 60031KH, 60050KH, 60051KH 60100KH, 60101KH, 60150KH, 60151KH MISTING PUMP MANUAL INCLUDING: SPECIFICATION DATA, GENERAL SAFETY PRECAUTIONS, OPERATION, INSTALLATION,
Colt Series C400, C500
 Colt Series C400, C500 RP/IS-A-C400/C500 C400 OSY Reduced Pressure Zone Assemblies Reduced Pressure Detector Assemblies Sizes: 2 1 2" 10" (65 250mm) Installation Service Repair Kits Maintenance For other
MH Series - Horizontal Multistage Pump OWNER'S MANUAL
 MH Series - Horizontal Multistage Pump OWNER'S MANUAL BEFORE YOU START BEFORE INSTALLING PUMP, BE SURE TO READ THIS OWNER S MANUAL CAREFULLY. REFER TO PRODUCT DATA PLATE(S) FOR ADDITIONAL OPERATING INSTRUCTIONS
Aqua Ultraviolet Sunami Series Pumps 1/3HP, 3/4HP, 3HP, 4HP, 5HP
 TM 42371 Avenida Alvarado Temecula, CA 92590 TOLL FREE (800) 454-2725 TEL (951) 296-3480 FAX (951) 296-3490 www.aquauv.com Aqua Ultraviolet Sunami Series Pumps 1/3HP, 3/4HP, 3HP, 4HP, 5HP Sunami Warranty
OWNER S MANUAL. 6. If you aren t competent to instal the pump, get help from a qualified source.
 OWNER S MANUAL RK2 Systems Pro Pump Energy-Efficient, Self Priming Centrifugal Pumps Important Safety Instructions Please read all instructions completely before you install or operate your new pump. Save
Series: PFUEG 1/12HP, 5000 RPM, 60 Hz Utility Pumps
 INSTALLATION MANUAL Series: 1/12HP, 5000 RPM, 60 Hz ISP No: - 6/09 General Safety Information Before installation, read the following instructions carefully. Failure to follow instruction and Safety information
Model 2008 I Battery Operated Irrigation Timer with 3/4 in. Anti-Siphon Valve
 i n s t r u c t i o n m a n u a l Model 2008 I Battery Operated Irrigation Timer with 3/4 in. Anti-Siphon Valve Features Weekly or cyclical programming 4 start times per day in weekly program Irrigation
M-3025CB-AV Fuel Pump
 SAVE THESE INSTRUCTIONS M-3025CB-AV Fuel Pump Owner s Manual TABLE OF CONTENTS General Information... 2 Safety Instructions... 2 Installation... 3 Operation... 4 Maintenance... 4 Repair... 5 Troubleshooting...
Intended Use: Explanation of Signal Word Consequences
 SAFETY INFORMATION & INSTRUCTION MANUAL Please read, understand, and follow all safety information contained in these instructions prior to the use of this device. Retain these instructions for future
Matala. VersiFlow Series. Instruction and Maintenance Manual
 VersiFlow Series High Flow Multi-Purpose "Versatile " Pump V-3200 1/5HP 150W / Discharge 2 V-3900 1/3HP 250W / Discharge 2 V-4700 1/2HP 400W / Discharge 2 V-5600 1HP 750W / Discharge 2 Instruction and
MODEL H INSTALLATION INSTRUCTIONS
 WWW.BURCAM.COM 2190 Boul. Dagenais West TEL: 514.337.4415 LAVAL (QUEBEC) FAX: 514.337.4029 CANADA H7L 5X9 info@burcam.com Your unit has been carefully packaged at the factory to prevent damage during shipping.
PUMP PRIMING INSTALLATION CHECK MOTOR ROTATION PUMP START-UP MOTOR REPLACEMENT DISASSEMBLY ELECTRICAL HOOKUP ASSEMBLY
 V6 VERTICAL BOOSTER PUMP OWNER'S MANUAL BEFORE INSTALLING PUMP, BE SURE TO READ THIS OWNER S MANUAL CAREFULLY. C A U T I O N Mechanical shaft seals must not run dry. Fill pump with water before starting
TS400Q TS800Q. Auto Pressure Control Pump Instruction Manual. ISO 9001 Certified Walrus America Inc
 TS400Q TS800Q Auto Pressure Control Pump Instruction Manual ISO 9001 Certified Walrus America Inc EC Declaration of Conformity Manufacturer: Walrus Pump Co., Ltd. Address: No. 83-14, Dapiantou, Sanjhih
SuperFlo 9,000 High Volume Pump Product Manual
 SuperFlo 9,000 High Volume Pump Product Manual For Model: SuperFlo 9,000 (Item #120225) Table of Contents: Important Information... 2 Technical Specs... 3-4 Installing Your SuperFlo Pump... 4-5 Cleaning
2 Wire Plus Ground 3 Wire Plus Ground IL0655
 4 INCH SUBMERSIBLE WELL PUMP 2 & 3 Wire 2 Wire Plus Ground 3 Wire Plus Ground Español p. 21 For installation videos and other information, scan with your smart phone. Or, visit: starwatersystems.com and
Cascade Owners Manual
 Cascade Owners Manual Reliable, Energy-Efficient Centrifugal Pumps Discharge Inlet Important Safety Instructions Please read all instructions completely before you install or operate your new pump. Save
LEV/Wn Building A Connected World
 LEV/Wn Building A Connected World PK-93370-10-00-2B Installing and Testing a GFCI Please read this leaflet completely before getting started. A CAUTION To prevent severe shock or electrocution always turn
MODELS 108 and 138 CRAWL SPACE PUMPING SYSTEM PREINSTALLATION CHECKLIST
 NOTICE TO INSTALLER: Instructions must remain with installation. Your Peace of Mind is Our Top Priority Product information presented here reflects conditions at time of publication. Consult factory regarding
Pressurized Bead Filters
 Pressurized Bead Filters Installation Instructions Table of Contents Safety Information Installation Assembly Start Up Maintenance Troubleshooting Warranty Safety Information: 1. Installation should be
Professional Séries. Professional Séries. Model T03828 SUBMERSIBLE SUMP DUPLEX SYSTEM SUBMERSIBLE SUMP DUPLEX SYSTEM. 1/3HP 2400 GPH Head of 20 (6 m)
") Model T0828 Primary pump 1/HP 200 GPH Head of 20 (6 m) SUBMERSIBLE SUMP DUPLEX SYSTEM Professional Séries Discharge: 1 1/2 ABS DWV pipe Electric cable: 9 piggyback type Oil cooled Cast iron construction
Model T0828 Primary pump 1/HP 200 GPH Head of 20 (6 m) SUBMERSIBLE SUMP DUPLEX SYSTEM Professional Séries Discharge: 1 1/2 ABS DWV pipe Electric cable: 9 piggyback type Oil cooled Cast iron construction
MetroPrime 22MPC Self-Priming Centrifugal Pump
 Page 1 of 6 prevent priming or reduce pump capacity. OPERATION The 22 MPC-Metropolitan Pump is a self-priming centrifugal pump and only requires priming prior to its initial start. The pump will retain
SLR / SLR-S/N. Instruction Manual. Walrus America Inc
 SLR / SLR-S/N Instruction Manual Walrus America Inc 1. Installation and Connection 1.1. Pump Installation The pump should be sited in a well ventilated and frost-free position. The distance between pumps-motors
Installation/Fonctionnement/Pièces. Pour plus de renseignements concernant l utilisation, l installation ou l entretien, Composer le 1 (800)
") OWNER S MANUAL Statuary and Pumps P.O. Box 4, Delavan, WI 55 Phone: -800-65-68 Fax: -800-56-757 E-Mail: flotec@flotecpump.com Web Site: http://www.flotecwater.com Water is Our Business NOTICE D UTILISATION
OWNER S MANUAL Statuary and Pumps P.O. Box 4, Delavan, WI 55 Phone: -800-65-68 Fax: -800-56-757 E-Mail: flotec@flotecpump.com Web Site: http://www.flotecwater.com Water is Our Business NOTICE D UTILISATION
G8 Portable Fuel Transfer Pump Owner s Manual
 G8 Portable Fuel Transfer Pump Owner s Manual GENERAL INFORMATION This pump is designed for use only with gasoline (up to 15% alcohol blends such as E15), diesel fuel (up to 20% biodiesel blends such as
4000SS. For other repair kits and service parts, send for Ames Repair Parts Price List, PL-A-RP-BPD.
 Series 4000SS RP/IS-A-4000SS 4000SS Reduced Pressure Zone Assemblies Sizes: 8" 10" (200 250mm) Installation Service Repair Kits Maintenance For other repair kits and service parts, send for Ames Repair
Series 957, 957N, 957Z, 957RPDA, 957NRPDA, 957ZRPDA
 Series 957, 957N, 957Z, 957RPDA, 957NRPDA, 957ZRPDA Reduced Pressure Zone Assemblies Reduced Pressure Detector Assemblies Sizes: 2 1 2" 10" (65 250mm) Installation Service Repair Kits Maintenance RP/IS-957/957RPDA
READ THIS MANUAL CAREFULLY BEFORE USING THE PUMP
 OWNER S MANUAL Pond Pump READ THIS MANUAL CAREFULLY BEFORE USING THE PUMP Important Notice: This manual contains important information about the installation, operation and safe use of this product. This
ArtesianPro Owners Manual
 ArtesianPro Owners Manual Energy-Efficient, Self Priming Centrifugal Pumps Discharge Inlet Important Safety Instructions Please read all instructions completely before you install or operate your new pump.
FIXED DEPTH INSERTION METER INSTRUCTIONS
 UNPACKING Please open and inspect your package upon receipt. Your package was packed with great care and all the necessary packing materials to arrive to you undamaged. If you do find an item that is broken
S33 Sump Pump INSTRUCTIONS AND SERVICE MANUAL VERTICAL FLOAT SWITCH S33V1 & S33V1C AUTOMATIC S33P1 & S33PC-1 (CONTROL WITH SERIES PLUG) NOT SHOWN
 NOT SHOWN") S33 Sump Pump INSTRUCTIONS AND SERVICE MANUAL VERTICAL FLOAT SWITCH S33V1 & S33V1C AUTOMATIC S33P1 & S33PC-1 (CONTROL WITH SERIES PLUG) NOT SHOWN AUTOMATIC S33A1 & S33A1C WARNING risk of electric shock.
S33 Sump Pump INSTRUCTIONS AND SERVICE MANUAL VERTICAL FLOAT SWITCH S33V1 & S33V1C AUTOMATIC S33P1 & S33PC-1 (CONTROL WITH SERIES PLUG) NOT SHOWN AUTOMATIC S33A1 & S33A1C WARNING risk of electric shock.
QUALITY MISTING PUMPS
 DIRECT DRIVE TOTALLY ENCLOSED FAN COOLED 60200KH, 60201KH MISTING PUMP MANUAL INCLUDING: SPECIFICATION DATA, GENERAL SAFETY PRECAUTIONS, OPERATION, INSTALLATION, PARTS, MAINTENANCE & WARRANTY QUALITY MISTING
Installation Instructions and Parts Manual CPJ SERIES JET PUMPS. Shallow Well Jet Pumps. Convertible Jet Pumps. Ejectors (Purchase separately)
") Installation Instructions and Parts Manual CPJ SERIES JET PUMPS Shallow Well Jet Pumps /3 - / HP CPJS SHALLOW WELL IL089 3/4 - -/ HP CPJS SHALLOW WELL Convertible Jet Pumps IL090 / HP CPJ CONVERTIBLE IL09
Installation Instructions and Parts Manual CPJ SERIES JET PUMPS Shallow Well Jet Pumps /3 - / HP CPJS SHALLOW WELL IL089 3/4 - -/ HP CPJS SHALLOW WELL Convertible Jet Pumps IL090 / HP CPJ CONVERTIBLE IL09
Series: PFSWCPC75. 3/4 HP 1750 RPM 60 Hz Submersible Sewage Pump OWNER S MANUAL. Power-Flo Pumps & Systems PUMPS
 OWNER S MANUAL Series: PFSWCPC75 3/4 HP 1750 RPM 60 Hz Submersible Sewage Pump ISP No: PFSWC75-8/1/15 General Safety Information Before installation, read the following instructions carefully. Failure
Owner s Manual Drill and Light Weight Portable Utility Pumps
 Owner s Manual Drill and Light Weight Portable Utility Pumps PUP61 Light Weight Utility Pump PUP62 Drill Pump with Kit PUP63 Drill Pump PUP61DC Light Weight Utility Pump LIMITED WARRANTY This pump is warranted
SAFETY INFORMATION & INSTRUCTION MANUAL
 SAFETY INFORMATION & INSTRUCTION MANUAL Please read, understand, and follow all safety information contained in these instructions prior to the use of this device. Retain these instructions for future
i n s t r u c t i o n m a n u a l
 i n s t r u c t i o n m a n u a l Model 7001 Battery Operated Irrigation Controller with Hose or Pipe Thread Features Weekly or cyclical programming 4 start times per day in weekly program Irrigation duration
OWNER S MANUAL. Submersible Sump Pumps Models: XQS33 (1/3 HP Sump Pump) XQS50 (1/2 HP Sump Pump) Suzhou Xin Qi Electric Co.,ltd
 XQS50 (1/2 HP Sump Pump) Suzhou Xin Qi Electric Co.,ltd") OWNER S MANUAL Submersible Sump Pumps Models: Suzhou Xin Qi Electric Co.,ltd www.xqepumps.com XQS33 (1/3 HP Sump Pump) XQS50 (1/2 HP Sump Pump) Installation/Operation For further operating, installation,
OWNER S MANUAL Submersible Sump Pumps Models: Suzhou Xin Qi Electric Co.,ltd www.xqepumps.com XQS33 (1/3 HP Sump Pump) XQS50 (1/2 HP Sump Pump) Installation/Operation For further operating, installation,
Self-Priming Centrifugal Pumps
 OWNER S MANUAL Self-Priming Centrifugal Pumps 293 Wright Street, Delavan, WI 53115 D Series 1362 1094ASBN Installation/Operation/Parts For further operating, installation, or maintenance assistance: Call
PRESSURE BOOSTER 150
 PRESSURE BOOSTER 150 Owners Manual! WARNING This equipment must be installed and serviced by a qualified technician. Improper installation can create electrical hazards which could result in property damage,
Models 3305P, 3307P, 3310P
 OWNER S MANUAL Convertible Deep Well Jet umps 293 Wright St., Delavan, WI 53115 hone: 1-800-468-7867 1-800-546-7867 Fax: 1-800-390-5351 5301 0206 Models 3305, 3307, 3310 Installation/Operation For further
VADA - V60-J PRODUCT OVERVIEW CONSTRUCTION MOTOR USAGE LIMITATIONS WARRANTY
 PRODUCT OVERVIEW The VADA series of self priming jet pumps combine the functional benefits of centrifugal pumps and the practical and qualitative benefits of self-priming pumps. The Venturi system the
3-Wire Deep Well Submersible Pump
 3-Wire Deep Well Submersible Pump Owner s Manual WARNING: Read carefully and understand all ASSEMBLY AND OPERATION INSTRUCTIONS before operating. Failure to follow the safety rules and other basic safety
ILLUSTRATED PARTS LIST
 ILLUSTRATED PARTS LIST 14 13 12 M-3130-RDP ONLY 33 11 9 10 15 8 1 2 3 16 5 17 6 7 22 29 30 4 28 26 32 18 31 19 20 21 23 25 27 24 Item No. No. Part No. Description Req d. 6 1 904006-38 Hex Head Screw 3/8-16
INSTALLATION INSTRUCTIONS MODELS S S S S SSN S SSW SSN SPRINKLER PUMPS
 WWW.BURCAM.COM 2190 Boul. Dagenais West TEL: 514.337.4415 LAVAL (QUEBEC) FAX: 514.337.4029 CANADA H7L 5X9 info@burcam.com Your pump has been carefully packaged at the factory to prevent damage during shipping.
ALITA LINEAR AIR PUMP OPERATION & MAINTENANCE MANUAL. AL- Model Number Date Code / Serial Number Date of Purchase
 ALITA LINEAR AIR PUMP OPERATION & MAINTENANCE MANUAL AL- Model Number Date Code / Serial Number Date of Purchase LIMITED WARRANTY ALITA warrants to the original retail consumer purchaser ( Customer ) that
USER S MANUAL FOR F & Q. Submersible Sewage Pumps
 USER S MANUAL FOR F & Q Submersible Sewage Pumps 100WQ Series The F&Q pumps are carefully inspected and tested to ensure operating performance and safety. However, failure to follow the instructions and
STOP. M-3130 & M-3130-RDP Series. 115/230 Volt Super Duty Fuel Pumps. Owner s Manual. M-3130-PO Pump Only DO NOT RETURN THIS PRODUCT TO THE STORE!
 SAVE THESE INSTRUCTIONS M-3130 & M-3130-RDP Series 115/230 Volt Super Duty Fuel Pumps M-3130-ML Manual Nozzle M-3130-PO Pump Only Owner s Manual STOP DO NOT RETURN THIS PRODUCT TO THE STORE! Please contact
CRD610 Automatic Fitting Inserter
 CRD610 Automatic Fitting Inserter OPERATIONS MANUAL VERSION 1.2 LAST EDITED 12.12.2018 cleanroomdevices.com 1 Table of Contents Title Page. 1 Table of Contents...2 1.0 General Product & Safety Information....3
IMPORTANT SAFETY INSTRUCTIONS
 OWNER S MANUAL FLO-MASTER XP2 SERIES PUMPS IMPORTANT SAFETY INSTRUCTIONS When installing and using this electrical equipment, basic safety precautions should always be followed, including the following:
Artesian Owners Manual
 Artesian Owners Manual Energy-Efficient, Self Priming Centrifugal Pumps Discharge Inlet Important Safety Instructions Please read all instructions completely before you install or operate your new pump.
Centrifugal Pumps (Part Nos. PS2SS PS73SS) PS2SS
 PS2SS") Centrifugal Pumps (Part Nos. PS2SS PS73SS) PS2SS Part No. Serial Number Date Purchased Table of Contents Page Safety Messages...2 Pump Curves...2 Pump End Assembly...3 Disassembly...3 Installation...4
Centrifugal Pumps (Part Nos. PS2SS PS73SS) PS2SS Part No. Serial Number Date Purchased Table of Contents Page Safety Messages...2 Pump Curves...2 Pump End Assembly...3 Disassembly...3 Installation...4
Operating Instructions & Parts Manual. Supa-Lite Lever Grease Gun. Model 48UJ77
 Operating Instructions & Parts Manual EN Supa-Lite Lever Grease Gun Model 48UJ77 PLEASE READ AND SAVE THESE INSTRUCTIONS. READ CAREFULLY BEFORE ATTEMPTING TO ASSEMBLE, INSTALL, OPERATE OR MAINTAIN THE
Getz Equipment Innovators 450 lb Portable / Wheeled Unit Dry Chemical Fill System Part No: 3G0061/3G0063
 Getz Equipment Innovators 450 lb Portable / Wheeled Unit Dry Chemical Fill System Part No: 3G0061/3G0063 1 Revised 4/12/17 2320 Lakecrest Drive, Pekin IL 61554 PH. (888) 747-4389 Fax (309) 495-0625 Website:
OWNERS GUIDE TO INSTALLATION AND OPERATION OF 1/2-5 HP, 5, 7, 10, 15, 19 & 27 GPM 4 SUBMERSIBLE PUMPS
 FW0080 0511 Supersedes 0610 OWNERS GUIDE TO INSTALLATION AND OPERATION OF 1/2-5 HP, 5, 7, 10, 15, 19 & 27 GPM 4 SUBMERSIBLE PUMPS IL0632 WARNING IMPORTANT SAFETY INSTRUCTIONS RULES FOR SAFE INSTALLATION
GeyserMax-Flow Series
 GeyserMax-Flow Series 115V/60Hz Waterfall Pump GM-3900 1/5HP 150W / Discharge 1-1/2 GM-4700 1/3HP 250W / Discharge 2 GM-5400 1/2HP 400W / Discharge 2 GM-6200 3/4HP 750W / Discharge 2 230V/50Hz GM-3800
Artesian2 Owners Manual
 Artesian2 Owners Manual Energy-Efficient, Self Priming Centrifugal Pumps Discharge Inlet Important Safety Instructions Please read all instructions completely before you install or operate your new pump.