What do I need to do when my parts are delivered via Truck Freight Delivery? When the shipment arrives, verify you have received all your items.
|
|
|
- Josephine Ramsey
- 5 years ago
- Views:
Transcription
1 GENERAL QUESTIONS Do your products come with a warranty? (Disclaimer: All claims are handled on a case by case basis) All products come with a limited manufacturer's warranty. The warranty covers shipping damages and customer satisfaction. Shipping charges are non-refundable, and all products must be inspected prior to signing for a shipment. Failure to note damage prior to signing acceptance of a shipment may void your warranty. If the product has been altered in any way, the warranty is voided. Please note that Carbon Creations products also include a one-year limited warranty against any defects with the clear coat. All Aero Function parts include a 3-year warranty against manufacturer deemed defects. What is your return policy? If for any reason you are not satisfied with what you ordered, simply contact LMP to return the product and receive a refund. Products returned within 30 days will receive a full refund of the product's original purchase price. Products returned after 30 days, but within 60 days, will incur a 25% restock fee. Shipping charges are not refundable and the customer will be responsible for the return fees. Do your kits come painted? No, our kits do not come painted. We recommend you have a professional body shop with experience in aftermarket aerodynamics paint and install your products. Our fiberglass parts will come with a signature black finish for shipping purposes. This black finish is not a paintable primer and will need to be completely sanded off before paint prep can begin. SHIPPING QUESTIONS How long does it take to receive my parts after I have placed an order? All in-stock orders ship from our distribution center within 2 business days. From that point you should expect an additional 3-7 business days for delivery (depending on your shipping location. Orders placed outside the USA can take longer) Is there a warranty on shipping damage? Items Shipped Via Ground: The part often times will simply be delivered to your provided address without requiring a signature. Once you see the ground box, open and inspect the parts for damage. If damage did occur, please take photos of the issue and supply them to LMP to begin a shipping damage claim. Items Shipped Via Truck Freight: Our larger items require to be delivered via truck freight and the items will require a scheduled delivery time & a signature to release the package to the customer. The truck freight warranty covers shipping damage and all products must be inspected prior to signing for a shipment. Failure to note damage prior to signing acceptance of a shipment may void your warranty. If the product has been altered in any way, the warranty is voided.

2 What do I need to do when my parts are delivered via Truck Freight Delivery? When the shipment arrives, verify you have received all your items. If any item is missing you must note it on the delivery bill. You must also examine the condition of the parts. Never assume the parts are in good condition because the box is in good condition. If you do find damage to the parts, please physically write "Damaged" on the delivery bill. You will then accept the shipment as is, and notify us immediately. We may ask for pictures to verify damage has occurred. Once your box arrives, please note the labels placed on all of our boxes. These warning labels state to inspect all boxed contents for damage before signing.

3 If I don't notice damage upon delivery can I still return my part if I notice damage later? If you did not note damage upon delivery, the products cannot be returned to us. However, you may file a claim with the shipping company directly.

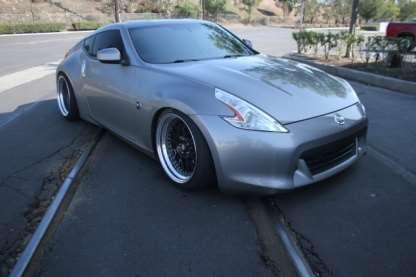
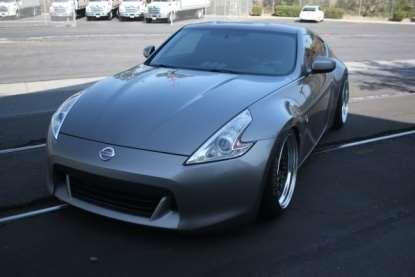
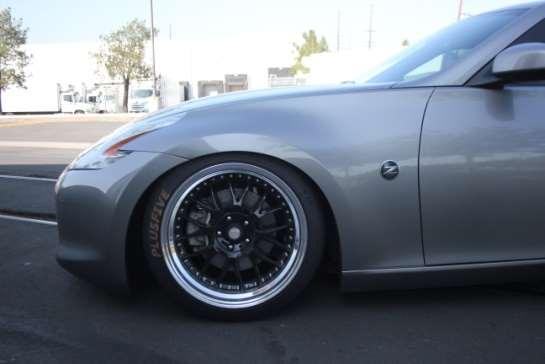
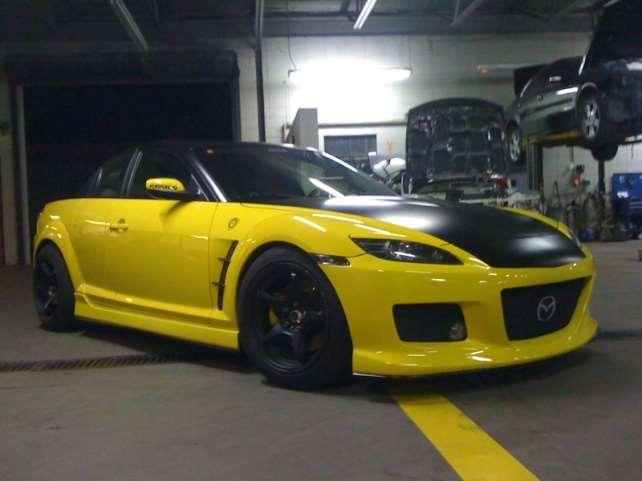
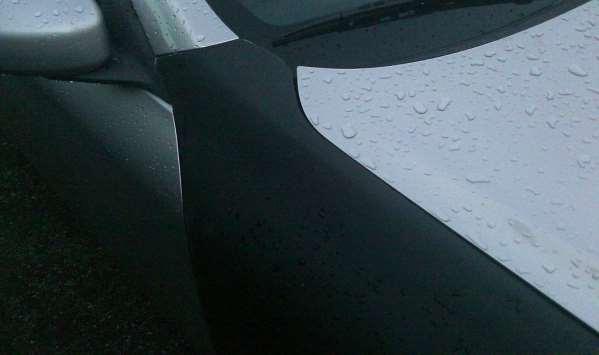
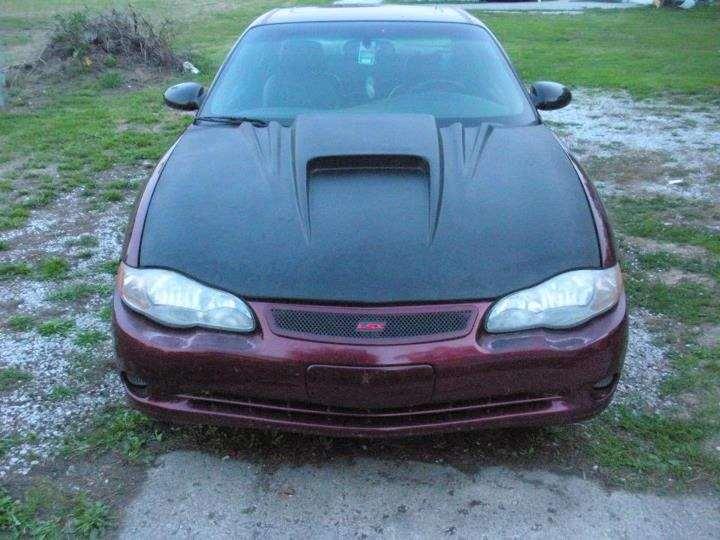
4 GENERAL INSTALLATION QUESTIONS Do you guarantee fitment? Due to the numerous variables involved with manufacturing aerodynamics and the condition of individual vehicles, we do not guarantee fitment. All our products are made to the closest OEM standards possible, but since they are all handmade, minor differences can occur. Fitment can be affected by many different variables, including vehicle collisions and incorrect installation. Should a fitment issue occur, please take multiple photos of the issue. These photos should include a close up of your concern as well as several different wide angle shots to showing the entire part. The part should be attached to the vehicle to show proper fitment issues. Please submit all photos to LMP for review. (Please see below for examples of proper photos needed for a claim)
5
6
7 Is it hard to install these products? We strongly recommend that all products are installed by a certified professional with extensive experience installing aftermarket aerodynamic products. The level of difficulty for installation varies for each application, and is dependent on the experience of the installer. Even though you might feel you have the experience and knowledge to install these products yourself, we do not recommend installation of these parts by anyone but a certified professional with extensive experience. What kind of body shop should I have this kit installed by? When looking for a body shop, look for one with extensive experience in aftermarket fiberglass aerodynamics installation. A body shop with 30 years experience in doing collision work but no experience in aftermarket body kits is not recommended. Ask to see examples of other finished vehicles to ensure that they really do have the experience they claim. Ask questions: - How many fiberglass parts do you install a month on average? - Is my install/ paint quote firm or subject to change? - How do you prepare the parts before paint? How much does it cost to paint and install these parts? Due to the numerous variables that could affect the cost of installation, we are unable to give you an exact quote. We strongly recommend you thoroughly research installers in your area and obtain several quotes. o fiberglass parts require any special preparation? Fiberglass aerodynamics will require paint preparation and will NOT be ready to paint out of the box. These products may require prepping such as, sanding, shaving, filling, or cutting. We HIGHLY recommend that a professional body shop with fiberglass body kit experience perform the installation. Do I need to remove the bumper reinforcement bar? Not in all cases. The removal of the reinforcement bar may be necessary for correct fitment of certain products. In some instances the reinforcement bar may not require removal or may just need to be trimmed. We strongly recommend that all parts are installed by a certified professional with extensive experience with aftermarket aerodynamic products. NOTE: Due to the strict regulations set forth by The Department of Transportation, all products are intended for off-road or show use only. Please check with your local law enforcement for rules and regulations in your area. Are fiberglass aerodynamic parts repairable? Yes, they are repairable and rebuildable. The amount of work that must go in to repairing damaged parts is dependent on the extent of the damage and the experience of the professional repairing the part. If it is a crack it can be repaired in minimal time but if the parts is broken into several pieces it will take more time to do so. Just as in a standard installation, we recommend all repairs be done by a certified professional with extensive experience in aftermarket fiberglass aerodynamics. NOTE: We recommend professional installation for all parts. All parts are installed at your own risk. If you notice the part is considerably off, please do not drill or modify in anyway, please take photos and start a customer service claim with LMP.
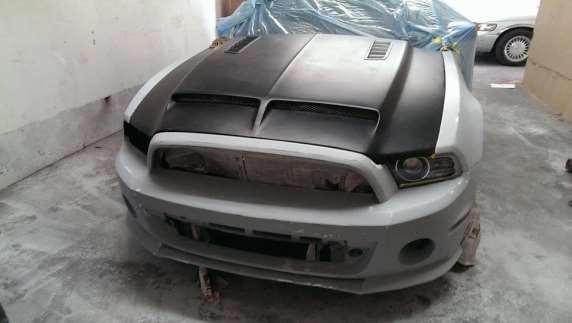
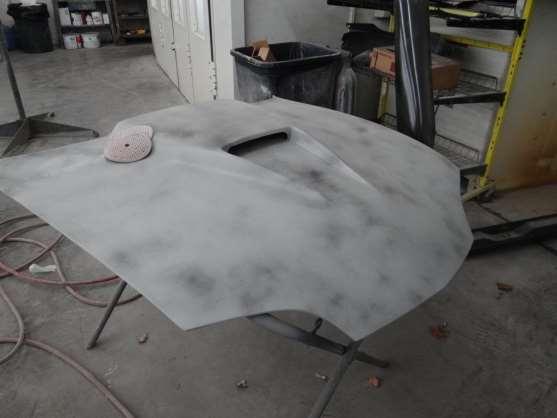
8 GENERAL GUIDELINES FOR INSTALLING YOUR NEW PARTS NOTE: ALL PARTS ARE INTENDED FOR SHOW AND OFF-ROAD USE ONLY. REMOVAL OF ANY FACTORY SAFETY COMPONENTS IS AT YOUR OWN RISK. Front Bumpers / Rear Bumpers: NOTE: SOME BUMPER REMOVAL/INSTALLATION MAY REQUIRE THE REMOVAL OF THE HEADLAMPS/TAILLAMPS. BE SURE TO DISCONNECT ANY AND ALL WIRING HARNESSES BEFORE THE REMOVAL OF THE HEADLAMPS/TAILLAMPS AND REATTACH THEM TO THE HEADLAMPS/TAILLAMPS AFTER THE INSTALLATION IS FINISHED. Inspect bumper for all bolts, screws and clips holding the bumper to the rest of the vehicle. (Make sure to have the proper tools for disassembly) Proceed to remove all fasteners and the actual bumper or bumper cover. As you start to test fit the new bumper, please make sure to inspect the section where the part will be placed to make sure nothing interferes with the installation (i.e. hanging wires, hoses, splash shields, etc.) Carefully proceed to install the new bumper, making sure that there is no interference from other components on the vehicle. Some installation will require removal or repositioning of factory components, including impact absorbers, reinforcement bars, horns, and/or fog lights. If any component is interfering with the installation, remove these components and proceed with test fitting the bumper (Make sure to reinstall all vital components back in their proper place or new location.) With the bumper mocked up in place, make sure it lines up properly with rest of the panels and lights of the vehicle. (Some areas of the bumper are purposely made with extra material to lower the risk of damage during transit. Some bumpers might need to be shaved or filed down in some areas to insure a good fitment.) When you are satisfied with the fitment, mark the holes needed for the installation and cut or drill accordingly. (Be very precise in marking holes, as this will determine the accuracy of the fitment to the other panels of the vehicle) After holes have been drilled, your part is now ready to be prepped for paint. Because of the characteristics of FRP composites, you would need to block (sand and fill, etc.) the whole bumper to ensure smooth and even application of paint. After the paint has dried, you are ready to install the bumper on to the vehicle. After part installation onto vehicle, you may wet sand the clear coat then buff to achieve proper shine. Check all other components that need to be attached to the new bumper. If other parts are preferred and will not attach to the new bumper, you will have to fabricate brackets or mounts to secure those parts.

9

10 Side Skirts: NOTE: SOME VEHICLES MAY NOT HAVE OEM SIDE SKIRTS/ROCKER PANELS, WHICH MAY BE REQUIRED FOR THE INSTALLATION OF CERTAIN AFTERMARKET PARTS. CHECK WITH YOUR SALES REPRESENTATIVE FOR FURTHER INFORMATION. Mock up the side skirt to confirm proper fitment. If the factory side skirt is interfering with the installation, removal may be necessary. If the side skirt looks a little short at the edges (where it wraps around the wheel well), you might be able to shave a little bit off the corner of the side skirt for a proper fit. Install the side skirt using screws on each end where it wraps around the wheel well. You may need to lift the car and take the wheels off for easier access. There are also a few other places to secure the side skirt, and this will depend on each individual style and application. Some might require screwing on to the factory rocker panels, the door jamb, or anywhere else that is not visible when the doors are closed. Some side skirts will have concave indentations for using rivets and can be filled over with body filler.

11

12 FRP Composite Fenders: NOTE: SOME FENDERS MAY REQUIRE REMOVAL OF THE HOOD, BUMPER, AND/OR SIDE SKIRTS DURING THE INSTALLATION PROCESS. Inspect the factory fender thoroughly. Make sure to check alignment and distance from adjacent panel to ensure proper installation and alignment of the aftermarket fender. Remove the factory fender and splash shield. Mock up the aftermarket fender and try to get it aligned as close to the original fender location as possible. Some fenders may need sanding, shaving, or cutting for proper fitment. After checking fitment, drill holes in the appropriate areas to ensure correct installation. Some applications may require additional or alternative mounting locations from the OEM fender. Install aftermarket fender and splash shield (if applicable), along with the rest of the parts that were uninstalled during the process. In each step reconfirm fitment to ensure changes do not occur. Check door and hood clearances, and make sure all fasteners are secure.
13

14 FRP Composite/Carbon FRP Composite Hoods: NOTE: SOME HOODS MAY REQUIRE THE REMOVAL AND REATTACHMENT OF THE OEM LATCH TO THE AFTERMARKET HOOD. PROPERLY INSTALLED HOOD PINS ARE RECOMMENDED ON ALL AFTERMARKET HOODS. Remove factory hood from the bolts at the end of the hinges. (Do not remove the hinges) Install new aftermarket hood by reverse process. Tighten bolts to just enough torque to hold the hood in place, but lose enough to be adjusted by a tug. Close hood and check alignment. If the hood is not aligned properly, adjust bolts accordingly at the hinges and/or latch.
15
Seibon Carbon Fenders Installation Guide
 Seibon Carbon Fenders Installation Guide Important: professional installation by an experienced carbon fiber/fiberglass expert is STRONGLY recommended. Installation may require specialty tools and equipment.
Installation Instructions
 Mar 13, 2018 1955-1957 Chevy Smooth Firewall Part number 81511 Installation Instructions The following instructions are intended for professional installers and are guidelines only. Speedtech Performance
350Z GT Aero Front Bumper
 GReddy AERO KIT 350Z GT Aero Front Bumper Installation Manual About this Instruction Manual IMPORTANT Please read these instructions before installation. This is for installation on a stock vehicle. Please
PERMA ROLL 75. installation instructions Automatic Roll-up Door. note:
 p PERMA TECH, INC. 363 hamburg street buffalo, new york 14204 phone: (716) 854 0707 fax: (716) 854 0774 1 800 362 7325 www.permatechinc.com PERMA ROLL 75 installation instructions Automatic Roll-up Door
2236 Sway Bar Installation Instructions
 2236 Sway Bar Installation Instructions Thank you for your purchase of this Hotchkis Performance product. Your stabilizer bar set was designed with the performance and durability you ve come to expect
Installation Instructions and Suggestions For Jeep YJ Fiberglass Replacement Bodies
 Installation Instructions and Suggestions For Jeep YJ Fiberglass Replacement Bodies Getting started with the removal of your existing Jeep body. Trust nothing to memory; take photos of everything at different
4007 (Coupe) / 4008 (Convertible) Subframe Connectors Camaro/Firebird
 / 4008 (Convertible) Subframe Connectors Camaro/Firebird") 4007 (Coupe) / 4008 (Convertible) Subframe Connectors 67-69 Camaro/Firebird Thank you for your purchase from our new line of F-Body parts. Please call us at (877) 4NO - ROLL if you have any questions regarding
4007 (Coupe) / 4008 (Convertible) Subframe Connectors 67-69 Camaro/Firebird Thank you for your purchase from our new line of F-Body parts. Please call us at (877) 4NO - ROLL if you have any questions regarding
4007/4008/ Camaro/Firebird. Please read the following key points before installing this kit.
 Please read the following key points before installing this kit. 1 Before performing the subframe connector installation, the vehicle must be completely assembled with all body and component parts installed
Feb 22, 2018 '67-69 Camaro & '68-74 Nova Bumpsteer Adjustment Kit
 Feb 22, 2018 '67-69 Camaro & '68-74 Nova Bumpsteer Adjustment Kit 10552 The following instructions are intended for professional installers. Speedtech Performance assumes NO responsibility for the installation
PRESENT, FORD TRANSIT, FRONT TOW POINT Version 1.0
 4039 2013-PRESENT, FORD TRANSIT, FRONT TOW POINT Version 1.0 General Notes For the most up to date and current instructions, please visit our website at www.vancompass.com Please read all instructions
4007/4008/ Camaro/Firebird. Please read the following key points before installing this kit.
 Please read the following key points before installing this kit. 1 Before performing the subframe connector installation, the vehicle must be completely assembled with all body and component parts installed
'64-72 Chevelle/ A Body Rear Coilover Conversion Kit
 Nov 3, 2017 '64-72 Chevelle/ A Body Rear Coilover Conversion Kit Includes instructions for Currie Brand Axles The following instructions are intended for professional installers and are guidelines only.
1912F/ 1913F FRONT COIL SPRINGS 97-UP DODGE DAKOTA / DURANGO
 1912F/ 1913F FRONT COIL SPRINGS 97-UP DODGE DAKOTA / DURANGO Thank you for purchasing from our fine line of Dodge Dakota/Durango suspension parts. If you have any questions regarding the service and installation
Camaro / Firebird. Please read the following key points before installing this kit.
 Please read the following key points before installing this kit. 1 Before performing the subframe connector installation, the vehicle must be completely assembled with all body and component parts installed
Chicane Coilover Kit For '64 to '72 Chevelle/ A Body. Installation Instructions
 Nov 3, 2017 Chicane Coilover Kit For '64 to '72 Chevelle/ A Body Installation Instructions Actual parts may vary from photo depending on application. 1 P a g e The following instructions are intended for
TOYOTA TUNDRA 3 BODY LIFT INSTALLATION INSTRUCTIONS 2014 KIT# 5643
 3651 N Highway 89 Chino Valley, AZ 86323 (928) 636-7080 www.p-a-g.net TOYOTA TUNDRA 3 BODY LIFT INSTALLATION INSTRUCTIONS 2014 KIT# 5643 Installation of a Performance Automotive Group body lift kit will
REAR SWAY BAR 2207R GM CAMARO/FIREBIRD
 REAR SWAY BAR 2207R 67-69 GM CAMARO/FIREBIRD Thank you for your purchase of this Hotchkis Performance product. Your stabilizer bar set was designed with the performance and durability you ve come to expect
, (877) MON-FRI 7AM-4PM PST OR WEBSITE: ReadyLIFT.COM
 MON-FRI 7AM-4PM PST OR WEBSITE: ReadyLIFT.COM") 66-2725, 66-2726 IF your ReadyLIFT product has a damaged or missing part, please contact customer service directly and a new replacement part will be sent to you immediately. For warranty issues, please
66-2725, 66-2726 IF your ReadyLIFT product has a damaged or missing part, please contact customer service directly and a new replacement part will be sent to you immediately. For warranty issues, please
JL Wrangler/Sahara/Sport
 IF your ReadyLIFT product has a damaged or missing part, please contact customer service directly and a new replacement part will be sent to you immediately. For warranty issues, please return to the place
(877) MON-FRI 7AM-5PM PST OR WEBSITE: ReadyLIFT.COM **Please retain this document in your vehicle at all times**
 MON-FRI 7AM-5PM PST OR WEBSITE: ReadyLIFT.COM **Please retain this document in your vehicle at all times**") IF YOUR ReadyLIFT PRODUCT IS MISSING A OR HAS A DAMAGED PART, PLEASE CONTACT CUSTOMER SERVICE DIRECTLY. For warranty issues please return to the place of installation and contact ReadyLIFT. A NEW REPLACEMENT
IF YOUR ReadyLIFT PRODUCT IS MISSING A OR HAS A DAMAGED PART, PLEASE CONTACT CUSTOMER SERVICE DIRECTLY. For warranty issues please return to the place of installation and contact ReadyLIFT. A NEW REPLACEMENT
Anti-roll bar set Chrysler Magnum, Charger, 300C, SRT Dodge Challenger
 Anti-roll bar set 22101 Chrysler Magnum, Charger, 300C, SRT-8 22107 Dodge Challenger Thank you for your purchase from our new line of Chrysler parts. Please call us at (877) 4NO-ROLL if you have any questions
Sport Sway Bar Kit (22425) Scion tc
 Scion tc") Sport Sway Bar Kit (22425) Scion tc Thank you for your purchase from our new line of Scion tc parts. Please call us at (877) 4NO - ROLL if you have any questions regarding the service or installation of
Sport Sway Bar Kit (22425) Scion tc Thank you for your purchase from our new line of Scion tc parts. Please call us at (877) 4NO - ROLL if you have any questions regarding the service or installation of
Z1 Motorsports 370Z/G37 Oil Cooler Kit Installation Manual
 Z1 Motorsports 2877 Carrollton Villa Rica Hwy Carrollton GA 30116 770.838.7777 Z1 Motorsports 370Z/G37 Oil Cooler Kit Installation Manual For 19, 25 and 34 Row Oil Cooler Kits Parts Included: 1 SETRAB
Chicane Coilover Kit For '70 to '81 Camaro/Firebird
 Nov 25, 2013 Chicane Coilover Kit For '70 to '81 Camaro/Firebird 1 P a g e Installation Instructions The following instructions are intended for professional installers and are guidelines only. Speedtech
Please read the following key points before installing this kit.
 Please read the following key points before installing this kit. 1 Before performing the subframe connector installation, the vehicle must be completely assembled with all body and component parts installed
INSTALLATION INSTRUCTIONS
 COLD AIR INTAKE INSTALLATION INSTRUCTIONS PART NUMBER D760-0390C APPLICATION: 1999-2003 E39 M5 PARTS LIST 1 Left Aluminum Intake Tube 1 Air Pump Bracket (A) 1 Right Aluminum Intake Tube 1 Air Pump Bracket
JBR MAZDASPEED
 Page1 james Barone Racing Aftermarket Parts and Accessories JBR 2007 2009 MAZDASPEED 3 Front Mount Intercooler Piping Kit Installation Instructions for TR8 Intercooler Tooling: o Jack, Jack Stands, Ramps
(877) MON-FRI 7AM-5PM PST OR WEBSITE: ReadyLIFT.COM **Please retain this document in your vehicle at all times**
 MON-FRI 7AM-5PM PST OR WEBSITE: ReadyLIFT.COM **Please retain this document in your vehicle at all times**") IF your ReadyLIFT product has a damaged or missing part, please contact customer service directly. For warranty issues please return to the place of installation and contact ReadyLIFT. A NEW REPLACEMENT
IF your ReadyLIFT product has a damaged or missing part, please contact customer service directly. For warranty issues please return to the place of installation and contact ReadyLIFT. A NEW REPLACEMENT
MS Chevy Trucks Blazers/Jimmys Hood Hinge Installation Instructions
 1 MS149-28 81-87 Chevy Trucks 81-91 Blazers/Jimmys Hood Hinge Installation Instructions We would like to take this opportunity to THANK YOU for purchasing EDDIE MOTORSPORTS products. We welcome any comments
(877) MON-FRI 7AM-5PM PST OR WEBSITE: ReadyLIFT.COM **Please retain this document in your vehicle at all times**
 MON-FRI 7AM-5PM PST OR WEBSITE: ReadyLIFT.COM **Please retain this document in your vehicle at all times**") IF your ReadyLIFT product has a damaged or missing part, please contact customer service directly. For warranty issues please return to the place of installation and contact ReadyLIFT. A NEW REPLACEMENT
IF your ReadyLIFT product has a damaged or missing part, please contact customer service directly. For warranty issues please return to the place of installation and contact ReadyLIFT. A NEW REPLACEMENT
78-88 G Body Rear Trailing Arm Kit
 May 14, 2014 78-88 G Body Rear Trailing Arm Kit Parts in this kit may vary slightly from photo. The following instructions are intended for professional installers and are guidelines only. Speedtech Performance
'64-72 Chevelle/ A Body Rear Coilover Conversion Kit
 February 3, 2014 '64-72 Chevelle/ A Body Rear Coilover Conversion Kit Includes instructions for Currie Brand Axles The following instructions are intended for professional installers and are guidelines
2010 to 2013 Toyota 4runner Rear bumper installation instructions:
 2010 to 2013 Toyota 4runner Rear bumper installation instructions: Note: This is one of the most difficult bumpers we product to install. The installation of this bumper requires cutting of the current
97-02 JEEP TJ BODY LIFT KIT INSTRUCTIONS
 92RC60500 97-02 JEEP TJ BODY LIFT KIT INSTRUCTIONS Congratulations on your purchase of a new Rough Country 2 /3 Body Lift. We are committed to providing you with the best product available for the best
Sport Coil Springs set # Cadillac CTS
 Sport Coil Springs set # 1979 2003+ Cadillac CTS Thank you for your purchase from our new line of CTS parts. Please call us at (877) 4NO-ROLL if you have any questions regarding the service or installation
Installation Instructions
 Instructions Created by an: Samurai Rear Diamond Plate Corners (Pre-bent) (SKU# SEB-RDP) Installation Instructions CAUTION: Safety glasses should be worn at all times when working with vehicles and related
FRONT BAR INSTRUCTIONS
 2228, 2229, 2230, 2231 & 2232 Sway Bar Installation Instructions. 99+ Chevrolet Silverado/GMC Seirra Pickups FRONT BAR INSTRUCTIONS *NOTICE HOW THE STOCK SWAY BAR LOOKS i.e. BRACKET PLACEMENT, BENDS, etc.
Sport Coil Springs (19425) Scion tc
 Scion tc") Sport Coil Springs (19425) Scion tc Thank you for your purchase from our new line of Scion tc parts. Please call us at (877) 4NO-ROLL if you have any questions regarding the service or installation of
Sport Coil Springs (19425) Scion tc Thank you for your purchase from our new line of Scion tc parts. Please call us at (877) 4NO-ROLL if you have any questions regarding the service or installation of
2015+ SUBARU STI FRONT-MOUNT INTERCOOLER PARTS LIST AND INSTALLATION GUIDE INSTALL DIFFICULTY DISCLAIMER CAUTION INSTALL PROCEDURE TOOLS NEEDED
 PARTS LIST AND PARTS INCLUDED 1PC ALUMINUM INTAKE PIPE 1PC BAR-AND-PLATE INTERCOOLER 1PC STEEL CRASH BAR W/ MOUNTING HARDWARE 2PC HOT-SIDE INTERCOOLER PIPES 2PC COLD-SIDE INTERCOOLER PIPES 1PC BPV FLANGE
Sport Sway Bar Kit VW Golf (GTI ), Jetta
, Jetta") Sport Sway Bar Kit 22813 VW Golf (GTI ), Jetta Thank you for your purchase from our new line of VW parts. Please call us at (877) 4NO - ROLL if you have any questions regarding the service or installation
Sport Sway Bar Kit 22813 VW Golf (GTI ), Jetta Thank you for your purchase from our new line of VW parts. Please call us at (877) 4NO - ROLL if you have any questions regarding the service or installation
Installation Instructions
 Nov 25, 2013 Custom Bent Brake Line Kit '67-'69 Camaro and '68-'74 Nova Installation Instructions The following instructions are intended for professional installers and are guidelines only. Speedtech
Savvy Off Road Front Bumper TJ/LJ
 Savvy Off Road Front TJ/LJ 1997-2006 Thank you for the purchase of our Front. Our front bumpers are available in two thicknesses 3/16 and 1/4 to suit your off-road needs. They are made from 6061-T6 aluminum
Sport Sway Bar Kit C-10 Truck
 Sport Sway Bar Kit 22108 67-72 C-10 Truck Thank you for your purchase from our new line of Chevy parts. Please call us at 877-4NO - ROLL if you have any questions regarding the service or installation
Copyright 1998 Inter-Industry Conference On Auto Collision Repair v.4.0
 Uniform Procedures For Collision Repair HO21S Hood 1. Description This procedure describes the repair and replacement of a steel hood. Inspection and evaluation requirements are also included. 2. Purpose
Installation Instructions and Warranty Information
 Installation Instructions and Warranty Information 1999 2003 Ford SuperDuty Truck and Excursion Part# 1669S, 1669S-1, 1669S-2 Read all instructions carefully before attempting installation. Rev. 10/05
Anti-roll bar set (pn 2278) Pontiac GTO
 Pontiac GTO") Anti-roll bar set (pn 2278) Pontiac GTO Thank you for your purchase from our new line of GTO parts. Please call us at (877) 4NO-ROLL if you have any questions regarding the service or installation of your
Anti-roll bar set (pn 2278) Pontiac GTO Thank you for your purchase from our new line of GTO parts. Please call us at (877) 4NO-ROLL if you have any questions regarding the service or installation of your
INSTALLATION GUIDE Front Bumper. KL Cherokee (Trailhawk)
") INSTALLATION GUIDE Front Bumper KL Cherokee (Trailhawk) Included Hardware: Sample Sample Sample Skill Level: 5/5 stars (Professional install recommended) Disclaimer Expedition One is not responsible for
INSTALLATION GUIDE Front Bumper KL Cherokee (Trailhawk) Included Hardware: Sample Sample Sample Skill Level: 5/5 stars (Professional install recommended) Disclaimer Expedition One is not responsible for
Rear Suspension System C-10 Pickup Truck
 Rear Suspension System 18390 67-72 C-10 Pickup Truck Thank you for your purchase from our new line of Chevy parts. Please call us at 877-4NO - ROLL if you have any questions regarding the service or installation
1107 Tubular Upper A-Arms Camaro/Firebird
 1107 Tubular Upper A-Arms 67-69 Camaro/Firebird Thank you for your purchase from our new line of F-Body parts. Please call us at (877) 4NO - ROLL if you have any questions regarding the service or installation
(2) 12mm x 35mm Single Bolt Plates. (2) 12mm x 30mm Double Bolt Plates
 12mm x 35mm Single Bolt Plates. (2) 12mm x 30mm Double Bolt Plates") PARTS LIST: 1 Bull Bar 6 12mm x 24mm OD x 2.5mm Flat Washers 1 Driver/Left Mounting Bracket 6 12-1.75mm Nylon Lock Nuts 1 Passenger/Right Mounting Bracket 4 10-1.50mm x 30mm Hex Bolts 2 12mm x 30mm Double
PARTS LIST: 1 Bull Bar 6 12mm x 24mm OD x 2.5mm Flat Washers 1 Driver/Left Mounting Bracket 6 12-1.75mm Nylon Lock Nuts 1 Passenger/Right Mounting Bracket 4 10-1.50mm x 30mm Hex Bolts 2 12mm x 30mm Double
INSTALLATION INSTRUCTIONS
 INSTALLATION INSTRUCTIONS SWAY BAR KITS # 2205 & 2206 Thank you for your purchase. Please call us at (562) 907-7757 if you have any questions about your Hotchkis Performance product. HOTCHKIS PERFORMANCE
Installation Instructions for the F2B Pedal Bracket Kit
 Installation Instructions for the F2B Pedal Bracket Kit A. General Information 1. Before you begin, familiarize yourself with this installation procedure. It is assumed that the installer is an experienced
(800) MON-FRI 7AM-5PM PST OR WEBSITE: ReadyLIFT.COM **Please retain this document in your vehicle at all times**
 MON-FRI 7AM-5PM PST OR WEBSITE: ReadyLIFT.COM **Please retain this document in your vehicle at all times**") IF YOUR ReadyLIFT PRODUCT IS MISSING A OR HAS A DAMAGED PART, PLEASE CONTACT CUSTOMER SERVICE DIRECTLY. For warranty issues please return to the place of installation and contact ReadyLIFT. A NEW REPLACEMENT
IF YOUR ReadyLIFT PRODUCT IS MISSING A OR HAS A DAMAGED PART, PLEASE CONTACT CUSTOMER SERVICE DIRECTLY. For warranty issues please return to the place of installation and contact ReadyLIFT. A NEW REPLACEMENT
INSTRUCTIONS
 INSTRUCTIONS 910-34489 SOCALOOK RADIUS ROD BRACKET ASSEMBLY One side only/repeat for opposite side. Figure 1 STEP 1. LOCATING RADIUS ROD BRACKETS From under the vehicle, remove the 2 bolts that secure
INSTALLATION OF HOTCHKIS FRONT STABILIZER BAR
 22441 FRONT AND REAR SPORT SWAY BAR SET Infiniti G37/S Coupe & G35/S Sedan Thank you for your purchase from our Hotchkis line of suspension parts. Please call us at (877) 4NO-ROLL if you have any questions
94-96 Impala SS/ B-Body Rear Coilover Conversion Kit
 January 29, 2014 94-96 Impala SS/ B-Body Rear Coilover Conversion Kit The following instructions are intended for professional installers and are guidelines only. Speedtech Performance assumes NO responsibility
(800) MON-FRI 7AM-5PM PST OR WEBSITE: ReadyLIFT.COM **Please retain this document in your vehicle at all times**
 MON-FRI 7AM-5PM PST OR WEBSITE: ReadyLIFT.COM **Please retain this document in your vehicle at all times**") IF YOUR ReadyLIFT PRODUCT IS MISSING A OR HAS A DAMAGED PART, PLEASE CONTACT CUSTOMER SERVICE DIRECTLY. For warranty issues please return to the place of installation and contact ReadyLIFT. A NEW REPLACEMENT
IF YOUR ReadyLIFT PRODUCT IS MISSING A OR HAS A DAMAGED PART, PLEASE CONTACT CUSTOMER SERVICE DIRECTLY. For warranty issues please return to the place of installation and contact ReadyLIFT. A NEW REPLACEMENT
FR11S Fender, Welded-On
 Uniform Procedures For Collision Repair UPCR FR11S Fender, Welded-On 1. Description This procedure describes the repair and complete replacement of a welded-on steel fender. Inspection and evaluation requirements
2002 CHEVY AVALANCHE INSTALLATION INSTRUCTIONS - KIT #PA10073
 WARNING This body lift kit should only be installed on vehicles in good working condition. Before installation, the vehicle should be thoroughly inspected for evidence of corrosion or deformation of the
Index. Page Number Section
 S H O C K S Index Page Number Section 1-4 GM Front Coil Over Installation 5-7 Front Smooth Body Shock Installation 7-8 Rear Smooth Body Shock Installation 8-11 Custom Coil Over Installation 12 Tuning and
2282R GM A Body Extreme Rear Sway Bar
 2282R 1964-1972 GM A Body Extreme Rear Sway Bar Thank you for your purchase from our new line of GM parts. Please call us at (877) 4NO - ROLL if you have any questions regarding the service or installation
Remove the 3-11mm nuts holding mirror on. Don t drop the nuts!
 2005-2012 Ford Mustang Puddle Lamp Kit Parts List: Quantity: Tool List: LED Lamps 2 Flat head screwdriver Seals 2 Ratchet & Socket set OR Nuts 2 Adjustable Wrench Wiring harness 1 Drill & 11/16 th bit
ECO# 1801 REVISION# 000 ES DATE
 SmokeShield Elevator ECO# 1801 REVISION# 000 ES 10-458 DATE 08/25/2018 ECO# 1801 REVISION# 000 ES 10-458 DATE 08/25/2018 Section 1 Table of Contents Section 2 Safety Check List 2 Section 3 Freight Receiving
(877) MON-FRI 7AM-5PM PST OR WEBSITE: ReadyLIFT.COM **Please retain this document in your vehicle at all times**
 MON-FRI 7AM-5PM PST OR WEBSITE: ReadyLIFT.COM **Please retain this document in your vehicle at all times**") IF YOUR ReadyLIFT PRODUCT IS MISSING A OR HAS A DAMAGED PART, PLEASE CONTACT CUSTOMER SERVICE DIRECTLY. For warranty issues please return to the place of installation and contact ReadyLIFT. A NEW REPLACEMENT
IF YOUR ReadyLIFT PRODUCT IS MISSING A OR HAS A DAMAGED PART, PLEASE CONTACT CUSTOMER SERVICE DIRECTLY. For warranty issues please return to the place of installation and contact ReadyLIFT. A NEW REPLACEMENT
HAVING INSTALLATION QUESTIONS? CALL TECHNICAL SUPPORT AT
 9/23/2009 1 of 6 ITEM 1 QTY 8 Parts List PART NUMBER DESCRIPTION 3/8" CONICAL TOOTHED WASHER TOOLS REQUIRED #2 PHILLIPS SCREWDRIVER #2 STUBBY SCREWDRIVER 8mm SOCKET 13mm SOCKET RATCHET 12" EXTENSION TORQUE
FORD RANGER/SPLASH MAZDA B-SERIES (2&4WD, STANDARD & EXT. CAB) 3 BODY LIFT KIT INSTALLATION INSTRUCTIONS KIT# 853
 3 BODY LIFT KIT INSTALLATION INSTRUCTIONS KIT# 853") 3651 N Highway 89 Chino Valley, AZ 86323 (928) 636-7080 www.p-a-g.net FORD RANGER/SPLASH MAZDA B-SERIES (2&4WD, STANDARD & EXT. CAB) 3 BODY LIFT KIT INSTALLATION INSTRUCTIONS 1995-1997 KIT# 853 Installation
3651 N Highway 89 Chino Valley, AZ 86323 (928) 636-7080 www.p-a-g.net FORD RANGER/SPLASH MAZDA B-SERIES (2&4WD, STANDARD & EXT. CAB) 3 BODY LIFT KIT INSTALLATION INSTRUCTIONS 1995-1997 KIT# 853 Installation
Please Read Instructions Completely Before Starting Your Installation QTY. PART NO. DESCRIPTION
 INSTRUCTIONS 916-31926 Master Cylinder and Pedal Assembly Speedway Motors, Inc. 2015 Master Cylinder and Pedal Assembly Model T Model A, and '32 Fords The master cylinder is suitable for 4-wheel disc or
INSTALLATION INSTRUCTIONS
 AUTOMOTIVE PRODUCTS, INSTALLATION INSTRUCTIONS ULTIMATE BULL BAR APPLICATION: 2003-2014 Ford Expedition 2007-2014 Ford Expedition EL 2003-2014 Lincoln Navigator L 2/4WD 2009-2014 Ford F-150 2015-2017 Ford
COLD AIR INTAKE INSTALLATION INSTRUCTIONS
 COLD AIR INTAKE INSTALLATION INSTRUCTIONS # D760-0030 Fits: 2007-10 135i (E82, E88; with N54 engine) 2007-08 335i/xi (E90) 2007-10 335i (E92, E93; with N54 engine) Congratulations for being selective enough
Sport Coil Springs Dodge Magnum, Chrysler 300C Dodge Challenger SRT Dodge Challenger R/T
 Sport Coil Springs 19101 - Dodge Magnum, Chrysler 300C 19107 - Dodge Challenger SRT-8 19108 - Dodge Challenger R/T Thank you for your purchase from our new line of Magnum/300C parts. Please call us at
Toyota Tacoma Winch Mount Bumper Installation Instructions Tools Required: Transmission cooler relocation brackets Torque Wrench
 2016-2017 Toyota Tacoma Winch Mount Bumper Installation Instructions Tools Required: Items Included: Small flat head screw driver Winch Mount Ratchet, 10mm, 12mm, 14mm, 17mm & Skid Plate 19mm sockets Transmission
" CHEVY / GMC WD BASIC KIT
 84302 2007-2013 6" CHEVY / GMC 1500 4WD BASIC KIT 100% Bolt On 6 Spindle Kit Front Differential Is Dropped A Full 6 To Maintain Proper CV Axle Angles Impact Struts To Distribute Front Suspension Impact
Rear Sway Bar Kit 22390R C-10 Truck
 Rear Sway Bar Kit 22390R 67-72 C-10 Truck Thank you for your purchase from our new line of Chevy parts. Please call us at 877-4NO - ROLL if you have any questions regarding the service or installation
Tubular Lower A-Arms GM A-Body Tubular Lower A-Arms GM F-Body
 1104 - Tubular Lower A-Arms 64-72 GM A-Body 1108 - Tubular Lower A-Arms 70-81 GM F-Body Tubular Lower A-Arms: Thank you for your purchase from our new line of A-Body parts. Please call us at (877) 4NO
metric BOlTS: 42 ft/lbs.
 Subaru Outback 11-13 TP20272,Rev.1 BOlT TORQuE SPECIfICATIONS STANDARD BOlTS: Size grade Torque 5/16 5 20 ft/lbs. 3/8 5 35 ft/lbs. 7/16 5 56 ft/lbs. 1/2 5 85 ft/lbs. metric BOlTS: Size 8mm 10mm 12mm 14mm
INSTALLATION INSTRUCTIONS Horizon CCR HZ13054
 INSTALLATION INSTRUCTIONS Horizon CCR HZ13054 IMPORTANT: PLEASE GIVE CUSTOMER ENCLOSED INFORMATION! Thank you for your purchase of our HeliBars. They are designed to increase your long distance comfort
R O A D M A S T E R, I N C.
 R O A D M A S T E R, I N C. 5 6 7 16 8 10 9 14 15 4 ITEM QTY NAME MATERIAL 1...2... 1/2 x 6 BOLT... 305109-00 2...3... 1/2 HEX NUT... 350258-00 3...3... 1/2 LOCK WASHER... 350309-00 4...1... 1/2 x 1 1/2
XJ CHEROKEE LIFT KIT
 921633XN200 Thank you for choosing Rough Country for your suspension needs. 84-01 4.5 XJ CHEROKEE LIFT KIT Rough Country recommends a certified technician installs this system. In addition to these instructions,
2000+ Silverado x4 P/N 2230
 2000+ Silverado 1500 4x4 P/N 2230 Thank you for your purchase of this Hotchkis product. Your Hotchkis Sway Bars were designed with the performance and durability you ve come to expect from Hotchkis Performance.
1401 / 1402 / 1403 ADJUSTABLE TRAILING ARM MOUNT BRACES INSTALLATION OF HOTCHKIS PERFORMANCE ADJUSTABLE TRAILING ARM MOUNT BRACES
 1401 / 1402 / 1403 ADJUSTABLE TRAILING ARM MOUNT BRACES 1401 78-88 GM A/G-BODY / 1402 68-72 GM A-BODY / 1403 64-67 GM A-BODY Thank you for your purchase. Please call us at (562) 907-7757 if you have any
R O A D M A S T E R, I N C.
 R O A D M A S T E R, I N C. 11 7 6 1 2 10 13 8 ITEM QTY NAME PART # 1...2...1/2 x 5 1/2 BOLT...350108-00 2...4...1/2 x 1 3/4 BOLT...350096-00 3...6...1/2 LOCK WASHER...350309-00 4...6...1/2 HEX NUT...350258-00
MOVE ON TO THE REAR BAR INSTALLATION
 22410 STREET SWAY BAR SET 2001-UP LEXUS IS300 Thank you for your purchase from our line of Lexus parts. Please call us at (877) 4NO-ROLL if you have any questions regarding the service or installation
Sport Sway Bar Kit C-10 Truck
 Sport Sway Bar Kit 22390 67-72 C-10 Truck Thank you for your purchase from our new line of Chevy parts. Please call us at 877-4NO - ROLL if you have any questions regarding the service or installation
Front Axle Assembly: Hairpin Radius Rods
 INSTRUCTIONS 916-395 *916-395* August 2011, Speedway Motors, Inc. Front Axle Assembly: Hairpin Radius Rods This radius rod front end kit is used with OEM or aftermarket tube or I-beam axles that use a
metric BOlTS: 42 ft/lbs.
 Nissan Sentra 04-10 TP20276,Rev.0 Pin height - 12-1/2 Centers - 20-1/2 BOlT TORQuE SPECIfICATIONS STANDARD BOlTS: Size grade Torque 5/16 5 20 ft/lbs. 3/8 5 35 ft/lbs. 7/16 5 56 ft/lbs. 1/2 5 85 ft/lbs.
P/N# Performance Lowering Springs Installation Instructions
 P/N# 19391 Performance Lowering Springs Installation Instructions Thank you for your purchase of this Hotchkis Performance product. Your Lowering Spring set was designed with the performance and durability
VTCM Installation Manual Table of Contents
 VTCM Installation Manual Table of Contents 1. Introduction:... 2 2. Disclaimer:... 2 3. Software / Drivers:... 2 a. Plugging in the controller:... 2 b. Install 4.0.NET Frame work:... 3 c. Install COM port
Installation Instructions
 Nov 3, 2017 G-Body Rear Coilover Conversion Kit 1 P a g e Installation Instructions The following instructions are intended for professional installers and are guidelines only. Speedtech Performance assumes
INSTALLATION INSTRUCTIONS FOR: RE1132 EXTREME-DUTY SWAY BAR DISCONNECT KIT JEEP WRANGLER JK w/2.5-6 LIFT
 \ Revised RUBICON EXPRESS 1900 El CAMINO AVE., SACRAMENTO, CA. 95815 866-533-7706, www.rubiconexpress.com INSTALLATION INSTRUCTIONS FOR: RE1132 EXTREME-DUTY SWAY BAR DISCONNECT KIT JEEP WRANGLER 2007-2013
1109 Tubular Lower A-Arms Camaro/Firebird
 1109 Tubular Lower A-Arms 67-69 Camaro/Firebird Tubular Lower A-Arms: Thank you for your purchase from our new line of F-Body parts. Please call us at (877) 4NO - ROLL if you have any questions regarding
Anti-Roll Bar Set # 2279, Cadillac CTS V6 & CTS-V
 Anti-Roll Bar Set # 2279, 2280 2003+ Cadillac CTS V6 & CTS-V Thank you for your purchase from our new line of CTS parts. Please call us at (877) 4NO-ROLL if you have any questions regarding the service
2015 & 2018 Fender Brace Installation Instructions
 2015 & 2018 Fender Brace Installation Instructions Thank you for your purchase of this Hotchkis Performance product. Your Fender Brace set was designed with the performance and durability you ve come to
Installation Manual Clayton Off Road Suspension: XJ 6.5 Coil Conversion Long Arm Lift Kit Jeep Cherokee Last Revision No.: 3/1/11 PN
 Thank you for purchasing a Clayton Off Road suspension. Please check to make sure you have all necessary parts before you start your install. XJ 8.0 Coil 1100107 3 Link Bridge W/mount 1100108 Front Spring
16385 Steering Tie Rods Chrysler A-Body
 16385 Steering Tie Rods 1967-76 Chrysler A-Body Before You Start: Thank you for your purchase from our new line of B & E-Body parts. Please call us at (877) 4NO - ROLL if you have any questions regarding
2010 Toyota Prius Fog Light Retrofit
 2010 Toyota Prius Fog Light Retrofit A DIY prospective Last updated: Friday, December 25, 2009 *** Disclaimer Use this document and its contents at your own risk! *** Forward: This document was compiled
(877) MON-FRI 7AM-5PM PST OR WEBSITE: ReadyLIFT.COM **Please retain this document in your vehicle at all times**
 MON-FRI 7AM-5PM PST OR WEBSITE: ReadyLIFT.COM **Please retain this document in your vehicle at all times**") IF YOUR ReadyLIFT PRODUCT IS MISSING A OR HAS A DAM- AGED PART, PLEASE CONTACT CUSTOMER SERVICE DIRECTLY. For warranty issues please return to the place of installation and contact ReadyLIFT. A NEW REPLACEMENT
IF YOUR ReadyLIFT PRODUCT IS MISSING A OR HAS A DAM- AGED PART, PLEASE CONTACT CUSTOMER SERVICE DIRECTLY. For warranty issues please return to the place of installation and contact ReadyLIFT. A NEW REPLACEMENT
INSTALLATION INSTRUCTIONS
 AUTOMOTIVE PRODUCTS, INSTALLATION INSTRUCTIONS ULTIMATE BULL BAR APPLICATION: 2009-2018 Dodge Ram 1500 (Excl. Rebel Model) 2019 Dodge Ram 1500 Classic PART NUMBER: 32-1960, 32-1965, 32-1960L, 32-1965L
* APPLICATION MODELS VARY. WE RECOMMEND TO VERIFY FITMENT BEFORE BEGINNING INSTALLATION PROCESS.
 Parts included (1) Main Grille Polished - Part #6214760 OR Black - Part #6214761 Hardware included (8) - #8 x 3/4 Black Screws (8) - #8 Flat Nuts (3) Push Nut Retainer Clips START HERE PLEASE READ AND
INSTALLATION INSTRUCTIONS FOR: JL7134 JL 2 DOOR & 4 DOOR 2.0 SPACER KIT
 RUBICON EXPRESS 1900 EL CAMINO AVE, SACRAMENTO, CA 95815 866-533-7706, www.rubiconexpress.com INSTALLATION INSTRUCTIONS FOR: JL7134 JL 2 DOOR & 4 DOOR 2.0 SPACER KIT Safety Warning: Suspension systems
SUPERLIFT 2.5 Level-It for 2014 RAM 2500 and / RAM 3500 (with Radius Arm Front Suspension) INSTALLATION INSTRUCTIONS
 INSTALLATION INSTRUCTIONS") FORM#40023.01-022614 PRINTED IN U.S.A. PAGE 1 OF 7 INTRODUCTION SUPERLIFT 2.5 Level-It for 2014 RAM 2500 and 2013 1/2-2014 RAM 3500 (with Radius Arm Front Suspension) INSTALLATION INSTRUCTIONS Installation
FORM#40023.01-022614 PRINTED IN U.S.A. PAGE 1 OF 7 INTRODUCTION SUPERLIFT 2.5 Level-It for 2014 RAM 2500 and 2013 1/2-2014 RAM 3500 (with Radius Arm Front Suspension) INSTALLATION INSTRUCTIONS Installation