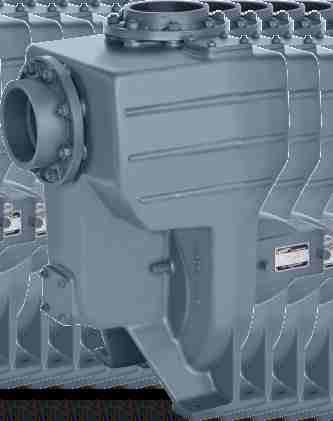
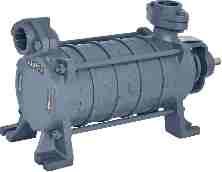
ISO 9001 CERTIFIED COMPANY INDUSTRIAL PUMPS. Installation & Operational Manual For BACK-PULL-OUT PUMP
|
|
|
- Bathsheba Fields
- 5 years ago
- Views:
Transcription


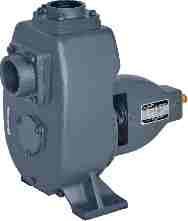
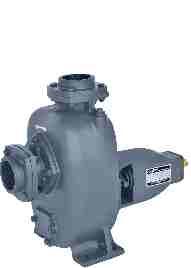
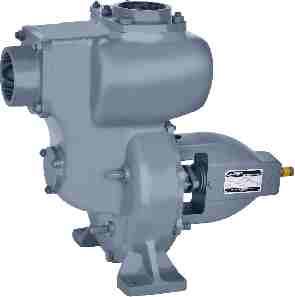
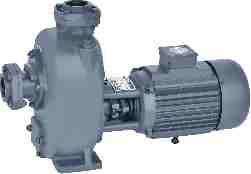
1 ISO 9001 CETIFIE COPANY Installation & Operational anual For BACK--OT P
2 EX Assembly isassembly Erection Starting unning Stopping and aintenance Cautions in use of echanical Seal Stuffing Box and Packing Troubleshooting Order Notice All imension of SB series pumps Part list of SB series pumps
3 Assembly Check the parts whether there are defects affecting assembly, or scrub them neatly and then start the process of assembly. Caution : The mating face, especially the friction face of the mechanical seal should be cleaned up, and there should not be obvious scratch, flaw and bump with the sealing face; otherwise replace it with new one. 1. Prepare the assembly work by putting the bolts and screws etc. in the places of the corresponding elements. 2. ocate the parts such as the O rings, paper washers, oil seals and put them in the places of the corresponding elements. Caution: - uring mounting the O seal ring, it is easily to fall off and fold, please take care to avoid of water leakage. 3. If mechanical seal is adopted, put the motion seal ring and stationary seal ring on the shaft and in the pump cover respectively. Next, place the parts such as the packing, packing rings, stuffing box glands and the rear packing ring (if any) in the pump cover in sequence. Caution: - uring mounting, the stationary rubber ring of mechanical seal is easily to slant, which would cause to leakage, so check it carefully. 4. ount the ball bearings to the shaft before put it in the overhung casing and then close the bearing caps, secure it with bolts. Next, put the lantern ring on the shaft. 5. Put the shaft sleeve on the shaft; fix the pump cover onto the overhung casing. Secure the thrust washer and the nuts of the impeller. Finally, place the whole piece in the pump casing before fixing the casing bolts of pump cover tightly. 6. After assembly, turn the rotor to see whether it rotates freely. Caution: - Please note that the small parts such as the flat key, lantern disk, lantern ring and the O ring are easily to miss or be mounted in a wrong sequence. isassembly The disassembly sequences of the pump are carried out in the opposite orders of the assembly. If there is dirty depositing causing the difficulty of disassembling, clean it up firstly. Caution : uring disassembling the mechanical seal, hit the stationary ring slightly with wood block instead of hitting it directly with hand or iron hammer, and then take it out slowly. Erection Correct assembly can often mean the significant difference between a successful and unsuccessful performance. ounting and adjusting 1. After cleaning the oil and dirt, place the bedplate in the concrete foundation. 2. se a level to check the bedplate. se iron wedge or steel shims when necessary. 3. Pour concrete into the bedplate and the anchor bolts holes. 4. After the concrete has thoroughly set, check both the bedplate and the anchor bolts to see if there are still loose in the concrete. And then tighten and check it again with a level. 5. After cleaning the mounting surfaces of the bedplate, pump feet and the driver feet, mount both pump and the driver on the bedplate. 6. Keep a certain amount of clearance between the couplings. Check the axial alignment of the pump and driver shafts. If misalignment, adjust it with steel shims and carry out the rim check on the coupling. The clearance should not exceed m ore than 0.1mm beyond the other one on four points, left, right, upper and lower of their circles. And both the max. and min. clearance between the two mating surfaces of the two couplings should not be more than 0.3mm on any point of the circles.
4 Installation Operation 1. Open the encasement to check the pump and motor. If it is guaranteed that there is no mangle and dropout of the fastern piece, and the inlet and outlet are in good condition with no dust or dirt coming into the pump during disassembly and transportation, the pump could be directed to the building site for use without needing to be dismantled. 2. The mounting height, length and diameter of pipes, flow rate should be in conformity with the specified values. uring installation, the place near the delivery liquid should be chose to getting the minimum suction head and shortest suction pipeline with the pump. 3. For long distance service, the pipeline in larger diameters should be adopted. The piping should be fixed by their independent supporters. Otherwise the pump would be damaged by the piping weights. 4. The rubber joints, which are convenient for pipeline connecting, should be mounted to the inlet and outlet flange. 5. The inlet and outlet pipeline should be mounted with valve, which makes the maintenance and adjust more conveniently. 6. ount the vacuum gauge in the inlet flange and the manometer in the outlet flange to check and control the operation of the unit. 7. If the check valve is mounted to the discharge pipeline, it should be located in the outside of the gate valve. 8. The absorber can be adopted in the place that the vibration is required strictly, and it should be installed following the instruction of the supplier. 9. With the foreign matter in the delivered liquid in the firstly mounting pipeline, the filter net should be installed to the inlet of pump to avoid of the damage to the pump. And the mesh diameter of the filter net is suggested between 3.85 to 6.96 inches. ntil the foreign matters are void of the suction liquid, the net can be dismantled. 10. uring pumping water from the pool, the straight length of pipeline ahead of inlet should be not 3 times less than the diameter of inlet, and the depth of suction pipe submerged under the water should be 1.5 times more than the diameter of inlet, and the value of which should not be less than 500mm. The distance from inlet to the pool wall and to the bottom of pool should be more than 1.5 times diameter of inlet, and the value should not be less than 500mm. And the filter net should be appended, and the area of which should not be 2~3 times less than the pipe orifice area of inlet. Caution : The horizontal section of suction pipeline should be installed downward slightly against the direction of flow to prevent from bubbles. 11. In order to ensure the motor operating reliably, the overload protection device should be equipped to the electric switch. Caution : If the over load protection device is omitted, when the discharge valve is fully opened, or the pump works in large flow, or in case the current increases suddenly, which would cause overload while mangling the motor.
5 Starting 1. Be sure that the driver is rotating in the correct direction and the rotor of the pump is turning freely before joining the couplings. Add lubricate into the overhung casing up to the centering level of the oil reservoir glass. 2. Close the gate valve of the discharge piping and the discharge pressure gauge and the suction vacuum gauge. 3. Prime the pump or direct water with a vacuum pump. 4. otate the pump (motor) shaft several loops by hand to make sure the mechanical seal have good lubrication, which could keep from dry friction or damaging the stationary and motion ring in sudden startup. 5. Start the motor to check whether it's rotating direction is accordance to the arrow. (From the view of the motor, it is clockwise). Caution: - on't operate the pump without water inside, or it would damage the mechanical seal. 6. nder the condition of inlet valve are fully opened and the outlet valve are closed, start the pump. When it reaches the normal speed, open the pressure gauge of outlet and vacuum gauge of inlet, and then gradually opens the outlet valve Caution: - The operating time should not be more than 3 minutes while the outlet valve is closed. till the required operating condition is obtained. unning 1. uring running, check frequently the values indicated in the gauges, the temperature of bearings and stuffing box, water leakage from stuffing box and the vibration and noise levels of the pump. Act immediately when there is anything wrong. 2. The bearings are not allowed to work at the temperature 40 C higher than the ambient temperature with their max working temperature not exceeding 80 C. 3. The amount of water leaking from the stuffing box is 60 drops per minute normally. 4. The bearing oil level should be kept in the specified range, being not too low or too high. When below the level, add oil in time. In order to keep the clean and good lubrication of the oil, replace it with new one according to the actual usage condition. In general, for every 1500 working hour, the oil should be replaced with all. 5. The gate valve of inlet is not allowed to regulate the capacity to avoid of cavitations. 6. When the clearance between the impeller and seal ring is worn out too much, replace the seal ring with new one. 7. Check the unit frequently whether is operates smoothly and the abrasion and leakage of mechanical seal, or replace the sealing components in time to prevent water from getting into the motor. 8. Check the pool often whether there is some floating objects and observe the liquid level. Stop the pump when the level is below the minimum to avoid cavitations and mangle to the impeller. If necessary, decrease the discharge capacity by adjusting the gate valve to re-rise the water level. Caution : The range of capacity and head of pump should be accommodated between the minimum and maximum value showed in the performance table to get the best energy saving. And the pump should not operate for long time under the 30% capacity than normal condition. Otherwise, the specified capacity can be obtained by mounting the bypass pipeline on the discharge pipeline. The capacity under service condition should not exceed the large value showed in the performance table. uring operating, the actual head H= (Pout-Pin)/ should not be less than the relevant value under the large capacity showed in the performance table. (in the equation: Pout indicates the value of pressure gauge in outlet, and P in indicates the value of vacuum gauge in inlet; Pressure unit: Pa, and Head unit: m). The service condition of high efficiency is the intermediate point showed in the performance table, which could be acquire d by regulating the discharge valve according to the value of the inlet and outlet (vacuum) pressure gauge. 9. In case the characteristic curve of equipment has been decided, if the operating condition needs to be adjusted, the better way is to change the speed or adjust the diameter of the impeller. Please inquire the supplier for more details.
6 Stopping and aintenance 1. Close the gate valve of the discharge piping gradually and switch off the power. 2. Close the manometer and vacuum gauge of the inlet and outlet, additionally; the inlet gate valve should be closed under pouring state. 3. When it is below 0 C, drain the remaining water inside the pump to prevent it from being frozen crack. 4. When being left inactive for a long time, turn the pump rotor periodically to ensure the unit starting easily. 5. When stopping the unit for a long time, disassemble it into pieces. After that, put some rust-resistance grease and re-assemble it again and store it in an appropriate place. Cautions in se of echanical Seal According to the working requirements, different methods and cautions vary with different seals. Some cautions are recommended below : Stuffing Box and Packing 1. The conventional mechanical seals are just suitable for coming in touch with clean liquids free from particles. To protect the seals against being damaged, clean thoroughly the new pipes and other circulating pipelines and prevent the solid foreign matter from coming in contact with the seals. 2. When delivering crystallized liquids, wash the seals time to time. Wipe out the remaining crystals on the seals before starting the unit after some idle hours. 3. Care should be taken to dismantle the seals. on't use hammer or other metal weights to hit them; otherwise, the stationary seal surfaces would be damaged. 4. The seals with oil and dirt stuck to are difficult to be dismantled. In the case, take them out after removing all the foreign matter rather than using much force that may cause damage to them. 5. Check if the seals are damaged or out of operation before using them. epair or replace them with new ones when necessary. 6. Check strictly if there are cracks or damage on the centric friction seal ends of both the stationary and rotating seals. All the components including the pump casing, impeller, seal chamber etc. should be cleaned well before assembling. Provisions are made to clean the two ends of both stationary and rotating seals with cotton cloth carefully and paint some grease or oil on them. 7. inimize the seal assembling deviation, tighten the relevant nuts and bolts enough to avoid the titling of seals, otherwise the seals may be out of operation. 8. Adjust the spring compression correctly, not being too less or much, and excessive spring compression will cause fast wearing out to the ends of the seals and more power consumption. Similarly, being not compressive enough will result in the out of operation of the seals and the worse leakage. For this reason, turn the shaft with hand after mounting up them, and it is correct when feeling the seals springs have a certain amount of compression and the shaft turning freely and smoothly without any clamping tension. Adjust the tension when they are too tight and the shaft cannot be turned around. Stuffing boxes should be carefully cleaned and the packing in them. Be sure that sufficient packing is placed at the back of the water seal cage. If the water to be pumped is dirty or gritty, sealing water should be piped to the stuffing boxes from clean outside source of supply in order to prevent damage to the packing and shaft. In placing the packing, each packing ring should be cut to the proper length so that ends come together but do not overlap. The succeeding rings of packing should not be pressed too tight as it may result in burning the packing and cutting the shaft. If stuffing box is not properly packed, friction in stuffing box prevents turning the rotor by hand. On starting the pump it is well to have the packing slightly loose without causing as air leak, and if it seems to leak, instead of putting too much pressure on gland, put some heavy oil/grease in the stuffing box until the pump works properly and then gradually tighten up the gland. The packing should be occasionally changed. o not tighten the gland excessively. A slight dripping of water from stuffing boxes when pump is running keeps packing in good condition.
7 Troubleshooting What To o Cause Symptoms 1. The pouring water is insufficient. 1. Water cannot be 2. Air leakage from the joints between sucked and both the the inlet and meters. hands of vacuum gauge and manometer beat violently. 1. Pour water in again; 2. Fix the joints tightly. 1. The foot valve is lodged or not open. 2. Too high suction resistance. 3. Suction pipe is mounted too high. 1. Check or replace the foot valve; 2. Check up or replace the suction pipe; 3. educe the suction lift. 3. No water is delivered in spite of pressure shown on the manometer. 1. Too high outlet resistance. 2. otor is working in a wrong direction. 3. The impeller is clogged. 4. otor Speed is insufficient caused by the low voltage. 1. Check or shorten the pipe; 2. Check the motor; 3. emove the foreign matter in the impeller; 4. egulate the voltage. 4. The pump is working at the capacity lower than the specified value. 1. The pump is clogged. 2. Seal ring has been worn out. 3. Speed is insufficient. 4. The foot valve or suction pipe is lodged. 1. Clean up the pump and relevant pipes; 2. eplace the seal ring; 3. Increase speed. 4. Clean up or replace the foot valve. 5. Too much power is consumed. 1. The packing is too tight and the stuffing box is too hot, or mechanical friction caused to the rotor. 2. Both the impeller and seal ring are worn out. 3.The pump is working in large flow. 1. oosen the packing gland appropriately. Calibrate the shaft and the rotor; 2. eplace the impeller and seal ring; 3. Close the gate valve of outlet a little bit to reduce the flow. 6. The pump vibrates of unexpected noise is heard. 1. Foundation is not firm. 2. Air leakage in suction pipeline or the submerse depth of inlet is not enough, which results in air pocket into pump. 3. Cavitations in the impeller. 4. The pump deviates the operating condition. 5. The bearing is mangled. 1. Tighten the supporter near the flange. 2. Fix the leakage points or increase the submerged depth of the suction pipe. 3. educe the mounting height or increase the diameter of inlet or coming pressure, replace the mangled impeller. 4. Adjust to working under the high efficient service condition instead of operating at large flow. 5.eplace the bearing. 7. The bearings are over-heated; the elastic piece of coupling is worn out too fast. 1. The bearings lack lubricant. 2. The motor shaft is not in alignment to that of the pump. the pump shaft is bent. 1. ubricate the bearings. 2. Align the motor shaft with that of the pump. Calibrate or replace the pump shaft. 8. The elastic place of coupling is worn out too fast. 1.The motor shaft is not alignment to that of the pump. 1.Align the motor shaft with that of the pump. 2. Water cannot be sucked while high degree vacuum is indicated on the vacuum gauge. Order Notice: The products are to be improved according to the requirements of the market. The information of this instruction is subject to change without prior notice.
8 Outline imensions & Part ist for SB Series Pumps


.")


9 Plot No. G-536, oad /2, Kishan Gate, Kalawad oad, G.I..C. etoda, AJKOT (Gujarat). Contact No , surgepumps@gmail.com Web :
INSTALLATION, OPERATION AND MAINTENANCE INSTRUCTIONS
 INSTALLATION, OPERATION AND MAINTENANCE INSTRUCTIONS Contents Section 1. General Observations... 2 2. Operation... 4 3. Control During Operation... 5 4. Trouble Shooting... 6 5. Maintenance... 7 Please
OPERATION & MAINTENANCE MANUAL HANGZHOU FLYING TECHNOLOGY CO., LTD.
 CENTRIFUGAL PUMP ZPD6-25*7 OPERATION & MAINTENANCE MANUAL HANGZHOU FLYING TECHNOLOGY CO., LTD. CONTENTS 1. GENERAL (1) 2. NOMENCLATURE OF THE TYPE (1) 3. MAIN TECHNICAL SPECIFICATIONS RANGE (1) 4. STANDARD
Table 6-1. Problems and solutions with pump operations. No Fluid Delivery
 Table 6-1. and solutions with pump operations No Fluid Delivery Fluid level in the reservoir is low. Oil intake pipe or inlet filter is plugged. Air leak in the inlet line prevents priming or causes noise
SERIES PC INSTRUCTION AND OPERATION MANUAL
 MEGGA SERIES PC INSTRUCTION AND OPERATION MANUAL Models PCT and PCF Close-coupled and frame-mounted single-stage horizontal end-suction pumps. WARNING: Read this manual before installing or operating this
HORIZONTAL SPLIT CASING PUMP
 OPERATION & MAINTENANCE MANUAL HORIZONTAL SPLIT CASING A Mark of Quality CROSS SECTION DRAWING No. DESCRIPTION MATERIAL 01 1/4 BSP PLUG BRASS 02 LOWER HOUSING C. I. IS-210, FG260 03 IMPELLER C. I. / G.
DISASSEMBLY AND ASSEMBLY INSTRUCTIONS FOR LIQUID RING VACUUM PUMPS
 (Rev. 2.0_10-2010) DISASSEMBLY AND ASSEMBLY INSTRUCTIONS FOR LIQUID RING VACUUM PUMPS TRVK 2003 to 5003 TRSK 2005 to 5005 INTRODUCTION These instructions are for the maintenance staff in case of repair
INSTALLATION AND SERVICE INSTRUCTIONS FOR 1008 AND 1010 SERIES PUMPS
 Service Instruction No. 11 INSTALLATION AND SERVICE INSTRUCTIONS FOR 1008 AND 1010 SERIES PUMPS GENERAL DESCRIPTION Pumping Principles Page 2 INSTALLATION Location Page 3 Proper Installation Page 3 Filter
INSTRUCTION MANUAL INTERNAL GEAR PUMP TITAN G-4124A SERIES=> FLANGED TITAN G-124A SERIES => FLANGED MODELS:
 INSTRUCTION MANUAL INTERNAL GEAR PUMP TITAN G-4124A SERIES=> FLANGED TITAN G-124A SERIES => FLANGED MODELS: G-H, G-HL, G-K, G-KK, G-L, G-LQ, G-LL, GLS, G-Q, G-QS 1 Contents Maintenance Thrust bearing adjustment
Installation Vertical Pump: Installation 'CM' and 'CDM' Style: Operation:
 Installation Vertical Pump: Gusher vertical end suction pumps with integral shaft is easily installed and put into service. With the one piece shaft design there is no couplings to align, no shims or no
PROCESS PUMPS (INDIA) PVT LTD
 PVT LTD") MANUAL: - M12 HORIZONTAL BPO METALLIC PUMP WITH GLAND PACKING (GROUP- III & IV) INSTALLATION, OPERATION AND MAINTENANCE MANUAL PROCESS PUMPS (INDIA) PVT LTD Plot No.86, III Phase, Peenya Industrial Area,
MANUAL: - M12 HORIZONTAL BPO METALLIC PUMP WITH GLAND PACKING (GROUP- III & IV) INSTALLATION, OPERATION AND MAINTENANCE MANUAL PROCESS PUMPS (INDIA) PVT LTD Plot No.86, III Phase, Peenya Industrial Area,
PROCESS PUMPS (INDIA) PVT LTD
 PVT LTD") HYDRODYNAMIC SEAL NON METALLIC PUMP INSTALLATION, OPERATION AND MAINTENANCE MANUAL PROCESS PUMPS (INDIA) PVT LTD Plot No.86, III Phase, Peenya Industrial Area, Bangalore 560058 Phone: 91-80-28395327/28
HYDRODYNAMIC SEAL NON METALLIC PUMP INSTALLATION, OPERATION AND MAINTENANCE MANUAL PROCESS PUMPS (INDIA) PVT LTD Plot No.86, III Phase, Peenya Industrial Area, Bangalore 560058 Phone: 91-80-28395327/28
PROCESS PUMPS (INDIA) PVT LTD
 PVT LTD") MANUAL: - M10 HORIZONTAL BPO METALLIC PUMP WITH EXTERNAL MECHANICAL SEAL (GROUP- III & IV) INSTALLATION, OPERATION AND MAINTENANCE MANUAL PROCESS PUMPS (INDIA) PVT LTD Plot No.86, III Phase, Peenya Industrial
MANUAL: - M10 HORIZONTAL BPO METALLIC PUMP WITH EXTERNAL MECHANICAL SEAL (GROUP- III & IV) INSTALLATION, OPERATION AND MAINTENANCE MANUAL PROCESS PUMPS (INDIA) PVT LTD Plot No.86, III Phase, Peenya Industrial
Table of Contents Illustrations
 Principals of Operation Inspection & Troubleshooting Principles of Operation Inspection & Troubleshooting Form No. F 1031 Section 1000 Issue Date 09/19/94 Rev. Date 02/07/07 Table of Contents Illustrations
END SUCTION CENTRIFUGAL PUMPS
 OWNERS GUIDE TO INSTALLATION AND OPERATION FW000 009 Supersedes 07 END SUCTION CENTRIFUGAL PUMPS READ THESE INSTRUCTIONS CAREFULLY Read these installation instructions in detail before installing your
SLR / SLR-S/N. Instruction Manual. Walrus America Inc
 SLR / SLR-S/N Instruction Manual Walrus America Inc 1. Installation and Connection 1.1. Pump Installation The pump should be sited in a well ventilated and frost-free position. The distance between pumps-motors
Fluid-O-Tech ROTOFLOW ROTARY VANE PUMP REBUILD MANUAL
 Fluid-O-Tech PUMP TECHNOLOGY AT ITS BEST WWW.FLUID-O-TECH.COM Office: 161 Atwater St., Plantsville, CT 06479 Phone: (860) 276-9270 Fax: (860) 620-0193 ROTOFLOW ROTARY VANE PUMP REBUILD MANUAL 08/09 Ed.,
1750 RPM Centrifugal Pumps
 Please read and save this Repair Parts Manual. Read this manual and the General Operating Instructions carefully before attempting to assemble, install, operate or maintain the product described. Protect
Water Treatment Plant Maintenance Considerations. Operation and Maintenance. Types of Maintenance 5/1/15
 Water Treatment Plant Maintenance 1 Operation and Maintenance Purpose of O&M maintain design functionality (capacity) restore the system components to their original condition and thus functionality. Effective
Single Stage Rotary Vane Vacuum Pump Installation and Operation Manual RX-10 RX-21 RX-25
 V acuum Pumps Single Stage Rotary Vane Vacuum Pump Installation and Operation Manual RX-10 RX-21 RX-25 www.republicsales.com Revised 10.14 2014 Republic Sales & Manufacturing Single Stage Rotary Vane Vacuum
TECHNICAL SERVICE MANUAL INSTALLATION, START UP, TROUBLESHOOTING, SERIES SG-04, SG-05 & SG-07 spur gear PUMPS
 Electronic copies of the most current TSM issue can be found on the Viking Pump website at www.vikingpump.com TECHNICAL SERVICE MANUAL SECTION TSM 340 PAGE 1 OF 10 ISSUE G INSTALLATION, START UP, TROUBLESHOOTING,
Single Stage Rotary Vane Vacuum Pump Installation and Operation Manual RX-40 RX-63 RX-100
 V acuum Pumps Single Stage Rotary Vane Vacuum Pump Installation and Operation Manual RX-40 RX-63 RX-100 www.republicsales.com Revised 02.15 2015 Republic Sales & Manufacturing Single Stage Rotary Vane
TECHNICAL SERVICE MANUAL GENERAL PURPOSE BRACKET MOUNTED PUMPS SERIES 115 MODELS G, GX2, H and HX4
 TECHNICAL SERVICE MANUAL GENERAL PURPOSE BRACKET MOUNTED PUMPS SERIES 115 MODELS G, GX2, H and HX4 SECTION 2 BULLETIN TSM-115-C ISSUE A CONTENTS Special Information 2 Maintenance 2 Packed Pump Breakdown
Installation and Service Instructions 1008 & 1010 Size Pumps
 Installation and Service Instructions 1008 & 1010 Size Pumps Excellence at work. Excellence in life. Table of Contents The Pumping Principle 3 Location 3 Proper Installation 3 Filter Protection 4 Startup
300 SERIES 331, 332, 333, 344, 356 AND 367 MODELS
 Section: MOYNO 500 PUMPS Page: 1 of 8 Date: March 1, 1998 SERVICE MANUAL MOYNO 500 PUMPS 300 SERIES 331, 332, 333, 344, 356 AND 367 MODELS Mechanical Seal Models Packing Gland Models MODELS DESIGN FEATURES
NECO Pumping Systems
 INSTALLATION OPERATION & MAINTENANCE INSTRUCTIONS For Your NECO Pumping Systems Fuel Oil Transfer System THIS COMPLETELY ASSEMBLED, TESTED, PACKAGED SYSTEM IS OF THE HIGHEST QUALITY AND DESIGN. TO OBTAIN
PROCESS PUMPS (INDIA) PVT LTD
 PVT LTD") VERTICAL CANTILEVER SHAFT SUMP PUMP (PPCS)_ METALLIC INSTALLATION, OPERATION AND MAINTENANCE MANUAL PROCESS PUMPS (INDIA) PVT LTD Plot No.86, III Phase, Peenya Industrial Area, Bangalore 560058 Phone:
VERTICAL CANTILEVER SHAFT SUMP PUMP (PPCS)_ METALLIC INSTALLATION, OPERATION AND MAINTENANCE MANUAL PROCESS PUMPS (INDIA) PVT LTD Plot No.86, III Phase, Peenya Industrial Area, Bangalore 560058 Phone:
SERIES G3DB/AG3DB ELEVATOR
 TM INSTRUCTIONS AND PARTS LIST SERIES G3DB/AG3DB ELEVATOR WARNING This manual, and GENERAL INSTRUCTIONS MANUAL, CA-1, should be read thoroughly prior to pump installation, operation or maintenance. SRM00059
barmesapumps.com IB SERIES & 3500 RPM Installation, Operation & Maintenance Manual End Suction Centrifugal Pumps
 Installation, Operation & Maintenance Manual End Suction Centrifugal Pumps IB SERIES 1-15 HP @ 1750 & 3500 RPM IMPORTANT! - Read all instructions in this manual before operating or servicing a pump. Before
Installation and Service Instructions 1018, 1020, 1022, & 1024 Size Pumps
 Installation and Service Instructions 1018, 1020, 1022, & 1024 Size Pumps Excellence at work. Excellence in life. Table of Contents General Description 3 The Pumping Principle 3 Location 3 Proper Installation
Submersible Turbine Pump (Volute) STM type (T, TU, and TU3) SSTM type (TUA)
 STM type (T, TU, and TU3) SSTM type (TUA)") Instruction Manual Installation Manual Submersible Turbine Pump (Volute) STM type (T, TU, and TU3) SSTM type (TUA) Thank you for your purchase of Teral (Volute) Submersible Turbine Pump. To the customers
Instruction Manual Installation Manual Submersible Turbine Pump (Volute) STM type (T, TU, and TU3) SSTM type (TUA) Thank you for your purchase of Teral (Volute) Submersible Turbine Pump. To the customers
Installation and Service Instructions 1012, 1014, 1015, & 1017 Size Pumps
 Installation and Service Instructions 1012, 1014, 1015, & 1017 Size Pumps Excellence at work. Excellence in life. Table of Contents General Description 3 The Pumping Principle 3 Location 3 Proper Installation
TECHNICAL SERVICE MANUAL GENERAL PURPOSE JACKETED PUMPS SERIES 230 MODELS HX4, KK, LQ, Q, M, N
 CONTENTS TECHNICAL SERVICE MANUAL GENERAL PURPOSE JACKETED PUMPS SERIES 230 MODELS HX4, KK, LQ, Q, M, N SECTION 2 BULLETIN TSM-230-V ISSUE A Special Information 2 Maintenance 2 Packed Pump Breakdown Drawing
PO Box 645, Stockton, Missouri, FAX superiorgearbox.com W D0446-A 4/1/05 1
 W000-7000-D0446-A 4/1/05 1 SAFETY PRECAUTIONS CAUTION Please read this entire document prior to operating the gear drive. Gear drive failure and / or injury to operators may be caused by improper installation,
PROCESS PUMPS (INDIA) PVT LTD
 PVT LTD") MANUAL: - NM3 HORIZONTAL BPO NON METALLIC PUMP WITH DOUBLE MECHANICAL SEAL GROUP 0 INSTALLATION, OPERATION AND MAINTENANCE MANUAL PROCESS PUMPS (INDIA) PVT LTD Plot No.86, III Phase, Peenya Industrial
MANUAL: - NM3 HORIZONTAL BPO NON METALLIC PUMP WITH DOUBLE MECHANICAL SEAL GROUP 0 INSTALLATION, OPERATION AND MAINTENANCE MANUAL PROCESS PUMPS (INDIA) PVT LTD Plot No.86, III Phase, Peenya Industrial
2.- HANDLING OF VALVES BEFORE ASSEMBLY 3.- FITTING THE VALVE TO THE REST OF THE ASSEMBLY 5.- PERIODICAL INSPECTION OF THE VALVE AND MAINTENANCE
 Page 1 of 16 CONTENTS 1.- INTRODUCTION 2.- HANDLING OF VALVES BEFORE ASSEMBLY 3.- FITTING THE VALVE TO THE REST OF THE ASSEMBLY 4.- OPERATION OF A BALL VALVE 5.- PERIODICAL INSPECTION OF THE VALVE AND
OWNER S MANUAL EVOLUTION 3500, 4500, 5500, & 8500 SERIES PUMPS
 OWNER S MANUAL EVOLUTION 3500, 4500, 5500, & 8500 SERIES PUMPS IMPORTANT SAFETY INSTRUCTIONS When installing and using this electrical equipment, basic safety precautions should always be followed, including
PR Series Positive Rotary Pumps
 PRSM PR Series Positive Rotary Pumps Models PR, PRE, and PRED CONTENTS Thank you for purchasing a Tri-Clover Product! This manual contains disassembly and assembly instructions, maintenance procedures,
Medium and high pressure pumps
 Screw pumps Medium and high pressure pumps Installation and Start-up Instruction This instruction is valid for all standard high pressure pumps: E4, D4 and D6 Contents Page Pump identification 2 Installation
There are few directions to maintain and operate the valves which are explained below for each valve.
 There are few directions to maintain and operate the valves which are explained below for each valve. MAINTENANCE INSTRUCTION FOR SLUICE GATE AS PER IS:3042/IS:13349 1. Frame (Serial No.- 2 of Drawing)
VERTICAL MULTI-STAGES CENTRIFUGAL PUMPS
 Installation and Operating Instructions VERTICAL MULTI-STAGES CENTRIFUGAL PUMPS Models 1, 3, 5, 10, 15, 20, 32, 45, 64, 90, 120, 150 1. Model numbering and nameplate format 1.1 Model numbering Example:
MAINTENANCE AND REPAIR INSTRUCTIONS
 MAINTENANCE AND REPAIR INSTRUCTIONS TYPE TH PUMPS Peerless Pump Company Indianapolis IN, 46207-7026 4849357 TABLE OF CONTENTS Maintenance Page 1 & 2 Disassembly Page 5 & 6 Impeller Clearance 3 Reassembly
BOILER FEED SYSTEM OPERATION AND MAINTENANCE MANUAL
 BOILER FEED SYSTEM OPERATION AND MAINTENANCE MANUAL IMPORTANT These instructions are intended as a guide for the Installing Contractor and as a reference for the Operator, Owner and Serviceman. RETAIN
SERVICE MANUAL 200 SERIES MOTORIZED 20352, 20452, 20551, 20552, AND MODELS
 Section: MOYNO 500 PUMPS Page:1 of 4 Date: March 1, 1998 SERVICE MANUAL MOYNO 500 PUMPS 200 SERIES MOTORIZED 20352, 20452, 20551, 20552, 22051 AND 22052 MODELS DESIGN FEATURES Housing: AISI 316 stainless
TECHNICAL SERVICE MANUAL HEAVY-DUTY BRACKET MOUNTED PUMPS SERIES 120 and SERIES 124 MODELS J, K, KK, L, LQ, LL AND LM
 TECHNICAL SERVICE MANUAL HEAVY-DUTY BRACKET MOUNTED PUMPS SERIES 120 and SERIES 124 MODELS J, K, KK, L, LQ, LL AND LM SECTION 3 BULLETIN TSM-120-124-V ISSUE B-2005 CONTENTS Special Information 2 Maintenance
END SUCTION CENTRIFUGAL PUMPS
 OWNERS GUIDE TO INSTALLATION AND OPERATION END SUCTION CENTRIFUGAL PUMPS FW000 0 Supersedes 009 READ THESE INSTRUCTIONS CAREFULLY Read these installation instructions in detail before installing your pump.
TILLOTSON LTD., CLASH INDUSTRIAL ESTATE, TRALEE, CO. KERRY, IRELAND PHONE: FAX:
 TILLOTSON LTD., CLASH INDUSTRIAL ESTATE, TRALEE, CO. KERRY, IRELAND PHONE: +353 66 7121911 FAX: +353 66 7124503 e-mail: sales@tillotson.ie SERIES SERVICE MANUAL INTRODUCTION The gasoline engine industry
PROMAG SR SERIES SEAL-LESS CENTRIFUGAL PUMPS
 PROMAG SR SERIES SEAL-LESS CENTRIFUGAL PUMPS INSTALLATION, OPERATION, AND MAINTENANCE INSTRUCTIONS TO OBTAIN THE BEST PERFORMANCE FROM YOUR PROMAG SR PUMP, PLEASE READ THE MANUAL CAREFULLY. Failure to
OPERATION MANUAL INTERNAL GEAR PUMP. Models: NG-H, NG-HL, NG-K, NG-KK, NG-L, NG-LQ, NG-LL, NG-LS, NG-Q, NG-QS. Tel: Fax:
 OPERATION MANUAL INTERNAL GEAR PUMP Models: NG-H, NG-HL, NG-K, NG-KK, NG-L, NG-LQ, NG-LL, NG-LS, NG-Q, NG-QS. 1 Contents Pump Designation System Maintenance Thrust bearing adjustment Pressure Relief Valve
METERING/DOSING PUMP CLOSE-COUPLED B4015D, B4050D, B4100D, B4190D, B2400D, AND B4400D MODELS
 Section: METERING/DOSING PUMPS Page: 1 of 5 Date: July 2009 SERVICE MANUAL METERING/DOSING PUMP CLOSE-COUPLED B4015D, B4050D, B4100D, B4190D, B2400D, AND B4400D MODELS DESIGN FEATURES Suction Housing:
barmesapumps.com CD SERIES RPM Installation, Operation & Maintenance Manual End-Suction Centrifugal Stainless Steel Pumps
 Installation, Operation & Maintenance Manual End-Suction Centrifugal Stainless Steel Pumps CD SERIES 1-3 HP @ 3450 RPM IMPORTANT! - Read all instructions in this manual before operating or servicing a
DESCRIPTION & OPERATION
 2004 BRAKES Disc - TSX DESCRIPTION & OPERATION WARNING: DO NOT use air pressure or a dry brush to clean brake assemblies. Avoid breathing brake dust. Use OSHA-approved vacuum cleaner for cleaning and collecting
 INSTRUCTIONS Your Ampco centrifugal pump is a rugged unit designed to provide years of low cost pumping service. There is a small amount of necessary care required to ensure you of this expected long service.
TROUBLESHOOTING TABLE
 TROUBLESHOOTING TABLE TROUBLESHOOTING GUIDE GLOSARY OF TERMS VANE PUMPS NO FLOW, NO PRESSURE A) Is the pump rotating? a-1) Check if the coupling is rotating. If not, check the rotation of the electric
Heavy duty slurry pumps
 USER S MANUAL Heavy duty slurry pumps TOYO PUMPS EUROPE Edition 27.07.2007 SAFETY INSTRUCTIONS TOYO PUMPS EUROPE User s manual for Toyo pumps type «GR..-2 3~10HP» This user s manual will help you to maintain
CONTENTS. VIKING PUMP, INC. A Unit of IDEX Corporation Cedar Falls, IA USA SECTION TSM 710.1
 TECHNICAL SERVICE MANUAL industrial heavy duty motor speed pumps SERIES 4076 AND 4176 SIZES hle, ate and ale SECTION TSM 710.1 PAGE 1 of 8 ISSUE B CONTENTS Introduction....................... 1 Safety
1750 RPM Centrifugal Pumps
 Please read and save this Repair Parts Manual. Read this manual and the General Operating Instructions carefully before attempting to assemble, install, operate or maintain the product described. Protect
3" & 4" Cast Iron Self-Priming Centrifugal Pump Instruction Manual
 12 3" & 4" Cast Iron Self-Priming Centrifugal Pump Instruction Manual 333 & 444 Series Read these instructions and the instructions covering operation of the pump drive unit. Do not operate the gas engine
Heavy duty slurry pumps
 USERS MANUAL Heavy duty slurry pumps TOYO PUMPS EUROPE Edition 27.07.2007 SAFETY INSTRUCTIONS TOYO PUMPS EUROPE Users manual for Toyo pumps type «DP..-6 30~40HP» This users manual will help you to maintain
SAM TURBO INDUSTRY LIMITED
 INSTRUCTIONS ON INSTALLATION, OPERATION AND MAINTENANACE FOR SAM TURBO PUMP TYPE MF SAM TURBO INDUSTRY LIMITED NEELAMBUR, COIMBATORE-641 014. INDIA PH: 0422-3058899(50 LINES), FAX: 3058000, E-MAIL: info@sampumps.com,
SELF PRIMING CHEMICAL SERVICE PUMPS
 SELF PRIMING CHEMICAL SERVICE PUMPS INSTALLATION AND OPERATING INSTRUCTIONS This Manual covers: SELF PRIMING MODEL RANGE J50ECX TO J250ECX STAINLESS STEEL*, and NON METALLIC SEAL PUMP MODEL: SERIAL NO:
Operating and Maintenance Manual Gas/Diesel Engine Powered Self-Priming Centrifugal Pumps Series
 Operating and Maintenance Manual Gas/Diesel Engine Powered Self-Priming Centrifugal Pumps 4100 Series Operating Manual Contents: Model Number/Serial Number Pg. 1 Safety Information Pg. 2 Operating Instructions
ENGINE LUBRICATION & COOLING SYSTEMS SECTIONLC CONTENTS. ENGINE LUBRICATION SYSTEM...2 Precautions...2
 ENGINE LUBRICATION & COOLING SYSTEMS SECTIONLC CONTENTS ENGINE LUBRICATION SYSTEM...2 Precautions...2 LIQUID GASKET APPLICATION PROCEDURE...2 Preparation...2 SPECIAL SERVICE TOOLS...2 Lubrication Circuit...3
VERTICAL MULTI-STAGE CENTRIFUGAL PUMPS
 Installation and Operating Instructions VERTICAL MULTI-STAGE CENTRIFUGAL PUMPS Models 1, 3, 5, 10, 15, 20, 32, 45, 64, 90 1. Model numbering and nameplate format 1.1 Model numbering Example: SBI / SBN
Operating Manual for Rotary Gear Pumps CMI, S.A. (Mendaro, Guipuzkoa, Spain)
") Operating Manual for Rotary Gear Pumps CMI, S.A. (Mendaro, Guipuzkoa, Spain) Pre-Installation 1. Choose a location that is easily accessible for pump servicing. Ensure adequate electrical service is available.
Operating Manual for Rotary Gear Pumps CMI, S.A. (Mendaro, Guipuzkoa, Spain) Pre-Installation 1. Choose a location that is easily accessible for pump servicing. Ensure adequate electrical service is available.
Installation & Operating Manual
 Installation & Operating Manual 25IPCC-M 7/08 Edition PC Series C E N T R I F U G A L Congratulations On Your Choice In Purchasing This Webtrol Pump Its Quality is unsurpassed in material and workmanship
Maintenance Instructions
 General Note These instructions contain information common to more than one model of Bevel Gear Drive. To simplify reading, similar models have been grouped as follows: GROUP 1 Models 11, 0, 1,, (illustrated),,
TECHNICAL SERVICE MANUAL
 Electronic copies of the most current TSM issue can be found on the Viking Pump website at www.vikingpump.com TECHNICAL SERVICE MANUAL industrial heavy duty motor speed pumps SERIES 4076 AND 4176 SIZES
TECHNICAL SERVICE MANUAL HEAVY-DUTY PUMPS SERIES 332 AND 260 MODELS Q, M, N AND R
 TECHNICAL SERVICE MANUAL HEAVY-DUTY PUMPS SERIES 332 AND 260 MODELS Q, M, N AND R BULLETIN TSM-332-260-C PAGE 1 of 16 ISSUE A.11/2004 CONTENTS Special Information 2 Maintenance 2 Packed Pump Breakdown
When installing the screwed end, socket weld & flanged end valves the following respective procedures shall be followed for better performance.
 1. Storage LARSEN & TOUBRO LIMITED Page 1 of 5 1.1. All valves are to be stored in fully open position, in order to protect the sphere surface and soft valve seats. 1.2. Before shipping, the inlet and
ENGINE COOLING SYSTEM
 B ENGINE A SECTION ENGINE COOLING SYSTEM CO C D CONTENTS E PRECAUTIONS... 2 Precautions for Liquid Gasket... 2 REMOVAL OF LIQUID GASKET SEALING... 2 LIQUID GASKET APPLICATION PROCEDURE... 2 PREPARATION...
Agri KAM INSTALLATION, OPERATION AND MAINTENANCE MANUAL. A View of KBL Dewas Manufacturing Plant. A Kirloskar Group Company KIRLOSKAR BROTHERS LIMITED
 A View of KBL Dewas Manufacturing Plant KIRLOSKAR Agri KAM MONOBLOC KIRLOSKAR BROTHERS LIMITED A Kirloskar Group Company CORPORATE OFFICE : YAMUNA, Survey No. 98 (-7), Baner, Pune 411 045 (India) Phone
TECHNICAL SERVICE MANUAL
 TECHNICAL SERVICE MANUAL HEAVY-DUTY bracket mounted PUMPS SERIES 4193 AND 493 SIZES GG - AL SECTION TSM 154 PAGE 1 of 10 ISSUE C CONTENTS Introduction....................... 1 Special Information...................
Pumps and Maintenance
 Pumps and Maintenance Questions 1) Where would you find information on when to lubricate a pump? 2) What problems can develop if too much grease is used in lubricating an electric motor? 3) Why should
PO Box 645, Stockton, Missouri, FAX superiorgearbox.com
 I000-7000-D0447-A 4/7/05 1 SAFETY PRECAUTIONS CAUTION Please read this entire document prior to operating the gear drive. Gear drive failure and / or injury to operators may be caused by improper installation,
Purging Air From Divider Block Lubrication Systems
 FROST ENGINEERING SERVICE Purging Air From Lubrication Systems A D I V I S I O N O F G E C S E Y S A L E S & S E R V I C E DESCRIPTION Divider block lubrication systems operate correctly only when all
Installation Operation and Maintenance Manual
 Installation Operation and Maintenance Manual C Water-sealed liquid ring compressors and compressor systems SERIAL NO.: May 2013/3 C WATER-SEALED LIQUID RING COMPRESSORS AND COMPRESSOR SYSTEMS TABLE OF
Table of Contents. 4. Before a New Turbocharger is Installed
 Table of Contents 1. Turbocharger Overview ------------------------------------------------------------------ 1.1. Definition -----------------------------------------------------------------------------
Engine Does Not Start or Is Hard to Start Cause of Trouble. 1. Open the drain screw, and check Fuel not supplied (1) Fuel tank empty
 Fuel tank empty") 20. Engine Does Not Start or Is Hard to Start 20-1 Engine Output Insufficient 20-2 Poor Performance at Low Speed and Idling 20-3 Poor Performance at High Speed 20-3 Unsatisfactory Operation 20-4 Fuel Gauge
20. Engine Does Not Start or Is Hard to Start 20-1 Engine Output Insufficient 20-2 Poor Performance at Low Speed and Idling 20-3 Poor Performance at High Speed 20-3 Unsatisfactory Operation 20-4 Fuel Gauge
The ELM Series Slurry Pump Installation and Operating Manual
 The ELM Series Slurry Pump Installation and Operating Manual Excellence Pump Industry Co., Ltd. SAFETY INFORMATION The following safety information relating to pump operation and maintenance should be
GP-2000 : Trouble Shooting. Cause of problems
 VOL: MA-GP2000-2 Troubleshooting GP-2000 Technical Knowledge GP-2000 : Trouble Shooting Cause of problems 1: s related to other factors 2: s on the pressure reducing valve A : Reduced pressure exceed specified
ABS Dry Installed Waste Water Pumps Series FR
 A Operating Instruction 3 ABS Dry Installed Waste Water Pumps Series FR Shaft Seal Close-coupled and Bearing Assemblies 3R, 4R, 5R, 5F and 6F! Observe for hazardous liquids that there can be liquid left
BRAKE SYSTEM Return To Main Table of Contents
 BRAKE SYSTEM Return To Main Table of Contents GENERAL... 2 BRAKE PEDAL... 10 MASTER CYLINDER... 13 BRAKE BOOSTER... 16 BRAKE LINE... 18 PROPORTIONING VALVE... 19 FRONT DISC BRAKE... 20 REAR DRUM BRAKE...
INSTRUCTION, INSTALLATION, MAINTENANCE AND REPAIR MANUAL MODELS 3341 AND 3344 END SUCTION PUMPS
 SECTION 6 ITEM 3340 DATED JULY 2005 SUPERSEDES SECTION 6 ITEM 3340 DATED JANUARY 2004 INSTRUCTION, INSTALLATION, MAINTENANCE AND REPAIR MANUAL MODELS 3341 AND 3344 END SUCTION PUMPS 6 IMPORTANT NOTE TO
Pump Installation & Service Manual
 unc S entric TM Pump Installation & Service Manual Please record your MODEL # SERIAL # and for your application: Volts Amps Thank you for purchasing the Dankoff SunCentric water pump. This pump has been
Impeller Replacement
 Impeller Replacement Threaded Shaft Frame Mount H 806 Clockwise Rotation Volute shown. 1149 0794 1 Unfasten hardware holding volute to bracket. Remove volute to expose impeller. Peel off old volute gasket
Precision-24 Manual & Specification
 Precision-24 Manual & Specification 1 Product Introduction... - 1-1.1 Product Overview... - 1-1.2 Technical Parameter...- 2-1.2.1 General Parameter...- 2-1.2.2 Performance Parameter... - 3-1.2.3 Installation
Coro-Vane Maintenance CP471. and Disassembly
 Coro-Vane Maintenance CP471 and Disassembly CoroVane Pumps Pumps all have discharge and suction pressure openings. The following slides depict a 1021, but all standard pumps are repaired the same. Grease
Instruction Manual for HSPA Take-Up Units
 Installation Instruction Manual for HSPA Take-Up Units Warning: To ensure the drive is not unexpectedly started, turn off and lockout the power source before proceeding. Failure to observe these precautions
Farval. Dualine Installation System Start-Up. Bulletin DL300 BIJUR DELIMON INTERNATIONAL
 Farval Dualine Installation System Start-Up Bulletin DL300 BIJUR DELIMON INTERNATIONAL 2685 Airport Road Kinston, NC 28504 Tel. 800-227-1063 Fax: 252-527-9232 website: www.bijurdelimon.com DC1-1 SECTION
SERVICING INSTRUCTIONS
 TSP Series 66 Triplex Plunger Pump SERVICING INSTRUCTIONS TRIPLEX TRIPLEX SERVICING PUMP PROCEDURES Valve Replacement: All inlet and discharge valves can be serviced without disrupting the inlet or discharge
MOREHOUSE INSTRUMENT COMPANY, INC. 60,000 LBS CAPACITY AIRCRAFT PART NUMBER SCALE S FORCE CALIBRATION PRESS PART NO.
 INDEX 1. GENERAL SPECIFICATION AND DRAWING 804000-03... 2 2. ASSEMBLY INSTRUCTIONS... 5 3. OPERATING INSTRUCTIONS... 6 4. MAINTENANCE INSTRUCTIONS... 7 5. CERTIFICATE OF CAPACITY LOAD TEST AND OVERLOAD...
Submersible Mixed Flow/Axial Flow Pump Model SAM Model SPM
 Instruction Manual Installation Manual Submersible Mixed Flow/Axial Flow Pump Model SAM Model SPM Thank you for your purchase of the Submersible Mixed Flow/Axial Flow Pump. Teral s Submersible Mixed Flow/Axial
INSTALLATION, OPERATION AND MAINTENANCE INSTRUCTIONS. Mr. Proprietor
 INSTALLATION, OPERATION AND MAINTENANCE INSTRUCTIONS APN PUMPS Mr. Proprietor Congratulations! You have just purchased an equipment of simple construction, designed with the most advanced technology, with
Principals of Operation... 1 Rotary Vane Priming Pump VPE and VPES... 2 Rotary Vane Priming Pump VPO and VPOS Priming Valve...
 Priming Systems Installation Priming Systems Operation & Maintenance Form No. F 1031 Section 2312 Issue Date 10/07/94 Rev. Date 02/27/06 Table of Contents Illustrations Principals of Operation...........................
Series Base mounted pump. Installation and operating instructions
 Series 4030 Installation and File No: 40.80 Date: june 25, 2015 Supersedes: 40.80 Date: october 10, 2009 contents General 4 Inspection 4 Installation - Series 4030 base mounted Pump 4 1.0 Location 4 2.0
Carburetor Instructions
 Carburetor Instructions for HUDSON SUPER SIX ESSEX SIX CYLINDER Hudson Motor Car Co. DETROIT, U.S.A. Carburetor The carburetor is a device for metering correct amounts of fuel and air for the various
CH-4 Series Fire Pumps Overhaul Instructions
 CH-4 Series Fire Pumps Overhaul Instructions Table of Contents Model CHK-4, Transmission Driven (The pump is turned by a K-Series Transmission mounted directly to the pump.) Introduction... 2 Ordering
I & M Mark 78 Series. Ideal Installation. Start-Up. Installation & Maintenance Instructions for Mark 78 Control Valves (1-1/2-2 )
") I & M Mark 8 Series 0 Wasson Road Cincinnati, OH 4509 USA Phone 5-5-5600 Fax 5-8-005 info@richardsind.com www.jordanvalve.com Installation & Maintenance Instructions for Mark 8 Control Valves (-/ - ) Warning:
I & M Mark 8 Series 0 Wasson Road Cincinnati, OH 4509 USA Phone 5-5-5600 Fax 5-8-005 info@richardsind.com www.jordanvalve.com Installation & Maintenance Instructions for Mark 8 Control Valves (-/ - ) Warning:
Before you go through this booklet, we request you to go through the following general instruction before commissioning your hydraulic systems.
 Hello, We are proud to be on your suppliers list. During few years we came to know that most of our customers are satisfied by Yuken Hydraulic Products but some of our customers had minor problems and
Operating Manual Includes Pumps: PG-9000 Part #R809606
 Operating Manual Includes Pumps: PG-9000 Part #R809606 Introduction Thank you for selecting the PG Series Pumps from Lifegard Aquatics. Before using this pump please take a moment to review this manual.