Class 205 Diesel Electric Multiple Unit
|
|
|
- Mervyn Holland
- 5 years ago
- Views:
Transcription
.")
1 Class 205 Diesel Electric Multiple Unit Contents How to install... 2 Technical information... 3 Liveries... 4 Cab guide Desk Auxiliary cupboard Engine room Battery isolation switch Keyboard controls Features Engine physics Tread brake simulation EP/auto brake Headcode blinds Cab Secure Radio (CSR) Advanced slam-door functionality Body sway Window condensation Windscreen fly splatters Cold start Setting up the driver s cab Driving guide How to use in the scenario editor Numbering Scenarios Credits Page 1
2 How to install 1) Locate where you have downloaded this pack and unzip it. Information on how to do this can be found here. 2) Go to the location where you have extracted the files from the.zip file. 3) Now find the.exe file called Class 205 DEMU Pack. Double-click this file. 4) Follow the steps and by the end of the process, the main part of this pack will have installed. 5) If you intend to use any of the included scenarios, make sure you have the freely available extra stock pack and relevant payware add-on packs listed on the product page installed so the scenarios function as intended. Page 2
3 Technical information Manufacturer British Rail - Eastleigh Years built Number built 33 ( ) ( ) Engine English Electric 4SRKT MkII Maximum speed 75mph (121km/h) Coupling type Buckeye Length 19.51m (DMBSO/DTC), 19.34m (TS) Height 3.86m Width 2.82m Weight 56t (DMBSO), 30t (TS), 32t (DTC) Page 3

")
4 Liveries BR Blue BR Blue ( East Kent Railway) - BR Blue (EKR) Page 4
5 BR Blue (Small Yellow Front) - BR Blue (SYF) BR Blue/Grey Page 5
 BR Green")
6 BR Blue/Grey (Pre-TOPS) BR Green Page 6
 - BR Green (FYF)")
 - BR Green (SYF)")
7 BR Green (Full Yellow Front) - BR Green (FYF) BR Green (Small Yellow Front) - BR Green (SYF) Page 7
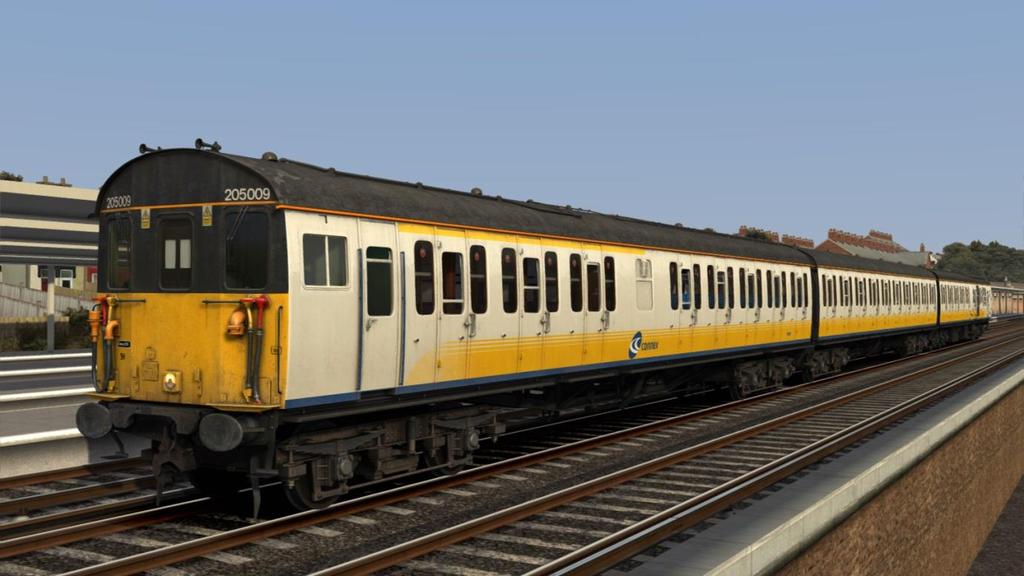
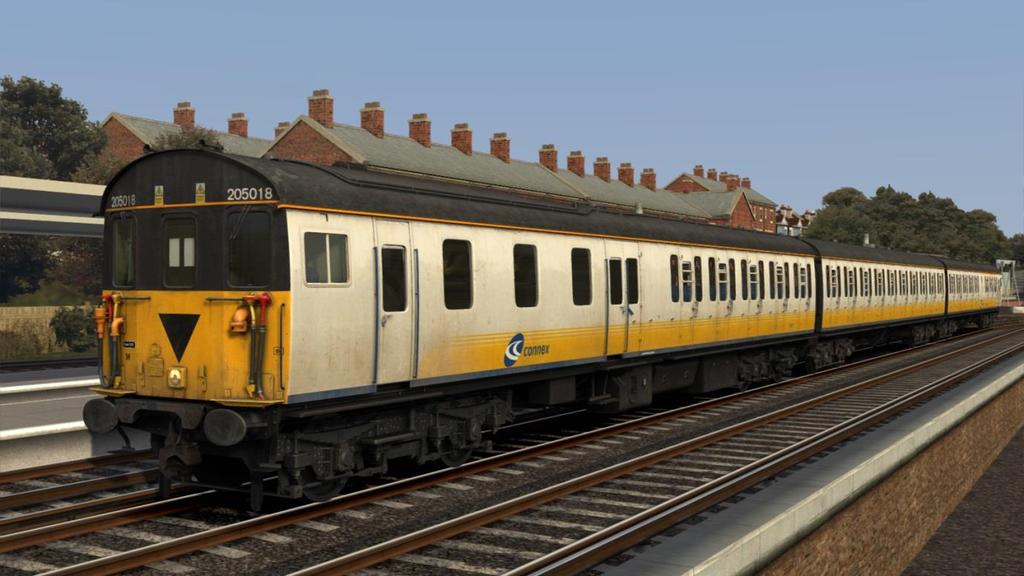
8 Connex Connex (Weathered) Page 8

9 Network SouthEast - NSE Railtrack Page 9
 8 - Instrument lights switch (off/on) 9 - Headcode lights switch (off/on) 10 - Brake")
 unit 16 - Engine running light 17 - Power handle (off/1/2/3/4/5/6/7) 18 - Reverser (off/forward/engine only/reverse) 19 -")
 crank 28 - Heater (B) switch (off/on) 24 - Cab Secure Radio (CSR) 29 - Engine stop button 25 - Ammeter (DMBSO only) 30 - Engine")
10 Cab guide Desk 1 - Brake handle (EP & auto) 2 - Headlight switch (off/on) 3 - Windscreen wiper switch (stop/park/run) 4 - AWS sunflower 5 - Driver to guard buzzer 6 - AWS reset button 7 - Cab lights switch (off/on) 8 - Instrument lights switch (off/on) 9 - Headcode lights switch (off/on) 10 - Brake pipe/main reservoir pressure gauge 11 - Horn (high/low) 12 - Brake cylinder pressure gauge 13 - Speedometer 14 - Overload reset button 15 - Train Protection Warning System (TPWS) unit 16 - Engine running light 17 - Power handle (off/1/2/3/4/5/6/7) 18 - Reverser (off/forward/engine only/reverse) 19 - Master key (in/out) 20 - Headcode box door 21 - Headcode box door lock 26 - Handbrake 22 - Headcode blind (left) crank 27 - Heater (F) switch (off/on) 23 - Headcode blind (right) crank 28 - Heater (B) switch (off/on) 24 - Cab Secure Radio (CSR) 29 - Engine stop button 25 - Ammeter (DMBSO only) 30 - Engine start button Page 10

 control switch (DMBSO only) 4 - Engine room lighting switch (DMBSO only) 5 -")

11 Auxiliary cupboard On the back wall of the non-driver s side of the cab. Opened and closed by clicking it. Accessible by pressing the right arrow key three times, from the main desk view. Closed Open 1 - Electric Train Heating (ETH) isolating switch (DMBSO only) 2 - Passenger saloon lighting switch 3 - Electric Train Heating (ETH) control switch (DMBSO only) 4 - Engine room lighting switch (DMBSO only) 5 - AWS isolation switch 6 - EP brake isolation switch Engine room Accessible by pressing the left arrow key three times, from the main desk view. 1 - Engine oil pressure gauge 2 - Engine start button 3 - Fire alarm test button 4 - Fuel priming pump button Page 11

12 Battery isolation switch This is an external view but only viewable via the cab. Accessible by pressing the left arrow key twice, from the main desk view. 1 - Battery isolation switch (in/out) Page 12
13 Keyboard controls Non-standard keyboard controls are listed below: Ctrl+A - AWS isolation switch ON/OFF Backspace - Brake handle (EMERGENCY) Ctrl+ - Brake handle (LAP/60%) L - Cab light ON/OFF C - Driver to guard buzzer Shift+E - Engine room light switch ON/OFF Z - Engine start button Ctrl+Z - Engine stop button Ctrl+P - EP brake isolation switch ON/OFF F - Fire alarm test button Ctrl+F3 - Headcode blind (left) DOWN Ctrl+F4 - Headcode blind (left) UP Ctrl+F5 - Headcode blind (right) DOWN Ctrl+F6 - Headcode blind (right) UP J - Headcode lights switch ON/OFF Space - Horn (low tone) B - Horn (high tone) I - Instrument lights switch ON/OFF Shift+W - Master key IN/OUT Shift+S - Passenger saloon lighting ON/OFF U - Sun visor DOWN/UP V - Wiper switch LEFT Shift+V - Wiper switch RIGHT Page 13
14 Features High definition textures Detailed internal & external audio Accurate engine physics Advanced tread brake simulation Authentic EP/auto brake User-changeable headcode blinds Cab Secure Radio (CSR) Advanced slam-door functionality Body sway Window condensation Windscreen fly splatters Cold start option Passenger view Fully functioning AWS with accurate delay between passing over the magnet and hearing the warning sound AWS & TPWS self-test Speedometer instability. Fluctuates slightly as per reality. Dynamic exhaust Opening cab windows and door Cab instrument lighting User-operable passenger saloon lights Page 14
15 Engine physics Power handle Off - Engine RPM = 450. Notch 1 - Engine RPM = 450 Notch 2 - Engine RPM = 450 Notch 3 - Engine RPM = 450 Notch 4 - Engine RPM = 620 Notch 5 - Engine RPM = 620 Notch 6 - Engine RPM = 750 Notch 7 - Engine RPM = 850 All notches between 1 & 7 progressively increase power and acceleration. Electric Train Heating (ETH) In ETH mode, the engine idles at a higher RPM of 620. When applying power from off, RPM dies back to 450 over 3.5 seconds before power is actually applied. ETH can be turned on by doing the following: 1) In the cab of the DMBSO, open the auxiliary cupboard doors 2) Move the ETH isolating switch to the on position 3) Click the ETH control switch so it is facing downwards ETH can be turned off by doing the following: 1) In the cab of the DMBSO, open the auxiliary cupboard doors 2) Click the ETH control switch so it is facing upwards 3) Move the ETH isolating switch to the off position ETH can be turned on upon a scenario loading, or on AI trains, by changing the number of the driven vehicle. More information on this can be found in the Numbering section of this manual. Overload reset If the unit is driven above 850 amps for more than 30 seconds, you will run the risk of overloading the traction motors. If this happens, power will be cut and the engine will rev down to idle. To regain power, you must return the power handle to off and press the overload reset button. Page 15
16 Tread brake simulation By default in Train Simulator, braking performance is constant throughout the speed range so a full brake application at 70mph will have the same level of retardation than at 10mph. This is a fairly good representation of how disc brakes work but for stock with tread brakes, like the class 205, this is not so realistic. As a result, this pack has scripted brake force to simulate the relatively poor performance at high speed, and the bite at lower speeds where performance increases quite significantly. EP/auto brake This pack implements an accurate representation of the combined EP (electropneumatic) and auto brake. Please see below for an explanation on how to use each brake: EP (electro-pneumatic) This proportional self-lapping brake operates between 0 and 44% on the train brake handle and provides graduated release, which means you can release the brake without having to move back to release, but by simply selecting the position on the train brake handle proportional to your desired brake force. Listen out for the relays which make a clicking sound when an EP brake application/release starts and ends. Auto This is a fail-safe brake if the EP brake is not operational for any reason, but you may still use it in normal circumstances if you wish. This brake operates between 60% (lap) and 100% on the train brake handle so if you wish to use it, you must move the handle in one movement from 0% to 60% (lap), to avoid an EP application. Also, a keyboard shortcut is available, Ctrl+, which will automatically place the brake handle in the 60% (lap) position without causing an EP application. The main difference with this brake is that if you wish to partially release it, you must move the train brake handle to 0%, and then back to 60% (lap) as soon as you wish to hold the application. Page 16
 Open the headcode box door by clicking it. 3) Place the mouse over the crank you wish to move and then click and drag in the direction you wish to move it.")
 Lock the headcode box door lock by clicking it. Alternatively, you can move the cranks by pressing F3 / F4 for the left-hand and F5 / F6 for the right-hand.")
17 Headcode blinds Closed Open The headcode blinds can be manually changed within the cab. To do this, please follow the instructions below: 1) Unlock the headcode box door lock by clicking it. 2) Open the headcode box door by clicking it. 3) Place the mouse over the crank you wish to move and then click and drag in the direction you wish to move it. The further you drag, the faster the blind will wind. 4) Turn the lights on by either clicking the Indicator Lights switch or pressing J. 5) Close the headcode box door by clicking it. 6) Lock the headcode box door lock by clicking it. Alternatively, you can move the cranks by pressing F3 / F4 for the left-hand and F5 / F6 for the right-hand. The headcode can be set upon a scenario loading, or on AI trains, by changing the number of the relevant vehicle. More information on this can be found in the Numbering section of this manual. Page 17

18 Cab Secure Radio (CSR) Bar actually being able to speak to the signalman, a fully functioning CSR unit is included in this pack. Introduced in the 1980s/1990s, this radio allows direct communication between the driver and signalman. Please see below on how to use it. Turning on and setting up 1) Press the ON button and wait for AREA NOT SET or RADIO LOST to appear. 2) Press the AR button. 3) Using the number keys, enter a 2-digit CSR area. If you make a typo, you can use # to erase the last digit. If using one of the included scenarios with this pack, the area number is given in the F1 briefing of the scenario. 4) Press the * button to validate the CSR area. 5) Wait for the area to register. It will appear on the left-hand side of the screen. 6) Press the T button to test the connection. If all is well, TEST OK will display for 5 seconds. Registering your train 1) Press the SU button. 2) Using the number keys, enter the number of the signal in front of you. This must be 4-digits so if the number is 55, this is input as If you make a typo, you can use # to erase the last digit. 3) Press the * button to validate the signal number. 4) Once the signal number is validated, the headcode of your train will appear on the right-hand side of the screen. Page 18
 To return to the previous screen, press the # button.")
19 Contacting signalman at red signal 1) When standing at a red signal, press the SG button. 2) AT SIG SENT will appear when the message has been sent. 3) Soon after, the signalman will reply with WAIT. This will always be the reply regardless of whether you can pass the signal or not so do still press Tab if required. 4) To return to the previous screen, press the # button. Emergency message 1) In case of an emergency, press the EM button. 2) EMG SENT will appear when the message has been sent. 3) To return to the previous screen, press the # button. Lamp test 1) Hold the LT button. 2) All display pixels and status lights will illuminate. 3) Release the LT button. Unit number display 1) Press the blank button between EM and * buttons. 2) The unit number will be shown on the screen for a short time. CSR area placement in scenarios CSR works by allocating an area number to each signal box (or panel in larger signal boxes) so the driver is always in contact with the signalman signalling his train. As the train moves from one area to another, the CSR unit will automatically change area. Also accompanying these changes in area, are lineside signs which state the number of the new area. This sign is included in this pack and must be placed by the scenario author if the CSR areas are to function. This sign can be found by selecting AP/Common in the Object Set Filter and browsing for AP CSR Sign in the left-hand Track Infrastructure flyout. To place it simply, simply place the marker on the track your train will be passing through, double click the sign, and input the area number in the right-hand fly-out. The area change will take place anywhere within 500m of this sign. Page 19


20 Advanced slam-door functionality Each door is individually scripted and opens/closes at random. This means that very rarely will all doors be open at once, just like reality. On top of this, the degree to which the door opens varies. Finally, whether the droplight windows are raised or not, is controlled by season so in the winter, they are much more likely to be raised than in the summer. Body sway Compared to the default cab sway when on the move in Train Simulator, we have devised a more advanced version. The main feature being that instead of the player s point of view moving, the train itself moves, which can be seen from both inside and outside the cab (only DMBSO when outside). This makes for a more realistic sensation and has also allowed us to introduce vertical movement which wasn t previously present. Finally, sway also occurs when starting up and shutting down the engine, just like reality! Window condensation When the heaters are on and the windows closed, condensation will gradually appear on the windows. To clear this, you will need to either open a window or turn off the heaters. Page 20

21 Windscreen fly splatters When driving in the summer, flies will periodically hit the windscreen and leave a splatter mark. To clean it away, you can use the wipers. Page 21
22 Cold start Cold start means the unit is in the following state when it loads: - Main reservoir, brake pipe and brake cylinder pressures are 0 - Battery isolation switch is out - The engine is shut down - The handbrake is applied and the paddle is positioned on the right-hand side window To prepare a unit from cold, please follow the instructions below: 1) Enter the cab and press the left arrow key twice which will show you the battery box. 2) Click the door to the left of the battery box and click the battery isolation switch to move it up. 3) Now move back to the cab and move the brake handle to the full EP brake position (44% on the HUD). This will ensure that the brake applies in sync with the brake pipe/main reservoir once the engine is started and the compressor is running. 4) Insert the master key by pressing Shift+W. 5) Move the reverser to the engine only position by pressing S. This will activate the oil priming pump, which must be run for at least 30 seconds before trying to start the engine. This is to allow the oil pressure to build up to 20psi. You can check its progress by moving to the engine room view and observing the gauge. 6) As soon as the gauge reaches 20psi, you may start the engine by holding the Z key until the engine running light in the cab extinguishes. 7) Reset the AWS self-test by pressing Q. 8) You will now need to wait for the compressor to build the air up in the brake pipe and main reservoir. You can check its progress by looking at the yellow needle on the far left-hand gauge in the cab. When this reaches 70psi, you may move onto the next step. 9) Release the handbrake on the right-hand side of the cab and then remove the paddle in the right-hand window by clicking it. After carrying out this procedure, your unit will be successfully prepared from cold. To get on the move, please follow the instructions on the next page. Page 22
23 Setting up the driver s cab Please follow the steps below to set up the cab of the class 205 so you are ready to move: 1) Move the brake handle to the emergency position by pressing Backspace. 2) Ensure the master key is inserted in the horizontal position. If not, press Shift+W. 3) Ensure the reverser is in the engine only position. If not, press S. 4) Move the brake handle to the EP area (0% to 44%) to ensure the brake is applied. 5) Switch the headcode box lights on by pressing J. Also, where applicable, turn on the headlight by pressing H. 6) Set up the headcode of your train. 7) Set up the Cab Secure Radio, if required. You should now be ready to move off. For information on this, please see below. Driving guide The following steps should allow you to drive the class 205 in a realistic and safe manner: 1) Move the reverser to your desired direction of travel by pressing either W for forward or S for reverse. 2) Release the brake to a low brake cylinder pressure by pressing the ; key. 3) Move the power handle to notch 1 by pressing A. At the same time, move the brake handle to the release position which will ensure you depart without rolling back. 4) From then on, apply further power as you see fit. Making sure not to overload the engine by drawing 850 amps+ for more than 30 seconds. 5) When returning the power handle to off, make sure to hold it in notch 1 for a few seconds beforehand. This is to let the power die off before removing it. 6) To brake the train, see the EP/auto brake section of the manual. 7) Just before coming to a stop, aim to only be lightly applying the brake so as to provide a smooth stop. Page 23
 Go to the right-hand fly-out which should have appeared. Select AP from the drop-down menu.")
 OR DMBSO + TS + DTC (3 car) Numbering When placing a class 205 in the scenario editor, you are able to control a number of features via the number of the unit.")
, you must add ;HC=xy to the number of the relevant vehicle. xy is the headcode you require.")
24 How to use in the scenario editor How to place To place a class 205 in the scenario editor, please follow the instructions below: 1) In the left-hand rolling stock fly-out, click the object set filter which looks like a blue box with an orange arrow to the right of it. 2) Go to the right-hand fly-out which should have appeared. Select AP from the drop-down menu. 3) Tick the second & third box beside Class205Pack01. 4) The class 205 liveries should now be visible in the left hand rolling stock fly-out. Formation DMBSO + DTC (2 car) OR DMBSO + TS + DTC (3 car) Numbering When placing a class 205 in the scenario editor, you are able to control a number of features via the number of the unit. Please note that for the unit number itself, the only number you need to change is the DMBSO s, as other vehicles in the consist will automatically be numbered correctly in relation to the DMBSO. Headcode To apply a preset headcode to a driving vehicle (DMBSO or DTC), you must add ;HC=xy to the number of the relevant vehicle. xy is the headcode you require. This can be made up of digits or for white blinds, W, red blinds, R and black blinds B. Logos On a number of liveries, you can control the logos shown on the whole unit by adding ;Logo=x to the DMBSO number. Please see below for the liveries you can use this on and what to put as x to receive your desired result: BR Blue/Grey & Network SouthEast: NSE = Network SouthEast. NO = No Network SouthEast logos. Page 24
25 Connex & Connex (Weathered): CXSC = Connex South Central. CX = Connex. SC = South Central. NO = No logos. Window bars In the 1990s, window bars were fitted to most units due to restricted clearance in Oxted tunnel. To apply these bars to the whole unit, you must add ;B=1 to the DMBSO number. Cab Secure Radio (CSR) To allow realistic configuration of the CSR unit in scenarios, ;CSR=DAASSSSTTTT can be added to the driven vehicle (DMBSO or DTC). Please see below for what each sequence of letters represents: D controls whether the CSR is already configured upon starting the scenario. Replace D with 0 for no or 1 for yes. AA is the 2-digit CSR area number required to set up the CSR at the start of the scenario. (eg. 75) SSSS is the 4-digit signal number required to set up the CSR as the start of the scenario. (eg. 0439) TTTT is the 4-character train reporting number of the train (eg. 1W40). Electric Train Heating (ETH) To have ETH turned on upon loading a scenario, or on AI trains, add ;ETH=1 to the driven vehicle (DMBSO or DTC). Cold start To activate cold start mode on a player train, add ;Cold=1 to the DMBSO number. Example number ;HC=88;Logo=CXSC;B=1;CSR= A45;ETH=1 Key: Unit number ;HC=88 - Headcode 88 ;Logo=CXSC - Connex South Central logo ;B=1 - Window bars applied ;CSR= A45 = CSR not automatically configured. CSR area 75. Signal number 32. Train reporting number 1A45. ;ETH=1 - ETH turned on Page 25


26 Scenarios APC205: 1Z66 09:21 London Victoria - London Victoria Route = London to Brighton Track covered = Brighton - London Victoria Traction = Ex-Connex , & Year = 2004 Duration = 50 minutes APC205: 5F52 19:37 Eastbourne - Selhurst Depot Route = London to Brighton Track covered = Keymer Junction - Selhurst Depot Traction = Ex-Connex Year = 2003 Duration = 55 minutes APC205: 1L07 07:27 Uckfield - London Victoria Route = South London Network Track covered = East Croydon - London Victoria Traction = Ex-NSE & Connex Year = 1999 Duration = 20 minutes APC205: 1L81 17:10 London Bridge - Uckfield Route = South London Network Track covered = London Bridge - East Croydon Traction = Ex-Connex & Year = 2004 Duration = 20 minutes APC205: 5J69 08:26 London Bridge - Selhurst Depot Route = South London Network Track covered = London Bridge - Selhurst Depot Traction = Ex-Connex & Year = 2004 Duration = 30 minutes APC205: 5L89 05:52 Selhurst Depot - Norwood Junction /1L89 06:06 Norwood Junction - Uckfield Route = South London Network Track covered = Selhurst Depot - Norwood Junction - East Croydon Traction = Ex-Connex & Year = 2003 Duration = 30 minutes Page 26
27 Credits Jordi Blumberg - Modelling & texturing Nicolas Schichan - Scripting Spa Valley Railway, East Kent Railway & Epping Ongar Railway - Hosting of sound recording and research sessions Page 27
Class 43 (VP185)/Mk3 Enhancement Pack
/Mk3 Enhancement Pack") Class 43 (VP185)/Mk3 Enhancement Pack Contents How to install... 2 Liveries... 3 Keyboard controls... 9 Features... 10 Automatic Train Protection (ATP)... 11 Speed limit display... 11 Brake intervention...
Class 43 (VP185)/Mk3 Enhancement Pack Contents How to install... 2 Liveries... 3 Keyboard controls... 9 Features... 10 Automatic Train Protection (ATP)... 11 Speed limit display... 11 Brake intervention...
Class 91/Mk4 Enhancement Pack
 Class 91/Mk4 Enhancement Pack Contents How to install... 2 Liveries... 3 Keyboard controls... 6 Features... 7 Dynamic brake simulation... 8 Speed set cruise control... 8 Neutral section functionality...
Class 43 (Valenta)/Mk3 Enhancement Pack
/Mk3 Enhancement Pack") Class 43 (Valenta)/Mk3 Enhancement Pack Contents How to install... 2 Liveries... 3 Keyboard controls... 13 Features... 14 Automatic Train Protection (ATP)... 15 Speed limit display... 15 Brake intervention...
Class 43 (Valenta)/Mk3 Enhancement Pack Contents How to install... 2 Liveries... 3 Keyboard controls... 13 Features... 14 Automatic Train Protection (ATP)... 15 Speed limit display... 15 Brake intervention...
Class 90 (Freightliner)
") Class 90 (Freightliner) Contents How to install... 2 Technical information... 3 Liveries... 4 Class 90... 4 Cab guide... 5 Keyboard controls... 7 Features... 8 Braking system (rheostatic/air)... 9 Train
Class 90 (Freightliner) Contents How to install... 2 Technical information... 3 Liveries... 4 Class 90... 4 Cab guide... 5 Keyboard controls... 7 Features... 8 Braking system (rheostatic/air)... 9 Train
London Overground Class 313 EMU
 London Overground Class 313 EMU Page 1 Contents Technical information... 3 Cab guide... 4 Keyboard controls... 6 Features... 7 Advanced and HUD versions... 8 Camshaft traction system... 9 Driver only/guard
Class 66 Enhancement Pack
 Class 66 Enhancement Pack Contents How to install... 2 Liveries... 3 Keyboard controls... 10 New features... 11 EM2000 screen... 12 Main Menu... 12 Meter Menu (Page 1)... 12 Meter Menu (Page 2)... 12 Power
GEML Class 90. Contents. Page 1
 GEML Class 90 Contents Technical information... 2 Liveries... 3 Class 90... 3 Mk3 DVT... 5 Mk3 coaches (FO, RFB & SO)... 7 Cab guide... 8 Keyboard controls... 10 Features... 11 Advanced and HUD versions...
Class 313 Electric Multiple Unit
 Class 313 Electric Multiple Unit Contents How to install... 2 Technical information... 3 Liveries... 4 Cab guide... 8 Standard... 8 Southern... 9 Keyboard controls... 10 Features... 11 Camshaft traction
Class 56 Enhancement Pack
 Class 56 Enhancement Pack Contents How to install... 2 Liveries... 3 Keyboard controls... 11 New features... 12 Warning indication lights... 13 Wheelslip Protection (WSP)... 13 Dynamic exhaust effects...
Class 350 Enhancement Pack
 Class 350 Enhancement Pack Contents How to Install... 2 Liveries... 3 Keyboard Controls... 7 Features... 8 Train Management System (TMS)... 9 Train Protection and Warning System (TPWS) Mk4... 14 Uncoupling
Arriva Trains Wales Class 150/2 DMU
 Arriva Trains Wales Class 150/2 DMU Contents Technical Information... 2 Liveries... 3 Cab Guide... 4 Keyboard Controls... 5 Features... 6 Global System for Mobile Communication-Railway (GSM-R)... 7 Registering...
Train Simulator 2017 Class 419 MLV. Class 419 MLV. Copyright Dovetail Games 2017, all rights reserved
 Class 419 MLV 1 BACKGROUND...4 1.1 Class 419 MLV...4 1.2 Class 419 Design & Specification...4 2 ROLLING STOCK - LOCOMOTIVES...5 2.1 Class 419 MLV in Network SouthEast livery...5 2.2 Class 419 MLV in Jaffa
CLASS 377. Copyright RailSimulator.com 2012, all rights reserved Release Version 1.0
 CLASS 377 1 BACKGROUND......... 3 1.1 Class 377...3 1.2 Design & Specification...3 1.3 Class 377 Consist Formations...3 2 ROLLING STOCK...... 4 3 CREATING A CLASS 377 TRAIN SET..... 7 3.1 Scenario Editor
Class 455/9 Electric Multiple Unit
 Class 455/9 Electric Multiple Unit 1 BACKGROUND... 2 1.1 Class 455/9... 2 1.2 Design & Specification... 2 2 THE CLASS 455/9 ELECTRIC MULTIPLE UNIT... 2 2.1 SWT Livery... 2 2.2 NSE Livery... 3 2.3 BR Livery...
InterCity BR Class 370 'Advanced Passenger Train - Prototype'
 InterCity BR Class 370 'Advanced Passenger Train - Prototype' Page 1 1 BACKGROUND...4 1.1 InterCity BR Class 370 'Advanced Passenger Train - Prototype'...4 1.2 Class 370 APT-P Design & Specification...4
Class 455/8 Southern. Copyright Dovetail Games 2015, all rights reserved Release Version 1.0
 Class 455/8 Southern 1 BACKGROUND... 3 1.1 The Multiple Unit... 3 1.2 Design & Specification... 3 2 ROLLING STOCK... 4 2.1 Unit List... 4 3 DRIVING THE CLASS 455/8... 6 3.1 Cab Controls... 6 3.2 Locomotive
Class 444 Electric Multiple Unit
 Class 444 Electric Multiple Unit 1 BACKGROUND...2 Class 444 Electric Multiple Unit...2 2 ROLLING STOCK...3 2.1 South West Trains Express White Livery...3 3 DRIVING THE CLASS 444 EMU...6 3.1 Cab Diagram...6
Class 319 Electric Multiple Unit Volume 1
 Class 319 Electric Multiple Unit Volume 1 Contents How to Install... 2 Technical Information... 3 Liveries... 4 Cab Guide... 9 Keyboard Controls... 11 Features... 12 Passenger View... 13 Sub-class Differences...
The Class 111 Diesel Multiple Unit
 The Class 111 Diesel Multiple Unit 1 BACKGROUND...2 Class 111 Diesel Mechanical Multiple Unit...2 2 ROLLING STOCK...3 2.1 BR Green DMBS...3 2.2 BR Green DTCL...3 3 DRIVING THE CLASS 111 DMU...4 3.1 Cab
Class 24 BR Blue. Copyright Dovetail Games 2015, all rights reserved Release Version 1.0
 Class 24 BR Blue 1 BACKGROUND... 3 1.1 Class 24... 3 1.2 Design & Specification... 3 2 ROLLING STOCK... 4 2.1 Class 24... 4 2.2 BR Blue Mk1 FK... 4 2.3 BR Blue Mk1 SK... 5 2.4 BR Blue Mk1 BG... 5 2.5 Hopper
Arriva Trains Wales DMU Pack
 Arriva Trains Wales DMU Pack 1 BACKGROUND... 3 1.1 Class 158... 3 1.2 Design & Specification... 3 1.3 Class 143... 3 1.4 Design & Specification... 3 2 ROLLING STOCK... 4 2.1 Class 158 Arriva Trains Wales...
ÖBB Copyright Dovetail Games 2016, all rights reserved Release Version 1.0
 ÖBB 4020 1 BACKGROUND... 4 1.1 Loco... 4 1.2 Design & Specification... 4 2 ROLLING STOCK... 5 2.1 ÖBB 4020... 5 2.2 ÖBB 4020 New Logo... 6 2.3 ÖBB 4020 Red Grey... 7 3 DRIVING THE ÖBB 4020... 8 3.1 Cab
Preparation and movement of trains Defective or isolated vehicles and on-train equipment Issue 7
 GERT8000-TW5 Rule Book Module TW5 Preparation and movement of trains Defective or isolated vehicles and on-train equipment Issue 7 September 2016 Comes into force 03 December 2016 Published by: RSSB The
Train Simulator 2015 EMD FL9. New Haven EMD FL9. Copyright Dovetail Games 2015, all rights reserved Release Version 1.0. Page 1
 New Haven EMD FL9 Page 1 1 BACKGROUND... 3 1.1 Loco... 3 1.2 Design & Specification... 3 2 ROLLING STOCK... 4 2.1 EMD FL9... 4 2.2 Metro-North Shoreliner III Cab car and Passenger car... 4 3 DRIVING THE
Route Guide. Route expansion for Train Simulator S-Bahn Rhein-Main Route Guide
 ROUTE GUIDE Route Guide Route expansion for Train Simulator 2018 2 CONTENTS INTRODUCTION...4 Route...4 Services...5 Depots and Sidings...6 NOTES ON USING THE ROUTE...7 Train Simulator Display Settings...7
BR Class 105. Copyright Dovetail Games 2015, all rights reserved Release Version 1.0
 BR Class 105 1 BACKGROUND... 3 1.1 Loco... 3 1.2 Design & Specification... 3 2 ROLLING STOCK... 4 2.1 BR Class 105 DMBS... 4 2.2 BR Class 105 DTCL... 4 3 DRIVING THE BR CLASS 105... 5 3.1 Cab Controls...
Issue 8. Module TW5. Preparation and movement of trains: Defective or isolated vehicles and on-train equipment. GERT8000-TW5 Rule Book
 GERT8000-TW5 Rule Book Preparation and movement of trains: Defective or isolated vehicles and on-train equipment Issue 8 Module TW5 September 2017 Comes into force 02 December 2017 Conventions used in
BR266 Diesel Locomtoive
 BR266 Diesel Locomtoive 1 BACKGROUND... 3 1.1 History... 3 1.2 Design & Specification... 3 2 ROLLING STOCK... 4 2.1 BR266... 4 2.2 Megafret container wagons... 4 3 DRIVING THE BR266... 6 3.1 Cab Controls...
BR 266 Diesel Locomotive
 BR 266 Diesel Locomotive 1 BACKGROUND... 3 1.1 History... 3 1.2 Design & Specification... 3 2 ROLLING STOCK... 4 2.1 BR266... 4 2.2 Megafret container wagons... 4 3 DRIVING THE BR266... 6 3.1 Cab Controls...
F40 Locomotive Operating Manual
 F40 Locomotive Operating Manual 1. Introduction The HP-Trainz team developed very detailed 3D-model of the American diesel-electric locomotive F40 for the use in the railway simulator Trainz. Beside the
DB BR261 - Voith Gravita 10BB
 DB BR261 - Voith Gravita 10BB 1 BACKGROUND... 3 1.1 Loco...3 1.2 Design & Specification...3 2 ROLLING STOCK... 4 2.1 DB BR261 Voith Gravita...4 2.2 Zacns 95m Tanker...4 2.3 Rnoos 644...5 2.4 Cab Controls...6
The Class 101 British Rail Pack
 The Class 101 British Rail Pack 1 BACKGROUND...2 Class 101 Diesel Mechanical Multiple Unit...2 2 ROLLING STOCK...4 2.1 British Rail Blue...4 2.2 British Rail Blue/Grey...4 3 DRIVING THE CLASS 101 DMU...5
Class 180 (Adelante) Copyright Dovetail Games 2015, all rights reserved Release Version 1.0
 Copyright Dovetail Games 2015, all rights reserved Release Version 1.0") Class 180 (Adelante) 1 BACKGROUND... 3 1.1 Class 180 (Adelante)... 3 1.2 Design & Specification... 3 2 ROLLING STOCK... 4 2.1 DMSL A (B)... 4 2.2 MFL (F)... 4 2.3 MSL (E)... 5 2.4 MSLRB (C)... 5 2.5 DMSL
Class 180 (Adelante) 1 BACKGROUND... 3 1.1 Class 180 (Adelante)... 3 1.2 Design & Specification... 3 2 ROLLING STOCK... 4 2.1 DMSL A (B)... 4 2.2 MFL (F)... 4 2.3 MSL (E)... 5 2.4 MSLRB (C)... 5 2.5 DMSL
Class 220 Voyager. Copyright Dovetail Games 2015, all rights reserved Release Version 1.0
 Class 220 Voyager 1 BACKGROUND... 3 1.1 Class 220 Voyager...3 1.2 Design & Specification...4 2 ROLLING STOCK... 5 3 DRIVING THE CLASS 220 VOYAGER... 7 3.1 Cab Controls...7 3.2 Locomotive Keyboard Controls...9
Class 220 Voyager. Copyright Dovetail Games 2014, all rights reserved Release Version 1.0
 Class 220 Voyager 1 BACKGROUND... 3 1.1 Class 220 Voyager...3 1.2 Design & Specification...4 2 ROLLING STOCK... 5 3 DRIVING THE CLASS 220 VOYAGER... 7 3.1 Cab Controls...7 3.2 Locomotive Keyboard Controls...9
Arriva Trains Wales DMU Pack
 Arriva Trains Wales DMU Pack 1 BACKGROUND...... 3 1.1 Class 158...3 1.2 Class 143...3 2 ROLLING STOCK... 4 2.1 Class 158 Arriva Trains Wales...4 2.2 Class 143 Arriva Trains Wales...4 3 DRIVING THE CLASS
GE ARROW III NJ TRANSIT
 GE ARROW III NJ TRANSIT 1 BACKGROUND... 4 1.1 Loco... 4 1.2 Design & Specification... 4 2 ROLLING STOCK... 5 2.1 Arrow III A Car... 5 2.2 Arrow III B Car... 5 3 DRIVING THE ARROW III... 6 3.1 Cab Controls
Issue 9. Module TW5. Preparation and movement of trains: Defective or isolated vehicles and on-train equipment. GERT8000-TW5 Rule Book
 GERT8000-TW5 Rule Book Preparation and movement of trains: Defective or isolated vehicles and on-train equipment Issue 9 Module TW5 September 2018 Comes into force 01 December 2018 Conventions used in
Class 45/46 Peak Diesel Locomotives 1 BACKGROUND...2
 Class 45/46 Peak Diesel Locomotives 1 BACKGROUND...2 1.1 Class 45/46 Heritage...2 1.2 Sulzer 12LDA28B Diesel engine...3 1.3 Nose End Variations...3 1.4 Design and Specification...4 2 THE CLASS 45/46 DIESEL
Class 605 ICE TD. Copyright Dovetail Games 2014, all rights reserved Release Version 1.0
 Class 605 ICE TD 1 Background... 3 Multiple Unit... 3 Design & Specification... 3 2 Rolling Stock... 4 Class 605 ICE TD... 4 3 Driving the ICE TD... 5 Cab Controls... 5 Keyboard Controls... 6 General Keyboard
ITCEMS950 Idle Timer Controller - Engine Monitor Shutdown Isuzu NPR 6.0L Gasoline Engine
 Introduction An ISO 9001:2008 Registered Company ITCEMS950 Idle Timer Controller - Engine Monitor Shutdown 2014-2016 Isuzu NPR 6.0L Gasoline Engine Contact InterMotive for additional vehicle applications
DB BR114. Copyright Dovetail Games 2016, all rights reserved Release Version 1.0
 DB BR114 1 BACKGROUND... 3 1.1 BR114... 3 1.2 Design & Specification... 3 2 ROLLING STOCK... 4 2.1 BR114... 4 2.2 Doppelstockwagen... 4 3 DRIVING THE BR114... 6 3.1 Cab Controls... 6 3.2 Locomotive Keyboard
Railworks Austria Skyhook Games ÖBB 1014 Manual
 Railworks Austria Skyhook Games ÖBB 1014 Manual Page 1 Index Introduction Page 3 1014 cab and key bindings Page 4 Train Operation Start-up procedure Page 8 Driving procedures Page 9 PZB/Indusi How does
BR Blue Diesel Electric Pack Classes 09/33/73/416/421
 BR Blue Diesel Electric Pack Classes 09/33/73/416/421 1 BACKGROUND... 3 1.1 Class 09... 3 1.2 Class 33... 4 1.3 Class 73... 5 1.4 Class 416 2EPB... 6 1.5 Class 421 4CIG... 7 2 ROLLING STOCK... 8 2.1 OBA
Indian Speedometer and Body Control Module Service Tool Users Guide
 Indian Speedometer and Body Control Module Service Tool Users Guide Installing speedometer software to your computer 1. Go to the Indian Motorcycle Website: WWW. Indianmotorcycle.com 2. Log in to Service
RhB Enhancement Pack 2
 Train Simulator 2017 RhB Enhancement Pack 2 1 THE GE 4/4 II LOCOMOTIVE... 3 1.1 Locomotive History... 3 1.2 Design & Specification... 3 1.3 Cabin Controls - Refer to the illustrations on page 4... 3 1.4
Operation Instructions
 BR111 and Bxf Expert-Line Operation Instructions Preface: We are happy to present you another Expert Line locomotive: the BR111 and the driving trailer Bxf. As we did with our first Expert Line locomotive
Operator s Manual Reppo Virtual Rail Vehicles Baldwin DR
 2 Rolling Stock PRR CENTIPEDE UNIT A-1 5823-A1-5834-A1 PRR CENTIPEDE UNIT A-2 5823-A2-5834-A2 PRR B60b BAGGAGE CAR 9200-9399 3 PRR D78d DINING CAR 4470-4474-4475-4478-4486-4490-4491-4492-4494-4497 4 OPERATION
DB BR152. Copyright Dovetail Games 2015, all rights reserved Release Version 1.0
 DB BR152 1 BACKGROUND... 3 1.1 Loco... 3 1.2 Design & Specification... 3 2 ROLLING STOCK... 4 2.1 DB BR152... 4 3 DRIVING THE BR152... 5 3.1 Cab Controls and image... 5 3.2 Keyboard Controls... 7 3.3 General
DB Class 424 Electrical Multiple Unit
 DB Class 424 Electrical Multiple Unit 1 THE CLASS 424...2 1.1 Class 424 EMU...2 1.2 Technical Specification...2 2 ROLLING STOCK...3 2.1 DB BR424...3 3 CAB CONTROLS...4 3.1 Controls...4 3.2 Keyboard Guide...5
DB Class 420 EMU. AddOn Users Manual
 DB Class 420 EMU AddOn Users Manual 1 Table of Contents History... 3 Technical Data... 4 Sound Playback Information... 4 Driving... 5 Combined Throttle and Brake Control... 5 Indicators... 6 Operating
DB E10 Expert-Line. Compatible with Train Simulator 2015
 DB E10 Expert-Line Compatible with Train Simulator 2015 Content... 1 1 Information... 3 1.1 DB E10... 3 1.2 DB E10 - Functions available in the Simulation... 3 1.3 Technical Data DB E10... 3 2 The Locomotive...
Idle Timer Controller - A-ITC620-A Chevrolet Express/GMC Savana
 Introduction An ISO 9001:2015 Registered Company Idle Timer Controller - A-ITC620-A1 2009-2019 Chevrolet Express/GMC Savana Contact InterMotive for additional vehicle applications The A-ITC620-A1 is an
CRH2A EMU Driver Manual Ver. 1.2
 CRH2A EMU Driver Manual Ver. 1.2 This manual is only for use with the Train Simulator game and is not for real-world use. 1 / 24 Table of Contents 1 Brief Introduction to CRH2A EMU... 3 2 About This Add-On...
TRAIN SIM WORLD : NORTHERN TRANS-PENNINE DRIVER S MANUAL
 TRAIN SIM WORLD : NORTHERN TRANS-PENNINE DRIVER S MANUAL 1 2018 Dovetail Games, a trading name of RailSimulator.com Limited ( DTG ). All rights reserved. "Dovetail Games", Train Sim World and SimuGraph
F40PH-2CAT New Jersey Transit
 F40PH-2CAT New Jersey Transit 1 BACKGROUND... 3 1.1 Loco... 3 1.2 Design & Specification... 3 2 ROLLING STOCK... 4 2.1 F40PH-2CAT... 4 2.2 Comet IV... 4 2.3 Comet V Cab Car... 5 3 DRIVING THE F40PH-2CAT...
Idle Timer Controller - ITC515-A Ford Transit Contact InterMotive for additional vehicle applications
 An ISO 9001:2008 Registered Company Idle Timer Controller - ITC515-A 2015-2018 Ford Transit Contact InterMotive for additional vehicle applications Overview The ITC515-A system will shut off gas or diesel
FORD MONDEO Quick Reference Guide
 FORD MONDEO Quick Reference Guide About This Quick Reference Guide We have created this guide to help you get to know certain features of your vehicle. It only contains basic instructions to get you started
Idle Timer Controller - A-ITC520-A Ford E Series Ford F250 - F Ford F250 - F550 (*B-ITC520-A) F650/F750
 F650/F750") An ISO 9001:2008 Registered Company Idle Timer Controller - A-ITC520-A 2009-2018 Ford E Series 2008-2016 Ford F250 - F550 2017-2018 Ford F250 - F550 (*B-ITC520-A) 2016-2018 F650/F750 *Uses the Ford 24-Pin
An ISO 9001:2008 Registered Company Idle Timer Controller - A-ITC520-A 2009-2018 Ford E Series 2008-2016 Ford F250 - F550 2017-2018 Ford F250 - F550 (*B-ITC520-A) 2016-2018 F650/F750 *Uses the Ford 24-Pin
Class 460 Train Operating Manual
 Class 460 Train Operating Manual Produced by: Introduction - Page 1 Index Introduction 3 Technical Specifications..4 Rolling Stock.5 Cab Layout 9 Keyboard Controls.17 Controls Description..18 Train Monitoring
DB BR361/V60. Copyright Dovetail Games 2015, all rights reserved Release Version 1.0
 DB BR361/V60 1 BACKGROUND... 3 1.1 BR361/V60... 3 1.2 Design & Specification... 4 2 ROLLING STOCK... 5 2.1 BR361/V60... 5 2.2 SGGRSS Freight Wagons... 5 3 DRIVING THE BR361/V60... 6 3.1 Cab Controls...
DB Class 101 traffic red Pro-Line
 DB Class 101 traffic red Pro-Line Compatible with Train Simulator 2017 DB Class 101 traffic red with ABpmz IC coaches Content... 2 1 Information... 3 1.1 DB class 101 - Functions available in the Simulation...
Idle Timer Controller - ITC Freightliner MT45 Contact InterMotive for additional vehicle applications
 An ISO 9001:2008 Registered Company System Operation Idle Timer Controller - ITC805 2013-2018 Freightliner MT45 Contact InterMotive for additional vehicle applications The ITC805 system shuts down idling
Vehicle health check ABS - ANTI LOCK BRAKE MODULE. Fault Codes. Parameters Snapshot ACM - AUDIO CONTROL MODULE. Fault Codes. Parameters Snapshot
 Vehicle health check Health check done on: 11/06/2015 08:17:25 VIN: xxxxxxxxxxxxxx Plate Number: Not Registered ABS - ANTI LOCK BRAKE MODULE Brake / Configuration and programming version --------- DTC
BR CLASS 156 DMU DRIVING MANUAL
 BR CLASS 156 DMU DRIVING MANUAL 1. Background 2. Technical information 3. Liveries 4. Key features 5. Switches, buttons and functionalities 6. Headlight system 7. Destination display 8. Scenarios 9. Keyboard
APPENDIX TO INSTRUCTIONS MANUAL LEON
 APPENDIX TO INSTRUCTIONS MANUAL LEON Instruments and control lamps Instruments and control lamps Digital instrument panel (SEAT Digital Cockpit) Details of the instruments : 1 2 3 4 5 Rev counter (revolutions
Operations Manual. Automated Fuel Maintenance System FUEL TECHNOLOGIES INTERNATIONAL
 Operations Manual Automated Fuel Maintenance System FTI-10A & 20A FUEL TECHNOLOGIES INTERNATIONAL Replacement Manuals Available on Website: www.fueltechnologiesinternational.com 07/15/2015 Rev E Fuel Technologies
Customer Experience Center Pocket Reference Guide
 Customer Experience Center 1-800-331-4331 2007 Pocket Reference Guide MN 00452-PRG07-COR Printed in USA 6/06 17 2007 Corolla This Pocket Reference Guide is a summary of basic vehicle operations. It contains
London Transport Heritage Collection
 London Transport Heritage Collection 1 ROLLING STOCK... 4 1.1 Class 20... 4 1.1.1 Background...4 1.1.2 Design & Specification...5 1.2 Pannier 5700 Class... 5 1.2.1 Background...6 1.2.2 Design & Specification...6
Preparation and movement of trains
 GERT8000-TW1 Rule Book Uncontrolled When Printed Preparation and movement of trains Issue 11 Module TW1 September 2016 Comes into force 03 December 2016 Published by: RSSB The authoritative version of
AS-1535 SH User Guide
 A U T O M A T I C T R A N S M I S S I O N M U L T I C H A N N E L R E M O T E S T A R T E R S Y S T E M AS-1535 SH User Guide Transmitter Part Number and Module Serial Number... 2 Introduction... 2 Basic
New Features and Description
 1 2 New Features and Description Full Throttle Decoder Operation for Diesels It is often challenging to make a scale model preform like it has the mass of a 260,000lb locomotive pulling 5,000 tons or more!
DB Class 101 traffic red Expert-Line
 DB Class 101 traffic red Expert-Line Compatible with Train Simulator 2016 DB Class 101 traffic red with ABpmz IC coaches Content... 1 1 Information... 3 1.1 DB class 101 - Functions available in the Simulation...
A U T O M A T I C T R A N S M I S S I O N M U L T I - C H A N N E L T W O - W A Y L C D R E M O T E S T A R T E R AS-2510 TW.
 A U T O M A T I C T R A N S M I S S I O N M U L T I - C H A N N E L T W O - W A Y L C D R E M O T E S T A R T E R S Y S T E M AS-2510 TW User Guide Transmitter Part Number and Module Serial Number...2
Virgin Trains First Generation Pack Class 43 HST & Class 47/8
 Virgin Trains First Generation Pack Class 43 HST & Class 47/8 1. BACKGROUND... 3 1.1 V irgin T rains...3 1.2 Class 43 'High Speed Train'...3 1.3 Class 47/8...4 2. ROLLING STOCK... 5 2.1 Class 43 HST...5
Amtrak Dash 8-32BWH. Copyright Dovetail Games 2016, all rights reserved Release Version 1.0
 Amtrak Dash 8-32BWH 1 BACKGROUND...... 3 1.1 Loco...3 1.2 Design & Specification...3 2 ROLLING STOCK...... 4 2.1 Amtrak Dash 8-32BWH...4 2.2 Amtrak Dash 8-32BWH Phase III...4 2.3 Amtrak Baggage Heritage...5
INSTALL GUIDE FLCI-IDS(RS)-BZ4-[FLRSBZ4]-EN
![INSTALL GUIDE FLCI-IDS(RS)-BZ4-[FLRSBZ4]-EN](/thumbs/95/126494956.jpg "INSTALL GUIDE FLCI-IDS(RS)-BZ4-[FLRSBZ4]-EN") INSTALL GUIDE DOCUMENT NUMBER 58247 REVISION DATE 20190116 FIRMWARE FLCI-IDS(RS)-BZ4-[FLRSBZ4] HARDWARE FLRSBZ4 ACCESSORIES FLPROG (REQUIRED) FLRF1/2/4 (OPTIONAL) MYCAR (OPTIONAL) TERMS OF USE: Automotive
INSTALL GUIDE DOCUMENT NUMBER 58247 REVISION DATE 20190116 FIRMWARE FLCI-IDS(RS)-BZ4-[FLRSBZ4] HARDWARE FLRSBZ4 ACCESSORIES FLPROG (REQUIRED) FLRF1/2/4 (OPTIONAL) MYCAR (OPTIONAL) TERMS OF USE: Automotive
ALP-46 New Jersey Transit
 ALP-46 New Jersey Transit 1 BACKGROUND... 3 1.1 Loco... 3 1.2 Design & Specification... 3 1.3 Multi-Level Cab car... 4 1.4 Design & Specification... 4 2 ROLLING STOCK... 5 2.1 NJT ALP-46... 5 2.2 Comet
XC Instrumentation System Owner s Manual Revision /05/06
 XC Instrumentation System Owner s Manual Revision 3.0 07/05/06 XC INSTRUMENTATION SYSTEM OWNER S MANUAL 1 Revision History Date New Revision Level Revision Description 11/08/05 1.0 Initial release 05/24/06
QUICK INSTALLATION GUIDE
 MANUAL/AUTOMATIC T R A N S M I S S I O N 2 - B U T T O N R E M O T E S T A R T E R W I T H V I R T U A L T A C H S Y S T E M ( A S P R G - 1 0 0 0 C O M P A T I B L E ) QUICK INSTALLATION GUIDE Manual
Idle Timer Controller - A-ITC620-A Chevrolet Express/GMC Savana
 An ISO 9001:2008 Registered Company Idle Timer Controller - A-ITC620-A1 2009-2018 Chevrolet Express/GMC Savana Contact InterMotive for additional vehicle applications Introduction The A-ITC620-A1 is an
CLASS 56. Railfreight Sectors. Copyright Dovetail Games 2014, all rights reserved Release Version 1.0
 CLASS 56 Railfreight Sectors 1 BACKGROUND... 3 Class 56 Locomotive...3 Design & Specification...3 ROLLING STOCK 4 Class 56 Railfreight Sectors...4 2 DRIVING THE CLASS 56 DIESEL LOCOMOTIVE... 5 Cab Controls...5
volvo C70 quick guide
 volvo C70 quick guide WELCOME TO THE GLOBAL FAMILY OF VOLVO OWNERS! Getting to know your new vehicle is an exciting experience. Please browse through this Quick Guide to get the full benefits from your
Activity. Briefing: The activity commences shortly after the arrival of W93 at Mt Victoria (11 55).
.") Activity Title: W93 Down Local Passenger Service Wednesday only Day / Time: Wednesday only, 11 55am Season & Weather: Summer & Clear Difficulty: Medium Time to complete: 1.5 hours Description: Activity
Activity Title: W93 Down Local Passenger Service Wednesday only Day / Time: Wednesday only, 11 55am Season & Weather: Summer & Clear Difficulty: Medium Time to complete: 1.5 hours Description: Activity
HHP-8 Electric Locomotive
 HHP-8 Electric Locomotive 1 BACKGROUND......... 3 1.1 Loco...3 1.2 Design & Specification...3 2 ROLLING STOCK...... 4 2.1 HHP-8 Electric Locomotive...4 2.2 Amcoach...5 2.3 Amcafe...5 3 DRIVING THE HHP-8.........
1003 Orientation B&SVRR 1003 Orientation Page 1 10/23/2009
 1003 Orientation B&SVRR 1003 Orientation Page 1 B&SVRR 1003 Orientation Page 2 CONTROLS AT ENGINEMAN'S POSITION 1. Air Gauges 8. Reverse Lever 2. Load Current Indicating Meter 9. Heater Switch 3. Indicating
: Automation Laboratory 1
 Table A.1 shows elements found in FluidSIM library with a brief description for each of them. Compressed air supply The compressed air supply provides the needed compressed air. It contains a pressure
User Guide 1 WAY FM MANUAL TRANSMISSION REMOTE STARTER. Table of Contents. Introduction
 1 WAY FM MANUAL TRANSMISSION REMOTE STARTER User Guide Table of Contents... 1 Introduction... 1 Using the Remote Control... 2 Multi-Level Features (default state)... 2 Remote-Starting Your Vehicle... 3
Wiring diagrams on page 29 are for reference only. For detailed vehicle wiring refer to Navistar documents.
 1 10/2014 REV 7 !!Attention!! Before performing diagnostics: Wiring diagrams on page 29 are for reference only. For detailed vehicle wiring refer to Navistar documents. Check for Fault Codes using the
Exterior overview. 2 Addendum TR1478. Addendum
 Contents This addendum describes features that are specific to the Roadster 2.5. It also provides updates and/or corrections that improve the accuracy or quality of the information published in your owner
KEY FOB. Locking And Unlocking The Doors
 KEY FOB Key Fob Locking And Unlocking The Doors Cargo Vehicle (Canada) Push and release the lock button once to lock all the doors. Push and release the unlock button once to unlock the front two doors.
TWO-WAY LED AUTOMATIC TRANSMISSION REMOTE STARTER. User Guide WARNING
 TWO-WAY LED AUTOMATIC TRANSMISSION REMOTE STARTER User Guide WARNING It is the responsibility of the vehicle operator to ensure their vehicle is parked in a safe and responsible manner. 1. When leaving
RS3200 PLUS OWNER S GUIDE SECURITY SYSTEM DESIGNED FOR USE WITH YOUR VEHICLE S REMOTE KEYLESS ENTRY SYSTEM
 2006 RAV4 TVIP V5 RS3200 PLUS OWNER S GUIDE RS3200 PLUS SECURITY SYSTEM DESIGNED FOR USE WITH YOUR VEHICLE S REMOTE KEYLESS ENTRY SYSTEM OWNER S GUIDE Rev. B 12/01/05 090002-29640700 090002-29640700 TOYOTA
ADAM TM Advanced Digital Audio Matrix
 ADAM TM Advanced Digital Audio Matrix USER MANUAL CSedit Intercom Configuration Software for ADAM and ADAM CS Intercom Systems 9350-7077-300 Rev C, 8/00 CONTENTS Introduction iii If You Are in a Hurry!
Instruction of connection and programming of the VECTOR controller
 Instruction of connection and programming of the VECTOR controller 1. Connection of wiring 1.1.VECTOR Connection diagram Fig. 1 VECTOR Diagram of connection to the vehicle wiring. 1.2.Connection of wiring
V8 Vantage Sportshift Driving Guide
 LG/GE/10/03/2011 The V8 Vantage incorporates a 6-speed Sportshift automated manual transmission. There are two driving modes for V8 Vantage Sportshift. The first is Paddle Shift Mode This is the mode where
Starting the engine GENERAL INFORMATION. Steering column lock. START/STOP button. Switching on the ignition
 Starting the engine GENERAL INFORMATION START/STOP button The START/STOP button is used to start or stop the engine, or to turn on the ignition without starting the engine. Note: The START/STOP button
Quick GUIDE Web edition
 s60 Quick GUIDE Web edition WELCOME TO YOUR NEW VOLVO! Getting to know your new car is an exciting experience. Take a look at this Quick Guide to learn some of the most common functions quickly and easily.
Release Notes. Scania Diagnos & Programmer 3 Version 2.28
 en-gb Release Notes Scania Diagnos & Programmer 3 Version 2.28 Version 2.28 replaces version 2.27 of Scania Diagnos & Programmer 3 and supports the systems for vehicles in the P, G, R, S and T series,
NO PART OF THIS DOCUMENT MAY BE REPRODUCED WITHOUT PRIOR AGREEMENT AND WRITTEN PERMISSION OF FORD PERFORMANCE PARTS.
 Table of Contents Table of Contents... 1 Getting Started... 2 ProCal Flash Tool... 2 Verify Package Contents... 2 Getting to Know the ProCal 3 Software... 3 Prepare Vehicle for Flashing... 7 Download Calibration