QUESTIONS? PATENT PENDING. Model No. WESY85100 Serial No. Write the serial number in the space above for future reference.
|
|
|
- Heather McDaniel
- 5 years ago
- Views:
Transcription

1 PATENT PENDING Model No. WESY85100 Serial No. Write the serial number in the space above for future reference. Serial Number Decal-- QUESTIONS? As a manufacturer, we are commiffed to providing complete customer satisfaction. If you have questions, or find that there are missing or damaged parts, we will guarantee you complete satisfaction through direct assistance from our factory. TO AVOID UNNECESSARY DELAYS, PLEASE CALL DIRECT TO OUR TOLL-FREE CUSTOMER HOT LINE. The trained technicians on our customer hot line will provide immediate assistance, free of charge to you. CUSTOMER HOT LINE: Mon.-Fri., 6 a.m.-6 p.m. MST USER'S MANUAL
2 TABLE OF CONTENTS LIMITED WARRANTY... 2 IMPORTANT PRECAUTIONS... 3 BEFORE YOU BEGIN... 4 ASSEMBLY... 5 HOW TO USE THE HOME GYM SYSTEM TROUBLE-SHOOTING AND MAINTENANCE CABLE DIAGRAM PART LIST EXPLODED DRAWING ORDERING REPLACEMENT PARTS... Back Cover Note: A PART IDENTIFICATION CHART is attached to the center of this manual. Remove the PART IDENTIFICATION CHART before beginning assembly. LIMITED WARRANTY ICON Health & Fitness, Inc. (ICON), warrants this product to be free from defects in workmanship and material, under normal use and service conditions, for a period of ninety (90) days from the date of purchase. This warranty extends only to the original purchaser. ICON's obligation under this warranty is limited to replacing or repairing, at ICON's option, the product at one of its authorized service centers. All products for which warranty claim is made must be received by ICON at one of its authorized service centers with all freight and other transportation charges prepaid, accompanied by sufficient proof of purchase. All returns must be pro-authorized by ICON. This warranty does not extend to any product or damage to a product caused by or attributable to freight damage, abuse, misuse, improper or abnormal usage or repairs not provided by an ICON authorized service center, for products used for commercial or rental purposes, or for products used as store display models. No other warranty beyond that specifically set forth above is authorized by ICON. ICON is not responsible or liable for indirect, special or consequential damages arising out of or in connection with the use or performance of the product or damages with respect to any economic loss, loss of property, loss of revenues or profits, loss of enjoyment or use, costs of removal, installation or other consequential damages of whatsoever nature. Some states do not allow the exclusion or limitation of incidental or consequential damages. Accordingly, the above limitation may not apply to you. The warranty extended hereunder is in lieu of any and all other warranties and any implied warranties of merchantability or fitness for a particular purpose is limited in its scope and duration to the terms set forth herein. Some states do not allow limitations on how long an implied warranty lasts. Accordingly, the above limitation may not apply to you. This warranty gives you specific legal rights. You may also have other rights which vary from state to state. ICON HEALTH & FITNESS, INC., 1500 S W., LOGAN, UT
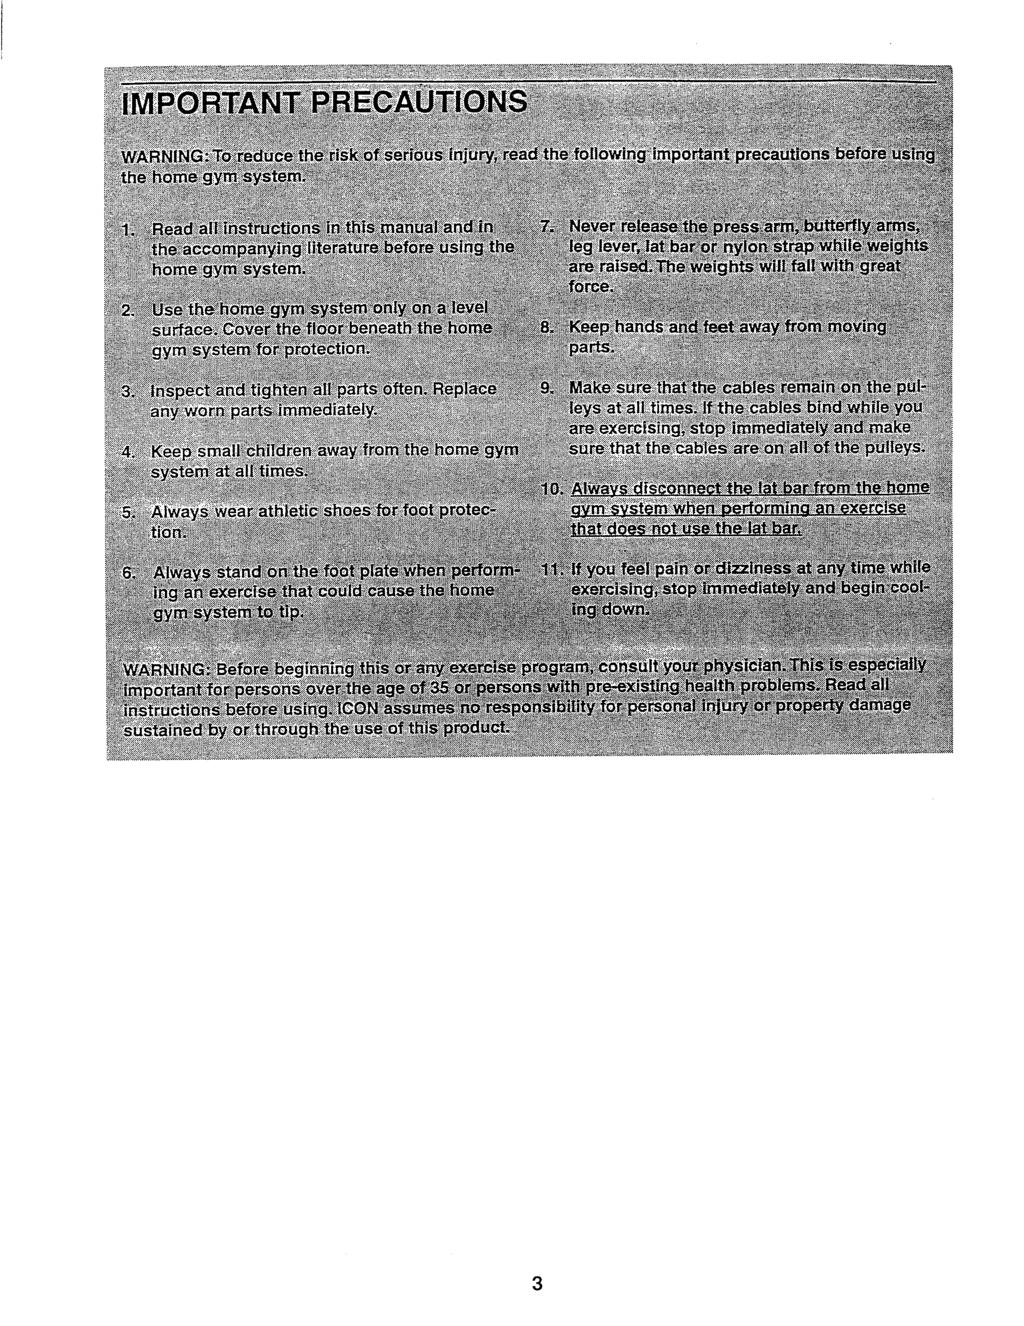
3 3
4 BEFORE YOU BEGIN Thank you for selecting the versatile WELDER 8510 Home Gym System. The WELDER 8510 offers a selection of weight stations designed to develop every major muscle group of the body. Whether your goal is to tone your body, build dramatic muscle size and strength, or improve your cardiovascular system, the WELDER 8510 will help you to achieve the specific results you want. For your benefit, read this manual carefully before using the WELDER 8510 Home Gym System. If you have additional questions, please call our Customer Service Department toll-free at , Monday through Friday, 6 a.m. until 6 p.m. Mountain Time (excluding holidays). To help us assist you, please note the product model number and serial number before calling. The model number is WESY The serial number can be found on a decal attached to the WELDER 8510 (see the front cover of this owner's manual). Before reading further, please review the drawing below and familiarize yourself with the parts that are labeled. ASSEMBLED DIMENSIONS: Height: Width: Length: 74 in. 38 in. 53 in. High Pulley Station - Lat Bar Butterfly Backrest Press Arm Seat FhtStack Leg Lever_ Weight Pin Foot -Low Pulley StOlon 4
5 ASSEMBLY Before beginning assembly, carefully read the following information.and instructions: Place all parts of the WEIDER 8510 in a cleared area and remove the packing materials; do not dispose of the packing materials until assembly is completed. The assembly is divided into four stages: 1) frame assembly, 2) press and butterfly arm assembly, 3) cable and pulley assembly, and 4) seat and backrest assembly. The hardware for each stage is packaged separately. Wait until you begin each assembly that parts bag. stage to open For help identifying the small parts used in assembly, use the PART IDENTIFICATION CHART located in the center of this manual. Note: Some small parts may have been preattached for shipping. If a part is not in the parts bag, check to see if it has been pre-attached. As you assemble the WELDER 8510, be sure that all parts are oriented as shown in the drawings. Tighten all parts as you assemble them, unless instructed to do otherwise. THE FOLLOWING TOOLS (NOT INCLUDED) ARE REQUIRED FOR ASSEMBLY: Two (2) adjustable One (1) standard wrenches screwdriver One (1) phillips screwdriver One (1) rubber mallet U Lubricant, such as grease or petroleum jelly, and soapy water will also be needed. Assembly will be more convenient if you have the following tools: A socket set, a set of open-end or closed-end wrenches, or a set of ratchet wrenches. ). Before beginning assembly, be sure that you have read and understand the information in the box above. _'"High Side Of Bracket Press a 2" Square Outer Cap (51) onto each end of the Stabilizer (5). Press a 2" Square Inner Cap (27) into the end of the Base (4). Insert two 5/16" x 2 3/4" Carriage Bolts (14) up through the Stabilizer (5). Insert two 5/16" x 2 1/2" Carriage Bolts (1) up through the Base (4). Slide the indicated end of the Base (4) onto the 5/16" x 2 3/4" Carriage Bolts (14) in the Stabilizer (5). Slide the Rear Upright (56) onto the Carriage Bolts. The high side of the bracket on the Rear Upright should be on the side shown. Hand-tighten a 5/16" Nylon Locknut (3) onto each Carriage Bolt. Do not tighten the Nylon Locknuts yet. 5\
6 2. Slide the Front Upright (42) onto the 5/16" x 2 2 1/2" Carriage Bolts (1). Hand-tighten a 5/16" Nylon Locknut (3) onto each Carriage Bolt. Do not tighten the Nylon Locknuts yet. Press a 1" Square Inner Cap (65) into the Front Upright (42). 65. Press a 2" Square Inner Cap (27) into each end of the Top Frame (55). Press a 1 3/4" Square Inner Cap (44) into each end of the crossbar on the Top Frame. Press two 1" Round Inner Caps (49) into the top of the crossbar Attach the Top Frame (55) to the Front Upright (42) and the Rear Upright (56) with four 5/16" x 2 3/4" Bolts (11), four 5/16" Flat Washers (8), and four 5/16" Nylon Locknuts (3) _ i \ "+= Crossbar Tighten all Nylon Locknuts used in steps 1 through 3, 3_42 ' Set two Weight Bumpers (19) onto the bracket on the Base (4) as shown. Stack six Weights (25) onto the Weight Bumpers (19). Be sure that the pin grooves are all on the same side and that the "welder" logo is on top. _1_ Pin Groove 4--Brac
7 , Press the Weight Tube Bumper (64) into the end of the Weight Tube (63). Insert the Weight Tube into the stack of Weights (25). Be sure that the pins on the Weight Tube are sitting in the pin grooves in the top Weight. Holes Lubricate the inside of the holes in the Top Weight. Set the Top Weight (76) onto the stack of Weights (25). Insert both Weight Guides (62) into the stack of Weights. Be sure that the holes in the Weight Guides are at the top, as shown Pin Attach the upper ends of the Weight Guides (62) to the Top Frame (55) with the 5/16" x 6" Bolt (60), two 1/2" x 3/4" Spacers (61), and a 5/16" Nylon Locknut (3). 61 Press a 1" x 7/8" Plastic Bushing (75) onto each welded spacer on the Press Frame (17). Slide the Press Frame into place on the Base (4). Note:This will be a tight fit.the 1" x 7/8" Plastic Bushings should fit on each end of the indicated tube in the Base. Be sure that the pulleys are on the indicated side. Lubricate the 3/8" x 8" Bolt (59). Attach the Press Frame (17) to the Base (4) with the 3/8" x 8" Bolt and a 3/8" Nylon Locknut (21). 4 --Tut Lubricate 7 ded Spacers 7
8 Press a 1 3/4" Square Inner Cap (44) into the top of a Press Arm (46). Press a 1" Round Inner Cap (49) into each end of the handle on the Press Arm. Attach the Press Arm to one side of the Press Frame (17) with two 5/16" x 2 1/2" Bolts (22) and two 5/16" Nylon Locknuts (3). Assemble the other Press Arm (46) in the same manner. 44% w'_ Lubricate both axles on the Top Frame (55). Slide the Right Arm (48) onto the right axle. Be careful not to confuse the Right Arm with the Left Arm (47); note the position of the "V" Pulley (6) to identify the Right Arm. Be sure that the upper end of the Right Arm is behind the indicated bracket on the Top Frame (55). 55 Bracket ubricate 47 Tap two 1" Retainers (69) and a 1" Round Cover Cap (70) onto the axle. Be sure that the teeth on the Retainers bend toward the Cover Cap, as shown in the inset drawing. Attach the Left Arm (47) in the same manner Press 1 3/4" Square Inner Caps (44) into the lower ends of the Right and Left Arms (47, 48). Wet the lower end of each Arm with soapy water. Slide a 10" Pad (45) onto the lower end of each Arm. 44 8
9 As you assemble the cables and pulleys in steps 10 through 18, please refer to the CABLE DIAGRAM on page 17 of this manual. 10. Route the Long Cable (23) around the 3 1/2" Pulley (15) attached to the Top Frame (55). Be sure that the end of the Cable with the ball is on the indicated side o_fthe Pulley and that the Cable is between the Pulley and the hook on the Top Frame. Tighten the 3/8" x 3 3/4" Bolt (71) and the 3/8" Nylon Locknut (not shown) / 11. Wrap the Long Cable (23) around a "V"-Pulley (6). Attach the "V"-Pulley and a Long Cable Trap (50) to the indicated bracket on the Front Upright (42) with a 3/8" x 2 1/2" Bolt (7) and a 3/8" Nylon Locknut (21). Route the Long Cable (23) around the "V"- Pulley (6) on the Left Arm (47). Be sure that the Cable is in the groove of the Pulley and that the Long Cable Trap (50) is turned to hold the Cable in place. Tighten the 3/8" x 2 1/2" Bolt (7) and the 3/8" Nylon Locknut (not shown). 11 \ //7 i 23 \ i Route the Long Cable (23) around the "V"- Pulley (6) at the top of the Right. Arm (48). Be sure that the Cable is in the groove of the "V"-Pulley and that the Long Cable Trap (50) is turned to hold the Cable in place. Tighten the 3/8" x 2 1/2" Bolt (7) and the 3/8" Nylon Locknut (not shown). Route the Long Cable (23) around the 3 1/2" Pulley (15) attached to the Pulley Bracket (20). Be sure that the Cable is in the groove of the Pulley and that the Cable Trap (66) is turned to hold the Cable in place. Tighten the 3/8" x 2" Bolt (12) and the 3/8" Nylon Locknut (not shown) _. -_:_r_./ 23-- //1 6 \ See the inset drawing. Attach a 3 1/2" Pulley (15) and a Cable Trap (66) to the indicated hole in the Long "U"-Bracket (57) with a 3/8" x 2" Bolt (12) and a 3/8" Nylon Locknut (21). Be sure that the Cable Trap is inside the "U"- Bracket. Note: This may come pre-assembled. Route the Long Cable (23) through the 3 1/2" Pulley (15) and Long "U"-Bracket (57). Be sure that the Cable is in the groove of the Pulley and that the Cable and Pulley move smoothly. 9
10 14. Route the Long Cable (23) around the 3 1/2" Pulley (15) attached to the bracket on the Top Frame (55). Tighten the 3/8" x 2" Bolt (12) and the 3/8" Nylon Locknut (21). (Note: This Pulley is pre-assembled. It has been shown disassembled for easy part identification.) Be sure that the Cable is in the groove of the Pulley and that the Cable and Pulley move smoothly, Bracket _.,_._ Attach the Long Cable (23) to the Small "U"- Bracket (67) with a 1/4" Nylon Locknut (2) and a 1/4" Flat Washer (10). Do not completely tighten the Nut. It should be threaded onto the end of the Cable only a couple of turns. Attach the Small "U"-Bracket (67) to the Weight Tube (63) with the 5/16" x 1 1/2" Bolt (72) and a 5/16" Nylon Locknut (3) Route the Short Cable (58) under the 3 1/2" Pulley (15) attached to the lower hole in the Press Frame (17). Be sure that the end of the Cable with the ball is on the indicated side of the Press Frame and that the Cable is between the Pulley and the crossbar on the Press Frame. Tighten the 3/8" Nylon Locknut (21) and 3/8" x 3 3/4" Bolt (not shown). 16 p. s8 Route the Short Cable (58) around the 3 1/2" Pulley (15) attached to the lower hole in the Front Upright (42). Be sure that the.cable Trap (not shown) is turned to hold the Cable in place and that the Cable is routed around the Pulley as shown. Tighten the 3/8" Nylon Locknut (21) and 3/8" x 3 3/4" Bolt (not shown). 21 _Crossbar 42_ 10
11 17. Route the Short Cable (58) around the 3 1/2" Pulley (15) attached to the upper hole in the Press Frame (17). Be sure that the Cable Trap (66) is in the "3 o'clock" position and that the Cable is routed around the Pulley as shown, Tighten the 3/8" Nylon Locknut (21) and 3/8" x 3 1/2" Bolt (not shown). Route the Short Cable (58) around the 3 1/2" Pulley (15) attached to the upper hole in the Front Upright (42). Be sure that the Cable Trap (not shown) is turned to hold the Cable in place and that the Cable is routed around the Pulley as shown, Tighten the 3/8" Nylon Locknut (21) and 3/8" x 3 3/4" Bolt (not shown). 17-b Attach the end of the Short Cable (58) to the Long "U"-Bracket (57) with a 1/4" Nylon Locknut (2) and a 1/4" Flat Washer (10). Do not completely tighten the Nut. It should be threaded onto the end of the Cable only a couple of turns. 19. Attach the Backrest (41) to the Front Upright (42) with two 1/4" x 2 1/2" Screws (43) and two 1/4" Flat Washers (10) Press a 1 1/2" Square Inner Cap (32) into the Seat Frame (36). Insert the 1/4" x 2" Carriage Bolt (38) through the center hole in the Seat Plate (37). Attach the Seat Plate to the Seat (13) with two 1/4" x 1/2" Screws (18). 2O 13 Insert the 1/4" x 2" Carriage Bolt(38) through the indicated hole in the Seat Frame (36). Tighten a 1/4" Nylon Locknut (2) with a 1/4" Flat Washer (10) onto the Carriage Bolt. ; Attach the other end of the Seat (13) to the Seat Frame (36) with a 1/4" Flat Washer (10) and the 1/4" x 2" Screw (24). 11
12 21. Press a 1 1/2" Square Inner Cap (32) into the Leg Lever (29). 21 Lubricate the 5/16" x 2 1/4" Bolt (33). Attach the Leg Lever (29) to the Seat Frame (36) with the 5/16" x 2 1/4" Bolt and a 5/16" Nylon Locknut (3). Insert the 5/16" x 2" Eyebolt (35) into the Leg Lever (29) from the direction shown. Tighten a 5/16" Nylon Locknut (3) with a 5/16" Flat Washer (8) onto the Eyebolt. 22. Rest the Seat Frame (36) on the indicated pin in the Front Upright (42). Attach the Seat Frame to the Front Upright with a 5/16" x 2 3/4" Carriage Bolt (14) and the Seat Knob (40). 22! _,._ l 23. Press 3/4" Round Inner Caps (34) into the ends of both 12 1/2" Pad Tubes (28). 23 Insert one 12 1/2" Pad Tube (28) into the Seat Frame (36). Slide a 5 1/2" Pad (30) onto each end of the Pad Tube. Insert the other 12 1/2" Pad Tube (28) into the Leg Lever (29). Slide a 5 1/2" Pad (30) onto each end of the Pad Tube
13 24. Remove the decals from the Decal Sheet (not shown) and apply them to the home gym system in the locations shown in the illustration below. 24 HIGH PULLEY 8510 BUTTERFLY LEG BENCH PRESS LEG CURL LOW PULLEY 25. Make sure that all parts have been properly tightened. Use of the remaining parts will be explained in HOW TO USE THE HOME GYM SYSTEM, beginning on page 14 of this manual. Before using the home gym system, pull each cable a few times to be sure that the cables move smoothly over the pulleys. If one of the cables does not move smoothly, find and correct the problem. IMPORTANT" If the cables are not properly installed, they may be damaged when heavy weight is used. See the CABLE DIAGRAM on page 17 of this manual for proper cable routing. If there is any slack in the cables, the cables should be tightened. See TROUBLE-SHOOTING AND MAINTENANCE on page
14 HOW TO USE THE HOME GYM SYSTEM The instructions below describe how each part of the home gym system can be adjusted. Refer to the exercise poster accompanying this manual to see how the home gym system should be set up for each exercise. IMPOR- TANT: When attaching the lat bar or nylon strap, make sure that the attachments are in the correct starting position for the exercise to be performed. If there is any slack in the cables or chain as an exercise is performed, the effectiveness of the exercise will be reduced. CHANGING THE WEIGHT SETTING To change the weight setting of the weight stack, insert a Weight Pin (26) under the desired Weight (25). Insert the Weight Pin until the bent end of the Weight Pin is touching the Weights, and turn the bent end downward. The weight setting of the weight stack can be changed from 6.5 pounds to 81.5 pounds, in increments of 12.5 pounds. Note: Due to the cables and pulleys, the actual amount of resistance at each exercise station may vary from the weight setting. Use the WEIGHT RESISTANCE CHART on page 15 to find the actual amount of resistance at each weight station ATI'ACHING THE LAT BAR OR NYLON STRAP TO THE HIGH PULLEY STATION Attach the Lat Bar (54) to the Long Cable (23) with a Cable Clip (53). For some exercises, the Chain (52) should be attached between the Lat Bar and the Long Cable with two Cable Clips. Adjust the length of the Chain between the Lat Bar and the Long Cable so the Lat Bar is in the correct starting position for the exercise to be performed. The Nylon Strap (39) (not shown) can be attached in the same manner ATTACHING THE LAT BAR OR NYLON STRAP TO THE LOW PULLEY STATION Attach the Lat Bar (54) to the Short Cable (58) with a Cable Clip (53). For some exercises, the Chain (52) should be attached between the Lat Bar and the Short Cable with two Cable Clips. Adjust the length of the Chain between the Lat Bar and the Short Cable so the Lat Bar is in the correct starting position for the exercise to be performed. The Nylon Strap (39) (not shown) can be attached the same manner. in
15 ATTACHING AND REMOVING THE SEAT Set the bracket on the Seat Frame (36) onto the indf cated pin on the Front Uptight (42). Attach the Seat Frame to the Front Upright with the 5/16" x 2 3/4" Carriage Bolt (14) and the Seat Knob (40). I1 b 424o r For some exercises, the Seat (13) must be removed. First, be sure that the chain is not attached to the leg lever. Next, remove the Seat Knob (40) and the 5/16" x 2 3/4" Carriage Bolt (14) from the Seat Frame (36). Lift the Seat Frame off the Front Upright (42). ATTACHING THE LEG LEVER TO THE LOW PULLEY STATION Pin,u_ To use the Leg Lever (29), the seat must be attached to the front upright (see ATTACHING AND REMOV- ING THE SEAT above). 29 Attach one end of the Chain (52) to the Low Cable (23) with a Cable Clip (53). Attach the other end Of the Chain to the Eyebolt (35) with a Cable Clip. < y WEIGHT RESISTANCE CHART This chart shows the approximate weight resistance at each station. "Top" refers to the 6.5 lb. top weight. The other numbers refer to the 12.5 lb. weight plates. The butterfly arm resistance listed is the resistance for each butterfly arm WEIGHT PLATES PRESS ARM BUTTERFLY ARM LEG LEVER HIGH PULLEY LOW PULLEY (Ibs.) (lbs.) (Ibs.) (lbs.) (Ibs.) Top O
16 TROUBLE-SHOOTING AND MAINTENANCE Inspect and tighten all parts often and replace any worn parts immediately. The home gym system can be cleaned using a damp cloth and mild non-abrasive detergent. Do not use solvents. TIGHTENING THE CABLES Woven cable, the type of cable used on the home gym system, can stretch slightly when it is first used. If there is slack in the cables before resistance is felt, the cables should be tightened. IMPORTANT: The weight pin must be inserted under the middle weight before tightening the cables. Slack can be removed from the cables by tightening the 1/4" Nylon Locknuts (2) at the end of the Long Cable (23) (see drawing 1) and at the end of the Short Cable (58) (see drawing 2). To do this you may need to remove the Small "U" -Bracket (67) from the Weight Tube (63) or remove the 3 1/2" Pulley (15) from the Long "U"- Bracket (57). Make sure that the cables are not too tight, or the Top Weight (76) will be lifted off the weight stack Additional slack can be removed by moving the 3 1/2" Pulley (1.5) to the other hole in the Long "U"-Bracket (57) (see drawing 2). Remove the 3/8" Nylon Locknut (21) and the 3/8" x 2" Bolt (12) from the Cable Trap (66), Pulley, and "U"-Bracket. Re-attach the Pulley and Cable Trap. Be sure that the Cable trap is in the proper position and that the Cable and Pulley move smoothly. Note: If a cable tends to slip off the pulleys often, the cable may have become twisted. Remove the cable and re-install it. 21..J"" ' 12 _-_ If the cables need to be replaced, see ORDERING REPLACEMENT PARTS on the back cover of this manual. 16
17 CABLE DIAGRAM The cable diagram below shows the proper routing of the Short Cable (58) and the Long Cable (23). Use the diagram to be sure that the two cables have been assembled correctly. If the cables have not been correctly routed, the home gym system will not function properly and damage may occur. The starting and ending points for each cable are labeled. The numbers show the correct route for each cable. 1 --High Pulley 3 Long Cable (23) Short Cable (58) Weight Stack --8 \ --Low Pulley 17
USER'S MANUAL QUESTIONS?
 Model No. WESY19510 Serial No. (Write the serial number in the space above for reference.) USER'S MANUAL Serial Number Decal QUESTIONS? As a manufacturer, we are committed to providing complete customer
USER'S MANUAL QUESTIONS? TABLE OF CONTENTS CAUTION. Model No. GGSY49230 Serial No. Serial Number Decal (Under Seat)
") Model No. GGSY4920 Serial No. Write the serial number in the space above for reference. USER'S MANUAL Serial Number Decal (Under Seat) QUESTIONS? As a manufacturer, we are committed to providing complete
Model No. GGSY4920 Serial No. Write the serial number in the space above for reference. USER'S MANUAL Serial Number Decal (Under Seat) QUESTIONS? As a manufacturer, we are committed to providing complete
USERÕS MANUAL QUESTIONS?
 Model No. WESY8501 Serial No. Write the serial number in the space above for reference. USERÕS MANUAL Serial Number Decal (Under Seat) QUESTIONS? As a manufacturer, we are committed to providing complete
USER'S MANUAL QUESTIONS?
 Model No. WESY86303 Serial No. Write the serial number in the space above for future reference. USER'S MANUAL Visit our website at Serial Number Decal (Under Seat) QUESTIONS? As a manufacturer, we are
ORDERING REPLACEMENT PARTS
 ORDERING REPLACEMENT PARTS If you encounter any difficulties or problems with this product, contact the ICON Fitness Lifestyle Ltd. office, or write: ICON Fitness Lifestyle Ltd. Greenwich House North Street
USER'S MANUAL ORDERING REPLACEMENT PARTS QUESTIONS? CAUTION. Visit our website at.
 ORDERING REPLACEMENT PARTS If you encounter any difficulties or problems with this product, contact the ICON Fitness Lifestyle Ltd. office, or write: ICON Fitness Lifestyle Ltd. Greenwich House North Street
USER S MANUAL CAUTION. Visit our website at. new products, prizes, fitness tips, and much more!
 Patent Pending Model No. 831.159730 Serial No. The serial number is found in the location shown below. Write the serial number in the space above. USER S MANUAL Serial Number Decal SEARS, ROEBUCK AND CO.
USER'S MANUAL QUESTIONS?
 Model No. WESY9100 Serial No. Write the serial number in the space above for future reference. USER'S MANUAL Serial Number Decal (Under Seat) QUESTIONS? As a manufacturer, we are committed to providing
USERÕS MANUAL QUESTIONS? CAUTION. Model No. PFSY92080 Serial No.
 Model No. PFSY92080 Serial No. The serial number is found in the location shown below. Write the serial number in the space above. USERÕS MANUAL QUESTIONS? Serial Number Decal As a manufacturer, we are
USER S MANUAL CAUTION. Visit our website at. new products, prizes, fitness tips, and much more! Model No Serial No.
 Model No. 831.19832 Serial No. The serial number is found in the location shown below. Write the serial number in the space above. USER S MANUAL Serial Number Decal SEARS, ROEBUCK AND CO. HOFFMAN ESTATES,
USER'S MANUAL QUESTIONS? CAUTION. Model No. GGSY Serial No. Write the serial number in the space above for reference.
 Æ Model No. GGSY91.0 Serial No. Write the serial number in the space above for reference. USER'S MANUAL Serial Number Decal QUESTIONS? As a manufacturer, we are committed to providing complete customer
POWERHOUSE CORNER GYM GS 9
 NOTE: Please read all instructions carefully before using this product Table of Contents Safety Notice Hardware Pack Assembly Instruction Parts List POWERHOUSE CORNER GYM GS 9 Resistance Chart Warranty
MARCY PLATINUM MP 1105 HOME GYM
 NOTE: Please read all instructions carefully before using this product Table of Contents Safety Notice Hardware Pack MARCY PLATINUM MP 1105 HOME GYM Assembly Instruction Parts List Resistance Chart Warranty
MARCY PLATINUM MP-3500 HOME GYM
 NOTE: Please read all instructions carefully before using this product Table of Contents Safety Notice Hardware Identifier MARCY PLATINUM MP-3500 HOME GYM Assembly Instruction Parts List Warranty Ordering
IVK-2155 HOME GYM. Model IVK Retain This Manual for Reference OWNER'S MANUAL
 NOTE: Please read all instructions carefully before using this product Table of Contents Safety Notice Hardware Identifier IVK-2155 HOME GYM Assembly Instruction Parts List Warranty Ordering Parts Model
Marcy Diamond Home Gym
 NOTE: Please read all instructions carefully before using this product Table of Contents Safety Notice Hardware Identifier Assembly Instruction Marcy Diamond Home Gym MD-2109 Parts List Resistance Chart
DELUXE SMITH MACHINE MSS Model MSS Retain This Manual for Reference
 NOTE: Please read all instructions carefully before using this product Table of Contents Safety Notice DELUXE SMITH MACHINE MSS-1280 Hardware Identifier Assembly Instruction Parts List Warranty Ordering
DELUXE OLYMPIC BENCH EVE Model EVE Retain This Manual for Reference OWNER'S MANUAL
 NOTE: Please read all instructions carefully before using this product Table of Contents Safety Notice Hardware Identifier Assembly Instruction Parts List Warranty DELUXE OLYMPIC BENCH EVE-1000 Ordering
MARCY PREMIER HOME GYM
 NOTE: Please read all instructions carefully before using this product Table of Contents Safety Notice Hardware Identifier Assembly Instruction MARCY PREMIER HOME GYM Parts List Resistance Chart Warranty
MD-3401 HOME GYM MARCY DIAMOND ELITE. Model MD Retain This Manual for Reference OWNER'S MANUAL
 NOTE: Please read all instructions carefully before using this product Table of Contents Safety Notice Hardware Identifier MARCY DIAMOND ELITE MD-3401 HOME GYM Assembly Instruction Parts List Warranty
MARCY DIAMOND ELITE SMITH MACHINE
 NOTE: Please read all instructions carefully before using this product Table of Contents Safety Notice Hardware Identifier Assembly Instruction MARCY DIAMOND ELITE SMITH MACHINE SM-1050 Parts List Warranty
IRON GRIP STRENGTH SMITH MACHINE
 NOTE: Please read all instructions carefully before using this product Table of Contents Safety Notice Hardware Identifier Assembly Instruction IRON GRIP STRENGTH SMITH MACHINE IGS-4350 Parts List Warranty
MARCY SMITH MACHINE MWB Model MWB Retain This Manual for Reference OWNER'S MANUAL
 NOTE: Please read all instructions carefully before using this product Table of Contents Safety Notice Hardware Identifier Assembly Instruction MARCY SMITH MACHINE MWB-4360 Parts List Warranty Ordering
MARCY WEIGHT BENCH WM-367. Model WM-367. Retain This Manual for Reference OWNER'S MANUAL
 NOTE: Please read all instructions carefully before using this product Table of Contents Safety Notice Hardware Identifier Assembly Instruction Parts List MARCY WEIGHT BENCH WM-367 Warranty Ordering Parts
MARCY DIAMOND WEIGHT BENCH MD-844
 NOTE: Please read all instructions carefully before using this product Table of Contents Safety Notice Hardware Pack Assembly Instruction MARCY DIAMOND WEIGHT BENCH MD-844 Exploded Diagram Parts List Warranty
EVERLAST EVE-840 WEIGHT BENCH
 NOTE: Please read all instructions carefully before using this product Table of Contents Safety Notice Hardware Pack Assembly Instruction EVERLAST EVE-840 WEIGHT BENCH Exploded Diagram Parts List Warranty
MARCY SMITH MACHINE SM Model SM Retain This Manual for Reference OWNER'S MANUAL
 NOTE: Please read all instructions carefully before using this product Table of Contents Safety Notice Hardware Pack Assembly Instruction MARCY SMITH MACHINE SM-4008 Parts List Warranty Ordering Parts
BODYFLEX GYM WM Model WM Retain This Manual for Reference OWNER'S MANUAL
 NOTE: Please read all instructions carefully before using this product Table of Contents Safety Notice Hardware Identifier Assembly Instruction BODYFLEX GYM WM 1407 Parts List Resistance Chart Warranty
WEIGHT BENCH MSS-7500
 NOTE: Please read all instructions carefully before using this product Table of Contents Safety Notice WEIGHT BENCH MSS-7500 Hardware Pack Assembly Instruction Exploded Diagram Parts List Warranty Ordering
EVERLAST SMITH BENCH EVE-890. Model EVE-890. Retain This Manual for Reference OWNER'S MANUAL
 NOTE: Please read all instructions carefully before using this product Table of Contents Safety Notice Hardware Pack Assembly Instruction Parts List Warranty Ordering Parts EVERLAST SMITH BENCH EVE-890
MARCY DIAMOND ELITE OLYMPIC BENCH MD-857. Model MD-857. Retain This Manual for Reference OWNER'S MANUAL
 NOTE: Please read all instructions carefully before using this product Table of Contents Safety Notice Hardware Identifier Assembly Instruction MARCY DIAMOND ELITE OLYMPIC BENCH MD-857 Parts List Warranty
MARCY WEIGHT BENCH MWB 715B. Model MWB 715B. Retain This Manual for Reference OWNER'S MANUAL
 NOTE: Please read all instructions carefully before using this product Safety Notice Hardware Identifier Assembly Instruction MARCY WEIGHT BENCH MWB 715B Parts List Warranty Ordering Parts Model MWB 715B
3 Station Bike Rack Organization Center
 H O L D I N G S, L L C 3 Station Bike Rack Organization Center Model No.: SBR300 This manual is designed to ensure that your new bike rack can be assembled successfully. Most people find that by setting
WMGG-224. GOLD S GYM Multi Purpose Bench. Model WMGG-224. Retain This Manual for Reference OWNER'S MANUAL
 NOTE: Please read all instructions carefully before using this product Table of Content Safety Notice Hardware Identifier Assembly Instruction Parts List Warranty Ordering Parts GOLD S GYM Multi Purpose
MARCY WEIGHT BENCH WM PRO. Model WM PRO. Retain This Manual for Reference OWNER'S MANUAL
 NOTE: Please read all instructions carefully before using this product Table of Contents Safety Notice Hardware Identifier Assembly Instruction MARCY WEIGHT BENCH WM PRO Parts List Warranty Ordering Parts
APEX JD-3.1 HYPER EXTENSION BENCH
 NOTE: Please read all instructions carefully before using this product Safety Notice Hardware Identifier Assembly Instruction APEX JD-3.1 HYPER EXTENSION BENCH Parts List Warranty Ordering Parts Model
MARCY Elliptical Machine PL-21930
 NOTE: Please read all instructions carefully before using this product Table of Contents Safety Notice Hardware Identifier MARCY Elliptical Machine PL-21930 Assembly Instruction Parts List Computer Warranty
MARCY BODY CYCLE MCPL-105
 NOTE: Please read all instructions carefully before using this product Safety Notice Hardware Identifier MARCY BODY CYCLE MCPL-105 Assembly Instruction Parts List Warranty Ordering Parts Model MCPL 105
MARCY Recumbent Bike PL-960
 NOTE: Please read all instructions carefully before using this product Table of Contents Safety Notice Hardware Identifier MARCY Recumbent Bike PL-960 Assembly Instruction Parts List Computer Warranty
FLAT BENCH OWNER S MANUAL QUESTIONS? CAUTION. Visit our website at.
 Model No. GZFW20611 Serial No. Write the serial number in the space above for future reference. Serial Number Decal QUESTIONS? As a manufacturer, we are committed to providing complete customer satisfaction.
FLAT BENCH OWNER S MANUAL QUESTIONS? CAUTION. Visit our website at.
 Model No. GZFW21410 Serial No. Write the serial number in the space above for future reference. Serial Number Decal QUESTIONS? As a manufacturer, we are committed to providing complete customer satisfaction.
User s Manual. Table of Contents CAUTION. Model No. MTSC20000
 Model No. MTSC20000 Table of Contents Important Precautions..........2 Limited Warranty..............2 Before You Begin.............3 How to Set Up and Fold the Scooter...............4 How to Operate the
USERʼS MANUAL QUESTIONS? CAUTION. Model No. WEBE Serial No.
 www.weiderfitness.com Model No. WEBE0878.1 Serial No. Write the serial number in the space above for future reference. USERʼS MANUAL Serial Number Decal QUESTIONS? If you have questions, or if parts are
MARCY SMITH MACHINE SM Model SM Retain This Manual for Reference OWNER'S MANUAL
 NOTE: Please read all instructions carefully before using this product Table of Contents Safety Notice Important Assembly Information MARCY SMITH MACHINE SM-4008 Care and Maintenance Parts List Warranty
OWNER S MANUAL QUESTIONS? CAUTION. Model No. F811.0 Serial No. Write the serial number in the space above for reference. Serial Number Decal
 Model No. F811.0 Serial No. Write the serial number in the space above for reference. OWNER S MANUAL Serial Number Decal QUESTIONS? If you have questions, or if parts are damaged or missing, please see
USER'S MANUAL ORDERING REPLACEMENT PARTS QUESTIONS? CAUTION. Visit our website at.
 ORDERING REPLACEMENT PARTS To order replacement parts, contact the ICON Health & Fitness, Ltd. office, or write: Unit Revie Road Industrial Estate Revie Road Beeston Leeds, LSJG UK Tel: 0 0 00 Outside
USER'S MANUAL ORDERING REPLACEMENT PARTS QUESTIONS? CAUTION. Visit our website at.
 ORDERING REPLACEMENT PARTS To order replacement parts, contact the ICON Health & Fitness, Ltd. office, or write: Unit Revie Road Industrial Estate Revie Road Beeston Leeds, LSJG UK Tel: 0 0 00 Outside
Gym Dandy TEETER TOTTER TT-360. Model TT-360. Retain This Manual for Reference OWNER'S MANUAL
 NOTE: Please read all instructions carefully before using this product Table of Contents Safety Notice Gym Dandy TEETER TOTTER TT-360 Important Assembly Information Care and Maintenance Parts List Warranty
OWNER S MANUAL. Dick s Sporting Goods 345 Court Street Coraopolis, PA Tools Required: Allen Wrench
 Tools Required: Adjustable Wrench Allen Wrench OWNER S MANUAL Retain This Manual For Reference Dick s Sporting Goods 345 Court Street Coraopolis, PA 15108 TABLE OF CONTENTS BEFORE YOU BEGIN..... 1 IMPORTANT
XM-4424 INTERNATIONAL OLYMPIC BENCH with LEG & PREACHER
 XM-4424 INTERNATIONAL OLYMPIC BENCH with LEG & PREACHER Owner s Manual 8/09 Read all precautions and instructions in this manual before using this equipment. Table of Contents Before You Begin Important
Gym Dandy TEETER TOTTER TT-320. Model TT-320. Retain This Manual for Reference OWNER'S MANUAL
 NOTE: Please read all instructions carefully before using this product Gym Dandy Table of Contents Safety Notice Hardware Pack TEETER TOTTER TT-320 Assembly Instruction Parts List Operation Tips Warranty
WARNING DECAL PLACEMENT
 I: EF/ 89 O0 Model No. 831.14923.0 Serial No. Write the serial number in the space above for reference. WEIGHT SYSTEM EXERCISER User's Manual _mber Decal Assembly Operation Maintenance Part List and Drawing
Be Strong. NS 200X. Assembly Manual. Model: NS 200X. P/N: Rev A (10/04/2006)
") Be Strong. Assembly Manual NS 00X Model: NS 00X P/N: 00-700 Rev A (0/0/00) TABLE OF CONTENTS Before You Assemble... 3 Product Specifications... Product Features... Parts List / Box Contents... 5 Exploded
Be Strong. Assembly Manual NS 00X Model: NS 00X P/N: 00-700 Rev A (0/0/00) TABLE OF CONTENTS Before You Assemble... 3 Product Specifications... Product Features... Parts List / Box Contents... 5 Exploded
The contents of this package are not suitable for children under 3 years of age.
 FLAT BENCH PRODUCT MANUAL - VERSION 08.17.04 FOR AGES: 13+ WEIGHT LIMIT: 400 Lbs 181 Kgs ADULT(S) NEEDED: TOOLS NEEDED: WARNING/ADVERTENCIA CUSTOMER SERVICE Do not allow more than one person at any time.
INSTALLATION INSTRUCTIONS
 INSTALLATION INSTRUCTIONS Thank you for purchasing ROXTERTM Hitch Mounted Mud Flaps. Agri-Cover, Inc. proudly manufactured these mud flaps using superior quality materials and workmanship. With proper
UAL USER'S QUESTIONS? _k CAUTION.
 Model No. 831.1 4595.0 Serial No. Write the serial number in the space above for future reference. USER'S UAL Serial Number Decal (Under Seat) QUESTIONS? As a manufacturer, we are corn = mitted to providing
PT1 Power Trainer ASSEMBLY & OPERATION MANUAL RECORD SERIAL NUMBER HERE
 PT1 Power Trainer ASSEMBLY & OPERATION MANUAL RECORD SERIAL NUMBER HERE www.inspirefitness.net by Health In Motion LLC Dec. 2010 TABLE OF CONTENTS Section Description.. Page Instructions.. 1 Tools Required
Owner s Manual. Upper Body Unit. Serial Number Here. Date of Purchase New Hope Road, Raleigh, NC Fusion -
 Revision 3 April 2015 Upper Body Unit Owner s Manual Serial Number Here Date of Purchase www.batcafitness.com 1207 New Hope Road, Raleigh, NC - 919.255.1233 Fusion - www.batcafitness.com 4 Upper Body Station
Installation Instructions
 Installation Instructions IMPORTANT! READ AND UNDERSTAND THESE INSTRUCTIONS FOR SAFETY, INSTALLATION, OPERATION, AND MAINTENANCE. SAVE ALL INSTRUCTIONS FOR FUTURE REFERENCE. Tested. Trusted. Guaranteed.
USER MANUAL ASSEMBLY, MAINTENANCE, &
 ASSEMBLY, MAINTENANCE, & USER MANUAL MODEL #SWAC100 WARNING Read all precautions and instructions in this manual before using this equipment. Save this manual for future reference. Adult use only. Skywalker
Owner s Manual. Upper Body Unit. Serial Number Here. Date of Purchase New Hope Road, Raleigh, NC Fusion -
 Revision 1 March 2012 Upper Body Unit Owner s Manual Serial Number Here Date of Purchase www.batcafitness.com 1207 New Hope Road, Raleigh, NC - 919.255.1233 Fusion - www.batcafitness.com 4 Upper Body Station
INSTALLATION INSTRUCTIONS
 INSTALLATION INSTRUCTIONS Thank you for purchasing ROLTECTM Electric Hopper Conversion. Agri-Cover, Inc. proudly manufactured this hardware using superior quality materials and workmanship. With proper
OWNER S MANUAL QUESTIONS? CAUTION. Visit our website at. Model No. GZFI Serial No.
 OWNER S MANUAL Model No. GZFI8008.0 Serial No. Write the serial number in the space above for future reference. Serial Number Decal (inside tower) QUESTIONS? At FreeMotion Fitness, we are committed to
HF4145 FOLDING MULTI-POSITION WORKOUT BENCH
 HF4145 FOLDING MULTI-POSITION WORKOUT BENCH Note: Both Serial Number and Model Number are Required when Ordering Parts RECORD SERIAL NUMBER HERE CATALOG NUMBER 0406-001 Customer Service (800) 548-5438
REPLACING ROLTEC SPRING ARMS
 REPLACING ROLTEC SPRING ARMS NOTICE TO INSTALLER: Even if familiar with hardware, read instructions prior to installation as improvements may be made without notice. Always handle components with care.
SMITH MACHINE F-SM. Model F-SM. Retain This Manual for Reference OWNER'S MANUAL
 -- NOTE: Please read all instructions carefully before using this product Table of Contents Safety Notice SMITH MACHINE F-SM Hardware Identifier Assembly Instruction Parts List Model F-SM Retain This Manual
ASSEMBLY & OPERATION MANUAL. CDVK2 Power Tower RECORD SERIAL NUMBER HERE
 ASSEMBLY & OPERATION MANUAL CDVK2 Power Tower RECORD SERIAL NUMBER HERE www.inspirefitness.net by Health In Motion LLC Feb. 2011 TABLE OF CONTENTS Section Description.. Page Instructions.. 1 Tools Required
48 SUPER JUMPER KIDS TRAMPOLINE
 48 SUPER JUMPER KIDS TRAMPOLINE PRODUCT MANUAL - VERSION 01.18.07 FOR AGES: WEIGHT LIMIT: 100 Lbs 45 Kgs TO BUILD: 3-10 1 X TOOLS NEEDED: CUSTOMER SERVICE GQBrands.com CustomerService@GQBrands.com 1-866-498-5269
3 Owner s Manual P E R S O N A L G Y M. Serial Number Here. Date of Purchase
 Revision 5 FEB 2016 P E R S O N A L G Y M Owner s Manual Serial Number Here Date of Purchase www.batcafitness.com 1207 New Hope Road, Raleigh, NC - 919.255.1233 - Fusion www.batcafitness.com 3 Owner s
Heavy Duty Engine Cranes
 Heavy Duty Engine Cranes Operating Instructions & Parts Manual Model Number Atd-7484 Atd-7485 (Foldable Legs) Capacity 2 Ton 2 Ton Model Atd-7484 Model Atd-7485 Atd Tools Inc. 160 Enterprise Drive, Wentzville,
USER MANUAL ASSEMBLY, MAINTENANCE, &
 ASSEMBLY, MAINTENANCE, & USER MANUAL MODEL #SWBB00 WARNING Read all precautions and instructions in this manual before using this equipment. Save this manual for future reference. Skywalker Holdings LLC
OWNERS MANUAL HF4550 PREACHER CURL. Customer Service (800) (858) Fax (858) RECORD SERIAL NUMBER HERE
 (858) Fax (858) RECORD SERIAL NUMBER HERE") OWNERS MANUAL HF4550 PREACHER CURL Note: Both Serial Number and Model Number are Required when Ordering Parts RECORD SERIAL NUMBER HERE CATALOG NUMBER 0805-001 Customer Service (800) 548-5438 (858) 578-7676
OWNERS MANUAL HF4550 PREACHER CURL Note: Both Serial Number and Model Number are Required when Ordering Parts RECORD SERIAL NUMBER HERE CATALOG NUMBER 0805-001 Customer Service (800) 548-5438 (858) 578-7676
OWNER'S MANUAL. Please Do Not Return This Product To The Store!
 TABLE TENNIS TABLE MODEL NO. T87 OWNER'S MANUAL 1. Read this manual carefully before starting assembly. Read each step completely before beginning each step. 2. Some smaller parts may be shipped inside
OWNERS MANUAL HF4263
 OWNERS MANUAL HF4263 ADJUSTABLE AB / BACK HYPER BENCH Note: Both Serial Number and Model Number are Required when Ordering Parts RECORD SERIAL NUMBER HERE CATALOG NUMBER 0805-000 Customer Service (800)
Owner s Manual. 4 Functional Trainer. Serial Number Here. Date of Purchase
 Revision 2 June 2014 Functional Trainer Owner s Manual Serial Number Here Date of Purchase www.batcafitness.com 1207 New Hope Road, Raleigh, NC - 919.255.1233 Fusion - www.batcafitness.com 4 Functional
USER MANUAL ASSEMBLY, MAINTENANCE, &
 ASSEMBLY, MAINTENANCE, & USER MANUAL MODEL #SWAC160 / SWAC180 WARNING Read all precautions and instructions in this manual before using this equipment. Save this manual for future reference. Adult use
OWNERS MANUAL HF
 OWNERS MANUAL HF4461-48 HORIZONTAL DUMBBELL RACK Note: Both Serial Number and Model Number are Required when Ordering Parts RECORD SERIAL NUMBER HERE CATALOG NUMBER 1005-000 Customer Service (800) 548-5438
UNIVERSAL CUSTOMIZABLE MUD FLAP INSTALLATION INSTRUCTIONS
 UNIVERSAL CUSTOMIZABLE MUD FLAP INSTALLATION INSTRUCTIONS Thank you for purchasing ROCKSTARTM Splash Guard Mud Flaps. Agri-Cover, Inc. proudly manufactured these mud flaps using superior quality materials
USER MANUAL ASSEMBLY, MAINTENANCE, &
 ASSEMBLY, MAINTENANCE, & USER MANUAL MODEL #SSALS102 Read all precautions and instructions in this manual before using this equipment. Save this manual for future reference. Skywalker Holdings LLC P.O.
INSTALLATION INSTRUCTIONS
 INSTALLATION INSTRUCTIONS Thank you for purchasing a LOMAX TM Hard Tri-Fold or Professional Series Cover. Agri-Cover, Inc. proudly manufactured this cover using superior quality materials and workmanship.
GS5 GYM MULTI STATION USER MANUAL
 GS5 GYM MULTI STATION USER MANUAL Product may vary slightly from the item pictured due to model upgrades Read all instructions carefully before using this product. Retain this owner s manual for future
Ford F150 SuperCab Ford F150 SuperCrew
 INSTALLATION GUIDE APPLICATION LENGTH MODEL YR PART # Ford F150 SuperCab 7 00-007 10-0996-11 Ford F150 SuperCrew 79 00-007 10-0996-1 INSTALLATION TIME 3:00 hrs SKILL LEVEL 1 3 = Experienced TOOLS REQUIRED
INSTALLATION INSTRUCTIONS
 INSTALLATION INSTRUCTIONS Thank you for purchasing ACCESS Original Roll-Up Cover. Agri-Cover, Inc. proudly manufactured this cover using superior quality materials and workmanship. With proper care, your
INSTALLATION INSTRUCTIONS AND OWNER S MANUAL
 INSTALLATION INSTRUCTIONS AND OWNER S MANUAL Thank you for purchasing ADARAC Truck Bed Rack. Agri-Cover, Inc. proudly manufactured this product using superior quality materials and workmanship. With proper
Installation Instructions HOSS Hardtop Organized Storage System
 Installation Instructions HOSS Hardtop Organized Storage System Application: 2007 - Current Jeep Wrangler, Wrangler Unlimited 2 and 4 Door Hard Top and Doors Storage System Part Number: 42805 www.bestop.com
Operating Instructions and Parts Manual SLT-330F Scissor Lift Table
 Operating Instructions and Parts Manual SLT-330F Scissor Lift Table For serial no. 17020001 and higher JET 427 New Sanford Road LaVergne, Tennessee 37086 Part No. M-140771 Ph.: 800-274-6848 Revision C
INSTALLATION INSTRUCTIONS
 INSTALLATION INSTRUCTIONS Thank you for purchasing TONNOSPORT Roll-Up Cover. Agri-Cover, Inc. proudly manufactured this cover using superior quality materials and workmanship. With proper care, your cover
OWNERS MANUAL HF PAIR VERTICAL DUMBBELL RACK. Customer Service (800) (858) Fax (858) RECORD SERIAL NUMBER HERE
 (858) Fax (858) RECORD SERIAL NUMBER HERE") OWNERS MANUAL HF4459 5 PAIR VERTICAL DUMBBELL RACK Note: Both Serial Number and Model Number are Required when Ordering Parts RECORD SERIAL NUMBER HERE CATALOG NUMBER 0605-000 Customer Service (800) 548-5438
OWNERS MANUAL HF4459 5 PAIR VERTICAL DUMBBELL RACK Note: Both Serial Number and Model Number are Required when Ordering Parts RECORD SERIAL NUMBER HERE CATALOG NUMBER 0605-000 Customer Service (800) 548-5438
3 Owner s Manual. Serial Number Here. Date of Purchase New Hope Road, Raleigh, NC Fusion
 Revision 2 Feb. 2013 Owner s Manual Serial Number Here Date of Purchase www.batcafitness.com 1207 New Hope Road, Raleigh, NC - 919.255.1233 - Fusion www.batcafitness.com 3 Owner s Manual Instructions Congratulations
INSTALLATION INSTRUCTIONS AND OWNER S MANUAL
 INSTALLATION INSTRUCTIONS AND OWNER S MANUAL Thank you for purchasing the AlloyCover from WeatherTech. Manufactured with pride using superior quality materials and workmanship. With proper care, your cover
Jeep Wrangler (TJ)
") INSTALLATION GUIDE APPLICATION MODEL YR PART # Bestop PART # Jeep Wrangler (TJ) 2003 2006 10-03315-10 751-01 INSTALLATION TIME 3:00 hrs SKILL LEVEL 1 2 3 4 4= Experienced TOOLS REQUIRED Safety goggles
INSTALLATION GUIDE APPLICATION MODEL YR PART # Bestop PART # Jeep Wrangler (TJ) 2003 2006 10-03315-10 751-01 INSTALLATION TIME 3:00 hrs SKILL LEVEL 1 2 3 4 4= Experienced TOOLS REQUIRED Safety goggles
OPERATIONS MANUAL LEVER CHAIN HOIST
 OPERATIONS MANUAL LEVER CHAIN HOIST IMPORTANT SAFETY INFORMATION Please read, understand and follow all safety information contained in these instructions prior to the use of this hoist. Retain these instructions
IMPORTANT READ ME FIRST
 IMPORTANT READ ME FIRST Thank you for purchasing your Kushlan Mixer. We hope that you will enjoy using it for many years to come. SHOULD YOU REQUIRE ANY SET-UP OR OPERATING ASSISTANCE WITH YOUR PRODUCT,
Linear Actuator. Installation Manual. warranty installation parts list. Linear Actuator Installation Manual Page 1
 Linear Actuator Installation Manual warranty installation parts list January 2004 Linear Actuator Installation Manual Page 1 MA1221B12 Warranty Information Chore-Time Equipment ( Chore-Time ) warrants
A S S E M B L Y I N S T R U C T I O N S
 A S S E M B L Y I N S T R U C T I O N S Please Do Not Return This Product to the Store! Contact Escalade Sports customer service department at: Phone: 1-888-USA-GOAL Toll-Free! Fax: 1-866-873-3536 Toll-Free!
HF4664 AB / BACK ROMAN HYPER
 OWNERS HF4664 AB / BACK ROMAN HYPER Note: Both Serial Number and Model Number are Required when Ordering Parts RECORD SERIAL NUMBER HERE CATALOG NUMBER 0206-001 Customer Service (800) 548-54 (858) 578-7676
INSTALLATION INSTRUCTIONS
 INSTALLATION INSTRUCTIONS Thank you for purchasing VANISH Roll-Up Cover. Agri-Cover, Inc. proudly manufactured this cover using superior quality materials and workmanship. With proper care, your cover
Please Do Not Return This Product To The Store!
 TABLE TENNIS TABLE MODEL NOS. T8167 QUICKPLAY 1000 T8267 QUICKPLAY 1000 T8180 METRO OWNER'S MANUAL 1. Read this manual carefully before starting assembly. Read each step completely before beginning each
Installation Instructions HOSS Hardtop Cart Only
 Installation Instructions HOSS Hardtop Cart Only Hardtop Organized Storage System Application: Hard Top Storage System Part Number: 42804 www.bestop.com - We re here to help! Visit our web site and click
ONE YEAR LIMITED WARRANTY
 TABLE OF CONTENTS ONE YEAR LIMITED WARRANTY Warranty 1 Overview Drawing 3 Parts List 4 Hardware List 7 Assembly Instructions 9 How to Fold-Up the Extrusion 14 How to Fold-Down the Extrusion 15 Adjustment