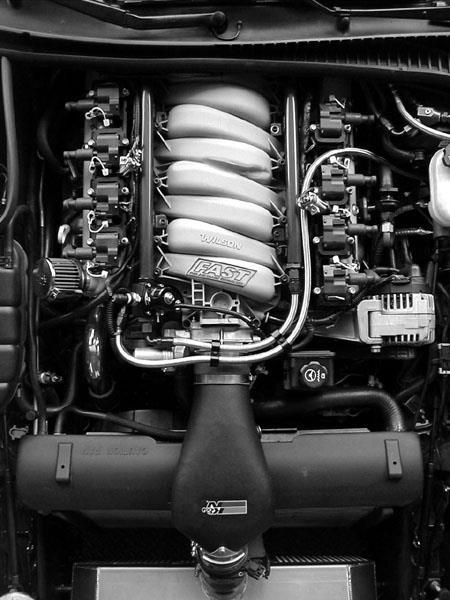
Corvette Stage X Twin Turbo Installation. Please read the entire instructions as we ve made many changes.
|
|
|
- Rhoda Fields
- 5 years ago
- Views:
Transcription


1 Corvette Stage X Twin Turbo Installation Please read the entire instructions as we ve made many changes. Disconnect battery. Remove plastic fuel rail covers over the valve cover. Remove Air Box in front of MAF. Remove complete air intake system from Throttle-body forward, save MAF meter. Remove spark plugs re gap to.035, save for reinstall. Suggested spark plug replacement for most applications would be NGK TR6 gapped Remove complete center section of exhaust (H-pipe and catalytic converters). If converters are to be used cut exhaust pipes in front of catalytic. See photo On newer models removal of the pre cats is necessary and the main converters must be move back about 3. We cut the stock exhaust pipe using a cut off saw then weld it back together. If not retaining the stock converters it s recommended to use a Corsa SS X-Pipe asm with the addition of 1-4 length of 2 ½ Stainless tube and 2-2 ½ stainless band clamps to complete the assembly. (Items not provided) Remove exhaust Manifolds and oil dip stick and tube. Remove front bumper cover and lower inner fender well extensions. Remove brake cooling ducts. Remove horns and electric air pump. ( On the X kit we don t reinstall the air pump) We have reinstalled it along with the EGR tubes on the manifold and if your planning on doing so contact us and we can supply pictures and fittings needed. Remove low pressure power steering hose from rack to reservoir. 1


2 Remove air conditioning line from compressor. (Be sure to evacuate the system before removing the line). Install supplied air condition manifold on the back of the compressor. 2


3 The upper line needs to be routed towards the rear of the engine between the turbo and block, be sure to position the fire sleeve so it is protecting the hose where it passes by the exhaust housing. Also insure upon final assembly that this hose is routed between the block and the dipstick tube. The lower hose installs on the bottom of the a/c manifold. It goes forward and attaches to the condenser. The routing of this hose goes initially to the rear and wraps down below the motor mount and then along the oil pan rail and out under the steering rack. 3


4 Installation of turbo oil drain fittings. When drilling pan you can use a shop vacuum to suck up all shavings while drilling, we also use grease on the drill bit. Use Grease in each flute of the tap will help hold shavings to the tap. On 2000 model year and up the oil pan is 2-piece design. The bottom cover can be removed during this process and tap area thoroughly cleaned. When reinstalling the pan cover fasteners, torque to 10 Nm. Install all fittings with a Teflon tape type thread sealer. Driver s side is 7/8 down from pan rail and 5 3/8 forward of oil filter boss, mark spot and drill 45/64 hole and tap ½ NPT pipe thread and install fitting. See photo Passenger side is 7/8 down from pan rail and 9-5/8 from bell housing, follow the same procedure from drivers side for drilling hole and tapping ½ NPT pipe. See photo 4


5 Remove left engine mount and modify as per photo, this must be done to clear the larger T4 compressor housing. The easiest way to accomplish this is with a simple 3 hole saw from your local hardware store. Make sure the mount is secure in a vise or equivalent before drilling. 5


6 Turbo charger preparation/installation. The passenger side engine cradle must be modified as shown. We use a die grinder with an aluminum cutting bit. The installation can be accomplished with out doing this step but it is very difficult to assemble. 6

7 On a few of the installs we ve done the R.S. turbo did contact the frame where a support plate is welded. If this is noticed on your install, the frame can be dented slightly with a pry bar or hammer. You can also grind some of the weld on the frame or grind the compressor cover. The turbo manifolds will be installed using factory bolts and gaskets. Preassemble the passenger side manifold/turbo combination using the provided studs and nuts using a thin bead of Loc-tite ulta copper sealant on the flanges. The oil feed fitting is preinstalled in the turbo in the position they need to be. Install the 34-3an oil feed line to the turbo with the line being fed slightly forward away from the exhaust side. Install 1 2 silicone couple and clamp into place on the compressor discharge. At this point the assembly can be installed as a unit from the top. Remove the passenger coil pack and valve cover this is easier if you remove the plastic shroud from around the battery first. With a little patience it will drop right in and can be bolted into place. 7

 to right of")
8 Locate (1) 2 ¾ silicone 45 elbows & 2 #44 clamps. Install silicone elbow with the short leg toward the compressor cover on passenger side turbo pointing 45 (horizontal to the ground) to right of car. 8
9 If you re doing the install with the engine installed in the engine bay, lay the first piece of 3 intake ducting (The left side ducting is in 3 parts) in the bay before installing the turbo as it will not be able to be installed unless you remove the alternator and power steering. Make sure a silicone 3 X 2 ½ coupler is fastened on the end of the pipe. The end that is 2 ¾ is fastened to the compressor inlet when the turbo is installed. At this time drop the Driver side manifold down from the top and let the rear turbo discharge hang in opening behind the engine cradle. Apply a thin bead of Loc-tite Ultra Copper RTV to the exhaust manifold and install driver s side turbocharger using the studs and 3/8 loc-nuts (provided). Attach the 13-3an turbo oil feed line directing the line slightly forward and down away form the exhaust housing. Install silicone elbow on driver s side turbo pointing 75 (toward steering column) up & left of car. Pull up the Turbo assembly and attach the manifold using the stock bolts and gaskets. 9

10 Install the pipe and clamps that was previously laid bay like shown below but do not tighten yet. Remove the oil transfer cover located above the oil filter that holds the temperature sensor. Drill 5/16 hole opposite of the sending unit and tap to 1/8 npt. Install the brass run tee with the two steel -3an oil feed line fitting already installed. The oil restrictors are already installed it the fittings. Route and install the oil feed line to the installed oil supply fitting installed in the previous step. The oil feed line is routed in front of the oil pan. The driver s side is self explanatory. 10


11 Install 4 extension wires onto oil temperature harness and plug into sending unit. This can simply be done but cutting the harness approx. 2 from the Packard connector and splicing in the 4 extensions using the supplied crimp type Butt connectors. Install the oil drain assemblies. Use the hardware and gaskets provided, try to use no silicone as it can plug up the drain exit. Verify a smooth drain transition to the fittings in the oil pan. If needed to insure a smooth drain transition, the center section can be rotated by loosening up turbine housing and compressor cover bolts. Install the driver s side using a 4 section of drain hose as shown below. 11


12 Install 5 ½ drain hose and clamps on passenger side and again verify smooth drain transition. Wiring on starter will have to be wrapped and moved to clear turbo housing. You will need to loosen the 13mm nut on the starter and reposition the connections away from the turbine housing See Photo 12

13 Now is a good time to wrap all wiring etc as shown with heat shielding to prevent damage from the heat of the turbochargers and down pipes. Locate exhaust down pipes and heat wrap and 4 #36 clamps. Wrap exhaust pipes from mounting flange to the support TAB and use #36 clamps to secure wrap. We supply the heat wrap but talking with installers they don t use it much. Install the down pipes using 5 bolts per side (provided) with a thin bead of RTV. We find a combination of a 5/16 combination wrench, a 11/32 6 point ¼ drive swivel socket and some patience and all will go well. If using the stock converters, insure the slip fit tubes provided are installed before installation. Be sure to use anti-seize on the bolts and wastegate dump tubes. The passenger side top bolts are easiest to install from top, leave all the bolts loose until all are started. Once both down pipes are installed you can now install the provided waste gates. From TTi the wastegates are installed with the 9-10 psi springs, change if required. All the flanges are designed to use RTV and not gaskets. Also preinstall the 1/8 NPT to hose barb fitting into the bottom most port on the wastegate. Using the provided bolts (½ are standard and ½ are metric) and slip fit tubes assemble each side (valve seat towards the down pipe) as shown below in the pics. Use a bit of patience when tweaking and rotating the wastegate flanges to align the bolt holes and again do not tighten until all fasteners have been started. 13


14 Once the down pipes are tight, slide the couplers back so that they mate to converters and tack weld in place and remove catalytic converter and weld all the way around and reinstall pipes. Use the stock bolts to fasten to undercarriage. Install 02 sensors and plug. Be sure wires DO NOT rub on exhaust pipes. This step may or may not be required. We have found if you have the external Power Steering cooler you can tweak the attachment brackets and relocate to clear turbo plumbing. 14


15 If required, install power steering adapter fitting into steering box. Install new power steering hose from steering box to reservoir and tighten fitting and hose clamp, refill reservoir. Before you can mount the intercooler, remove plastic radiator shroud from in front of radiator and discard. Save the outside air temperature sensor for reinstall later. Locate the front mount intercooler and install (2) 2 1/2 silicone hoses and clamps. Position the cooler as low as possible while still being able to slip the compressor discharge pipes into the inter cooler hose just above the front radiator support (see photo. Using the intercooler mounting bracket as a template, mark the holes while an assistant holds the cooler in position as described above. Drill the support where marked and use the (2) 2 X 5/16 bolts and hardware to install. Don t over tighter as the support is hollow. 15


16 Locate (2) 2 x 3 silicone hose couplers & 4 #32 clamps, Install the couplers onto the turbo outlets of each turbo, tighten clamps to secure to turbo, slide remaining clamps onto hoses Locate the 6 Intercooler hot pipes, pipe #1, #2, & #3 is passenger side (RS) (shown in pic from top to bottom). Install pipe #1 into passenger side turbo hose coupler. Attach Pipe #2 as shown below into #1 and down to lower radiator area. 16


17 Install pipe #3 onto R.S. of intercooler & through hole in brake ducting panel. Do not tighten. Attach the other end to pipe #2 as shown (Note Pipe #3 no longer contains a BOV) Locate Pipes #4 & #5 & 6, they are drivers side (LS) pipes and labeled top to bottom. 17
 turbo, Position pipe so it exits between the engine cradle and the frame under steering linkage.")
 install 2 hose onto # 5 pipe, tighten clamp. Next install # 6 pipe into the intercooler.")
18 Locate (1) 2 x 3 silicone coupler & (2) #32 clamps, install onto pipe #4 locate pipe #4, install into driver side (L.S.) turbo, Position pipe so it exits between the engine cradle and the frame under steering linkage. Locate pipe #6, install onto end of #5 pipe making sure # 5 pipe is routed under the sway bar. (See photo) install 2 hose onto # 5 pipe, tighten clamp. Next install # 6 pipe into the intercooler. Insure all pipes are aligned and won t contact anything. Tighten all remaining hose clamps. 18


19 Below are the two pipes used for the compressor inlet ducting on the passenger side. The smaller pipe with the 2.75 end installs into the silicone elbow previously installed on the compressor inlet. Sometimes it s easier to install if the tube is slightly ovaled in a vise to help clear the A/C compressor fitting. Locate 3 R.S. air inlet pipe, the pipe is routed through the brake cooling duct hole over the steering linkage. Before installing the pipe review the pictures below. Using a suitable tool remove the excess material as shown so the pipe will sit flush against the frame. Once removed use black spray paint to cover any exposed metal. 19


20 The second pipe is installed from the 3 outlet of the first pipe through the brake duct hole. See photo below. Once the pipe is in place and the mounting tab is in the 12 o clock position, drill ¼ hole fasten using hardware provided. Install K&N Air filter. 20


21 Locate the two remaining 3 compressor inlet ducting. The first pipe was installed when the turbo/manifold was installed. The middle pipe is routed above the engine cradle and below the steering rack and attached to the pipe installed earlier.(see photo below) Remove the rack/pinion bolt and pry up on the rack to insert the pipe. You need to twist the pipe to install it. Route it to the pipe that is fastened to the compressor inlet and snug the clamp. Fasten the pipe to the engine cradle using the threaded hole already there. Be sure the pipe doesn t rub on the balancer. If your vehicle is equipped with a Power steering cooler you must first unbolt the cooler and trim off the bottom right mounting tab as the pipe travels through that point. After installing the intermediate pipe, reinstall the modified cooler using the left mount bolt and a zip tie on the right hand side to the power steering rack. 21


22 Install 3 pipe #3 onto the center pipe coupler and position through the brake duct hole (some trimming may be required) using the bracket on the pipe, mark and drill a hole it the radiator cradle, align and fasten. Tighten all clamps from turbo compressor housing to filter. Once again check the ducting to be sure in isn t rubbing on the chassis, steering or sway bar and final tighten all clamps. Install K&N filter. Locate horns, you will need to drill a ¼ hole in passenger side front frame 3 from end of tube, mount horns as seen in photo using ¼ x 1 ½ bolts and nut, plug in horns. 22


23 On the stage X system we do not install the A.I.R. tubes or reinstall Air Pump. Codes to be disabled by tuner. If require, install the A.I.R pump as shown below and contact TTI for fittings etc to connect the A.I.R. system. Install the front fascia and other plastic panels removed prior to installion, note some plastic panels will need some minor trimming to reinstall. Install tie wrap mounts using the supplied sheet metal screws to the metal frame inline with the 5 holes located in the bottom of the front fascia. Using zip ties thread them through the tie wrap mounts installed and then through the adjacent hole in the front fascia. When all 5 are installed, gradually tighten each curling up the front fascia creating a nice airflow entry into the front intercooler. Locate the drain holes in the front of each leg of the radiator cradle. This will be the new attachment point for the spring loaded center air deflector. Trim the top portion of the stock air deflector to clear the intercooler and use 3/8 sheet metal screws to attach the deflector to the cradle. (Note install in pic is slightly different than described). 23


24 Locate 8x6 heat shields, this will need to be installed between passenger exhaust manifold & turbo outlet pipe, once installed bend around pipe & it will stay in place. Reinstall the dip stick tube, some bending and modification on the tube is necessary. Install spark plugs gapped to If running more that 5 psi its recommend to use NGK TR6 plugs Install coil packs and spark plug wires. 24
 cut the factory hose and slip the barb log into the hose. There is no need to clamp this hose.")

25 Remove hose from throttle body and install vacuum caps on throttle body & clamp. Remove hose from valve cover side and install vacuum cap. Install vacuum log into brake booster hose. (See photo) cut the factory hose and slip the barb log into the hose. There is no need to clamp this hose. Install BOV, we now use the new tial 50 mm valve mounted directly to the outlet tank of the intercooler. Using vacuum hose provided install one end to by-pass valve and the other end to the fitting on the vacuum log. For a boost source for the wastegates, route a single hose from the log to the L.S. waste gate, tee from there to the R.S. waste gate. If your using a boost controller follow there instructions from here. 25
. Boost should be kept below 5 psi.")

26 We have changed the crankcase breather to a PH special, it simply will replace the stock oil fill cap. No trimming necessary. Now is a good time to install injectors. This turbo system is sold as system only. It can be run on a stock engine with proper tuning and fuel system (injectors and boost-apump). Boost should be kept below 5 psi. On modified engine with forged internals we ve seen over 850rwhp. Install a 3.5 silicone coupler over the end of the MAF and 2 clamps. Note the Direction of airflow on the MAF denoted by an arrow. Install the top airflow closeout panel as shown below under the stock radiator hold down. Some slight trimming may be needed, especially with an aftermarket radiator. Connect MAF meter to K&N tube using 3 ½ hose and 2 #56 clamps be sure to point MAF plug up. Install 3 ½ hose onto MAF. Slide the assembly onto the MAF and then onto throttle body, tighten all clamps. Install air temp sensor into K&N air tube, plug in air temp sensor and MAF. 26
27 ENJOY!! 27
4. Remove (4) 10mm and (1) 7mm bolt that holds fascia at front corners, on each side
 10mm and (1) 7mm bolt that holds fascia at front corners, on each side") 2010 Camaro LS3 1. Disconnect battery ground 2. Remove front wheels 3. Remove (5) push pins and (5) #20 torx screws on inner front wheel well liners and remove liners on each side 4. Remove (4) 10mm and
2010 Camaro LS3 1. Disconnect battery ground 2. Remove front wheels 3. Remove (5) push pins and (5) #20 torx screws on inner front wheel well liners and remove liners on each side 4. Remove (4) 10mm and
05-08 GT. Hellion Power Systems Mustang Kit Instructions
 Hellion Power Systems 05-08 Mustang Kit Instructions 1. Disconnect Battery 2. Drain Radiator, keep fluid for re-installation. 3. Remove air box and inlethoses. 6. Next, underneath, punch oil pan for turbo
CHALLENGER TWIN TURBO SYSTEM INSTALLATION INSTRUCTIONS
 CHALLENGER TWIN TURBO SYSTEM INSTALLATION INSTRUCTIONS 1 Verify contents of kits with supplied packing list 1) Unhook the battery. 2) Remove wheel wells & front fascia of vehicle. 3) Remove the catalytic
03-04 Mach 1. Hellion Power Systems Mach 1 Kit Instructions
 Hellion Power Systems 03-04 Mach 1 Kit Instructions Part 1 Hellion recommends that the front suspension system be installed either by trained professionals or by 5.Remove rack bolts K-Member Installation
99-04 GT. Hellion Power Systems Mustang GT Kit Instructions
 Hellion Power Systems 99-04 Mustang GT Kit Instructions Part 1 Hellion recommends that the front suspension system be installed either by trained professionals or by 5.Remove rack bolts K-Member Installation
Step 6: Remove and save the MAP sensor for later use. Step 7: Remove the passenger side intercooler pipe and the EGR intake manifold.
 LBZ Twin kit Install Step 1: Disconnect both batteries. Step 2: Drain coolant and oil also remove passenger side inner fender. Step 3: Remove intake box and piping. (Remove and save the MAF sensor in the
Pump Gas Instructions for Polaris And 800 Models. Important Information before Installing This System:
 Pump Gas Instructions for Polaris 600 700 And 800 Models Important Information before Installing This System: Before you begin your turbo install, read through these instructions to determine if you are
3 October 2016 PN# V Dodge Twin Turbo Kit (I-00274) ½ D o d g e 2 4 v I S B
 ½ D o d g e 2 4 v I S B") 3 October 2016 PN#1045320 24V Dodge Twin Turbo Kit (I-00274) 1 DOWNLOAD ENHANCED INSTALL MANUALS AT dieselperformance.com BD Twin Turbo Kit 1998½- 2 0 0 2 D o d g e 2 4 v I S B Part# 1045320 PLEASE READ
3 October 2016 PN#1045320 24V Dodge Twin Turbo Kit (I-00274) 1 DOWNLOAD ENHANCED INSTALL MANUALS AT dieselperformance.com BD Twin Turbo Kit 1998½- 2 0 0 2 D o d g e 2 4 v I S B Part# 1045320 PLEASE READ
V1 Truck Manifold Turbo Kit for F-body
 V1 Truck Manifold Turbo Kit for 98-02 F-body Prep: -Remove all A/C Components, Alternator and brackets, tensioner, front bumper, front bumper foam, and front bumper support. Remove radiator and cooling
INSTALL MANUAL D o d g e 1 2 v 6 B T A PLEASE READ ALL INSTRUCTIONS BEFORE INSTALLATION.
 PN#1045310 12V Dodge Twin Turbo Kit (I-00273) 1 INSTALL MANUAL BD Twin Turbo Kit 1994-1 9 9 8 D o d g e 1 2 v 6 B T A Part# 1045310 PLEASE READ ALL INSTRUCTIONS BEFORE INSTALLATION. * Picture as shown
96-04 tt. Hellion Power Systems Mustang Twin Turbo Kit Instructions
 96-04 tt Hellion Power Systems 1996-2004 Mustang Twin Turbo Kit Instructions 1. Disconnect battery and elevate front end of car on either Jack stands or a lift if available 2.Lock steering wheel and remove
Installation Instructions
 2011-2013 LML DURAMAX COMPOUND-ADD 2011-2015 LML A Duramax TURBO KIT Add INSTALL A Turbo INSTRUCTIONS Compound Kit Installation Instructions 1-800-955-0476 - www.industrialinjection.com - info@industrialinjection.com
2017+ L5P Duramax 3 ½ Down Pipe & EGR Fix Kit
 2017+ L5P Duramax 3 ½ Down Pipe & EGR Fix Kit Covers installation of PN s: WCF100630, WCF100829 Note: This Kit is for off road competition use only! Off Road Competition Use Tuning & Exhaust System is
03-04 Cobra. Hellion Power Systems Mustang Cobra Kit Instructions
 Hellion Power Systems 03-04 Mustang Cobra Kit Instructions NECESSARY PARTS REQUIRED FOR INSTALLATION Necessary: 03-04 Cobra hellion Kit ONLY 99-01 Alternator #YR3210346AA Alternator Bracket #XR3Z-10153-AB
LML 3 Y-Bridge Kit or High Flow Intake Bundle Package
 2011-2016 LML 3 Y-Bridge Kit or High Flow Intake Bundle Package Covers installation of PN s: WCF100607, WCF100691, WCF100716, & WCF100353 Note: This Kit is for off road competition use only! Overview-
Phone Fax
 Directions for Installation of ECS Paxton Supercharger Kit Disconnect battery Remove stock serpentine belt Remove stock belt tensioner, save the 2 bolts for later use on supercharger bracket Remove alternator
Procharger Stage II Intercooled Supercharger System (11-14 GT)
") Procharger Stage II Intercooled Supercharger System (11-14 GT) Installation Time: Approximately one day. Installed on 2012 Mustang GT 5.0/Manual Required Tools 3/8 Socket Set (Standard and Metric) 1/2
Procharger Stage II Intercooled Supercharger System (11-14 GT) Installation Time: Approximately one day. Installed on 2012 Mustang GT 5.0/Manual Required Tools 3/8 Socket Set (Standard and Metric) 1/2
TURBO KIT INSTRUCTIONS
 Revision 12/20/10 TURBO KIT INSTRUCTIONS This turbo kit consists of the necessary parts to upgrade or add a turbo to your 22R/RE/RET. This kit may require some fabrication to address your particular application
Installation Manual v1.0: Aurora Plus Turbo Kit ( ) 5.9L Dodge. Please read all instructions before installation.
 5.9L Dodge. Please read all instructions before installation.") Installation Manual v1.0: Aurora Plus - 4000 Turbo Kit (2003-2007) 5.9L Dodge Please read all instructions before installation. Figure 1: Aurora Plus - 4000 Kit Contents 1 Figure 2: Aurora Plus Hardware
Installation Manual v1.0: Aurora Plus - 4000 Turbo Kit (2003-2007) 5.9L Dodge Please read all instructions before installation. Figure 1: Aurora Plus - 4000 Kit Contents 1 Figure 2: Aurora Plus Hardware
Scion FR-S ZN6. GTX2867R Gen2 (Internal Wastegate) Installation Instructions GPP P/N #
 Installation Instructions GPP P/N #") TURBO KIT Scion FR-S ZN6 Subaru BRZ ZC6 GTX2867R Gen2 (Internal Wastegate) Installation Instructions GPP P/N # 11518000 Vehicle Type Chassis Code Engine Code Transmission Model Year Scion FR-S DBA-ZN6
TURBO KIT Scion FR-S ZN6 Subaru BRZ ZC6 GTX2867R Gen2 (Internal Wastegate) Installation Instructions GPP P/N # 11518000 Vehicle Type Chassis Code Engine Code Transmission Model Year Scion FR-S DBA-ZN6
Rotated Tuner Kit for Garrett GT Turbos
 Rotated Tuner Kit for Garrett GT Turbos 031411 Thank you for purchasing the PERRIN performance rotated turbo kit. Installation of this turbo should only be performed by persons experienced in the installation
98-02 LS1 F-Body Single Turbo Truck Manifold Kit
 98-02 LS1 F-Body Single Turbo Truck Manifold Kit Prep: -Remove all A/C Components, Alternator and brackets, tensioner, front bumper, front bumper foam, and front bumper support. Remove radiator and cooling
Installation Manual v1.0: MST Turbo Kit ( ) 5.9L Dodge. Please read all instructions before installation.
 5.9L Dodge. Please read all instructions before installation.") Installation Manual v1.0: MST Turbo Kit (2003-2007) 5.9L Dodge Please read all instructions before installation. Figure 1: MST Kit Contents Figure 2: MST Hardware Kit Please make sure all of the components
Installation Manual v1.0: MST Turbo Kit (2003-2007) 5.9L Dodge Please read all instructions before installation. Figure 1: MST Kit Contents Figure 2: MST Hardware Kit Please make sure all of the components
B5 A4 1.8t Front Mount Intercooler Install Instructions
 B5 A4 1.8t Front Mount Intercooler Install Instructions Only work underneath your vehicle after properly supporting it with adequate jack stands on a flat surface. NEVER work under a vehicle only supported
4 December 2017 PN# , , Dodge 6.7L Rumble B SXE (I-00400) 1. BD Rumble B SXE. D o d g e 6. 7 L H P C R Installation Instructions
 1. BD Rumble B SXE. D o d g e 6. 7 L H P C R Installation Instructions") 4 December 2017 PN#1045705, 1045706, 1045708 Dodge 6.7L Rumble B SXE (I-00400) 1 DOWNLOAD ENHANCED INSTALL MANUALS AT dieselperformance.com BD Rumble B SXE D o d g e 6. 7 L H P C R Installation Instructions
4 December 2017 PN#1045705, 1045706, 1045708 Dodge 6.7L Rumble B SXE (I-00400) 1 DOWNLOAD ENHANCED INSTALL MANUALS AT dieselperformance.com BD Rumble B SXE D o d g e 6. 7 L H P C R Installation Instructions
Revised 10/22/2014 Page 2 of?
 1.Remove side panels, hood, seat, fuel tank, and 2.Remove stock air box, remove fuel line muffler. Save exhaust springs and rubber muffler mounts for turbo bracket. Sand back surface flat for mounting.
ZX-14 Stage I Turbo Kit
 62910 Peerless Ct. Bend, OR 97701 Phone 541.385.0706 Fax 541.382.9406 ZX-14 Stage I Turbo Kit WARNING: This turbo kit is for OFF-ROAD RACING use ONLY. Advisement: These instructions are written to be comprehensive
Instant Chat off the main page of Or simply call our tech team at
 FRONT MOUNT INTERCOOLER 2015+ WRX 2017-07-07 Thank you for purchasing this PERRIN product for your car! Installation of this product should only be performed by persons experienced with installation of
7 th Gen. Celica GTS Turbo Kit Installation Guide This kit has not been CARB approved and is intended for racing / offroad purposes only.
 7 th Gen. Celica GTS Turbo Kit Installation Guide This kit has not been CARB approved and is intended for racing / offroad purposes only. The purpose of this guide is to serve as a reference for use when
2015 Corvette Supercharger System Instructions
 2015 Corvette Supercharger System Instructions These instructions are meant to serve as a guide to the installation of the ECS 2015 Corvette Supercharging system. Please be sure to use all safety equipment
Huron Speed Products Twin Turbo Install Gen 2 CTS-V (09-15)
") Huron Speed Products Twin Turbo Install Gen 2 CTS-V (09-15) The following install guide is simply that, a guide to help you with installation. It is by no means the exact method to perform installation,
Huron Speed Products Twin Turbo Install Gen 2 CTS-V (09-15) The following install guide is simply that, a guide to help you with installation. It is by no means the exact method to perform installation,
Instant Chat off the main page of Or simply call our tech team at
 08+ Rotated Tuner Kit for Garrett GT Turbos 2016-11-03 Thank you for purchasing this PERRIN product for your car! Installation of this product should only be performed by persons experienced with installation
Z1 Motorsports 300zx 2.5 Upgraded piping & BA SMIC Install Guide
 Z1 Motorsports 300zx 2.5 Upgraded piping & BA SMIC Install Guide Congratulations on your new upgraded piping and intercooler kit, this kit has proven to provide the lowest intake air temps to date on our
BD 6.7L Super B Special Turbo Kit For L Dodge -- I n s t a l l a t i o n I n s t r u c t i o n s -- PN#
 28 January 2014 1045140 6.7L Super B Special Turbo Installation (I-00266) 1 BD 6.7L Super B Special Turbo Kit For 2007.5-2012 6.7L Dodge -- I n s t a l l a t i o n I n s t r u c t i o n s -- PN# 1045140
JBR MAZDASPEED
 Page1 james Barone Racing Aftermarket Parts and Accessories JBR 2007 2009 MAZDASPEED 3 Front Mount Intercooler Piping Kit Installation Instructions for TR8 Intercooler Tooling: o Jack, Jack Stands, Ramps
Always wear safety glasses when working on your vehicle.
 90-93 MAZDA MIATA SUPERCHARGER KIT The KraftWerks 90-93 Mazda Miata Supercharger Kit was designed for easy installation. Competent mechanics with the appropriate tools will find the process to be relatively
SLP Camaro ZL1 STAGE 3 (650 HP)
") SLP - 2012 Camaro ZL1 STAGE 3 (650 HP) PART #26002 PACKING LIST Before installation, use this check list to make sure all necessary parts have been included. ITEM QTY CHECK PART NUMBER DESCRIPTION 1. 1
SLP - 2012 Camaro ZL1 STAGE 3 (650 HP) PART #26002 PACKING LIST Before installation, use this check list to make sure all necessary parts have been included. ITEM QTY CHECK PART NUMBER DESCRIPTION 1. 1
FULL LENGTH HEADERS/ CATTED HEAD PIPES
 INSTALLATION INSTRUCTIONS INS232 2016-2018 CAMARO 6.2L V8 FULL LENGTH HEADERS/ CATTED HEAD PIPES Part #4044 and 40440 Special Tools required: 10mm, 12mm, 13mm, 15mm Socket and Wrenches, Pliers, Saw, Welder
Huron Speed Products Twin Turbo Install Gen 2 CTS-V (09-15)
") Huron Speed Products Twin Turbo Install Gen 2 CTS-V (09-15) 1 2 Remove two bolts in trunk cover with 8mm socket. Pull up on cover to remove. Unscrew net tie down on side cover where battery is located
Huron Speed Products Twin Turbo Install Gen 2 CTS-V (09-15) 1 2 Remove two bolts in trunk cover with 8mm socket. Pull up on cover to remove. Unscrew net tie down on side cover where battery is located
Keeping You Cool Under Pressure
 Installation Instruction for 92-93 GM 6.5L Turbo Diesel Series 3500-4 Wheel Drive Pickup and Series 1500, 2500, 3500 4 Wheel Drive Suburban Intercooler System (Part No. 2-436) TOOLS REQUIRED: 1.) Normal
Camaro/Trans Am V3 T6 Kit Installation Instructions
 1998-2002 Camaro/Trans Am V3 T6 Kit Installation Instructions A- Driver s Side Manifold B- Passenger s Side Manifold C- Crossover Pipe Parts List D- 2.5 v-band Clamp - Quantity-2 E- Downpipe F- Heat Wrap
BD TrackMaster S D o d g e H P C R Installation Instructions
 7 July 2016 PN#1045701, 1045702, 1045704 Dodge 6.7L TMS400 (I-00361) 1 BD TrackMaster S400 2008-2012 D o d g e H P C R Installation Instructions 1045701 2008-2009 Dodge 6.7L TMS400 1045702 2010-2012 Dodge
IAG Street Series Air / Oil Separator (AOS) For WRX
 For WRX") P IAG Street Series Air / Oil Separator (AOS) For 2015-16 WRX Part# IAG-ENG-7152 Tools Required: Ratchet, torque wrench, extensions, needle nose pliers, hose cutter, snips/scissors, flat head screw driver,
P IAG Street Series Air / Oil Separator (AOS) For 2015-16 WRX Part# IAG-ENG-7152 Tools Required: Ratchet, torque wrench, extensions, needle nose pliers, hose cutter, snips/scissors, flat head screw driver,
Included parts: 1 - BorgWarner SX-E Turbocharger 1 - SX-E 90-Degree Compressor Outlet Elbow 1 - HSM Cast Exhaust Manifold 1 - HSM Downpipe
 TROUBLESHOOTING: Please read and understand all installation instructions before proceeding with the installation. If you have questions during the installation of this product, please email H&S Motorsports
BD 6.7L Super B Special Turbo Kit For L Dodge -- I n s t a l l a t i o n I n s t r u c t i o n s -- PN#
 26 September 2012 1045140 6.7L Super B Special Turbo Installation 1 BD 6.7L Super B Special Turbo Kit For 2007.5-2012 6.7L Dodge -- I n s t a l l a t i o n I n s t r u c t i o n s -- PN# 1045140 PLEASE
Always use fuel with a minimum octane rating of 93 (R+M)/2. (Equivalent to 98 RON).
/2. (Equivalent to 98 RON).") Before Commencing Installation Verify that you have all necessary tools as listed. Clean all air ducting prior to commencing installation. The sequence of installation of each part is very important. It
Before Commencing Installation Verify that you have all necessary tools as listed. Clean all air ducting prior to commencing installation. The sequence of installation of each part is very important. It
1 October V Dodge Twin Turbo Kit # ½ D o d g e 2 4 v I S B PLEASE READ ALL INSTRUCTIONS BEFORE INSTALLATION.
 1 October 2012 24V Dodge Twin Turbo Kit #1045420 1 BD r700 RaceTwin Turbo Kit 1998½- 2 0 0 2 D o d g e 2 4 v I S B Part# 1045420 PLEASE READ ALL INSTRUCTIONS BEFORE INSTALLATION. * Picture as shown features
Air Oil Separator for WRX
 Air Oil Separator for 2015+ WRX 2018-06-05 Thank you for purchasing this PERRIN product for your car! Installation of this product should only be performed by persons experienced with installation of aftermarket
MAZDASPEED3 Intercooler Instructions
 MAZDASPEED3 Intercooler Instructions Congratulations on your purchase of the COBB Tuning Front Mount Intercooler System for your 2007-2009 Mazdaspeed3. The following instructions should assist you through
Slingshot Rotrex Supercharger Kit
 Slingshot Rotrex Supercharger Kit This supercharger kit improves on the Slingshot by forcing more dense air into the engine and creating more power. Installation time of the supercharger depends on you
VW & Audi TDI CR140 ECO KIT Installation Guide
 VW & Audi TDI CR140 ECO KIT Installation Guide This guide is to help you install your new Rawtek DPF, EGR & Adblue Delete Exhaust ECO Kit on your (2009-2014) VW / Audi with 2.0l CR140 Diesel Engine. Note:
TiAL R770 & S605. Installation notes. TIAL Sport!! TiALsport.com!! Revision 2
 TiAL R770 & S605 Installation notes TIAL Sport!! TiALsport.com!! Revision 2 Caution! The components in this package may require additional parts to be sourced or fabricated for the installation. Due to
R35 GTR ALPHA X TURBO KIT INSTALLATION INSTRUCTIONS
 R35 GTR ALPHA X TURBO KIT INSTALLATION INSTRUCTIONS 04 06 09 10 14 21 30 31 34 Turbo Kit Packaging Information Engine Mount Installation Exhaust Manifold Installation Heat Shield Exhaust Manifold Shield
Sikky Oil Pan Install Guide
 Sikky Oil Pan Install Guide **If you have a double chain timing belt or after market oil pump setup then further modifications may need to be made in order for the pan to fit.** Remove starter Remove plastic
Subaru Front Mount Intercooler Kit STI Subaru Front Mount Intercooler Kit STI
 Subaru Front Mount Intercooler Kit STI 2008-2014 715500 Subaru Front Mount Intercooler Kit STI 2008-2014 Congratulations on your purchase of the Subaru Front Mount Intercooler Kit STI 2008-2014. The following
IAG Competition Series Air / Oil Separator (AOS) For WRX
 For WRX") P IAG Competition Series Air / Oil Separator (AOS) For 2015-16 WRX Part# IAG-ENG-7252 Tools Required: Ratchet, torque wrench, extensions, needle nose pliers, hose cutter, snips/scissors, flat head screw
P IAG Competition Series Air / Oil Separator (AOS) For 2015-16 WRX Part# IAG-ENG-7252 Tools Required: Ratchet, torque wrench, extensions, needle nose pliers, hose cutter, snips/scissors, flat head screw
Included parts: 1 - BorgWarner SX-E Turbocharger 1 - SX-E 90-Degree Compressor Outlet Elbow 1 - HSM Cast Exhaust Manifold 1 - HSM Downpipe
 TROUBLESHOOTING: Please read and understand all installation instructions before proceeding with the installation. If you have questions during the installation of this product, please email H&S Motorsports
Revised 10/23/2015 Page 2 of 10
 1.Remove the gauge, side panels, hood and headlight. Remove the air box from the throttle bodies then remove the seat and gas tank. 2.Carefully remove temp sensor from air box using a small pick or screw
Part# PLEASE READ ALL INSTRUCTIONS BEFORE INSTALLATION.
 16 November 2009 HPCR Dodge Twin Turbo Kit #1045430 1 BD Twin Turbo R700 Kit 2003-2007 Dodge HPCR ISBe Installation Instructions Part# 1045430 PLEASE READ ALL INSTRUCTIONS BEFORE INSTALLATION. UNLESS AN
Instant Chat off the main page of Or simply call our tech team at
 FRONT MOUNT INTERCOOLER 2008-13 STI 2014-04- 08 Thank you for purchasing this PERRIN product for your car! Installation of this product should only be performed by persons experienced with installation
GT-R Alpha 10/12 Turbo Kit
 GT-R Alpha 10/12 Turbo Kit Instructions V6 The goal of AMS is to provide the highest quality, best performing products available. By utilizing research and development, and rigorous testing programs AMS
v Porsche 928
 1985-86 32v Porsche 928 Toll-Free Tech Hot Line: 877-FOR-928M 877-367-9286 Please do not copy this manual and give copies to your friends. Our ability to bring you this supercharger kit at this price relies
Trackspeed Engineering, LLC 1289 Reamwood Ave #A, Sunnyvale, CA
 Trackspeed Engineering, LLC 1289 Reamwood Ave #A, Sunnyvale, CA 94089 650-701-7223 info@trackspeedengineering.com Trackspeed DIY Turbocharger System Installation Instructions v1.00 (10/12/16) Thanks for
IAG Air / Oil Separator (AOS) For STi
 For STi") IAG Air / Oil Separator (AOS) For 2008-14 STi Part# IAG-ENG-7000 Tools Required: Ratchet, torque wrench, extensions, needle nose pliers, hose cutter, snips/scissors Sockets: 10mm, 12mm 13mm Wrenches: 10mm,
IAG Air / Oil Separator (AOS) For 2008-14 STi Part# IAG-ENG-7000 Tools Required: Ratchet, torque wrench, extensions, needle nose pliers, hose cutter, snips/scissors Sockets: 10mm, 12mm 13mm Wrenches: 10mm,
XDP Complete EGR Race Track Kit w/up-pipe. Item Number: XD144
 XDP Complete EGR Race Track Kit w/up-pipe Item Number: XD144 PACKING LIST: 2 - Lined 3/4" SS Hose Clamp 1-3/4 Silicone Hose 1 - XDP Engraved EGR Valve Block-Off Plate with O-ring 1 - EGR Cooler Block-Off
Page1. ISF Stainless Steel Headers // Part# HDR-004
 Congratulations on the purchase of your ISF Stainless Steel Headers and thank you for choosing Sikky Manufacturing. This installation manual is intended to guide you through the removal of the factory
TABLE OF CONTENTS PARTS LIST
 TROUBLESHOOTING: Note: You will have a check engine light and/or other problems unless using this product with a compatible ECM calibration. H&S Motorsports provides compatible calibrations for H&S Performance
Installation manual BMW E TS1/TS2
 Installation manual BMW E46 330 TS1/TS2 Technical support Europe: +4741558555 Technical support USA: (858)314-2954 Email support: support@esstuning Installation manual BMW E46 330 TS1/TS2 Remove and send
Industrial Injections Compound Turbo Installation For 6.7L Scorpion
 Industrial Injections Compound Turbo Installation For 6.7L Scorpion Step 1: Whenever you are doing an installation the first thing you should do is unhook the batteries to avoid arcing. You will need an
OIL COOLER KIT INSTALLATION INSTRUCTIONS PART NUMBER D
 OIL COOLER KIT INSTALLATION INSTRUCTIONS PART NUMBER D570-0904 APPLICATION: 2011-2012 E90 335i/xi (N55 engine) with BMW standard bumper and with stock oil cooler Congratulations for being selective enough
#TL T EA888 GEN 3 FUELING SYSTEM/ INSTALLATION INSTRUCTIONS
 #TL100069 2.0T EA888 GEN 3 FUELING SYSTEM/ INSTALLATION INSTRUCTIONS Notes: These instructions were written for a North American specification MkVII GTI. Other models, like the Golf R, are similar. When
BD Cobra Compound Turbo
 3 July 2018 1045780-98 Dodge Cobra Turbo Kit (I-00377) 1 DOWNLOAD COLOR INSTALL MANUALS AT www.dieselperformance.com BD Cobra Compound Turbo 2003-2018 Dodge Cummins Cobra 76 Cobra 80 Cobra 86 Cobra 88
C40008 & C40009 EXHAUST BRAKES
 EXHAUST BRAKES C40008 & C40009 1995 2003 Ford F250 / F350 7.3 L Powerstroke Diesel with manual transmissions 1995 1998 Ford F250 / F350 7.3 L Powerstroke Diesel with automatic transmission* *Requires the
OIL COOLER KIT INSTALLATION INSTRUCTIONS PART NUMBER D E92 335is (N54 engine) with BMW M-Technic bumper and with stock oil cooler
 with BMW M-Technic bumper and with stock oil cooler") OIL COOLER KIT INSTALLATION INSTRUCTIONS PART NUMBER D570-0923 APPLICATION: 2011 E92 335is (N54 engine) with BMW M-Technic bumper and with stock oil cooler Congratulations for being selective enough to
OIL COOLER KIT INSTALLATION INSTRUCTIONS PART NUMBER D570-0923 APPLICATION: 2011 E92 335is (N54 engine) with BMW M-Technic bumper and with stock oil cooler Congratulations for being selective enough to
IAG Street Series Air / Oil Separator (AOS) For 2017 WRX
 For 2017 WRX") P IAG Street Series Air / Oil Separator (AOS) For 2017 WRX Part# IAG-ENG-7152 Tools Required: Ratchet, torque wrench, extensions, needle nose pliers, hose cutter, snips/scissors, flathead screwdriver,
P IAG Street Series Air / Oil Separator (AOS) For 2017 WRX Part# IAG-ENG-7152 Tools Required: Ratchet, torque wrench, extensions, needle nose pliers, hose cutter, snips/scissors, flathead screwdriver,
Thermostats, Radiator, Coolant Hose, Hydraulic Fan/Steering R&R PT38 8V92
 REMOVING AND REPLACING THE THERMOSTATS, COOLANT HOSES, RADIATOR AND CHANGING THE HYDRAULIC FAN/STEERING FILTER/OIL/SHAFT SEALS ON A 1987 PT38 8V92 BY CURT SPRENGER March 2007 Thermostats, Radiator, Coolant
OIL COOLER KIT INSTALLATION INSTRUCTIONS PART NUMBER D E92 335i/xi (N55 engine) with M-Technic bumper and without stock oil cooler
 with M-Technic bumper and without stock oil cooler") OIL COOLER KIT INSTALLATION INSTRUCTIONS PART NUMBER D570-0925 APPLICATION 2011-12 E92 335i/xi (N55 engine) with M-Technic bumper and without stock oil cooler Congratulations for being selective enough
OIL COOLER KIT INSTALLATION INSTRUCTIONS PART NUMBER D570-0925 APPLICATION 2011-12 E92 335i/xi (N55 engine) with M-Technic bumper and without stock oil cooler Congratulations for being selective enough
Installation Manual. Model Chassis Code Engine Code Year
 INTERCOOLER KIT NISSAN GT-R R35 (VR38 38DETT) SPEC-R HG TYPE29 Full KIT Installation Manual Please read the Installation Manual before installing. Keep this manual for future reference. Model Chassis Code
Turner M50 Manifold Adapter Install. April 26, 2012
 April 26, 2012 Models: 1996-99 E36 328i/M3; 1997-98 E39 528i, 1997-98 Z3 2.8, 1998-2000 MZ3 S52 Product(s): Turner M50 Manifold Adapter Kit Subject: Installation Guidelines and Tips This guide will aid
Treadstone Performance Engineering Inc, Miami Fl
 INSTALLATION INSTRUCTIONS TURBOCHARGER SYSTEMS: 2007+ Nissan Sentra SER & Spec-V READ THIS FIRST: Study these instructions completely before proceeding. Engine and/or turbocharger damage may occur if any
OIL COOLER KIT INSTALLATION INSTRUCTIONS PART NUMBER D E92 335i/xi (N55 engine) with BMW Standard bumper and with stock oil cooler
 with BMW Standard bumper and with stock oil cooler") OIL COOLER KIT INSTALLATION INSTRUCTIONS PART NUMBER D570-0924 APPLICATION: 2011-12 E92 335i/xi (N55 engine) with BMW Standard bumper and with stock oil cooler Congratulations for being selective enough
OIL COOLER KIT INSTALLATION INSTRUCTIONS PART NUMBER D570-0924 APPLICATION: 2011-12 E92 335i/xi (N55 engine) with BMW Standard bumper and with stock oil cooler Congratulations for being selective enough
Tools Required. Metric Wrench Set Screwdriver Set Metric Socket Set Pliers Heavy duty hydraulic Jack and Car Stands Box knife or similar Hacksaw WD40
 Subaru 2004+ Legacy GT & Outback XT For JDM 2.0 twinscroll turbo and USDM 2.5 turbo models Front Mount Intercooler Fitting Instructions PN# LEG-1348-000 You are now the proud owner of a highly tested and
LPE C5 Battery Relocation Kit
 LPE C5 Battery Relocation Kit The LPE C5 Corvette battery relocation kit improves vehicle weight distribution by moving weight to the rear of the vehicle. The improved weight distribution increases traction
These instructions were written for reference only and the use of a factory service manual is recommended.
 Introducing the CorkSport High Pressure Fuel Line designed for the MZR DISI. This fuel line is designed to replace the OEM fuel line which are prone to failure at the brazed connection at the rail. The
IAG Street Series Air / Oil Separator (AOS) For WRX & WRX STI
 For WRX & WRX STI") IAG Street Series Air / Oil Separator (AOS) For 2006-07 WRX & 2004-07 WRX STI Part# IAG-ENG-7150 Tools Required: Ratchet, torque wrench, extensions, needle nose pliers, hose cutter, snips/scissors, flat
IAG Street Series Air / Oil Separator (AOS) For 2006-07 WRX & 2004-07 WRX STI Part# IAG-ENG-7150 Tools Required: Ratchet, torque wrench, extensions, needle nose pliers, hose cutter, snips/scissors, flat
2015+ SUBARU STI FRONT-MOUNT INTERCOOLER PARTS LIST AND INSTALLATION GUIDE INSTALL DIFFICULTY DISCLAIMER CAUTION INSTALL PROCEDURE TOOLS NEEDED
 PARTS LIST AND PARTS INCLUDED 1PC ALUMINUM INTAKE PIPE 1PC BAR-AND-PLATE INTERCOOLER 1PC STEEL CRASH BAR W/ MOUNTING HARDWARE 2PC HOT-SIDE INTERCOOLER PIPES 2PC COLD-SIDE INTERCOOLER PIPES 1PC BPV FLANGE
YOU WILL BLOW YOUR MOTOR UP IF YOU MOUNT A SUPERCHARGER TO THIS KIT AND DRIVE AWAY WITHOUT INTEGRATING A RELIABLE TUNING METHOD!!!!!!
 NOTICE This supercharger mounting kit is sold with NO supercharger head unit and is intended for use with Vortech supercharger head units exclusively. DO NOT attempt to adapt any other manufacturer s supercharger
Toyota Tacoma Winch Mount Bumper Installation Instructions Tools Required: Transmission cooler relocation brackets Torque Wrench
 2016-2017 Toyota Tacoma Winch Mount Bumper Installation Instructions Tools Required: Items Included: Small flat head screw driver Winch Mount Ratchet, 10mm, 12mm, 14mm, 17mm & Skid Plate 19mm sockets Transmission
* PLEASE READ INSTRUCTIONS PRIOR TO INSTALLATION
 XDP 6.0L Complete EGR Delete Kit w/up-pipe Item Number: XD169 PACKING LIST: 2 - Lined 3/4" Hose Clamps, 1-180 Coolant Tube, 1-3/4 Silicone Hose, 1 - Stainless Steel Up-pipe 1 - EGR Valve Block-Off Plate,
BLACKBIRD INSTALLATION SUPPLEMENT
 BLACKBIRD INSTALLATION SUPPLEMENT FOR 2003-7 FORD 6.0 LITER DIESEL F-SERIES DUAL ALTERNATOR VERSION 10/07 Blackbird Installation Supplement for Ford 6.0. Liter Dual Alternator Parts included in the 6.0
2006 Honda Civic SI Supercharger Kit Installation Instruction Kit #
 2006 Honda Civic SI Supercharger Kit Installation Instruction Kit #350-091 3239 MONIER CIRCLE, STE.5 RANCHO CORDOVA, CA 95742 916.635.4550 FAX 916.635.4632 www.ct-engineering.com INS-157 VERSION: 3.25.2009
BD SUPER B SINGLE TURBO KIT Dodge 5.9L Cummins v ISBe (Non 600 motors)
") 1 DOWNLOAD ENHANCED INSTALL MANUALS AT dieselperformance.com BD SUPER B SINGLE TURBO KIT Dodge 5.9L Cummins 2003-2004 24v ISBe (Non 600 motors) Part # 1045230 PLEASE READ ALL INSTRUCTIONS BEFORE INSTALLATION
1 DOWNLOAD ENHANCED INSTALL MANUALS AT dieselperformance.com BD SUPER B SINGLE TURBO KIT Dodge 5.9L Cummins 2003-2004 24v ISBe (Non 600 motors) Part # 1045230 PLEASE READ ALL INSTRUCTIONS BEFORE INSTALLATION
APIKOL Ur-S4/S6 Gen. II Front Mount Intercooler INSTALLATION INSTRUCTIONS
 APIKOL Ur-S4/S6 Gen. II Front Mount Intercooler INSTALLATION INSTRUCTIONS Only work underneath your vehicle after properly supporting it with adequate jack stands on a flat surface. NEVER work under a
IAG Competition Series Air / Oil Separator (AOS) For 2017 STI
 For 2017 STI") P IAG Competition Series Air / Oil Separator (AOS) For 2017 STI Part# IAG-ENG-7251 Tools Required: Ratchet, torque wrench, extensions, needle nose pliers, hose cutter, snips/scissors, flat head screw driver,
P IAG Competition Series Air / Oil Separator (AOS) For 2017 STI Part# IAG-ENG-7251 Tools Required: Ratchet, torque wrench, extensions, needle nose pliers, hose cutter, snips/scissors, flat head screw driver,
Porsche 928 with 16v LH-Jetronic Fuel System
 Porsche 928 with 16v LH-Jetronic Fuel System Toll-Free Tech Hot Line: 877-FOR-928M 877-367-9286 Please do not copy this manual and give copies to your friends. Our ability to bring you this supercharger
This information covers procedures for replacing the sealant for the crankshaft cover on the Volvo D16F engine.
 Volvo Trucks North America Greensboro, NC USA DService Bulletin Trucks Date Group No. Page 1.2008 216 50 1(17) Sealant Crankshaft Cover, Replacement D16F Sealant Crankshaft Cover, Replacement W2005773
ZZP LNF Cobalt Turbo Upgrade
 ZZP LNF Cobalt Turbo Upgrade Note: These instructions are intended for installers with previous turbo installation experience. Some procedures will not be described in full detail. If you run into any
These instructions were written for reference only and the use of a factory service manual is recommended.
 Introducing the CorkSport High Pressure Fuel Line designed for the MZR DISI. This fuel line is designed to replace the OEM fuel line which are prone to failure at the brazed connection at the rail. The
IAG Street Series Air / Oil Separator (AOS) For WRX & WRX STI
 For WRX & WRX STI") IAG Street Series Air / Oil Separator (AOS) For 2006-07 WRX & 2004-07 WRX STI Part# IAG-ENG-7100 Tools Required: Ratchet, torque wrench, extensions, needle nose pliers, hose cutter, snips/scissors, flat
IAG Street Series Air / Oil Separator (AOS) For 2006-07 WRX & 2004-07 WRX STI Part# IAG-ENG-7100 Tools Required: Ratchet, torque wrench, extensions, needle nose pliers, hose cutter, snips/scissors, flat
Instant Chat off the main page of Or simply call our tech team at
 02-07 WRX/STI Air Oil Separator for Top Mounted Intercooler Setups 2013-02- 27 Thank you for purchasing this PERRIN product for your car! Installation of this product should only be performed by persons