12 Disk Style Brush Chippers Model 2012 Model 2012HD Model 2512 Model 2512HD
|
|
|
- Donald Bishop
- 5 years ago
- Views:
Transcription
 578-9335 Fax (864) 578-0210 www.")
1 12 Disk Style Brush Chippers Model 2012 Model 2012HD Model 2512 Model 2512HD Machine Serial # Engine Model & Spec # Engine Serial # PTO/Clutch Model & Spec # Clutch Serial # Purchase Date Dealer Carlton J.P.Carlton Company Div. D.A.F. Inc. 121 John Dodd Road Spartanburg, SC Ph. (864) Fax (864)
2
3 DIESEL ENGINE EXHAUST WARNING CALIFORNIA Proposition 65 Warning Diesel engine exhaust and some of its constituents are known to the State of California to cause cancer, birth defects, and other reproduction harm.
4
5 CHIPPER SAFETY ALERT
6
7 CHIPPER SAFETY ALERT
8
9 CHIPPER SAFETY ALERT
10
11 CHIPPER SAFETY ALERT
12
13 CHIPPER SAFETY ALERT
14
15 CHIPPER LIMITED WARRANTY J. P. Carlton Co. Inc., hereafter referred to as the Manufacturer, warrants each new Carlton Chipper to be free of defects in workmanship and material for a period of one year. This warranty takes effect upon delivery to the original retail purchaser. The manufacturer at its option will replace or repair at a point designated by the manufacturer, any parts which appear to have been defective in material or workmanship. The manufacturer is not responsible for consequential damages. This warranty will be valid only if the chipper is operated in a manner recommended by the manufacturer. The following examples would void warranty: 1. The chipper has been abused. (Such as over extending size limits, not following routine maintenance recommendations, etc.) 2. The machine is involved in or damaged by an accident. 3. Repairs or attempted repairs were made without prior written authorization. Including, but not limited to, repairs made due to normal wear or not using manufacturer approved replacement parts. 4. Chipper damaged by foreign materials. (Such as wire, metals of any kind, etc.) The owner is responsible for all regular maintenance as explained in the operator s manual. Neglect in regular maintenance or failure to replace normal wear items such as knives, anvil, lubrication oils, filters, belts, bearings, etc. may void warranty. This warranty is expressly in lieu of any other warranties, expressed or implied, including any implied warranty or merchantability of fitness for a particular purpose and of any non-contractual liabilities including product liabilities based upon negligence or strict liability. J. P. Carlton Co. Inc. will not be liable for consequential damages resulting from breach of warranty. IT IS NECESSARY TO RETURN THE WARRANTY VALIDATION FORM AND NOTIFY J. P. CARLTON CO. INC. IN WRITING WITHIN TEN (10) DAYS FROM DELIVERY DATE TO VALIDATE THIS WARRANTY. NOTE: This warranty applies only to new and unused equipment or parts thereof manufactured by J. P. Carlton Co. Inc. ANY MACHINES USED FOR LEASE OR RENTAL WARRANTY IS LIMITED TO 90 DAYS FROM FIRST DAY OF INITIAL SERVICE. NOTICE: All power units and associated components are NOT warranted by J. P. Carlton Co. Inc. or their dealers. It is the customer s responsibility to return the machine to the local engine distributor. Information phone numbers to find your local engine & parts service centers: Honda Kohler Engines Briggs & Stratton Engines Lombardini Deutz Engines John Deere Engines Caterpillar Kubota Kawasaki Engines Wisconsin Engines Onan Engine In order to process any claims, it is the owner's responsibility to report claims properly to the manufacturer or the authorized dealer from whom the equipment was purchased. It is necessary to include the following information on any and all request for warranty: 1. Dealer from whom purchased 2. Date of delivery 3. Serial number of unit 4. Model number of unit 5. Engine make and serial number 6. Length of time in use 7. Date of failure 8. Nature of failure
16
17 CHIPPER LIMITED WARRANTY EXPLANATION OF LIMITED WARRANTY The manufacturer will not reimburse the customer or dealer labor cost incurred for installing bolt-on or slip-on items, such as pumps and motors, bearings, belts, pulleys, etc. The manufacturer will provide replacement parts at no cost to the customer for defective parts during the warranty period. Defective parts must be returned to J. P. Carlton Company. It will be the customer s responsibility to install the replacement parts unless arrangements are made with the selling dealer. The manufacturer will not reimburse travel cost to servicing dealer. It is the customer s responsibility to deliver the machine to the dealer s facility, unless other arrangements have been agreed to between the selling dealer and the customer. The manufacturer may elect, at its discretion, to reimburse reasonable labor cost to customer or dealer for major defect repairs. Prior approval must be obtained from J. P. Carlton Company Inc. IMPORTANT NOTICE 1. AIR FILTER MAINTENANCE IS CRITICAL ON CHIPPERS. DIRT INGESTION WILL NOT BE WARRANTED BY THE ENGINE MANUFACTURER OR BY J. P. CARLTON COMPANY. 2. OIL AND OIL FILTER MAINTENANCE ARE CRITICAL ON CHIPPERS. STARVING THE ENGINE FOR OIL WILL NOT BE WARRANTED BY THE ENGINE MANUFACTURER OR BY J. P. CARLTON COMPANY. 3. CLUTCH MAINTENANCE AND ADJUSTMENT ARE CRITICAL; FOLLOW THE CLUTCH MAINTENANCE AND ADJUSTMENT SECTIONS IN THIS MANUAL. J. P. CARLTON CO. DOES NOT WARRANT THE CHIPPER CLUTCH. READ THE CLUTCH MANUAL FOR THE MANUFACTURER S WARRANTY.
18
19 Warranty Validation Form Congratulations on your purchase of a Carlton Chipper. This product has been designed and manufactured to provide years of profitable service while minimizing maintenance and downtime. Please take the time now to complete this warranty validation form. This information is necessary for Carlton to instate your warranty. Return Form To: J. P. Carlton Company, Div. D.A.F. Inc. 121 John Dodd Road; Spartanburg, SC 29303; Phone: Purchaser Information: Company Name: City: Telephone: Machine Information: Model Number: Serial Number: Dealer Information: Dealer Name: City: Telephone: Street Address: State: Zip Code: Contact Name: Engine Model: Serial Number: Street Address: State: Zip Code: Contact Name: 1. Customer has been instructed on the operation and safety of this chipper. 2. Customer understands it is the chipper owners responsibility to train all operators on all aspects of operator safety and operation of this chipper. 3. Customer has been instructed that every person within a 100 foot radius of the chipper while in operation must be wearing personal safety equipment as specified in the Safety Section of this manual. 4. Customer has been instructed on positioning the discharge chute away from the direction of people and/or property because of the danger of airborne chips. 5. Customer has been warned that no one should ever reach, kick or lean into the feed intake chute. Customer has been informed that at least one operator must be in position, at all times, to activate the feed control bar to shut down and reverse the feed wheels any time material is being fed or the feed wheels are running. 6. Customer has been instructed to feed short brush or vine-like material on top of longer material or to use the push paddle, not to reach or kick this material into the chipper feed intake chute. 7. Customer has been warned not to operate the chipper with the chipper hood open or unlocked. The chipper hood must be pad locked and must not be able to come open during operation. 8. Customer has been instructed on the procedures to follow before performing maintenance of any kind on the chipper: turn engine off and remove ignition key; disconnect battery cable; allow the cutter disk to come to a complete stop (which will take several minutes); install cutter disk lock; and allow all parts to cool completely. If working between feed wheels, raise upper feed wheel using the hydraulic lift, insert yoke pin and put wooden block between feed wheels. 9. Customer has been instructed on normal maintenance and lubrication schedules and procedures and has been advised that failure to perform periodic maintenance may void the warranty. Oil and air filters must be maintained properly or the warranty will be voided. 10. Customer has been advised that the engine or power unit that is used on this machine is warranted by the engine manufacturer and NOT J. P. Carlton Company. All engine warranty issues should be addressed to the local engine dealer. 11. Customer has been advised that maintenance and adjustment on the clutch are critical. Customer has been advised that J. P. Carlton Co. does not warrant the clutch and the only warranty that applies is in the clutch manufacturer s manual. Contact the clutch manufacturer with warranty issues. 12. All operation and warning decals are properly displayed on equipment and have been reviewed with the customer. All safety devices have been inspected and found to be working properly at this time. 13. Customer has received and reviewed all operators manuals, warranties, safety instructions, and parts. 14. Customer fully understands all information that has been provided, both written and verbal. I have inspected this equipment and find it in good working condition. To the best of my knowledge, the customer and his personnel are aware of the above procedures. Date: Signed: Dealer Representative The equipment has been thoroughly checked by the above named dealer, and I am satisfied with his instructions. Date: Signed: Customer
20
21 12 CHIPPER TABLE OF CONTENTS INTRODUCTION FOREWORD 1 GENERAL INFORMATION 2 MACHINE FEATURES 3 MACHINE SPECIFICATIONS 4 OPERATION SAFETY PRECAUTIONS 5 DAILY CHECKLIST 10 MACHINE CONTROLS 17 TOWING GUIDE 28 MACHINE OPERATION 32 MAINTENANCE MACHINE MAINTENANCE 47 LUBRICATION 54 TROUBLESHOOTING GUIDE 58 SERVICING HYDRAULICS 61 SERVICING PTO/CLUTCH 65 SERVICING CUTTER SYSTEM 69 SERVICING BELTS 80 SERVICING FEED WHEEL MOTOR 87 MACHINE WIRING 92 PARTS DECAL ASSEMBLY 94 PARTS BOOK MISCELLANEOUS AUTO-FEED PLUS MANUAL E-Z LUBE MAINTENANCE WINCH INFORMATION BACK
22

23 12 CHIPPER FOREWORD Congratulations on your purchase of a new Carlton Professional Chipper! Carlton has built its reputation on the superior performance and reliability of their stump grinders and you can be assured your new chipper has the same performance and reliability. A machine is not profitable if it s broken-down and we do our absolute best to help you avoid costly downtime. Each and every machine has been over designed and overbuilt to ensure years and years of trouble-free operation. In this, we take pride. The Carlton 12 chipper is the heaviest duty 12-inch capacity disk style chipper available. From the ground up, the components and weldments are the strongest on the market. Read this manual carefully and TAKE RESPONSIBILITY for thoroughly familiarizing yourself with the controls and the concepts behind the operation of this machine before attempting to operate it. Slowly experiment with the controls and gradually work yourself up to the full capabilities of this machine. The Carlton 12 chipper is a durable and profitable professional chipper. Read the chipper manual, the safety and operational decals on the chipper, and all other operation and safety materials provided for the engine and other components. Use proper safety precautions. Follow the instructions and use common sense and your OX will perform like its namesake. If getting more work done in a day, with less trouble, is your idea of good business, then you ll love your new Carlton Chipper. We welcome your suggestions on how we might better build our machines. We solicit any and all questions concerning the safe operation or proper servicing of your new chipper. Please feel free to write to us with any comments. We ll enjoy hearing from you! 1

24 12 CHIPPER GENERAL INFORMATION The J. P. Carlton Company constantly strives to create the best professional tree equipment available in the industry. Therefore, the material in this manual is correct at the time of publication. Carlton reserves the right to make improvements, modifications, and even discontinue features as we deem necessary to meet our goal. Carlton also reserves the right to discontinue models without any prior notification or obligation. Inspect your new Carlton Chipper as soon as you receive it. Any damages incurred during shipment are not warranted and, therefore, are not covered repairs. You should have the truck driver verify or acknowledge any damages caused during shipment. If not, contact the truck lines as soon as possible with your complaint. Any reference made to the right, left, front, or rear in relationship to the chipper is illustrated in the following pictures. Please refer to these any time you call your dealer or J. P. Carlton for parts or assistance. Front Rear Front Left Right 2

25 12 CHIPPER MACHINE FEATURES Available Machine Features: HP diesel turbo charged engine Reversing auto feed Digital tachometer Direct drive hydraulic pump Hydraulic variable flow control Auto-Feed Plus system Twin lift cylinders Hand crank adjustable height and swivel discharge Axle 9000# cap 36 telescoping tongue Lockable tanks w/gauges Electric brakes Front jack stand 7000# Cap, Screw type Rear jack stand AR400 anvil 18 ply tires, rated over 6000 pounds Tapered roller bearings 2 thick cutter disk 4 knives Massive 25 x 12 throat opening 64 wide feed intake opening Two 10 1/2" x 25 feed rollers Adjustable feed rate Key start High capacity battery Lockable, steel battery box Epoxy primer Dupont Imron paint Double wire braid hoses We Pride Ourselves in the strength and quality of each and every machine 3
26 Carlton Model 2012 Specifications General: Hydraulic System: Weight: 6200 Pounds Hyd Pump Displcmnt:.87 in cu/rev (14.4cm cu/rev) Length: 186 inches Hyd Pump Drv Systm:Direct Drive off Engine Mount Height: 100 inches Flow: Variable Pressure Compensated Tires: 215/75R17.5 Ld Rng H 4805 PSI System Relief: 2500 PSI Axle: Dexter Torflex 8,000 Pound Cap Oil Tank Capacity: 13 Gallons Brakes: Electric with Breakaway Switch Oil Type: AW32 Hitch: Five Inch Height Adjustable Pintle Valve: Series Type Fuel Capacity: 40 Gallons Hose: 16,000 PSI Burst - Exceeds SAE 100R2 Battery: 29HVD 650 CCA Oil Filter: 10 Micron Return with Suction Strainer Jack Stand: 7000 # Cap Screw Type Swing Up Engine: Drive System: Manufacturer: John Deere Engine Sheave: 6/5V7.1 Number of Cylinders: Four Jackshaft Sheave: 6/5V15 Bore: 4.19 Inches (106 mm) Drive Belt: 6/5V1000 Stroke: 5.0 Inches(127 mm) Cutter Head Shaft: 4 ¼ inches Displacement: 276 Cubic Inches (4.5L) Maximum RPM: 2400 RPM Feed System: Horsepower: 140HP Torque: 367 Ft Lbs (498 NM) Feed Motors: 32 Cubic Inch Displacement Cooling Medium: Liquid Water/Antifreeze Mixture Flow: Pressure Compensated Adjustable Air Cleaner: Two Stage Dry Type Hydraulic Drive: Live Driven off engine Oil Filter: Full Flow Spin On Autofeed: Reversing, Digital, Fully Adjustable Oil Capacity: 13 Quarts Feed Rate: Adjustable Oil Type: John Deere Feed Rollers: Two 10 ½ x 20 Electrical: 12 Volt Springs: Two 19 Tight Wound Powder Coated Gauges: Powerview Slide Bearings: Four 16 x 1 x 1 Ryertex Clutch: Twin Disk 11 ½ Over Center Lift Cylinders: Two 2 x 12 with 1 attachments Discharge: Crank Adjustable Swivel and Height Bearings: Frame: Disk Bearings: 2 7/16 inches Tapered Roller Main Trailer Tongue: 4 x 6 with 3/8 wall Feed Roller Bearings: 2 inches Ball Bearing Main Trailer Frame: 3 x6 with ¼ wall Disk Shaft: 3 ½ inches Telescoping Tongue: 3 x5 with 3/8 wall by 72 long Feed Roller Shaft: 2 inches Engine Channel Mnts: 4 Channel with 5/16 web Infeed Chute: 3/16 with 2 x2 x1/4 tube frame Folding Infeed Tray: 3/16 with 4 x11/2 x3/16 bracing Chipper Disk: Folding Tray Lock: ¾ Spring Loaded Pin Discharge Chute: 10 gauge Wheel Diameter: 40 inches Discharge Lock: ¾ Spring Loaded Pin Wheel Thickness: 2 inches Fuel Tank: 10 gauge with baffles rubber mtd Disk Balance: Precision High Speed Balanced Hydraulic Tank: 10 gauge with baffles rubber mtd Wheel Speed: 1180 RPM Battery Box: 10 gauge checker plate - lockable Number of Knives: 4 Fenders: 3/16 checker plate Knife Dimensions: 7 ¼ x 4 ½ x1/2 Feeder Bar: 1 ½ OD x 1/8 wall - removable Anvil: 4 ½ x 12 ½ x ½ AR400 Radiator Guards: 2 x4 with 3/16 wall Chip Throwers: Two 3/8 x 4 x 4 x 12 long Light Brackets: 3/16 with hidden wiring Axle Mounts: ½ Plate Cutting Dimensions: Hitch Plate: ¾ Plate adjustable 5 Up/Down Throat Opening: 12 ¾ x 20 F:\data\John\Docs\Machine Docs\Machine Specs\2012 SPECS 140 Deere.DOC


27 12 CHIPPER SAFETY PRECAUTIONS Before operating the chipper, read this manual, the engine manual, and all the safety decals on the machine. Know all parts of the machine and their functions, especially the shut down procedures in case of emergency. No inexperienced person may operate the chipper. Inexperience may cause injury. It is the owner s responsibility to ensure all operators are trained and fully understand all safety and operational aspects of the chipper. This machine was built with safety in mind. The guards and other safety devices only work when kept in place and secured properly. Safety decals are placed on the machine as reminders of how to operate the machine safely, pay attention to the instructions. SAFETY FIRST ALWAYS! This is the Safety-Alert Symbol. This symbol is placed on the machine and in the manual to alert the operator to the potential for bodily injury or death. The operator should pay close attention to the instructions whenever they see this symbol. The Safety-Alert Symbol will be accompanied by one of the following words: DANGER, WARNING, or CAUTION A DANGER symbol means that if the instructions are not followed the possibility of serious personal injury or death is probable. A WARNING symbol means that if the instructions are not followed there is a possibility of serious personal injury or death. A CAUTION symbol means there is an unsafe condition or practice that may cause personal injury or property damage. PERSONAL PROTECTION: All personnel must wear eye and ear protection, hard hat, short fitted gloves without cuffs, long sleeve shirt, long pants without cuffs, and over the ankle work boots with skid resistant soles Do not wear loose-fitting clothing Tie long hair back Do not wear jewelry or long dangling clothing; i.e. neckties, long belts, or chains Stay away from feed wheels Keep away from moving parts Only run in a well ventilated area because of carbon monoxide poisoning P/N A P/N P/N

28 12 CHIPPER SAFETY PRECAUTIONS Be Safe and Practice Safe Operation using the following guidelines. Any individual operating this chipper must first read and understand this manual, the engine and other component manuals supplied with the chipper, and all safety and operational decals on machine. DO NOT permit children to operate machinery or to play near machinery during operation. DO NOT allow spectators to stand and watch chipper in operation. DO NOT allow people to pass by discharge zone while chipper is in operation. Keep hands, feet, legs, clothing, hair and all other body parts away from feed intake wheels, chipper knives, and other moving parts. Do not hang from, ride, sit, stand, lay, or climb anywhere on this chipper while it is in operation, running, or being transported. Do not move, position, or transport this chipper with the engine running. Keep away from pressurized leaks. Never check for leaks using hand or finger, use cardboard or wood. Pressurized fluid can penetrate the skin and cause injury or even death. Seek immediate medical attention if penetration occurs. Always wear eye protection. DO NOT operate any machinery while under the influence of alcohol or drugs (prescription, over the counter, or otherwise). DO NOT modify or change any part without written approval from J. P. Carlton Company. No one should ever reach, lean, or kick into the feed intake chute when the chipper or the engine is running. Feed wheels will pull in anything in the path of operation and will cause severe personal injury if a person is pulled into feed intake wheels. Always load shorter pieces of wood or brush on top of longer pieces or use push paddle, never reach into the feed intake chute to load these pieces. Stay clear of discharge zone when running chipper. Never allow anyone to stand near or to walk close to the discharge zone, even if being discharged into a bin or truck. Airborne debris may cause severe injury. If inspection of chipped material is required, shut down the chipper and the engine first. Discharge spout should not be pointed toward people, buildings, or other personal property that may be injured or damaged. Airborne debris is as dangerous as any powerful projectile. Never position, adjust, or move the discharge chute while the chipper or the cutter disk are running 6


29 12 CHIPPER SAFETY PRECAUTIONS Always have at least 2 operators at the job site running the chipper. One to load the brush into the feed wheels and the other to maintain the feed control bar in case of an accident. Always feed trees and brush butt end first and walking to the right side of the chipper, material being fed should be to the operator s left side. The material being fed tends to kick to the left and could injure anyone on that side. Never lean over material being loaded into the feed wheels; especially small diameter, short length material that is still long enough to be fed into the feed wheels alone. The material is not heavy enough to hold down when the feed wheels first grab it and will kick up hitting the operator in the chin or head causing injury. Never lay vine type material in front of feed intake chute. Never allow yourself or your clothing to become tangled in or tripped by vine type material. SEVERE INJURY COULD OCCUR. Always cut vine type material into shorter, easier to handle pieces, approximately 4 to 5 feet. Don t feed the vines into the chipper unless they have been cut!!! STOP automatic feed system and run vine type material through using manual start/stop controls and a wooden push paddle. CUTTER DISK HOOD KEEP CUTTER DISK HOOD CLOSED WHILE CHIPPER IS RUNNING. Always make sure the cutter disk hood latch pin is in place and locked securely using a padlock before starting chipper. The cutter disk hood must be locked using the factory issued lock pin and padlock. Never open the cutter disk hood while engine is running. After the engine is turned off, allow the cutter disk to come to a complete stop before opening the cutter disk hood. This will take several minutes Never run the chipper or the engine with the cutter disk hood open or unlocked at any time or for any reason. If the cutter disk hood or hinge is damaged, replace immediately. Always have the trees and brush cut to size for the chipper before the chipper arrives at the job site. It is very dangerous to run a chain saw and the chipper at the same time. If a tree gets jammed and has to be trimmed, shut down the chipper first. 7

30 12 CHIPPER SAFETY PRECAUTIONS DO NOT PERFORM MAINTENANCE OF ANY KIND ON THIS MACHINE UNLESS: The engine is turned off The ignition key is removed Positive battery cable is disconnected The clutch is disengaged Feed control bar is in neutral All machine parts have come to a complete stop NOTE: The cutter disk takes several minutes to come to a complete stop All machine parts have had sufficient time to cool down The cutter disk lock pin is installed in the disk lock tube No operator is in position at the controls to accidentally start machine At least 2 people are at the site where maintenance is performed YOKE LOCK PIN MUST BE IN POSITION before performing maintenance between the feed wheels. Use the hydraulic lift to raise upper feed wheel high enough to insert yoke lock pin as shown above. After the upper feed wheel has been raised and the lock pin is in position, place a block of wood 4 x 12 x 16 between feed wheels to keep wheel from coming down. See Maintenance Section for further instruction. More accidents occur while performing maintenance than any other time! Use extra caution. Never perform maintenance with the engine running, not even with the clutch disengaged. The pilot bearing could seize or freeze to the clutch shaft and permit the clutch to engage even though the operator thought the clutch had been disengaged. ALWAYS REPLACE GUARDS AND OTHER PROTECTIVE EQUIPMENT BEFORE STARTING CHIPPER AFTER PERFORMING MAINTENANCE. Keep a well-stocked First Aid Kit with the chipper at all times. Keep a full Fire Extinguisher with the chipper at all times. Stop engine, remove key, and disconnect battery cable when repairing or adjusting machine or drive belts. Keep engine in good condition, service as instructed in engine manual. Do not touch engine while running or hot (serious burns may result). Allow all machine parts to cool sufficiently before servicing or making adjustments. Hot machine parts can cause severe burns. 8
31 12 CHIPPER SAFETY PRECAUTIONS During operation of the chipper, all people within a 100-foot radius should wear protective equipment, including eye and ear protection and hard hats. If unusual noise or vibration occurs, stop engine immediately and correct the problem before continuing operation, consult authorized dealer if necessary. Keep all guards in place and properly secured during operation. Never operate the chipper with guards missing or loose. Keep all safety devices working properly and all other machine parts in good condition. Never leave the controls unattended while in operation. Be sure machine is not capable of operation when left unattended. Remove key and disconnect battery, if necessary. DO NOT OPERATE THE ENGINE AT AN ANGLE GREATER THAN 25 OR SEVERE ENGINE DAMAGE WILL OCCUR. PROPER ENGINE OIL LEVEL MUST BE MAINTAINED TO ACHIEVE MAXIMUM ANGLE OF OPERATION OF 25. (See Engine Owner s Manual for proper oil level.) Gasoline, diesel fuel and their vapors are highly flammable and explosive. Handle with care. Only use approved (red) fuel containers for storage. Do not store machine with fuel inside tank or fuel containers near any open flames, sparks, or other sources of ignition. Do not store equipment with fuel in the tank for long periods. Battery fumes are explosive. Recharge battery in an open area away from fire, sparks, or other sources of ignition. Use caution in extreme cold! Frozen battery will explode! Allow battery to thaw in heated area away from fire or sparks. Battery acid can cause severe burns. Keep away from eyes, skin, and clothing. Remove battery before welding on equipment. Do not operate chipper in dim lit, dark, or concealed areas. Do not operate or run machine or engine in enclosed area due to carbon monoxide poisoning hazard. Keep machine clean and clear of debris to eliminate fire hazard. It is especially important to clean any oil or fuel spills to prevent the danger of fire. Keep safety and instructional decals clean and replace any that are damaged, difficult to read, or missing. Decals may be purchased from J. P. Carlton or an authorized dealer. Remove all foreign objects from the chipper before starting, i.e. jackets, gloves, tools, etc. If operating chipper uncoupled from tow vehicle, the tires and tongue must be blocked. Use but do not depend on jack stands to hold machine steady. Always store tools safely away from moving machine parts, especially the feed intake wheels. There should be no obstacles in the path of operation behind the chipper or around the chipper to allow trip free movement of all personnel. Keep unauthorized persons away from the chipper operation area. 9


 ON THIS MACHINE UNLESS: The engine is turned off The ignition key")

32 12 CHIPPER DAILY CHECKLIST It is vital that the owner and operators inspect the chipper each day before operation. This inspection will help identify potential problems that may arise during the workday. The operators must get in the habit of performing this inspection each and every day. By performing this inspection each day, the operators will help minimize downtime and costly repairs. This inspection will also help to minimize risks associated with the operation of this brush chipper. SAFETY: DO NOT PERFORM MAINTENANCE OF ANY KIND (including routine inspections) ON THIS MACHINE UNLESS: The engine is turned off The ignition key has been removed The clutch is not engaged All moving parts have come to a complete stop NOTE: The cutter disk takes several minutes to come to a complete stop The cutter disk lock pin is installed in the disk lock tube All machine parts have cooled completely There is no operator at the controls to accidentally start the machine At least 2 people are at the site where the maintenance is to be performed Inspect Decals making sure all are in place, secure, and legible. (Not all decals are shown here just a small representation) 10


33 12 CHIPPER DAILY CHECKLIST Make sure all personnel are equipped with all applicable safety equipment: Eye protection Hearing protection Hard hat Short, fitted gloves Long sleeve shirt Long pants Over the ankle work boots with skid resistant soles PERSONAL PROTECTION: All personnel must wear eye and ear protection, hard hat, short fitted gloves without cuffs, long sleeve shirt, long pants without cuffs, and over the ankle work boots with skid resistant soles Do not wear loose-fitting clothing Tie long hair back Do not wear jewelry or long dangling clothing; i.e. neckties, long belts, or chains Stay away from cutter disk Keep away from moving parts Only run in a well ventilated area because of carbon monoxide poisoning BECAUSE OF MACHINE VIBRATION, ALL EQUIPMENT ATTACHED USING SCREWS OR BOLTS AND NUTS SHOULD BE CHECKED REGULARLY FOR TIGHTNESS. ALL SCREWS, BOLTS, AND NUTS NEED TO BE INSPECTED FOR TIGHTNESS AND WEAR. ALL SCREWS, BOLTS, AND NUTS THAT WON T STAY TIGHTENED OR THAT HAVE WORN, CHIPPED, OR MISSING THREADS SHOULD BE REPLACED. Inspect bolts, hydraulic fittings, wiring harnesses, hoses, and equipment for tightness, wear, or leakage. Replace if necessary. DO NOT inspect for hydraulic leaks with your hand or finger. FLUID UNDER PRESSURE CAN PENETRATE THE SKIN AND CAUSE SEVERE INJURY. CHECK FOR LEAKS USING A BOARD OR CARDBOARD; DO NOT USE HAND OR FINGER. SEEK IMMEDIATE MEDICAL ATTENTION IF SKIN IS PENETRATED. ALWAYS WEAR EYE PROTECTION. 11

34 12 CHIPPER DAILY CHECKLIST Check tires air pressure. Inflate to tire manufacturers recommended maximum inflation pressure. Inspect tires for wear. Inspect axle caps. Replace tires and other parts when needed. Grease axles as suggested by manufacturer. HITCH & HITCH BOLTS Inspect hitch and hitch bolts. Make sure all guards are in place and properly secured. Inspect belts for wear and proper tension. (See Servicing Belts section for further information.) New belts will stretch and become loose as machine runs. Check belt tension more often when belts are new. Check tail and brake lights for proper operation. Make any repairs that are necessary before towing the chipper. 12
 are specially designed. Torque to 180 ft. lbs. Inspect cutter disk knives for wear.")
 CHIPPED KNIFE Cutter disk must rotate freely.")
35 12 CHIPPER DAILY CHECKLIST Inspect knife bolts and nuts for tightness daily. It is very important to check knife bolts and nuts after first hour of operation for new bolts and nuts. It is not uncommon for bolts to loosen slightly during this time. The 12 chipper knife bolts and nuts (5/8-11) are specially designed. Torque to 180 ft. lbs. Inspect cutter disk knives for wear. Do not operate the machine without a full set of undamaged knives in place. Worn or chipped knives will cause improper operation of the chipper. (See Servicing Cutter Disk Section to change or sharpen knives and anvil.) CHIPPED KNIFE Cutter disk must rotate freely. This will help insure there are no foreign objects inside the cutting chamber and there is ample knife to anvil clearance. (The cutter disk lock pin will have to be pulled out of cutter disk to check rotation. Replace pin after checking rotation to perform further inspections.) When inspection of cutter disk is complete, close cutter disk hood, insert hood lock pin and padlock. Make sure hood will not open. Check cutter disk hood hinges for damage and fit, replace immediately if there is any damage or misalignment. CUTTER DISK HOOD HINGE HOOD PIN & PADLOCK 13


36 12 CHIPPER DAILY CHECKLIST Inspect the anvil for wear by raising the upper feed wheel and blocking it as described in the Servicing Cutter System section of this manual. The anvil should be checked any time the knives are inspected. THE CUTTER DISK LOCK PIN MUST BE IN LOCK TUBE AND THE UPPER FEED WHEEL MUST BE RAISED AND BLOCKED WHEN INSPECTING THE ANVIL EDGE. ANVIL WORKING EDGE Inspect the inside of the infeed chute. Check to make sure there are no foreign objects inside the infeed chute. Anything that is inside of the infeed chute may go through the chipper. There should never be anything or anyone inside the infeed chute when starting the chipper, damage or injury could occur. Check the feed control bar operation daily for correct operation of Forward, Reverse, and Off positions. Contact your local dealer or J. P. Carlton if operation is not correct. Inspect and clean radiator screen daily. This screen along with the radiator fins must be kept clean. Dust and debris can easily clog the screen and or radiator and cause overheating along with major engine damage. Inspect fan blades for wear or damage. 14


37 12 CHIPPER DAILY CHECKLIST Check and maintain proper engine oil, fuel, radiator coolant, and hydraulic oil levels. Make sure engine is cool before checking. Replenish engine oil, fuel, radiator coolant, and hydraulic oil every morning before starting the machine so there is no danger of fire from hot machine parts or sparks. Read your engine owner s manual for additional coolant information. Do not fill fuel or hydraulic oil tanks more than 7/8 full to allow for heat expansion. RADIATOR CAP ON TOP OF ENGINE JOHN DEERE ENGINES REQUIRE A SPECIAL COOLANT ADDITIVE. OIL DIPSTICK NEVER REFUEL OR ADD OIL: WHILE ENGINE IS RUNNING, WHILE IN AN ENCLOSED AREA, OR WHILE ENGINE IS HOT. HYDRAULIC OIL LEVEL/TEMP GAGE Inspect air filters for dirt and damage, clean or replace as necessary. REPLACE WITH MANUFACTURER RECOMMENDED AIR FILTERS ONLY. MAIN FILTER SAFETY FILTER The proper repair or replacement procedures, if required, are further illustrated in the Maintenance or Service Sections of this manual. Other periodic inspections and maintenance are covered in other sections of this manual. 15


38 WINCH (OPTIONAL EQUIPMENT) Inspect winch rope daily. Replace rope if there is any wear, fraying, or cuts. See Machine Controls section for more information. Check rollers for burrs or sharp edges if rope is damaged in any way. Replace any damaged or worn rollers. Winch roller guides should be greased as necessary every hours of operation. Use only Texaco Starplex II grease. 12 CHIPPER DAILY CHECKLIST 16


39 12 CHIPPER MACHINE CONTROLS It is imperative that all operators are familiar with all controls of the chipper. This will make for a much more productive and safer work period. (The actual controls may differ depending on the engine supplied with your chipper.) ENGINE CONTROLS: Key Switch and Gauges are located in a lockable panel at the rear of the engine DO NOT OPERATE THE ENGINE AT AN ANGLE GREATER THAN 25 OR SEVERE ENGINE DAMAGE WILL OCCUR. PROPER ENGINE OIL LEVEL MUST BE MAINTAINED TO ACHIEVE MAXIMUM ANGLE OF OPERATION OF 25. (See Engine Owner s Manual for proper oil level.) OFF RUN START USE PADLOCK FOR PROTECTION AND SAFETY Key switch has 3 positions Off, Run and Start There is an emergency shutdown bypass switch, which must be held down during starting. (If the engine experiences low oil pressure or high temperatures when running, this switch will shut down the engine.) BYPASS SWITCH Also in the control box are the voltage meter, engine temperature, and oil pressure displays. The configuration at the right is typical but may vary depending on the exact engine supplied with your chipper. ENGINE TEMPERATURE VOLTAGE METER OIL PRESSURE 17


40 12 CHIPPER MACHINE CONTROLS The Auto-Feed Plus monitors the engine RPM and controls the feed system based on this information. The Auto-Feed is calibrated when installed in the chipper with a high and low RPM setting for the feed wheels to operate. When the engine RPM is low and the Auto-Feed is on, the hydraulics will not work. If large diameter wood is being chipped and the engine RPM drops below the Auto-Feed Low setting, the Auto-Feed will stop the feed wheels. After the engine RPM is high enough to handle the force required to chip this material without causing the engine to lug down, the Auto-Feed restarts the feed wheels. The Auto-Feed Plus control is calibrated to automatically come on when the chipper is started. If you need to turn on the Auto-Feed Plus control, press and hold the right button down for 4 seconds and release. The Auto-Feed must be turned off to operate the hydraulics at low engine RPM or idle. When the Auto-Feed is on the hydraulics only work when the engine RPM is high. To operate the feed wheels at low engine RPM, turn off the Auto-Feed by pressing and holding the left button for 4 seconds and release. Read the Auto-Feed Plus manual supplied at the end of this manual if programming is required. AUTO-FEED OFF AUTO-FEED ON A two-position throttle is located on the engine cowling. The lower (idle) position is for starting the engine, low speed engine operation during warm up, clutch engagement/disengagement, and engine cool down. The upper position is for running the engine at full speed during chipping operations. 18

 position Bring the cutter disk up to speed by a series of")
41 CLUTCH ENGAGEMENT HANDLE 12 CHIPPER MACHINE CONTROLS The clutch is to be engaged and disengaged at low engine speeds only. NEVER ENGAGE OR DISENGAGE THE PTO/CLUTCH AT ENGINE SPEEDS IN EXCESS OF 1200 RPM. Engagement or disengagement of the clutch at elevated engine speeds can cause severe clutch damage. This is not warrantable. Please refer to clutch manufacturers manual for clutch adjustment procedures. To engage the clutch: Engine must be below 1200 RPM Infeed chute must be clear of material Feed control bar must be in the stop (middle) position Bring the cutter disk up to speed by a series of short engagements and disengagements at intervals long enough to prevent excessive heat build up in the facings. UNDER NO CIRCUMSTANCES should the clutch be slipped without fully engaging or disengaging the clutch to permit it to cool. Engage clutch fully. This should take a minimum of 100 lbs. of force to engage clutch on over center models (shown here), which will require most of the operators strength. If the clutch engages with less force than this, it needs to be adjusted immediately! Clutches out of adjustment will slip and fail in a very short period of time. This type of failure is not covered by the warranty. (Please refer to clutch manufacturers manual for clutch adjustment procedures.) New clutches or new facings require several frequent adjustments until the friction facings have worn in. (See the Twin Disc PTO/Clutch section to making adjustments or read the Twin Disc manual.) DISENGAGED ENGAGED CLUTCH ENGAGEMENT HANDLE 19


42 12 CHIPPER MACHINE CONTROLS DISCHARGE FLAP There is an adjustable flap on the end of the discharge chute. This flap is adjustable in the vertical direction to help control the height and distance of the chips being discharged. To adjust this flap pull down on the handle and rotate the flap up or down to desired position. NEVER ADJUST THIS FLAP WHILE THE CHIPPER IS IN OPERATION OR WHILE THE CHIPPER DISK IS SPINNING! HEIGHT ADJUSTABLE DISCHARGE Carlton Chippers are equipped with a height adjustable discharge chute. This allows the discharge chute to be adjusted for different truck heights and discharge angles. To adjust discharge chute height: Flip retainer up out of the way of the crank handle Crank height adjuster to adjust chute to desired height Return retainer to original position securing crank handle SWIVEL DISCHARGE Carlton Chippers are equipped with a rotating discharge chute. To rotate the chute to the desired position 1. Pull down and unlock the rotation lock pin 2. Turn the crank handle to rotate the discharge chute to desired position 3. Release the lock pin making sure it engages in one of the lock locations on the discharge chute securing the chute in desired position. ALWAYS MAKE SURE THE DISCHARGE IS POINTED IN A CLEAR DIRECTION FOR DISCHARGE OF CHIPS


43 12 CHIPPER MACHINE CONTROLS FEED CONTROL BAR The feed control bar is located on three sides of the infeed chute; across the top and down each side. The feed control bar has three distinct positions In the out position pulled towards the rear of the machine the bar is now in the feed position. In this position the feed wheels are engaged and will pull material into the chipper In the middle position the bar is in the stop position. With the bar in this position the feed wheels are stopped and do not rotate. In the in position pushed towards the front of the chipper the feed control bar is in the reverse mode. This position reverses the feed wheels and attempts to back material out of the chipper. ALWAYS VERIFY CORRECT FUNCTION OF THE FEED CONTROL BAR BEFORE BEGINNING TO CHIP MATERIAL NO ONE SHOULD EVER REACH, LEAN, OR KICK INTO THE FEED INTAKE CHUTE WHEN MACHINE OR ENGINE IS RUNNING FEED CONTROL BAR - FORWARD FEED MODE FEED CONTROL BAR FEED CONTROL BAR - REVERSE FEED MODE 21


44 VARIABLE SPEED CONTROL The variable speed control valve controls the speed of the feed wheels. Turn the valve clockwise to make the feed wheels turn faster. Loosen the lock washer on the end of the control knob and adjust the wheels to the desired speed and then retighten the washer. 12 CHIPPER MACHINE CONTROLS LIFT CYLINDER CONTROL VALVE (OPTIONAL EQUIPMENT) The Carlton chipper may be equipped with a hydraulic yoke lift, which allows the operator to hydraulically lift the top feed wheel. This can be of assistance when feeding large square cut butt ends, which the feed wheels cannot ride up easily. The lift cylinders can also be used to provide positive down pressure on material being fed. This is useful when feeding extremely bushy material or material which the feed wheel cannot grab. The Lift cylinder control valve is located on the right rear of the infeed chute. Push the valve in to raise the lift cylinder and top feed wheel Pull the valve handle out to lower the lift cylinder and provide positive down pressure on the top feed wheel. LIFT CYLINDER LIFT CONTROL VALVE 22


45 12 CHIPPER MACHINE CONTROLS FRONT JACK STAND Use the front jack stand anytime the chipper is removed from the tow vehicle. Do not depend on this jack stand to support the machine for stand-alone operation by itself. The tires must be blocked using wheel chocks and the rear jack stand must be used. The front jack stand can be attached to the tongue on either side of the machine. The jack stand can then be rotated up and stored on either side of the machine during transport. FRONT JACK STAND STAND ALONE OPERATION REAR JACK STAND REAR JACK STAND When the chipper is uncoupled from the tow vehicle at the job site, use the rear jack stand for support. The rear jack stand should be used along with the front jack stand, and wheel chocks when using the chipper in stand-alone operation. REAR JACK STAND WHEEL CHOCKS FRONT JACK STAND FEED WHEEL CLEAN OUT DOOR There is a drop-down door to clean excess debris out from under the bottom feed wheel. This will help to keep the chipper from getting clogged or stopped up. Use the handle, located on both sides behind the infeed chute, and drop the door down to remove debris, then close and secure the door. Should be cleaned frequently to prevent damage to clean out door and to prevent clogging the chipper. DO NOT open the clean out door until the chipper has been shut down and all parts have come to a complete stop, danger of flying debris could cause injury. 23

46 12 CHIPPER MACHINE CONTROLS BRAKES & REAR LIGHTS The chipper s brakes and lights are connected to the tow vehicle actuator to be activated by the tow vehicle operation. See the Machine Wiring section of this manual for wiring diagram. BREAKAWAY SWITCH The breakaway switch is a safety device designed to activate the chipper brakes if it ever becomes uncoupled from the tow vehicle. A cable attached to the breakaway switch is attached to the tow vehicle so that the breakaway switch will separate and cause the brakes to be applied to slow the chipper. 24


 To pull the winch rope to the tree, put the winch in free spool by turning both levers to FREE. (Never put winch in free spool with a load on the rope.")
47 WINCH CONTROL VALVE (OPTIONAL EQUIPMENT) Carlton Chippers may be equipped with a hydraulic winch. The winch is used to pull trees and brush that are too large to carry to the chipper and to assist in lifting the tree into the infeed tray. 12 CHIPPER MACHINE CONTROLS ONLY USE THE WINCH TO DRAG MATERIAL TO THE CHIPPER THAT IS GOING TO BE CHIPPED. NEVER USE THE CHIPPER WINCH TO SECURE OR HOLD LOADS. The winch has control levers on the disk to put the winch in free spool, low speed, high speed, or to lock the winch. There is a decal on the side of the winch casing to illustrate this operation. For further information and service please read the winch instruction manual. (The levers may be in any position but the correct words must be facing away from the winch disk to perform the function.) To pull the winch rope to the tree, put the winch in free spool by turning both levers to FREE. (Never put winch in free spool with a load on the rope.) Always leave at least 5 wraps on the disk when unwinding the winch rope. To operate the winch at low speed, put Lever 1 in LOW and Lever 2 in FREE. To operate the winch at high speed, put Lever 1 in FREE and Lever 2 in HIGH. To lock the winch, put Lever 1 in LOW and Lever 2 in HIGH. LEVER 1 LEVER 2 NOTE: THERE IS TEXT ON BOTH SIDES OF EACH LEVER TO SET THE WINCH IN FREE SPOOL, LOW SPEED, HIGH SPEED, OR TO LOCK THE WINCH. 25

48 12 CHIPPER MACHINE CONTROLS Two hydraulic valves control the winch on this chipper. The hydraulic winch selector valve diverts hydraulic fluid from the feed roller circuit and enables the hydraulic winch circuit. Once the hydraulic winch circuit is enabled the winch control valve controls the hydraulic winch motor. The 9 chipper winch selector valve is located on the hydraulic valve box. There is a decal that shows the proper operation (pictured at the right). Push the valve to the left to turn the feed wheels on and to the right to turn the winch on. The winch control lever is the right hand lever on the hydraulic control lever panel. There is a decal next to the lever to show proper operation of the winch control. After the rope has been attached to the tree, push the lever in to pull the tree to the chipper. Also use this lever position to rewind the rope. Pull the lever back to release the pressure on the rope to remove the rope from the tree once it has been pulled to the chipper and has been put into position to be run through the chipper. After use of the winch is finished use the winch control lever to rewind and secure the rope before running the feed wheels. (The winch selector will have to be turned back to the Feed Wheels On position to feed the tree through the chipper.) HYDRAULIC WINCH CONTROL VALVE HYDRAULIC WINCH SELECTOR VALVE NEVER ALLOW ANYONE TO OPERATE THE WINCH CONTROL VALVE WHILE AN OPERATOR IS IN THE VICINITY OF THE WINCH ROPE!!! ROPE BURNS OR OTHER INJURIES COULD OCCUR IF THE PERSON BECAME ENTANGLED OR TRIPPED BY THE ROPE. 26


49 12 CHIPPER MACHINE CONTROLS The winch disk rotates counterclockwise when pulling in loads. If the rope needs to be replaced make sure it is started under the disk. Winding the rope over the top (clockwise) could cause the rope to rub on the encasement and wear the rope causing fraying and breakage. Always wind the rope under the winch disk. Read the winch instruction manual for complete information. ALWAYS WIND ROPE UNDER THE WINCH DISK 27


50 12 CHIPPER TOWING GUIDE SAFETY: NEVER ALLOW INEXPERIENCED DRIVERS TO TOW MACHINERY. ALWAYS MAKE SURE THE TRUCK HITCH AND THE CHIPPER HITCH ARE OF MATCHING STYLE AND SIZE. ALWAYS MAKE SURE THE TOW VEHICLE AND THE CHIPPER ARE ON LEVEL GROUND AND THE WHEELS ARE CHOCKED BEFORE CONNECTING OR DISCONNECTING THE CHIPPER. MAKE SURE THE TOW VEHICLE IS OF ADEQUATE SIZE AND HAS THE TOWING CAPABILITY TO SAFELY TOW THE CHIPPER. NEVER TOW A MACHINE WHILE IT IS RUNNING. Make sure the truck hitch and the chipper hitch are of matching style and size and not worn. Check all hitch bolts to make sure they are tight on the chipper and the truck. Make sure the pintle ring on the chipper and the ball on the truck are greased for smoother pivots and to reduce the wear on both parts. Make sure the tow vehicle is of adequate size and has the towing capacity to safely tow the chipper. Make sure the truck hitch is heavy enough and built strong enough. Adjust both the truck hitch and chipper hitch so the chipper sits as close to level as possible when connected to the truck. A proper amount of tongue weight is required to allow the machine to tow properly. Too little tongue weight will result in wandering, fishtailing, or axle damage. CHIPPER SHOULD RIDE AS CLOSE TO LEVEL AS POSSIBLE WHEN TOWING Connect safety chains to a secure position on the tow vehicle. Crisscross safety chains for support in the event of hitch failure. Chains may be twisted to shorten to compensate for excessive length. If the tongue should contact the ground at highway speeds, the machine may dig in and catapult the machine into traffic. USE YOUR SAFETY CHAINS. 28


51 12 CHIPPER TOWING GUIDE Connect chipper lights to the tow vehicle. Observe light operation to insure correct electrical connections. CONNECT LIGHTS Attach the breakaway switch to the tow vehicle so that it will engage the switch and slow the chipper if the chipper should become uncoupled from the tow vehicle. Secure the front jack stand to the machine for towing. The jack stand may be used on either the left or right sides of the machine and must be secured to the tongue for towing. Make sure the rear jack stand is raised and secured in the up position before towing the chipper. 29


52 12 CHIPPER TOWING GUIDE The chipper infeed tray must be closed and locked when towing. First, check the lock pins behind the infeed chute frame to make sure they are in their storage position. Then close the tray and make sure the spring lock pin is in position and the tray is secured. INFEED TRAY LOCK PIN IN STORAGE POSITION (ONE ON EACH SIDE OF CHIPPER) SPRING LOCK PINS Make sure the discharge chute is over the chipper for towing. Use the swivel handle to turn the discharge chute over the chipper with the end of the chute facing the front of the chipper. Use the height adjustment handle to return the discharge chute back to the lowest height for towing; don t take any chances with over head obstructions hitting the discharge chute. 30
53 12 CHIPPER TOWING GUIDE Always chock the wheels when the chipper is parked, even when attached to the tow vehicle. Make sure the chock blocks have been removed before towing the chipper. Towing will affect handling, allow for extra stopping distances. Start and stop gradually. Tow at a safe, reasonable speed. Obey posted speed limits. Slow down over rough terrain. 31


54 12 CHIPPER MACHINE OPERATION STARTING READ THIS MANUAL, THE ENGINE OWNERS MANUAL, THE CLUTCH MANUAL, AND ALL SAFETY DECALS ON CHIPPER BEFORE STARTING. SAFETY: DO NOT ALLOW CHILDREN OR OTHER SPECTATORS TO STAND AND WATCH THE CHIPPER IN OPERATION. ALL OPERATORS MUST WEAR RECOMMENDED PROTECTIVE EQUIPMENT. DO NOT ALLOW ANYONE TO BE IN CHIP DISCHARGE ZONE WHILE MACHIINE IS RUNNING. NEVER REACH OR KICK INTO THE INFEED CHUTE FOR ANY REASON. KEEP CHIPPER HOOD CLOSED WHILE MACHINE IS RUNNING. ALWAYS MAKE SURE CUTTER DISK HOOD HAS LATCH PIN IN POSITION AND LOCKED WITH A PADLOCK, AND IS NOT CAPABLE OF BEING OPENED. AN OPERATOR MUST ALWAYS BE IN POSITION AND BE PREPARED TO OPERATE THE FEED CONTROL BAR TO REVERSE OR STOP THE FEED WHEELS IF NECESSARY. ALWAYS BE ATTENTIVE AND AWARE OF THE CHIPPERS OPERATION AND NEVER ALLOW YOURSELF OR ANYONE TO BECOME PULLED INTO THE FEED WHEELS. ALWAYS LOAD SHORT PIECES OF BRUSH ON TOP OF LONGER PIECES OF WOOD AND BRUSH. NEVER FEED LONG VINE TYPE MATERIAL INTO CHIPPER. ALWAYS CUT INTO SHORT PIECES TO FEED VINE TYPE MATERIAL. THIS MATERIAL COULD TANGLE AND WRAP AROUND SOMEONE OR SOMETHING AND PULL IT INTO THE CHIPPER. NEVER OPERATE MACHINERY WHILE UNDER THE INFLUENCE OF ALCOHOL OR DRUGS, (PRESCRIPTION, OVER THE COUNTER OR OTHERS). START-UP PROCEDURES: Check all fluids before starting. Daily Checklist must be completed before starting. PTO/Clutch must be disengaged before starting. ALWAYS KEEP A FIRST AID KIT AND A FIRE EXTINGUISHER WITH CHIPPER Cutter disk hood and all other guards must be in place and secured properly before starting. All personnel must be wearing protective equipment: eye and ear protection; hard hat; short fitted gloves without cuffs; long sleeve shirt; long pants without cuffs; and over the ankle work boots with skid resistant soles. Use wheel chocks to block the chipper tires so that the chipper doesn t move, shift, or roll during operation. 32


55 LOWER THE INFEED TRAY 12 CHIPPER MACHINE OPERATION SPRING LOCK PIN During transportation the infeed tray will be closed and locked using the spring lock pins attached. At the job site, release the pins and lower the tray. There are two removable lock pins located at the back of the infeed frame, there is a pin on each side of the frame. Once the tray is fully lowered, remove the pins and lock the tray into position as shown in these pictures. Make sure there is no brush or other obstruction between the tray and the hopper so that the tray will lower fully. 33


56 12 CHIPPER MACHINE OPERATION AIM DISCHARGE CHUTE 1 Carlton Chippers are equipped with a rotating discharge chute. To rotate the chute to the desired position 1. Pull down and unlock the rotation lock pin 2. Turn the crank handle to rotate the discharge chute to desired position 3. Release the lock pin making sure it engages in one of the lock grooves on the discharge chute securing the chute in desired position. 2 3 ALWAYS MAKE SURE THE DISCHARGE IS POINTED IN A CLEAR DIRECTION FOR DISCHARGE OF CHIPS NEVER ROTATE DISCHARGE CHUTE WHILE CHIPPER IS IN OPERATION OR WHILE THE CUTTER DISK IS SPINNING Stay clear of discharge zone when running chipper. Never allow anyone to stand near or to walk close to the discharge zone, even if being discharged into a bin or truck. Airborne debris may cause severe injury. If inspection of chipped material is required, shut down the machine first. Discharge spout should not be pointed toward people, buildings, or other personal property that may be injured or damaged. Airborne debris is as dangerous as any powerful projectile. Never position, adjust, or move the discharge chute while the chipper or the cutter disk is running LOCK GROOVES There is an adjustable flap on the end of the discharge chute. This flap is adjustable in the vertical direction to help control the height and distance of the chips being discharged. To adjust this flap pull down on the handle and rotate the flap up or down to desired position. NEVER ADJUST THIS FLAP WHILE CHIPPER IS IN OPERATION OR WHILE THE CUTTER DISK IS SPINNING 34


57 12 CHIPPER MACHINE OPERATION Carlton Chippers are equipped with a height adjustable discharge chute. This allows the discharge chute to be adjusted for different truck heights and discharge angles. To adjust discharge chute height: Flip retainer up out of the way of the crank handle Crank height adjuster to adjust chute to desired height Return retainer to original position securing crank handle NEVER ADJUST THE DISCHARGE CHUTE WHILE CHIPPER IS IN OPERATION OR WHILE THE CUTTER DISK IS SPINNING START ENGINE Key Switch and Gauges are located in a lockable panel at the rear of the engine Key switch has 3 positions - Off, Run and Start There is an emergency shutdown bypass switch, which must be held down during starting. (If the engine experiences low oil pressure or high temperatures when running, this switch will shut down the engine.) DO NOT OPERATE THE ENGINE AT AN ANGLE GREATER THAN 25 OR SEVERE ENGINE DAMAGE WILL OCCUR. PROPER ENGINE OIL LEVEL MUST BE MAINTAINED TO ACHIEVE MAXIMUM ANGLE OF OPERATION OF 25. (See Engine Owner s Manual for proper oil level.) CONTROLS MAY VARY DEPENDING ON ENGINE OPTION 35
 position is for starting the engine, low speed engine operation during warm up, clutch engagement/disengagement, and engine cool down.")
 Test the controls for proper operation, especially the feed control bar.")
58 12 CHIPPER MACHINE OPERATION Start engine at idle speed and allow sufficient time for oil to circulate before proceeding. A two-position throttle is located on the engine cowling. The lower (idle) position is for starting the engine, low speed engine operation during warm up, clutch engagement/disengagement, and engine cool down. The upper position is for running the engine at full speed during chipping operations. (See engine manual for further starting procedures. Be sure to follow the engine manual instructions for cold weather operation.) Test the controls for proper operation, especially the feed control bar. (The engine speed must be high enough for the Auto-Feed to engage the hydraulics or the Auto-Feed must be off. Press down the left button and hold for 4 seconds to turn Auto-Feed off.) Pull feed control bar to the rear of the machine to test forward (pulling) feed wheel motion Push feed control bar to the middle position to test off position (feed wheels should not turn at all) Push feed control bar all the way toward the front of the machine to test the reverse feed wheel motion 36

59 12 CHIPPER MACHINE OPERATION TURN AUTO-FEED PLUS ON (CONTROLS MAY VARY DEPENDING ON AUTOFEED OPTION) The Auto-Feed Plus monitors the engine RPM and controls the feed system based on this information. The Auto-Feed is calibrated when installed in the chipper with a high and low RPM setting for the feed wheels to operate. When the engine RPM is low and the Auto-Feed is on, the hydraulics will not work. If large diameter wood is being chipped and the engine RPM drops below the Auto-Feed Low setting, the Auto-Feed will stop the feed wheels. After the engine RPM is high enough to handle the force required to chip this material without causing the engine to lug down, the Auto-Feed restarts the feed wheels. The Auto-Feed Plus control is calibrated to automatically come on when the chipper is started. If for some reason you need to turn on the Auto- Feed Plus control, press and hold the right button down for 4 seconds and release. (See Auto-Feed Plus manual included in this chipper manual.) AUTO-FEED OFF AUTO-FEED ON 37

60 12 CHIPPER MACHINE OPERATION CLUTCH ENGAGEMENT The clutch is to be engaged and disengaged at low engine speeds only. NEVER ENGAGE OR DISENGAGE THE PTO/CLUTCH AT ENGINE SPEEDS IN EXCESS OF 1200 RPM. Engagement or disengagement of the clutch at elevated engine speeds can cause severe clutch damage. This is not warrantable. Please refer to the clutch manufacturers manual for clutch adjustment procedures. To engage the clutch: Engine must be below 1200 RPM Infeed chute must be clear of material Feed control bar must be in the stop (middle) position Bring the cutter disk up to speed by a series of short engagements and disengagements at intervals long enough to prevent excessive heat build up in the facings. UNDER NO CIRCUMSTANCES should the clutch be slipped without fully engaging or disengaging the clutch to permit it to cool. Engage clutch fully. This should take a minimum of 100 lbs. of force to engage clutch on over center models (shown here), which will require most of the operators strength. If the clutch engages with less force than this, it needs to be adjusted immediately! Clutches out of adjustment will slip and fail in a very short period of time. This type of failure is not covered by the warranty. (Please refer to the clutch manufacturers manual for clutch adjustment procedures.) New clutches or new facings require several frequent adjustments until the friction facings have worn in. CLUTCH MAINTENANCE AND ADJUSTMENT ARE CRITICAL; FOLLOW THE CLUTCH MAINTENANCE AND ADJUSTMENT SECTIONS IN THIS MANUAL. J. P. CARLTON CO. DOES NOT WARRANT THE CHIPPER CLUTCH. READ THE CLUTCH MANUAL FOR THE MANUFACTURER S WARRANTY. DISENGAGED ENGAGED CLUTCH ENGAGEMENT HANDLE 38


61 INCREASE THROTTLE Once the clutch has been fully engaged the engine can be run at full speed. Push the throttle up to increase engine speed. The engine should always be run at high RPM while material is being chipped. This will help keep the discharge chute from clogging. High engine speed increases the throwing power. PERSONAL SAFETY All personnel must be wearing protective equipment: eye and ear protection; hard hat; short fitted gloves without cuffs; long sleeve shirt; long pants without cuffs; and over the ankle work boots with skid resistant soles. 12 CHIPPER MACHINE OPERATION FEED MATERIAL You are now ready to start feeding material into the chipper. Always have at least two operators at the job site. One to load the trees and brush into the chipper and one to always stand and operate the feed control bar. It is imperative to have someone operate the feed control bar in case of an accident where someone is pulled into the feed wheels. Always have the trees and brush cut to size for the chipper before the chipper arrives at the job site. It is very dangerous to run a chain saw and the chipper at the same time. If a tree gets jammed and has to be trimmed, shut down the chipper. Always feed trees and brush walking to the right side of the chipper, material being fed should be to the operators left side. When the material is being fed into the feed wheels it tends to kick to the left and an operator could be injured if loading the material from the left side. ALWAYS FEED MATERIAL FROM THE RIGHT SIDE AND BUTT END FIRST 39


62 12 CHIPPER MACHINE OPERATION Start feeding smaller diameter trees and brush first and work your way up to the full capacity of the chipper, which is 12 diameter material. Feed pieces long enough for the feed wheels to pick up without endangering yourself by reaching into the infeed chute. No one should ever reach or kick into the infeed chute for any reason when the feed wheels or engine are running. Feed shorter pieces of brush and limbs on top of longer material. Pay close attention to feeding the small diameter material that is long enough, 6 or shorter, to be fed into the feed wheels but doesn t have enough weight to be held down when the wheels first grab onto it. This material could kick straight up and hit the operator causing injury. Hold the material away from the body using both hands and never lean over the material in case the feed wheels cause it to kick up. Use the hydraulic lift cylinder to open the feed wheels when feeding this type of material. Do not hold onto or try to force the material through the chipper. Once the material has been grabbed by the feed wheels and is being chipped, release it and let the chipper do its job. When the chipper feed wheels are feeding the material, turn away from the material and walk away to get more material. 40


 USING THE LIFT CYLINDER, LIFT UPPER FEED WHEEL & PUT LARGE DIAMETER WOOD INSIDE THEN, LOWER UPPER FEED WHEEL BACK DOWN")
63 12 CHIPPER MACHINE OPERATION The Carlton chipper may come equipped with a hydraulic yoke lift, which allows the operator to hydraulically lift the top feed wheel. This can be of assistance when feeding large square cut butt ends, which the feed wheels cannot ride up easily. The lift cylinders can also be used to provide positive down pressure on material being fed. This is useful when feeding extremely bushy material or material which the feed wheel cannot grab. The Lift cylinder control valve is located on the right rear of the infeed chute. Push the valve in to raise the lift cylinder also raising the top feed wheel Pull the valve handle out to lower the lift cylinder and provide positive down pressure on the top feed wheel. LIFT CONTROL (IF EQUIPPED) USING THE LIFT CYLINDER, LIFT UPPER FEED WHEEL & PUT LARGE DIAMETER WOOD INSIDE THEN, LOWER UPPER FEED WHEEL BACK DOWN ONTO WOOD Keep an eye on the surrounding area and don t allow anyone to come up too close to the chipper or to be in the chip discharge area. Maintain a clear area of at least 100 ft. in every direction around the chipper. Do not lean, reach, or kick past the safety zone when feeding material. SAFETY ZONE 41

 position and rotate the winch selector valve counter-clockwise to engage the winch circuit.")

64 WINCH OPERATION (OPTIONAL EQUIPMENT) 12 CHIPPER MACHINE OPERATION ONLY USE THE WINCH TO DRAG MATERIAL TO THE CHIPPER THAT IS GOING TO BE CHIPPED. NEVER USE THE CHIPPER WINCH TO SECURE OR HOLD LOADS. When a tree is too large to carry to the chipper, use the winch to pull the tree into the infeed chute. 1. Put the feed control bar in the middle (stop) position and rotate the winch selector valve counter-clockwise to engage the winch circuit. The feed wheels should not turn when the winch circuit is engaged. DO NOT operate the winch if the feed wheels still turn. Contact J. P. Carlton or the local dealer for service. 2. Put the winch in free spool by putting both levers on the winch drum in FREE. (The levers may be in any position but the correct words must be facing away from the winch drum to perform the function. See Machine Control section or decal on chipper for lever operation.) 42


65 12 CHIPPER MACHINE OPERATION 3. Pull the winch rope to the tree. Always wear leather gloves when handling winch rope. Broken wires will cause injuries. 4. Attach the winch rope to the tree. 5. Secure the winch rope through the loop never on the rope itself. 6. To operate the winch at low speed, put Lever 1 in LOW and Lever 2 in FREE. Or to operate the winch at high speed, put Lever 1 in FREE and Lever 2 in HIGH. (The levers may be in any position but the correct words must be facing away from the winch drum to perform the function. See Machine Control section or decal on chipper for lever operation.) LEVER 1 LEVER 2 43


 7. Pull the tree to the chipper using the winch control valve. 8.")
66 12 CHIPPER MACHINE OPERATION NEVER ALLOW ANYONE TO OPERATE THE WINCH CONTROL VALVE WHILE AN OPERATOR IS IN THE VICINITY OF THE WINCH ROPE!!! ROPE BURNS OR OTHER INJURIES COULD OCCUR IF THE PERSON BECAME ENTANGLED OR TRIPPED BY THE ROPE. ROPE COULD BREAK OR COME LOOSE AND WHIP AROUND AND CAUSE SEVERE INJURY. USE A LARGE BLANKET, JACKET, OR TOWEL TO WEIGHT THE ROPE WHEN REELING IN TO REDUCE RISKS IF THE ROPE COMES LOOSE OR BREAKS. For more information on correct operation of the winch, please read the winch operator s manual. WINCH CONTROL VALVE (IF EQUIPPED) 7. Pull the tree to the chipper using the winch control valve. 8. Pull the tree up into the chipper infeed chute. 9. When the tree is in the infeed chute, remove the winch rope. Rotate the winch selector valve back to the left (clockwise) and follow the standard operating procedures for chipping the material. 44
 and the clutch can be disengaged.")

67 SHUT DOWN PROCEDURES With engine RPM still high, push the feed control bar to the middle (off) position. Feed wheels should not be turning. 12 CHIPPER MACHINE OPERATION Push the throttle down into the low position so that the engine can slow down (idle) and the clutch can be disengaged. Once the engine has had time to slow down below 1200 RPM, disengage the clutch by pulling back on the clutch engagement handle. NEVER ENGAGE OR DISENGAGE THE CLUTCH AT ENGINE SPEEDS OVER 1200 RPM. CAUTION: Chipper disk will continue to spin even though it is disengaged! Allow the engine to idle for 5 minutes. This allows the engine to cool. When the clutch has been fully disengaged and the engine has had time to cool down, you can turn the ignition key to the off position. Allow the cutter disk and belts to come to a complete stop, which will take several minutes. Remove the ignition key. 45

68 12 CHIPPER MACHINE OPERATION The chipper infeed tray must be closed and locked when towing. Make sure the spring lock pin is in position and the tray is secured. First the lock pins behind the infeed chute frame will have to removed and put back into their storage position. Make sure there is no other obstruction, such as limbs, bark, or leaves, in between the infeed chute and the tray. BOTH SIDES OF INFEED CHUTE Secure the discharge chute. Rotate the discharge chute back over the chipper and lock the swivel releasing the lock pin into one of the lock grooves. Make sure the height adjustment is at the lowest position so that the chute will not be high enough to hit any overhead obstructions and secure the handle. The flap on the end of the discharge chute needs to be lowered as far as possible so that no debris comes out during travel. ROTATE CHUTE Remove the wheel chocks before moving the chipper. 46
69 12 CHIPPER MACHINE MAINTENANCE DO NOT PERFORM MAINTENANCE OF ANY KIND ON THIS MACHINE UNLESS: The engine is turned off The ignition key has been removed The positive battery cable has been disconnected The clutch is disengaged Feed control bar is in neutral All machine parts have come to a complete stop NOTE: The cutter disk takes several minutes to come to a complete stop All machine parts have had sufficient time to cool down The cutter disk lock pin is installed in the disk lock tube No operator is in position at the controls to accidentally start machine At least 2 people are at the site where maintenance is performed More accidents occur while performing maintenance than any other time! Use extra caution. Never perform maintenance with the engine running, not even with the clutch disengaged. The pilot bearing could seize or freeze to the clutch shaft and permit the clutch to engage even though the operator thought the clutch had been disengaged. ALWAYS REPLACE GUARDS AND OTHER PROTECTIVE EQUIPMENT BEFORE STARTING CHIPPER AFTER PERFORMING MAINTENANCE. ENGINE The air filters, the radiator screens and fans, and the oil and fuel filters are extremely important in chipper operation. (For all other engine maintenance follow the engine manufacturer s manual.) AIR FILTERS MAIN & SAFETY Inspect the main and safety air filters daily. Do not tap or hit the main air filter to clean it. Do not wash the main air filter. Follow the engine manual for cleaning the main air filter. Replace the air filter when it cannot be cleaned or after cleaning six times or if damaged. NOTICE Never run the engine without the air filter installed or with a damaged air filter. Replace air filters if there is damage to the pleats, gaskets, or seals. The air filter is used to prevent airborne debris from getting into the engine. If dirt is allowed to get into the engine it will greatly reduce engine life and/or cause damage. Never service the air cleaner with the engine running. 47


70 12 CHIPPER MACHINE MAINTENANCE Do not clean the safety filter. Replace the safety filter if dirty or when the main air filter has been cleaned 3 times. When cleaning or changing the air filters, place tape over the air inlet hole to reduce the chance of any dirt getting inside the engine. Use a clean dry cloth to wipe down the inside of the air cleaner housing and cover. Check the general condition of the air cleaner housing and components. Make sure there are no dents, cracks, or other damage to these parts that could allow unfiltered air to enter the engine. RADIATOR SCREEN & FAN Inspect the radiator for dirt, insects, leaves, oil, and other debris that can clog the radiator screen and fins. The radiator screen and fins should be cleaned using pressurized air from the backside of the radiator. For further cleaning instructions refer to the engine owner s manual. Inspect for damaged or bent fins, fan blades, and for corrosion. Inspect the welds, mounting brackets, connections, clamps, air hoses, and seals for damage or breakage. Repair or replace any damaged parts. OIL & OIL FILTER Change engine oil and filter every 250 hours of operation or 3 months. Follow the engine manufacturer owner s manual for changing the oil & filter. Only use engine manufacturer recommended oil filter. Some engine manufacturers require special break-in oil to be run for a certain period of time. Refer to engine manual supplied with your chipper. MAIN FILTER RADIATOR SCREEN SAFETY FILTER CLEAN FROM THIS SIDE ENGINE OIL FILTER DIESEL FUEL Check fuel level daily and replenish as necessary. DO NOT fill tank more than 7/8 full to allow fuel to expand when temperatures are high. FUEL LEVEL INDICATOR & LOCKABLE CAP COVER 48


71 12 CHIPPER MACHINE MAINTENANCE FUEL FILTER & FUEL/WATER SEPARATOR Replace the fuel filter every 500 hours of operation or 6 months. Follow the engine owner s manual on how to remove the filters and to drain the fuel/water separator. Only use engine manufacturer approved fuel filters. Make sure to clean the area around the fuel filter before removing any parts; do not take a chance on contaminating the fuel line. Do not leave spilled fuel on the machine; spilled fuel on hot engine parts can cause fires. FUEL FILTER COOLANT SYSTEM FUEL/WATER SEPARATOR Pressurized System: Hot coolant can cause serious burns. To open the cooling system filler cap, stop the engine and wait until the coolant system components are cool. Loosen the cooling system pressure cap slowly in order to relieve the pressure. Check the coolant level daily when the engine is off and all parts are cool. Remove the coolant filler cap slowly to relieve built up pressure. When adding coolant to the tank, leave at least 1/2" between the coolant and the bottom of the filler pipe. Anti-freeze ratio to water must be 50/50, never use 100% anti-freeze. Clean the coolant filler cap and check the caps gaskets for damage. Replace the cap if the gaskets are damaged. Inspect the coolant system for leaks. (For other service on the coolant system refer to the engine owner s manual.) Be sure to replace the filler cap before starting the engine. John Deere engines require a special coolant additive. Read your engine owner s manual for additional coolant information. COOLANT TANK COVER ON TOP OF ENGINE COOLANT FILLER CAP 49


72 FEED CONTROL BAR Before starting to chip any wood, always test the feed control bar. Make sure the reverse, stop, and forward feed positions work properly. Contact Carlton or an authorized dealer immediately if the control bar doesn t work properly in any of the three positions. ALWAYS VERIFY CORRECT FUNCTION OF THE FEED CONTROL BAR BEFORE BEGINNING TO CHIP MATERIAL NO ONE SHOULD EVER REACH, LEAN, OR KICK INTO THE FEED INTAKE CHUTE WHEN THE MACHINE OR THE ENGINE IS RUNNING 12 CHIPPER MACHINE MAINTENANCE Grease the feed control bar every hours of operation as needed. There is a grease fitting on the end of each side of the feed control bar. Apply a light coating of oil to the feed control linkage weekly. FEED CONTROL LINKAGE 50

73 12 CHIPPER MACHINE MAINTENANCE HITCH Make sure the bolts on the chipper hitch are tightened. If not, tighten to the specified torque for the bolts size. Also, make sure the hitch bolts on the tow vehicle are tightened properly. Check the bolts and nuts for wear. If bolt or nut threads are chipped or worn down, or if the bolts and nuts won t stay tight after tightening them, the bolts and nuts need to be replaced. Check the bolt holes for wear also. If the holes are stretched or distorted, the hitch will need to be replaced. Keep the Pintle ring on the chipper greased. This will keep the wear between the two metal surfaces down to a minimum and will make your hitch last longer. If the Pintle ring is worn and does not fit the hitch on the tow vehicle properly, replace it as soon as possible. The loose fit between the two surfaces may cause the chipper to swerve in traffic and possibly even come uncoupled from the tow vehicle. Also check the hitch on the tow vehicle for wear for the same reasons. LIGHTS WIRING Check lighting wire connections for damage, and loose or broken wires. Make sure the lights are working properly at all times when towing. See the Machine Wiring section of this manual for wiring diagram. 51


74 BREAKAWAY SWITCH Check to make sure the breakaway switch is working properly. This switch activates the brakes if the chipper ever becomes uncoupled from the tow vehicle. When the switch separates, power is sent to the brakes. Check the wiring for any loose or broken wires. Replace or rewire if necessary. 12 CHIPPER MACHINE MAINTENANCE JACK STAND FRONT Check the lock pins to make sure they are fitting properly and in good shape. Replace any pins that are worn, bent or damaged in any way. Check general condition of the jack stand. Make sure the holes are not worn or elongated. Check the bottom of the jack to make sure it will sit level on level ground. Replace the jack stand if it is warped, has unusual wear, or if it won t hold position when supporting the chipper. Grease the jack stand as necessary. JACK STAND REAR Check the lock pins to make sure they are fitting properly and in good shape. Replace any pins that are worn, bent or damaged in any way. Check general condition of the jack stand. Make sure the holes are not worn or elongated. Check the bottom of the jack to make sure it will sit level on level ground. Replace the jack stand if it is warped, has unusual wear, or if it won t hold position when supporting the chipper. Grease the jack stand as necessary. 52

75 12 CHIPPER MACHINE MAINTENANCE TIRES AND AXLES Check tire air pressure daily. Inflate tires as necessary. Keep tire air pressure adjusted based on the temperature and the load. When towing, make sure the chipper is sitting as close to level as possible to ensure proper tire wear and axle alignment. Check lug nuts for proper tightness. Tighten when necessary. Replace lug nuts if the threads are worn, chipped, or missing. Check tire rims for damage that could cause improper air pressure. If rims are damaged beyond repair, replace. See Dexter information for E-Z Lube or Nev-R-Lube Axles supplied in this manual. Remember to inspect axles regularly. Check and replace dust caps as needed. FRAME Periodically check the chipper frame and other permanent parts for cracks, bends, failed welds, or other damage that needs repair. Repair as necessary or contact an authorized dealer. 53
76 12 CHIPPER LUBRICATION All of Carlton s machines are built to be rugged performers. Our design goals are sturdiness, simplicity and reliability. A regularly scheduled maintenance program will pay big dividends in machine life, performance, and avoided downtime. Check grease fittings regularly and replace any that are clogged or missing. Below you will find a Lubrication Schedule that will give you the recommended frequency for lubrication. Next you will find specific locations of the grease points. Use a hand operated grease gun. Lubrication Schedule Use Texaco Starplex II grease. Always clean tip of grease gun fitting and grease fitting on machine before attaching hose to prevent dirt from being forced into machine parts. 54

77 12 CHIPPER LUBRICATION CHIPPER LEFT SIDE EQUIPPED WITH DEXTER AXLES, EITHER E-Z LUBE OR NEV-R-LUBE SEE DEXTER INFORMATION ENCLOSED IN MANUAL PTO/CLUTCH RELEASE BEARING GREASE FITTING * GREASE DAILY ADD 1-2 PUMPS - ROTATE THE SHAFT BY HAND WHILE ADDING GREASE PTO/CLUTCH CROSS SHAFT GREASE FITTING * EVERY 500 HOURS OF OPERATION ADD 1-2 PUMPS OF GREASE PTO/CLUTCH MAIN BEARING GREASE FITTING * ADD GREASE EVERY 100 HOURS OF OPERATION UNTIL GREASE IS FORCED OUT OF THE LABYRINTH SEAL AROUND THE SHAFT. ROTATE THE SHAFT BY HAND WHILE ADDING GREASE. FEED WHEEL BEARING GREASE FITTING (2 PLACES) * 1 PUMP OF GREASE DAILY ON EACH BEARING FEED CONTROL BAR GREASE FITTING * GREASE AS NECESSARY EVERY HOURS OF OPERATION 55
78 12 CHIPPER LUBRICATION CHIPPER RIGHT SIDE DISCHARGE SWIVEL HANDLE GREASE FITTING * GREASE AS NECESSARY EVERY HOURS OF OPERATION DISCHARGE SWIVEL PLATE (3 PLACES) GREASE FITTING * GREASE EVERY 3 MONTHS, APPROX. 300 HOURS OF OPERATION DISCHARGE HEIGHT ADJUSTMENT GREASE FITTING * GREASE AS NECESSARY EVERY 100 HOURS OF OPERATION EQUIPPED WITH DEXTER AXLES, EITHER E-Z LUBE OR NEV-R-LUBE SEE DEXTER INFORMATION ENCLOSED IN MANUAL CUTTER DISK BEARING (BELT SIDE) GREASE FITTING * PURGE BEARINGS DAILY, UNTIL NEW GREASE IS SEEN FEED CONTROL BAR GREASE FITTING * GREASE AS NECESSARY EVERY HOURS OF OPERATION FEED WHEEL BEARING GREASE FITTING (2 PLACES) * 1 PUMP OF GREASE DAILY ON EACH BEARING CUTTER DISK BEARING GREASE FITTING * PURGE BEARINGS DAILY, UNTIL NEW GREASE IS SEEN CLUTCH ENGAGEMENT HANDLE (CROSS SHAFT) GREASE FITTING * EVERY 500 HOURS OF OPERATION ADD 1-2 PUMPS OF GREASE 56

79 12 CHIPPER LUBRICATION CHIPPER WINCH (OPTIONAL EQUIPMENT) WINCH PLUNGERS GREASE FITTINGS * SPRAY LUBRICANT ON PLUNGERS EVERY HOURS OF OPERATION 57
80 12 CHIPPER TROUBLESHOOTING GUIDE DO NOT PERFORM ANY INSPECTION OR SERVICE ON THE CHIPPER WITHOUT MAKING SURE: THE CUTTER DISK IS DISENGAGED AND HAS COME TO A COMPLETE STOP; THE CUTTER DISK LOCK PIN IS INSTALLED; THE ENGINE HAS BEEN TURNED OFF, THE IGNITION KEY HAS BEEN REMOVED AND THE BATTERY CABLE HAS BEEN DISCONNECTED; THE FEED WHEELS HAVE BEEN RAISED, THE YOKE LOCK PIN IS IN POSITION, AND THE WHEELS HAVE BEEN BLOCKED; AND THERE ARE AT LEAST TWO OPERATORS AT THE SITE. FOLLOW PROPER MAINTENANCE PROCEDURES IN SERVICE SECTIONS TO REPAIR OR REPLACE PARTS OR CONTACT YOUR DEALER. COMPLAINT CAUSE CORRECTION Discharged chips are not correct size: too large or too fine Knives have lost their edge Knife anvil worn Check for wear in the throat/base area (non-cutting areas) Knife angle is not correct Material being chipped is very small, dry or rotting Cutter disk knife hits anvil Anvil to knife clearance is not correct Check the chipper bearing retainer cap for tightness Discharge chute clogs or chips are not discharging properly Lugging engine on large material Obstruction in discharge chute Chipping rotting material that has little substance can also plug the discharge chute DO NOT operate chipper with dull knives or with mismatched knives (see Servicing Cutter System section) Rotate, repair, or replace (see Servicing Cutter System section) Outer, non-cutting edges that are exposed to chipper knives must be built up with weld to maintain surface to original integrity Make sure knives are ground at correct angle (see Servicing Cutter System section) This type of material does not produce good chip quality See Servicing Cutter System section for adjustment Retighten bolts or setscrews as tight as possible Keep engine speed up and use feed control bar to reverse material if engine lugs down, check Auto-Feed Plus setting and adjust (see Auto-Feed Plus Manual) Any object that protrudes inside the chute may cause clogging; replace discharge chute, if necessary Use care when running this type of material; flush the discharge chute using other material with more substance 58
81 12 CHIPPER TROUBLESHOOTING GUIDE COMPLAINT CAUSE CORRECTION Auto-Feed not working properly or at all Chipper bearings are overheating Feeding material causes feed wheels to slow down or stop One or both feed wheels don t turn or turn too slow to feed material Faulty or broken wiring Settings not correct Bearings are dry Check the chipper bearing retainer cap for tightness Bearings worn out Setscrews on sheave side bearing not tight Dull knives Relief valve is worn or dirty Hydraulic pump has excessive wear Feed wheel motor(s) not working properly Feed wheel springs to tight Feed wheel motor(s) not working properly Safety switch not in position Relief valve opens too easily or stuck open Feed wheel valve (control valve) worn & leaking internally Feed wheel relief pressure off One or more hoses may be crimped or leaking Hydraulic oil level low Pump has excessive wear Feed wheels binding Control lever improperly shifting valve Worn or dirty flow divider Repair or replace wires wiring diagram enclosed in this manual Reset following Auto- Feed/Houston street manual instructions enclosed in this manual Grease bearings daily using Texaco Starplex II grease Retighten bolts or setscrews as tight as possible Replace Tighten Replace knives (see Servicing Cutter System section) Clean or replace; reset pressure Replace Check & replace Adjust Reverse hoses at flow divider - if same motor still doesn't turn, motor is probably bad; if other motor is now the one not turning, the flow divider is probably bad. Repair or replace Make sure the safety switch is attached properly Valve needs to be cleaned or replaced; reset pressure Check & Replace Reset pressure to 2500 PSI Replace (see Servicing Hydraulics section) Keep oil level about 7/8 full Replace pump Check bearings, lubricate properly Readjust; valve must open completely Clean or replace 59
82 12 CHIPPER TROUBLESHOOTING GUIDE COMPLAINT CAUSE CORRECTION Engine won t turn over Battery is dead Cutter disk is engaged Hydraulic oil overheating and causing chipper to operate slower than normal Hydraulic pump making loud noise or a lot of noise (pump is cavitated) Cutter disk hood safety switch is not in position Hydraulic pump has excessive wear or not working properly Hose crimped or leaking Relief valve opens too easily or stuck open Feed wheels binding Hydraulic tank oil level is too low, hydraulic oil is contaminated, or hydraulic filter is dirty Hydraulic oil viscosity is wrong for atmospheric temperature Hydraulic oil viscosity is wrong for atmospheric temperature Oil operating temperature too low Pump has excessive wear Recharge or replace battery Disengage the cutter disk and lock the engine slide lock Cutter disk hood lock pin and safety switch must be in position for the engine to start Check & replace pump, if necessary Replace (see Servicing Hydraulics section) Valve needs to be cleaned or replaced; reset pressure Check bearings, lubricate properly Keep oil tank about 7/8 full; follow proper maintenance schedule and change oil and filter as suggested (see Servicing Hydraulics section) Contact JP Carlton or local dealer for recommended oil type for the situation Contact JP Carlton or local dealer for recommended oil type for the situation Allow system to warm up Replace pump Any other problems, please contact your local dealer or J. P. Carlton Co. ONLY USE QUALIFIED PERSONNEL TO WORK ON HYDRAULIC SYSTEMS FOR REPAIRS OR REPLACEMENT OF PARTS!! 60

83 12 CHIPPER SERVICE HYDRAULICS DO NOT PERFORM MAINTENANCE OF ANY KIND ON THIS MACHINE UNLESS: The engine is turned off The ignition key has been removed The positive battery cable has been disconnected The clutch is disengaged Feed control bar is in neutral All machine parts have come to a complete stop NOTE: The cutter disk takes several minutes to come to a complete stop All machine parts have had sufficient time to cool down The cutter disk lock pin is installed in the disk lock tube No operator is in position at the controls to accidentally start machine At least 2 people are at the site where maintenance is performed More accidents occur while performing maintenance than any other time! Use extra caution. Never perform maintenance with the engine running, not even with the clutch disengaged. The pilot bearing could seize or freeze to the clutch shaft and permit the clutch to engage even though the operator thought the clutch had been disengaged. ALWAYS REPLACE GUARDS AND OTHER PROTECTIVE EQUIPMENT BEFORE STARTING CHIPPER AFTER PERFORMING MAINTENANCE. WARNING: RELEASE HYDRAULIC PRESSURE BEFORE PERFORMING ANY SERVICE TO HYDRAULIC LINES OR OTHER COMPONENTS. FLUID UNDER PRESSURE CAN PENETRATE THE SKIN AND CAUSE SEVERE INJURY. SEEK IMMEDIATE MEDICAL ATTENTION IF SKIN IS PENETRATED. CHECK HOSES AND FITTINGS USING A BOARD OR CARDBOARD; DO NOT USE HAND OR FINGER. ALWAYS WEAR EYE PROTECTION. HYDRAULIC OIL & FILTER This Carlton chipper has an in-tank hydraulic filter and a level/temp gauge. Check hydraulic oil daily, before and during use. Refill with AW-32 hydraulic oil, same as supplied by the manufacturer. Carlton chippers are equipped with lockable cap guards. 61


.")
84 Check hydraulic oil level daily. This Carlton chipper is equipped with a gauge that shows the level of oil and the temperature of the oil. When filling the tank with oil, the window of the gauge will also fill with oil as the level gets higher in the tank. Never fill the oil tank above the BLACK line at the top of the gauge. Do not run the machine with the oil level below the RED line at the bottom of the gauge. On a new chipper, change the hydraulic oil filter when the chipper has been operating for 10 hours. Replace with the same type of in-tank filter element supplied originally, available through Carlton or Carlton dealers. From this point on, change the filter every 200 hours of operation. Change hydraulic oil every 500 hours of operation or at least once a year depending on use. Flush the hydraulic tank when changing the hydraulic oil. Replace oil if it has a burnt odor or if it is contaminated. Replace oil if the chipper has been stored for a long period of time (all winter). Drain the hydraulic tank using the drain plug located on the bottom of the tank. Dispose of used oil according to state regulations. 12 CHIPPER SERVICE HYDRAULICS HYDRAULIC OIL COOLER THE OIL COOLER ON THE 12 CHIPPER MAY BE LOCATED UNDER THE ENGINE OR TO THE UPRIGHTS AS SHOWN HERE There is a hydraulic oil cooler on this Carlton chipper to keep the hydraulic oil from over heating. When the cooler is mounted as shown, the engine radiator fan cools the oil. If mounted under the engine, there is a fan on the cooler that comes on if the oil temperature rises to 140 or higher. The fan may go on and off as the temperature of the oil changes depending on the environment and the chipper operation. Keep the fins clean. Use a garden hose and a mild detergent. Do not use a power washer as it may cause the fins to bend. Do not use an industrial strength detergent that may cause the metal to deteriorate. 62


85 HOSES AND FITTINGS Inspect hoses and fittings for leaks, tightness, wear, or damage. Replace any hoses and fittings that need replacing. FLUID UNDER PRESSURE CAN PENETRATE THE SKIN AND CAUSE SEVERE INJURY. CHECK HOSES AND FITTINGS USING A BOARD OR CARDBOARD; DO NOT USE HAND OR FINGER. SEEK IMMEDIATE MEDICAL ATTENTION IF SKIN IS PENETRATED. ALWAYS WEAR EYE PROTECTION. 12 CHIPPER SERVICE HYDRAULICS HYDRAULIC PRESSURE DO NOT UNDER ANY CIRCUMSTANCES SET THE HYDRAULIC PRESSURES ABOVE THE FACTORY SETTINGS; COMPONENT PART AND HYDRAULIC SYSTEM DAMAGE WILL OCCUR AND POSSIBLY PERSONAL INJURY. REMOVE PLUG AND INSTALL PRESSURE GAUGE If feed wheels start to run slow when engine RPM is high, check hydraulic pressure. Remove the plug in the top right rear corner of the hydraulic block, hole marked G, and install a pressure gauge. Test the hydraulic pressure. With the engine at idle and with the cutter disk disengaged, run a log between the feed wheels and butt it against the cutter disk. Turn Auto-Feed off to operate feed wheels with engine at idle, see Machine Controls section. Check the pressure reading. The overall hydraulic pressure setting is 2500 PSI, preset at the factory, and should remain set at that pressure. 63

86 12 CHIPPER SERVICE HYDRAULICS The plugs on top of the block are marked G1 for the top feed wheel and G2 for the bottom feed wheel. The pressure adjustment valves are below each plug on the bottom of the block. Adjust pressure only if necessary and after testing with a pressure gage. To increase pressure turn clockwise until it bottoms out. Recheck pressure. Contact J. P. Carlton or your dealer for more information. PRESSURE ADJUSTMENT If equipped with the hydraulic yoke lift, the pressure setting is 900 PSI, set at the factory and should remain set at that pressure. If equipped with the hydraulic winch, the pressure setting is 2000 PSI, set at the factory and should remain set at that pressure. If the pressure needs adjusting for either the hydraulic yoke lift or the hydraulic winch, remove the plug and turn the slotted screw clockwise to increase pressure and counterclockwise to decrease pressure. HYDRAULIC LIFT ADJUSTMENT HYDRAULIC WINCH ADJUSTMENT ONLY USE QUALIFIED PERSONNEL TO WORK ON HYDRAULIC SYSTEMS FOR REPAIRS OR REPLACEMENT OF PARTS!! 64
87 12 CHIPPER TWIN DISC, INC. PTO/CLUTCH DO NOT PERFORM MAINTENANCE OF ANY KIND ON THIS MACHINE UNLESS: The engine is turned off The ignition key has been removed The positive battery cable has been disconnected The clutch is disengaged Feed control bar is in neutral All machine parts have come to a complete stop NOTE: The cutter disk takes several minutes to come to a complete stop All machine parts have had sufficient time to cool down The cutter disk lock pin is installed in the disk lock tube No operator is in position at the controls to accidentally start machine At least 2 people are at the site where maintenance is performed More accidents occur while performing maintenance than any other time! Use extra caution. Never perform maintenance with the engine running, not even with the clutch disengaged. The pilot bearing could seize or freeze to the clutch shaft and permit the clutch to engage even though the operator thought the clutch had been disengaged. ALWAYS REPLACE GUARDS AND OTHER PROTECTIVE EQUIPMENT BEFORE STARTING CHIPPER AFTER PERFORMING MAINTENANCE. PTO/CLUTCH A good maintenance program is imperative for the PTO/Clutch. Read the PTO/Clutch owner s manual before performing any service to your PTO/Clutch. NEVER ENGAGE OR DISENGAGE THE PTO/CLUTCH AT ENGINE SPEEDS IN EXCESS OF 1200 RPM. Always disengage the clutch before performing any type of service. Follow the Twin Disc Inc. PTO Service Manual for servicing the PTO/Clutch. (The following instructions came from the Twin Disc manual.) 65
 APPROVED High grade, lithium base #2, short fiber grease with an EP")

88 12 CHIPPER TWIN DISC, INC. PTO/CLUTCH LUBRICATION To lubricate the bearings in the PTO/Clutch USE ONLY NGLI (National Grease and Lubrication Institute) APPROVED High grade, lithium base #2, short fiber grease with an EP (extreme pressure) additive recommended for use in high-speed roller bearings operating at 200 F (93.3 C). Carlton uses TEXACO STARPLEX II grease. Listed below are the manufacturer s suggested guidelines for lubrication: 1. Release Bearing using a hand-operated grease gun, add 1 or 2 pumps of grease per 8 to 10 hours of operation (or add grease until grease begins to weep from the ID of the bearing and from the release sleeve and the shaft). Rotate the shaft manually (by hand) while adding grease. DO NOT OVER GREASE! 2. Main Bearings grease every 100 hours of operation. Add grease until grease is forced out of the labyrinth seal(s) around the shaft. Manually (not by starting the engine) rotate the shaft while adding grease. 3. PTO cross shaft (engagement linkage) grease every 500 hours of operation. Add 1 or 2 pumps of grease using a hand operated grease gun. RELEASE BEARING CROSS SHAFT & ENGAGEMENT LINKAGE MAIN BEARING 66


89 CLUTCH ADJUSTMENT The clutch in this machine does not automatically adjust to compensate for wear of the clutch facing(s) and therefore must be manually adjusted. Maintaining the correct engagement pressure is the responsibility of the owner/operator. The owner/operator must periodically adjust the clutch to ensure correct clutch operation. The clutch requires frequent adjustments when parts are new to prevent slipping, overheating, and failure. MEASURING ENGAGEMENT FORCE The clutch should be adjusted if the force required for engaging the clutch drops by 10 to 15 percent of the specified force. Destructive damage may have already occurred if engagement force is allowed to diminish to the point where the clutch fails to carry the load (slippage) or facing(s) have overheated. 12 CHIPPER TWIN DISC, INC. PTO/CLUTCH NOTE: New clutches or new facings usually require several frequent adjustments until the friction facing surfaces have worn in. The clutch friction facing plates will become glazed and possibly permanently damaged if the clutch is permitted to slip excessively. If the facings have been slipped excessively, and enough heat was generated that the facings began to smoke, the clutch material may have been destroyed. Excessive heat normally destroys the friction material. Therefore, further clutch adjustment will not remedy the slippage problems. Replace burned facing plates. CLUTCH ENGAGEMENT 67


90 12 CHIPPER TWIN DISC, INC. PTO/CLUTCH The preferred method of checking the force required to engage the clutch is using a torque wrench to check the foot-pounds required to engage the clutch. The torque wrench should be used at the cross shaft to measure engagement force. For the clutch used in this machine, the reading should be between ft-lbs. The clutch should ENGAGE within this torque reading range. An adapter, Twin Disc, Inc. part number , may be obtained to provide a 1 1/2" hex nut at the end of the cross shaft. The adapter may be used in place of the standard handle for the purpose of checking clutch adjustment with a torque wrench or it may be installed on the end of the cross shaft. (Most PTOs have serrations on both ends of the cross shaft.) Another method for checking engagement force is the spring scale method, which is covered in the PTO/Clutch manual. CHECK ENGAGEMENT FORCE AT EITHER END OF THE CROSS-SHAFT REMOVE NAMEPLATE CLUTCH ADJUSTMENT PROCEDURE If the clutch requires adjustment, remove the PTO nameplate and disengage the clutch. Push the adjustment lock pin in and rotate the adjustment ring. Rotate the adjusting ring clockwise to tighten the clutch. (Rotating the adjusting ring counterclockwise will further loosen the clutch.) Check with the torque wrench, as described earlier, and continue to adjust until the handle engagement force is within the range of ft-lbs. When clutch is properly adjusted, replace the PTO nameplate. ADJUSTING RING NOTCH ADJUSTMENT LOCK 68

91 12 CHIPPER SERVICE CUTTER SYSTEM DO NOT PERFORM MAINTENANCE OF ANY KIND ON THIS MACHINE UNLESS: The engine is turned off The ignition key has been removed The positive battery cable has been disconnected The clutch is disengaged Feed control bar is in neutral All machine parts have come to a complete stop NOTE: The cutter disk takes several minutes to come to a complete stop All machine parts have had sufficient time to cool down The cutter disk lock pin is installed in the disk lock tube No operator is in position at the controls to accidentally start machine At least 2 people are at the site where maintenance is performed More accidents occur while performing maintenance than any other time! Use extra caution. Never perform maintenance with the engine running, not even with the clutch disengaged. The pilot bearing could seize or freeze to the clutch shaft and permit the clutch to engage even though the operator thought the clutch had been disengaged. ALWAYS REPLACE GUARDS AND OTHER PROTECTIVE EQUIPMENT BEFORE STARTING CHIPPER AFTER PERFORMING MAINTENANCE. INSPECT/CHANGE KNIVES Cutter disk knives need to be kept sharp and free of chips to keep the chipper running smoothly. Visually inspect knives daily for dull edges, chips, and other damage. Dull or chipped knives do not cut well adding stress to the engine and requiring more power to cut through the wood. This can cause heat to build up and cause knife failure. Check the knives if the wood chips are too large, if the material will not feed properly, or if the engine lugs down. Always wear leather gloves when handling knives. Edges are extremely sharp and could cause severe injury. WORN & CHIPPED KNIFE EDGE 69

92 DANGER: Make sure the ignition key has been removed and machine can t be started before servicing any part of the chipper. DANGER: Do not open the cutter disk hood until the cutter disk has come to a complete stop. Do not perform service on the cutter disk or knives without installing the disk lock pin. 12 CHIPPER SERVICE CUTTER SYSTEM Remove the padlock and lock pin from the cutter disk hood and open. The cutter disk lock pin will have to be removed to rotate the cutter disk and inspect the knives. Use extra care when rotating the cutter disk to prevent injury. Always wear leather gloves when performing any service on the cutter disk system. CUTTER DISK HOOD LOCK DANGER KNIVES ARE EXTREMELY SHARP Inspect knives. If knives are still in good shape, proceed with other inspections or maintenance. To change knives, follow these procedures. Install the cutter disk lock pin. Rotate the cutter disk slowly to line up and insert the pin. Remove the three bolts and nuts holding each knife in place on the cutter disk. Two knives are lined up together in two opposing pockets. Inspect the bolts and nuts carefully for worn, chipped, or stripped threads. Do not remove and replace knife bolts and nuts more than 3 times before replacing with new bolts and nuts. Knife bolts are of a particular design and nuts are security lock nuts. DO NOT USE ANY OTHER STYLE OF BOLTS AND NUTS. You must purchase these bolts and nuts from Carlton or an authorized dealer. CUTTER DISK LOCK PIN IN LOCKED POSITION 70


93 After knives have been removed, clean the pocket to remove any debris that may keep the knife from seating properly. DANGER KNIVES ARE EXTREMELY SHARP 12 CHIPPER SERVICE CUTTER SYSTEM Inspect both edges of knives; wear leather gloves while handling knives. If knives still have one good edge, rotate each knife and reassemble. Make sure all knife edges line up in the set of four. Inspect knife bolt holes for cracks or distortion, replace knives if any problems are found. If both edges are worn or chipped, have knives ground to sharpen. Never use knives that are below 2" from center of hole to outside edge of knife. Keep sets of knives together that are ground to the same distance from center of hole to outside edge. This will keep the cutter disk balanced reducing chipper vibration and improving cutting. A set is four knives, two knives in each of two opposing pockets. ONLY have knives sharpened by an authorized dealer using the proper equipment. Improper sharpening may affect knives hardness resulting in knife failure. If knives are too narrow to grind, replace with a complete set of new knives. Knives are hardened steel made to Carton s specifications. Use only Carlton chipper knives as replacements. MINIMUM DIMENSION 2" SHARP EDGE NEW KNIFE SHARP EDGE 71

94 Reassemble knives in the pocket making sure they seat flat. Tighten knife bolts and torque the nuts to 180 ft. lbs. Do not over tighten knife bolts. Torque only to the recommended amount. Knives that are overly tight can crack or bow around the hole. This could cause chipped material to pack between the knife and cutter disk causing knife failure. Check knife for distortion using a straight edge and a light, replace the knife if distorted. 12 CHIPPER SERVICE CUTTER SYSTEM CHECK/ADJUST CLEARANCE ALWAYS CHECK AND SET KNIFE TO ANVIL CLEARANCE AFTER REMOVING AND REPLACING KNIVES OR ANVIL. FEED WHEEL RAISED & LOCK PIN INSERTED Raise and block upper feed wheel. Use the hydraulic lift, if equipped, to raise the upper feed wheel. Insert the yoke lock pin into the yoke lock tube. Place a block of wood 4 x 12 x 16 between the feed wheels. Inspect the anvil working edge for wear or damage before you check the clearance. If the anvil needs to be changed to a new work surface or to be replaced, follow the instructions in Anvil Replacement later in this section. The anvil has four working edges that can be used before replacing. ANVIL WORKING EDGE 72


95 12 CHIPPER SERVICE CUTTER SYSTEM Check the clearance between the knives and the anvil. The clearance for the knife to anvil should be between.045 and.065 ( mm). Use a feeler gage that measures within that range. The gage should fit easily between the knife and the anvil without force and without too much free space on either side. Check clearance at the top and bottom of each knife assembly. CHECKING CLEARANCE AT BOTTOM OF KNIFE ASSEMBLY FEELER GAGE One person will need to be in the infeed chute area to check the clearance between the anvil and the knives. While another person is outside to make the adjustments and to turn the cutter disk. The disk will have to be rotated fully to check both knife settings. This is one time that the cutter disk lock pin will not be in position so extreme care needs to be taken for safety. Before allowing anyone to be in the infeed chute, make sure there is no obstruction or binding in the cutter disk by turning it by hand from the outside first. If the cutter disk does not turn freely, find and remove the obstruction and then proceed. UPPER FEED WHEEL MUST BE RAISED, HAVE YOKE LOCK PIN IN POSITION, AND BE BLOCKED WHEN WORKING BETWEEN FEED WHEELS. UPPER FEED WHEEL MUST BE RAISED, PINNED, AND BLOCKED If clearance needs to be adjusted, loosen the three anvil bolts; just loose enough to be able to move the anvil with the adjuster bolts. ANVIL BOLTS 73


96 12 CHIPPER SERVICE CUTTER SYSTEM Loosen the nuts on the adjustment bolts that are on the far side of the plate (as shown). There are two adjustment bolts. Using the nuts on the inside of the plate, turn the nuts up toward the machine to move the anvil closer to the knife. This will shorten the clearance if it was too wide. Make slight adjustments as the clearance is being checked. Or, you will need to loosen the nuts on the inside of the plate and turn the outside nuts down if the clearance is too narrow for the feeler gage to go in easily. This will move the anvil farther away from the knife. ADJUSTMENT BOLTS & NUTS After the clearance has been set, tighten the anvil bolts (3/4-10) and torque to 175 ft. lbs. Retighten the nuts on the adjustment bolts that were loosened earlier. Recheck the anvil/knife clearance to make sure nothing changed when tightening the bolts. Checking and setting the clearance by the knife that is the closest to the anvil will be the best place to start. Clearance should be ( mm). ALWAYS REMEMBER TO CLOSE THE CUTTER DISK HOOD AFTER SERVICING CUTTER DISK. INSTALL THE HOOD LOCK PIN AND PADLOCK. Check condition of cutter disk hood. Make sure the hinges are not damaged and that the hood closes completely with no gaps or openings; check both sides. If there are any problems go to Servicing Cutter Disk Hood later in this section. NO GAPS OR OPENINGS 74


97 12 CHIPPER SERVICE CUTTER SYSTEM SHARPEN KNIVES Have knives ground by a qualified grinder. Grind knives at 29 to 31. Before and after grinding the knife-edge, check the width of the knife from the center of the hole to the sharp edge of the knife. Never use a knife with this measurement below 2. Three factors for a good cutting system are: 1. Never use a knife with the distance from the cutting edge to the center of the bolt hole less than Always use knives in sets of four with the dimension from the cutting edge to the center of the bolt hole as close as possible to each other. 3. Never use a knife if the back edge is inside the knife pocket edge. KNIVES PART NO DESCRIPTION QTY Knife 1/2 x 4 1/2 x 7x1/ /8 Knife Bolt Special Design Purchase from JP Carlton or Dealer /8 Security Lock Nuts Purchase from JP Carlton or Dealer 12 75

98 DANGER: TURN ENGINE OFF REMOVE IGNITION KEY DISENGAGE CLUTCH PUT FEED CONTROL BAR IN NEUTRAL ALLOW CUTTER DISK TO COME TO A COMPLETE STOP ALLOW ALL PARTS TO COOL COMPLETELY INSTALL CUTTER DISK LOCK PIN ANVIL REPLACEMENT 12 CHIPPER SERVICE CUTTER SYSTEM Check the anvil for wear when knives have been changed and clearance is being set. The anvil has four working edges that can be used before having to be replaced. Rotate the anvil to a new working edge unless all edges are worn and the anvil needs replacing. Do not grind the anvil to get more life. There is only a certain amount of adjustment available for clearance and if the anvil is ground you will loose that adjustment capability. The anvil is hardened steel made to Carton s specifications. Use only Carlton anvils as replacements or damage may occur. Purchase the new anvil from Carlton or an authorized dealer. To rotate or replace the anvil, remove the anvil bolts and washers. There are three anvil bolts, each with a square washer and a lock washer. THE ANVIL HAS FOUR WORKING EDGES. TWO OF THESE EDGES ARE SHOWN ABOVE. FLIP THE ANVIL OVER FOR THE OTHER TWO EDGES. REMOVE ANVIL BOLTS & WASHERS REMOVE OUTSIDE NUT ON ADJUSTER BOLT There are two adjuster eyebolts that the anvil bolts go through. Remove the nut on the outside of each adjuster bolt. 76


.")
99 12 CHIPPER SERVICE CUTTER SYSTEM Use the handle on the anvil to rotate the anvil 90 and pull it through the slot. REMOVE ANVIL ROTATE 90 & PULL THROUGH OPENING Remove the handle from the anvil and turn the anvil to a good working edge. The working edge that was being used is on the back opposite side from the handle. Replace the handle either in the same hole on the other side of the anvil or remove the setscrew and insert the handle in the hole on the opposite side of the anvil. Use LocTite Red 262 on the handle when replacing and torque jam nut to 25 ft. lbs. (5/16-18 bolt). A setscrew must always be in the hole next to the working edge to keep debris out of the hole (see picture at right). Insert the setscrew on the handle side of the anvil to prevent clogging the wrench slot. Use LocTite Red 262 on the setscrew when replacing to keep the setscrew from working out of hole or damage will occur because of tight tolerances. Replace with a new anvil if all working edges are worn or damaged. Do not grind the anvil to get more life. There is only a certain amount of adjustment available for clearance and if the anvil is ground you will loose that adjustment capability. The anvil is hardened steel made to Carton s specifications. Use only Carlton anvils as replacements or damage may occur. Purchase the new anvil from Carlton or an authorized dealer. CURRENT WORKING EDGE HANDLE INSERT SETSCREW FROM THIS SIDE OPPOSITE TO HANDLE USE LOCTITE RED


100 12 CHIPPER SERVICE CUTTER SYSTEM Use the handle and put the anvil back through the slot. Rotate the anvil back 90 to insert the anvil bolts. Make sure the hardware is replaced in the correct order. The square washer has to be next to the machine. For the top and bottom anvil bolts, the adjuster eyebolt would go on next. The lock washer will go closest to the head of the bolt on all three bolts. It may be a good idea to insert the middle bolt first to hold the anvil in place while putting in the bolts with the adjuster bolts. The adjuster bolts must be inserted through the slot provided to make clearance adjustments. A flat washer goes between the nut on the adjuster bolt and the plate. Tighten the anvil bolts loosely. Put a flat washer and a nut back on the outside of each adjuster bolt. Do not tighten the nut until clearance has been set. ALWAYS CHECK & SET KNIFE TO ANVIL CLEARANCE AFTER REMOVING AND REPLACING KNIVES OR ANVIL. Go back to the Check/Adjust Clearance earlier in this section. After the clearance has been set, tighten the anvil bolts (3/4-10) and torque to 175 ft. lbs. Tighten the nuts on the adjuster bolts. ALWAYS REMEMBER TO CLOSE THE CUTTER DISK HOOD AFTER SERVICING CUTTER DISK. INSTALL THE HOOD LOCK PIN AND PADLOCK. Check condition of cutter disk hood. Make sure the hinges are not damaged and that the hood closes completely with no gaps or openings; check both sides. If there are any problems go to Servicing Cutter Disk Hood later in this section. REPLACE ANVIL PUT THROUGH OPENING & ROTATE BACK 90 HARDWARE ORDER MIDDLE BOLT: LOCK WASHER NEXT TO BOLT HEAD SQUARE WASHER ON LAST (NEXT TO MACHINE) HARDWARE ORDER TOP & BTM BOLTS: LOCK WASHER NEXT TO BOLT HEAD ADJUSTER BOLT IN BETWEEN WASHERS SQUARE WASHER ON LAST (NEXT TO MACHINE) 78


 CUTTER DISK BEARINGS Check cutter disk bearing bolts weekly for tightness.")
101 12 CHIPPER SERVICE CUTTER SYSTEM SERVICING CUTTER DISK HOOD CUTTER DISK HOOD HINGES & SPRING Inspect cutter disk hood for fit and damage daily. Check for cracks around welds. Check hood hinges and spring making sure hood closes completely with no gaps or openings; check both sides. Hood lock pin must go through locking plates easily and completely allowing room for padlock. Check pin for distortion and cracks. If any problems are discovered, contact Carlton or your local dealer for repair or replacement. THE CUTTER DISK HOOD IS ONE OF THE MOST IMPORTANT PIECES OF SAFETY EQUIPMENT ON THIS CHIPPER. MAKE SURE IT IS KEPT IN GOOD WORKING CONDITION. CUTTER DISK HOOD LOCK PIN & PADLOCK CUTTER DISK BEARING BOLTS BEHIND SHEAVE (1/2-13 BOLTS) CUTTER DISK BEARINGS Check cutter disk bearing bolts weekly for tightness. Replace any bolts that have worn, chipped, or missing threads. If bolts are loose and need tightening, use LocTite 608 (Green) and torque the bolts to the normal spec listed in the torque wrench chart for the correct size and Grade 8 bolts. Also check collar set screws for tightness, Remove the bearing cover on the right side of the chipper and check the retainer bolt. The bearing retainer bolt is a 3/4"-16 bolt on the end of the cutter disk shaft. Coat the bolt with LocTite 680 (Red) and torque to the normal spec listed in the torque wrench chart for Grade 8 bolts to retighten. RIGHT SIDE CUTTER DISK BEARING BOLTS (5/8-11 BOLTS) 79


102 12 CHIPPER SERVICE BELTS DO NOT PERFORM MAINTENANCE OF ANY KIND ON THIS MACHINE UNLESS: The engine is turned off The ignition key has been removed The positive battery cable has been disconnected The clutch is disengaged Feed control bar is in neutral All machine parts have come to a complete stop NOTE: The cutter disk takes several minutes to come to a complete stop All machine parts have had sufficient time to cool down The cutter disk lock pin is installed in the disk lock tube No operator is in position at the controls to accidentally start machine At least 2 people are at the site where maintenance is performed More accidents occur while performing maintenance than any other time! Use extra caution. Never perform maintenance with the engine running, not even with the clutch disengaged. The pilot bearing could seize or freeze to the clutch shaft and permit the clutch to engage even though the operator thought the clutch had been disengaged. ALWAYS REPLACE GUARDS AND OTHER PROTECTIVE EQUIPMENT BEFORE STARTING CHIPPER AFTER PERFORMING MAINTENANCE. BELT TENSION CHECK BELT TENSION New belts will stretch and become loose as machine runs. Check belt tension often when belts are new. Belts should deflect 1/2" when a force of ft. lb. is applied to new belts or ft. lb. to used belts. Check tension through the slot on the belt guard. BELT TENSION SLOT 80
 through the slot to check belt tension.")


103 ENGINE MUST BE OFF AND IGNITION KEY REMOVED BEFORE CHECKING BELT TENSION. ALL PARTS MUST BE COMPLETELY STOPPED. CLUTCH MUST BE DISENGAGED. Insert a screwdriver or metal bar (a metal ruler would be good) through the slot to check belt tension. Make a mark on the screwdriver or metal when it touches the belts without any force applied and then apply force and make another mark. Measure the distance between the two marks. If the measurement is more than 1/2", the belts tension needs to be adjusted. If the measurement is much less than 1/2", the belts tension is too tight. Do not over tighten the engine belts. Overly tight belts will cause damage to PTO/clutch bearings and to cutter disk bearings. 12 CHIPPER SERVICE BELTS ADJUST BELT TENSION There are four engine slide bolts (5/8 ) mounting the engine to the frame. There are also two eyebolts for adjustment, which are mounted to the two engine slide bolts at the front of the machine to move the engine and adjust the belt tension. Loosen all four of the engine slide bolts enough to be able to move the engine but don t remove the bolts. The bolts are secured through a block under the frame and will require only one wrench to loosen. ENGINE SLIDE BOLT - 2 AT FRONT OF ENGINE ADJUSTMENT EYEBOLT ENGINE SLIDE BOLT - 2 AT BACK OF ENGINE 81

104 Loosen the inside jam nuts on the adjustment eyebolts. Turn the outside jam nuts clockwise, moving the engine closer to the right side of the machine and tightening the belts. Make only slight adjustments at a time and recheck tension. Make equal adjustments to both eyebolts to keep sheaves aligned. Keep making slight adjustments and recheck tension until correct tension is achieved. Do not over tighten the engine belts. Overly tight belts will cause damage to PTO/clutch bearings and to cutter disk bearings. To loosen belt tension, loosen the outside jam nut and turn the inside jam nut counter-clockwise making slight and equal adjustments as with tightening the belt tension. Replace belts when worn or when repeated adjustments are necessary. Belts should never get so loose that all of the adjustment capability is used. When tension is correct, tighten the inside jam nuts. Retighten the engine slide bolts and torque to 230 ft lbs. Torque all four engine slide bolts. 12 CHIPPER SERVICE LOOSEN INSIDE JAM NUTS ON ADJUSTMENT BOLTS INSIDE JAM NUT BELTS TURN OUTSIDE JAM NUTS CLOCKWISE TO TIGHTEN BELT CHECK BELT GUARDS Check and retighten bolts daily. Check condition of bolt threads when belt guards are removed or if a bolt won t tighten or won t stay tightened. Replace any bolts that are worn or damaged. Replace bolts and/or nuts with stripped threads. NEVER RUN MACHINE WITHOUT ALL GUARDS IN PLACE AND SECURED. ROTATING PARTS ARE DANGEROUS AND COULD CAUSE SEVERE INJURY. ENGINE SLIDE BOLT 82

 and turn inside jam nuts counterclockwise to move engine back and loosen belts enough to remove over sheaves.")

105 REPLACING BELTS 12 CHIPPER SERVICE BELTS Follow all safety precautions at the beginning of this section and make sure the clutch is disengaged. Replace belts when they are worn or regularly need adjustment. Replace belts as a complete set. Old or worn belts will not tension the same as new belts. Remove belt guard bolts and remove belt guard cover. Loosen all four engine slide bolts as described earlier. Loosen outside jam nuts (two places) and turn inside jam nuts counterclockwise to move engine back and loosen belts enough to remove over sheaves. Turn jam nuts on both of the eyebolts the same amount to keep from twisting the engine. Jam nuts will only need to be turned a few turns to loosen belts. OUTSIDE JAM NUTS INSIDE JAM NUTS ENGINE SLIDE BOLTS Cutter disk lock pin should be removed to allow the sheaves to turn in removing the belts. DO NOT HAVE CUTTER DISK HOOD OPEN. Remove all six belts. It may be a good idea to start removing 3 belts from each sheave as shown in the pictures to the right. Install new belts using the same procedure only in reverse. Never pry new belts onto the sheave! 83
106 Once belts have been replaced, you will need to loosen the inside jam nuts and tighten the outside jam nuts on the eyebolts. When belts start getting tight, check tension. 12 CHIPPER SERVICE BELTS Check sheave alignment and make adjustments using engine slide adjuster (jam) nuts. Make slight adjustments until sheaves are aligned and tension is correct. (See Check Belt Tension and Adjust Belt Tension earlier in this section.) Tighten inside jam nuts locking down the adjustment. Retighten the engine slide bolts and torque to 230 ft lbs. NEVER RUN MACHINE WITHOUT ALL GUARDS IN PLACE AND SECURED. ROTATING PARTS ARE DANGEROUS AND COULD CAUSE SEVERE INJURY. 84


107 REPLACING SHEAVE OR BUSHING 12 CHIPPER SERVICE BELTS If it becomes necessary to replace a sheave or bushing, replace only one at a time. Never remove both sheaves at the same time. This section covers removing and replacing the cutter disk sheave and bushing. Follow the same procedure for removing the engine sheave and bushing. Remove belt guard bolts and remove guard. Mark position of bushing on shaft before removing for lining up bushing when replaced. MARK BUSHING LOCATION ON SHAFT BEFORE REMOVING Remove belts as described in Replacing Belts section. Remove bolts from the bushing and screw each bolt into the threaded holes to push sheave off bushing. Screw bolts in equally to prevent damaging the bushing or the sheave especially if you plan to use either one again. When the sheave is loose on the bushing, remove the setscrew in the bushing. Remove the bushing from the shaft and from the sheave. Remove the sheave and replace with new sheave. 85

108 12 CHIPPER SERVICE BELTS Insert old or new bushing, lining up keyway with the keyway on the shaft. Make sure the key is in position. Replace bolts in the sheave and tighten until bushing is at the location marked on the shaft earlier. Go to Replacing Belts section to replace belts and adjust tension. Make sure sheaves are aligned when retightening belts to the proper tension. Replace belt guard cover and end. NEVER RUN MACHINE WITHOUT ALL GUARDS IN PLACE AND SECURED. ROTATING PARTS ARE DANGEROUS AND COULD CAUSE SEVERE INJURY. 86
109 12 CHIPPER SERVICE FEED WHEEL MOTOR DO NOT PERFORM MAINTENANCE OF ANY KIND ON THIS MACHINE UNLESS: The engine is turned off The ignition key has been removed The positive battery cable has been disconnected The clutch is disengaged Feed control bar is in neutral All machine parts have come to a complete stop NOTE: The cutter disk takes several minutes to come to a complete stop All machine parts have had sufficient time to cool down The cutter disk lock pin is installed in the disk lock tube No operator is in position at the controls to accidentally start machine At least 2 people are at the site where maintenance is performed More accidents occur while performing maintenance than any other time! Use extra caution. Never perform maintenance with the engine running, not even with the clutch disengaged. The pilot bearing could seize or freeze to the clutch shaft and permit the clutch to engage even though the operator thought the clutch had been disengaged. ALWAYS REPLACE GUARDS AND OTHER PROTECTIVE EQUIPMENT BEFORE STARTING CHIPPER AFTER PERFORMING MAINTENANCE. There is a special tool required to separate the motor and coupling once it is off the machine, contact J. P. Carlton or your local dealer to purchase the puller. CHANGE MOTORS ONE AT A TIME. The following instructions are for the upper feed wheel motor but the lower feed wheel motor has the same configuration. The only difference is the design and direction of the torque arm. PULLER 87
110 12 CHIPPER SERVICE FEED WHEEL MOTOR WARNING: RELEASE HYDRAULIC PRESSURE BEFORE PERFORMING ANY SERVICE TO HYDRAULIC LINES OR OTHER COMPONENTS. FLUID UNDER PRESSURE CAN PENETRATE THE SKIN AND CAUSE SEVERE INJURY. SEEK IMMEDIATE MEDICAL ATTENTION IF SKIN IS PENETRATED. CHECK HOSES AND FITTINGS USING A BOARD OR CARDBOARD; DO NOT USE HAND OR FINGER. ALWAYS WEAR EYE PROTECTION. Before changing feed wheel motor, release the hydraulic pressure. Mark the location of each hose, possibly with an R and L for right and left hoses. Then disconnect the hydraulic hoses and cap the ends of hoses and the connections on the motor. Remove the rubber guard that covers the feed wheel coupling and bushing by removing the two 3/8 bolts. Be sure to keep all parts and hardware together to make reassembly easier. Remove the three bolts (3/8 ) from the bushing and screw these bolts back into the three threaded holes in the bushing to push the motor assembly off the bushing. Screw these bolts in a little at a time to take the assembly off without applying more pressure to one side than the other. 88


111 When the motor assembly is off the machine, move it to a workbench for easier access. Then, remove the 1 nut that is inside the coupling. You may need to use a vise to hold the motor steady while you break the nut loose since it was put on with LocTite 262 and then tightened to 150 ft. lbs. CAUTION: Always wear eye protection when working on hydraulic components. 12 CHIPPER SERVICE FEED WHEEL MOTOR There is a special tool required to separate the motor and coupling once it is off the machine, contact J. P. Carlton or your local dealer to purchase the puller. Attach the separating tool to the coupler as shown and screw the three bolts from the bushing into the tool in the outside holes. Screw the bolts into the coupling as far as they will go. Now turn the bolt in the center of the tool to pull the coupling off the feed wheel motor. Remove the torque arm held on with two 1/2 bolts. (The torque arm looks slightly different on the lower feed motor, but is still held on with two bolts.) 89

 LINE UP KEY WITH KEYWAY ON COUPLING HIT COUPLING WITH RUBBER MALLET TO SEAT Put the coupling onto the motor and line up key and keyway always use new key. Use a rubber mallet to seat the coupling.")
112 12 CHIPPER SERVICE FEED WHEEL MOTOR Replace with new motor. Clean the threads on the motor, the 1 nut, and the coupling with degreaser before beginning to replace all the parts. Attach the torque arm to the new motor using the 1/2 bolts that were removed. Tighten the bolts and torque to 120 ft. lbs. (The torque arm looks slightly different on the lower feed motor, but is still held on with two bolts.) LINE UP KEY WITH KEYWAY ON COUPLING HIT COUPLING WITH RUBBER MALLET TO SEAT Put the coupling onto the motor and line up key and keyway always use new key. Use a rubber mallet to seat the coupling. Strike the coupling a couple of times. Apply LocTite 262 (red) to the 1 nut and screw in place. Torque the nut to 150 ft. lbs. Strike the coupler again a couple of times with the rubber mallet to finish seating and torque the nut to 150 ft. lbs. again. 90


113 12 CHIPPER SERVICE FEED WHEEL MOTOR Return the feed wheel motor assembly to the machine and tighten the bolts in the bushing. Tighten each bolt a little at a time to pull the coupling into place as straight as possible. Try not to pull one side on faster than the other or damage may occur to the bushing and the coupling. When bolts are screwed in all the way, torque the bolts to 35 ft. lbs. Replace the rubber guard and bolt into place using the two 3/8 bolts that were removed. Tighten the bolts. Reconnect the hydraulic hoses making sure to connect them in the right order, see markings made when hoses were removed. If hoses are reversed, the feed wheels will work in reverse. Change hoses if this happens to make feed wheels turn correctly. 91
114 12 CHIPPER MACHINE WIRING CHIPPER WIRING DIAGRAM JOHN DEERE ENGINE COLOR CODES ACTUAL RELAY CONNECTIONS R = RED Y = YELLOW O = ORANGE PR = PURPLE GY = GRAY GR = GREEN BL = BLUE BK = BLACK BR = BROWN W = WHITE R/BK = RED/BLACK O/BK = ORANGE BLACK Y/BK = YELLOW/BLACK Y/R = YELLOW/RED O/R = ORANGE/RED BL/BK = BLUE/BLACK BL/R = BLUE/RED BR/BK = BROWN/BLACK GR/BK = GREEN/BLACK BK/Y = BLACK/YELLOW BK/BL = BLACK/BLUE BK/R = BLACK/RED BK/GR = BLACK/GREEN BK/BR = BLACK/BROWN 6-WAY PLUG DESCRIPTION FUNCTION COLOR PIN # GROUND WHITE GD LEFT TURN YELLOW LT BRAKE BROWN BR RIGHT TURN GREEN RT NA NA AS TAIL LIGHTS BLACK TM EC # REMOVED AUTO FEED CIRCUIT; WAS REPLACED IN TIER 3 AUTO FEED IN ENGINE COMPARTMENT. 1ST SN J9PF AND UP Carlton PROFESSIONAL TREE EQUIPMENT J.P. CARLTON CO. DIVISION DAF INC CHECKED BY: D2512HDHS-10A CURRENT AHF 1/04/ A 140HP TIER 3 JOHN DEERE ENGINE WIRING. USED ON 2012,2012HD,2512,2512HD AND 2015 W/ OIL COOLER AND HOUSTON STREET CONTROLLER(*WINCH OPTIONAL) R/BK BIG R + BAT 86 BK TRAILER PLUG KEY SWITCH ACC KILL SWITCH SAFETY - CUTTER DISK HOOD BK LT W BL ALL GROUNDS ARE TO SIDE OF MOTOR BLOCK BR GD RT TM AS BATTERY 12GA O BR ENGINE COMPARTMENT RELAY * THE R WIRING AND COMPONENTS WITH THE DASH-DOT LINES DO NOT APPLY FOR A CHIPPER WITHOUT THE WINCH. THE EXTRA WIRING AND COMPONENTS REQUIRED FOR A CHIPPER SUPPLIED WITH THE WINCH ARE SHOWN WITH THE DASH-DOT LINES. THE WIRE FROM THE MAIN RELAY #87 TO THE FORWARD OVERRIDE RELAY #30 IS NOT ON A CHIPPER WITH A WINCH. BK BR BK EC # REVISED THE WIRING FOR THE WINCH. 1ST SN 1J9PF AND UP BREAK AWAY A CUTTER DISK SAFETY 20AMP W MAIN W GA O W W W BR R FUNCTION RELAYS GA R R/BK FORWARD FORWARD STOP REVERSE OVERRIDE 87A A DEUTSCH R R CONNECTS TO "C" CONNECTOR IN ENGINE COMPARTMENT FOR AUTO FEED 87A A A A R SPARE 12GA R JOHN DEERE HARNESS BN/BK GR/BK BK/BL BK/BR BL/BK BK/BL BR/BK BR/BK GR/BK GR/BK BK/BL FUNCTION BLOCK BK/BR R LEFT RIGHT BR BRAKE BRAKE FORWARD WINCH BK OVERRIDE SELECTOR R W BK BL TAG LIGHT W W BK BRAKE LIGHTS BK W W LEFT TAIL LIGHT RIGHT TAIL LIGHT SIDE SIDE FEED SAFETY STOP MARKER W MARKER GR Y BK BL FEED SWITCHES W W W FORWARD REVERSE W COMMON SIDE MARKER OPEN NORMALLY CLOSED NORMALLY CLOSED NORMALLY OPEN NORMALLY COMMON W * SIDE MARKER BK BK W W W W Y/BK * WIRING MAY BE DIFFERENT DEPENDING ON ENGINE SUPPLIED WITH THE CHIPPER. IF YOU HAVE A CHIPPER WITH AN ENGINE OTHER THAN CATERPILLAR OR JOHN DEERE, CONTACT J. P. CARLTON, FOR THE WIRING DIAGRAM. SEE THE ENGINE OWNER S MANUAL FOR THE ENGINE WIRING DIAGRAM 92
115 12 CHIPPER MACHINE WIRING CHIPPER WIRING DIAGRAM JOHN DEERE ENGINE COLOR CODES R = RED Y = YELLOW O = ORANGE PR = PURPLE GY = GRAY GR = GREEN BL = BLUE BK = BLACK BR = BROWN W = WHITE R/BK = RED/BLACK O/BK = ORANGE BLACK Y/BK = YELLOW/BLACK Y/R = YELLOW/RED O/R = ORANGE/RED BL/BK = BLUE/BLACK BL/R = BLUE/RED BR/BK = BROWN/BLACK GR/BK = GREEN/BLACK BK/Y = BLACK/YELLOW BK/BL = BLACK/BLUE BK/R = BLACK/RED BK/GR = BLACK/GREEN BK/BR = BLACK/BROWN J.P. CARLTON CO. DIVISION DAF INC CHECKED BY: 2512HD-10H CURRENT (AHF/1/04/10) R GR A 86 ACTUAL RELAY CONNECTIONS 6-WAY PLUG DESCRIPTION FUNCTION COLOR PIN # GROUND WHITE GD LEFT TURN YELLOW LT BRAKE BROWN BR RIGHT TURN GREEN RT NA NA AS TAIL LIGHTS BLACK TM * THE R/BK BK R + BAT 0000 AUTO FEED PLUS KEY SWITCH ACC 12GA R ENGINE COMPARTMENT RELAYS BK AUTO- FEED TRAILER PLUG LT WIRING AND COMPONENTS WITH THE DASH-DOT LINES DO NOT APPLY FOR A CHIPPER WITHOUT THE WINCH. THE EXTRA WIRING AND COMPONENTS REQUIRED FOR A CHIPPER SUPPLIED WITH THE WINCH ARE SHOWN WITH THE DASH-DOT LINES. THE WIRE FROM THE MAIN RELAY #87 TO THE FORWARD OVERRIDE RELAY ALL GROUNDS ARE #30 IS NOT ON A TO SIDE OF MOTOR CHIPPER WITH A WINCH. BLOCK W EC # CHANGED CIRCUITS FROM RED TO RED/BLACK AND RED WIRE TO FUSE TO ORANGE 12GA. 1ST SERIAL #1J9PF EC # C - WAS C; MOVED COOLER TO UPRIGHTS & REMOVED WIRING FOR FAN (ONLY ON THE 12" CHIPPERS). 1ST SERIAL #1J9PF Carlton PROFESSIONAL TREE EQUIPMENT BR GD RT TM AS EC # E - 30 AMP FUSE WAS ON BL WIRE TO RELAY #87; RED WIRES FROM BOTH RELAY'S #30 WERE TO BATTERY; R/BK WIRE FROM FEED SAFETY STOP WAS MARKED R; ADDED SIDE MARKERS & WIRING; ADDED TEMP SWITCH, COOLER NEG. RELAY & WIRING; ADDED TAG LIGHT. EC # D - ADDED COOLER, RELAY, AND REWIRED FOR COOLER. EC # C - RED WIRE FROM BATTERY WAS TO RELAY #86; RED WIRE FROM KEY SWITCH WAS TO RELAY #30; RELAY JUMP WIRE WAS FROM #86 TO #87A; WIRE FROM KILL SWITCH TO RELAY #85 WAS RED; & WIRE FROM KILL SWITCH TO GROUND WAS BLUE. EC # B2 - CORRECTED 6-WAY PLUG DESCRIPTION; ADDED TAIL LIGHT TEXT. + BATTERY EC # B - MOVED WIRE FROM BREAK AWAY. BR EC # A - RELAY, IN WIRING DIAGRAM, REDRAWN TO SHOW FUNCTION. 140HP TIER 3 JOHN DEERE ENGINE WIRING. USED ON 2012,2012HD,2512 AND 2512HD W/ OIL COOLER AND W/O HOUSTON STREET CONTROLLER(*WINCH OPTIONAL) R R EC # REVISED THE WIRING FOR THE WINCH. 1ST SN 1J9PF AND UP BK BR BK 87 BREAK AWAY BR W 30 87A BK CLUTCH SPEED PICK-UP A 12GA R CUTTER DISK SAFETY W MAIN W BR R/BK R/BK W 30AMP 12GA R A 10 AMP GR FUNCTION RELAYS FORWARD FORWARD STOP REVERSE OVERRIDE 87A R/BK R 12GA R STARTER A A A A R KILL SWITCH SAFETY - CUTTER DISK HOOD BL BK BK/BR BL/BK BK/BL BR/BK BR/BK GR/BK GR/BK FUNCTION BLOCK BK/BR LEFT RIGHT BR BRAKE BRAKE W FORWARD WINCH BK OVERRIDE SELECTOR R W BK BL TAG LIGHT W W BK BRAKE LIGHTS BK W W LEFT TAIL LIGHT RIGHT TAIL LIGHT SIDE SIDE FEED SAFETY STOP MARKER W MARKER GR Y BK 12GA O 20AMP W W W W 12GA O R/BK* BK SPARE 12GA R JOHN DEERE HARNESS BK/BL BK/BL R BL FEED SWITCHES W W W FORWARD REVERSE W COMMON SIDE MARKER OPEN NORMALLY CLOSED NORMALLY CLOSED NORMALLY OPEN NORMALLY COMMON W * SIDE MARKER BK BK W W W Y/BK * WIRING MAY BE DIFFERENT DEPENDING ON ENGINE SUPPLIED WITH THE CHIPPER. IF YOU HAVE A CHIPPER WITH AN ENGINE OTHER THAN CATERPILLAR OR JOHN DEERE, CONTACT J. P. CARLTON, FOR THE WIRING DIAGRAM. SEE THE ENGINE OWNER S MANUAL FOR THE ENGINE WIRING DIAGRAM 93
 3 0700314 WARNING FROZEN BATTERY 4 0700316")

116 12 CHIPPER DECAL ASSEMBLY CHIPPER LEFT SIDE ITEM # PART # DESCRIPTION DANGER FEED HOPPER DANGER MOVING PARTS (2 places) WARNING FROZEN BATTERY WARNING DIESEL FUEL NOTICE RADIATOR MAINTENANCE NOTICE CHIPPER KNIFE DISK LOCK TUBE DISK LOCK PIN GREASE DAILY CARLTON OX DECAL CARLTON 2512HD 94
117 12 CHIPPER DECAL ASSEMBLY CHIPPER RIGHT SIDE ITEM # PART # DESCRIPTION DANGER VINE TYPE MATERIAL WARNING PRESSURE LEAKS DANGER MOVING PARTS DANGER FEED WHEEL SERVICE BEARING RETAINER BOLT GREASE DAILY (2 places) DANGER INJURY/DEATH DANGER AIRBORNE CHIPS WARNING HEARING/EYE PROTECTION NOTICE BELT/BEARING MAINTENANCE NOTICE ADJUST PTO/CLUTCH DANGER NEVER RIDE ON, ETC NOTICE DECAL MAINTENANCE NOTICE CLUTCH MAINTENANCE NOTICE HYDRAULICS/LUBRICATION CARLTON 2512HD 95


118 12 CHIPPER DECAL ASSEMBLY CHIPPER RIGHT SIDE W/ AUXILIARY VIEWS ITEM # PART # DESCRIPTION YOKE LOCK PIN YOKE LOCK HOLE YOKE - LIFT MOTOR COUPLER GUARD (2 places) AUTO-FEED ON/OFF INFO. (Inside Control Box Cover) GREASE DAILY (2 PLACES) 96


119 12 CHIPPER DECAL ASSEMBLY CHIPPER REAR ITEM # PART # DESCRIPTION PUSH REVERSE DANGER SERVICING NEVER REACH DANGER MOVING PARTS CARLTON OX DECAL 97


120 12 CHIPPER DECAL ASSEMBLY CHIPPER OPTIONAL WINCH 98

121
122 Carlton PROFESSIONAL TREE EQUIPMENT PART ITEM DESCRIPTION QTY BATTERY BRACKET 3/8 X 7 X B 6-WAY CONNECTOR PLUG B TAG LIGHT A1 BATTERY HP31E 950CCA B PINTLE, 2 1/2" W/4 HOLE BRKT TRAILER JACK- 12" CHIPPER F TEKONSHA BREAKAWAY SWITCH 1 ** G1 #13 TORFLEX /2512 CHIPPER 1 ** /75R 17.5 TIRE - 12" CHIPPER 2 * WELDMENT,FRAME,NARROW 1 ** WELDMENT,FENDER,WIDE,RH 1 ** WELDMENT,FENDER,WIDE,LH WELDMENT,BATTERYBOX/FRONT MOUNT D-06 NUT,ELASTIC STOP, 3/8-16 UNC GR8 2 1 NOTES: * WIDE FRAME (HD) ** CONSULT FACTORY WHEN ORDERING 2012 SN - 1J9P60118C & UP 2512 SN - 1J9P60119D & UP FUCTION GROUP BUINESS LINE 1 FRAME AND TANKS CHIPPERS OWNER DOMAIN J.P. CARLTON COMPANY DIV. DAF INC. SERIAL NUMBERS SEE NOTES DESCRIPTION DUE TO CONTINUOUS DESIGN IMPROVEMENTS CONSULT FACTORY PRIOR TO ORDERING AXLE, TIRES AND RIMS 5 ISSUE R5 Revised
123 Carlton PROFESSIONAL TREE EQUIPMENT PART ITEM DESCRIPTION QTY 1 12A-0810ZI HEX C/S 1/2-13 x 1-1/4 UNC GR 8 ZINC ASSY,FUEL TANK ASSY,HYDRAULIC TANK ISOLATOR,HYD/FUEL TANK,SMALL A-08 LOCKWASHER 1/2" A-08 FLAT WASHER, NARROW 1/2 SAE GR8 2 FUCTION GROUP BUINESS LINE 1 FRAME AND TANKS CHIPPERS OWNER DOMAIN J.P. CARLTON COMPANY DIV. DAF INC. SERIAL NUMBERS 1J9PF & UP DESCRIPTION DUE TO CONTINUOUS DESIGN IMPROVEMENTS CONSULT FACTORY PRIOR TO ORDERING FUEL TANK/HYDRAULIC TANK ISSUE R5 Revised
124 Carlton PROFESSIONAL TREE EQUIPMENT PART ITEM DESCRIPTION QTY MACHINED PIN PIN,MACHINE 3/8"X13/32 LONG MASTER LOCK A PLASTIC GAS TANK CAP A1 GASKET- BAYONET MOUNT GAS CAP SPIRAL FUEL GAUGE- 18 1/2" /8MP-5/16BARB B-1010 SHCS x 1 1/4 UNC GR WELDMENT,FUEL TANK WELDMENT,PICK-UP TUBE BRACKET,VANDADLISM,FUEL TANK 1 5 FUCTION GROUP BUINESS LINE 1 FRAME AND TANKS CHIPPERS OWNER DOMAIN J.P. CARLTON COMPANY DIV. DAF INC. SERIAL NUMBERS 1J9PF &UP DESCRIPTION DUE TO CONTINUOUS DESIGN IMPROVEMENTS CONSULT FACTORY PRIOR TO ORDERING ASSY,FUEL TANK ISSUE R5 Revised
125 Carlton PROFESSIONAL TREE EQUIPMENT PART ITEM DESCRIPTION QTY PIN,MACHINE 3/8"X13/32 LONG 1 MACHINED PIN MASTER LOCK E HYDRAULIC IN TANK FILTER STF F HYDRAILIC IN TANK FILTER ELEME STRAINER- TANK MOUNTED LTM A HYDRAULIC SITE GAUGE W/TEMP D-0612 SHCS 3/8 X 1-1/2 NC GR WELDMENT, HYDRAULIC TANK BRACKET,VANDADLISM,HYRDRUALIC TANK 1 4 FUCTION GROUP BUINESS LINE 1 FRAME AND TANKS CHIPPERS OWNER DOMAIN J.P. CARLTON COMPANY DIV. DAF INC. SERIAL NUMBERS 1J9PF &UP DESCRIPTION DUE TO CONTINUOUS DESIGN IMPROVEMENTS CONSULT FACTORY PRIOR TO ORDERING ASSY,HYDRAULIC TANK ISSUE R5 Revised
126 Carlton PROFESSIONAL TREE EQUIPMENT FUCTION GROUP PART ITEM DESCRIPTION QTY RIVET-ALUMINUM W STEEL MANDREL MARKER LIGHT- 4" AMBER OVAL REFLECTOR- AMBER 2 3/8" 2 5 BUINESS LINE 2 ENGINE/ELECTRICAL CHIPPERS OWNER DOMAIN J.P. CARLTON COMPANY DIV. DAF INC. SERIAL NUMBERS 1J9P & UP DESCRIPTION DUE TO CONTINUOUS DESIGN IMPROVEMENTS CONSULT FACTORY PRIOR TO ORDERING INSTALL MARKER LIGHTS AND REFLECTORS ISSUE R5 Revised
127 Carlton PROFESSIONAL TREE EQUIPMENT * * ** ** 13 1 ** 2 ** FUCTION GROUP CUTTER WHEEL/BASE 6 BUINESS LINE CHIPPERS OWNER DOMAIN J.P. CARLTON COMPANY DIV. DAF INC. SERIAL NUMBERS SEE NOTES DESCRIPTION DUE TO CONTINUOUS DESIGN IMPROVEMENTS CONSULT FACTORY PRIOR TO ORDERING DRIVE BELTS/GUARDS CUTTER WHEEL BEARINGS ISSUE R5 Revised
128 Carlton PROFESSIONAL TREE EQUIPMENT PART ITEM DESCRIPTION QTY Bushing - 75 CW - F 2 7/16" SHEAVE 6/5V DISK Sheave 6/5V Disk A BUSHING, SF 2-1/2" SWITCH - LANYARD - CLOSED BELT 2012/2512 5V1000K F/B 2 7/16-9"&12" CHIPPER CW WELDMENT,BASE/THROAT, WELDMENT,TRANSITION WELDMENT,CUTTER WHEEL BEARING COVER BUSHING,DISCHARGE ADJUST ASSY,CUTTER WHEEL.40" DIA GUARD,BELT,BACK/SIDES MOUNT,BELT GUARD,FRONT/BOTTOM PLATE,BELT GUARD,JOHN DEER WELDMENT,LOCK PIN,DOOR WELDMENT,CUTTER WHEEL, LOCK PIN WIRE,LANYARD SWITCH,DOOR LOCK WIRE,LANYARD SWITCH,DOOR LOCK,LATCH WELDMENT,DISCHARGE ADJUST,HANDLE WELDMENT,BELT GUARD,TOP SPROCKET, DISCHARGE ADJUST WASHER,CUTTER WHEEL BEARING WELDMENT,DISCHARGE ADJUST COVER WELDMENT,MANUAL DISCHARGE ADJUST MOUNT 26 34A-12ZI FLAT WASHER 3/4" SAE NARROW GR 8 Z&YL NOTES: * SN - 1J9PF & UP ** 2512 SN - 1J9P & UP 2012 SN - 1J9PF & UP FUCTION GROUP BUINESS LINE 3 CUTTER WHEEL/BASE CHIPPERS OWNER DOMAIN J.P. CARLTON COMPANY DIV. DAF INC. SERIAL NUMBERS SEE NOTES DESCRIPTION DRIVE BELTS/GUARDS CUTTER WHEEL BEARINGS ISSUE R5 7 Revised DUE TO CONTINUOUS DESIGN IMPROVEMENTS CONSULT FACTORY PRIOR TO ORDERING
129 Carlton PROFESSIONAL TREE EQUIPMENT PART ITEM DESCRIPTION QTY /4x4 1/2x1/2 DE KSBC CHIPPER KNIFE BOLT NUT - 5/8" CHIPPER KNIFE BOLT - 5/8" WELDMENT,CUTTER WHEEL,40" DIA SHAFT,CUTTER WHEEL,12" RETAINER,CUTTER WHEEL SHAFT,40"DIA 8 FUCTION GROUP BUINESS LINE 3 CUTTER WHEEL/BASE CHIPPERS OWNER DOMAIN J.P. CARLTON COMPANY DIV. DAF INC. SERIAL NUMBERS SEE NOTES DESCRIPTION DUE TO CONTINUOUS DESIGN IMPROVEMENTS CONSULT FACTORY PRIOR TO ORDERING NOTES: 2012 SN - 1J9P60118C & UP 2512 SN - 1J9P60119D & UP CUTTER WHEEL ISSUE R5 Revised
130 Carlton PROFESSIONAL TREE EQUIPMENT PART ITEM DESCRIPTION QTY /8-11 X 5" ROD END A-0426 HEX C/S 1/4-20 x 3 1/4 UNC GR A-1218ZI HEX C/S 3/4-10 x 2-1/4 UNC GR8 Z&Y A-04ZI NUT,HEX, 1/4-20 UNC GR 5 ZINC A-10ZI NUT,HEX,5/8-11 UNC GR 8 Z&Y ANVIL WASHER,ANVIL ZI LOCKWASHER 3/4" USS GR8 ZINC A-10ZI FLAT WASHER 5/8 SAE GR8 ZINC 4 9 NOTES: 2012 SN - 1J9P60118C & UP 2512 SN - 1J9P60119D & UP FUCTION GROUP BUINESS LINE 3 BASE/CUTTER WHEEL CHIPPERS OWNER DOMAIN J.P. CARLTON COMPANY DIV. DAF INC. SERIAL NUMBERS SEE NOTES DESCRIPTION DUE TO CONTINUOUS DESIGN IMPROVEMENTS CONSULT FACTORY PRIOR TO ORDERING ANVIL MOUNTING ISSUE R5 Revised
131 Carlton PROFESSIONAL TREE EQUIPMENT 4 ** ** PART ITEM DESCRIPTION QTY BUSHING - 65/75 ENGINE - SF 2" HD TOP FEED MOTOR WHITE HD BOTTOM FEED MOTOR WHITE CYLINDER - 12" CHIPPER LIFT SPRING TIGHTENER FOR COUPLER, FEED WHEEL HUB A-0610ZI HEX C/S 3/8-16 x 1-1/4" UNC GR 8 ZINC A-0614ZI HEX C/S 3/8-16 x 1-3/4" UNC GR 8 ZINC A-0812 HEX C/S 1/2-13 x 1-1/2 UNC GR D-0812 SOC HD C/S 1/2-13 X 1-1/2" UNC BLCK A-08 NUT,HEX,1/2-13 UNC GR WELDMENT,LIFTING EAR PLATE, ASSY,YOKE BOTTOM 20" 1 14 ** ASSY,YOKE/TOP,20" WASHER,FEED WHEEL BEARING WELDMENT,TRAP DOOR,20" SPRING,LIFT 2 18 ** SPACER,1/2 FEED ENCLOSURE WASHER,FEED WHEEL COUPLER COVER MOUNT COVER,PVC,FEED WHEEL COUPLER WELDMENT,FEED WHEEL BRKT,TOP WELDMENT,FEED WHEEL BRKT,BTM WELDMENT,LOCK PIN,YOKE A-06 LOCKWASHER, 3/8" USS GR A-08 LOCKWASHER 1/2" A-06 FLAT WASHER, 3/8 USS GRD B-06 FLAT WASHER 3/8 USS GR 8 6 * * * * 10 NOTES: * FOR 2512/2512HD MACHINES USE THE FOLLOWING ITEM # USE ITEM # USE ITEM # USE ITEM # USE ** 2512 SN - 1J9P SN - 1J9PF FUCTION GROUP BUINESS LINE 4 FEED SYSTEM CHIPPERS OWNER DOMAIN J.P. CARLTON COMPANY DIV. DAF INC. SERIAL NUMBERS SEE NOTES DESCRIPTION DUE TO CONTINUOUS DESIGN IMPROVEMENTS CONSULT FACTORY PRIOR TO ORDERING FEED SYSTEM/TRAP DOOR FEED MOTORS ISSUE 21 R5 Revised
132 Carlton PROFESSIONAL TREE EQUIPMENT 2 1 ** 1 ** 3 *** 4 ** NOTES: * FOR 2512/2512HD MACHINES USE THE FOLLOWING ITEM # USE ITEM # USE ** 2012 SN - 1J9PF & UP 2512 SN - 1J9P & UP *** 2012 SN - 1J9P60117E & UP 2512 SN - 1J9P60115E & UP FUCTION GROUP * PART ITEM DESCRIPTION QTY * 1 ** FB 2" LINKBELT-FEEDWHEEL, CHIP WELDMENT,YOKE/BTM, *** WELDMENT,FEED WHEEL/BTM, ** SPACER,FEED WHEEL BEARING 2 11 BUINESS LINE 4 FEED SYSTEM CHIPPERS OWNER DOMAIN J.P. CARLTON COMPANY DIV. DAF INC. SERIAL NUMBERS SEE NOTES DESCRIPTION DUE TO CONTINUOUS DESIGN IMPROVEMENTS CONSULT FACTORY PRIOR TO ORDERING BOTTOM FEED ENCLOSURE ISSUE R5 Revised
133 Carlton PROFESSIONAL TREE EQUIPMENT 2 1 ** 3 1 ** NOTES: * FOR 2512/2512HD MACHINES USE THE FOLLOWING ITEM # USE ITEM # USE ** 2012 SN - 1J9PF O2 & UP 2512 SN - 1J9P & UP FUCTION GROUP 4 FEED SYSTEM PART ITEM DESCRIPTION QTY * * 1 ** FB 2" LINKBELT-FEEDWHEEL, CHIP WELDMENT,YOKE/TOP, WELDMENT,FEED WHEEL/TOP, BUINESS LINE CHIPPERS OWNER DOMAIN J.P. CARLTON COMPANY DIV. DAF INC. SERIAL NUMBERS SEE NOTES DESCRIPTION DUE TO CONTINUOUS DESIGN IMPROVEMENTS CONSULT FACTORY PRIOR TO ORDERING TOP FEED ENCLOSURE ISSUE R5 Revised
134 Carlton PROFESSIONAL TREE EQUIPMENT *** FUCTION GROUP 5 INFEED SYSTEM 13 BUINESS LINE CHIPPERS OWNER DOMAIN J.P. CARLTON COMPANY DIV. DAF INC. SERIAL NUMBERS SEE NOTES DESCRIPTION DUE TO CONTINUOUS DESIGN IMPROVEMENTS CONSULT FACTORY PRIOR TO ORDERING INFEED SYSTEM HYDRAULIC CONTROL VALVES ISSUE R5 Revised
135 Carlton PROFESSIONAL TREE EQUIPMENT PART ITEM DESCRIPTION QTY ** RIVET-ALUMINUM W STEEL MANDREL ENERGY LIFT CYLINDER VALVE SUN CHIPPER BLOCK A40726VC A1 TAIL LIGHT - 12" CHIPPER SWITCH - LANYARD - CLOSED LANYARD ONLY FOR SWITCH MARKER LIGHT- 4" RED OVAL REFLECTOR - RED 2 3/8" WELDMENT,INFEED,64X PLATE,TAIL LIGHT COVER,LH MOUNT,FEED WHEEL CONTROL,LINKAGE TUBING,CONTROL BAR MOUNT,CONTROL BAR,64" BUSHING,CONTROL BAR SPACER,CONTROL ARM TUBING,LOCK PIN,FOLDING END TABLE PLATE,TAIL LIGHT COVER,RH 1 18 *** ASSY,ELECTRONIC CONTROL LINKAGE FLATBAR,ELECTRONIC ENGAGE LINKAGE 20 41E-04 GREASE FITTING 1/4-28 STRAIGHT 4 14 *** 2012 SN - 1J9P60118C & UP *** 2512 SN - 1J9P UP FUCTION GROUP BUINESS LINE 5 INFEED SYSTEM CHIPPERS OWNER DOMAIN J.P. CARLTON COMPANY DIV. DAF INC. SERIAL NUMBERS SEE NOTES DESCRIPTION DUE TO CONTINUOUS DESIGN IMPROVEMENTS CONSULT FACTORY PRIOR TO ORDERING * CONSULT FACTORY FOR HYDRAULIC HOSES AND FITTINGS. ** FOR 2012/2012HD MODELS USE THE FOLLOWING: ITEM # USE FOR 48" x 25" USE FOR 48" x 20" USE INFEED SYSTEM HYDRAULIC CONTROL VALVES ISSUE R5 Revised
136 Carlton PROFESSIONAL TREE EQUIPMENT PART ITEM DESCRIPTION QTY HARDENED SPRING BUSHING-1/2" LIMIT SWITCH- OMRON A-0812ZI BOLT,HEX C/S 1/2-13 x 1-1/2 UNC GR8 Z&Y A-0814ZI BOLT,HEX C/S 1/2-13 x 1-3/4 UNC GR8 Z&Y A-0816ZI BOLT,HEX C/S 1/2-13 x 2 UNC GR8 Z&Y A-0606ZI HEX C/S 3/8-16 x 3/4" UNC GR 8 ZINC A-0608ZI HEX C/S 3/8-16 x 1" UNC GR 8 ZINC A-0610ZI HEX C/S 3/8-16 x 1-1/4" UNC GR 8 ZINC MOUNT,FEED CONTROL LINKAGE SPRING PLATE,FEED CONTROL LINKAGE SPRING,FEED CONTROL LINKAGE WELDMENT,ELECT. CNTRL. LINKAGE MOUNT WELDMENT,ELECTRONIC LINKAGE COVER BUSHING,SCHA BEARING A3248,ELECTRONIC LINKAGE PLATE,ELECTRONIC LINKAGE COVER,TOP A-08 NUT,STOVER LOCK, 1/2-13 UNC GR A-06 LOCKWASHER, 3/8" USS GR A-06 FLAT WASHER, 3/8 USS GRD B-08 FLAT WASHER 1/2" SAE-W GR NOTES: 2512 SN - 1J9P & UP 2012 SN - 1J9P60118C & UP FUCTION GROUP BUINESS LINE 5 INFEED SYSTEM CHIPPERS OWNER DOMAIN J.P. CARLTON COMPANY DIV. DAF INC. SERIAL NUMBERS SEE NOTES DESCRIPTION DUE TO CONTINUOUS DESIGN IMPROVEMENTS CONSULT FACTORY PRIOR TO ORDERING ELECTRONIC FEED CONTROLS ISSUE R5 Revised
137 Carlton PROFESSIONAL TREE EQUIPMENT PART ITEM DESCRIPTION QTY WELDMENT,DISCHARGE ADJUST COVER WELDMENT,DISCHARGE ELBOW WELDMENT,DISCHARGE CHIP REFLECTOR WELDMENT,REAR JACK WELDMENT,DISCHARGE ELBOW/DN ROD WELDMENT,DICHARGE NECK WELDMENT,DISCHARGE ADJUST HANDLE WELDMENT,DISCHARGE ADJUST SPROCKET CHAIN,DISCHARGE ADJUST 1 16 FUCTION GROUP BUINESS LINE 6 DISCHARGE SYSTEM CHIPPERS OWNER DOMAIN J.P. CARLTON COMPANY DIV. DAF INC. SERIAL NUMBERS 1J9P60118C & UP DESCRIPTION DUE TO CONTINUOUS DESIGN IMPROVEMENTS CONSULT FACTORY PRIOR TO ORDERING DISCHARGE SYSTEM ISSUE R5 Revised
138 1. Panel description and electrical pinout A RP h Reve A uto- PR B C Ref. Description Signal type INput/OUTput A B C Back-lit display for visualizing: Heat engine RPM D IN (PNP NO, can be set to NPN) max. input frequency: 10KHz (1) Working hours - - auto-feed function ON - - reverse status ON - - Setting key: it allows to decrease the value of the parameter being set Setting key: to enter the parameters setting Positive output EVS solenoid valve power supply Positive output EVR solenoid valve power supply Positive input - monitor power supply (2) OUT (+V b*) 3A max OUT (+V b*) 3A max IN (+Vb*) Pinout 4-way Delphi connector A D Faston female single C
139 Ground input monitor power supply IN (GND) B * RPM 74 h Reverse A uto-feed PROG 41 A 57.5 B C G D F E A Silk-screened front panel in polyester B Front frame in black ABS C Housing in black ABS D Black metal supporting bracket E Black rubber fairlead-ring F Grey multipolar wiring 5x0.75mm 2, L = 250mm with 4-way Delphi connector, male contacts (cod ). G Wiring for EVR solenoid valve, with single female faston connector AMP cod or
140 2. Operating After turning on the monitor, a 2 seconds test is automatically carried out: all display segments are on; after such a test, working hours are displayed for about 3 seconds, then engine RPMs are displayed and the other display indicators show the working status: RPM a b h Reverse c d Auto-Feed Picture A a) if ON, engined RPMs are displayed; b) if ON, working hours are displayed; c) if ON, reverse phase is currenlty ongoing (emergency condition) d) if ON, auto-feed procedure is currently ongoing (emergency condition). During standard operation the monitor detects engine RPMs. In case they go below the minimum programmed value, the monitor enables one of the emergency procedures listed below. All emergency procedures are back off, after the RPMs are restored over the maximum programmed value. The monitor is now back in standard working condition. Emergency procedures are different depending on the "type" parameter programmed.
141 3. Emergency procedure type 0 This procedure is applied on those machines only where the ACTIVATION of the solenoid valves allows to protect the engine against excessive stress. "BACK" = reverse time 12 V 0 V EVR 12 V 0 V EVS RPM MAX RPM MIN 0 RPM DISPLAY INDICATIONS Auto-Feed Auto-Feed Auto-Feed Auto-Feed Reverse Reverse Reverse Reverse Reverse
142 4. Emergency procedure type 1 This procedure is applied on those machines only where the DE-ACTIVATION of the solenoid valves allows to protect the engine against excessive stress. "BACK" = reverse time 12 V 0 V EVR 12 V 0 V EVS RPM MAX RPM MIN 0 RPM DISPLAY INDICATIONS Auto-Feed Auto-Feed Auto-Feed Auto-Feed Auto-Feed Reverse Reverse Reverse Reverse Reverse
143 In case RPMs exceed the RPM maximum value during the reverse interval (back), the activation sequence shall be as shown below: 12 V 0 V EVR type 0 "BACK" = reverse time 12 V 0 V EVS RPM MAX RPM MIN 0 RPM DISPLAY INDICATIONS Auto-Feed Auto-Feed Auto-Feed Reverse Reverse Reverse Reverse 12 V EVR type 1 "BACK" = reverse time 0 V 12 V EVS 0 V RPM MIN 0 RPM DISPLAY INDICATIONS Auto-Feed Auto-Feed Auto-Feed Auto-Feed Reverse Reverse Reverse Reverse
144 During operation, working hours can always be displayed by switching for a BRIEF INTERVAL key (+) or (-). The display shows now the ref. indicator b on page 7 and working hours are displayed for 3 seconds. During this interval the EVS solenoid valve is energized or de-energized by the monitor (according to what programmed in type parameter) only if the auto-feed function has been enabled (see chapter 5.3), whereas the EVR solenoid valve is never energized. 5. Range of parameters displayed Description Range Engine RPMe steps of 10 RPMs Working hours hours, steps of 0.1 hour ( 6 minutes ); once are reached, then steps of 1 hour until 9999 hours. Working hours increase only if RPMs > Setting The device has two setting phases: user setting and "manufacturer" setting. Both programming phases can be carried out with the engine operating (RPMs > 500). The operator shall complete the procedure for each phase by confirming all parameters at a time to allow all modified parameters are stored. Otherwise, if the operator is within one programming phase and no key is selected for an interval of 7 seconds, the monitor quits the phase WITHOUT storing any executed changes. The user phase permits programming of the following parameters: Minimum value for RPMs Maximum value for RPMs Machine type selection (with or without reverse) Reverse time (not used if the reverse valve is not present). The manufacturer setting allows programming of the following parameter: Pulses/revolution for engine RPMs counting (Set By Factory) NOTES: the parameter value is kept displayed during each programming phase; the parameter name is displayed only while going from one parameter to the next one or when keys + (plus) and (-) minus are simultaneously pressed. For safety purposes, the EVS solenoid valve is energized or de-energized (according to what programmed in type parameter) by the monitor each time a programming phase is entered only if the auto-feed function has been enabled (see par. 5.3), whereas the EVR solenoid valve is never energized.
145 7. User setting To enter the user programming phase, with the monitor ON keep key PROG pressed for at least 2 seconds and until the first parameter "HI" (i.e. RPMs minimum permitted value) is displayed. After an interval of 1 second the current programmed value is displayed (es. 4800RPM). RPM RPM h h Reverse 1 sec. Auto-Feed Reverse Auto-Feed press both "+" and "-" RPM h Reverse 1 sec. Auto-Feed The parameter is changed by using key + or - ; switching key PROG allows to go to next parameter LO (i.e. RPMs minimum permitted value). It is displayed with same procedure. RPM RPM h h Reverse 1 sec. Auto-Feed Reverse Auto-Feed press both "+" and "-" RPM h Reverse 1 sec. Auto-Feed The parameter is changed by using key + or - ; switching key PROG allows to go to next parameter TYPE (i.e. machine with reverse solenoid valve or without reverse valve). It is displayed with same procedure.
146 RPM RPM h h Reverse 1 sec. Auto-Feed Reverse Auto-Feed press both "+" and "-" RPM h Reverse 1 sec. Auto-Feed The parameter is changed by using key + or - ; switching key PROG allows to go to next parameter BACK (i.e. activation time of the reverse solenoid valve, in ms). It is displayed with same procedure. RPM RPM h h Reverse 1 sec. Auto-Feed Reverse Auto-Feed press both "+" and "-" RPM h Reverse 1 sec. Auto-Feed The parameter is changed by using key + or - ; switching key PROG allows to store all data entered and quit setting - the display will show for 1 second following indication: RPM h Reverse Auto-Feed.
147 How to activate and de-activate the auto-feed function The device has a further programming phase, meant for activating and de-activating the auto-feed function. This function includes the emergency procedures previously described. NOTE: when the auto-feed function is de-activated, the monitor features exclusively revolution counter function and hours counter function; the reverse solenoid valve EVR is always de-energized and the EVS safety valve can be deenergized (if type 0 operation type is selected) or energized (if type 1 operation type is selected). The monitor is supplied as a standard with the auto-feed function enabled; in fact, when the monitor is switched-on with engine off (RPM =0), the ref. indicator "d" picture "A" pag. 7 is on. Press key (-) minus for at least 3 seconds to de-activate the auto-feed function and until the sequence below is displayed: RPM RPM RPM h h h Reverse 0.5 sec Auto-Feed Reverse Auto-Feed Reverse Auto-Feed 0.5 sec 0.5 sec Once the sequence has been completed, engine RPMs are displayed but the ref. indicator "d" picture "A" page 7 is off; to activate again the auto-feed function press key (+) plus for at least 3 seconds until the sequence below is displayed: RPM RPM RPM h h h Reverse Auto-Feed Reverse Auto-Feed Reverse 0.5 sec 0.5 sec 0.5 sec Auto-Feed Once the sequence has been completed, engine RPMs are displayed and the ref. indicator "d" picture "A" page 7 is on.
148 8. Range of programmable parameters Description Programmable range Default values LOW (Minimum RPM value (*) RPM, steps 10RPM 2240 permitted) HIGH (Maximum RPM value 2000(*) 5000 RPM, steps 2440 permitted) 10RPM BACK (reaction time for ms, steps 10ms 300 reverse valve) PULSES (number of pulse/rev, steps pulses/revolution for RPM) pulse/rev TYPE (reverse function is ON) ON or OFF ON (*) LOW value shall never exceed HIGH value (and vice versa), and priority shall be given to the LOW value with 20RPMs hysteresis; e.g: if a LOW value is programmed equal to 1980RPM, the HIGH value shall not be lower than 2000RPM; Now, by releasing all keys, the monitor operates under standard condition and the initial test is carried out again. 7. Technical features Supply voltage Vdc Max. current absorption at 16 Vdc (excluding outputs) 200 ma Protection degree IP 66 Operating temperature range -20 / +70 C Storage temperature range -25 / +85 C Mechanical vibrations resistance 2 g random Reference standards for the project MC14982 Autofeed Settings for Carlton Chippers Engine Make Engine Model HP Rating High Setting Low Setting CAL Vanguard Big Block V Twin 35 HP Kubota D1105T 33 HP Kohler CH740 27HP Kubota V3300T 88 HP Kubota V3800T 99HP John Deere 99 HP John Deere 140 HP John Deere 6068T 173 HP John Deere 6068H 250 HP
149 Axles equipped with Dexter's E-Z Lube feature can be periodically lubricated without removing the hubs from the axle. This feature consists of axle spindles that have been specially drilled and assembled with grease fittings in their ends. When grease is pumped into the fitting, it is channeled to the inner bearing and then flows back to the outer bearing and eventually back out the grease cap hole. 1. Remove the rubber plug from the end of the grease cap. 2. Place a standard grease gun onto the grease fitting located in the end of the spindle. Make sure the grease gun nozzle is fully engaged on the fitting. 3. Pump grease into the grease fitting. The old, displaced grease will begin to flow back out the cap around the grease gun nozzle. 4. When the new, clean grease is observed, remove the grease gun, wipe off any excess, and replace the rubber plug in the cap. The E-Z Lube feature is designed to allow immersion in water. Axles not equipped with E-Z Lube are not designed for immersion and bearings should be repacked after each immersion. If hubs are removed from an axle with an E-Z Lube feature, it is imperative that the seals be replaced before bearing lubrication. Otherwise, the chance of grease getting on brake linings is greatly increased. NOTE: The convenient lubrication provisions of the E-Z Lube must not replace periodic inspection of the bearings.
150 CAUTION Do not mix Lithium, calcium, sodium or barium complex greases due to possible compatibility problems. When changing from one type of grease to another, it is necessary to insure all the old grease has been removed. If your axles are equipped with oil-lubricated hubs, then your lubrication procedure is to periodically fill the hub with high quality hypoid gear oil to the level indicated on the clear plastic oil cap. The oil can be filled through the rubber plug hole in the cap. Recommended Wheel Bearing Lubrication Specifications Grease: Thickener Type... Lithium Complex Dropping Point C (446 F) minimum Consistency... NLGI No. 2 Additives... EP, Corrosion & Oxidation Inhibitors Base Oil... Solvent Refined Petroleum Oil Base Oil C (104 F) 150cSt(695 SUS) Min. Viscosity Index Minimum Pour Point C (14 F) Minimum Approved Sources: Mobil Oil... Mobilgrease HP Exxon/Standard... Ronex MP Kendall Refining Co.... Kendall L-427 Ashland Oil Co.... Valvoline Val-plex EP Grease Pennzoil Prod. Co.... Premium Wheel Bearing Grease 707L Oil: SAE 90 Hypoid Gear (Hypoid Rear Axle Oil) Use only with hubs equipped with oil option. Approved Sources: Union Oil Co.... Union MP, Gearlube - LS Exxon Co. USA... Gear Oil GX 80W-90 Mobil Oil Corp..... Mobilube SHC 75W-90 Pennzoil Prod. Co.... Multipurpose Gear Lubricant 4092,... Multipurpose Gear Lubricant 4096
151

152 Product Features No need to pull the hubs to repack the bearings OR replace the seals when checking the brakes. Pre-set adjustment means installation is easy and human error is virtually eliminated in bearing adjustment. Pre-lubricated at the bearing factory providing resistance to contamination. Sealed for life, which means increased durability and reliability and no more bearing maintenance. 5 year or 100,000 mile warranty against defects in material and workmanship.
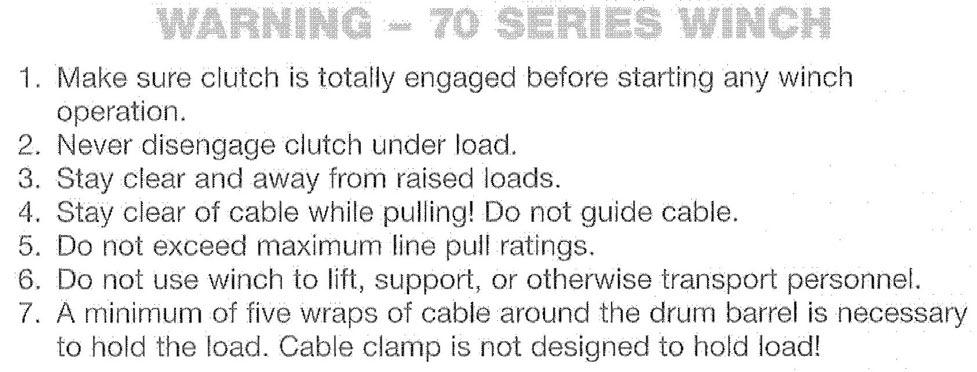
153 WINCH INFORMATION
Drum Style Brush Chippers Model 2518
 Drum Style Brush Chippers Model 2518 Machine Serial # Engine Model & Spec # Engine Serial # PTO/Clutch Model & Spec # Clutch Serial # Purchase Date Dealer Carlton J.P.Carlton Company Div. D.A.F. Inc. 121
Wood Chipper Model C550M Operator's Manual
 Wood Chipper Model C550M Operator's Manual THIS MANUAL MUST BE READ AND UNDERSTOOD BEFORE ANYONE OPERATES THIS MACHINE! Manual# 990023 Revised 01/2010 YOU MUST FILL OUT YOUR WARRANTY REGISTRATION TO ACTIVATE
2000-lb Hand Winch Truck Crane
 2000-lb Hand Winch Truck Crane Owner s Manual WARNING: Read carefully and understand all ASSEMBLY AND OPERATION INSTRUCTIONS before operating. Failure to follow the safety rules and other basic safety
Wood Chipper Model C551H Operator's Manual
 Wood Chipper Model C551H Operator's Manual THIS MANUAL MUST BE READ AND UNDERSTOOD BEFORE ANYONE OPERATES THIS MACHINE! Manual# 990023 Revised 01/2010 YOU MUST FILL OUT YOUR WARRANTY REGISTRATION TO ACTIVATE
3000-Lb. Vehicle Positioning Jacks. Owner s Manual
 3000-Lb. Vehicle Positioning Jacks Owner s Manual WARNING: Read carefully and understand all ASSEMBLY AND OPERATION INSTRUCTIONS before operating. Failure to follow the safety rules and other basic safety
150-Lb. Drywall and Panel Hoist
 150-Lb. Drywall and Panel Hoist Owner s Manual WARNING: Read carefully and understand all ASSEMBLY AND OPERATION INSTRUCTIONS before operating. Failure to follow the safety rules and other basic safety
Maintenance and Repair
 Maintenance and Repair WARNING ALWAYS shut off the engine, remove key from ignition, make sure the engine is cool, and disconnect the spark plug and positive battery terminal from the battery before cleaning,
Table of Contents. Safety symbols... 3 Assembly 6. Operation Maintenance Troubleshooting 11. Storage. 12. Notes. 13
 Table of Contents Safety symbols... 3 Assembly 6 Operation... 8 Maintenance... 10 Troubleshooting 11 Storage. 12 Notes. 13 2 Safety Information Attention; this machine can be dangerous! All operators should
Adjustable Steel Welding Table
 Adjustable Steel Welding Table Owner s Manual WARNING: Read carefully and understand all ASSEMBLY AND OPERATION INSTRUCTIONS before operating. Failure to follow the safety rules and other basic safety
Auto-Locking Pintle Hook
 Auto-Locking Pintle Hook 7-Ton Capacity Owner s Manual WARNING: Read carefully and understand all ASSEMBLY AND OPERATION INSTRUCTIONS before operating. Failure to follow the safety rules and other basic
Heavy-Duty Welding Fabrication Table
 Heavy-Duty Welding Fabrication Table with Fix-Up Kit Owner s Manual WARNING: Read carefully and understand all ASSEMBLY AND OPERATION INSTRUCTIONS before operating. Failure to follow the safety rules and
Champion Chippers OPERATOR S MANUAL. Operation & Safety. Includes Model: CX850 CX851. Part #
 OPERATOR S MANUAL Champion Chippers Operation & Safety Includes Model: CX850 CX851 Part # 990026 YOU MUST FILL OUT YOUR WARRANTY REGISTRATION TO ACTIVATE YOUR WARRANTY AND TO QUALIFY FOR PARTS SERVICE!!
Auto-Locking Trailer Coupler
 Auto-Locking Trailer Coupler 7-Ton Capacity Owner s Manual WARNING: Read carefully and understand all ASSEMBLY AND OPERATION INSTRUCTIONS before operating. Failure to follow the safety rules and other
Mulcher Operators Manual
 Mulcher Operators Manual Skid Pro Attachments PO Box 982 Alexandria, MN 56308 October 2015 1 2 Contents 1. Introduction And Warranty... 4 1.1 Introduction... 4 1.2 Warranty... 4 2. Component Identification...
Heavy-Duty Drywall Dolly Cart
 Heavy-Duty Drywall Dolly Cart Owner s Manual WARNING: Read carefully and understand all ASSEMBLY AND OPERATION INSTRUCTIONS before operating. Failure to follow the safety rules and other basic safety precautions
ATV Log Arch and Holder
 ATV Log Arch and Holder Owner s Manual WARNING: Read carefully and understand all ASSEMBLY AND OPERATION INSTRUCTIONS before operating. Failure to follow the safety rules and other basic safety precautions
1000-lb Hydraulic Truck Crane
 1000-lb Hydraulic Truck Crane Owner s Manual WARNING: Read carefully and understand all ASSEMBLY AND OPERATION INSTRUCTIONS before operating. Failure to follow the safety rules and other basic safety precautions
Drum Deheader. Owner s Manual
 Drum Deheader Owner s Manual WARNING: Read carefully and understand all ASSEMBLY AND OPERATION INSTRUCTIONS before operating. Failure to follow the safety rules and other basic safety precautions may result
Operator's Manual. VC-60 & VC-60 Plus Harper Industries, Inc. 7/03 Part No
 Operator's Manual VC-60 & VC-60 Plus 2003 Harper Industries, Inc. 7/03 Part No. 970066 Thank you for purchasing a Harper/Goossen Verti-Cutter. As with all Harper/Goossen products, the Harper/Goossen Verti-Cutter
Angle Grinder Holder
 Angle Grinder Holder Owner s Manual WARNING: Read carefully and understand all ASSEMBLY AND OPERATION INSTRUCTIONS before operating. Failure to follow the safety rules and other basic safety precautions
Electric Chainsaw Sharpener With Bar Mount
 Electric Chainsaw Sharpener With Bar Mount Owner s Manual WARNING: Read carefully and understand all ASSEMBLY AND OPERATION INSTRUCTIONS before operating. Failure to follow the safety rules and other basic
Sawhorse with Chainsaw Holder
 Sawhorse with Chainsaw Holder Owner s Manual Chainsaw not included. WARNING: Read carefully and understand all ASSEMBLY AND OPERATION INSTRUCTIONS before operating. Failure to follow the safety rules and
Manual Chain Hoist. Owner s Manual
 Manual Chain Hoist Owner s Manual WARNING: Read carefully and understand all ASSEMBLY AND OPERATION INSTRUCTIONS before operating. Failure to follow the safety rules and other basic safety precautions
Air-Operated Waste Oil Drainer
 Air-Operated Waste Oil Drainer 20-Gallon Tank Owner s Manual WARNING: Read carefully and understand all ASSEMBLY AND OPERATION INSTRUCTIONS before operating. Failure to follow the safety rules and other
Hydraulic Bead Breaker Kit
 Hydraulic Bead Breaker Kit Owner s Manual WARNING: Read carefully and understand all ASSEMBLY AND OPERATION INSTRUCTIONS before operating. Failure to follow the safety rules and other basic safety precautions
RAPID ROLLER OPERATOR S MANUAL. L&C ENTERPRISES - U.S.A, Inc N.75 Drive, Escanaba, MI OWNER S NAME MODEL
 RAPID ROLLER OPERATOR S MANUAL OWNER S NAME MODEL SERIAL NUMBER DATE OF PURCHASE L&C ENTERPRISES - U.S.A, Inc. 6652 N.75 Drive, Escanaba, MI 49829 906-786-1008 1-866-786-1009 LIMITED WARRANTY L&C Enterprises-USA,
12 Volt Heavy-Duty Air Inflator
 12 Volt Heavy-Duty Air Inflator Owner s Manual WARNING: Read carefully and understand all ASSEMBLY AND OPERATION INSTRUCTIONS before operating. Failure to follow the safety rules and other basic safety
Read instructions carefully and follow rules for safe operation. Failure to do so could result in serious injury. Fradan Manufacturing Corp.
 OPERATOR MANUAL FRADAN POWER BLOWERS Part No. 888-011-222-0 Read instructions carefully and follow rules for safe operation. Failure to do so could result in serious injury. Fradan Manufacturing Corp.
4-Claw Log Lifting Tongs
 4-Claw Log Lifting Tongs Owner s Manual WARNING: Read carefully and understand all ASSEMBLY AND OPERATION INSTRUCTIONS before operating. Failure to follow the safety rules and other basic safety precautions
SAVE THESE INSTRUCTIONS
 12 Volt High-V Volume Air Inflator Owner s Manual WARNING: Read carefully and understand all ASSEMBLY AND A OPERATION INSTRUCTIONS before operating. Failure to follow the safety rules and other basic safety
Voltmaster Centrifugal Trash Pumps
 Voltmaster Centrifugal Trash Pumps Model TSP2, TSP3 and TSP4 Owner s Manual February 2011 Table of Contents 1 Introduction............................ 1 1.1 Read before using..................... 1 1.2
Package Contents Part A (3) I-Beam (1) Base (2) Other parts
 I-Beam (1) Base (2) Other parts") Page 1 Installation Instructions for 81245 Adjustable Height Gantry Crane 1-Ton Capacity Table of Contents Important Safety Information pg. 2 Specific Operation Warnings pg. 2 Main Parts of Product pg.
Page 1 Installation Instructions for 81245 Adjustable Height Gantry Crane 1-Ton Capacity Table of Contents Important Safety Information pg. 2 Specific Operation Warnings pg. 2 Main Parts of Product pg.
110 Volt/12 Volt Portable Inflator
 110 Volt/12 Volt Portable Inflator Owner s Manual WARNING: Read carefully and understand all ASSEMBLY AND OPERATION INSTRUCTIONS before operating. Failure to follow the safety rules and other basic safety
WOOD CHIPPER WC1103 5PQ (8/02/12)
") O P E R A T O R ' S M A N U A L WOOD CHIPPER WC1103 5PQ990101 (8/02/12) To the Owner; Thank-You for choosing a quality product from Frontier Equipment. We strive to give you the best equipment and the
O P E R A T O R ' S M A N U A L WOOD CHIPPER WC1103 5PQ990101 (8/02/12) To the Owner; Thank-You for choosing a quality product from Frontier Equipment. We strive to give you the best equipment and the
MODEL HD99 HYDRAULIC ONE MAN TOWABLE EARTHDRILL
 DO NOT THROW AWAY IMPORTANT MANUAL MODEL HD99 HYDRAULIC ONE MAN TOWABLE EARTHDRILL Operators Manual GROUND HOG, INC. P.O.BOX 290 San Bernardino, CA. 92402 Phone (909) 478-5700 Fax (909) 478-5710 E-mail:
TurfMaker TAILGATE MULCHER
 TurfMaker TAILGATE MULCHER OPERATORS MANUAL AND PARTS LIST FOREWORD Congratulations on your purchase of a TurfMaker Tailgate Mulcher. You will find this to be one of the most versatile and work-saving
3-Pt. Quick Hitch. Owner s Manual
 3-Pt. Quick Hitch Owner s Manual WARNING: Read carefully and understand all ASSEMBLY AND OPERATION INSTRUCTIONS before operating. Failure to follow the safety rules and other basic safety precautions may
2-in-1 Air Operated Waste Oil Drainer
 2-in-1 Air Operated Waste Oil Drainer 24-Gallon Tank Owner s Manual WARNING: Read carefully and understand all ASSEMBLY AND OPERATION INSTRUCTIONS before operating. Failure to follow the safety rules and
Large Hydraulic Bead Breaker
 Large Hydraulic Bead Breaker Owner s Manual WARNING: Read carefully and understand all ASSEMBLY AND OPERATION INSTRUCTIONS before operating. Failure to follow the safety rules and other basic safety precautions
12V Oil Extractor Pump
 12V Oil Extractor Pump Owner s Manual WARNING: Read carefully and understand all ASSEMBLY AND OPERATION INSTRUCTIONS before operating. Failure to follow the safety rules and other basic safety precautions
600-lb. Trailer Dolly
 600-lb. Trailer Dolly Owner s Manual WARNING: Read carefully and understand all ASSEMBLY AND OPERATION INSTRUCTIONS before operating. Failure to follow the safety rules and other basic safety precautions
INFEED HOPPER COMPONENTS. Parts may not be exactly as shown. Bandit. Copyright 1/12
 INFEED HOPPER COMPONENTS 80 INFEED HOPPER COMPONENTS 1. 626-200019 Folding Pan for Infeed Hopper 2 a. 900-4901-83 Folding Pan Spring Lock & Trap Door Lock b. 900-7900-93 Black Rubber Cap (Not Shown) 3
Garden Hose Reel with 3/4In. x 100Ft. Hose. Owner s Manual
 Garden Hose Reel with 3/4In. x 100Ft. Hose Owner s Manual WARNING: Read carefully and understand all ASSEMBLY AND OPERATION INSTRUCTIONS before operating. Failure to follow the safety rules and other basic
VICE MOUNTED BEAD ROLLER
 VICE MOUNTED BEAD ROLLER Owner s Manual WARNING: Read carefully and understand all ASSEMBLY AND OPERATION INSTRUCTIONS before operating. Failure to follow the safety rules and other basic safety precautions
Model SP4012 Equipped with a 33HP Kubota Diesel Engine
 Model Equipped with a 33HP Kubota Diesel Engine Machine Serial # Engine Model & Spec # Engine Serial # Purchase Date Dealer Carlton J.P.Carlton Company Div. D.A.F. Inc. 121 John Dodd Road Spartanburg,
Pressure Washer Hose Reel
 Pressure Washer Hose Reel Owner s Manual WARNING: Read carefully and understand all ASSEMBLY AND OPERATION INSTRUCTIONS before operating. Failure to follow the safety rules and other basic safety precautions
MODELS 1324 & 1624 & 1824
 THE MODELS 1324 & 1624 & 1824 HYDRAULIC TRENCHERS CONGRATULATIONS! You are now the proud owner of a BARRETO trencher. Please take a moment of your time to look over the following information. Familiarize
50 Ft. Retractable Cord Reel
 50 Ft. Retractable Cord Reel with Triple Tap Owner s Manual WARNING: Read carefully and understand all ASSEMBLY AND OPERATION INSTRUCTIONS before operating. Failure to follow the safety rules and other
W & A 12 ROW TOP LEVELING STACKER LEVEL BANDER
 W & A 12 ROW TOP LEVELING STACKER LEVEL BANDER NO. 3640 OPERATOR S MANUAL TO THE OWNER: Congratulations on your purchase of a new W & A Top Leveling Stacker Level Bander. Your selection is an indication
MK AUGERS POWER SWING KIT ASSEMBLY & OPERATION MANUAL
 MK AUGERS POWER SWING KIT ASSEMBLY & OPERATION MANUAL Read this manual before using product. Failure to follow instructions and safety precautions can result in serious injury, death, or property damage.
16 Inch Surface Cleaner
 16 Inch Surface Cleaner Owner s Manual WARNING: Read and understand all instructions, warnings, and cautions before using this product. Failure to follow the instructions, warnings, and cautions may result
WOOD CHIPPER WC1105 5PQ (8/08/2012)
") O P E R A T O R ' S M A N U A L WOOD CHIPPER WC1105 5PQ990102 (8/08/2012) To the Owner; Thank-You for choosing a quality product from Frontier Equipment. We strive to give you the best equipment and the
O P E R A T O R ' S M A N U A L WOOD CHIPPER WC1105 5PQ990102 (8/08/2012) To the Owner; Thank-You for choosing a quality product from Frontier Equipment. We strive to give you the best equipment and the
PROPANE TORCH WITH TURBO BURNER
 PROPANE TORCH WITH TURBO BURNER MODEL 91894 ASSEMBLY AND OPERATING INSTRUCTIONS 3491 Mission Oaks Blvd., Camarillo, CA 93011 Visit our Web site at http://www.harborfreight.com TO PREVENT SERIOUS INJURY,
SIDE-WIND, A-FRAME TRAILER JACK. Model Due to continuing improvements, actual product may differ slightly from the product described herein.
 SIDE-WIND, A-FRAME TRAILER JACK Model 95157 Assembly And Operation Instructions Due to continuing improvements, actual product may differ slightly from the product described herein. 3491 Mission Oaks Blvd.,
OPERATOR S MANUAL. 20-bu 3-Point Hitch Material Collection System. LP65048 Supplier ST /07/2017 English. North American Edition Printed in USA
 OPERATOR S MANUAL 20-bu 3-Point Hitch Material Collection System LP65048 Supplier ST48289 11/07/2017 English North American Edition Printed in USA Introduction Using Your Operator s Manual Read this entire
Prime Attachments & Custom Fab Brush Mower Owners/Operators Manual
 Prime Attachments & Custom Fab Brush Mower Owners/Operators Manual The operator is responsible for the safe operation and maintenance of the machine. It is important that anyone who uses the machine is
Manual Tire Changing Station
 Manual Tire Changing Station Owner s Manual WARNING: Read carefully and understand all ASSEMBLY AND OPERATION INSTRUCTIONS before operating. Failure to follow the safety rules and other basic safety precautions
2000 lb Adjustable Gantry Crane
 2000 lb Adjustable Gantry Crane Owner s Manual WARNING: Read carefully and understand all ASSEMBLY AND OPERATION INSTRUCTIONS before operating. Failure to follow the safety rules and other basic safety
Machinery Skate. Owner s Manual
 Machinery Skate Owner s Manual WARNING: Read carefully and understand all ASSEMBLY AND OPERATION INSTRUCTIONS before operating. Failure to follow the safety rules and other basic safety precautions may
Mini Lever Hoist. Owner s Manual
 Mini Lever Hoist Owner s Manual WARNING: Read carefully and understand all ASSEMBLY AND OPERATION INSTRUCTIONS before operating. Failure to follow the safety rules and other basic safety precautions may
ATV Log Skidding Arch
 ATV Log Skidding Arch Owner s Manual WARNING: Read carefully and understand all ASSEMBLY AND OPERATION INSTRUCTIONS before operating. Failure to follow the safety rules and other basic safety precautions
Poly Strapping Tensioner & Cutter
 Poly Strapping Tensioner & Cutter Owner s Manual WARNING: Read carefully and understand all ASSEMBLY AND OPERATION INSTRUCTIONS before operating. Failure to follow the safety rules and other basic safety
4400-Lb. Cargo Trolley
 4400-Lb. Cargo Trolley Owner s Manual WARNING: Read carefully and understand all ASSEMBLY AND OPERATION INSTRUCTIONS before operating. Failure to follow the safety rules and other basic safety precautions
Wheel Horse. 44 Snowthrower. for 5xi Lawn and Garden Tractors. Model No & Up. Operator s Manual
 FORM NO. 8 Rev A Wheel Horse Snowthrower for 5xi Lawn and Garden Tractors Model No. 7966 890050 & Up Operator s Manual IMPORTANT: Read this manual, and your tractor manual, carefully. They contain information
Two-Stage Snow Blower For 4WD Pick Up Trucks. Operator s Manual
 Two-Stage Snow Blower For 4WD Pick Up Trucks Operator s Manual Distrubuted by: Metal Fabricating LLC P.O. Box 831 Brodheadsville, PA 18322 Phone: 570-992-9989 SnowVac.com WARRANTY POLICY Metal Fabricating
60 Watt Industrial LED Low Bay Light
 60 Watt Industrial LED Low Bay Light Owner s Manual WARNING: Read carefully and understand all ASSEMBLY AND OPERATION INSTRUCTIONS before operating. Failure to follow the safety rules and other basic safety
JOHN DEERE WORLDWIDE COMMERCIAL & CONSUMER EQUIPMENT DIVISION. Lawn Tractors L100, L110, L120, and L130 TM2026 DECEMBER 2002 TECHNICAL MANUAL
 2026 December 2002 JOHN DEERE WORLDWIDE COMMERCIAL & CONSUMER EQUIPMENT DIVISION Lawn Tractors L100, L110, L120, and L130 TM2026 DECEMBER 2002 TECHNICAL MANUAL North American Version Litho in U.S.A. Safety
25 GALLON PORTABLE OIL LIFT
 25 GALLON PORTABLE OIL LIFT Model 92859 SET UP AND OPERATING INSTRUCTIONS Diagrams within this manual may not be drawn proportionally. Due to continuing improvements, actual product may differ slightly
HEAVY-DUTY STEEL WAGON
 HEAVY-DUTY STEEL WAGON Owner s Manual WARNING: Read carefully and understand all ASSEMBLY AND OPERATION INSTRUCTIONS before operating. Failure to follow the safety rules and other basic safety precautions
MANUAL FLUID EXTRACTOR
 Please read and save these instructions. Read through this owner s manual carefully before using product. Protect yourself and others by observing all safety information, warnings, and cautions. Failure
Table of Contents. Safety Assembly Pre-operation / Starting. 7. Operation.. 8. Maintenance. 9. Storage 10
 Table of Contents Safety... 3 Assembly... 6 Pre-operation / Starting. 7 Operation.. 8 Maintenance. 9 Storage 10 Parts drawings..11 Parts list by number..12 Notes.13 2 Safety Information Attention; this
DEBRIS BLOWER 3600 OPERATOR S MANUAL. Debris Blower
 DEBRIS BLOWER 3600 OPERATOR S MANUAL 9-208 Thank you for purchasing a Harper. As with all Harper products, the has been developed through tough design and testing procedures to produce a top quality machine.
4400-Lb. Capacity Pallet Jack
 Read carefully and understand all ASSEMBLY AND OPERATION INSTRUCTIONS before operating. Failure to follow the safety rules and other basic safety precautions may result in serious personal injury. Item#
60in. Acreage Rake. Owner s Manual
 60in. Acreage Rake Owner s Manual WARNING: Read carefully and understand all ASSEMBLY AND OPERATION INSTRUCTIONS before operating. Failure to follow the safety rules and other basic safety precautions
Owner s Manual. Mortar / Plaster Mixer. Models M785 M1000 M1200
 Owner s Manual Mortar / Plaster Mixer Models M785 M1000 M1200 Tiger Equipment LLC. 15 Byrd Lane Rocky Mount, VA 24151 Tel: 540-489-7777 Fax: 540-489-7778 www.tigerequip.com 1. PREFACE This manual contains
4400-Lb. Capacity Extra-Long Pallet Jack
 4400-Lb. Capacity Extra-Long Pallet Jack Owner s Manual WARNING: Read carefully and understand all ASSEMBLY AND OPERATION INSTRUCTIONS before operating. Failure to follow the safety rules and other basic
SPECIFICATIONS GENERAL SAFETY RULES PERSONAL SAFETY. Save This Manual TOOL USE AND CARE WORK AREA
 SPECIFICATIONS 2 Forged Safety Latch Hooks Cable extends to: 44 Drop forged steel hanging bracket Heavy duty 3/16 Steel Cable Pulling Capacity: 1200 LB. One piece double ratchet gear Save This Manual You
CAMBELT TENSION GAUGE
 CAMBELT TENSION GAUGE Model 96557 Operating Instructions Diagrams within this manual may not be drawn proportionally. Due to continuing improvements, actual product may differ slightly from the product
Model SP7015 Remote Machine with 2-Speed
 Model SP7015 Remote Machine with 2-Speed Machine Serial # Engine Model # Engine Specification # Engine Serial # Purchase Date Dealer Carlton J. P. Carlton Company Div. DAF Inc. 121 John Dodd Road Spartanburg,
Operating and Assembly Manual
 Model 1080 Operating and Assembly Manual Midwest Equipment Manufacturing, Inc. 5225 Serum Plant Road Thorntown, IN 46071 08-02-16 SAFETY RULES Remember, any power equipment can cause injury if operated
Mini Manual Tire Changer
 Mini Manual Tire Changer Owner s Manual WARNING: Read carefully and understand all ASSEMBLY AND OPERATION INSTRUCTIONS before operating. Failure to follow the safety rules and other basic safety precautions
# SAVE THESE INSTRUCTIONS
 400-Ft.Wagon Hose Reel Cart Owner s Manual WARNING: Read and understand all instructions, warnings, and cautions before using this product. Failure to follow the instructions, warnings, and cautions may
Model SP4012 Equipped with a 35HP Briggs and Stratton Engine
 Model SP4012 Equipped with a 35HP Briggs and Stratton Engine Machine Serial # Engine Model & Spec # Engine Serial # Purchase Date Dealer Carlton J.P.Carlton Company Div. D.A.F. Inc. 121 John Dodd Road
RED23305 Owner s Manual
 RED23305 Owner s Manual 5 foot, 3-Point Mounted Snow Blower 270 West Park Avenue Huron, SD 57350 866-526-5682 Serial Number: Date of Purchase: Red Devil Snow Blower See Figure 1. 1. The Red Devil Snow
Dolly with Pneumatic Tires
 Dolly with Pneumatic Tires Owner s Manual WARNING: Read carefully and understand all ASSEMBLY AND OPERATION INSTRUCTIONS before operating. Failure to follow the safety rules and other basic safety precautions
WARNING! Decals. IMPORTANT INFORMATION Xxxx xxx xxxx xx xxxx x xxxx. Xxxx xxx xxxx xx xxxx x xxxx.
 symbols and decals Xxxx xxx xxxx xx xxxx x xxxx. Used in this publication to notify the reader of a risk of personal injury, particularly if the reader DOES NOT follow the instructions given in the manual.
Push Trolley. Owner s Manual
 Push Trolley Owner s Manual WARNING: Read carefully and understand all ASSEMBLY AND OPERATION INSTRUCTIONS before operating. Failure to follow the safety rules and other basic safety precautions may result
Model SP4012 Equipped with a 27HP Kohler Engine
 Model SP4012 Equipped with a 27HP Kohler Engine Machine Serial # Engine Model & Spec # Engine Serial # Purchase Date Dealer Carlton J.P.Carlton Company Div. D.A.F. Inc. 121 John Dodd Road Spartanburg,
Hydraulic Drum Transporter
 Hydraulic Drum Transporter Owner s Manual WARNING: Read carefully and understand all ASSEMBLY AND OPERATION INSTRUCTIONS before operating. Failure to follow the safety rules and other basic safety precautions
DEBRIS BLOWER 2700 OPERATOR S MANUAL. Debris Blower
 DEBRIS BLOWER 2700 OPERATOR S MANUAL 6-2015 Thank you for purchasing a Harper. As with all Harper products, the has been developed through tough design and testing procedures to produce a top quality
Hydraulic Immediate Need Power Pack
 Safety, Operation, and Maintenance Manual WARNING Improper use of this tool can result in serious bodily injury This manual contains important information about product function and safety. Please read
Hydraulic Furniture Movers
 Hydraulic Furniture Movers Owner s Manual WARNING: Read carefully and understand all ASSEMBLY AND OPERATION INSTRUCTIONS before operating. Failure to follow the safety rules and other basic safety precautions
DWHOIST. Drywall Hoist Assembly & Operating Instructions
 DWHOIST Drywall Hoist Assembly & Operating Instructions READ ALL INSTRUCTIONS AND WARNINGS BEFORE USING THIS PRODUCT. SAVE THESE INSTRUCTIONS FOR FUTURE REFERENCE. This manual provides important information
55-Gallon Drum Cradle
 55-Gallon Drum Cradle Owner s Manual WARNING: Read carefully and understand all ASSEMBLY AND OPERATION INSTRUCTIONS before operating. Failure to follow the safety rules and other basic safety precautions
Owner s Manual: PS4000 4,000 LB. WINCH
 Owner s Manual: PS4000 4,000 LB. WINCH PIERCE ARROW INC. 549 U.S. HWY 287 S. HENRIETTA, TEXAS 76365 ---------------------------------------------------- TOLL FREE 800-658-6301 FAX 940-538-4382 ----------------------------------------------------
Log Splitter. Owner/Operator Manual. Models HCWP1-26
 Log Splitter Owner/Operator Manual Models HCWP1-26 SAFETY..........................2 SAFETY WARNING SYMBOL.........3 SAFETY RULES.................. 4-5 SPECIFICATIONS................. 6 CONTROLS AND FEATURES.......
Adjustable Steel Drum Dolly
 Adjustable Steel Drum Dolly Owner s Manual WARNING: Read carefully and understand all ASSEMBLY AND OPERATION INSTRUCTIONS before operating. Failure to follow the safety rules and other basic safety precautions
1500-lb Snowmobile Dollies
 1500-lb Snowmobile Dollies Owner s Manual WARNING: Read carefully and understand all ASSEMBLY AND OPERATION INSTRUCTIONS before operating. Failure to follow the safety rules and other basic safety precautions
55-Gallon Drum Cradle
 55-Gallon Drum Cradle Owner s Manual WARNING: Read carefully and understand all ASSEMBLY AND OPERATION INSTRUCTIONS before operating. Failure to follow the safety rules and other basic safety precautions
1000-Lb. Drum Truck. Owner s Manual
 1000-Lb. Drum Truck Owner s Manual WARNING: Read carefully and understand all ASSEMBLY AND OPERATION INSTRUCTIONS before operating. Failure to follow the safety rules and other basic safety precautions