DV8 Tire Carrier Manufacturer Part Number TCSTTB-01 Model Number J104640
|
|
|
- Jane Watts
- 5 years ago
- Views:
Transcription
 on the back of a 2007-2017 Jeep Wrangler in place of the OEM")
1 DV8 Tire Carrier Manufacturer Part Number TCSTTB-01 Model Number J Installation Time: 30 Minutes Tools Required: 19mm Socket 13mm Socket Ratchet T15 Torx Driver T50 Torx Driver Painters Tape Dremel Tool Hammer 9/32 Nutdriver Center Punch Drill with 1/8 and 5/16 bits This guide is for installing the DV8 Tire Carrier (J104640) on the back of a Jeep Wrangler in place of the OEM stock spare tire carrier. Read all instructions carefully before starting. Before
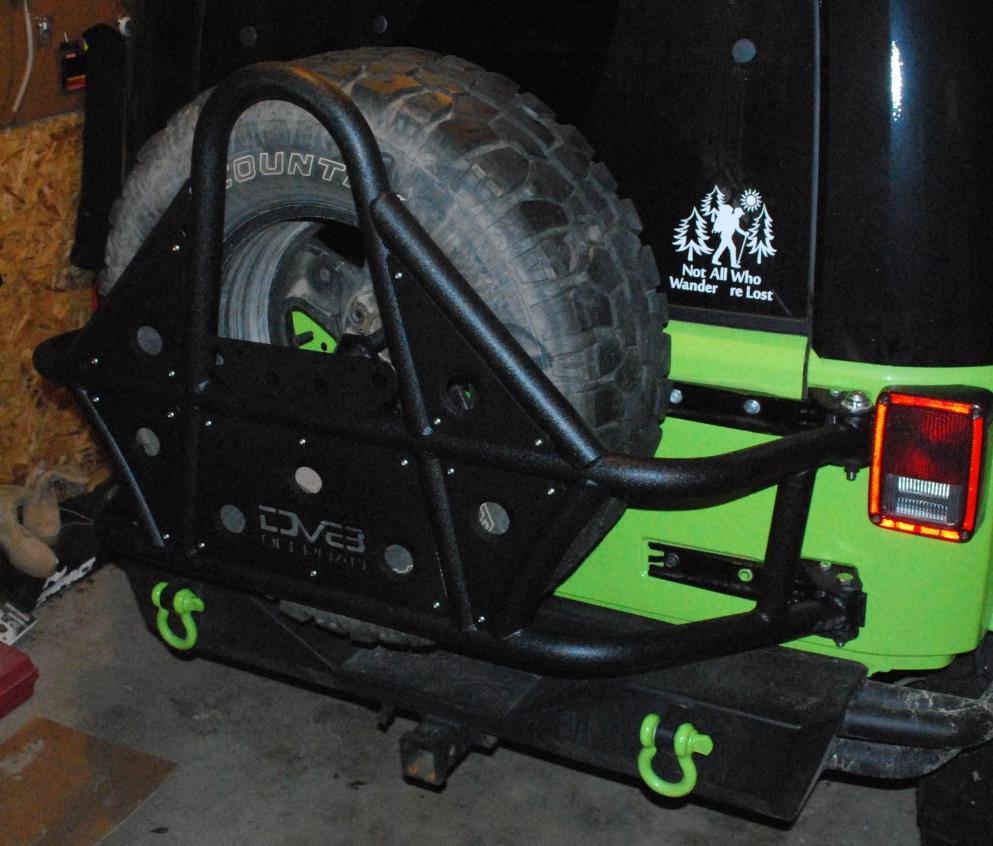
2 After


 screws to take apart brake light.")
3 Installation Instructions: 1. Remove your spare tire from your stock carrier using a 19mm socket wrench. 2. Using a 13mm socket wrench, remove the eight (8) bolts holding the carrier to the tailgate. 3. a. If you wish to use the original brake light wiring in the future, use a T15 Torx driver to remove four (4) screws to take apart brake light. Unclip the wiring from the tire carrier. (This carrier does not have a brake light installed, so an aftermarket brake light will be needed if you wish to have one)

 bolts from the top hinge ONLY (removing both hinges at the same time will cause the")
 T50 Torx bolts from the body-side of the hinge. 7.")
. Place the non-dremeled side of the pin over something hollow and sturdy (we used a long and wide socket).")
4 b. If you do not wish to use the original brake light wiring in the future, open the tailgate, pop out the plastic cover (shown below) and unplug the grey wire connector. 4. Remove the rubber tire stops from the tailgate by gently pulling them out. 5. Remove the plastic hinge covers by gently pulling them off. Use a 13mm socket wrench to remove the two (2) bolts from the top hinge ONLY (removing both hinges at the same time will cause the tailgate to slip, which may cause damage or injury). 6. Use a T50 Torx driver to remove the three (3) T50 Torx bolts from the body-side of the hinge. 7. Using a dremel tool, remove one end of the hinge pin from the original hinge (you will need the tailgate-side of the original hinge for your new carrier). Place the non-dremeled side of the pin over something hollow and sturdy (we used a long and wide socket). Use a long object (we used an extension for a socket wrench) and a hammer to remove the hinge pin from the hinge, trying not to damage the long (tailgate) side of the hinge. CAUTION: When using the dremel, wear protective eyewear!

.")
5 8. Install the upper hinge (with elongated bolt hole) using the three (3) T50 Torx bolts. 9. Line up the original tailgate hinge piece to the new body-side hinge piece and reinstall the original two (2) 13mm bolts to hole the hinge in place. Use the included new hinge pin to ensure proper alignment, and secure with a nut (included). 10. Repeat steps 5-9 for the bottom hinge.


6 11. Place the hinge stopper bolt into the top hinge. (keeps carrier from swinging out too far) Hinge Pin Hinge Stopper Bolt Under side


7 12. Using a 9/32 nut driver, remove the four (4) license plate bolts. Remove the four (4) bolts from the tail light above the license plate as well. 13. Disconnect the wiring from your license plate holder to remove. Tuck the wires into the body of the Jeep. Install the license plate holder delete plate using two strips of 3M double-sided adhesive tape (included).
 onto the new hinges and insert the hinge bolts to hold it in place.")
8 14. With the help of a friend, install the new tire carrier (without the tire) onto the new hinges and insert the hinge bolts to hold it in place.
 12mm bolts provided. 16.")

9 15. Swing the carrier open and install the tire stud and license plate holder with the six (6) 12mm bolts provided. 16. Install your spare tire onto the new carrier tire stud. Secure the tire in place with the tire mount wing nut. Note: Depending on the style of wheel you have, you may or may not require the circular spacer.
. 18.")
.")
10 17. To prevent excessive scratches or gouges from the drill, place two layers of painters tape from top to bottom, covering the area the new carrier latch will be (from tail light to door opening, top to bottom). 18. With the tire mounted to the carrier (to ensure proper weight), attach the tire carrier body bracket to the doorside of the new carrier by inserting the two (2) quick release pins (with the rectangular handles). Gently close the new carrier so that the body bracket lines up properly to the body, and use a pen or marker to mark where the five (5) holes are in the bracket. Mark precisely, because this is where you will drill into the body.
 marks you have made.")
 20.")
11 19. Gently use a center punch and hammer to mark the center of your mounting marks. Using a 1/8 drill bit, drill pilot holes into the five (5) marks you have made. Once the 1/8 pilot holes are drilled, use a 5/16 drill bit to drill out the five (5) holes. (Note: In some areas, you will be drilling through two layers of sheet metal) 20. Remove the painters tape and close the tire carrier. Use the provided hardware to mount the bracket to the body with 5/16 bolts, and secure with nuts on the inside of the vehicle body.
 holes (center punch, 1/8 pilot hole, then 5/16 hole).")
. 22. Reinstall the rear tail light using the four (4) original 9/32 bolts.")
12 21. Remove the quick release pins and open the tire carrier. Mark the last two (2) holes that were covered by the closed carrier. Remove the bracket and repeat drilling instructions for the remaining two (2) holes (center punch, 1/8 pilot hole, then 5/16 hole). Reinstall the bracket, install first five (5) bolts and nuts, then install the two (2) rubber bumper stops with button head bolts and washers, making sure not to over-tighten (to avoid collapsing the stopper). 22. Reinstall the rear tail light using the four (4) original 9/32 bolts. Note: If the installed body bracket is in the way of reinstalling the tail light, you may need to loosen the bracket to fit the light in. Once the light is reinstalled, tighten the bracket again. 23. To adjust the tire carrier up or down for proper alignment, turn the adjustable cam on the carrier hinge clockwise or counter-clockwise Post Installation: Verify the carrier is secure. Close the carrier and check that everything fits easily. It should not be difficult to open and close your carrier. Enjoy your DV8 Tire Carrier! Installation Instructions Written by ExtremeTerrain Customer /19/2017
Smittybilt XRC Rear Bumper Installation Guide Part # 76856
 Installation Difficulty: Easy Installation Duration: 2 Hours Tools Needed: Smittybilt XRC Rear Bumper Installation Guide Part # 76856-13, 16, 17, 18, 19mm wrenches and/or sockets - Socket extension - Torque
Rugged Ridge Spartacus HD Tire Carrier Kit Install
 Rugged Ridge Spartacus HD Tire Carrier Kit Install Installation Time: 2 hours Tools Required: Ratchet ¾ socket 19 mm socket 13 mm socket 10 mm socket 19 mm Wrench 10 mm wrench 6mm Allen Wrench T50 torx
Master Your Terrain (307) Rear Swing-out Tire Carrier Jeep CJ. Installation Instructions
 Rear Swing-out Tire Carrier Jeep CJ. Installation Instructions") Master Your Terrain (307) 775 9565 www.tntcustoms.com Rear Swing-out Tire Carrier Jeep CJ Installation Instructions Congratulations for purchasing a TNT, Inc. Rear Swing-out Tire Carrier for your Jeep
Master Your Terrain (307) 775 9565 www.tntcustoms.com Rear Swing-out Tire Carrier Jeep CJ Installation Instructions Congratulations for purchasing a TNT, Inc. Rear Swing-out Tire Carrier for your Jeep
JEEP Wrangler JK/JKU Swing-A-Way Tire Carrier/RotoPpax WARNINGS/CAUTIONS NOTE. INSTALLATION INSTRUCTIONS 2 Door Models 85209
 JEEP Wrangler JK/JKU Swing-A-Way Tire Carrier/RotoPpax 2007-2017 INSTALLATION INSTRUCTIONS Item Kit No. 2 Door Models 85209 4 Door Models 85209 WARNINGS/CAUTIONS These instructions are for both the can
Before starting installation
 Before starting installation The load rating for these tire-can/tire carriers is a MAXIMUM of 175 lbs. Please be aware that some tire and wheel combinations along with gas cans and hi-lift jacks can exceed
2007 Current Jeep Wrangler JK Stealth Fighter Rear Bumper With Tire Gate Installation Instructions
 2007 Current Jeep Wrangler JK Stealth Fighter Rear Bumper With Tire Gate Installation Instructions PREPARATION 1. Disconnect the negative terminal on the battery. Park the vehicle on level ground and set
Remove the rear tire and the (8) 13mm bolts holding the tire carrier to the tailgate. Remove the 3rd brake light wiring harness.
 13mm bolts holding the tire carrier to the tailgate. Remove the 3rd brake light wiring harness.") J108781 2 4 Rear Bumper & Tire Carrier & Optional Flood Lights Jeep Wrangler JK (2007-2017) Tools Required: Basic Hand Tools 35mm Socket Tape Measure Grease Gun Straight Edge Remove the rear tire and the
J108781 2 4 Rear Bumper & Tire Carrier & Optional Flood Lights Jeep Wrangler JK (2007-2017) Tools Required: Basic Hand Tools 35mm Socket Tape Measure Grease Gun Straight Edge Remove the rear tire and the
LAND ROVER DISCOVERY 3/ SPARE WHEEL CARRIER
 LAND ROVER DISCOVERY 3/ 4 SPARE WHEEL CARRIER RBLD007 INSTALL TIME: 4.5 Hours NOTE: Park Distance Control will be affected by this fitment and the customer should be informed. IMPORTANT WARNING! IT IS
RS-2 SINGLE ACTION REAR BUMPER WITH TIRE CARRIER INSTALL MANUAL FOR JEEP WRANGLER ALL MODELS.
 RS-2 SINGLE ACTION REAR BUMPER WITH TIRE CARRIER INSTALL MANUAL FOR 2007-2016 JEEP WRANGLER ALL MODELS. Rear Bumper Installation Instructions 1) Remove factory rear bumper, (this includes all tow hitch
EVO-1162 EVO Tailgate Tire Carrier
 EVO-1162 EVO Tailgate Tire Carrier Bill of Materials EVO-1162 Tailgate Tire Carrier Part number Description Quantity EVO-12161 EVO Tailgate Tire Carrier 1 EVO-12162 Bolt Plate 1 EVO-12163 Wheel Mount 1
Backside License Plate Mount for Jeep JK Wrangler
 REQUIRED TOOLS 10mm SOCKET 13mm SOCKET 4mm HEX KEY WIRE CRIMPS WIRE STRIPPERS ELECTICAL TAPE SCREW DRIVER KIT CONTAINS BACKSIDE MOUNT LICENSE PLATE BRACKET WITH LEDS PLASTIC PASS-THROUGH GROMMET STAINLESS
JL SHIELD TIRE CARRIER INSTALLATION INSTRUCTIONS
 JL SHIELD TIRE CARRIER INSTALLATION INSTRUCTIONS TOOLS NEEDED 3/4 Wrench 3/4 Socket 9/16 Wrench or Socket 1 1/2 Socket 1 1/8 Wrench 13mm Socket Torque Wrench for 1 1/2 Socket HARDWARE 2-1/2 X 2 Hex Bolt
INSTALLATION MANUAL
 INSTALLATION MANUAL 2563000 Parts List 1 Carrier weldment 2 Support arm assembly 1 Third brake light assembly 1 Light extension bracket 1 Spare tire adjustment plate 1 Spare tire mount plate 1 Female spade
SAFETY THIS PRODUCT IS FOR OFFROAD USE ONLY. ALL LIABILITY FOR INSTALLATION AND USE RESTS WITH THE OWNER.
 SAFETY Your safety and the safety of others is very important. In order to help you make informed decisions about safety, we have provided installation instructions and other information. These instructions
80703 & Backside License Plate Mount for Jeep JK Wrangler (80707) & 10+ (80703)
 & 10+ (80703)") 80703 Backside Mount 80707 Backside Mount REQUIRED TOOLS 10mm SOCKET 13mm SOCKET 4mm HEX KEY WIRE CRIMPS WIRE STRIPPERS ELECTICAL TAPE SCREW DRIVER KIT CONTAINS BACKSIDE MOUNT LICENSE PLATE BRACKET WITH
80703 Backside Mount 80707 Backside Mount REQUIRED TOOLS 10mm SOCKET 13mm SOCKET 4mm HEX KEY WIRE CRIMPS WIRE STRIPPERS ELECTICAL TAPE SCREW DRIVER KIT CONTAINS BACKSIDE MOUNT LICENSE PLATE BRACKET WITH
JK SHIELD TIRE CARRIER INSTALLATION INSTRUCTIONS
 JK SHIELD TIRE CARRIER INSTALLATION INSTRUCTIONS TOOLS NEEDED 3/4 Wrench 3/4 Socket 9/16 Wrench or Socket 1 1/2 Socket 1 1/8 Wrench 13mm Socket Torque Wrench for 1 1/2 Socket 5mm Allen T20 Torx Hammer
Rear Bumper Installation Instructions
 KEY TO COMPONETS A. 1 ea. Rear bumper B. 2 ea. Mounting L bracket C. 11 ea. M12x1.75 hex head bolt D. 4 ea. M12x1.75 hex head bolt E. 6 ea. M12 Hex head lock nut F. 9 ea. Pressure washer G. 19 ea. M12
HD Hinge Casting HARDWARE: CONTENTS:
 Page 1/9 Part #11546.51 CONTENTS: HD Hinge Casting Spacer Plates (2 PCS) HD Hinge Casting HARDWARE: Hex Bolt X 4 Washer X 4 TOOLS REQUIRED: Socket Wrench 10 extension 13mm socket 3/4 deep socket T-20,
INSTALLATION INSTRUCTIONS
 INSTALLATION INSTRUCTIONS OUTLAW REAR BUMPER APPLICATION: 2016-2018 Chevrolet Silverado 1500 PART NUMBER: 58-81005 CONTENT ITEM QUANTITY DESCRIPTION TOOLS NEEDED 1 1 REAR BUMPER 18MM WRENCH 2 4 SENSOR
TrailGator REAR BUMPER INSTALLATION INSTRUCTIONS Runner
 TrailGator REAR BUMPER INSTALLATION INSTRUCTIONS 2010+ 4Runner Version 3.1.0 - December 2018 Thank you for purchasing the Southern Style OffRoad Toyota 4Runner 5 th Gen Modular Rear Plate Steel Bumper.
JK SHIELD TIRE CARRIER INSTALLATION INSTRUCTIONS
 JK SHIELD TIRE CARRIER INSTALLATION INSTRUCTIONS TOOLS NEEDED 3/4 Wrench 3/4 Socket 9/16 Wrench or Socket 1 1/2 Socket 1 1/8 Wrench 13mm Socket Torque Wrench for 1 1/2 Socket 5mm Allen T20 Torx Hammer
PRODUCT: JK SportGate Tire Carrier READ INSTRUCTIONS IN FULL BEFORE INSTALLATION. QUESTIONS? CALL M-F 7:00 AM 5:00 PM PST
 PRODUCT: JK SportGate Tire Carrier READ INSTRUCTIONS IN FULL BEFORE INSTALLATION. QUESTIONS? CALL 916-631-8071 M-F 7:00 AM 5:00 PM PST The MetalCloak experience includes the ease of installation of our
(Ford Transit Rear Bumper) INSTALLATION INSTRUCTIONS
 INSTALLATION INSTRUCTIONS") Aluminess Products Inc 9402 Wheatlands Ct. #A Santee, CA 92071 619-449-9930 (Ford Transit Rear Bumper) INSTALLATION INSTRUCTIONS Please read before beginning Stainless steel hardware may bind together
Aluminess Products Inc 9402 Wheatlands Ct. #A Santee, CA 92071 619-449-9930 (Ford Transit Rear Bumper) INSTALLATION INSTRUCTIONS Please read before beginning Stainless steel hardware may bind together
Installation Manual TWM Performance Short Shift Kit Stage 1 and Stage 2 MazdaSpeed 6
 Page 1 Installation Manual TWM Performance Short Shift Kit Stage 1 and Stage 2 MazdaSpeed 6 Please Note: It is preferable to park on a flat surface, as you will have to engage and disengage the hand brake
2017 Current Ford Raptor Stealth Fighter Rear Bumper Installation Instructions
 2017 Current Ford Raptor Stealth Fighter Rear Bumper Installation Instructions PREPARATION 1. Disconnect the negative terminal on the battery. Park the vehicle on level ground and set the emergency brake.
Installation of Auto Meter Cobalt Boost/Vacuum Gauge:
 Installation of Auto Meter Cobalt Boost/Vacuum Gauge: Fitment: All 79-14 models. This installation was completed on a 2004 Mustang GT, and should be identical for all 1999-2004 model Mustangs. Time needed:
Focus ST Carbon Fiber Intake
 791400 - Focus ST Carbon Fiber Intake 791400 COBB Focus ST Carbon Fiber Intake Congratulations on your purchase of the COBB Tuning Carbon Fiber Intake System! The following instructions will assist you
Deuce/Ace Installation Instructions
 HARDWARE KIT: Upper Mounting Plate: 2-7/16" (11mm) X 3.5" bolts 2-7/16" flange nuts 2-2" spacers 2-7/16" trim cap mounting washers 2 - plastic trim caps TOOLS NEEDED: safety glasses wrenches 16mm or 5/8"
Jeep JK Wrangler XHD Rear Tire Carrier
 Contents: 1. Frame (1) 2. Pivot Mount (1) 3. Latch Mount (1) 4. Lug Nuts (3) 5. Catch Pin (1) 6. M12 Washer (18) 7. M12 x 30 Hex Bolt (14) 8. Brake Light Mount (1) 9. Snap Ring (1) 10. Rub Strip (1) 11.
SAFETY THIS PRODUCT IS FOR OFFROAD USE ONLY. ALL LIABILITY FOR INSTALLATION AND USE RESTS WITH THE OWNER.
 SAFETY Your safety and the safety of others is very important. In order to help you make informed decisions about safety, we have provided installation instructions and other information. These instructions
Universal Tall HoneyBadger Chase Rack Installation Instructions
 PREPARATION Universal Tall HoneyBadger Chase Rack Installation Instructions 1. Disconnect the negative terminal on the battery. Park the vehicle on level ground and set the emergency brake. 2. We recommend
Deegan 38 HD Rock Sliders w/ LED Rock Lights (07-18 Wrangler JKU)
") Installation Time: 2-3 Hours Deegan 38 HD Rock Sliders w/ LED Rock Lights (07-18 Wrangler JKU) Note: This kit comes with everything you need to wire the lights with a switch in the cab. However, I recommend
Installation Time: 2-3 Hours Deegan 38 HD Rock Sliders w/ LED Rock Lights (07-18 Wrangler JKU) Note: This kit comes with everything you need to wire the lights with a switch in the cab. However, I recommend
Installation of Barricade Flat Style Fender Flare Kit (97-06 Wrangler TJ)
") Installation of Barricade Flat Style Fender Flare Kit (97-06 Wrangler TJ) Installation Time: 3-4 Hours Tools Required: 8mm wrench 8mm socket drive #1 Phillips screw driver Pliers Pry bar Electric drill
Installation of Barricade Flat Style Fender Flare Kit (97-06 Wrangler TJ) Installation Time: 3-4 Hours Tools Required: 8mm wrench 8mm socket drive #1 Phillips screw driver Pliers Pry bar Electric drill
Curt Mfg. Trailer Hitch and Hoppy Wiring Kit Installation Instructions
 Curt Mfg. Trailer Hitch and Hoppy Wiring Kit Installation Instructions The Curt trailer hitch replaces the stock rear cross member in the Touareg. It attaches with 8 bolts just like the factory VW hitch.
Included in Hardware Kit. Rear Corners 2-Door. Jeep JK Trail Armor. Set Part #14009 Rev STEP 1 - PRIOR TO INSTALLATION
 Jeep JK Trail Armor Set Part #14009 Rev-2 02-23-11 A) B) C) STEP 1 - PRIOR TO INSTALLATION Bushwacker only approves installing the trail armor according to these written instructions with the hardware
701-Tire Swing for 153-A/T Slider rear bumper
 701-Tire Swing for 153-A/T Slider rear bumper Holds up to a 37 Spare, Swings clear of rear tailgate for easy access. One-piece construction creates a clean professional appearance. 2 1/2 O.D. heavy-duty
SAFETY THIS PRODUCT IS FOR OFFROAD USE ONLY. ALL LIABILITY FOR INSTALLATION AND USE RESTS WITH THE OWNER.
 SAFETY Your safety and the safety of others is very important. In order to help you make informed decisions about safety, we have provided installation instructions and other information. These instructions
IE Audi B9 S4, S5, A4, A5, Allroad FDS Intercooler Install Guide IETPCK1
 IE Audi B9 S4, S5, A4, A5, Allroad FDS Intercooler Install Guide IETPCK1 Thank you for purchasing the best performing intercooler on the market! This instruction guide is used for installation of IE s
Current Ford F150 Race Series R Rear Bumper Installation Instructions
 2015 - Current Ford F150 Race Series R Rear Bumper Installation Instructions PREPARATION STEPS 1. Disconnect the negative terminal on the battery. Park the vehicle on level ground and set the emergency
JK RockBrawler II Rear Bumper with Tire Carrier
 INSTALLATION INSTRUCTIONS INST-17-62-020_A JK RockBrawler II Rear Bumper with Tire Carrier IMPORTANT: Thank you for purchasing this Poison Spyder product. Please read through this entire document before
Rugged Ridge Spartacus HD Tire Carrier Kit Install
 Rugged Ridge Spartacus HD Tire Carrier Kit Install Installation Time: 2Hrs Tools Required: T-20 Torx T-50 Torx Phillips Screw driver #2 Wire cutters/strippers/crimpers Socket Wrench & Extension 6mm hex
Prepare to install kit
 4. Park the vehicle on a clean, dry, flat, level surface and block the tires so the vehicle cannot roll in either direction. Prepare to install kit 2011-2012 JEEP WRANGLER (JK) SPORT CAGE INSTALLATION
Smittybilt Gen2 XRC 9,500,lb. Winch Manufacturer Part Number Model Number J106786
 Smittybilt Gen2 XRC 9,500,lb. Winch Manufacturer Part Number 97495 Model Number J106786 Installation Time: 1 hour Tools Required: Work Light Box Cutter 10mm Open End Wrench 13mm Open End Wrench 14mm Open
JEEP JK WRANGLER UNLIMITED 4-DOOR Pro-Series Front Replacement Fenders
 PSFF001 2007-2016 JEEP JK WRANGLER UNLIMITED 4-DOOR Pro-Series Front Replacement Fenders HARDWARE INCLUDED 4 6mm x 25mm Hex Bolts 16 10mm x 20mm Button Head Bolts 8 6mm x 12mm x 1.6mm Flat Washers 16 10mm
JK SHIELD TIRE CARRIER INSTALLATION INSTRUCTIONS
 JK SHIELD TIRE CARRIER INSTALLATION INSTRUCTIONS TOOLS NEEDED 7/16" wrench or socket 3/4" wrench or socket 15/16" wrench or socket 5/8" wrench or socket 3/16 Allen wrench or socket 1 1/8" Wrench HARDWARE
INSTALLATION INSTRUCTIONS
 INSTALLATION INSTRUCTIONS ----1075 North Ave. Sanger, CA 93657-3539 toll free: 800-445-3767 web: www.belltechcorp.com---- 6420 SHACKLE & HANGER KIT FORD F-350 Congratulations! You were selective enough
Weistec M113K Supercharger System Installation Guide
 Weistec M113K Supercharger System Installation Guide WARNING! DO NOT HAVE YOUR ECU REPROGRAMMED ANYWHERE BUT AT WEISTEC FOR THIS SUPERCHARGER. THE AMG 55 USES AN ELECTRONIC THROTTLE CONTROL (ETC), WHICH
EVO Manufacturing. EVO-3032/3032B JL JLU HD Hinge Tire Carrier
 EVO Manufacturing EVO-3032/3032B JL JLU HD Hinge Tire Carrier READ BEFORE INSTALLATION: Some backspacing wheels/tire width combinations (small backspacing/wide tires) may require a single wheel spacer
INSTALLATION INSTRUCTIONS JEEP 2011-UP JK SECURITY FULL CONSOLE #274
 INSTALLATION INSTRUCTIONS JEEP 2011-UP JK SECURITY FULL CONSOLE #274 PARTS CHECKLIST Tuffy Console #9 Left Front Mounting Bracket #10 Right Front Mounting Bracket #11 Electronics mounting bracket #12 Divider
INSTALLATION INSTRUCTIONS
 INSTALLATION INSTRUCTIONS Accessory REAR SPOILER Application 2011 CR-Z MUGEN Publications No. AII 45919 Issue Date APRIL 2011 PARTS LIST Right wing bracket Rear wing Left wing bracket Right wing base Right
REAR STEEL BUMPER INSTALLATION INSTRUCTIONS Runner
 REAR STEEL BUMPER INSTALLATION INSTRUCTIONS 2010+ 4Runner Version 2.1.0 - September 2016 Thank you for purchasing the Southern Style OffRoad Toyota 4Runner 5 th Gen Modular Rear Plate Steel Bumper. It
Lingenfelter Signature Series Camaro SS Rear Valance
 Lingenfelter Signature Series 2010-2012 Camaro SS Rear Valance PN: L850161410 Lingenfelter Performance Engineering 1557 Winchester Road Decatur, IN 46733 (260) 724-2552 (260) 724-0422 fax www.lingenfelter.com
Tire Gate Hardware Kit PN: HWKIT includes: RockBrawler II Turnbuckle Assembly PN: HWKIT includes (pre-assembled):
:") INSTALLATION INSTRUCTIONS INST-17-62-020_A JK Brawler Rear Bumpers with Tire Carrier IMPORTANT: Thank you for purchasing this Poison Spyder product. Please read through this entire document before proceeding
INSTALLATION INSTRUCTIONS INST-17-62-020_A JK Brawler Rear Bumpers with Tire Carrier IMPORTANT: Thank you for purchasing this Poison Spyder product. Please read through this entire document before proceeding
JEEP TJ/LJ REAR BUMPER INSTALLATION INSTRUCTIONS
 JEEP TJ/LJ REAR BUMPER INSTALLATION INSTRUCTIONS JRR4002-P JRR4102-P JRR-TL INCLUDED PARTS LIST- JRR-TL 2-12MM X 45MM BOLT 2-1/2 FLAT WASHER 2-1/2 SAE FLAT WASHER 4-7/16 NYLOCK NUT 8-7/16 X 1.25 BOLT 12-7/16
INSTALLATION INSTRUCTIONS
 INSTALLATION INSTRUCTIONS WJ2 FULL-WIDTH FRONT BUMPER APPLICATION: 2018 Jeep Wrangler JL PART NUMBER: 59-80105, 59-80115, 59-80125 CONTENT ITEM QUANTITY DESCRIPTION TOOLS NEEDED 1 1 FRONT BUMPER ASSEMBLY
SAFETY THIS PRODUCT IS FOR OFFROAD USE ONLY. ALL LIABILITY FOR INSTALLATION AND USE RESTS WITH THE OWNER.
 SAFETY Your safety and the safety of others is very important. In order to help you make informed decisions about safety, we have provided installation instructions and other information. These instructions
SAFETY. Read and understand all safety precautions and instructions before installing this product.
 SAFETY Your safety and the safety of others is very important. In order to help you make informed decisions about safety, we have provided installation instructions and other information. These instructions
Install rubber bump stop thru the tab on the left side of bumper. Use stainless steel 1/4 cap nut to tighten in place.
 Install rubber bump stop thru the tab on the left side of bumper. Use stainless steel 1/4 cap nut to tighten in place. Install the nylon scuff block with 1 steel spacer under it, use 2 @ 1/4 X1 1/4 SS
Installation Manual TWM Performance Short throw shifter 2001 and up Hyundai Accent
 Installation Manual TWM Performance Short throw shifter 2001 and up Hyundai Accent 1. Place the vehicle on a flat surface with blocks in front and behind the wheels preventing unwanted movement. The car
VELAR HITCH INSTALLATION INSTRUCTIONS TOW RANGE ROVER MODEL/ TRIM YEARS: WEIGHT CAPACITY to Present PARTS & SUPPLIES: TOOLS REQUIRES:
 HITCH INSTALLATION INSTRUCTIONS MAKE: RANGE ROVER YEARS: 2018 to Present MODEL/ TRIM VELAR PACKAGE: TOW WEIGHT CAPACITY TRAILER TONGUE 5300 LBS. 300 LBS. INSTALLATION TIME: 2 HOURS NO YES YES PARTS & SUPPLIES:
SAFETY. Read and understand all safety precautions and instructions before installing this product.
 SAFETY Your safety and the safety of others is very important. In order to help you make informed decisions about safety, we have provided installation instructions and other information. These instructions
RIGID SERIES REAR BUMPER RB-F-100-JK, RB-F-101-JK, RB-F-102-JK, RB-F-103-JK RB-F-100-JKA, RB-F-101-JKA, RB-F-102-JKA, RB-F-103-JKA
 RIGID SERIES REAR BUMPER RB-F-100-JK, RB-F-101-JK, RB-F-102-JK, RB-F-103-JK RB-F-100-JKA, RB-F-101-JKA, RB-F-102-JKA, RB-F-103-JKA PARTS LIST QTY DESCRIPTION QTY DESCRIPTION 1 Rear Bumper 1 1'' Washer
INSTALLATION GUIDE. JK Rear bumper & tire carrier. AEV30105AC Last Updated: 10/11/16 US PATENT: D642,502 ; D
 AEV30105AC Last Updated: 10/11/16 JK Rear bumper & tire carrier US PATENT: D642,502 ; D633.024 INSTALLATION GUIDE PLEASE READ BEFORE YOU START TO GUARANTEE A QUALITY INSTALLATION, WE RECOMMEND READING
Installation Instructions BR20 Rear Bumper Replacement Part # 28178T Toyo ta Tundra 2/4WD
 Installation Instructions BR20 Rear Bumper Replacement Part # 28178T 2014-2016 Toyo ta Tundra 2/4WD Excludes Models with B lind Spot Monitoring & Cross Traffic Alert Parts List Item Qty. Part # Description
LoD Offroad. Jeep JK Door Linked Rear Bumper with Tire Carrier Installation Instructions
 LoD Offroad Jeep JK Door Linked Rear Bumper with Tire Carrier Installation Instructions Please read through the instructions before beginning any part of the installation process. Packaging List: 1-Rear
Four Panel Amber LED Front Light Kit Installation Guide
 Four Panel Amber LED Front Light Kit Installation Guide Kit Contents: 2 LED panels 4 socket plugs 1 cut out template PN 2100886 Please refer to webiste for full warranty information. DIGI-TAILS is not
JK REAR BUMPER AND TIRE CARRIER
 JK REAR BUMPER AND TIRE CARRIER Installation Guide AEV30105AA (Updated 5/10/10) Page 1 of 20 Page 2 of 20 EXPLODED VIEW PLEASE READ BEFORE YOU START IN ORDER TO INSTALL THIS PART PROPERLY YOU OR YOUR INSTALLER
Installation Instructions
 Installation Instructions TrailView Soft Top Important Safety Information For proper installation and best possible fit, please read all instructions BEFORE you begin. Periodically check all components
SAFETY. Read and understand all safety precautions and instructions before installing this product.
 SAFETY Your safety and the safety of others is very important. In order to help you make informed decisions about safety, we have provided installation instructions and other information. These instructions
W205 C63 Suspension Adjustable Suspension Installation Guide
 W205 C63 Suspension Adjustable Suspension Installation Guide 2015+ C63 AMG Sedan 2015+ C63S AMG Sedan Thank you for your purchase of the Weistec W205 C63 Adjustable Suspension. Please follow all directions,
SAFETY THIS PRODUCT IS FOR OFFROAD USE ONLY. ALL LIABILITY FOR INSTALLATION AND USE RESTS WITH THE OWNER.
 SAFETY Your safety and the safety of others is very important. In order to help you make informed decisions about safety, we have provided installation instructions and other information. These instructions
Front Bumper Installation Instructions
 Front Bumper Installation Instructions 1) Remove the factory bumper, air dam, and frame cover (optional). A) Remove the air dam by pulling on the plastic clips holding it in place with a set of pliers.
SAFETY. Read and understand all safety precautions and instructions before installing this product.
 SAFETY Your safety and the safety of others is very important. In order to help you make informed decisions about safety, we have provided installation instructions and other information. These instructions
INSTALLATION INSTRUCTIONS RATTLER STEEL RUNNING BOARDS FORD TRANSIT VAN (FULL SIZE)
") INSTALLATION INSTRUCTIONS PARTS LIST: 1 32-inch Steel Running Board 1 8-1.25mm x 35mm Hex Bolt 1 96-inch Steel Running Board 13 8-1.25mm x 25mm Hex Bolt 5 Passenger Side/Driver Side Mounting Brackets 20
INSTALLATION INSTRUCTIONS PARTS LIST: 1 32-inch Steel Running Board 1 8-1.25mm x 35mm Hex Bolt 1 96-inch Steel Running Board 13 8-1.25mm x 25mm Hex Bolt 5 Passenger Side/Driver Side Mounting Brackets 20
Fig A ADDICTIVE DESERT DESIGNS. Preparation: Removal: Release these clips
 Preparation: Disconnect the negative battery terminal. Park the vehicle on level ground and set the emergency brake. We recommend reading through the installation instructions in whole before performing
SAFETY THIS PRODUCT IS FOR OFFROAD USE ONLY. ALL LIABILITY FOR INSTALLATION AND USE RESTS WITH THE OWNER.
 SAFETY Your safety and the safety of others is very important. In order to help you make informed decisions about safety, we have provided installation instructions and other information. These instructions
I. Before starting installation
 5. Park the vehicle on a clean, dry, flat, level surface and block the tires so the vehicle cannot roll in either direction. A. Disconnect battery cables 1. Disconnect the negative cable first, then the
2017 Current Ford Raptor HoneyBadger Rear Bumper Installation Instructions
 2017 Current Ford Raptor HoneyBadger Rear Bumper Installation Instructions PREPARATION 1. Disconnect the negative terminal on the battery. Park the vehicle on level ground and set the emergency brake.
BBK Intake Manifold Kit ( L) - Installation Instructions
 - Installation Instructions") BBK Intake Manifold Kit (86-93 5.0L) - Installation Instructions The below installation instructions work for the following products: BBK Intake Manifold Kit (86-93 5.0L) Please read through the instructions
BBK Intake Manifold Kit (86-93 5.0L) - Installation Instructions The below installation instructions work for the following products: BBK Intake Manifold Kit (86-93 5.0L) Please read through the instructions
FRONT FENDERS WITH FACTORY INNER FENDERS JEEP WRANGLER TJ/LJ/YJ/CJ7 INSTALLATION INSTRUCTIONS
 FRONT FENDERS WITH FACTORY INNER FENDERS JEEP WRANGLER TJ/LJ/YJ/CJ7 INSTALLATION INSTRUCTIONS TOOLS NEEDED 13mm socket 5/32 Allen head 5/16 wrench or socket 7/16 wrench or socket 7/32 Allen head 5/8 wrench
Installation Instructions 2019 Chevy and GMC 1500 Rear Bumper Product Number: E4050, E4051 Application: Chevy and GMC 1500 Trucks
 IMPORTANT SAFETY GUIDE Your safety and the safety of others is very important. In order to help you make informed decisions about safety, we have provided the following warnings, safety precautions, installation
*Patent Pending Design*
 *Shown with optional Angled Tire Mount Part # 94202 *Patent Pending Design* Components 1) Rear Bumper 1) Swingarm 1) Swingarm Stop Bracket 1) Assembly 1) Rear Door Plate 1) Lower 3rd Brakelight Bracket
Installing a genuine HoodLift on a Jeep JK with an AEV hood
 Installing a genuine HoodLift on a Jeep JK with an AEV hood (to print a full-color version of these instructions go to www.hoodlift.com/products.html. Scroll down to the JK HoodLift and click on the AEV
INSTALLATION INSTRUCTIONS
 INSTALLATION INSTRUCTIONS Accessory Application Publications No. All 30482 S 2006 PILOT Issue Date P/N 08F23-S9V-100A SEP 2005 PARTS LIST Left front trim piece Right front trim piece Left rear trim piece
PRELIMINARY INSTALLATION INSTRUCTIONS. PARTS LIST Left front trim piece
 INSTALLATION INSTRUCTIONS Accessory Application Publications No. All 30482 S 2006 PILOT Issue Date P/N 08F23-S9V-100A SEP 2005 PARTS LIST Left front trim piece Right front trim piece Left rear trim piece
SALEEN SPEEDLAB S281SC REAR WING KIT
 = SALEEN SPEEDLAB S281SC REAR WING KIT INSTALLATION MANUAL: 2005 to '09 Mustang P/N: 10-8002-C11998B Saleen Performance, Inc. 1225 East Maple Rd. Troy, MI 48083 (800)-888-8945 www.saleen.com 2 IF YOU ARE
INSTALLATION INSTRUCTIONS FOR M.O.R.E. SHACKLE REVERSAL SYSTEM (S.R.S. ) PART # THIS SYSTEM FITS Jeep CJ-5, CJ-7, CJ-8 VEHICLES.
 PART # THIS SYSTEM FITS Jeep CJ-5, CJ-7, CJ-8 VEHICLES.") INSTALLATION INSTRUCTIONS FOR M.O.R.E. SHACKLE REVERSAL SYSTEM (S.R.S. ) PART # 7686-6 THIS SYSTEM FITS 1976-1986 Jeep CJ-5, CJ-7, CJ-8 VEHICLES. Please read all instructions carefully (including terms-policies)
INSTALLATION INSTRUCTIONS FOR M.O.R.E. SHACKLE REVERSAL SYSTEM (S.R.S. ) PART # 7686-6 THIS SYSTEM FITS 1976-1986 Jeep CJ-5, CJ-7, CJ-8 VEHICLES. Please read all instructions carefully (including terms-policies)
SR Performance Twin 62mm Throttle Body for GT
 Required Tools: SR Performance Twin 62mm Throttle Body for 2005-2010 GT Flat-head screwdriver Ratchet Small extension 10mm socket 8mm socket T20 Torx bit Needle nose pliers 5mm allen wrench Recommended
SAFETY. Read and understand all safety precautions and instructions before installing this product.
 SAFETY Your safety and the safety of others is very important. In order to help you make informed decisions about safety, we have provided installation instructions and other information. These instructions
INSTALLATION INSTRUCTIONS C-VS-2000-DUR-1 20 VEHICLE SPECIFIC CONSOLE for 2018 Dodge Durango with Standard Shifter
 INSTALLATION INSTRUCTIONS C-VS-2000-DUR-1 20 VEHICLE SPECIFIC CONSOLE for 2018 Dodge Durango with Standard Shifter TOOLS REQUIRED: Phillips Screw Driver T-20 Torx bit Standard Socket set 9/64 Allen wrench
Installation Instructions I - Sheet Number I-TVR-01 Rev. A
 Installation Instructions I - Sheet Number I-TVR-01 Rev. A TrailView Soft Top For proper installation and best possible fit, please read all instructions BEFORE you begin. For technical assistance or to
SAFETY THIS PRODUCT IS FOR OFFROAD USE ONLY. ALL LIABILITY FOR INSTALLATION AND USE RESTS WITH THE OWNER.
 SAFETY Your safety and the safety of others is very important. In order to help you make informed decisions about safety, we have provided installation instructions and other information. These instructions
2017 Current Ford SuperDuty Adaptive Cruise Control Relocation Bracket Installation Instructions
 2017 Current Ford SuperDuty Adaptive Cruise Control Relocation Bracket Installation Instructions PREPARATION 1. Disconnect the negative terminal on the battery. Park the vehicle on level ground and set
SAFETY THIS PRODUCT IS FOR OFFROAD USE ONLY. ALL LIABILITY FOR INSTALLATION AND USE RESTS WITH THE OWNER.
 SAFETY Your safety and the safety of others is very important. In order to help you make informed decisions about safety, we have provided installation instructions and other information. These instructions
2. With the rear door open remove pull-style clip from the passenger side just below the door latch.
 LoD Offroad FJ Cruiser Rear Bumper with Tire Carrier Installation Instructions 1. Begin with removing factory spare from the rear door. 2. With the rear door open remove pull-style clip from the passenger
ADDICTIVE DESERT DESIGNS
 Preparation: Disconnect the negative battery terminal. Park the vehicle on level ground and set the emergency brake. We recommend reading through the installation instructions in whole before performing
2010+ Audi B8 S4/S5 3.0T S-FLO Intake Kit INSTALLATION GUIDE FOR RACING USE ONLY
 INSTALLATION GUIDE 2010+ Audi B8 S4/S5 3.0T S-FLO Intake Kit FOR RACING USE ONLY Congratulations on your purchase of the AWE Tuning S-FLO Intake for the 2010+ Audi B8 S4 and B8 S5 3.0T. Exquisite build
Parts List. Item Qty. Part # Description Item Qty. Part # Description Torque. 1 1 Bumper Replacement Shell 10 4 ½ x 1 ½ Hex Bolt 65 Ft.
 Installation Instructions BR20 Rear Bumper Replacement Part # 28371T 2011-2016 Ford F-250 & F-350 Super Duty 2/4WD Do not attempt to install this product on any vehicle other than the one listed above!
Jeep Wrangler Heavy Duty Drag Link Installation Instructions
 THE INFORMATION CONTAINED IN THIS DRAWING IS THE SOLE PROPERTY OF SYNERGY MFG. ANY REPRODUCTION IN PART OR WHOLE WITHOUT THE WRITTEN PERMISSION OF SYNERGY MFG IS PROHIBITED. Revisions Rev. Description