Model: PSB100. Rear Parking Sensor System. Installation Manual TABLE OF CONTENTS
|
|
|
- Reynold Short
- 6 years ago
- Views:
Transcription


1 Rear Parking Sensor System Model: PSB100 Installation Manual TABLE OF CONTENTS Warnings...2 Product Description...3 Packing List...3 Installation Instructions...4 Mounting the Sensors...4 Installing the Power Harness...7 Mounting the Speaker...8 Mounting the Control Module...9 Specifications...10 Maintenance...10 Diagnostics/Troubleshooting...11 Warranty...12
2 Features Four Reversing Sensors detect obstacles up to 4.5 feet Includes 0, 4, 8 and 16 sensor sleeves to fit most bumpers Activates only when vehicle is in reverse Will not drain battery or void factory warranty Includes LED/Speaker display with 3 settings - high, low, and off Three detection zones give the following warnings: 1 = slow beep within feet 2 = medium beep within feet 3 = steady tone within 1.3 feet Works with any vehicle 1
3 Warnings This product is intended to assist in safe driving by signaling the driver of obstacles behind the vehicle while the vehicle is in reverse. You, as the driver, are solely responsible for the safe operation of your vehicle and the safety of your passengers according to your local traffic regulations. Do not use any features of this system to the extent it distracts you from safe driving. Your first priority while driving should always be the safe operation of your vehicle. Audiovox Electronics Corporation cannot accept any responsibility whatsoever for accidents resulting from failure to observe these precautions or safety instructions. 1. This product utilizes high voltage. Any unauthorized modifications or damage to the product may result in electrical shock. Handle all components with care. Inspect regularly for damage to components and cabling. 2. You are responsible for ensuring that the installation of this product does not void or affect the vehicle manufacturer s warranty. Audiovox Electronics Corporation or its subsidiaries are not liable in full or in part for improper installation resulting in loss or damage to your property, or for voiding all or part of the vehicle manufacturer s warranty. 3. Do not apply excessive force to any of the components contained within this kit. Excessive force used before, during or after installation that results in a damaged or non-functional part will void all warranties. 4. Please follow the procedures in this installation manual. Improper installation or modification of this product will void all warranties. 2
4 Product Description This Rear Parking Sensor System is designed to assist the driver by providing an alert when an object is behind the vehicle whenever the vehicle is shifted into reverse. Never rely solely on this product to ensure the area is clear of children and/or obstructions. This product is not intended to replace existing safety procedures, but rather to add an additional safety tool for your vehicle. Packing List The model PSB100 Rear Parking Sensor System consists of the following items: 1. Control box 2. 4 sensors, each with 19.68ft (6M) length of cable ft (3M) power cable 4. LED display/speaker with 9.84ft (3M) length of cable 5. Sensor sleeves 4 x 0 4 x 4 4 x 8 4 x Hardware bag includes: 2 tap connectors 6 cable ties 1 Velcro pad (for control module) 1 3M sticker (for speaker/led display) 1 alcohol swab pad Lock screw for speaker/led display Grounding screw/washer/ring terminal 7. Installation Manual 8. User Manual 3
5 Installation Instructions Before installing this product, take time to familiarize yourself with the items in the box and use the packing list to verify all parts are present. Mounting the Sensors Choosing the Correct Sensor Sleeve Use the application guide below to determine whether a sensor sleeve will be required. This will affect the diameter of the hole in the bumper. 4
6 Marking and Drilling Holes Figure 1 1. Mark the locations for the sensors on the rear bumper using a grease pencil. a. Identify the sensors height on the bumper and mark. The sensor height should be between 18 and 30 from the ground. b. Divide and mark the bumper as shown in Figure 1. c. Install the sensors equally from the center of the bumper, as shown in Figure 1. d. Inspect behind the bumper where the sensors are to be located to check for possible obstructions, including metal braces, electrical wires, and clearance. The sensors need 1.3 of clearance behind the bumper to be fully inserted and mounted securely. Do not mount sensors directly above exhaust pipes. Relocate the sensors if any obstruction exists. 2. Before drilling the holes, use a center punch to make a dimple on the bumper to prevent the drill from slipping from the intended mark. 3. Drill the sensor holes. o Use a 26mm Hole Saw if you are using a sensor sleeve o Use a 13/16 Hole Saw if you are installing without a sensor sleeve. NOTE: Drill bits available for purchase from Audiovox. o When drilling a metal bumper, remove the sharp edges using a round metal file. Be careful not to enlarge the hole when filing. 5
7 Installing the Sensor Sleeve and Sensors NOTE: When installing the sensors into the sensor sleeves, push on the outer ring of the sensor only. Never push on the center of the sensor. 1. Ensure sensors and sleeves are upright (all products have an alignment mark on the top). 2. If required, install the sensor into the sleeve. 3. Install the sensor (with sleeve if required) into the holes drilled in the bumper. 4. Run the sensor wires through the sensor sleeves in the bumper. Alignment Mark 5. Press on the outer ring of the sensor and push until the sensor is flush with the bumper. The sensor should fit snugly into the bumper and lock into place. 6. Determine where the sensor wires will enter into the trunk area or passenger compartment. Many vehicles have a factory grommet to allow routing of wires from the outside to the inside of the vehicle. If needed, drill a hole to route the wires into the vehicle, taking care when drilling metal. Smooth edges with a round metal file and use a rubber grommet to protect the wires. 7. Feed the sensor wires through the factory grommet or other opening into the vehicle for connection to the control module (e.g., into the cab of most trucks or the trunk of passenger cars). NOTE: Once the wires are passed through, make sure there is enough wire to route to the control module. Check that the sensor wires will not be pinched by moving parts or panels. 8. Cable tie the sensor wires and the power harness wires behind the bumper, keeping them away from the exhaust system or moving suspension parts (install power harness before using cable ties). Do not pull on the sensor wires near the sensor shaft exit point, as this may damage the inner connections. 6
8 Installing the Power Harness Tap/Run Connection 1. Wire the Power Harness to the vehicle s reverse lamp. a) Locate the reverse lamp in the tail light assembly. Using the tap connector supplied, perform the following steps: i. Place the un-stripped positive lead wire on the run channel. ii. Insert the un-stripped red power wire completely. iii. Make the connection between the wires by crimping down the metal connector with a pair of pliers, making sure the metal is flush with the plastic insulator. iv. Close the top hinged cover until latched. b) Attach the black to the vehicle body, either directly with supplied hardware or by attaching to a wire directly attached to the vehicle body. If attaching to another wire: i. Place the un-stripped ground lead wire on the run channel. ii. Insert the un-stripped black ground wire completely. iii. Make the connection between the wires by crimping down the metal connector with a pair of pliers, making sure the metal is flush with the plastic insulator. iv. Close the top hinged cover until latched. 2. Route the power harness wires with the sensor wires to the control box. 7

9 Mounting the Speaker The speaker has three volume settings: Off, Hi, and Low. Since the speaker can be adjusted as needed, you should mount the speaker in an accessible location in the interior, where it is visible using the rear-view mirror. 1. Route the wires for the speaker to the area where you will install the control module. Make sure they will not be pinched by the panel or moving parts. 2. Clean the back of the speaker and the mounting location to ensure good adhesion. When the location is dry, peel the backing strip off the Velcro tape and place on the back of the speaker. Next, peel the backing strip off the other side of the Velcro tape and press on the cleaned surface. Use the optional mounting screws (provided), if necessary. 8
10 Mounting the Control Module Determine a dry place inside the vehicle (out of the way) to mount the control module (e.g., behind an inner body panel), making sure that all wiring will reach the intended location. 1. Plug the sensor wires, speaker and power harness into the control module before mounting. The sensor must be plugged into the corresponding socket (see Figure 4). The control module is pre-fitted with Velcro for mounting. 2. Clean the pre-selected mounting area to ensure good adhesion. 3. When the surface is dry, peel the backing off the Velcro pad and attach the control module. Figure 4 9
11 Specifications Power Supply DC9V-DC16V Current Draw <120mA Detecting Distance 0ft 4.5ft Sensor Cable Length 19.68ft (6M) Operating Temperature Range -0 F ~ 176 F Maintenance Though your backup system requires minimum care, you should maintain its condition and performance using the following the guidelines: Keep the control box away from moisture, extreme heat or cold. Keep the sensors free from snow, ice, and debris. 10
12 Diagnostics / Trouble Shooting Problem No sound when reverse gear is engaged. Solution 1. Check if ignition/reverse light on 2. Check power cable connection 3. Check switch on speaker 1 Beep System is functioning correctly 2 Beeps 1 sensor is disconnected/damaged 3 Beeps 2-3 Sensors are disconnected/damaged 4 Beeps No sensors are connected System beeping without obstacle behind vehicle 1. Ensure sensor is mounted upright. 2. Remove anything mounted on the vehicle that may be in the detection area. 3. Ensure correct hole size has been drilled in bumper. 4. Verify sensor is installed at the correct height. 5. Verify sensor is in the correct position. 6. Check all connections. 7. Ensure module is not mounted near electrical components with high current. 8. Verify supporter was used if required (angled/metal bumpers). 11

13 12
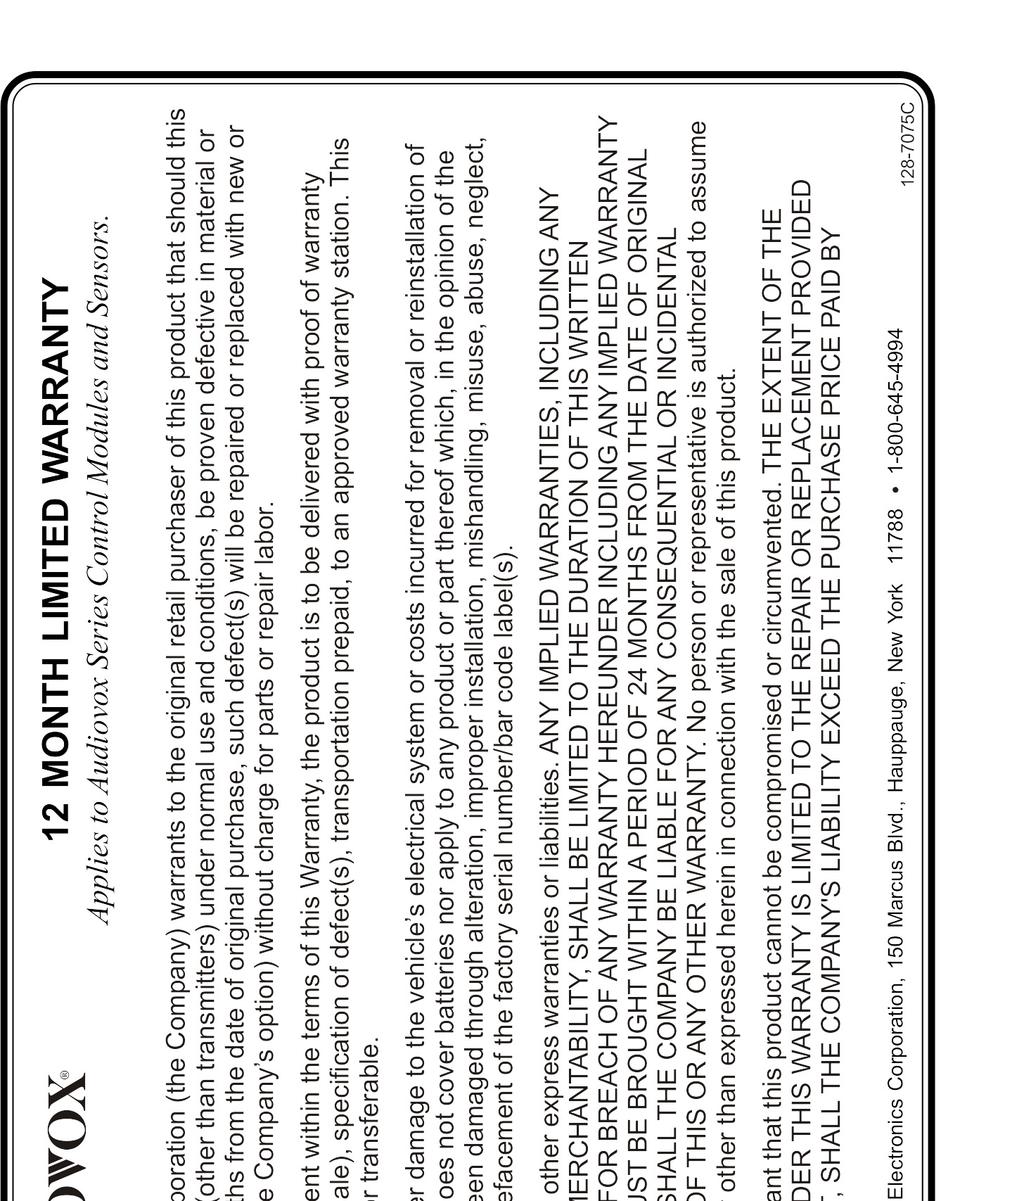
14 2009 Audiovox Electronics Corp., 150 Marcus Blvd., Hauppauge, N.Y
4 Sensor Backup Obstacle Sensing System Model: ACAB104 Installation Manual
 4 Sensor Backup Obstacle Sensing System Model: ACAB104 Installation Manual 0 5 10 Features: Four reversing sensors detect obstacles between 1-7 feet Includes 0, 5, and 10 angle sensor sleeves to fit most
4 Sensor Backup Obstacle Sensing System Model: ACAB104 Users Manual
 4 Sensor Backup Obstacle Sensing System Model: ACAB104 Users Manual 0 5 10 Features: Four reversing sensors detect obstacles between 1-7 feet Includes 0, 5, and 10 angle sensor sleeves to fit most bumpers
Vehicle Rear Observation System With Integrated Parking Sensors
 Vehicle Rear Observation System With Integrated Parking Sensors Model: CAMSBAR Installation/User Manual Features: 2.5" LCD Color Display 2 Ultra Sonic Rear Obstacle Sensors On-screen Display Function Automatically
Installation Manual for Rear Park Assist
 Installation help? 1. Go to www.echomaster.com 2. Click on the [Login Area] located on the side blue bar. 3. Click [Technician/Installer Training & Support Site] 4. Click [Return User/Click here to Log
Rearview Mirror with 4" Color LCD Monitor and Camera Package Model: RVMPKG4 (V2.0) User s Manual
 User s Manual") Rearview Mirror with 4" Color LCD Monitor and Camera Package Model: RVMPKG4 (V2.0) User s Manual Features: Rearview Mirror with 4" LCD Monitor Built-In Speaker Rearview Camera Input Auxiliary Video Input
Rearview Mirror with 4" Color LCD Monitor and Camera Package Model: RVMPKG4 (V2.0) User s Manual Features: Rearview Mirror with 4" LCD Monitor Built-In Speaker Rearview Camera Input Auxiliary Video Input
Rear Observation System Package Model RVMPKG1 Installation Manual
 Rear Observation System Package Model RVMPKG1 Installation Manual Features: Rearview Mirror with 4 LCD 2 Built in Speakers Rearview Camera Input Auxiliary Video Input Video System Auto Detection for PAL/NTSC
P5000 Series Owners Manual 12/16/04 5:16 PM Page 1. Owners Manual
 P5000 Series Owners Manual 12/16/04 5:16 PM Page 1 Owners Manual P5000 Series Owners Manual 12/16/04 5:16 PM Page 2 C ongratulations, You have made a wise investment and an excellent choice in selecting
PD10-M-RIM INSTALLATION INSTRUCTIONS. The PD10-M-RIM is a storefront grade 1 exit device equipped with motor drive latch retraction.
 PD10-M-RIM INSTALLATION INSTRUCTIONS The PD10-M-RIM is a storefront grade 1 exit device equipped with motor drive latch retraction. Retrofits Doromatic 1790 & First Choice 3790. B. G. A. C. D. E. F. PD10-M-RIM
INSTALLATION INSTRUCTIONS
 Ultrasonic Rear Park Aid Kit (Kit # 9002-3000) INSTALLATION INSTRUCTIONS Please read thoroughly before starting installation and check that kit contents are complete. Items Included in the Kit: 4 Ultrasonic
INSTALLATION INSTRUCTIONS:
 INSTALLATION INSTRUCTIONS: The CA-5030 is an ultrasonic parking assist system designed for use on the rear bumper of most cars and trucks. This system detects any people or objects behind the vehicle using
TOYOTA RAV4/HV INTERIOR LIGHT KIT Preparation
 Preparation Part Number: PT413-42130 Kit Contents Item # Quantity Reqd. Description 1 1 Wire Harness 2 3 Hardware Bag Contents Item # Quantity Reqd. Description 1 20 Cable Tie 2 2 Scotchlok 3 2 Foam Pad
Back-Up Sensor System
 Back-Up Sensor System Model No.: PKC0RE Owner s Manual and Warranty Information OFF ON 0.4m/1.3ft 0.6m/2.0ft 1.0m/3.3ft 1.2m/4.0ft 1.5m/5.0ft LEFT RIGHT Read these instructions completely before using
U L T I M A T E R A D A R / L A S E R D E F E N S E S Y S T E M
 S m a r t e r Q u i e t e r M o r e A c c u r a t e U L T I M A T E R A D A R / L A S E R D E F E N S E S Y S T E M Installation Manual PASSPORT 9500ci Comes Complete Front Radar Receiver Miniature weatherproof
INSTALLATION INSTRUCTIONS
 Ultrasonic Rear Park Aid Kit (Kit # 9002-3000) INSTALLATION INSTRUCTIONS Please read thoroughly before starting installation and check that kit contents are complete. Items Included in the Kit: 4 Ultrasonic
Assembly instructions Original parking distance control system, Volkswagen
 Assembly instructions Original parking distance control system, Volkswagen Set contents: 1 x controller 1 x buzzer 4 x sensor Set contents: 4 x covering rings 4 x protective rings Special tools, test and
INSTALLATION INSTRUCTIONS:
 INSTALLATION INSTRUCTIONS: The CA-5010.II is an ultrasonic parking assist system designed for use on the rear bumper of most cars and trucks. This system detects any people or objects behind the vehicle
STC2 Car Kit. Installation Guide
 STC2 Car Kit Installation Guide Box Contents When you unpack your STC2 Car Kit, it should include everything as shown below: Suction Cup Mount & Screws Surface Preparation Cleaning Kit (To clean a surface
REARSENTRY TM BASE KIT ROSTRA OBSTACLE SENSING SYSTEM CONTENTS
 REARSENTRY TM ROSTRA OBSTACLE SENSING SYSTEM BASE KIT 250-1728 CONTENTS Parts List... 2 Parts Diagrams... 2 Before You Start... 5 Installation... 7 Troubleshooting Guide...11 Form #4713, Rev. B, 01-07-04
INSTALLATION INSTRUCTIONS
 28 INSTALLATION INSTRUCTIONS SECTION - AIR SPRING SECTION 2 - AIR ACCESSORY 2-5 ! IMPORTANT PLEASE DON T HURT YOURSELF, YOUR KIT OR YOUR VEHICLE. TAKE A MINUTE TO READ THIS IMPORTANT INFORMATION. This
UNPACK AND IDENTIFY THE FOLLOWING PARTS.
 SUT-250-M2 ASSEMBLY REQUIREMENTS *Torque all T-bolt nuts to 35-40 foot pounds. *Check all lights before towing. *Tire pressure not to exceed recommendation on serial tag. *Re-torque wheel nuts after first
and Original Series Pickup Lift Mounting Instructions Fleetside Chevy & GMC Trucks Fleetside 4-door Chevy & GMC Trucks T-100
 r ve and Original Series Pickup Lift Mounting Instructions Fleetside Chevy & GMC Trucks - 1960-1987 Fleetside 4-door Chevy & GMC Trucks - 1988-1991 Preparing the Gate 1. Remove the mounting hardware which
INSTALLATION INSTRUCTIONS
 INSTALLATION INSTRUCTIONS Accessory Application 2008 ACCORD 2-DOOR Publications No. AII 37561-38377 Issue Date NOV 2007 PARTS LIST Control unit bracket (L4) Back-up Sensor Attachment Kit P/N 08V67-TE0-100A
TOYOTA RAV TRAILER WIRE HARNESS Preparation
 Preparation Part Number: PU322-42013-UW Kit Contents Item # Qty Description 1 1 Trailer Module Harness 2 1 Trailer 4-Flat Harness 3 1 Trailer Power Wire Harness 4 1 Mounting Bracket, 4-Flat 5 2 Screw #10-24
Rear Vision System Liftgate Emblem Camera for Aftermarket Display Ford Flex (Kit part number )
") Rear Vision System Liftgate Emblem Camera for Aftermarket Display 2009-2012 Ford Flex (Kit part number 1008-6509) Kit Contents: Liftgate Emblem Mount with Camera Chassis Harness with RCA (Note: In some
Rear Vision System Liftgate Emblem Camera for Aftermarket Display 2009-2012 Ford Flex (Kit part number 1008-6509) Kit Contents: Liftgate Emblem Mount with Camera Chassis Harness with RCA (Note: In some
Your Legal Fuel Tank Source.
 February 23, 2015 IS# 808 Page 1 of 13 THANK YOU FOR PURCHASING A TRANSFER FLOW 40 GALLON TOOLBOX REFUELING SYSTEM. PLEASE READ THE FOLLOWING PROCEDURES CAREFULLY BEFORE STARTING THE INSTALLATION. CAUTION:
INSTALLATION INSTRUCTIONS
 2807 INSTALLATION INSTRUCTIONS SECTION - AIR SPRING SECTION 2 - AIR ACCESSORY -6 ! IMPORTANT PLEASE DON T HURT YOURSELF, YOUR KIT OR YOUR VEHICLE. TAKE A MINUTE TO READ THIS IMPORTANT INFORMATION. This
Water in Fuel Sensor Kit
 03/08/2016 1050355-1050356 Water in Fuel Sensor Kit (I-00369) 1 Water in Fuel Sensor Kit Fast and Accurate Detection of Water in Diesel Fuel 1050355 Universal Kit For use with BD FlowMax water separator
Installation Instructions Harley-Davidson Saddlebag Lids
 Installation Instructions Harley-Davidson Saddlebag Lids Thank you for your purchase of Bagger Audio Saddlebag Lids for your Harley- Davidson motorcycle. We have carefully engineered these products to
Installation Instructions. Fog Lights. The lamps get very hot when they have been in use. Do not touch them as they may cause burns.
 2100X Installation Instructions Thank you very much for purchasing PIAA product. Please read this entire manual before installation and use of this product. Fog Lights For Installers Please give this Installation
Conflicts NOTE: XLE, LE, AND SE MODELS
 TOYOTA SIENNA 2011- REARSIGHT Part Number: 00016-00085 Accessory Code: MC9 Conflicts NOTE: XLE, LE, AND SE MODELS KIT CONTENTS ITEM QTY DESCRIPTION 1 1 MIRROR/MONITOR 2 1 REAR CAMERA ASSEMBLY 3 1 CAMERA
INSTALLATION INSTRUCTIONS DOCUMENT REVISION : /17/2014
 INSTALLATION INSTRUCTIONS DOCUMENT REVISION : 1.0 10/17/2014 LPF COMPONENT LIST LPF W/ WIRE & GROMMET ( 1 ) M6 X 20MM SCREW ( 2 )* LPF DRIVER BOX ( 1 ) REVERSE CIRCUIT WIRE ( 1 ).25 THICK LICENSE PLATE
and Original Series Pickup Lift Mounting Instructions T-150-T T-150 PART#5177 T-150-T
 Fullsize Chevy & GMC Trucks- 988-999 Toyota Tundra- 2000-2006 Toyota T-00-993-999 Preparing the Gate r ve and Original Series Pickup Lift Mounting Instructions. Remove the mounting hardware which is banded
PBS-MWSK. Microwave Blind Spot Sensor System. Installation/User Manual
 Installation/User Manual Introduction Congratulations on purchasing the EchoMaster Pro Microwave Blind Spot Sensor system. This detection system is designed for you and your vehicle s safety. EchoMaster
INSTALLATION INSTRUCTIONS
 INSTALLATION INSTRUCTIONS PARTS LIST Accessory Application Publications No. MII 13038 GL1800 P/N 08E75-MCA-100K Issue Date November 2009 Honda Dealer: Please give a copy of these instructions to your customer.
Digitrip Retrofit System for ITE K-3000, K-3000 S, K-4000 and K-4000 S Breakers
 Supersedes IL 33-858-4 Dated 05/02 Digitrip Retrofit System for ITE K-3000, K-3000 S, K-4000 and K-4000 S Breakers Digitrip Retrofit System for ITE K-3000, Digitrip Retrofit System for ITE K-3000, K-3000
Banks SmartLock. THIS MANUAL IS FOR USE WITH system 55270
 owner s manual with installation instructions Banks SmartLock 2003-Early 2004 Dodge 5.9L CUMMINS TURBO DIESEL TRUCKS THIS MANUAL IS FOR USE WITH system 55270 Gale Banks Engineering 546 Duggan Avenue Azusa,
JEEP JK4 STEP SLIDER INSTALLATION BD-SS-100-JK4
 JEEP JK4 STEP SLIDER INSTALLATION BD-SS-100-JK4 PARTS LIST QTY DESCRIPTION 1 Drivers Side Slider Assembly 1 Passenger Side Slider Assembly 1 Wiring Harness and Fuse 1 Double Sided Sticky Squares and Alcohol
IT IS IMPORTANT THAT YOU OBTAIN THE CORRECT INFORMATION FOR YOUR VEHICLE, OR DAMAGE TO THE WIRING SYSTEM COULD OCCUR.
 Instructions for Universal Harness PRINT THESE INSTUCTIONS Gentex Mirror Installation Instructions Provided by www.rearviewautomirrors.com These instructions have been prepared to provide you with details
TOYOTA VENZA 2009 TRAILER WIRE HARNESS Procedure
 Part Number: PT791-0T099 Kit Contents Item # Quantity Reqd. Description 1 1 Trailer Wire Harness Module 2 1 4-Flat Harness 3 1 Battery Power Wire Harness 4 1 Mounting Bracket, 4-Flat 5 2 Screw #10-24 6
<THESE INSTRUCTIONS MUST BE GIVEN TO THE END USER> B&W
 B&W Trailer Hitches 6 Hawaii Rd / PO Box 86 Humboldt, KS 66748 P:60.473664 F:60.869.903 Turnoverball Gooseneck Hitch Installation Instructions MODEL 08
UNPACK AND IDENTIFY THE FOLLOWING PARTS.
 SUT-500-S ASSEMBLY REQUIREMENTS *Torque all T-bolt nuts to 35-40 foot pounds. *Check all lights before towing. *Tire pressure not to exceed recommendation on serial tag. *Re-torque wheel nuts after first
RECOMMENDED SEQUENCE OF APPLICATION
 2007-2008 TOYOTA TUNDRA CAMERA KIT PART NUMBER: 250-8045 KIT CONTENTS ITEM QTY DESCRIPTION 1 1 CAMERA ASSEMBLY 2 1 TRUCK EXTENSION HARNESS 3 1 TAILGATE EXTENSION HARNESS 4 1 POWER HARNESS 5 1 HARDWARE
SUT-450-I ASSEMBLY REQUIREMENTS
 SUT-450-I Torque wrench, carpenters square, wire cutters, Phillips screwdriver, 7/16, 9/16, and 3/4 combination wrenches, ratchet, 9/16,3/4,13/16, and 7/8 sockets. ASSEMBLY REQUIREMENTS *Torque all T-bolt
Conflicts. TOYOTA 4Runner REARSIGHT. Part Number: Code: MC90 KIT CONTENTS ADDITIONAL ITEMS REQUIRED FOR INSTALL RECOMMENDED TOOLS
 TOYOTA 4Runner 2010 - REARSIGHT Part Number: 00016-00085 Code: MC90 Conflicts KIT CONTENTS ITEM QTY DESCRIPTION 1 1 MIRROR/MONITOR 2 1 REAR CAMERA ASSEMBLY 3 1 CAMERA EXTENSION HARNESS 4 1 SACK PARTS 5
INSTALLATION INSTRUCTIONS
 INSTALLATION INSTRUCTIONS Accessory Application Publications No. BII 31129 REARVIEW CAMERA 2006 RL Issue Date OCT 2005 PARTS LIST Attachment Kit P/N: 08B21-SJA-B00 Template Rear camera trim 6-Pin connector
P Original Series Cargo Van Lift Mounting Instructions Fullsize Ford Van present. Preparing the Gate
 Fullsize Ford Van- 1992-present Preparing the Gate 1. Remove the mounting hardware which is banded to the liftgate. 2. Verify mounting kit (Figure 1 and Table 1). S-400-40 STRAP VAN MOUNTING EAR BENT BRACKET
SELF DRILL SCREWS FILLER STRIP
 r ve Pickup Lift Mounting Instructions Fullsize Ford Trucks- F-150 2015-present Preparing the Gate 1. Remove the mounting hardware which is banded to the liftgate. 2. Verify mounting bracket kit (Figure
GENUINE PARTS INSTALLATION INSTRUCTIONS
 GENUINE PARTS INSTALLATION INSTRUCTIONS DESCRIPTION: APPLICATION: PART NUMBER: KIT CONTENTS: Tow Hitch Wire Harness Kit Quest (2011) 999T8 NW000 Installation of this accessory requires installation of
and Original Series Pickup Lift Mounting Instructions Fullsize Chevy & GMC Trucks: 1500 & 2500 LD HD & 3500HD BOLT-ON GUSSET
 r ve and Original Series Pickup Lift Mounting Instructions Fullsize Chevy & GMC Trucks: 1500 & 2500 LD 1999-2007 2500HD & 3500HD 2000-2007 Preparing the Gate 1. Remove the mounting hardware which is banded
General Information. Notations and Conventions. Compatibility Check. Kit Description. Call-Outs. Part Lists Great Plains Manufacturing, Inc.
 Part Lists Great Plains Manufacturing, Inc. 1 Installation Instructions Loup Shaft Monitor Used with Drill models: Compatible with most 1995 and later, two- and three-box drills with 5 8 -inch square main
Classic Light Bar Mustang
 Classic Light Bar 2005-2012 Mustang Note: Read installation instructions before starting. Component List: 1 Light Bar Part #110000 1 Driver Side Bracket w/set Screw Part #115003 1 Passenger Side Bracket
INSTALLATION INSTRUCTIONS
 OEM Recessed Lip Camera with Harness and Auto Dimming Mirror (Kit part number 9002-8721) Please read thoroughly before starting installation and check that kit contents are complete. Items Included in
SUBARU Rear Obstacle Detection System 2004 onward
 SUBARU Rear Obstacle Detection System IMPREZA 5 DOOR 2004 onward ENSURE THE SET-UP PROCEDURE IS CARRIED OUT FOLLOWING INSTALLATION (See Pg 4) IMPREZA 5 DOOR JUNE 04 MODEL ONWARDS KEY POINTS OF THE INSTALLATION
GENUINE Interior Lighting Kit
 GENUINE Interior Lighting Kit INSTALLATION INSTRUCTIONS Thank you for purchasing a genuine Mazda accessory. Before removal and installation, be sure to thoroughly read these instructions. Please read the
Installation Guide. Blind Spot Detection / ADVBSD20 REV. A
 Guide Blind Spot Detection / ADVBSD20 REV. A Kit Contents System Layout NO. Item QTY. Image 1 BSD Sensor 2 2 GPS Module 1 3 Main Harness 1 BUZZER GPS Module 4 Sensor Harness 2 Left LED Right LED 5 GPS
CHEVROLET TAHOE/DENALI/AVALANCHE/YUKON/ SILVERADO/SIERRA 2007+
 CHEVROLET TAHOE/DENALI/AVALANCHE/YUKON/ SILVERADO/SIERRA 2007+ INSTALLATION INTRODUCTION 1. REMOVING THE FENDER AND DOORS FROM THE A-PILLAR AND DISCONNECTING THE WIRE HARNESS @ THE DOOR JAM 2. REMOVING
Rear EU Number Plate Sensor System User Manual SS-NP2
 User Manual Introduction Congratulations on purchasing EchoMaster parking sensors. This ultrasonic detection system is designed to assist in the avoidance of obstacles while reversing. Disclaimer: EchoMaster
AOM452 In-Car LCD Display System Package Installation Manual
 AOM452 In-Car LCD Display System Package Installation Manual Features: 4.5 TFT Color LCD Display Camera 1 input for Rearview camera Camera 2 input for Side view camera Navigation Input Cautions! The product
JEEP JK4 STEP SLIDER INSTALLATION BD-SS-100-JK4
 JEEP JK4 STEP SLIDER INSTALLATION BD-SS-100-JK4 PARTS LIST QTY DESCRIPTION 1 Drivers Side Slider Assembly 1 Passenger Side Slider Assembly 1 Wiring Harness and Fuse 1 Double Sided Sticky Squares and Alcohol
<THESE INSTRUCTIONS MUST BE GIVEN TO THE END USER> B&W Trailer Hitches 1216 Hawaii Rd / PO Box 186 Humboldt, KS P: F:
 B&W Trailer Hitches 26 Hawaii Rd / PO Box 86 Humboldt, KS 66748 P:620.473664 F:620.869.903 Turnoverball Gooseneck Hitch Installation Instructions Mounting
and Original Series Pickup Lift Mounting Instructions Fullsize Nissan Titan Trucks present T-420 BOLT-ON GUSSET PART#5257
 and Original Series Pickup Lift Mounting Instructions Fullsize Nissan Titan Trucks- 2004-present Preparing the Gate 1. Remove the mounting hardware which is banded to the liftgate. 2. Verify mounting bracket
TOYOTA VENZA 2009 TRAILER WIRE HARNESS Procedure
 Part Number: PT791-0T099 Kit Contents Item # Quantity Reqd. Description 1 1 Trailer Wire Harness Module 2 1 4-Flat Harness 3 1 Battery Power Wire Harness 4 1 Mounting Bracket, 4-Flat 5 2 Screw #10-24 6
CHEVY CAMARO Four panel Sequential LED Taillight kit installation guide
 1978-81 CHEVY CAMARO Four panel Sequential LED Taillight kit installation guide Kit Contents: 4 LED panels 1 power wire with t-tap 2 driver side LED harnesses, 24 2 passenger side LED harnesses, 48 4 LED
<THESE INSTRUCTIONS MUST BE GIVEN TO THE END USER> B&W Trailer Hitches 1216 Hawaii Rd / PO Box 186 Humboldt, KS P: F:
 B&W Trailer Hitches 26 Hawaii Rd / PO Box 86 Humboldt, KS 66748 P:620.473664 F:620.473766 Turnoverball Gooseneck Hitch Installation Instructions Mounting
INSTALLATION INSTRUCTIONS
 INSTALLATION INSTRUCTIONS Accessory Application Publications No. All 28593 2006 RIDGELINE P/N 08F23-SJC-100 Issue Date FEB 2005 PARTS LIST Center front bumper trim (Not used if the vehicle is equipped
AUXILIARY BATTERY BOX INSTALLATION INSTRUCTIONS
 AUXILIARY BATTERY BOX INSTALLATION INSTRUCTIONS The original TOMMY GATE hydraulic lift Assembling the Auxiliary Battery Box 1. Remove the cover from the auxiliary battery box by removing the two nuts and
ThermoLite 110W-330W Solar Panel Installation Instructions
 ThermoLite 110W-330W Solar Panel Installation Instructions INSTALL APPLICATIONS SUPPORTED BY THIS GUIDE: 1. Trailer Roof Top Mounted 2. Bus Roof Top Mounted 3. Tractor Fairing Mounted 40W and 110W Replacement
Installation Manual. AutoSteer. Gleaner Combine. AutoGuide 2 Steer Ready. Supported Models A66 A76 R66 R76 S67 S77 PN: A
 Installation Manual AutoSteer Gleaner Combine AutoGuide 2 Steer Ready Supported Models A66 A76 R66 R76 S67 S77 PN: 602-0312-01-A LEGAL DISCLAIMER Note: Read and follow ALL Instructions in this manual carefully
LGT-306L / LB Club Car Precedent LED Light Bar Bumper Kit Installation Instructions
 LGT-306L / LB Club Car Precedent LED Light Bar Bumper Kit Installation Instructions Caution: Please read through the instructions carefully. Before starting this project, remove the system s positive and
SUT-250-S (These instructions are used for SUT-250-SCLC also)
") SUT-250-S (These instructions are used for SUT-250-SCLC also) Torque wrench, carpenters square, wire cutters, Phillips screwdriver, 7/16, 9/16, and 3/4 combination wrenches, ratchet, 9/16, 3/4, 13/16,
SUT-250-S (These instructions are used for SUT-250-SCLC also) Torque wrench, carpenters square, wire cutters, Phillips screwdriver, 7/16, 9/16, and 3/4 combination wrenches, ratchet, 9/16, 3/4, 13/16,
Installation Instructions
 patent pending Portable Proportional Braking System Installation Instructions Part number 9400 Towing and Suspension Solutions ROADMASTER, Inc. 6110 NE 127th Ave. Vancouver, WA 98682 800-669-9690 Fax 360-735-9300
INSTALLATION INSTRUCTIONS
 Rear Vision System Tailgate Emblem Camera Aftermarket Display 2009-Current Ford F-150 and 2010-Current Super Duty (Kit part number 1008-6509) Kit Contents: Tailgate Emblem Mount with Camera Chassis Harness
Installation Instructions LamboStyleDoors (The instruction are to be used as a reference. Please repeat for both doors)
") Installation Instructions LamboStyleDoors (The instruction are to be used as a reference. Please repeat for both doors) Mercedes C-Class Sport coupé type W203 Part number 500 25 009 Pre installation check
Installation Instructions LamboStyleDoors (The instruction are to be used as a reference. Please repeat for both doors) Mercedes C-Class Sport coupé type W203 Part number 500 25 009 Pre installation check
SS41HF Mitsubishi Pajero NS & NT V8/V9 Series 3.2 Litre Turbo Diesel (4M41 Engine) 3.8 Litre V6 Petrol (6G76 Engine)
 3.8 Litre V6 Petrol (6G76 Engine)") SS41HF Mitsubishi Pajero NS & NT V8/V9 Series 3.2 Litre Turbo Diesel (4M41 Engine) 3.8 Litre V6 Petrol (6G76 Engine) 21/7/2010 Parts List ITEM PART NO DESCRIPTION QTY 1 570-133-200 BODY - SNORKEL (SS41HF)
SS41HF Mitsubishi Pajero NS & NT V8/V9 Series 3.2 Litre Turbo Diesel (4M41 Engine) 3.8 Litre V6 Petrol (6G76 Engine) 21/7/2010 Parts List ITEM PART NO DESCRIPTION QTY 1 570-133-200 BODY - SNORKEL (SS41HF)
INSTALLATION INSTRUCTIONS
 INSTALLATION INSTRUCTIONS Accessory Application Publications No. UNDER 2007 CIVIC SI All 33529 Issue Date AUG 2006 PARTS LIST Rear under spoiler Clip Rubber washer 6 Flange bolts 6 Flange nuts TOOLS REQUIRED
Ag Leader Technology. Parts List for Combine MF , 8780, White 9700
 Parts List for Combine Quantity by Model Note: Indented items indicate parts included W in an assembly listed above 8 8 8 8 H 5 5 5 7 I 6 7 9 8 T Part Name/Description Part No. 0 0 0 0 E Instruction Kit
IR Temp Probe. Toyota Sienna Rear Sight. Part Number: Accessory Code:MC1
 Toyota Sienna 200 - Rear Sight Part Number: 0006-00085 Accessory Code:MC Section I Installation Preparation Kit Contents Item # Quantity Reqd. Description 2 3 4 5 6 7 8 MIRROR/MONITOR REVERSE MINI-CAMERA
Installation Instructions
 Portable Proportional Braking System Installation Instructions Part number 9400 Time Tested Time Proven ROADMASTER, Inc. 6110 NE 127th Ave. Vancouver, WA 98682 800-669-9690 Fax 360-735-9300 roadmasterinc.com
Installation Manual: Hyundai Tucson Power Lift Gate System
 Installation Manual: Hyundai Tucson Power Lift Gate System Page 1 of 12 NOTE: Installation Precaution 1. It is recommended to have this product installed by a professional to avoid damage caused by improper
INSTALLATION INSTRUCTIONS
 Rear Vision System Liftgate Emblem Camera Mirror Display 2009-2012 Ford Flex (Kit part number 1008-9527) Kit Contents: Mirror Liftgate Emblem Mount with Camera Interior (shorter) Harness Chassis (longer)
Installing the PBX-PIT01 or PBX-PIT05 Pit Bar in the Ford Police Interceptor Utility
 25500242 Rev. B0 0216 Safety Message to Installers and Service Personnel of Emergency Vehicle Safety Equipment Installing the PBX-PIT01 or PBX-PIT05 Pit Bar in the 2011 2016 Ford Police Interceptor Utility
Installation Instructions
 Instructions Created by an: DIY Underhood LED Lighting Kit (SKU# DIY-E-UHLK) Installation Instructions NOTICE: This Under Hood Light Kit was installed on a 2002 Toyota Tacoma. However, these instructions
Installation Instructions
 Installation Instructions Important INSTALLATION REQUIRES WELDING to the unibody chassis by a qualified welder or metal fabricator. A bolt-on installation is not possible for this product. CHECK STEERING
Page 1. File: Motolight caliper one-piece Date: 8/14/2006
 Page 1 Caliper Mount Installation One-piece mounting brackets You should allow about two to three hours for installation. We suggest you use a well-lighted space for installation. PLEASE READ ALL THE INSTRUCTIONS.
Stay-IN-Play with Panic Stop Braking
 INSTALLATION INSTRUCTIONS TOWED VEHICLE BRAKING SYSTEM Stay-IN-Play with Panic Stop Braking SMI Manufacturing, Inc. P.O. Box 14040 Evansville, IN 47728 1-800-893-3763 www.smibrake.com SIP0906 Model SIP0603
INSTALLATION INSTRUCTIONS
 INSTALLATION INSTRUCTIONS Accessory Application CR-V Publications No. AII 32953-34081 Issue Date NOV 2006 PARTS LIST 2 Corner sensor clips Backup Sensor Attachment Kit P/N 08V67-SWA-100A Back-up sensor
2-row and All-row systems included.
 Ag Leader Technology Cotton Picker Installation Installation Instructions for John Deere cotton picker models: 2-row and All-row systems included. IMPORTANT: Ensure the model numbers shown above correspond
SHAVED-DX. Installation Manual & Operation Instructions. Trouble Shooting Reverse Polarity Wiring Problems
 Trouble Shooting Reverse Polarity Wiring Problems Switch doesn't work properly but the shaved kit transmitters do work Step 1 Did you purchase a switch kit designed for three switches and only use two
ATTENTION. Custom Dynamics UTV Turn Signal Kit Installation Instructions
 Custom Dynamics UTV Kit Installation Instructions We thank you for purchasing the Custom Dynamics UTV LED Kit. Our products utilize the latest technology and high quality components to ensure you the most
Deuce/Ace Installation Instructions
 HARDWARE KIT: Upper Mounting Plate: 2-7/16" (11mm) X 3.5" bolts 2-7/16" flange nuts 2-2" spacers 2-7/16" trim cap mounting washers 2 - plastic trim caps TOOLS NEEDED: safety glasses wrenches 16mm or 5/8"
INSTALLATION INSTRUCTIONS
 INSTALLATION INSTRUCTIONS Accessory Application Publications No. BII 39890 2009 MDX Issue Date JULY 2008 PARTS LIST Backup Sensor Attachment Kit P/N 08V67-STX-200A Self-tapping screw, 5 x 16 mm 12 Wire
Remove 4 circled pins. Route wiring along dashed line. Remove the 2 9mm nuts and black retaining plate that secure extractor.
 2015 Ford Mustang Turn Signal Hood Kit Parts List: Quantity: Tool List: Bracket & pre-installed lamp 2 Flat head screwdriver Wiring harness 1 Phillips screwdriver PB-3660 Parts Bag 1 Ratchet & Socket set
WARNING READ ALL INSTRUCTIONS PRIOR TO INSTALLATION
 SUPRA MULTITEMP HOST UNIT S PART NO. MODEL DESCRIPTION KIT NUMBER (REFERENCE) 980336900 SUPRA 950M/T TDD 760053727 WARNING READ ALL INSTRUCTIONS PRIOR TO INSTALLATION 1.0 INSTALLATION OF THIS REFRIGERATION
PFadvantage MF 6850/6855; Ideal 9080/9090
 MF 6850/6855; Ideal 9080/9090 Note: Indented items indicate parts included in an Quantity by Model assembly listed above MF Ideal Part Name/Description Part Number 6850 6855 9080 9090 Instruction Kit MF
650 Series Cargo Van Lift Mounting Instructions Fullsize Ford 1992-Present
 TOMMY GATE OWNER'S / OPERATOR'S MANUAL 650 Series 650 LB Capacity 650 Series Cargo Van Lift Mounting Instructions Fullsize Ford 1992-Present Installing the Base Plate 1. Examine the interior and exterior
INSTALLATION INSTRUCTIONS
 INSTALLATION INSTRUCTIONS Accessory Application Publications No. AII 26033 KIT 2004 ODYSSEY Issue Date JAN 2004 PARTS LIST Trailer Hitch: P/N 08L92-S0X-100 Heavy-Duty P/S Cooler Kit P/N 53765-S0X-305 Heavy-duty
UNPACK AND IDENTIFY THE FOLLOWING PARTS.
 SUT-350-AIT ASSEMBLY REQUIREMENTS *Torque all T-bolt nuts to 35-40 foot pounds. *Check all lights before towing. *Tire pressure not to exceed recommendation on serial tag. *Re-torque wheel nuts after first
Air Conditioner for M915 A0/A1 Truck
 RD-2-4530-0 Air Conditioner for M915 A0/A1 Truck INSTALLATION INSTRUCTIONS Install refrigerant compressor per instructions provided with compressor mount kit. CAUTION: Edges of sheet metal can be sharp!
JEEVES. JEEVES Installation Manual. Installation Manual The Easiest Do-It-Yourself Dumbwaiter on the Market
 1 888-323-8755 www.nwlifts.com JEEVES Installation Manual The Easiest Do-It-Yourself Dumbwaiter on the Market This manual will cover the installation procedure step-by-step. The installation of this dumbwaiter
SUBARU Rear Obstacle Detection System 2004 onward
 SUBARU Rear Obstacle Detection System IMPREZA 4 DOOR 2004 onward ENSURE THE SET-UP PROCEDURE IS CARRIED OUT FOLLOWING INSTALLATION (See Pg 4) IMPREZA 4 DOOR JUNE 04 MODEL ONWARDS KEY POINTS OF THE INSTALLATION