2510 E Sunset Rd Suite #3 Las Vegas, NV Phone (702) or Fax (702) Mustang Depot all rights reserved
|
|
|
- Barbra Matthews
- 6 years ago
- Views:
Transcription


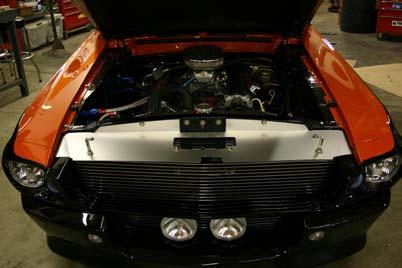
1 1 Thank you for purchasing the Mustang Depot E Body Kit! This new kit has evolved through a careful process of improving fitment and overall quality over the last 8 years. The current manufacturer, FSI now produces this third generation kit for 1967 and 1968 Fastbacks, Coupes and Convertibles. (Fastback show below) We offer everything to complete your car from head to toe and down to the last bolt! Any questions, comments or concerns can be directed to tech@mustangdepot.com or by calling our direct line show below. While this kit is manufactured under strict standards, every car is different and can impose different challenges when fitting the parts. While we recognize there a several methods for installing these parts, we have found the methods contained in these instructions are a good starting point for you to install your body kit. The car itself has over 40 years of history and can impose problems with some of the methods below. This is consequential to working on classic cars and extra material is present on the parts to allow for variances between cars. Also, there are several considerations that should be considered prior to the install of the panels including if your going with functional side exhaust and fender lip rolling for wider tires. Mustang Depot was involved in the development process of this kit, and fitting these parts on various cars. So we have direct experience to assist you in installing these parts. We have a hand full of tips and tricks to minimize the overall install time. So you can rest assured that continual efforts are in place to provide our customers with a quality kit you can rely on for years to come. We highly recommend using Norton Speed Grip for the bonding portions of the install Click Here


2 2 1. Sand area flat where hood hinges meet the underside of the hood. Mount the hood to the hinges using the original bolts. Leave bolts slightly loose for movement on hinges to align. Make adjustments to the hinges at the fender apron as necessary. Enlarging the hinge holes may be necessary. These hoods are far thicker then the stock sheet metal hoods. 4. Continue working with the hood until the hood lines up with the fenders and cowl. 2. Close hood and pull and push hood until it lines up with the body lines the lift back up and tighten hinge bolts. 5. Next acquire 1/4x20 rod stock and cut 2 sections and install in the nutserts integrated in manufacturing into the upper nose section. 3. Slight trimming is required to allow the hood to sit down in all areas. Every car is slightly different so this is a step-by-step process until the hood sits flat. 6. Preliminary fit test show some slight trimming necessary to sit flat against the fenders. Remove the high spots with an angle grinder.


3 3 7. Continue with this process until upper nose sits tightly against both fenders. Keep in mind the hood will likely need to be addressed again to sit evenly and in unison with the upper nose. We ve seen variances here between cars especially when fender aprons are replaced too high or too low. Put the upper nose aside until the lower nose is fitted. 8. Preliminary fitment of lower nose. The center should sit on top of the radiator cross support. The optional but recommended, lower front brace can be used for extra support and has provisions to mount the lower center lights. This mounts to original bumper bracket locations on the front subframe using the original hardware. Part #JV-ELN-LFB The optional Lower Front Brace above gives support to the lower nose and creates the bracketing for the lower center mounted fog lights. Click here to order


4 4 9. Continue by contouring the lower nose to sit tightly against the fenders. Use a pencil or marker to mark the material that needs to be removed. The lower nose will use the natural bodyline on the fender, as a shelf. Do not remove all of the material here as the front fender flare needs integrate. Also there are areas at the front that will need to be removed or the nose will not wrap around the fender to the wheel well properly. 11. Continue by removing the excess material at the front of the fender. 12. Once again, don t forget to match with front fender flares in the process. Use a bonding agent (we recommend Speed Grip) at the sides of the fenders and secure the lower nose on both sides by shooting a screw through the tab at the wheel well opening in the center bottom of the picture above. Shoot two sheet metal screws through the middle of the lower nose where it rests on the cross support. Do not bond flares at this point! 10. Contour the to match fender. There is extra material here for this process however be careful not to remove too much. This area is cut out for the hood latch support.


5 5 13. The front splash-guard will need to be removed to allow access to the studs on the upper nose to actually bolt-in. Once together the car begins to take on that recognizable appearance. The upper and lower nose can be held together tightly by riveting them together. 15. We offer a headlight bucket kit shown above to complete the headlight installation. Click here. Simply install brackets double brackets to the core support, and the single to the outer fender tab. Then hold buckets in place. Make sure to pay attention to the adjusters so they have both vertical and horizontal adjustment, then mark and drill holes. The reason they are not pre-drilled is the tabs on the buckets are not installed on a jig so they end up in different locations. Once mounted, install headlight rings on upper hose and install upper nose. 14. When cutting out the headlights, it s important to leave ears/lips to install trim ring for the 5.75 headlights. Side Skirts Installation #1 Install the side skirts using jack stands, mark for drilling. If you re going for functional exhaust, we recommend marking and cutting the outer rocker to make room for the exhaust tip. It s recommended that you fill in the area exposing the inside rocker to minimize environmental affects. We find it best to rivet the skirt on the underside of the rockers. Also cut a U shape in the bottom of the skirt so the tip can pass through once installed.

 draw a")


6 6 wait for it to set. Again, using Speed Grip allows you to use the squeeze out to fill the area between the flare and body. No bondo needed. If you wish to obtain and attached look (ie the flares look like they are attached to the car) draw a line in the crease of the flare with a Dremel tool. This was the original technique used on the movie car. #2 Hold front flare in place and mark the excess to be removed. The excess is built in to allow for fitment variations of the side skirt. #3 Continue at the rear. The top edge of the side skirt will be the edge you apply Speed Grip for bonding. Again, the excess squeeze out can be used as the actual filler when using Speed Grip. We now offer Side Skirts without the exhaust opening for integration with the kit. However the rear corners relational to the rear flare has not been addressed. Click here for more info and ordering. The top edge of the flares have a bonding lip or surface for ease of installation. This promotes the mold in look. After applying Speed Grip, clamp the flare on the car and


7 7 We offer the side filler kit for the side fill gas cap pictured here part #MD-FBSFK. Click here to order. Side fill instructions The movie car used the Mach I Deluxe Pop Open Cap pictured here. However the Lemans style cap used on Cobras is also used on many builds pictured below. Tail Panel Installation It s best to drill out light sockets prior to installing the panel on the car if using normal bulb and socket style tail lights. If you use our LED panels, do not worry about drilling the holes. Only one hole would be needed to pass the wiring through. Continue by centering the tail panel on the car. Placement of Gas Cap On the driver side, you can do this without cutting the inner structure by putting the edge of the cap around 4.5 inches from the trunk line. However it looks much better if placed 8.5 on center from the trunk line. A small notch on the internal structure will be required to clear the gas fill piping. Our side filler kit is designed around using the original style cap at the 4.5" measurement, so an additional coupler as stated in the side fill instructions, and cutting the filler pipe mid length, front to back will allow you to both add length to the system, as well as rotate the tube to allow the use of the Lemans style cap. To recess the cap, trim out circle on car, add a little material to create the lip, and weld back in. Mark and drill the panel, then secure with sheet metal screws or rivets on the top and bottom edges. This is the method used on the original Shelby s. You can also use the bond on method previously discussed for a more finished look. Just make sure the bonding surfaces match up as discussed in the side scoops section to follow.


8 8 We offer this tail lamp kit #67-STLK2 to complete your tail lights, Click here #3 Sand the bonding surface just created with 80 grit. Speed Grip needs a good tooth for maximum bonding efficiency. You can apply scotch tape to the body at this point to catch the excess filler if you re going for the attached look. Lower Side Scoop Install #1 Test fit the side scoop. We decided to bond on the side scoops using Norton Speed Grip. NSG is a urethane-bonding adhesive that remains flexible, can be sanded, feathered and painted. So the use of traditional fillers that can crack can be avoided. Apply wax paper to the car surface area where the scoop contacts the car. Use kit # FS-380, cut out the front and make the side scoops functional. Please note, when making these functional on a coupe or convertible, it will render the rear quarter window inoperable. #4 Apply Norton Speed Grip to both surfaces. #5 Press the scoop to fit. Smooth any excess into the contact point to create a smooth look. Using the bond on method, the rise behind the door can be minimized by filing the lip down. In other words, just make the transition more gradual. #2 Add short strand fiberglass filler to the inside perimeter of the scoop and press fit to the car to create a bonding surface. #6 Sand and feather the scoop for paint. This bonding method can be used also on


9 9 the flares, side skirts, or where ever you decide to bond the fiberglass to the metal. certain areas to align. Removal of stock tension rods and/or springs is expected and use of a prop rod or other device is suggested. The sooner you approach the fitment of the trunk lid, the easier it is to get movement from it. There is a 6-8 week cure time in fiberglass so this is a critical time to make any necessary adjustments. Upper Scoops The bond on method can be used for the upper scoops as well. Otherwise, just use the 4ea studs already integrated into each upper scoop and bolt into the stock location of the vents they replace. The integrated studs may require minor bending to line up with the factory vent holes. Remove any excess material on the scoop to tighten up against the C pillars. Installation of Trunk Panel When fitting with the trunk itself, most cars vary slightly in width and height between the quarters. Final prep may include the adding of more filler to create a perfect seam between the trunk and end caps. The seal should be taped on and used in the fitment process. Also it s important to bolt the trunk on to your hinges, and attach the latch mechanism to secure. Consider the use of rubber bumpers to combat any height differences that may be encountered from side to side, or contours relational to the car. Since these hoods are thicker then a sheet metal hood, adjusting the hinges and possible reaming of the hinge holes may be necessary. Trimming of the seal in-half vertically can be helpful in the fitment process. You can also manipulate the drip rail itself inside the trunk to push up in We offer trunk lift kits designed for this purpose. Click here to order Installing Fiberglass End Caps First things first, the end caps will not just bolt right on. The edge that you match to your quarter panel is the edge that is cut while coming out of the mold. So, there it is expected that you will need to match this edge up to the contours of the quarter panel using either a flat edge file, or a angle grinder with a sanding disc attached. There is extra material built into the mold to accommodate the fitting of your end caps. The bolts that are integrated are usually fairly close to the holes on the car, but some minor bending may be in order to align. In some cases, some reaming of the holes on the car may also be in order.


10 10 #3 Make sure to pay attention to both sides of the end cap at the same time. Trim the excess until the cap begins to sit all the way down. This must be done evenly as you go or there will be alignment problems with the trunk lid. #1 Start out by matching the end cap up to the car. Find the high point areas, mark with a fine point marker. It s best to go little by little until the end cap begins sitting flush against the car. #2 This process will be repeated about times while you slowly remove the material to match the edge on the quarter panel. The excess it there to allow extra material for car to car variations. #4 On the top edge, it should be expected that there may be some minor filler and sanding for a perfect fit. Filler can be minimized by using sheet metal screws into the quarter panel, then flexing the cap down to flex to top edge line into position. This same technique can be used along the side of the end cap. #5 Each side will present different fit issues. Also, each car has history, so fitment may change drastically from one side to the next.


11 11 #6 Bolt on the end cap at this point for final fitment. #8 After the fitment has been addressed, it will follow the contour of an unmolested quarter panel very nicely. #7 A sheet metal screw is used to push-in the bottom of the end cap for the finishing touch. #9 Finishing of both the hood and trunk for paint will include using the skin coat technique with bondo for a show quality finish. The process includes a light scuff of the gelcoat, lay down a thin coat of bondo/filler, then high/low the part by wet sanding until the part has the desired finish.


12 12 #3 Use sheet metal screws to secure in place. Optional Fiberglass Bumper An optional fiberglass rear bumper can be installed without any bolts visible using the same bonding technique discussed here with Norton Speed Grip. Start by mounting and grinding the stock bumper brackets. #4 After the adhesive dries, remove the bumper from mounts inside the trunk. Grind off the alignment screws and prep for filler. #1 Fit the bumper and pre-drill holes. #5 After the filler is applied the smoothed bumper can now be primed and remounted for paint. #2 Apply bonding adhesive to both surfaces. Don t forget to sand the backside of the bumper with 80 grit before applying the adhesive. We offer this complete inexpensive light kit #VPS-LK5 for all the lights on the car. If using our fiberglass rear valance, add one more set of VPS-PL2020C to complete. Click here to view and order


13 13 Rims Fog light installation Here s the view from the rear. If you glass in a small flat bracket, you can bolt the lights onto that bracket, wire to complete. Same method is applied through the rest of the lights on the car. Side Exhaust Kit Parts & Accessories to Consider Optional Rear Valance #FS-M-7001RV Billet Grill Set

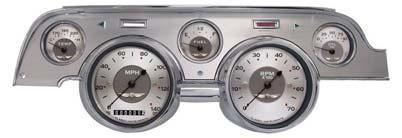
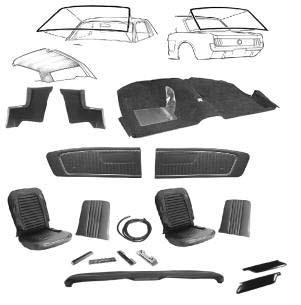
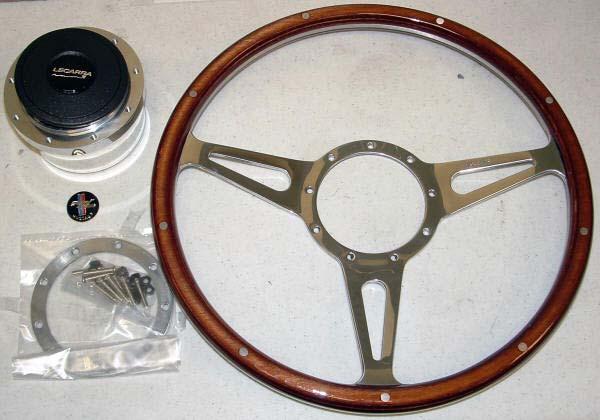
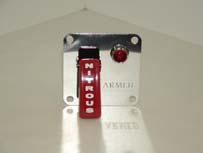
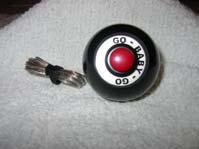
14 14 Exhaust Tips Fiberglass Rear Bumper Interior Kits Emblems Steering Wheel Kits Bullet Mirrors NOS Switches / Go Baby Go Shifter TCP Pedal Covers Gauge Kits Radiator / Grill Cover
PART #137 & # DODGE DAKOTA HOODS
 Rev. 11/03 PART #137 & #138 97-04 DODGE DAKOTA HOODS Prefit Before Painting! STEP 1: Adjust hood until proper alignment with matching panels is achieved. STEP 2: Adjust primary latch until it fits into
Installation Instructions and Suggestions For Jeep YJ Fiberglass Replacement Bodies
 Installation Instructions and Suggestions For Jeep YJ Fiberglass Replacement Bodies Getting started with the removal of your existing Jeep body. Trust nothing to memory; take photos of everything at different
INSTALLATION INSTRUCTIONS
 INSTALLATION INSTRUCTIONS Document# 19-0038 2004+ Lotus Elise (Series 2) Rear Clamshell Removal Kit Safely support the vehicle. This is a two-person job. Allow 1 to 2 hours for initial disassembly. Have
Mustang Radiator Conversion DIY. By GearHeadPeter. January 27, 2011
 1964-1966 Mustang Radiator Conversion DIY By GearHeadPeter January 27, 2011 We all know that the radiators in our cars are not the best, especially if you have done any customization to the engine, which
MUSTANG PROJECT INSTALLING THE MUSTANG PROJECT SHELBY SEQUENTIAL CONVERSION KIT ON YOUR MUSTANG
 VOLUME 6 Price:$9.95 MUSTANG PROJECT A SafeCode Inc. Publication INSTALLING THE MUSTANG PROJECT SHELBY SEQUENTIAL CONVERSION KIT ON YOUR 64.5-66 MUSTANG Convert from original 1964.5-66 Mustang style taillights
Detroit Speed, Inc. Mini-Tub Kit Chevy Nova, Oldsmobile Omega, Pontiac Ventura P/N: &
 Detroit Speed, Inc. Mini-Tub Kit 1968-74 Chevy Nova, Oldsmobile Omega, Pontiac Ventura P/N: 041207 & 041208 Item Component Quantity 1 DSE Mini Tubs 1968-74 X-Body 2 2 Rear Upper Shock Crossmember 1 3 Upper
Z1 Motorsports 350Z / G35 Oil Cooler Kit Installation Manual
 Z1 Motorsports 2877 Carrollton Villa Rica Hwy Carrollton GA 30116 770.838.7777 Z1 Motorsports 350Z / G35 Oil Cooler Kit Installation Manual For 19, 25 and 34 Row Oil Cooler Kits Parts Included: 1 Aluminum
Mustang Shaker
 2005-2009 Mustang Shaker CDC #110050 ( 05/ 06) or 0711-7000-01 ( 07/ 09) Component Check List: Quantity/Description Part # CDC Installer 1 - Engine Cover Assembly 114050 1 - Aluminum Shaker Scoop 183020
REVISION DESCRIPTION:
 REVISION DESCRIPTION: 1) Page: 12-03 REV 1: Step 1: and Figure 1: Final-Drill s.b. Match-Drill. Step 4: Updated flox mixture description to match later description (removed "peanut butter-like" description).
Toyota Tacoma Winch Mount Bumper Installation Instructions Tools Required: Transmission cooler relocation brackets Torque Wrench
 2016-2017 Toyota Tacoma Winch Mount Bumper Installation Instructions Tools Required: Items Included: Small flat head screw driver Winch Mount Ratchet, 10mm, 12mm, 14mm, 17mm & Skid Plate 19mm sockets Transmission
Rev TOOLS & MATERIALS REQUIRED QTY 3D PART NO. DESCRIPTION
 Rev. 04-10 QTY 3D PART NO. DESCRIPTION 1 691609 FRONT BUMPER REPLACEMENT 1 691610 RIGHT SIDE SKIRT 1 691611 LEFT SIDE SKIRT 1 691612 REAR LOWER SKIRT 4 3M 94 3M ADHESION PROMOTER 16 #8 X ¾ SELF DRILLING
Upper Class Grille. Main Grille - # / # Dodge Charger. GRILLE Installation Guide. Parts included (1) Main Grille.
 Main Grille.") Main Grille - # 51480 / #54480 Parts included (1) Main Grille Polished - Part #51480 OR Black - Part #54480 Hardware included (8) - 3/4 x 5/8 L Brackets (8) - #6-32 Nylon Nuts (8) - 3/16 x 1 x 1/32 Black
Main Grille - # 51480 / #54480 Parts included (1) Main Grille Polished - Part #51480 OR Black - Part #54480 Hardware included (8) - 3/4 x 5/8 L Brackets (8) - #6-32 Nylon Nuts (8) - 3/16 x 1 x 1/32 Black
COLD AIR INTAKE INSTALLATION INSTRUCTIONS. # D Fits: E92 328i & xdrive PARTS LIST
 COLD AIR INTAKE INSTALLATION INSTRUCTIONS # D760-9001 Fits: 2007-13 E92 328i & xdrive PARTS LIST (1) Intake Snorkel (1) Flex Tube (1) Brake Scoop Assy (1) Front Grill (1) Filter (1) Hardware Kit (2) Edge
Detroit Speed, Inc. Mini Tubs Camaro/Firebird P/N:
 Detroit Speed, Inc. Mini Tubs 1967-1969 Camaro/Firebird P/N: 040401 The Detroit Speed Mini-Tubs are inner wheel housings designed to accommodate a wider wheel and tire package. They are engineered for
2011 Cadillac CTS Coupe EGX Exhaust Tip & Rear Valance Mesh Accent Kit Part #: Complete E
 BILLET GRILLS IMPORTANT: PLEASE KEEP THIS INSTRUCTION MANUAL FOR FUTURE REFERENCE! 2011 Cadillac CTS Coupe EGX Exhaust Tip & Rear Valance Mesh Accent Kit Part #: Complete 5122-1900-11E TOOLS REQUIRED Automotive
1464. Interior Installation. Cover Rear Seat Support Cut the vinyl to approximately the size of the rear seat support.
 Chapter 37 (Video Clip 37) - Interior Installation 1464. Interior Installation Cover Rear Seat Support 1465. Cut the vinyl to approximately the size of the rear seat support. 1466. Make a dry fit of the
Shelby GT500 Front Fascia Conversion Kit (05-09 All) Item # Installation Time: 1 Day. Required tools:
 Item # Installation Time: 1 Day. Required tools:") Shelby GT500 Front Fascia Conversion Kit (05-09 All) Item #53611 Installation Time: 1 Day Required tools: Phillips Screw driver 10mm Socket + Ratchet/Wrench 8mm Socket + Ratchet/Wrench 5mm Socket + Ratchet/Wrench
Shelby GT500 Front Fascia Conversion Kit (05-09 All) Item #53611 Installation Time: 1 Day Required tools: Phillips Screw driver 10mm Socket + Ratchet/Wrench 8mm Socket + Ratchet/Wrench 5mm Socket + Ratchet/Wrench
GM F-Body Convertible 1404 Center X-Brace Installation Instructions
 1967-1969 GM F Body 1967-1969 GM F-Body Convertible 1404 Center X-Brace Installation Instructions Thank you for your purchase of this Hotchkis Performance product. Your X-Brace was designed with the performance
MAZDASPEED3 Intercooler Instructions
 MAZDASPEED3 Intercooler Instructions Congratulations on your purchase of the COBB Tuning Front Mount Intercooler System for your 2007-2009 Mazdaspeed3. The following instructions should assist you through
Detroit Speed, Inc. Mini Tubs Camaro/Firebird P/N:
 Detroit Speed, Inc. Mini Tubs 1967-1969 Camaro/Firebird P/N: 040401 The Detroit Speed Mini-Tubs are inner wheel housings designed to accommodate a wider wheel and tire package. They are engineered for
JK8 Body Kit KIT CONTENTS 1 K
 JK8 Body Kit KIT CONTENTS A B C 1 K6861352 D E G F H 2 K6861352 I M N J K L O P Q R S 3 K6861352 T U V W X Y CALL OUT PART NUMBER DESCRIPTION QUANTITY A P5156021 HARDTOP 1 B P5155997 BULKHEAD 1 C 1PH98/9TZZAE
COLD AIR INTAKE INSTALLATION INSTRUCTIONS
 COLD AIR INTAKE INSTALLATION INSTRUCTIONS # D760-0030 Fits: 2007-10 135i (E82, E88; with N54 engine) 2007-08 335i/xi (E90) 2007-10 335i (E92, E93; with N54 engine) Congratulations for being selective enough
GT Mustang Shaker
 CD4II3CU CDC Mustang 5.0 Shaker 2011-2014 2011-2014 5.0 GT Mustang Shaker Part #1111-7000-01 Component Check List: Shaker Assembly: Part # 1 - Aluminum Shaker Scoop 183020 1 Upper Air Box 1111-3301-01
Dynacorn International Inc.
 2009 Dynacorn International Inc. A Acceleraator Pedal Assembly: 21 Arm Rest Base: 18 B Battery Clamp & Tray: 3 Body Panel, Rear: 11 Body Shims & Washers: 2 Bridge Plate, Radiator: 3 Bumper: 1 Bumper Bracket:
Expedition Front Bumper Instructions
 Expedition Front Bumper Instructions QTY 3D PN. FCS PART NUMBER DESCRIPTION 1 691256 A 8 E X D - 1 7 B 635-AAPLN FRONT BUMPER REPLACEMENT HARDWARE SUPPLIED 10 SELF TAPING SCREWS -10 for Front Bumper PLASTIC
2011 Honda Accord Coupe Fine Mesh Grille
 IMPORTANT: PLEASE KEEP THIS INSTRUCTION MANUAL FOR FUTURE REFERENCE! TOOLS REQUIRED 2011 Honda Accord Coupe Fine Mesh Grille Replacement Upper / Lower Overlay Part #: Complete #1124-0102-11 / Black Ice
Deuce/Ace Installation Instructions
 HARDWARE KIT: Upper Mounting Plate: 2-7/16" (11mm) X 3.5" bolts 2-7/16" flange nuts 2-2" spacers 2-7/16" trim cap mounting washers 2 - plastic trim caps TOOLS NEEDED: safety glasses wrenches 16mm or 5/8"
XX, TOYOTA, TACOMA FRONT BUMPER INSTALLATION INSTRUCTIONS THIS BUMPER SHOULD ONLY BE INSTALLED BY A PROFESSIONAL. SAFETY
 FRONT BUMPER INSTALLATION INSTRUCTIONS THIS BUMPER SHOULD ONLY BE INSTALLED BY A PROFESSIONAL. SAFETY Know safety, no injury. Know injury, no safety. ~Author Unknown If there are any questions, call 1-855-HHTOUGH
Right On Replicas, LLC Step-by-Step Review * 1970 Plymouth HEMI Cuda 1:25 Scale Revell Model Kit # Review
 Right On Replicas, LLC Step-by-Step Review 20140923* 1970 Plymouth HEMI Cuda 1:25 Scale Revell Model Kit #85-4268 Review Review and Photos by Will Emerson In 1964 Plymouth developed the Barracuda from
Part# C3132/C Up Ford Mustang 8-Point Roll Bar
 Part# C3132/C3156 2005-Up Ford Mustang 8-Point Roll Bar Installation Instructions Please read the instructions completely BEFORE starting this project. Competition Engineering 8-Point Roll Bars are not
1997/98 Corvette. Panel Identification Front Bumper Impact Bar Front Wheelhouse Rail - Underbody Side Assembly...
 1997/98 Corvette Panel Identification...3-1 Front Bumper Impact Bar...3-2 Front Wheelhouse...3-4 Rail - Underbody Side Assembly...3-6 Front Side Door Opening Assembly...3-17 Windshield Frame Assembly...3-19
SHARK UPPER WINDSHIELD FRAME & WINDSHIELD REPLACEMENT. Text and Photos by TOM BENFORD
 Text and Photos by TOM BENFORD I purchased a fathom green 69 big-block tri-power T-top coupe with only 42,000 original miles on it recently. I'm the third owner of the car, and I got it for a very good
Mounting Body CHAPTER 9
 CHAPTER 9 Mounting Body During the build of your car, you will need to trial fit the body numerous times. It is possible to construct a simple moveable rack that can lift the body and then move the body
Current Range Rover Sport STRUT Collection Installation Manual
 2014 - Current Range Rover Sport STRUT Collection Installation Manual 1 1. Removing Main Grille and Lower Fascia 1.1 Run a line of low tack masking tape across the front of the bumper below the grille
ROLL BARS ROLL BAR COVERS
 EAT UPHOLTERY On early cars the Deluxe seat upholstery was all smooth (interior Code 6A). ome of the very late cars also received this upholstery, believed to be because of a lack of available material.
REV READ BEFORE INSTALLATION OF KIT:
 REV. 05-08 QTY 3D PN. FCS PART NUMBER DESCRIPTION 1 691509 A7EDG-7820049-AAPLN EDGE BODY KIT- V6 B PCS & EXH TIPS 1 691256 A 7 E D G - 7 8 20049-BAPLN EDGE BODY KIT- V6 8PCS & EXH TIPS W/HITCH 1 691501
Mustang CDC Lightbar (94-04) - Installation Instructions
 - Installation Instructions") Mustang CDC Lightbar (94-04) - Installation Instructions The below installation instructions work for the following products: Classic Design Concepts Mustang Convertible Lightbar (94-04 Carbon Fiber) Classic
Mustang CDC Lightbar (94-04) - Installation Instructions The below installation instructions work for the following products: Classic Design Concepts Mustang Convertible Lightbar (94-04 Carbon Fiber) Classic
RS-2 SINGLE ACTION REAR BUMPER WITH TIRE CARRIER INSTALL MANUAL FOR JEEP WRANGLER ALL MODELS.
 RS-2 SINGLE ACTION REAR BUMPER WITH TIRE CARRIER INSTALL MANUAL FOR 2007-2016 JEEP WRANGLER ALL MODELS. Rear Bumper Installation Instructions 1) Remove factory rear bumper, (this includes all tow hitch
Subaru Front Mount Intercooler Kit STI Subaru Front Mount Intercooler Kit STI
 Subaru Front Mount Intercooler Kit STI 2008-2014 715500 Subaru Front Mount Intercooler Kit STI 2008-2014 Congratulations on your purchase of the Subaru Front Mount Intercooler Kit STI 2008-2014. The following
2. As you can see, that the windows and door jams have been taped off. This will keep the liquid stripper from going into those hidden areas.
 Paint Stipping (The proper procedure for removing paint with Liquid Stripper) Before you can begin to do body and paint work on your vehicle you have to face those hidden horrors under the paint. You will
* APPLICATION MODELS VARY. WE RECOMMEND TO VERIFY FITMENT BEFORE BEGINNING INSTALLATION PROCESS.
 Parts included (1) Main Grille Polished - Part #6214760 OR Black - Part #6214761 Hardware included (8) - #8 x 3/4 Black Screws (8) - #8 Flat Nuts (3) Push Nut Retainer Clips START HERE PLEASE READ AND
Instant Chat off the main page of Or simply call our tech team at
 FRONT MOUNT INTERCOOLER 2008-13 STI 2014-04- 08 Thank you for purchasing this PERRIN product for your car! Installation of this product should only be performed by persons experienced with installation
Hard Bar Sport, M1/M2 Hard Core Hardtop, M2 Sport, and Xtreme Installation Instructions
 HARDWARE KIT: Hard Bar Sport, M1/M2 Hard Core Shoulder Harness Guide Relocation Assemblies: 2-3/8" X 1" grade 8 bolts 4-3/8" flat washers 2-3/8" lock nuts 2 - brass bushings 2 - plastic trim caps 2-3/8"
by Pony # all MUSTANG hardware from Pony Enterprises, Inc.
 052 04522 65-66 screw, dash and pillar trim (8) $2.00 101 8260 65-70 kit, band hose clamps, 170 & 200 6 cyl (10) $36.00 102 8260 65-73 kit, band hose clamps, small block V-8 & 69-73 250 6 cyl (10) $36.00
FRONT BUMPER REMOVAL. 1) Turn off engine and chalk tires with stop block. Open Hood. Disconnect Battery.
 Turn off engine and chalk tires with stop block. Open Hood. Disconnect Battery.") Parts included (1) - Main Full Opening - Polished - Part #6202130 Full Opening - Black - Part #6202131 OR GRILLE REMOVAL & Grille Installation Guide Hardware included (5) - Trim Retainer (4) - 1/2 x 1/2-3/16
Parts included (1) - Main Full Opening - Polished - Part #6202130 Full Opening - Black - Part #6202131 OR GRILLE REMOVAL & Grille Installation Guide Hardware included (5) - Trim Retainer (4) - 1/2 x 1/2-3/16
PHONE:
 HELPING TO SAVE THEM ALL! www.ebodyproducts.com PHONE: 606.481.9014 REPRODUCTION SHEETMETAL / TRIM CATALOG FOR A/B/E BODY DODGE & PLYMOUTH CARS REVISION DATE: 8/13/14 1 AMD CHROME PLATED FRONT BUMPERS
B5 A4 1.8t Front Mount Intercooler Install Instructions
 B5 A4 1.8t Front Mount Intercooler Install Instructions Only work underneath your vehicle after properly supporting it with adequate jack stands on a flat surface. NEVER work under a vehicle only supported
54531/ FORD FUSION
 54531/51531 54531/51531 13-15 FORD FUSION 13-15 FORD FUSION FORD FUSION Upper Class Grille w/ Bars TOOLS REQUIRED: Socket Set Flat/Phillips Screw Drivers Torx Bits Plastic Pry Bar 3/16 Drill Bit and Drill
Wood Grain Warrior Line Incognito hidden winch bumper installation instructions Lexus GX470
 Wood Grain Warrior Line Incognito hidden winch bumper installation instructions 2003-2009 Lexus GX470 Version 1.0-2016 Thank you for purchasing the Southern Style OffRoad Wood Grain Warrior Line Lexus
MUSTANG FLYER MARCH 2018
 MUSTANG FLYER MARCH 2018 AJM000 Catalogue of early Mustang parts available. Will help you see if what you want is available 03.60 ACCESSORIES: AJM060 Fender/wing cover 21.62sp BUMPERS AJM002 64-66 Front
Lingenfelter Signature Series Camaro SS Rear Valance
 Lingenfelter Signature Series 2010-2012 Camaro SS Rear Valance PN: L850161410 Lingenfelter Performance Engineering 1557 Winchester Road Decatur, IN 46733 (260) 724-2552 (260) 724-0422 fax www.lingenfelter.com
05-08 MUSTANG CAT-BACK SIDE EXHAUST SYSTEM
 01/08 PART# 8015, 8017, 8037, 8038 05-08 MUSTANG CAT-BACK SIDE EXHAUST SYSTEM Notice: Altered Parts are Non-Refundable Note: The side exhaust system must be installed before the side skirts. Note: Do not
JEEP JK4 STEP SLIDER INSTALLATION BD-SS-100-JK4
 JEEP JK4 STEP SLIDER INSTALLATION BD-SS-100-JK4 PARTS LIST QTY DESCRIPTION 1 Drivers Side Slider Assembly 1 Passenger Side Slider Assembly 1 Wiring Harness and Fuse 1 Double Sided Sticky Squares and Alcohol
Lexus ES Fine Mesh and Adaptive Cruise Control Fine Mesh Grilles Upper and Lower Replacements
 IMPORTANT: PLEASE KEEP THIS INSTRUCTION MANUAL FOR FUTURE REFERENCE! 2013-15 Lexus ES Fine Mesh and Adaptive Cruise Control Fine Mesh Grilles Upper and Lower Replacements Part #1372-0102-13 / Black Ice
TJ YJ LJ STEP SLIDER INSTALLATION
 TJ YJ LJ STEP SLIDER INSTALLATION BD-SS-100-TJ, BD-SS-100-YJ, BD-SS-100-LJ PARTS LIST QTY DESCRIPTION 1 Drivers Side Slider Assembly 1 Passenger Side Slider Assembly 1 Wiring Harness 1 Double Sided Sticky
Installation Instructions
 Suzuki Samurai 1 Inch and 2 Inch Body Lift Kit (SKU# SSP-BL) Installation Instructions Background: These instructions are designed for installing the 2 body lift. Our approach is to raise the entire body
54531/ FORD FUSION
 2014-2015 FORD Upper Class Grille w/ Bars TOOLS REQUIRED: Socket Set Flat/Phillips Screw Drivers Torx Bits Plastic Pry Bar 3/16 Drill Bit and Drill Motor PARTS LIST: (4) #8 u-nuts (2) seal brackets (driver
OIL COOLER KIT INSTALLATION INSTRUCTIONS PART NUMBER D
 OIL COOLER KIT INSTALLATION INSTRUCTIONS PART NUMBER D570-0904 APPLICATION: 2011-2012 E90 335i/xi (N55 engine) with BMW standard bumper and with stock oil cooler Congratulations for being selective enough
Factory Five Racing, Inc. 818 Kit Assembly manual revision 1J update
 Factory Five Racing, Inc. 818 Kit Assembly manual revision 1J update Turbo coolant overflow tank...1 Shifter handle...4 Install...4 Door skin...7 Door Liner... 10 Side mirrors... 14 Door handles and pulls...
---Optional Items---
 1 2 3 4 5 6 ---Optional Items--- 10 9 11 7 8 12 This package should contain: 1. One (1) CorkSport Crashbar Weldment 2. Eight (8) M8x1.25x20 mm Bolts 3. Eight (8) M8x1.25mm Nyloc Nuts 4. Sixteen (16) M8
OIL COOLER KIT INSTALLATION INSTRUCTIONS PART NUMBER D E92 335is (N54 engine) with BMW M-Technic bumper and with stock oil cooler
 with BMW M-Technic bumper and with stock oil cooler") OIL COOLER KIT INSTALLATION INSTRUCTIONS PART NUMBER D570-0923 APPLICATION: 2011 E92 335is (N54 engine) with BMW M-Technic bumper and with stock oil cooler Congratulations for being selective enough to
OIL COOLER KIT INSTALLATION INSTRUCTIONS PART NUMBER D570-0923 APPLICATION: 2011 E92 335is (N54 engine) with BMW M-Technic bumper and with stock oil cooler Congratulations for being selective enough to
4-Bulkheads. Bulkheads. December XLR Page 4-1
 Bulkheads December 2007 04-XLR Page 4-1 This Page Intentionally Left Blank Page 4-2 04-XLR December 2007 Contents 4.0 - Chapter Preface...4-4 4.0.1 - Parts List... 4-4 4.0.2 - Tools List... 4-4 4.0.3 -
OIL COOLER KIT INSTALLATION INSTRUCTIONS PART NUMBER D E92 335i/xi without stock oil cooler
 OIL COOLER KIT INSTALLATION INSTRUCTIONS PART NUMBER D570-0921 APPLICATION 2007-08 E92 335i/xi without stock oil cooler Congratulations for being selective enough to use a Dinan Engineering Oil Cooler
Mercedes E63/CLS AMG Carbon Turbo Intake System Instructions
 Mercedes E63/CLS AMG Carbon Turbo Intake System Instructions The goal of Alpha Performance is to provide the highest quality, best performing products available. By utilizing research and development,
OIL COOLER KIT INSTALLATION INSTRUCTIONS D Application: , E89 Z4 sdrive 35i without stock oil cooler* PARTS LIST
 OIL COOLER KIT INSTALLATION INSTRUCTIONS D570-0891 Application: 2009-11, E89 Z4 sdrive 35i without stock oil cooler* PARTS LIST Qty Part No. Description 1 D573-0050 Oil Cooler + Frame Assy 1 D573-0044
TESLA MODEL S REFRESH FRONT FASCIA INSTALLATION MANUAL FIGURE 1. Unplugged Performance 3523 Jack Northrop Ave, Hawthorne, CA 90250
 INSTALLATION MANUAL TESLA MODEL S PARTS QUANTITY INCLUDES FRONT FASCIA 1 PIECE V-STRIPE PANEL 1 PIECE HARDWARE KIT 1 SET PDC SENSOR HOLDERS 4 / 6 PIECES HOOD RELEASE KIT 1 KIT REFRESH FRONT FASCIA PLEASE
1. Front Fascia Removal 1.1 Remove the 6 plastic clips that secure the upper valance, then remove. 1.2 Remove 6 upper bolts that hold the grille and f
 STRUT 2015 GMC Denali Collection Installation Manual " 1. Front Fascia Removal 1.1 Remove the 6 plastic clips that secure the upper valance, then remove. 1.2 Remove 6 upper bolts that hold the grille and
Remove 4 circled pins. Route wiring along dashed line. Remove the 2 9mm nuts and black retaining plate that secure extractor.
 2015 Ford Mustang Turn Signal Hood Kit Parts List: Quantity: Tool List: Bracket & pre-installed lamp 2 Flat head screwdriver Wiring harness 1 Phillips screwdriver PB-3660 Parts Bag 1 Ratchet & Socket set
GM TRUCK Double Din Head Unit Install Kit
 www.thedetailss.com 95-99 GM TRUCK Double Din Head Unit Install Kit Please read all instructions including the *install tips* first! 1. Disconnect the vehicle s battery. 2. Remove the dash panel; Lower
OIL COOLER KIT INSTALLATION INSTRUCTIONS PART NUMBER D E92 335i/xi (N55 engine) with M-Technic bumper and without stock oil cooler
 with M-Technic bumper and without stock oil cooler") OIL COOLER KIT INSTALLATION INSTRUCTIONS PART NUMBER D570-0925 APPLICATION 2011-12 E92 335i/xi (N55 engine) with M-Technic bumper and without stock oil cooler Congratulations for being selective enough
OIL COOLER KIT INSTALLATION INSTRUCTIONS PART NUMBER D570-0925 APPLICATION 2011-12 E92 335i/xi (N55 engine) with M-Technic bumper and without stock oil cooler Congratulations for being selective enough
94-96 Impala SS & Caprice Double Din Head Unit Installation Kit
 .. 94-96 Impala SS & Caprice Double Din Head Unit Installation Kit Please read all instructions including the install tips first! You must notch or drill the inner dash plastic in two spots. Two holes
Automatic Roof Hatch Opener
 Automatic Roof Hatch Opener Installation Guide REQUIRED TOOLS (These tools are required to complete the installation) Cordless Drill 1/8 1/4 Drill Bits 1/8 Pin Punch #2 Philips Bit Rachet Sharpie Hammer
OIL COOLER KIT INSTALLATION INSTRUCTIONS PART NUMBER D
 OIL COOLER KIT INSTALLATION INSTRUCTIONS PART NUMBER D570-0907 APPLICATION: 2011-12 E90 335i/xi (N55 engine) with BMW M-Technic bumper and without stock oil cooler Congratulations for being selective enough
Side Rocker Installation Instructions
 Side Rocker Installation Instructions Guidelines + Trial fit all parts prior to painting + Do not use the side rockers as an attachment point for tie downs + Every 3-6 months, make sure all fasteners are
Door Panel Removal & Window Stop Adjustment
 Door Panel Removal & Window Stop Adjustment By: Jeff Wolford Disclaimer: This is simply an article of how I fixed my car. I m not responsible if you break, scratch, or mess up anything following my example.
GENERAL GUIDELINES FOR THE APPLICATION OF TECTYL AUTO/TRUCK/TRAILER RUSTPROOFING COMPOUNDS
 Number 17 GENERAL GUIDELINES FOR THE APPLICATION OF TECTYL AUTO/TRUCK/TRAILER RUSTPROOFING COMPOUNDS A. Equipment 1) Airless type spray equipment, designed for fluid pressure atomization. The spray gun
VW SCIROCCO TWINTERCOOLER INSTALLATION INSTRUCTIONS
 VW SCIROCCO TWINTERCOOLER INSTALLATION INSTRUCTIONS Tools needed: T25 torx driver Small flat head screwdriver 12mm & 13mm socket, with ratchet Dremel or similar with cut off disc Large Phillips screwdriver
2005+ Roll Bar (Mm5RB-20.1 to -20.6) Recommended Center punch 1/8" pilot drill 1-3/4" Hole saw 2" Hole saw
 Recommended Center punch 1/8 pilot drill 1-3/4 Hole saw 2 Hole saw") 3430 Sacramento Dr., Unit D San Luis Obispo, CA 93401 Telephone: 805/544-8748 Fax: 805/544-8645 www.maximummotorsports.com 2005+ Roll Bar (Mm5RB-20.1 to -20.6) Recommended Center punch 1/8" pilot drill
3430 Sacramento Dr., Unit D San Luis Obispo, CA 93401 Telephone: 805/544-8748 Fax: 805/544-8645 www.maximummotorsports.com 2005+ Roll Bar (Mm5RB-20.1 to -20.6) Recommended Center punch 1/8" pilot drill
Z1 Motorsports 370Z/G37 Oil Cooler Kit Installation Manual
 Z1 Motorsports 2877 Carrollton Villa Rica Hwy Carrollton GA 30116 770.838.7777 Z1 Motorsports 370Z/G37 Oil Cooler Kit Installation Manual For 19, 25 and 34 Row Oil Cooler Kits Parts Included: 1 SETRAB
JK REAR BUMPER AND TIRE CARRIER
 JK REAR BUMPER AND TIRE CARRIER Installation Guide AEV30105AA (Updated 5/10/10) Page 1 of 20 Page 2 of 20 EXPLODED VIEW PLEASE READ BEFORE YOU START IN ORDER TO INSTALL THIS PART PROPERLY YOU OR YOUR INSTALLER
INTERCOOLER UPGRADE INSTALLATION INSTRUCTIONS PART NUMBER D
 INTERCOOLER UPGRADE INSTALLATION INSTRUCTIONS PART NUMBER D330-0021 APPLICATION: 2014-16 F22 228i & xdrive coupe (see restrictions below) 2015-16 F23 228i & xdrive convertible 2012-16 F30 328i & xdrive
INSTALLATION INSTRUCTIONS 97 FORD EXPEDITION
 INSTALLATION INSTRUCTIONS 97 FORD EXPEDITION 1. Read the instructions completely and carefully before you begin. Check the kit for proper contents (refer to the part s list and the picture diagrams). Before
COLD AIR INTAKE INSTALLATION INSTRUCTIONS
 COLD AIR INTAKE INSTALLATION INSTRUCTIONS # D760-0033 Fits: 2013-15 F01 B7, 750i & xdrive (N63TU engine) 2013-15 F02 B7L, 750Li & xdrive (N63TU engine) PARTS LIST Left and right carbon fiber air box lids
INSTALLATION INSTRUCTIONS
 COLD AIR INTAKE INSTALLATION INSTRUCTIONS PART NUMBER D760-0390C APPLICATION: 1999-2003 E39 M5 PARTS LIST 1 Left Aluminum Intake Tube 1 Air Pump Bracket (A) 1 Right Aluminum Intake Tube 1 Air Pump Bracket
Left and Right Bar Light L Brackets. Driver/Left Frame Bracket
 PARTS LIST: 1 Bumper 14 12mm Nylon Lock Nuts 1 Bull Nose Hoop 2 10mm Double Bolt Plates 1 Winch Tray 4 10-1.5mm x 25mm Hex Bolts 1 Driver/left Frame Mounting Bracket 8 10mm x 30mm x 2.5mm Flat Washers
START HERE FRONT BUMPER REMOVAL. 1) Turn off engine and chalk tires with stop block. Open Hood. Disconnect Battery.
 Turn off engine and chalk tires with stop block. Open Hood. Disconnect Battery.") Parts included (1) - Main Full Opening - Polished - Part #54213 OR Full Opening - Black - Part #51213 Hardware included (10) - #10 Screws (10) - #10 Flat Nuts (2) - Thread Cutting Nuts OR START HERE PLEASE
Parts included (1) - Main Full Opening - Polished - Part #54213 OR Full Opening - Black - Part #51213 Hardware included (10) - #10 Screws (10) - #10 Flat Nuts (2) - Thread Cutting Nuts OR START HERE PLEASE
INSTALLATION GUIDE PREMIUM FRONT BUMPER FOR RAM AEV30304AA Last Updated: 09/18/17
 AEV30304AA Last Updated: 09/18/17 PREMIUM FRONT BUMPER FOR RAM 1500 INSTALLATION GUIDE PLEASE READ BEFORE YOU START To guarantee a quality installation, we recommend reading these instructions thoroughly
Depress each tab as you pull the bezel off. The bezels are tight. L.H. shown.
 2013-2014 Ford Mustang V6 & Boss 302 Lower Valance Fog Light Kit Parts List: Quantity: Tool List: Fog light & bulb with bracket 2 Flat head & Phillips screwdriver Black bezels 2 Ratchet & Socket set OR
INVISIHITCH. Hidden Hitch Receiver for. BMW X5 [F15] 2014 Current (all engines/suspension pkgs/trimlines, including M Sport line and Aero kit)
![INVISIHITCH. Hidden Hitch Receiver for. BMW X5 [F15] 2014 Current (all engines/suspension pkgs/trimlines, including M Sport line and Aero kit)](/thumbs/85/92794256.jpg "INVISIHITCH. Hidden Hitch Receiver for. BMW X5 [F15] 2014 Current (all engines/suspension pkgs/trimlines, including M Sport line and Aero kit)") INVISIHITCH Hidden Hitch Receiver for BMW X5 [F15] 2014 Current (all engines/suspension pkgs/trimlines, including M Sport line and Aero kit) Capacity: 7,700 lbs. Towed Weight / 600 lbs Tongue Weight* *
INVISIHITCH Hidden Hitch Receiver for BMW X5 [F15] 2014 Current (all engines/suspension pkgs/trimlines, including M Sport line and Aero kit) Capacity: 7,700 lbs. Towed Weight / 600 lbs Tongue Weight* *
INTERCOOLER UPGRADE INSTALLATION INSTRUCTIONS PART NUMBER D
 INTERCOOLER UPGRADE INSTALLATION INSTRUCTIONS PART NUMBER D330-0021 APPLICATION: 2014-16 F22 228i & xdrive coupe (see restrictions below) 2012-16 F30 328i & xdrive sedan 2014-16 F31 328i xdrive wagon 2014-16
6th generation (2015+) Mustang Harness Mount Bar Installation Instructions
 Mustang Harness Mount Bar Installation Instructions") R-1180 6th generation (2015+) Mustang Harness Mount Bar Installation Instructions A. Install harness bar 1. Remove front seats. First remove the plastic bolt covers front and rear using a small flat head
R-1180 6th generation (2015+) Mustang Harness Mount Bar Installation Instructions A. Install harness bar 1. Remove front seats. First remove the plastic bolt covers front and rear using a small flat head
11 - Fairings. Fairings. February XLF Page 11-1
 11 - Fairings Fairings February 2003 11-XLF Page 11-1 11 - Fairings This Page Intentionally Left Blank Page 11-2 11-XLF February 2003 11 - Fairings Contents 11.0 - Chapter Preface... 11-4 11.0.1 - Parts
Instant Chat off the main page of Or simply call our tech team at
 FRONT MOUNT INTERCOOLER 2015+ WRX 2017-07-07 Thank you for purchasing this PERRIN product for your car! Installation of this product should only be performed by persons experienced with installation of
MOPAR Index. Grille & Headlamp Bezels (MOPAR): 21 Grille & Molding (Challenger): 16. Hood Hinges, Latches & Supports: 3. Ignition Switch Bracket: 4
: 21 Grille & Molding (Challenger): 16. Hood Hinges, Latches & Supports: 3. Ignition Switch Bracket: 4") 2013 MOPAR MOPAR Index B Battery Tray, Brace & Hold-Down: 3 Bumpers & Guards: 1 Bumper Brackets: 1 C Carpet: 23 Control Arm, Upper: 3 Cowl Panels: 4 Crossmember, Trunk Floor: 7 Crossmembers, Floor Pan:
2013 MOPAR MOPAR Index B Battery Tray, Brace & Hold-Down: 3 Bumpers & Guards: 1 Bumper Brackets: 1 C Carpet: 23 Control Arm, Upper: 3 Cowl Panels: 4 Crossmember, Trunk Floor: 7 Crossmembers, Floor Pan:
GTO. L License Plate Holder Bracket. M Mirror Door Outside. C Clothes Hanger Convertible Top Latch. Q Quarter Panel
 Index Contents A Arm Rest Base Accelerator B Bumper C Clothes Hanger Convertible Top Latch GT1 GT2 GT3 GT4 GT5 Hood Hinge Horn L License Plate Holder Bracket M Mirror Door Outside Q Quarter Panel GT19
Procharger Stage II Intercooled Supercharger System (11-14 GT)
") Procharger Stage II Intercooled Supercharger System (11-14 GT) Installation Time: Approximately one day. Installed on 2012 Mustang GT 5.0/Manual Required Tools 3/8 Socket Set (Standard and Metric) 1/2
Procharger Stage II Intercooled Supercharger System (11-14 GT) Installation Time: Approximately one day. Installed on 2012 Mustang GT 5.0/Manual Required Tools 3/8 Socket Set (Standard and Metric) 1/2
Golden Leaf Automotive
 MOPAR Golden Leaf Automotive 2011 MOPAR Index B Bumpers & Guards: 1 Bumper Brackets: 1 C Cowl Panels: 4 D Deck Filler Panel: 13 Doors & Components: 10 Door Drip Rails: 9 E Engine Compartment: 3 F Fenders,
INSTRUCTIONS FOR MILD STEEL STRUT AVENGER CHASSIS 1937 CHEVY, SCALED DOWN BODY
 #917325 Page 1 of 5 7325 INSTRUCTIONS FOR MILD STEEL STRUT AVENGER CHASSIS 1937 CHEVY, SCALED DOWN BODY Item Qty Part No/Tube Size Tube Code Description 1 1 4069 Main hoop 2 1 pr 4169 Cage side (driver&passenger
60-65 Falcon, Comet & Ranchero Coil Spring IFS
 60-65 Falcon, 62-65 Comet & 62-65 Ranchero Coil Spring IFS All engine installations with this front end will require a rear sump oil pan. 289-302 Small Block Ford Motors Milodon rear sump pan holds 7 quarts
INSTALLATION GUIDE. JK Rear bumper & tire carrier. AEV30105AC Last Updated: 10/11/16 US PATENT: D642,502 ; D
 AEV30105AC Last Updated: 10/11/16 JK Rear bumper & tire carrier US PATENT: D642,502 ; D633.024 INSTALLATION GUIDE PLEASE READ BEFORE YOU START TO GUARANTEE A QUALITY INSTALLATION, WE RECOMMEND READING