Primary Controls. Chapter 11. Introduction. Functions of the primary control
|
|
|
- Edith Owen
- 6 years ago
- Views:
Transcription
1

2
3 Chapter 11 Introduction The safe, automatic operation of an oilheat system is dependent on the interaction between: The thermostat, which opens and closes a circuit based on temperature changes in the heated space. The limit control, which opens and closes a circuit based on temperature or pressure changes in the boiler or furnace. The primary control, which regulates the operation of the oilburner. In a properly designed, installed, and serviced oilheat system, these three components work together to safely satisfy a call for space heating, cooling, or water heating. In a typical oilheat system, line voltage flows in a series circuit from the fuse or circuit breaker to a remote toggle (on/off) switch located away from the heating unit. From there, it continues to a service switch at the oil-fired appliance, then to the limit controls, and then to the primary control, which distributes power to the oilburner components (motor, igniter and oil valve). Functions of the primary control The primary control has three main functions: 1. To respond to the thermostat 2. To respond to the limit control 3. To control the startup, run cycle, and shutdown of the oilburner. All primary controls, whether old thermo-mechanical or modern microprocessor, operate on the same basic principles. The primary control accomplishes its mission by: Reacting to the presence or absence of flame Managing oilburner startup by checking for a flame before energizing ignition transformers (or igniters), burner motors, and oil valves. Supervising burner shutdown once the thermostat is satisfied or the limit control opens. All primary controls have line voltage (120 VAC) circuits. In a basic heating system, line voltage is supplied to the primary control through the high limit control when the temperature, in a water heater, boiler or furnace, or the pressure, in a steam boiler, is below the limit setting. Once the limit control is satisfied, it breaks, or opens the circuit, de-energizing the primary control and shutting down the burner. Most primary controls also have low voltage circuits (24 VAC) to accommodate thermostats and/or other devices. The low voltage circuit is closed when the thermostat senses the need for an increase in room Chapter

 the primary control will not activate the oilburner.")


4 Figure 11-1: Parallel wiring for 24v thermostat and aquastat to the primary Primary Control Thermostat temperature. When the heat reaches the right temperature and the thermostat is satisfied, it opens the circuit. For the primary control to activate the oilburner, both the line and low voltage circuits must be closed. In most cases, that means that if either the thermostat or the limit control is satisfied (open) the primary control will not activate the oilburner. Aquastat In systems with a line voltage thermostat, or with a low voltage thermostat connected to controls other than the primary control, a jumper is placed between the primary s thermostat terminals, permanently closing the low voltage circuit, Figure The primary control is activated solely by the limit control. Some systems have an additional control wired in parallel with the thermostat. In those cases, the primary s low voltage circuit can be completed through either the thermostat or the Figure 11-3: Cad cell and its wiring symbol additional control. For example, a steam boiler with a domestic hot water coil will normally have an aquastat wired to the low voltage terminals on the primary control. This enables the boiler to maintain domestic hot water even when the room thermostat is not calling for heat. Did you know? Power outages do not affect flame detection. If power is lost during a running cycle, the control will NOT go off on safety and it will normally re-energize the burner after power is restored. Bimetal Element Ignition Relay (RA117 only) Mounting Bracket Recycle Adjust Lever Lever to Put Contacts In Step Ignition Timing Adj. (RA117 only) Motor Relay Reset Lever on Safety Switch Transformer Flame detection Primary controls detect both the presence and absence of flame. A safety feature of primary controls is that they will not activate the oilburner for startup if the control senses a flame during the off cycle. This prevents additional fuel being pumped into a unit that has a fire before startup. Primary controls must react quickly to the presence or absence of flame while the oilburner is running. The primary control must shut the burner off promptly if no flame is established on startup or if the flame is lost during the run cycle. If the primary control did not shut off the oilburner in these circumstances, the burner Figure 11-2: Honeywell RA117a primary control 11-4

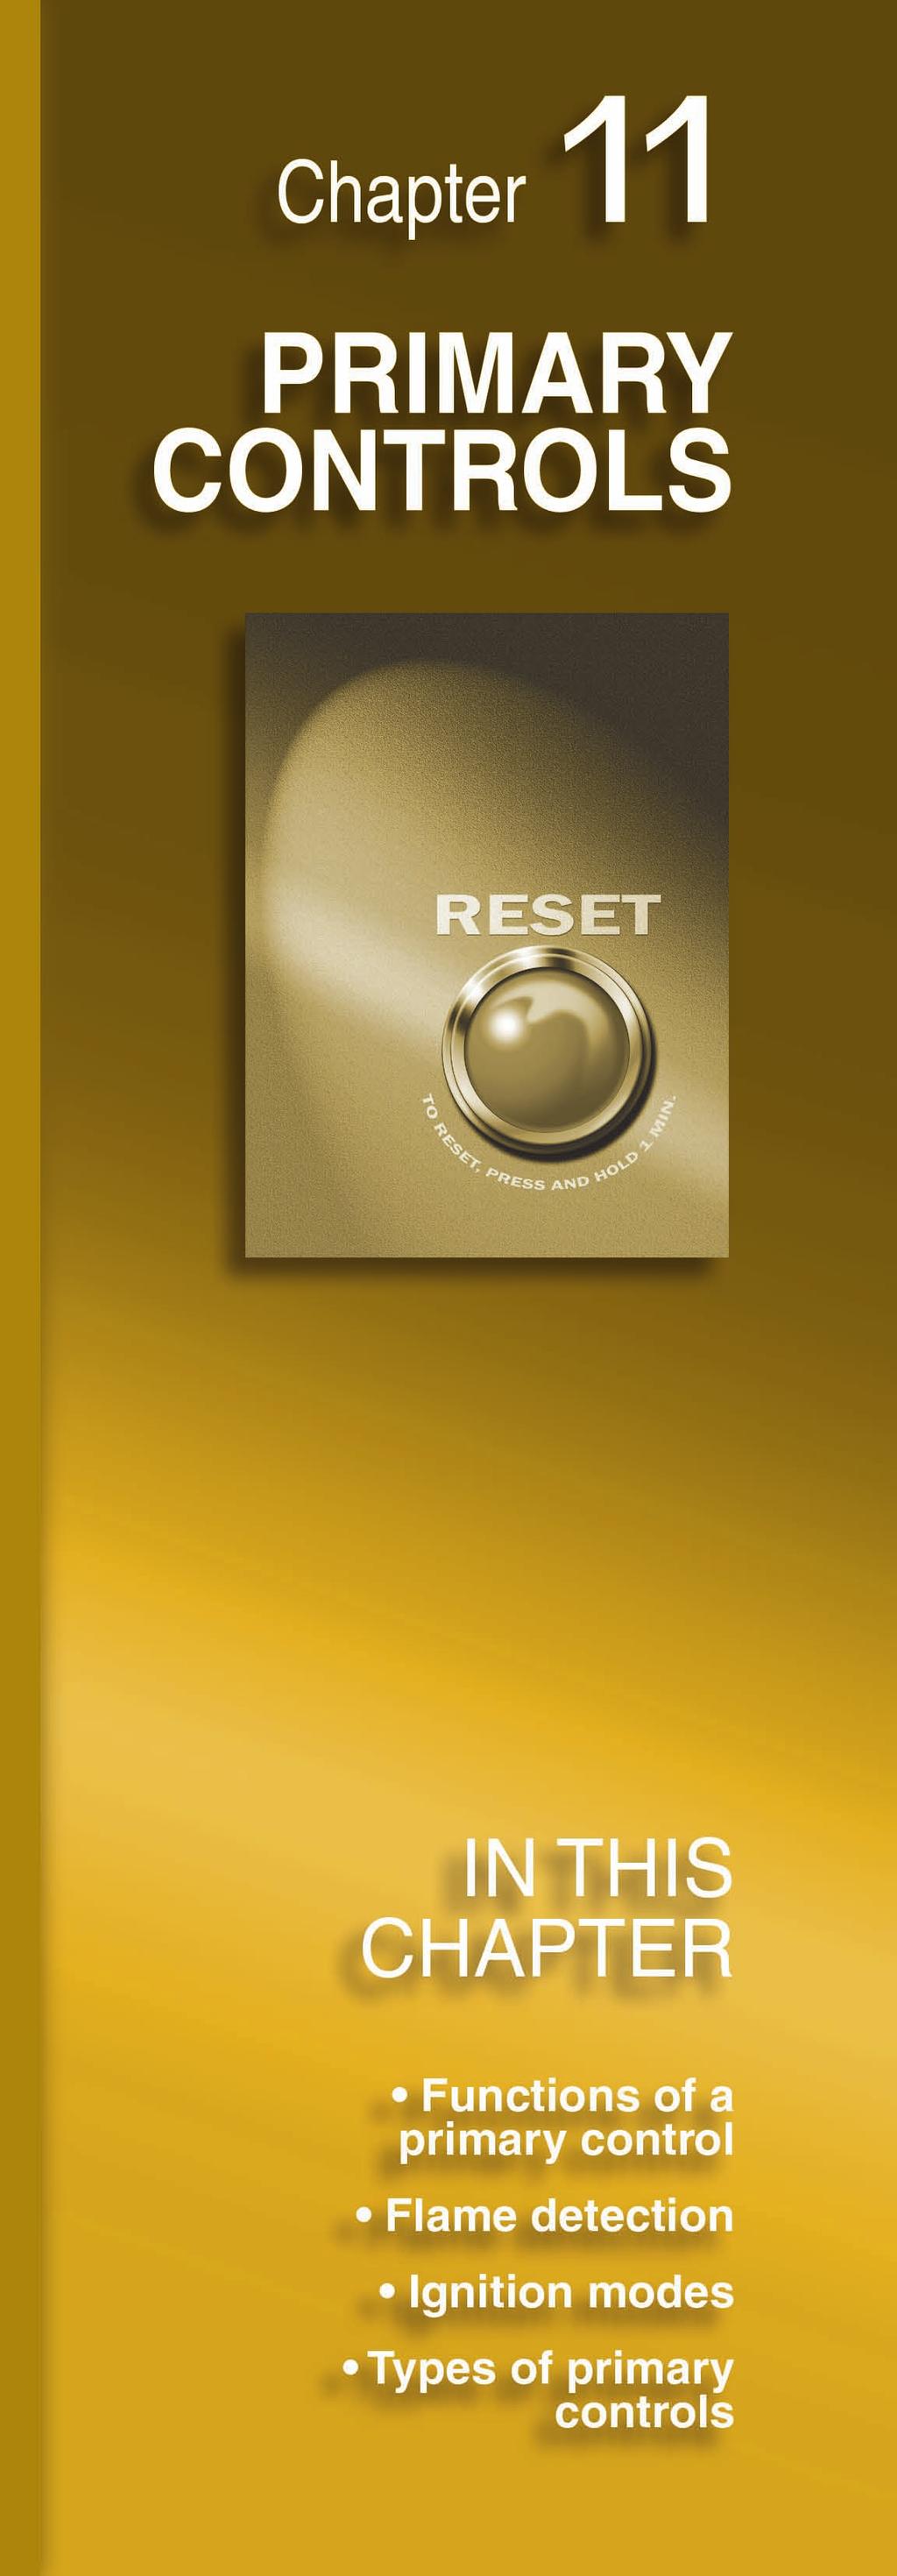
5 could continue to pump fuel into the unit, creating a hazardous condition. When the primary control shuts off the burner because no flame is detected, it is referred to as being off on safety, in safety or in lock out. Once the primary control goes off on safety, it must be manually reset before it can send power to the burner again, Figure The amount of time that elapses from the start of a cycle in which flame is not detected, to the time the control goes off on safety is referred to as trial for ignition or safety timing. Slight variations from an individual control s stated safety timing often exist due to manufacturing tolerances, voltage variations, and temperature changes. spark across the electrodes that ignites the oil is present whenever the burner is running. Interrupted duty ignition means the spark comes on for a short time at the beginning of each burner operating cycle and is turned off once flame is established, or for a fixed time which may include a period of time after trial for ignition, known as a Sparkout period to insure a stable flame is fully established. Interrupted duty ignition is preferred because it makes for quieter combustion, increases the life of the ignition system, uses less electricity, and generates fewer nitrogen oxide (NOx) emissions. Did you know? Primary controls that are designed for interrupted duty ignition can be adapted for intermittent duty ignition, but primary controls designed for intermittent ignition cannot be used for interrupted ignition. Figure 11-4: Low voltage safety switch Basic Concept of How a Safety Switch Operates Bimetal Heater Wires Contacts Insulators Contact Blades Spring Ignition modes Oilheat systems operate in one of two ignition modes: intermittent duty or interrupted duty. Intermittent duty ignition means that the Spring Reset Button Wires Types of primary controls There are two basic types of primary controls commonly found in the field today: Thermal-mechanical primary controls Cad cell primary controls Thermal-mechanical controls, commonly called stack switches or stack relays, utilize bi-metals to detect flame and to mechanically open and close electrical contacts to provide burner control. They have spring loaded reset buttons and a thermal safety switch that must cool before the control is allowed to be removed from lockout. Through the 1960 s, stack relays were the industry s standard primary control and Chapter

6 Figure 11-5: Wiring diagram for RA117A with 24v 3-wire thermostat Series 10 Thermostat there are many types of stack relays still operating in the field today. Fortunately, the manufacturers designed the wiring to be the same regardless of the make and model. Stack relays are typically mounted in the flue pipe, although you may occasionally find one mounted directly into the flue collector or heat exchanger. Flame detection Stack relays employ a bi-metal heatsensing element for flame detection. This heat-sensing element MUST be in the path of the combustion gases, between the L2 Burner Motor High Limit L1 (Hot) heating unit and the draft regulator. It should be centered in the flue pipe at a point where it will be exposed to flue gases between 300 o and 1000 o F. When the burner operates, heat rises and passes over the bimetal element, which expands and moves a shaft. This closes contacts that enable the burner to continue operating. If the bimetal is not sufficiently heated, a built-in safety switch shuts the burner off in approximately 75 to 120 seconds and it cannot be started again until the safety switch cools down and is manually reset. Wiring The power or hot lead from the limit control is connected to Terminal 1. All neutrals are connected to Terminal 2. One wire from the burner motor and one from the oil valve, if used, are connected to Terminal 3. If the unit operates as interrupted duty ignition, one wire from the transformer is connected to Terminal 4. For intermittent duty ignition, connect the transformer lead to Terminal 3 along with the burner motor lead, leaving terminal 4 empty If the control has a green terminal, it should be connected to ground. Figure Power Supply, Provide Disconnect Means and Overload Protection as Required Use Green Terminal to Connect Control Case to Ground If Using a Two-Wire Thermostat, Tape Loose Ends of Red Wire (If Necessary) Contacts Break in Sequence on Temperature Rise To Replace an Intermittent Ignition Device, Connect Ignition Leadwire to Terminal 3, Instead of Terminal 4 Thermostat connections If the control has two low voltage terminals for the thermostat connection, one of the thermostat wires connects to each. If the control has three low voltage terminals and the system has a two-wire thermostat, it is connected to the W and B terminals. If a 3-wire heat-only thermostat 11-6
7 is used, connect the red wire to Terminal R, white wire to W and black wire to B. Operation of a stack relay If all components are functioning properly, the control is in standby mode until: Line voltage is applied through the limit control to Terminal 1, AND a call for heat from the thermostat completes the circuit between W and B, or T-T. Then Terminal 4 will be powered and Terminal 3 will be powered a split second later. The transformer will generate ignition through the electrodes. The motor will turn the fuel pump and burner fan. If there s a delayed oil valve installed, it will open based on its delay timing. Once flame is established and heated flue gases pass over and expand the bimetal detector element, the safety switch heater will be de-energized, preventing the unit from shutting off on safety. The ignition circuit will be de-energized, shutting off the transformer if the unit operates on interrupted ignition. The oilburner will then continue to run until either the thermostat is satisfied, opening the low voltage circuit, or the limit control is satisfied, opening the line voltage circuit. Either of these actions causes the primary control to cut power to Terminals 3 and 4, safely shutting down the oilburner. The primary control then returns to standby mode. Safety check It is important to check the safety timing of primary controls every time you perform a service call. To check the safety timing: Turn off the service switch at the unit. Remove the stack switch from the flue pipe or block the flow of oil by installing your pressure gauge in the nozzle port. Turn on the service switch. Make sure that both the line and low voltage circuits are complete. The control should energize and shut off on safety in approximately 75 seconds. If the control goes off on safety within 120 seconds, clean the bi-metal and reinstall it. If the control does not go off on safety, replace it and be sure to check the timing on the new control. Cad cell primary controls Any system still operating with a stack relay is probably a good candidate for replacement with a high-efficiency oilheat system. While the basic functions of cad cell primary controls are the same as those of stack relays, they feature a much quicker reaction time through visual, as opposed to thermal, flame detection. The cad cell primary control circuit is made up of two components: the flame detector and the primary control. Flame detection The flame detector consists of a cad cell, a holder to secure it in place, and a wiring harness to connect it to the primary control. The detector is installed in the air tube of the oilburner where it can view the flame. Did you know? Cad cell resistance looking into an inactive chamber should be at least 50,000 ohms. Did you know? Cad cell primary controls, also called cad cell relays, were introduced in the early 1970 s. Modern oilheat systems operate more cleanly, more efficiently and much more economically than systems designed when stack relays were the standard. Chapter
8 Did you know? The burner manufacturer determines the location of the cad cell; if for some reason an alternate location must be used, make sure that: The cell has a clear view of the flame Ambient light does not reach the cell Ambient temperature is below the cell s rating (approx 140 F, see specs) Movement, shielding or radiation of metal surfaces near the cell does not affect cell function. Avoid extreme changes in flame light reaching the CAD cell, as pass/fail thresholds in the control may not function properly. The cad cell is a ceramic disc coated with cadmium sulfide and overlaid with a conductive grid. Electrodes attached to the ceramic disc transmit an electrical signal to the primary control. In darkness, cadmium sulfide has a very high resistance to the passage of electrical current. As the cell is exposed to light, its resistance decreases and current is allowed to pass. For a cad cell relay to start the burner, the flame detector must sense the absence of flame and resist the passage of current. Once the burner starts and flame is established, the cell senses light, resistance drops, current passes through the circuit and the burner continues to run. If the cad cell does not sense enough light when the burner starts, the control will shut off on safety. It can not be started Cad cells can only see yellow and white flames. This is why they are not used on gas controls. New low NOx oil burners burn with a transparent to blue flame and biofuels flames are also more blue. Manufacturers are using infrared or ultraviolet detectors to see these new flames. again until the safety switch cools off and is manually reset. Note that electronic safety switches do not have to cool down before resetting. If the flame is lost during the running cycle, very early model controls will shut the system down after the safety timing (15 to 45 seconds) is reached; later models will make one attempt to restart. Recycle type controls will shut down for 1 minute, then allow startup, for any number of startup attempts. Wiring As with stack mounted primary controls, the major manufacturers adopted uniform standards regarding wiring connections for first generation cad cell primary controls. In place of the numbered screw terminals on stack relays, cad cell relays have color-coded wire leads pre-attached to the solid-state circuitry. These wire leads from the control are connected to the wiring for the system components with wire nuts. The hot wire from the limit control is connected to the black wire of the cad cell relay. Some postpurge controls have line voltage connected to a red/white wire. The hot wire of the burner motor, igniter and oil valve are connected to the orange wire. Postpurge controls have the valve connected to the violet wire. The white wire is connected to the neutral lead along with the neutrals from the burner components. The low voltage side of cad cell relays typically has two terminals labeled T-T, which can be connected to the thermostat. The cad cell flame detector leads are connected to the F-F terminals. Figure Operation The most common first generation cad cell primary controls you are likely to come across in the field are the Honeywell 11-8


9 Thermostat R8184G Protectorelay Control Black Junction Box Line Voltage Thermostat Orange Cad Cell White Figure 11-6: Cad cell primary control Power Supply, Provide Disconnect Means and Overload Protection as Required To Use R8184 with Line Voltage Controller, Jumper T-T Terminals and Connect Line Voltage Thermostat in Series with Limit Controller. R8184G or the White Rogers 668. They both feature intermittent duty ignition and operate as follows: If all components are functioning properly, the control is in stand-by mode until: Power is applied through the limit control to the black wire, AND a call for heat from the thermostat completes the circuit between T and T. Then, assuming that the cad cell does NOT sense light The control is energized and the orange wire is powered. The igniter generates ignition through the electrodes and the motor turns the fuel unit and burner fan. If there is an oil valve installed, it opens based on its delay timing. Flame is established and the cad cell resistance decreases to fewer than 1600 ohms, de-energizing the safety switch heater and preventing the unit from shutting off on safety. As long as the cad cell senses flame, the oilburner continues to run until either the thermostat or limit control is satisfied. Safety check To check the safety: 1. Turn off the power at the service switch. 2. Install a 1,000 ohm resistor across the F-F terminals to reduce resistance and simulate flame. It is OK to leave the cad cell leads hooked up. 3. Turn on the service switch and make sure that both the line and low voltage circuits are complete. 4. The control should NOT energize, because the resistor connected to the F-F terminals simulates a fire in the chamber. If it does energize, replace the control. If it does not 1. Turn off the service switch and remove the resistor. 2. Disconnect one lead from the F-F terminals. 3. Turn on the electrical switch. The control should energize and the burner should lock out based on safety switch timing (15 45 seconds.) If the control Chapter


10 does not go off on safety, replace it and be sure to check the timing on the new control. 4. If the control does go off on safety, reconnect the lead to the F terminal and press the reset button. The safety is working properly. Troubleshooting tips If the oilburner does not start: Verify that electrical switches are in the ON position and that the thermostat is set Cad Cell Checkout Burner On Ignition Electrode Nozzle Air Tube Ohmmeter C554A Blower Light Cell Resistance Under 1600 ohms Primary Control Remove Cad Cell Leadwires From the Primary Control Start Burner Jumper Terminals Allows Burner to Run Connect Ohmmeter to Cad Cell Leadwires Must Read Less Than 1600 Ohms Cad Cell Checkout Burner Off Ignition Electrode Ignition Transformer Air Tube Nozzle Ohmmeter C554A Blower Primary Control Start Burner Remove the Jumper Check Resistance Must Be 100,000 Ohms or More When Dark above room temperature. Be sure that there is not a fire burning in the unit. Remove the primary control s cover and visually check to see if the spring-loaded mechanism has locked off on safety. If the primary control is NOT off on safety, check for proper voltage coming from the limit control. If there is sufficient line voltage, remove one lead from the F-F terminals. If the burner starts, the problem is in the cad cell sensor or wires. The cell may be sensing light or the wires may have been shorted. If the burner does not start, disconnect all the thermostat leads and install a jumper. If the burner starts, the problem is in the thermostat or its wiring. Did you know? Leaving the thermostat wiring connected to the control while testing may harm today s computerized thermostats. If the primary is off on safety, check the combustion chamber to be sure the unit is not saturated with oil. If the chamber contains excess oil, follow your company s procedures to eliminate the oil. Never attempt to fire an oilburner into a saturated chamber! If the chamber is free of excess oil, press the reset button. If the primary control energizes but the burner motor does not turn shut off the service switch and check the electrical connections and the burner motor reset button. If the burner runs and flame is established but the control shuts off on safety, disconnect the cad cell leads, press the reset and, before the unit shuts off on safety again, place a 1000-ohm resistor across the F-F terminals. If the burner continues to operate with the 11-10
 Control Locks Out Replace Burner Runs Trouble is Cad Cell")

11 Burner Locks Out On Safety Check Resistance Check Primary Control With Ohmmeter Check Cad Cell Without Ohmmeter Clean Cell Check Wiring Check Flame Adjustment Checking Cad Cell and Primary Ignition Electrode Nozzle Air Tube Blower Ohmmeter Primary Control Remove Lead Wires From Primary Control Start Burner Jumper F-F (With 1500 Resistor) Control Locks Out Replace Burner Runs Trouble is Cad Cell Check Resistance Infinite Open Circuit (Cell Defective or Not Seated) Greater Than 1600 Ohms Cell Dirty or Not Sighting Properly resistor in place, the cad cell relay is operating as designed and the problem is with the cad cell flame detector. With the unit operating, connect the cad cell leads to your ohmmeter. A reading of zero ohms indicates a short circuit. Check for pinched or shorted cad cell wires. If the resistance is infinite, check for broken cad cell wires or a loose or defective cell. On most properly adjusted burners, the reading will be 400 ohms or less. Some burners with large static plates or small openings in the retention head operate in the ohm range. Very few burners operate with resistance over 800 ohms. If the reading is greater than 1600 ohms, there is a serious problem with the fire, the cad cell eye, its holder, its leads or its alignment. Remember the cad cell needs to have a good view through the air tube to the fire. If the eye is coated with soot, it will not be able to see the flame. Clean the eye and continue your troubleshooting to find out why the eye is dirty. Cad Cell Check List Ohmmeter Reading Cause Action 0 ohms Short circuit Check for pinched cad cell leadwires Less than 1660 ohms Cad cell and application None but not zero are working correctly Over 1600 ohms Dirty or defective cell, 1. Clean cell face, recheck but not infinite improper sighting or 2. Check flame sighting improper air adjustment 3. Replace cell, recheck 4. Adjust air band to get good reading Infinite resistance Open circuit Check for improper wiring, loose cell in holder or defective cell Chapter
12 Second generation cad cell primary controls Second generation cad cell primary controls have the same basic features as first generation controls, but steady advances in technology have led to a number of improvements. For example, second generation cad cell primary controls have electronic reset mechanisms which are not spring loaded. The reset button on these controls does not pop-up when the unit shuts off on safety, and the reset doesn t have a thermal component, so there s no cooling time required before the control can be reset. To bring the control out of safety lockout, you simply depress the reset button for three seconds. Typical second generation cad cell primary controls include: Safety monitoring circuit This circuit monitors the contacts of two separate, redundant motor relays. Safety lockout occurs if the contacts of either motor relay are found closed when they should be open, thus ensuring shutdown even if one motor relay fails. Interrupted duty ignition These controls have an additional wire that is connected to the transformer or igniter. With interrupted duty ignition: Electrodes and igniters/transformers last longer Electrical consumption, operational noise and NOx emissions are reduced Combustion problems leading to dirty boilers and running saturations are minimized Recycle-on-flame-failure Recycle-on-Flame-Failure means that instead of shutting off on safety on loss of flame during the run cycle, the burner will shut off within approximately 1.5 seconds. After a wait of seconds, the control will attempt to restart the oilburner. Operation Second generation cad cell primary controls operate similarly to first generation controls. If all components are functioning properly, the control is in stand-by mode until Power is applied through the limit control to the black wire, AND the circuit between T and T is closed. Then assuming that the cad cell does NOT sense light The control is energized and the orange and blue wires are powered. The ignition and motor start. After the cad cell senses flame, the ignition stays on for another 10 seconds, then shuts off. As long as the cad cell senses flame, the oilburner continues to run until the thermostat or limit control is satisfied. If the control does not sense flame within the control s safety timing, lockout occurs. Pressing the reset button for 3 seconds resets the control. Third generation cad cell primary controls Third generation primary controls 11-12
13 include a microprocessor in the printed circuit boards. They feature interrupted duty ignition, fifteen-second safety timing and include several new features. Valve-delay-on technology depending on the manufacturer, this feature may be referred to as valve-on-delay, delayed-valve-on, or other similar wording. Through the use of an oil valve, valve-delay-on allows the burner motor to get up to speed delivering full flow from the fuel unit and full airflow from the fan before oil flows from the nozzle. This optimizes fuel/air mixing at start up resulting in a significant reduction of soot build-up and increased efficiency. Motor-delay-off technology may also be referred to as burner-motor-offdelay, or other similar wording. This feature allows the motor/fan combination to continue delivering full air flow for a period of time after the oil flow through the nozzle has been cut off by an oil valve, resulting in cleaner shut downs. Did you know? Many people in our industry refer to valve-delay-on as pre-purge and motor-delay off post purge. This is not correct. The primary controls operations do not fit the Underwriters Laboratories (UL) definition of pre- and post-purge. Dry alarm contacts These auxiliary electrical contacts close when the control goes into lock out or latch up. Through various added controls (i.e. an auto dialer) can alert the homeowner, alarm company, and/or service company of the situation. Limited reset This feature protects against the repeated pressing of the reset button which floods the chamber with oil. If the control goes into lockout three times during a single call for heat, it goes into a restricted mode, commonly called latch up. The control can be reset only twice, regardless of the number of times the reset button is pressed. Instructions for removing these controls from latch-up are printed on the underside of the control where the customer cannot see them. Limited recycle This feature limits the number of times the control will attempt to restart if the flame is repeatedly established and then lost, preventing excessive sooting from repeated combustion failure. Diagnostic LEDs These small, lowpower lights provide a significant amount of information to help the service technician quickly and accurately diagnose the situation. Conclusion Primary controls have evolved from simple stack switches to microprocessor based controls that offer greater reliability, safety and efficiency. Control manufacturers continue to develop new products with advanced features that will make the controls in use today seem as obsolete as thermo-mechanical controls are now. As an oilheat service technician it s important for you to be aware of these new controls so that you can continue to offer professional service to your customers. Chapter
14 Specific Microprocessor-Based The following section is intended strictly as an overview. While other manufacturers may have similar controls, these are the units that you are most likely to encounter. Also, remember that manufacturers periodically add improvements and additional features to their controls. It is critical to consult product specific literature to verify information regarding individual controls, even if they are familiar to you. Model Carlin Model numbers can be found just above the thermostat and flame detector terminals. Wiring diagrams are to the left, and the controls timings are listed above the model number. For example, this xxx has an xxsecond trial for ignition an xx-second recycle time, an x second valve delay on, an xx-second trial for ignition, and an xx-second motor-delay-off. There may also be a revision designation printed on the lower right side of the label. Carlin s microprocessor based controls, models and feature: Limited reset also known as Serviceman Reset Protection. Once these controls go into lockout three consecutive times without establishing flame, the control will go into latch-up. In order to release them from latch-up, depress and hold the reset button. After 10 seconds, the two diagnostic lights will blink alternately. After another 20 seconds, the lights will stop blinking. Release the button to complete the reset procedure. Recycle-on-flame-failure in the event of flame loss during the run cycle, within approximately two seconds the will shut the burner off and the will turn off power to the oil valve and complete a motor-delay-off cycle. After a wait of seconds, the red LED light will flash for 65 seconds, then the control will attempt to restart the oilburner. If flame is established during the trial for ignition period, the burner will resume normal operation. If flame is not established in the trial for ignition period the control will go into lockout. Diagnostic LEDs these primary controls have two diagnostic LEDs: one red and one amber. Amber-on signals that the control is in self-test. Red-on indicates that the control is in lockout Amber and red-on indicates that the control has locked out three times during a single call for heat and is in latch-up. Red flashing indicates that flame has been lost during a run cycle, after trial for ignition. Amber blinking-off every 3 to 4 seconds while the control is in the standby mode indicates that the cad cell is sensing light, or a diagnostic fault which disallows startup. Wiring Thermostat and cad cell leads connect to the appropriate terminals

15 The is connected in the same way as earlier interrupted-ignition cad cell relays: The black wire connects to the limit control The white wire connects to all neutrals The blue wire connects to the igniter or transformer The orange wire connects to the burner motor The control has both valvedelay-on and motor-delay-off features, so the wiring is slightly more complicated: The black wire connects to the limit control The white wire connects to all neutrals The blue wire connects to the igniter or transformer The orange wire connects to the burner motor The violet wire connects to the oil valve The red wire with white tracer (stripe) connects to constant power Operation The Carlin operates as follows: Each time power is applied to the red wire with white tracer, the control performs a boot up test to verify internal operation. After about 4 seconds, the amber LED comes on. The test continues for 6 more seconds and, if successful, the amber light turns off. If the test is not successful, the control repeats the test until successful. When a call for heat is initiated, the amber LED turns on and there is a 3 to 4 second delay while the control performs a safe start check. If no flame is sensed and all internal conditions are correct, the LED turns off and the control enters valvedelay-on mode. The ignition is powered and one second later, the motor is powered. After completion of the valve-delayon cycle, the control goes into trial for ignition. The oil valve is powered and opens. Flame should be established within the trial for ignition period of 15 seconds. If the flame is not sensed by the end of trial for ignition, the control goes into lockout, the red LED comes on and the dry alarm contacts close. The control must be manually reset by pushing the reset button for one second and releasing. Once the flame is established, the ignition remains on for a short time to ensure flame stability and then shuts off. The burner will then run until the call for heat is satisfied, at which time the power to the oil valve will shut off. The motor will continue to operate for the specified motor-delay-off period. Once that cycle is completed, the control returns to standby mode. Model Chapter

16 Specific Microprocessor-Based The following section is intended strictly as an overview. While other manufacturers may have similar controls, these are the units that you are most likely to encounter. Also, remember that manufacturers periodically add improvements and additional features to their controls. It is critical to consult product specific literature to verify information regarding individual controls, even if they are familiar to you. Riello primary controls Riello primary controls are designed exclusively for use on Riello burners. The Riello primary control, in combination with the coil of the oil valve and a cad cell, monitors and controls all functions of the burner. An auxiliary tap on the motor windings provides a 46-volt AC power supply to operate the control. The oil valve provides the starting and running circuits for the primary control through a logic board and safety lockout switch. The ignition transformer is integrated into the primary control and provides interruptedduty ignition. There are no thermostat terminals on current Riello primary controls. An additional device, such as a switching relay, must be used for low voltage thermostat connections. The Riello control s safety switch is equipped with a contact allowing remote sensing of burner safety lockout. Should burner lockout occur, 120 Volts AC is supplied to sub-base Terminal 4 to activate any connected remote alarm systems. Wiring All wiring is connected through the control s sub-base terminals. A wiring diagram is supplied with each control and serves as an insulator on the underside of the control. This diagram should always be left in place to protect the printed circuit board of the control. When working on these controls, most experienced Service Technicians refer to Riello s plastic laminated troubleshooting card or the troubleshooting guide provided in the training manual. Operation If all components are functioning properly, the control is in standby mode until 120 volts is supplied through the limit control to Terminal 5. Then assuming that the cad cell does NOT sense light: The control is energized and Terminal 6 is powered, providing 120 Volts AC to the motor. The auxiliary winding tap provides 46 Volts AC to power the control. The motor starts and establishes a 10- second valve-delay-on. The oil valve opens, supplying oil to the nozzle line, and at the same time the ignition is powered. Once the cad cell senses flame, the ignition circuit is opened and the spark shuts off. As long as the cad cell senses flame, the oilburner continues to run until the demand for heat is satisfied. If the control does not sense flame Chapter
17 within approximately 5 seconds after valve delay-on, the control shuts the burner off on safety. If the cad cell loses sight of the flame at any time during the firing cycle, the control immediately closes the oil valve to prevent oil flow, then goes back into valve-delay-on mode and makes one attempt to relight. Safety check Turn off the service switch Remove the control box from the sub-base Remove the cad cell from the control box Replace the control box on the sub-base Turn on the service switch and make sure that the line voltage circuit is complete The control should energize and the burner should go off on safety approximately 5 seconds after the valve-delayon cycle. If the control does NOT go off on safety, replace it and be sure to check the timing on the new control. Troubleshooting tips In general, it is good practice to check that the control box spades and sub-base terminals are making good contact, and to verify that there is between 42 and 52 Volts AC between terminals 3 and 7 while the motor is running. If the burner stays in valve-delay-on, check for the following before you condemn the control: Cad cell faulty or sensing light before trial for ignition. Coil wires are reversed on Terminals 1 and 2 or on Terminals 1 and 8. Open coil circuit, Terminals 2 and 8. To check this, connect your ohmmeter between terminals 2 and 8; if the coil circuit is open, the reading will be 0 ohms. Open coil circuit, Terminals 1 and 2. Reading should be 1235 ohms or less. Note this is for the 530 SE primary control only. An open coil circuit on Terminal 1 will cause the 483 SE control to lock out. Insufficient voltage between Terminals 3 and 7. It should read 42 to 52 Volts AC. If you have lower voltage, check the incoming supply. If there is proper incoming voltage, above 102 Volts AC, change the burner motor. If a burner with a 530 SE control continues to purge and light off with immediate flame dropout, or a burner with a 483 SE control cycles on and off in quick succession, check the following: The metal yoke for the coil may be missing or improperly installed. Coil wires 2 and 8 may be reversed. There may be low resistance on the coil holding circuit, terminals 1 & 2. Resistance should be 1350 ohms, plus or minus 10%. If the resistance is low, change the coil. The following pages show reference guides for the Riello primary control. -17 Chapter
18 11-18
19 11-19 Chapter 11

20 Specific Microprocessor-Based The following section is intended strictly as an overview. While other manufacturers may have similar controls, these are the units that you are most likely to encounter. Also, remember that manufacturers periodically add improvements and additional features to their controls. It is critical to consult product specific literature to verify information regarding individual controls, even if they are familiar to you. The Honeywell R7184 Honeywell s controls differ from Carlin s. It is also extremely important to note that some Honeywell models utilize different wire color-coding. Standard features of the Honeywell R7184 include: Limited reset This control can be reset only two times before it goes into restricted lockout, or latch-up mode. The reset count returns to zero each time a call for heat is successfully completed. To reset the control from latch-up, press and hold the reset button. The LED will go out. Continue holding the button for approximately 30 to 45 seconds until the light comes on again. Limited recycle Should the flame be lost while the burner is firing, the control shuts down the burner, enters a 60 second recycle delay and then attempts a restart. During the recycle delay, the LED will flash slowly two seconds on, two seconds off. Do not confuse this with the burner being in lockout. If the flame is lost three consecutive times without successfully satisfying a call for heat, the control goes into lockout and must be reset manually. Diagnostic LED The diagnostic LED has four states: On flame present Off no flame 2 seconds on, 2 seconds off recycle 1/2 second on, 1/2 second off lockout and latch-up. The LED can also be used to check cad cell resistance. When the burner is running after the ignition has turned off, quickly press and release the reset button. Hold it for only a half-second or less. The LED will flash from one to four times depending on the cad cell resistance: If the light flashes once cad cell resistance is normal: ohms Two flashes means resistance is normal: ohms Three flashes is normal: ohms Four flashes indicate limited resistance of more than 1600 ohms Lockout can occur above 4000 ohms. Pump priming cycle To facilitate priming, the control can be placed in a purge routine by pressing and quickly releasing the reset button while the ignition is on. If the control has not locked out since its last complete heating cycle, the lockout timing will be extended for up to 4 minutes and the ignition will operate in the intermittent mode for this cycle only. Communications port Many Honeywell residential combustion controls 11-20
21 have a communications port that allows for data interchange between the control and other products, such as diagnostic tools, modems, zoning systems, and home automation. Wiring the Honeywell R7184 Currently there are four models of the R7184: A, B, P and U. On each model, the thermostat leads and cad cell leads connect to the appropriate terminals. R7184A The black wire connects to the limit control The white wire connects to all neutrals The blue wire connects to the igniter or transformer The orange wire connects to the burner motor R7184B The B model has a 15-second valve-on delay feature requiring the installation of an oil valve. This control has an added violet wire that connects to that valve. The other wire from the valve is connected to the neutrals. All other wiring is consistent with the A model. R7184P The P model has both a fixed 15-second valve-on delay and a burner motor-off- delay feature which may be field selected to 30 seconds, 2 minutes, 4 minutes or 8 minutes or fixed at 15 seconds. In addition to the violet wire for valve on delay, there is a red wire that connects to the limit control, while the black wire connects to constant power to achieve the burner motor-off delay feature. All other wiring is consistent with the B model. R7184U The U model has all of the features of the P models with selectable on and off delays, plus low voltage dry alarm contacts that are located above the thermostat terminals. On the U model you have the ability to adjust dip switches that enable or disable both the valve on delay and the burner motor-off delay. This makes the U model control the same as the A control. This way you only need to stock one control on your truck. All other wiring is consistent with the P model. Model designations and revisions Honeywell puts the model designations and revision information for the R7184 next to the control part number and/or prints it on the side of the control. Revisions are numerical and indicate which improvements or changes are included in the particular control. For example, Series 1 controls have different cad cell indicator ranges; Revision 2 changed the pump priming cycle from 45 seconds to 4 minutes and added the limited recycle. Some Chapter
22 Honeywell continued revisions have wires, while others have spade connectors. Series 4 and later controls have added safety features. If a Series 4 control detects flame eight seconds into valve on delay or 30 seconds into burner motor-offdelay, the control will go into lock out. This is to prevent poor starts and shutdowns due to bad oil valves. This means that these controls CANNOT be operated without an oil valve. If the fuel unit has to be replaced, you MUST use one with either an integral or external oil valve. It also means that if you are replacing an earlier control with a Series 4 or later control, you cannot simply cap off the violet and/or black wires as you could with earlier revisions. There is also a series 5 control. See Beckett s website for details. Sequence of operation Currently, the most sophisticated Honeywell R7184 is the U model. Let s take a look at how it operates. Standby: When a call for heat is initiated, there is a 2 to 6 second delay while the control performs a safe start check. If no flame is sensed and all internal conditions are correct, the control enters valve on delay mode and the ignition and motor are powered for 15 seconds. Trail for ignition: Then the control goes into trial for ignition. The oil valve is powered and opens. Flame should be established within the trial for ignition timing of 15 or 30 seconds. If no flame is sensed by the end of trial for ignition, the control goes into lockout and must be manually reset. The dry alarm contacts close and complete the circuit to activate any remote alarm that is connected. Carryover: Once the flame is established, the ignition remains on for 10 seconds to ensure flame stability, then shuts off. The burner will then run until the call for heat is satisfied, at which time the power to the oil valve will shut down. Burner motor off delay: The motor will continue to operate from 30 seconds to 8 minutes depending on how the dip switches are set. Once this burner motor-off delay cycle has been completed, the control returns to standby mode
E Series CE Approved Intermittent Pilot Ignition Control
 Installation Instructions Issue Date January 11, 2013 E Series CE Approved Intermittent Pilot Ignition Control Application The E Series CE Approved Intermittent Pilot Ignition Control is a safety control
Modulating Furnace Information. Warning on Meter Setting - Read First!
 Modulating Furnace Information Pressure Transducer Pressure DC Volts 0.00" 0.25 0.20" 0.63 0.25" 0.72 0.30" 0.82 0.35" 0.91 0.40" 1.00 0.45" 1.09 0.50" 1.19 0.55" 1.28 0.60" 1.38 0.65" 1.47 0.70" 1.56
G821L/G822L Series Integrated Function Direct Spark Ignition Controls
 Installation Sheets Manual 121 Gas Combustion Combination Controls and Systems Section G Technical Bulletin G821L/G822L Issue Date 1199 G821L/G822L Series Integrated Function Direct Spark Ignition Controls
G72x Series Direct Spark Ignition Controls
 Installation Sheets Manual 121 Gas Combustion Combination Controls and Systems Section G Technical Bulletin G72x Issue Date 1299 G72x Series Direct Spark Ignition Controls Figure 1: G72x Direct Spark Ignition
SERIES VAC Microprocessor Based Direct Spark Ignition Control FEATURES DESCRIPTION APPLICATIONS THE TOTAL SOLUTION FOR GAS IGNITION CONTROL
 SERIES 35-72 120 VAC Microprocessor Based Direct Spark Ignition Control 35.72.03 FEATURES Two Mounting Configurations Open Board With Stand-Off's - saves space and cost Potted - protection for washdown
G76x Direct Spark Ignition Controls
 Installation Sheets Manual 121 Gas Combustion Combination Controls and Systems Section G Technical Bulletin G76x Issue Date 0400 G76x Direct Spark Ignition Controls Figure 1: G76x Direct Spark Ignition
GeniSys 24V. Model Advanced 24 Vdc Burner Control. Description / Applications
 PARTS & ACCESSORIES GeniSys 24V Model 7559 Advanced 24 Vdc Burner Control Description / Applications The Beckett GeniSys TM 24V Advanced Burner Control is a 24 Vdc primary safety control for oil burners
X4 Installation and Operation Manual - POWER FLAME INCORPORATED
 7.13.2 Set the burner s combustion air inlet damper to the approximate setting as shown in this manual for the desired firing rate. Also, verify that the correct main orifice is installed in the main orifice
BLOWER VACUUM SWITCH FAILED OPEN
 F1 F1 AC BLOWER VACUUM SWITCH FAILED CLOSED AC BLOWER VACUUM SWITCH FAILED CLOSED UHS If the blower vacuum switch is closed before blower start-up, the control module will not start the blower. Pre-check
Hayward error codes and troubleshooting
 http://waterheatertimer.org/intermatic-trippers-and-parts.html#pool 50 Hayward error codes and troubleshooting Section V. TROUBLESHOOTING http://www.hayward-pool.com/prd/in-ground-pool-manuals_10201_10551_14502_-1
BG1600M Intermittent Pilot Ignition Control
 Installation Instructions Issue Date March, 00 BG600M Intermittent Pilot Ignition Control Application The BG600M Intermittent Pilot Ignition Control is a safety control designed for indirect burner ignition
G861 Series Integrated Function. Direct Spark Ignition Control
 Installation Sheets Manual 121 Gas Combustion Combination Controls and Systems Section G Technical Bulletin G861 Issue Date 0699 G861 Series Integrated Function Direct Spark Ignition Control Figure 1:
TECHNICAL SERVICE DEPARTMENT Technical Service Bulletin LowNOx Commercial Gas Electronic Spark Ignition Sequence
 The Universal TM gas LowNOx series water heaters contain an electronic spark ignition system. The heater is connected to a 120VAC power source required by the transformer. The transformer steps down the
HP21 SERVICE SUPPLEMENT UNIT INFORMATION. TSC6 Two-Speed Control
 SERVICE UNIT INFORMATION SUPPLEMENT HP21 Corp. 9426 L10 Litho U.S.A. All HP21-4 and -5 units (single and three phase) are equipped with a TSC6 two-speed control. The TSC6 (A14) two-speed control contains
ORDERING INFORMATION SPECIFICATIONS APPLICATION
 ORDERING INFORMATION UNIVERSAL MODELS The ordering part number for the universal model is 82UNIVERSAL. The 82UNIVERSAL comes with remote flame sense active. For internal flame sense, the supplied universal
G600 Series Replacement Intermittent Pilot Ignition Controls
 Installation Instructions G600 Issue Date 0601 G600 Series ment Intermittent Pilot Ignition Controls Installation IMPORTANT: These instructions are intended as a guide for qualified personnel installing
en Hydronic Surface Heater S 3000 REPAIR MANUAL
 0178388en 002 0209 Hydronic Surface Heater S 3000 REPAIR MANUAL 0 1 7 8 3 8 8 E N S 3000 Repair Foreword Foreword Machines covered by this manual Machine Item Number S 3000 0620182 S 3000 0620218 Machine
BGH2UNCNTRLHT-01 Universal Hot Surface Ignition Control
 Installation Instructions BGH Issue Date vember 9, 2017 BGH2UNCNTRLHT-01 Universal Hot Surface Ignition Control Application The BASO Gas Products BGH2UNCNTRLHT-01 Universal Series Hot Surface Ignition
AHE S - 12 VDC AHE X - 12 VDC AHE X - 12 VDC
 Shop Manual Model Numbers AHE-100-04S - 12 VDC AHE-120-04X - 12 VDC AHE-130-04X - 12 VDC TABLE OF CONTENTS Section 1 Section 2 Section 3 Section 4 General Heater Information 1.1 Component Overview 1.2
Control. Part B, Section 2. This section covers the following unit configurations. 3400V 3500V. Voltage 4. Pump Piston (E, F, G)
") Part B, Section 2 Model This section covers the following unit configurations. Voltage 4 3100V 3400V 3500V Pump Piston (E, F, G) Manifold 4-Port (A) 6-Port (B, C) 2-Port (S, T) Vista Standard (V) B 2-0
Part B, Section 2 Model This section covers the following unit configurations. Voltage 4 3100V 3400V 3500V Pump Piston (E, F, G) Manifold 4-Port (A) 6-Port (B, C) 2-Port (S, T) Vista Standard (V) B 2-0
First Correlating Revision No. 1-NFPA [ Section No ]
![First Correlating Revision No. 1-NFPA [ Section No ]](/thumbs/73/68781388.jpg "First Correlating Revision No. 1-NFPA [ Section No ]") First Correlating Revision No. 1-NFPA 85-2013 [ Section No. 3.3.52.1 ] 3.3.52.1 Booster Fan. A device fan used to assist in the supply of air to, or the removal of flue gas products from, the combustion
First Correlating Revision No. 1-NFPA 85-2013 [ Section No. 3.3.52.1 ] 3.3.52.1 Booster Fan. A device fan used to assist in the supply of air to, or the removal of flue gas products from, the combustion
EC 200 EC 300 GE 360 GE 400 GE 600 L-S BM
 DIESEL SPACE HEATER - SERVICE MANUAL INDEX 1. CONTROLS AND COMPONENTS 2. FLAME CONTROL CYCLES 3. MAINTENANCE SCHEDULE 4. REPAIR PROCEDURES 1. FAN MOTOR ASSEMBLY 2. FUEL FILTER ASSEMBLY 3. FUEL PUMP ASSEMBLY
Control System. Part B, Section 1. This section covers the following unit configurations. Model Voltage 1, 2 Pump Piston (E, F, or G)
") Part B, Section 1 This section covers the following unit configurations. Model 3100 3400 3500 Voltage 1, 2 Pump Piston (E, F, or G) Manifold 4-Port (A) 6-Port (B or C) Control UniScan (1) B 1-0 B 1-1 Section
Part B, Section 1 This section covers the following unit configurations. Model 3100 3400 3500 Voltage 1, 2 Pump Piston (E, F, or G) Manifold 4-Port (A) 6-Port (B or C) Control UniScan (1) B 1-0 B 1-1 Section
Service Bulletin. (This bulletin and all other active bulletins are downloadable from our website at
 Bulletin 00--ABDE Service Bulletin (This bulletin and all other active bulletins are downloadable from our website at www.frymaster.com/parts_service.) Bulletin 00--ABDE Page of + Worksheets Date: 0//00
SERIES VAC Microprocessor Based Direct Spark Ignition Control with Combustion Blower Relay FEATURES DESCRIPTION
 SERIES 35-71 120 VAC Microprocessor Based Direct Spark Ignition Control with Combustion Blower Relay 35.71.02 FEATURES 3 Enclosure Configurations Case and Cover - dust and foreign object protection Open
PAGE 1. TES Operation & Testing Guidelines: Tes Trouble shooting
 PAGE 1 This document outlines questions to ask and components to check during TES troubleshooting. More detailed troubleshooting procedures are available in the TES Troubleshooting Guide. 1. Flow Light
Section 3 Technical Information
 Section 3 Technical Information In this Module: Engine identification Modes of operation Battery charging and heat manage operation Service and repair procedures Maintenance requirements Engine Identification
R & D SPECIALTIES ROTROL I USER'S MANUAL
 R & D SPECIALTIES ROTROL I USER'S MANUAL TABLE OF CONTENTS INTRODUCTION...2 SPECIFICATIONS...2 CONTROLS AND INDICATORS...3 TIME DELAYS...4 INSTALLATION...5 SYSTEM OPERATION...9 TROUBLESHOOTING...13 OPTIONAL
Automated Control Electronics (ACE ) System Operation and Diagnostics
 System Operation and Diagnostics") Commercial Products Automated Control Electronics (ACE ) System Operation and Diagnostics PART NO. 98962SL This page is intentionally blank. Table of Contents Introduction... 1 Controller Operation and
Commercial Products Automated Control Electronics (ACE ) System Operation and Diagnostics PART NO. 98962SL This page is intentionally blank. Table of Contents Introduction... 1 Controller Operation and
SECOND GENERATION Use this guide with unit serial number prefix beginning with BWF using Terra Power separator.
 Technical Information and Diagnostic Guide for SECOND GENERATION Use this guide with unit serial number prefix beginning with BWF using Terra Power separator. This guide will assist you in becoming more
INSTALLATION INSTRUCTIONS
 INSTALLATION INSTRUCTIONS Universal Air Series!! NOTE!! Covers the following model: 6000 Series 85-0100B-AZ Rev 0 5/07 To ensure that the system is installed properly, provide your electrician with these
C.E. Niehoff & Co. C653/C653A and C625 Alternators Troubleshooting Guide NOTICE. Hazard Definitions. Battery Charge Volt and Amp Values
 C.E. Niehoff & Co. C653/C653A and C625 Alternators Troubleshooting Guide Hazard Definitions These terms are used to bring attention to presence of hazards of various risk levels or to important information
MAGNETIC MOTOR STARTERS
 Chapter 6 MAGNETIC MOTOR STARTERS 1 The basic use for the magnetic contactor is for switching power in resistance heating elements, lighting, magnetic brakes, or heavy industrial solenoids. Contactors
IMPORTANT SAFEGUARDS READ THIS MANUAL AND FOLLOW ALL SAFETY INSTRUCTIONS THOROUGHLY BEFORE OPERATING THE EMIU INVERTER SYSTEM SAVE THESE INSTRUCTIONS
 THIS UNIT CONTAINS A RECHARGEABLE VALVE-REGULATED LEAD ACID BATTERY. PLEASE RECYCLE OR DISPOSE OF PROPERLY. IMPORTANT SAFEGUARDS INTERRUPTIBLE EMERGENCY LIGHTING UNIT INVERTER INSTRUCTION MANUAL When using
C.E. Niehoff & Co. C703/C703A and C706 Alternators Troubleshooting Guide CAUTION. Testing Guidelines. Hazard Definitions WARNING.
 C.E. Niehoff & Co. C703/C703A and C706 Alternators Troubleshooting Guide WARNING Before troubleshooting any CEN products, the service technician should: read, understand, and agree to follow all information
LANDFILL GAS ELEVATED (CANDLESTICK) FLARE SYSTEM
 FLARE SYSTEM") LANDFILL GAS ELEVATED (CANDLESTICK) FLARE SYSTEM Part 1. General 1.01 Description A. This section describes a candlestick flare system for the combustion of landfill gases. The flare system must be of
LANDFILL GAS ELEVATED (CANDLESTICK) FLARE SYSTEM Part 1. General 1.01 Description A. This section describes a candlestick flare system for the combustion of landfill gases. The flare system must be of
EMIU 720W Mini Inverter
 THIS UNIT CONTAINS A RECHARGEABLE VALVE-REGULATED LEAD ACID BATTERY. PLEASE RECYCLE OR DISPOSE OF PROPERLY. INTERRUPTIBLE EMERGENCY LIGHTING UNIT INVERTER INSTRUCTION MANUAL IMPORTANT SAFEGUARDS When using
 Page 1 of 29 Section 04-05: Suspension, Computer Controlled 1997 Town Car Workshop Manual DIAGNOSIS AND TESTING Procedure revision date: 05/16/2000 Suspension, Computer Controlled Inspection and Verification
SOLAR LIGHTING CONTROLLER SUNLIGHT MODELS INCLUDED IN THIS MANUAL SL-10 SL-10-24V SL-20 SL-20-24V
 SOLAR LIGHTING CONTROLLER OPERATOR S MANUAL SUNLIGHT MODELS INCLUDED IN THIS MANUAL SL-10 SL-10-24V SL-20 SL-20-24V 10A / 12V 10A / 24V 20A / 12V 20A / 24V 1098 Washington Crossing Road Washington Crossing,
C.E. Niehoff & Co. C840D Alternator Troubleshooting Guide CAUTION. Testing Guidelines. Hazard Definitions WARNING.
 C.E. Niehoff & Co. C840D Alternator Troubleshooting Guide WARNING Before troubleshooting any CEN products, the service technician should: read, understand, and agree to follow all information contained
PowerLevel s e r i e s
 Owner s Manual Hydraulic Leveling CONTENTS Introduction Operation Control Panel Automatic Leveling Manual Leveling Retracting Jacks Remote Operation Care & Maintenance Troubleshooting Error Codes 1 2 2
Electronic Dynamo Regulator INSTRUCTION MANUAL. COPYRIGHT 2015 CLOVER SYSTEMS All Rights Reserved
 DR310 TM Electronic Dynamo Regulator INSTRUCTION MANUAL COPYRIGHT 2015 CLOVER SYSTEMS All Rights Reserved INTRODUCTION The Clover Systems DR310 is an allelectronic voltage and current regulator for dynamos
Troubleshooting Manual
 Troubleshooting Manual NOTICE: DO NOT DISCARD THIS MANUAL Models: LEGACY42-IFT PHOENIX42-IFT 1 TABLE OF CONTENTS A. Normal Operation...3 B. Wiring Diagram...4 C. Troubleshooting IntelliFire Touch...5 D.
IMPORTANT SAFEGUARDS READ THIS MANUAL AND FOLLOW ALL SAFETY INSTRUCTIONS THOROUGHLY BEFORE OPERATING THE LMIU INVERTER SYSTEM SAVE THESE INSTRUCTIONS
 THIS UNIT CONTAINS A RECHARGEABLE VALVE-REGULATED LEAD ACID BATTERY. PLEASE RECYCLE OR DISPOSE OF PROPERLY. IMPORTANT SAFEGUARDS INTERRUPTIBLE EMERGENCY LIGHTING UNIT INVERTER INSTRUCTION MANUAL When using
TROUBLESHOOTING. 1. What is the model and serial number? If you don t know, how old is it? Give description.
 TROUBLESHOOTING There is excellent literature on our website: heatec.com. Look under TEC-NOTE. You will find our newest heater manual. This is full of information (complete with great pictures) on our
Technical Service Bulletin
 Number 02-36-030 Subject OBD-II READINESS TEST DRIVE CYCLE FOR 1996-1998 SONATA Date Model DECEMBER, 2002 1996-1998 SONATA DESCRIPTION: This TSB describes Drive Cycles which may assist the vehicle s OBD-II
f i r e - p a r t s. c o m
 System Overview: The primary components that are included in the SIT Proflame II GTMFS System Gas Valve Integrated Fireplace Control (IFC) SIT Pilot Assembly Transmitter (remote control) (GTMF model) 2
Application Engineering Europe
 Date of last update: Feb-12 Ref: D7.8.4/0112-0212/E Application Engineering Europe CORESENSE DIAGNOSTICS FOR STREAM REFRIGERATION COMPRESSORS 1/17 1 Introduction CoreSense is an ingredient brand name for
WARRANTY WILL BE VOID If These Steps are Not Performed Before Installing The Control STEPS TO PERFORM BEFORE CONTROL INSTALLATION
 Curtis 1268-5411 This sheet is provided to aid in the installation of your remanufactured CURTIS controller. Upon installation, you may encounter problems that may, or may not, be due to a faulty controller.
Operation of the FFBH is enabled and disabled by the Automatic Temperature Control Module (ATCM).
.") Page 1 of 8 Published : Apr 22, 2004 Auxiliary Heater COMPONENT LOCATIONS Item Part Number Description 1 - Fuel line connection with fuel tank 2 - Auxiliary fuel pump 3 - Fuel fired booster heater GENERAL
Page 1 of 8 Published : Apr 22, 2004 Auxiliary Heater COMPONENT LOCATIONS Item Part Number Description 1 - Fuel line connection with fuel tank 2 - Auxiliary fuel pump 3 - Fuel fired booster heater GENERAL
Easy Start. 364 (3 ton) Soft Starter 368 (6 ton) Soft Starter. Installation Manual
 Soft Starter 368 (6 ton) Soft Starter. Installation Manual") Easy Start 364 (3 ton) Soft Starter 368 (6 ton) Soft Starter Installation Manual Micro Air Corporation Phone (609) 259-2636 124 Route 526. www.microair.net Allentown NJ 08501 Fax (609) 259-6601 Retrofit
Easy Start 364 (3 ton) Soft Starter 368 (6 ton) Soft Starter Installation Manual Micro Air Corporation Phone (609) 259-2636 124 Route 526. www.microair.net Allentown NJ 08501 Fax (609) 259-6601 Retrofit
Specifications of STICKTITE and PILOTPAK Nozzles
 -.-5 Specifications of STICKTITE and PILOTPK Nozzles This graph indicates the relationship between capacity and applied mixture differential pressure for STICKTITE and PILOTPK nozzles when fed with an
Specifications of STICKTITE and PILOTPAK Nozzles
 Low Temperature urners - STICKTITE and PILOTPK Nozzles 1-1.1-5 Specifications of STICKTITE and PILOTPK Nozzles This graph indicates the relationship between capacity and applied mixture differential pressure
S4562C 1085 COMBI BOARD APPLICATION. Contents PRODUCT HANDBOOK. General
 S4562C 1085 COMBI BOARD APPLICATION PRODUCT HANDBOOK The S4562C 1085 combi board is an integration of an on/off temperature control and an electronic ignition control. The S4562C 1085 combi board is intended
Application Engineering
 Application Engineering February, 2009 Copeland Digital Compressor Controller Introduction The Digital Compressor Controller is the electronics interface between the Copeland Scroll Digital Compressor
ACCUSENSE CHARGE SERIES ON/OFF BOARD FULLY AUTOMATIC BATTERY CHARGER
 ACCUSENSE CHARGE SERIES ON/OFF BOARD FULLY AUTOMATIC BATTERY CHARGER SPECIFICATIONS: *Photo for reference only* Part number 8890439 Mode Select: Selects Battery Type Refer to Section 6. IMPORTANT: READ
INSTALLATION INSTRUCTIONS
 INSTALLATION INSTRUCTIONS TEC20 TEC20H ELECTRONIC CONTROLLER BARD MANUFACTURING COMPANY Bryan, Ohio 43506 Since 1914...Moving ahead, just as planned. Manual: 2100-306D Supersedes: 2100-306C File: Volume
Advanced EasyStart Troubleshooting
 Advanced EasyStart Troubleshooting EasyStart is designed for excellent reliability and durability. Every EasyStart is tested on a compressor before it leaves Micro-Air to ensure it will work when delivered.
HGM-MZ Multi-Zone Monitor Annual Maintenance And Troubleshooting Guide
 HGM-MZ Multi-Zone Monitor Annual Maintenance And Troubleshooting Guide Service, Testing and Maintenance procedures BACHARACH Inc. HGM-MZ Routine Annual Maintenance And Operating Parameter Verification
BIGLA30-T/BIELA14-T Event Codes Quick Reference EXPLANATION CORRECTIVE ACTION PARTS TO CARRY ON SERVICE CALL
 E13 TEMPERATURE PROBE FAILURE E16 HIGH LIMIT 1 EXCEEDED A. TEMP Probe reading out of range. B. Bad Connection. C. Problem with the temperatur e measuring circuitry including the probe. High limit temperature
Technical Information and Diagnostic Guide
 Technical Information and Diagnostic Guide This guide will assist you in becoming more familiar with the working components of the NITE System and the proper steps and procedures to completely diagnose
Third Generation NITE Phoenix
 Technical Information and Diagnostic Guide for Third Generation NITE Phoenix Use this guide with unit serial number prefix beginning with BYC, CAI built after 2-10-2012 and CCA, CDJ, CIA units after 6/25/2012
RESIDENTIAL ELECTRONIC IGNITION SYSTEMS
 Service Application Manual SAM Chapter 630-153 Section 12 RESIDENTIAL ELECTRONIC IGNITION SYSTEMS by Marcus G. Metoyer, Jr., CMS INTRODUCTION The information contained in this publication is generic in
Troubleshooting Guide
 Troubleshooting Guide IntelliFire Plus Ignition System *For authorized gas technicians use only. 9/15/2011 Hearth & Home Technologies Page1 Guide Table of Contents Introduction. 3 Tools and Instruments...
User s Manual. Automatic Switch-Mode Battery Charger
 User s Manual Automatic Switch-Mode Battery Charger IMPORTANT Read, understand, and follow these safety rules and operating instructions before using this battery charger. Only authorized and trained service
Devices Supported: KEB48220 KEB48221 KEB48300 KEB48301 KEB48400 KEB48401 KEB48600 KEB48601 KEB72330 EB KEB72450 KEB EB KEB72600 KEB
 Kelly KEB Brushless Motor Controller User s Manual Devices Supported: KEB48220 KEB48221 KEB48300 KEB48301 KEB48400 KEB48401 KEB48600 KEB48601 KEB72330 KEB EB72 72331 KEB72450 KEB EB72 72451 KEB72600 KEB
Application Engineering
 Application Engineering March 2011 Copeland Digital Compressor Controller Introduction The Digital Compressor Controller is the electronics interface between the Copeland Scroll Digital compressor or the
N1387 Series Troubleshooting Guide for N Alternators
 N1387 Series Troubleshooting Guide for N1387-1 Alternators Hazard Definitions These terms are used to bring attention to presence of hazards of various risk levels or to important information concerning
Preventative Maintenance Tune-ups
 Chapter 14 Preventative Maintenance Tune-ups The preventive maintenance tune-up is the most important service our industry offers. A properly performed tune-up assures the customer that their heating system
Users Manual. Defender 1 8.0KW to 14.0KW Online Emergency Lighting Inverter. Technical Manual # Revision B
 Users Manual Defender 1 8.0KW to 14.0KW Online Lighting Inverter Technical Manual #018-0102-01 Revision B Phone: 1.877.DSPM.POWER 1.877.377.6769 Fax: 909.930.3335 Website: www.dspmanufacturing.com E-Mail:
HVF110, 210, 310, 410HD
 342 N. Co. Rd. 400 East Valparaiso, IN 46383 219-464-8818 Fax 219-462-7985 www.heatwagon.com Installation and Maintenance Manual Please retain this manual for future reference. HVF110, 210, 310, 410HD
3 Phase Smart Controller
 3 Phase Smart Controller Installation and Owner s Manual STP-SCIII 208-230 VAC, 60Hz, 120 Volt Coil Franklin Fueling 3760 Marsh Rd. Madison WI 53718 USA Tel: +1 608 838 8786 800 225 9787 Fax: +1 608 838
Electronic Dynamo Regulator INSTRUCTION MANUAL. COPYRIGHT 2014 CLOVER SYSTEMS All Rights Reserved
 DRM TM DRM-HP TM Electronic Dynamo Regulator INSTRUCTION MANUAL COPYRIGHT 2014 CLOVER SYSTEMS All Rights Reserved INTRODUCTION The Clover Systems DRM is a state-of-the art all-electronic voltage and current
C.E. Niehoff & Co. N1601, N1602, N1603, and N1604 Alternator Troubleshooting Guide NOTICE. Hazard Definitions. Battery Charge Volt and Amp Values
 C.E. Niehoff & Co. N1601, N1602, N1603, and N1604 Alternator Troubleshooting Guide Hazard Definitions These terms are used to bring attention to presence of hazard(s) of various risk levels or to important
SHORT-STOP. Electronic Motor Brake Type G. Instructions and Setup Manual
 Electronic Motor Brake Type G Instructions and Setup Manual Table of Contents Table of Contents Electronic Motor Brake Type G... 1 1. INTRODUCTION... 2 2. DESCRIPTION AND APPLICATIONS... 2 3. SAFETY NOTES...
Coleman Air Diversion Controller Model C40
 Coleman Air Diversion Controller Model C40 Version 2.0 With Extended Diversion Mode Designed for 12 volt battery based systems. The Coleman Air model C40 charge controller is a compact, simple to use controller
B-03 ELECTRICIAN TRAINING SKILL DEVELOPMENT GUIDE
 B-03 ELECTRICIAN TRAINING SKILL DEVELOPMENT GUIDE Duty B: Power Distribution (600V and below) B-03: Troubleshoot 480V System Issued 06/01/98 Task Preview Troubleshoot 480V System The 480V distribution
C.E. Niehoff & Co. C505, C527, C531, and C534 Alternators Troubleshooting Guide CAUTION. Testing Guidelines. Hazard Definitions WARNING
 C.E. Niehoff & Co. C505, C527, C531, and C534 Alternators Troubleshooting Guide WARNING Before troubleshooting any CEN products, the service technician should: read, understand, and agree to follow all
OnCommand Troubleshooting Guide Hayward Industries
 OnCommand Troubleshooting Guide 2010 Hayward Industries Table of Contents Safety Precautions Page 1 Overview Pages 2-5 Software Troubleshooting Page 6 Local Display Pages 7-8 Relays Pages 9-10 Heaters
Circuit Board Diagnostics
 Circuit Board Diagnostics NOTE: Discharge your body s static electricity before touching unit. An electrostatic discharge can adversely affect electrical components. Troubleshoot Integrated Control Module
Wiring diagrams on page 29 are for reference only. For detailed vehicle wiring refer to Navistar documents.
 1 10/2014 REV 7 !!Attention!! Before performing diagnostics: Wiring diagrams on page 29 are for reference only. For detailed vehicle wiring refer to Navistar documents. Check for Fault Codes using the
AC Rectifiers for use with Armature Actuated Brakes. Product Overview. Full Wave. Half Wave. Combination Full and Half Wave. TOR-AC Full and Half Wave
 Rectifiers for use with Armature Actuated Brakes Product Overview NOTE: For brake response times with and without rectifiers see page 94. Full Wave A rectifier in which both positive and negative half-cycles
Users Manual. Cobra Plus Stand-By Emergency Lighting Inverter. Technical Manual # Revision B
 Users Manual Cobra Plus Stand-By Lighting Inverter Technical Manual #018-0110-01 Revision B Phone: 1.877.DSPM.POWER 1.877.377.6769 Fax: 909.930.3335 Website: www.dspmanufacturing.com E-Mail: techsupport@dspmanufacturing.com
INSTALLATION/OPERATING INSTRUCTIONS TSC
 INSTALLATION/OPERATING INSTRUCTIONS TSC Two-Stage Set Point Control with External Activation Two-Stage Heating (Rotation Included) Two-Stage Cooling (Rotation Included) Change-Over Control (Heat/Cool)
S8600B,C,H,M; S8610B,C,H,M; S8670D,E,J,K Intermittent Pilot Gas Ignition Control
 S8600B,C,H,M; S8610B,C,H,M; S8670D,E,J,K Intermittent Pilot Gas Ignition Control APPLICATION The 8600 family of ignition controls provide ignition sequence, flame monitoring safety shutoff for intermittent
INSTALLATION INSTRUCTIONS
 INSTALLATION INSTRUCTIONS Universal Air Series!! NOTE!! Covers the following models: 9000 Series 6000 Series To ensure that the system is installed properly, provide your electrician with these instructions.
OPERATION MANUAL for MANUAL LEVELING SYSTEMS with square foot pads on jacks
 OPERATION MANUAL for MANUAL LEVELING SYSTEMS with square foot pads on jacks Dewald manual system touchpad #140-1179 Visit us on the web at www.powergearus.com 82-L0377 REV.0B 2 TABLE OF CONTENTS Page 3:
 8803214-8803999 DIODE BOARD The diode board is located inside the lower control box. D15 D8 D7 D14 D5 D13 ART_2181 J1 14 8 D9 D10 7 1 R2 R1 R3 R4 TB1 8601 D11 D3 D12 D4 D1 D2 J1 Plug Pin Identification
 DIODE BOARD The diode board is located inside the lower control box. D15 D8 D7 D14 D5 D13 ART_2181 J1 14 8 D9 D10 7 1 R2 R1 R3 R4 TB1 8601 D11 D3 D12 D4 D1 D2 J1 Plug Pin Identification PIN # WIRE # SIGNAL
USERS GUIDE LO-21U LOCKOUT RELAY
 USERS GUIDE LO-21U LOCKOUT RELAY PRODUCT DESCRIPTION The LO-21U (PN: 10LO21U) is a micro-processed lock out module designed to operate on swing door applications with BEA s Bodyguard or DK-12 overhead
INSTALLATION/OPERATING INSTRUCTIONS MCP
 INSTALLATION/OPERATING INSTRUCTIONS MCP Modulating Digital Set Point Control with Boiler Output and External Activation Temperature Range -30 to 250 F (-35 to 120 C) Pressure Ranges 0-30, 0-100, 0-200PSI
Northwest RV Supply Manual Compliments of Printed From TROUBLESHOOTING
 TROUBLESHOOTING for the 5 BUTTON 3109228.001 COMFORT CONTROL CENTER SYSTEM INTRODUCTION The Comfort Control Center control system can be used to operate the following Duo-Therm Units: Roof Top Air Conditioners
CORESENSE DIAGNOSTICS FOR STREAM REFRIGERATION COMPRESSORS
 Date of last update: Apr-15 Ref: D7.8.4/0112-0415/E Application Engineering Europe CORESENSE DIAGNOSTICS FOR STREAM REFRIGERATION COMPRESSORS CoreSense Diagnostics for Stream Refrigeration Compressors...
Cover. L5v2 Plug-In Conversion Module(PCM) Diagnostic Trouble Codes
 Diagnostic Trouble Codes") Cover L5v2 Plug-In Conversion Module(PCM) Diagnostic Trouble Codes Copyright 2009 A123 Systems, Inc. All rights reserved DOCUMENT NOTICE: The information contained in this manual is the property of A123
Cover L5v2 Plug-In Conversion Module(PCM) Diagnostic Trouble Codes Copyright 2009 A123 Systems, Inc. All rights reserved DOCUMENT NOTICE: The information contained in this manual is the property of A123
GENERAL <ELECTRICAL>
 00E-1 GROUP 00E GENERAL CONTENTS HARNESS CONNECTOR INSPECTION................................. 00E-2............. 00E-6................. 00E-6 TROUBLESHOOTING STEPS.......... 00E-6 INFORMATION
348002K/348012K Manifold Block Style Service Manual 12/2000
 348002K/348012K Manifold Block Style Service Manual 12/2000 Service Manual 348002K/348012K Manifold Block Style Recovery/Recycling/Recharging Unit For R-12 or R-134a Only TABLE OF CONTENTS: Theory of Operation
Start Up Instructions for the Kiln, Page 1 of 2
 Start Up Instructions for the Kiln, Page 1 of 2 1. Turn the Main Breaker at the right side of the panel on. 2. Press the orange [Control Power On] push button. It will light up when pressed. 3. If the
OUTDOOR UNIT CONTROLLER (OUC)
") AUCKLAND temperzone Ltd 38 Tidal Road, Mangere, Auckland. Private Bag 93303, Otahuhu, N.Z. Phone 0-9-279 5250 Fax 0-9-275 5637 Email sales@temperzone.co.nz WELLINGTON Phone 0-4-569 3262 Fax 0-4-566 6249
AUCKLAND temperzone Ltd 38 Tidal Road, Mangere, Auckland. Private Bag 93303, Otahuhu, N.Z. Phone 0-9-279 5250 Fax 0-9-275 5637 Email sales@temperzone.co.nz WELLINGTON Phone 0-4-569 3262 Fax 0-4-566 6249
STANDARD AND GROUND SWITCHED APPLICATIONS
 SNOWDOGG LIGHT REFERENCE STANDARD AND GROUND SWITCHED APPLICATIONS GENERAL REFERENCE SNOWDOGG LIGHT REFERENCE GENERAL REFERENCE 3 TROUBLESHOOTING GUIDES/PROCEDURES 6 CONNECTOR REFERENCE 12 ADAPTER HARNESS