All cores due 30 days after invoice date - no credit after 60 days.
|
|
|
- Victoria Martin
- 6 years ago
- Views:
Transcription
1
2 NO WARRANTY STATEMENT High performance parts & products no warranty policy: The purchaser understands and recognizes that high performance diesel products and services sold by INDUSTRIAL INJECTION SERVICE. INC. are exposed to many and varied conditions due to the manner in which they are installed and used. INDUSTRIAL INJECTION SERVICE. INC., makes no warranties either expressed or implied including any warranty of merchantability or fitness for a particular purpose. No salesman, officer, agent or representative of INDUSTRIAL INJECTION SERVICE. INC., is authorized to waive or modify this warranty disclaimer and limitation of damages. Further, no representation, promise, description of goods or affirmation of fact made by any salesman, officer, agent or representative of INDUSTRIAL INJECTION SERVICE. INC., shall be effective to any extent whatsoever to waive or modify this warranty disclaimer and limitation of damages. All cores due 30 days after invoice date - no credit after 60 days. Purchasers of our product(s) agree to accept full responsibility for any loss of factory warranty and or loss of product life cycle attributable to the installation and use of said product(s). ALL HIGH PERFORMANCE PARTS & PRODUCTS ARE MADE FOR COMPETITION AND RACE USE ONLY. Note: Our kit will NOT work with an AFE exhaust manifold. It will work with BD, ATS or PDI exhaust manifold. If you have any questions call us at Twin Turbo Dodge Cummins


3 STEP 1 Disconnect the negative battery cables from both the passenger side and the drivers side batteries. STEP 2 Unplug air intake sensor, then remove the clamps from the intake tube, one at the turbo, and one at the air box. Remove hold down nut at the front of the air box. Then remove the intake tube and air box from the truck


4 STEP 3 Use a pair of pliers to drain coolant by twisting the coolant drain plug found on the bottom drivers side of the radiator. STEP 4 Remove the passenger side wheel well by removing the screws that attach it to the fender. 4 Twin Turbo Dodge Cummins


5 STEP 5 Loosen the two clamps on the stock exhaust downpipe and cast elbow then remove. STEP 6 Remove oil filter and clean the freeze plug located beneath the oil filter. Note: It helps to use brake cleaner and compressed air to make sure the freeze plug is cleaned thoroughly, so no debris will fall into the block when it is removed


6 STEP 7 Use a screwdriver and a hammer to tap the top part of the freeze plug gently until it begins to roll. Then grab the freeze plug with pliers and remove it from the block. Note: Once the freeze plug has been removed, double check that it is clean around the hole in the block and make sure there are no sharp edges. STEP 8 Install the o-ring onto the groove of the drain nipple and apply grease to the drain and the hole in the block. 6 Twin Turbo Dodge Cummins


7 STEP 9 Install the drain nipple into the block by gently tapping with a hammer until the edge of the drain and the block meet. Note: You can use an air hammer to install, but you need to be careful to not use excessive force because you can damage the nipple. STEP 10 Using pliers remove the clamps from the coolant hoses that lead to the heater core. There are two clamps at the engine, and two clamps at the firewall. After the clamps are removed you can remove the hoses. Note: Be careful not to damage the coolant nipples at the firewall when removing the coolant hoses. You may also need to cut the lower waterline bracket at this time if it hasn t been done on your truck previously


8 STEP 11 Use a marker to trace the heat shield onto the back of the protective heat wrap, then cut to fit and apply to heat shield. Important: If you are installing on a 6.7L please skip to page 28 for the next step! If you are installing on a 5.9L then continue to step 12. STEP 12 Remove two plastic clips from cowling, slide heat shield in between plastic and metal part of cowling and secure with provided push lock fasteners. Attach bottom part of the heat shield using the provided hardware. Note: 6.7L trucks may need to drill out the plastic cowling. There is already a hole in the metal underneath. Cut Cover On late model 6.7L you will have to cut a section of the wire harness cover off in order for the heat shield to fit. Then cover harness with wire loom. 8 Twin Turbo Dodge Cummins


9 STEP 13 If you are installing a pyrometer or already have one installed, you will need to make sure it is installed in the #1,2 or 6 location of the exhaust manifold. If it is installed in the #3, 4 or 5 location it will interfere with the new large charger that is being installed. Note: If your new or current manifold is drilled and tapped in the #3, 4 or 5 location, you will have to plug the hole and re-locate the pyrometer. 1,2 or 6 STEP 14 Use the remainder of the heat wrap from step 11 to wrap around the new coolant hoses that have been provided. Then using the stock hose clamps, install the new hoses. On the 5.9L the longer hose goes from the top hole on the heater core to the cylinder head, the shorter hose goes from the bottom hole to the bypass next to the manifold. Note: 6.7L add a turbo only - switch orientation of coolant hoses; longer hose from lower heater core connection to cylinder head, shorter hose from upper heater core connection to bypass. Early 6.7L ADD A TURBO ONLY Shorter hose to bypass Longer hose to cylinder head (re-use factory hose)


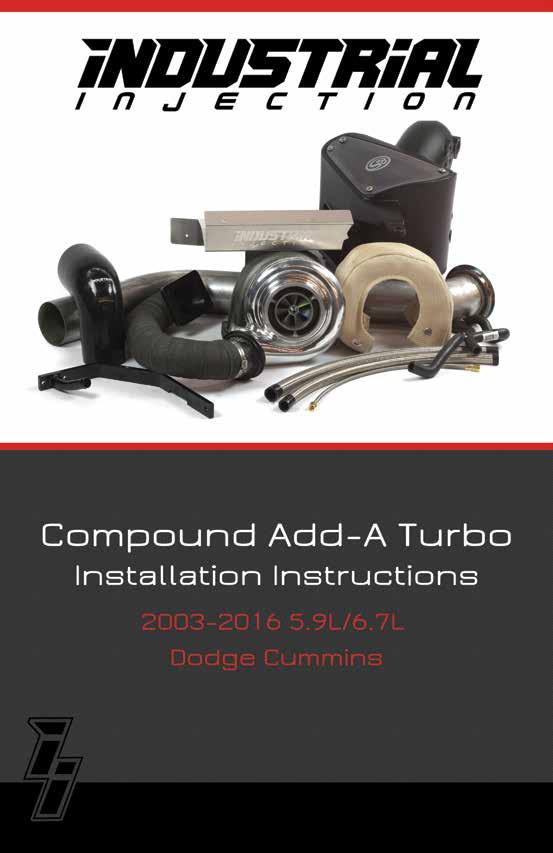
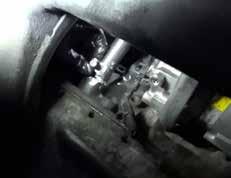
10 STEP 15 Remove the compressor cover and clamp on your new large charger. Then loosen the turbine housing slightly so that it will spin with slight force. STEP 16 Using the supplied oil drain gasket and hardware, (two smaller bolts and washers included in bag of hardware) install the oil drain onto the center section of the large charger. Make sure the drain faces towards the compressor side of the charger. Continued on next page» 10 Twin Turbo Dodge Cummins


11 » Step 16 Continued STEP 17 Remove the front upper motor mount bolt and set aside to use for the large charger support bracket. Then remove the factory A/C line from the fire wall and from the A/C compressor and discard


12 STEP Only Using the factory hardware, install the new supplied soft A/C line from the fire wall to the A/C compressor. Using the supplied P-clamp, mark and drill the shock tower then secure the A/C line to the shock tower using the clamp and supplied hardware. Continued on next page» 12 Twin Turbo Dodge Cummins


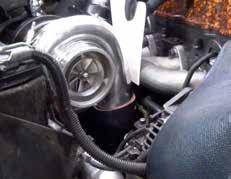
13 » Step 18 Continued STEP 19 Install the new large charger by lining up the support bracket to the hole on the motor mount and install the bolt that you previously removed. Do not fully tighten, leave it loose enough that you can rock the charger back and forth slightly. Note: It is helpful to have a second person start the bolt by reaching in through the wheel well


14 STEP 20 Install the hot pipe by having a person pass it through the wheel well, and another person aligning it with the large charger from above. Install the supplied gasket and hardware. Leave the hardware loose so you can line up the hot pipe with the S300 charger. Position hot pipe clamp so that it will not interfere with the down pipe. Do not tighten fully at this time. 14 Twin Turbo Dodge Cummins


15 STEP 21 Install the heim joint top support bracket onto the studded exhaust manifold bolt, then attach the heim joint to the support bracket and to the top of the charger using the supplied hardware and tighten. Note: You will have to push the bolt for the heim joint support through the hole before you mount it onto the exhaust manifold stud. Install bracket onto exhaust stud


16 STEP 22 Make sure everything is lined up properly, tighten the bottom side of the hot pipe first, tighten the turbine housing clamp next. Use a torque wrench to make sure the turbine housing clamp is tightened to 110 in/lbs. Then tighten the four T6 flange bolts. Important: it is good to check that the compressor wheel spins free and has not gotten bound up during the installation process. Note: It may be easier to tighten the back T6 flange bolt closest to the engine, using a long extension and a wobbly, accessing through the wheel well. Torque to 110 in/lbs Long extension and wobbly through wheel well 16 Twin Turbo Dodge Cummins


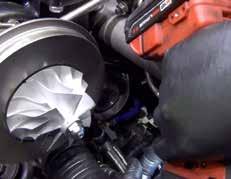
17 STEP 23 Get the supplied (large) steel braided drain hose and apply some assembly lube into the end. Also apply some assembly lube onto the drain line on the support bracket. Install the hose onto the drain line. Note: It will take a lot of force and twisting to get the hose installed fully onto the drain line. It helps to have a person pushing from the bottom and another person pulling from the top. STEP 24 On the bottom side of the drain, using a marker, align the hose to the drain nipple and mark where to cut. Be sure not to cut too short, but also leave enough hose to have room to remove the oil filter. Once you have it marked, use some electrical tape to cover the metal sheathing where you will cut. Using a die grinder, cut the hose to fit. Make sure the hose is clean of all debris then apply some assembly lube to the hose and nipple. Slide the clamps onto the hose, then install the hose onto the drain nipple. Slide top clamp up to the drain support and tighten. Then tighten bottom clamp on the nipple. Continued on next page»


18 » Step 24 Continued 18 Twin Turbo Dodge Cummins


19 STEP 25 Carefully slide the compressor cover on and mark a line on the exhaust manifold where the center of the compressor outlet and the manifold meet. This will be used as a reference while cutting the boot to fit. The boot will need to be modified to ensure a perfect fit for your truck. Use the supplied clamps to help you cut a straight line when cutting the boot. Cut the 4 inch side to fit. Be careful not to cut too much. After the first cut, do a test fit and reference the marking on the manifold to see if you need to cut more. Note: It is always better to cut the boot slightly long to allow expansion when under boost pressure


20 STEP 26 Now cut the 3 inch side of the boot and test fit it before installing the compressor cover. STEP 27 Install the boot onto the compressor housing outlet first. Make sure the compressor clamp is on the large charger before installation. Carefully slide the compressor and boot into place. Once the boot and compressor cover are in place, keep steady pressure on the compressor while you tighten the compressor clamp. Torque the compressor cover clamp to 110 in/lbs. Tighten the jam nuts on the heim joint. Make sure there is at least a paper width gap between the compressor cover and the manifold to ensure they aren t touching. Continued on next page» 20 Twin Turbo Dodge Cummins


21 » Step 27 Continued STEP 28 Install the boot clamps. Install the bottom clamp first from the top side and slide it down. Tighten through the wheel well. Install the top clamp and tighten


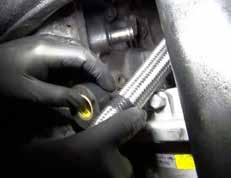
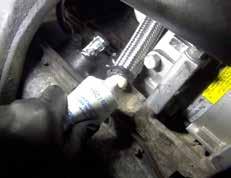
22 STEP 29 Remove plug from oil filter housing. Apply adequate amount of thread tape to new oil feed fittings. Install small fitting into the top of the oil filter housing and tighten. Install larger fitting into the top of the large charger and tighten. Once the fittings are tightened you can install the oil feed line from the top of the oil filter housing to the top of the large charger and tighten. Note: Be careful not to get the oil feed line twisted when tightening. All new turbo charger oil feed lines should be bled. 22 Twin Turbo Dodge Cummins


23 STEP 30 Remove grid heater relay from stock location and install drop bracket using supplied hardware. You may have to twist the charge air tube so the grid heater relay will fit with the drop bracket. Twist Charge air tube if necessary STEP 31 Install the down pipe by passing it through the bottom of the engine bay and aligning it with the large charger and tighten the clamp. Note: You may need to loosen the clamp again when installing the exhaust


24 STEP 32 Install the supplied turbine blanket onto the large charger. Make sure there is enough room for the blanket to slide between the turbine housing on the large charger and the compressor cover on the S300. Use the supplied metal zip ties to secure the turbine blanket through the eyelets. Do not overtighten. Cut off the excess zip tie when finished. STEP 33 Remove the sensor(s) out of the stock intake box and install into the S&B sensor location(s) with new hardware and seal Intake tube 24 Twin Turbo Dodge Cummins


. Note: On 5.")
25 STEP Only Set the air intake box in the truck. Install the filter onto the intake tube and tighten. Then slide the boot all the way on the other end of the intake tube. Slide clamps onto the intake tube before installing intake on the truck. Install intake tube onto turbo, once in place, slide the boot onto the compressor cover and tighten clamps. Remove film from intake window and install on box and tighten hardware. Re-connect sensor(s). Note: On 5.9L and early 6.7L the front intake hold down will be a stud, on late 6.7L it will be a bolt


26 STEP Only Install 4.5 to 5 boot onto intake tube, then push intake tub into intake box to install. Set intake into truck and push boot onto the compressor cover. Install clamps onto boot and tighten. Install air filter onto intake tube and tighten. Install intake box window with hardware and tighten. Tighten front intake box hold down with supplied bolt. 26 Twin Turbo Dodge Cummins
27 STEP 36 To complete the install, re-connect your exhaust to the down pipe and reattach your battery cables. Before you re-install your wheel well, we recommend doing a test drive to make sure everything is fit correctly and there are no leaks in the system. Once you have determined that everything is working properly, re-install the wheel well. Thank you for choosing Industrial Injection!


28 The following are instructions for 6.7L ONLY!» Continued from step 11 STEP Only Remove factory coolant overflow bottle and detach hoses. Install coolant bottle bracket using supplied hardware. Attach bracket with 2 mounts on fire wall side, and 1 on the fender side. Note: You will use the same mount location when installing the heat shield. 28 Twin Turbo Dodge Cummins


29 STEP Only Remove factory coolant bottle by first detaching all coolant hoses, coolant level sensor, and removing mounting bolts. STEP Only Install new coolant overflow bottle and attach the overflow hose. Attach to the bracket with the 3 supplied zip screws. Attach coolant hose


30 STEP Only Once the factory coolant bottle is removed, you will need to detach the battery and remove it to install the new coolant bottle. You will need to drill the holes in the battery tray to a slightly larger size where the new coolant bottle will mount. Install new coolant bottle by sliding mounting hook into the factory slot on the back side of the battery tray. Tighten using supplied hardware 30 Twin Turbo Dodge Cummins


 stud on the manifold")
31 STEP Only Remove factory grid heater relay and re-locate to the new coolant bottle using supplied hardware. You will need to cut and splice the negative cable to lengthen for re-location. Lengthened Negative Cable Route negative cable underneath the battery box to the relay. STEP 6 Install supplied performance exhaust plates onto the manifold. Note: We are simulating this step on a manifold that has been removed from the truck. Your manifold will remain on the truck. Note: For clearance of the hotpipe, remove outer rear (passenger side rear) stud on the manifold and replace with supplied bolt for the performance plate


32 STEP 7 Add a little assembly lube onto coolant plug and install. Add tear drop style bracket onto the coolant line as shown, and attach support bracket from cylinder head to the coolant plug Coolant Fitting Attach support bracket STEP Only Install supplied coolant line to coolant bottle and reattach factory lines to coolant bottle. Install coolant level fooler and zip tie out of the way. Note: You may need to cut the line to fit. 32 Twin Turbo Dodge Cummins


33 STEP Only Using factory and supplied coolant hoses, cut and lengthen the coolant hose from the firewall. Use supplied 90 hose from firewall, measure length, cut and splice with factory hose. Be sure to route the spliced together lines away from any heat sources. Use supplied bracket and self tapping screw to mount hose to the heat shield. Note: You may want to wrap the coolant hose with heat wrap. Factory hose Spliced Hose Remove factory coolant line bracket. Re-use bolt and install new bracket using the manifold stud


34 STEP Only Now you will need to remove the EBP sensor and install the supplied EBP plug. STEP 11 Install the intake horn performance plate. Re-use the factory mount bolts. Install crank case breather hose using the supplied clamp. Route it down the engine to vent to atmosphere. 34 Twin Turbo Dodge Cummins


35 STEP 12 Install transmission dipstick support bracket using supplied hardware. Mount one side to the factory mount on the dipstick. Mount the other side to the factory studded bolt on the valve cover. Install 3 coolant plugs. One in coolant line, one on the cylinder head, and one in the engine block behind the filter housing as shown. Please return to page 8 - step 12 to finish the remainder of the install
36
2Charge Air Elbow, 1Install hose & Parts list. hardware kit. Clamp & O-ring. Downpipe clamp. Downpipe w/ Wrap 3 & Wrap Clamp.
 Parts list 1Install hose & hardware kit 2Charge Air Elbow, Clamp & O-ring Downpipe w/ Wrap 3 & Wrap Clamp Downpipe clamp 4 4 Straight Boot 5 Exhaust manifold w/ 6 gaskets 5.9L Only 6.7L Only 4 Intake Pipe
All cores due 30 days after invoice date - no credit after 60 days.
 NO WARRANTY STATEMENT High performance parts & products no warranty policy: The purchaser understands and recognizes that high performance diesel products and services sold by INDUSTRIAL INJECTION SERVICE.
All cores due 30 days after invoice date - no credit after 60 days.
 NO WARRANTY STATEMENT High performance parts & products no warranty policy: The purchaser understands and recognizes that high performance diesel products and services sold by INDUSTRIAL INJECTION SERVICE.
91/2 Bulb End Fuel. Low Pressure. Fitting. Low Pressure 12Molded Hose. High Pressure 11Feed Line. Injection Line
 Parts list 1CP3 & O-Rings 2CP3 Mounting Plate 3Mounting Plate Hardware 43 Brass Sealing Washers 5Fuel Temp Sensor Bracket 6Fuel Temp Sensor Bracket Hardware 7Fuel Rail Cap & plug 83/8 Bulb End Fuel Fitting
Installation Instructions
 2011-2013 LML DURAMAX COMPOUND-ADD 2011-2015 LML A Duramax TURBO KIT Add INSTALL A Turbo INSTRUCTIONS Compound Kit Installation Instructions 1-800-955-0476 - www.industrialinjection.com - info@industrialinjection.com
3 October 2016 PN# V Dodge Twin Turbo Kit (I-00274) ½ D o d g e 2 4 v I S B
 ½ D o d g e 2 4 v I S B") 3 October 2016 PN#1045320 24V Dodge Twin Turbo Kit (I-00274) 1 DOWNLOAD ENHANCED INSTALL MANUALS AT dieselperformance.com BD Twin Turbo Kit 1998½- 2 0 0 2 D o d g e 2 4 v I S B Part# 1045320 PLEASE READ
3 October 2016 PN#1045320 24V Dodge Twin Turbo Kit (I-00274) 1 DOWNLOAD ENHANCED INSTALL MANUALS AT dieselperformance.com BD Twin Turbo Kit 1998½- 2 0 0 2 D o d g e 2 4 v I S B Part# 1045320 PLEASE READ
INSTALL MANUAL D o d g e 1 2 v 6 B T A PLEASE READ ALL INSTRUCTIONS BEFORE INSTALLATION.
 PN#1045310 12V Dodge Twin Turbo Kit (I-00273) 1 INSTALL MANUAL BD Twin Turbo Kit 1994-1 9 9 8 D o d g e 1 2 v 6 B T A Part# 1045310 PLEASE READ ALL INSTRUCTIONS BEFORE INSTALLATION. * Picture as shown
Step 6: Remove and save the MAP sensor for later use. Step 7: Remove the passenger side intercooler pipe and the EGR intake manifold.
 LBZ Twin kit Install Step 1: Disconnect both batteries. Step 2: Drain coolant and oil also remove passenger side inner fender. Step 3: Remove intake box and piping. (Remove and save the MAF sensor in the
IAG Air / Oil Separator (AOS) For STi
 For STi") IAG Air / Oil Separator (AOS) For 2008-14 STi Part# IAG-ENG-7000 Tools Required: Ratchet, torque wrench, extensions, needle nose pliers, hose cutter, snips/scissors Sockets: 10mm, 12mm 13mm Wrenches: 10mm,
IAG Air / Oil Separator (AOS) For 2008-14 STi Part# IAG-ENG-7000 Tools Required: Ratchet, torque wrench, extensions, needle nose pliers, hose cutter, snips/scissors Sockets: 10mm, 12mm 13mm Wrenches: 10mm,
Included parts: 1 - BorgWarner SX-E Turbocharger 1 - SX-E 90-Degree Compressor Outlet Elbow 1 - HSM Cast Exhaust Manifold 1 - HSM Downpipe
 TROUBLESHOOTING: Please read and understand all installation instructions before proceeding with the installation. If you have questions during the installation of this product, please email H&S Motorsports
Part# PLEASE READ ALL INSTRUCTIONS BEFORE INSTALLATION.
 16 November 2009 HPCR Dodge Twin Turbo Kit #1045430 1 BD Twin Turbo R700 Kit 2003-2007 Dodge HPCR ISBe Installation Instructions Part# 1045430 PLEASE READ ALL INSTRUCTIONS BEFORE INSTALLATION. UNLESS AN
BD TrackMaster S D o d g e H P C R Installation Instructions
 7 July 2016 PN#1045701, 1045702, 1045704 Dodge 6.7L TMS400 (I-00361) 1 BD TrackMaster S400 2008-2012 D o d g e H P C R Installation Instructions 1045701 2008-2009 Dodge 6.7L TMS400 1045702 2010-2012 Dodge
Installation Manual v1.0: Aurora Plus Turbo Kit ( ) 5.9L Dodge. Please read all instructions before installation.
 5.9L Dodge. Please read all instructions before installation.") Installation Manual v1.0: Aurora Plus - 4000 Turbo Kit (2003-2007) 5.9L Dodge Please read all instructions before installation. Figure 1: Aurora Plus - 4000 Kit Contents 1 Figure 2: Aurora Plus Hardware
Installation Manual v1.0: Aurora Plus - 4000 Turbo Kit (2003-2007) 5.9L Dodge Please read all instructions before installation. Figure 1: Aurora Plus - 4000 Kit Contents 1 Figure 2: Aurora Plus Hardware
Included parts: 1 - BorgWarner SX-E Turbocharger 1 - SX-E 90-Degree Compressor Outlet Elbow 1 - HSM Cast Exhaust Manifold 1 - HSM Downpipe
 TROUBLESHOOTING: Please read and understand all installation instructions before proceeding with the installation. If you have questions during the installation of this product, please email H&S Motorsports
Industrial Injections Compound Turbo Installation For 6.7L Scorpion
 Industrial Injections Compound Turbo Installation For 6.7L Scorpion Step 1: Whenever you are doing an installation the first thing you should do is unhook the batteries to avoid arcing. You will need an
Installation Manual v1.0: MST Turbo Kit ( ) 5.9L Dodge. Please read all instructions before installation.
 5.9L Dodge. Please read all instructions before installation.") Installation Manual v1.0: MST Turbo Kit (2003-2007) 5.9L Dodge Please read all instructions before installation. Figure 1: MST Kit Contents Figure 2: MST Hardware Kit Please make sure all of the components
Installation Manual v1.0: MST Turbo Kit (2003-2007) 5.9L Dodge Please read all instructions before installation. Figure 1: MST Kit Contents Figure 2: MST Hardware Kit Please make sure all of the components
BD SUPER B SINGLE TURBO KIT Dodge 5.9L Cummins v ISBe (Non 600 motors)
") 1 DOWNLOAD ENHANCED INSTALL MANUALS AT dieselperformance.com BD SUPER B SINGLE TURBO KIT Dodge 5.9L Cummins 2003-2004 24v ISBe (Non 600 motors) Part # 1045230 PLEASE READ ALL INSTRUCTIONS BEFORE INSTALLATION
1 DOWNLOAD ENHANCED INSTALL MANUALS AT dieselperformance.com BD SUPER B SINGLE TURBO KIT Dodge 5.9L Cummins 2003-2004 24v ISBe (Non 600 motors) Part # 1045230 PLEASE READ ALL INSTRUCTIONS BEFORE INSTALLATION
4 December 2017 PN# , , Dodge 6.7L Rumble B SXE (I-00400) 1. BD Rumble B SXE. D o d g e 6. 7 L H P C R Installation Instructions
 1. BD Rumble B SXE. D o d g e 6. 7 L H P C R Installation Instructions") 4 December 2017 PN#1045705, 1045706, 1045708 Dodge 6.7L Rumble B SXE (I-00400) 1 DOWNLOAD ENHANCED INSTALL MANUALS AT dieselperformance.com BD Rumble B SXE D o d g e 6. 7 L H P C R Installation Instructions
4 December 2017 PN#1045705, 1045706, 1045708 Dodge 6.7L Rumble B SXE (I-00400) 1 DOWNLOAD ENHANCED INSTALL MANUALS AT dieselperformance.com BD Rumble B SXE D o d g e 6. 7 L H P C R Installation Instructions
05-08 GT. Hellion Power Systems Mustang Kit Instructions
 Hellion Power Systems 05-08 Mustang Kit Instructions 1. Disconnect Battery 2. Drain Radiator, keep fluid for re-installation. 3. Remove air box and inlethoses. 6. Next, underneath, punch oil pan for turbo
IAG Street Series Air / Oil Separator (AOS) For WRX
 For WRX") IAG Street Series Air / Oil Separator (AOS) For 2008-14 WRX Part# IAG-ENG-7100 Tools Required: Ratchet, extensions, needle nose pliers, hose cutter, snips/scissors, flat head screw driver, hose clamping
IAG Street Series Air / Oil Separator (AOS) For 2008-14 WRX Part# IAG-ENG-7100 Tools Required: Ratchet, extensions, needle nose pliers, hose cutter, snips/scissors, flat head screw driver, hose clamping
LML 3 Y-Bridge Kit or High Flow Intake Bundle Package
 2011-2016 LML 3 Y-Bridge Kit or High Flow Intake Bundle Package Covers installation of PN s: WCF100607, WCF100691, WCF100716, & WCF100353 Note: This Kit is for off road competition use only! Overview-
X Flow Intake Manifold For Dodge 5.9L Cummins Trucks
 21 September 2012 1998-02 Dodge Intake Manifold 1041550 & 1041550P - 1 - X Flow Intake Manifold For 1998-02 Dodge 5.9L Cummins Trucks Part # Description 1041550 Intake Horn (Black Powder Coat) 1041550-P
Installation Manual v1.1: Piece Pulse Flow Exhaust Manifold, Stock Replacement L Cummins
 Installation Manual v1.1: 204-927-2326 2-Piece Pulse Flow Exhaust Manifold, Stock Replacement 2007.5-2016 6.7L Cummins Please read all instructions before installation. We suggest purchasing new gaskets
INSTALLATION INSTRUCTIONS AOS-R (Air Oil Separator-Return) Turbo Subaru and STi Document# Support:
 Turbo Subaru and STi Document# Support:") INSTALLATION INSTRUCTIONS AOS-R (Air Oil Separator-Return) 02-14 Turbo Subaru and 2015+ STi Document# 19-0102 Support: info@radiumauto.com These instructions are based on a vehicle with an OEM turbocharger
INSTALLATION INSTRUCTIONS AOS-R (Air Oil Separator-Return) 02-14 Turbo Subaru and 2015+ STi Document# 19-0102 Support: info@radiumauto.com These instructions are based on a vehicle with an OEM turbocharger
2017+ L5P Duramax 3 ½ Down Pipe & EGR Fix Kit
 2017+ L5P Duramax 3 ½ Down Pipe & EGR Fix Kit Covers installation of PN s: WCF100630, WCF100829 Note: This Kit is for off road competition use only! Off Road Competition Use Tuning & Exhaust System is
Dodge 5.9L Cummins 24v ISBe
 15 December 2011 Part # 1045160 Killer B Dodge 2003-07 - 1 - BD Killer B Single Turbo 2003-2007 Dodge 5.9L Cummins 24v ISBe Part #1045160 PLEASE READ ALL INSTRUCTIONS BEFORE INSTALLATION. UNLESS AN EO#
2004½-2007 Dodge 5.9L Cummins 24v ISBe (600 motors only)
") 31 October 2006 Part # 1045235-1 - BD Supe r B Single 2004½-2007 Dodge 5.9L Cummins 24v ISBe (600 motors only) Part # 1045235 PLEASE READ ALL INSTRUCTIONS BEFORE INSTALLATION. Note: This turbo system is
31 October 2006 Part # 1045235-1 - BD Supe r B Single 2004½-2007 Dodge 5.9L Cummins 24v ISBe (600 motors only) Part # 1045235 PLEASE READ ALL INSTRUCTIONS BEFORE INSTALLATION. Note: This turbo system is
BD Cobra Compound Turbo
 3 July 2018 1045780-98 Dodge Cobra Turbo Kit (I-00377) 1 DOWNLOAD COLOR INSTALL MANUALS AT www.dieselperformance.com BD Cobra Compound Turbo 2003-2018 Dodge Cummins Cobra 76 Cobra 80 Cobra 86 Cobra 88
IAG Competition Series Air / Oil Separator (AOS) For 2017 STI
 For 2017 STI") P IAG Competition Series Air / Oil Separator (AOS) For 2017 STI Part# IAG-ENG-7251 Tools Required: Ratchet, torque wrench, extensions, needle nose pliers, hose cutter, snips/scissors, flat head screw driver,
P IAG Competition Series Air / Oil Separator (AOS) For 2017 STI Part# IAG-ENG-7251 Tools Required: Ratchet, torque wrench, extensions, needle nose pliers, hose cutter, snips/scissors, flat head screw driver,
IAG Competition Series Air / Oil Separator (AOS) For WRX
 For WRX") P IAG Competition Series Air / Oil Separator (AOS) For 2015-16 WRX Part# IAG-ENG-7252 Tools Required: Ratchet, torque wrench, extensions, needle nose pliers, hose cutter, snips/scissors, flat head screw
P IAG Competition Series Air / Oil Separator (AOS) For 2015-16 WRX Part# IAG-ENG-7252 Tools Required: Ratchet, torque wrench, extensions, needle nose pliers, hose cutter, snips/scissors, flat head screw
BD Twin Turbo Cobra Kit
 14 September 2017 1045780-94 Dodge Cobra Kit (I-00377) 1 BD Twin Turbo Cobra Kit 2003-2012 Dodge HPCR Machined BD turbochargers only BUILDERS KIT Installation reccomendations to aid asssembly Does not
IAG Street Series Air / Oil Separator (AOS) For WRX
 For WRX") P IAG Street Series Air / Oil Separator (AOS) For 2015-16 WRX Part# IAG-ENG-7152 Tools Required: Ratchet, torque wrench, extensions, needle nose pliers, hose cutter, snips/scissors, flat head screw driver,
P IAG Street Series Air / Oil Separator (AOS) For 2015-16 WRX Part# IAG-ENG-7152 Tools Required: Ratchet, torque wrench, extensions, needle nose pliers, hose cutter, snips/scissors, flat head screw driver,
IAG Street Series Air / Oil Separator (AOS) For 2017 WRX
 For 2017 WRX") P IAG Street Series Air / Oil Separator (AOS) For 2017 WRX Part# IAG-ENG-7152 Tools Required: Ratchet, torque wrench, extensions, needle nose pliers, hose cutter, snips/scissors, flathead screwdriver,
P IAG Street Series Air / Oil Separator (AOS) For 2017 WRX Part# IAG-ENG-7152 Tools Required: Ratchet, torque wrench, extensions, needle nose pliers, hose cutter, snips/scissors, flathead screwdriver,
INSTALLATION INSTRUCTIONS AOS-R (Air Oil Separator-Return) Turbo Subaru and STi Document# Support:
 Turbo Subaru and STi Document# Support:") INSTALLATION INSTRUCTIONS AOS-R (Air Oil Separator-Return) 02-14 Turbo Subaru and 2015+ STi Document# 19-0102 Support: info@radiumauto.com These instructions are based on a vehicle with an OEM turbocharger
INSTALLATION INSTRUCTIONS AOS-R (Air Oil Separator-Return) 02-14 Turbo Subaru and 2015+ STi Document# 19-0102 Support: info@radiumauto.com These instructions are based on a vehicle with an OEM turbocharger
8 Zip Tie Zip Tie 1 Union Fitting 1 ½ ½ Union Reducer Fitting Union 1 5/8 ½ (For Plastic Intake Manifold Vehicles)
") P IAG Street Series Air / Oil Separator (AOS) For 2017 STI Part# IAG-ENG-7151 Tools Required: Ratchet, torque wrench, extensions, needle nose pliers, hose cutter, snips/scissors, flat head screw driver,
P IAG Street Series Air / Oil Separator (AOS) For 2017 STI Part# IAG-ENG-7151 Tools Required: Ratchet, torque wrench, extensions, needle nose pliers, hose cutter, snips/scissors, flat head screw driver,
4. Remove (4) 10mm and (1) 7mm bolt that holds fascia at front corners, on each side
 10mm and (1) 7mm bolt that holds fascia at front corners, on each side") 2010 Camaro LS3 1. Disconnect battery ground 2. Remove front wheels 3. Remove (5) push pins and (5) #20 torx screws on inner front wheel well liners and remove liners on each side 4. Remove (4) 10mm and
2010 Camaro LS3 1. Disconnect battery ground 2. Remove front wheels 3. Remove (5) push pins and (5) #20 torx screws on inner front wheel well liners and remove liners on each side 4. Remove (4) 10mm and
INSTALLATION INSTRUCTIONS AOS-R (Air Oil Separator-Return) Turbo Subaru and STi
 Turbo Subaru and STi") INSTALLATION INSTRUCTIONS AOS-R (Air Oil Separator-Return) 02-14 Turbo Subaru and 2015+ STi These instructions are based on a vehicle with an OEM turbocharger and top-mount intercooler. If a front-mount
INSTALLATION INSTRUCTIONS AOS-R (Air Oil Separator-Return) 02-14 Turbo Subaru and 2015+ STi These instructions are based on a vehicle with an OEM turbocharger and top-mount intercooler. If a front-mount
Wrenches: ⅞, 8mm, 10mm, 13mm, 19mm P. allen, Other: Electrical Tape
 IAG Street Series Air / Oil Separator (AOS) For 2008-14 STI Part# IAG-ENG-7100 Tools Required: Ratchet, torque wrench, extensions, needle nose pliers, hose cutter, snips/scissors, flat head screw driver,
Ford 6.0L Regulated Return Kit
 2003-2007 Ford 6.0L Regulated Return Kit A. Passenger Rear Return B. Line (Longer w/ 1-90 fitting) C. Driver Rear Return Line (Shorter w/ 1-90 fitting) D. Fuel Return Line (2 female fittings) E. Passenger
INSTALLATION INSTRUCTIONS Dual Catch Can Kit Subaru Turbo and STi Document# Support:
 INSTALLATION INSTRUCTIONS Dual Catch Can Kit 02-14 Subaru Turbo and 2015+ STi Document# 19-0099 Support: info@radiumauto.com This document covers the installation of a Radium dual catch can kit for the
Installation Manual v1.0: P/N 202-A Aurora 3000/5000 Compound Turbo Kit Dodge Cummins 5.9
 Installation Manual v1.0: P/N 202-A35-2272 Aurora 3000/5000 Compound Turbo Kit 2003-2007 Dodge Cummins 5.9 Please read all instructions before installation. Figure 1. Figure 2. Figure 3. Figure 4. 1. Install
Installation Instructions
 Installation Instructions Transverse K04 Tools Required Jack and jack stands Drain pan for coolant and oil 3" and 6" extensions Channel locks 7mm, 8mm, 10mm, 11mm, 12mm, 13mm, and 16mm sockets Oxygen sensor
Included: 2. Intake Block Off Plates 1. Exhaust Block Off Plate 1. Coolant Hose - Reroutes the EGR Cooler Coolant 12. Pieces of mounting hardware -
 Included: 2. Intake Block Off Plates 1. Exhaust Block Off Plate 1. Coolant Hose - Reroutes the EGR Cooler Coolant 12. Pieces of mounting hardware - Nuts, Bolts, & Washers 2. Hose Clamps 1. Support Bracket
96-04 tt. Hellion Power Systems Mustang Twin Turbo Kit Instructions
 96-04 tt Hellion Power Systems 1996-2004 Mustang Twin Turbo Kit Instructions 1. Disconnect battery and elevate front end of car on either Jack stands or a lift if available 2.Lock steering wheel and remove
BD Twin Turbo Cobra Kit
 17 March 2017 1045780-94 Dodge Cobra Kit (I-00377) 1 BD Twin Turbo Cobra Kit 2003-2012 Dodge HPCR Machined BD turbochargers only BUILDERS KIT Installation reccomendations to aid asssembly Does not include
Ford 6.0L. Part #: Part #: BD GASKET PART# will be needed for this installation.
 1 BD EGR COOLER 2003-2007 Ford 6.0L Part #: 1090201 Part #: 1090202 PLEASE READ ALL INSTRUCTIONS BEFORE INSTALLATION BD GASKET PART# 1090002 will be needed for this installation. 2 K I T C O N T E N T
1 October V Dodge Twin Turbo Kit # ½ D o d g e 2 4 v I S B PLEASE READ ALL INSTRUCTIONS BEFORE INSTALLATION.
 1 October 2012 24V Dodge Twin Turbo Kit #1045420 1 BD r700 RaceTwin Turbo Kit 1998½- 2 0 0 2 D o d g e 2 4 v I S B Part# 1045420 PLEASE READ ALL INSTRUCTIONS BEFORE INSTALLATION. * Picture as shown features
Parts List See cover Page
 Thank you for purchasing the CorkSport Front Mount Intercooler Kit for the 2010-2013 Mazdaspeed 3. Keep your BAT s under check with the CorkSport FMIC Kit with the small or large intercooler. Please let
DURAMAX LMM EGR DELETE
 007.5-010 DURAMAX LMM EGR DELETE Duramax LMM EGR Delete B K I J F D G H A C PACKING LIST: E Part # A B C D E F G H I J K QTY. 1 1 1 1 Description Billet Intake Block Off Plate with O-ring Exhaust Block
EXTERNAL OIL FILTER SYSTEM WITH COOLANT FILTER KIT
 EXTERNAL OIL FILTER SYSTEM WITH COOLANT FILTER KIT External Oil Filter with Coolant Filter Kit PACKING LIST: QTY. 4 4 Description Oil Filter Coolant Filter Small Brass 90 Fitting Large Brass 90 Fitting
1963 GEN IV SUREFIT VINTAGE AIR CONDITIONING INSTALLATION
 by Randy Irwin 1963 GEN IV SUREFIT VINTAGE AIR CONDITIONING INSTALLATION Randy Irwin - Technical Writer Randy has been involved in the Chevy parts business for over 30 years. He is a wizard at creating,
IAG Street Series Air / Oil Separator (AOS) For WRX & WRX STI
 For WRX & WRX STI") IAG Street Series Air / Oil Separator (AOS) For 2006-07 WRX & 2004-07 WRX STI Part# IAG-ENG-7150 Tools Required: Ratchet, torque wrench, extensions, needle nose pliers, hose cutter, snips/scissors, flat
IAG Street Series Air / Oil Separator (AOS) For 2006-07 WRX & 2004-07 WRX STI Part# IAG-ENG-7150 Tools Required: Ratchet, torque wrench, extensions, needle nose pliers, hose cutter, snips/scissors, flat
IAG Street Series Air / Oil Separator (AOS) For WRX & WRX STI
 For WRX & WRX STI") IAG Street Series Air / Oil Separator (AOS) For 2006-07 WRX & 2004-07 WRX STI Part# IAG-ENG-7100 Tools Required: Ratchet, torque wrench, extensions, needle nose pliers, hose cutter, snips/scissors, flat
IAG Street Series Air / Oil Separator (AOS) For 2006-07 WRX & 2004-07 WRX STI Part# IAG-ENG-7100 Tools Required: Ratchet, torque wrench, extensions, needle nose pliers, hose cutter, snips/scissors, flat
Mega-Rail System Installation
 Installation Manual Mega-Rail System P/N 030767-MRS 2003-2007 DODGE CUMMINS Mega-Rail System Installation Installation Instructions GDP 03-07 Mega-Rail System P/N 030767-MRS PLEASE READ ALL INSTRUCTIONS
Dodge 24v ISBe
 BD SUPER B 2003-2004 Dodge 24v ISBe (Non 600 motors) Part # 1045230 PLEASE READ ALL INSTRUCTIONS BEFORE INSTALLATION This turbo system is not compatible with an AFE intake system WITHOUT MODIFICATIONS.
IAG Street Series Air / Oil Separator (AOS) For WRX & WRX STI
 For WRX & WRX STI") IAG Street Series Air / Oil Separator (AOS) For 2006-07 WRX & 2004-07 WRX STI Part# IAG-ENG-7150 Tools Required: Ratchet, torque wrench, extensions, needle nose pliers, hose cutter, snips/scissors, flat
IAG Street Series Air / Oil Separator (AOS) For 2006-07 WRX & 2004-07 WRX STI Part# IAG-ENG-7150 Tools Required: Ratchet, torque wrench, extensions, needle nose pliers, hose cutter, snips/scissors, flat
Duramax LMM EGR Delete With Intake Tube
 Duramax LMM EGR Delete With Intake Tube PACKING LIST: QTY. 4 2 2 2 Description Intake Charge Pipe w/ O-Ring M8 Flange Nut M8x25 Flange Hex Bolt M0x20 Hex Head Bolts M8x25 Socket Head Bolts M8x20 Hex Head
Page 6 of 6 OUTLAW DIESEL EGR COOLER DELETE KIT W/INTAKE ELBOW L FORD POWERSTROKE
 What s in the box 1 Exhaust Block-Off Plate 1 Exhaust Gasket 2 Coolant Line Plugs 1 Brass Barbed Hose Connector 1 Stand-off Spacer 4 M10-1.25 x 40 Hex Head Bolts (Exhaust Manifold) 2 M10-1.25 x 20 Hex
INSTALLATION INSTRUCTIONS
 Equipped with AEM Dryflow Filter No Oil Required! INSTALLATION INSTRUCTIONS PART NUMBER: 21-8203 2003-2005 DODGE RAM 1500 Pickup V8-5.7L C.A.R.B. E.O. # D-670 2003-2005 DODGE RAM 2500 Pickup V8-5.7L C.A.R.B.
2015+ SUBARU STI FRONT-MOUNT INTERCOOLER PARTS LIST AND INSTALLATION GUIDE INSTALL DIFFICULTY DISCLAIMER CAUTION INSTALL PROCEDURE TOOLS NEEDED
 PARTS LIST AND PARTS INCLUDED 1PC ALUMINUM INTAKE PIPE 1PC BAR-AND-PLATE INTERCOOLER 1PC STEEL CRASH BAR W/ MOUNTING HARDWARE 2PC HOT-SIDE INTERCOOLER PIPES 2PC COLD-SIDE INTERCOOLER PIPES 1PC BPV FLANGE
Ford 6.7 EGR Delete Kit
 Fits: 2011 12 Powerstroke 6.7L Read instructions thoroughly before proceeding! ***This kit may void factory warranty please check with manufacturer.*** ***This kit is intended for off road use only.***
DOWNLOAD ENHANCED INSTALL MANUALS
 U 3 October 2016 1041564 6.7L Performance Intake Plate Manual (I-00371) 1 DOWNLOAD ENHANCED INSTALL MANUALS Cummins 6.7L High Flow Intake Plenum Cover 1041564 2008-2016 6.7L RAM 2500-3500 Pickup PLEASE
Ford 6.0L Powerstoke Regulated Fuel Return
 Ford 6.0L Powerstoke Regulated Fuel Return ! WARNING REGARDING EMISSIONS LAWS Not legal for sale or use on pollution-controlled motor vehicles anywhere in the United States. Legal ONLY for off-road competition
Includes: 1. High Flow Turbo Up-Pipe 1. J-Hook Block Off / Coolant Reroute 1. Coolant Hose 1. EGR Valve Block Off Plate 2. Hose Clamps 4.
 Includes: 1. High Flow Turbo Up-Pipe 1. J-Hook Block Off / Coolant Reroute 1. Coolant Hose 1. EGR Valve Block Off Plate 2. Hose Clamps 4. Bolts & Nuts WARNING: This product is not legal for sale or use
Twin Turbo Installation Instructions
 Twin Turbo Installation Instructions Pacific Performance Engineering 303 N Placentia Ave. Fullerton, CA 92831 www.ppediesel.com Legal in California only for racing vehicles which may never be used on the
Cummins Coolant Bypass Kit:
 Cummins Coolant Bypass Kit: 2003-2007 Automatic Transmissions 8 9 10 Part # Description Quantity 1 Fleece Performance thermostat Housing 1 2 M12 Flange Head Bolts 2 3 OE Thermostat housing Riser Block
DODGE SRT-4 PART NUMBER P (with Turbo Toys) P (without Turbo Toys) P (Stage 2 to Stage 3R Upgrade Kit)
 P (without Turbo Toys) P (Stage 2 to Stage 3R Upgrade Kit)") INFORMATION SHEET Stage 3R Turbo Upgrade Kit Components (1) Stage 3R PCM (4) 682 cc/min Fuel Injectors* (1) 3.0 bar MAP Sensor* (1) 3.0 bar TIP Sensor* (1) Block-off Connector for PCM (1) Mopar TD05HR
INFORMATION SHEET Stage 3R Turbo Upgrade Kit Components (1) Stage 3R PCM (4) 682 cc/min Fuel Injectors* (1) 3.0 bar MAP Sensor* (1) 3.0 bar TIP Sensor* (1) Block-off Connector for PCM (1) Mopar TD05HR
Includes: 1. Silicone Hose 2. EGR Block Off Plates 1. Exhaust Block Off Plate 2. Hose Clamps 1. Spacer/Washer 8. Bolts 2. Nuts
 Includes: 1. Silicone Hose 2. EGR Block Off Plates 1. Exhaust Block Off Plate 2. Hose Clamps 1. Spacer/Washer 8. Bolts 2. Nuts WARNING: This product is not legal for sale or use on pollution controlled
Installation Instructions for: TOYOTA 3.4L SUPERCHARGER SYSTEM
 Installation Instructions for: TOYOTA 3.4L SUPERCHARGER SYSTEM 1996-2002 4Runner 1997-1998 T100 1997-2004 Tacoma 2000-2003 Tundra * PREMIUM FUEL REQUIRED * Magnuson Products LLC 1990 Knoll Drive, Bldg
Equipped with AEM Dryflow Filter No Oil Required! INSTALLATION INSTRUCTIONS
 Equipped with AEM Dryflow Filter No Oil Required! INSTALLATION INSTRUCTIONS PART NUMBER: 21-9211 2003-2006 DODGE Ram 2500 Pickup L6-5.9L DSL C.A.R.B. E.O. # D-670 2003-2006 DODGE Ram 3500 Pickup L6-5.9L
Procharger Stage II Intercooled Supercharger System (11-14 GT)
") Procharger Stage II Intercooled Supercharger System (11-14 GT) Installation Time: Approximately one day. Installed on 2012 Mustang GT 5.0/Manual Required Tools 3/8 Socket Set (Standard and Metric) 1/2
Procharger Stage II Intercooled Supercharger System (11-14 GT) Installation Time: Approximately one day. Installed on 2012 Mustang GT 5.0/Manual Required Tools 3/8 Socket Set (Standard and Metric) 1/2
Equipped with AEM Dryflow Filter No Oil Required!
 Equipped with AEM Dryflow Filter No Oil Required! INSTALLATION INSTRUCTIONS PART NUMBER: 21-9210 1994-2002 DODGE Ram 2500 Pickup L6-5.9L DSL C.A.R.B. E.O. # D-670 1994-2002 DODGE Ram 3500 Pickup L6-5.9L
INSTALLATION INSTRUCTIONS PART NUMBER:
 Equipped with AEM Dryflow Filter No Oil Required! INSTALLATION INSTRUCTIONS PART NUMBER: 21-8207 2005 DODGE Durango V8-5.7L See * NOTE 2004 DODGE Durango V8-5.7L C.A.R.B. E.O. # D-670 * NOTE: Legal in
Dodge 6.7L
 22 March 2016 2007-2010 6.7L Dodge Cummins (I-00014) 1 A Tuner capable of eliminating DTC codes, must be used with this kit. EXHAUST GAS BLOCKER KIT 2007-2016 Dodge 6.7L Part #: 1090011 Part #: 1090012
* PLEASE READ INSTRUCTIONS PRIOR TO INSTALLATION *
 XDP Duramax LBZ EGR Race Track Kit Item Number: XD165 PACKING LIST: 1 LBZ EGR Plate for Up Pipe 5 M8x1.25-20mm Bolt 2 M10x1.5 Flange Hex Nut 1 LBZ EGR Plate for Intake 1 M8x1.25-45mm Bolt 1 M8x1.25 Flange
XDP Complete EGR Race Track Kit w/up-pipe. Item Number: XD144
 XDP Complete EGR Race Track Kit w/up-pipe Item Number: XD144 PACKING LIST: 2 - Lined 3/4" SS Hose Clamp 1-3/4 Silicone Hose 1 - XDP Engraved EGR Valve Block-Off Plate with O-ring 1 - EGR Cooler Block-Off
Equipped with AEM DRYFLOW Filter No oil Required! Kit Part Number:
 Equipped with AEM DRYFLOW Filter No oil Required! Kit Part Number: 2003-2006 Dodge Ram 5.9L Cummins Diesel CARB EO D-392-33 2009, Advanced Engine Management, Inc. AEM is a registered trademark of Advanced
99-04 GT. Hellion Power Systems Mustang GT Kit Instructions
 Hellion Power Systems 99-04 Mustang GT Kit Instructions Part 1 Hellion recommends that the front suspension system be installed either by trained professionals or by 5.Remove rack bolts K-Member Installation
TABLE OF CONTENTS PARTS LIST
 TROUBLESHOOTING: Note: You will have a check engine light and/or other problems unless using this product with a compatible ECM calibration. H&S Motorsports provides compatible calibrations for H&S Performance
SHELBY GT500
 2007-2009 SHELBY GT500 Removal of Factory Unit WARNING: 1. Radiator fluid must be handled properly. Please observe local ordinances with regards to handling and disposal. 2. Allow vehicle and components
Scion FR-S ZN6. GTX2867R Gen2 (Internal Wastegate) Installation Instructions GPP P/N #
 Installation Instructions GPP P/N #") TURBO KIT Scion FR-S ZN6 Subaru BRZ ZC6 GTX2867R Gen2 (Internal Wastegate) Installation Instructions GPP P/N # 11518000 Vehicle Type Chassis Code Engine Code Transmission Model Year Scion FR-S DBA-ZN6
TURBO KIT Scion FR-S ZN6 Subaru BRZ ZC6 GTX2867R Gen2 (Internal Wastegate) Installation Instructions GPP P/N # 11518000 Vehicle Type Chassis Code Engine Code Transmission Model Year Scion FR-S DBA-ZN6
INSTALLATION INSTRUCTIONS AIR/OIL SEPARATOR KIT
 INSTALLATION INSTRUCTIONS AIR/OIL SEPARATOR KIT 2015+ SUBARU WRX (LHD ONLY) Document: 19-0136 Support: info@radiumauto.com This document covers the installation of the Radium brake master cylinder brace
LPE C5 Battery Relocation Kit
 LPE C5 Battery Relocation Kit The LPE C5 Corvette battery relocation kit improves vehicle weight distribution by moving weight to the rear of the vehicle. The improved weight distribution increases traction
2014+ Ram 3.0 EcoDiesel EGR Delete
 2014+ Ram 3.0 EcoDiesel EGR Delete Installation Guide WARNING: This product is for competition use only in a sanctioned racing event. NOT FOR USE ON VEHICLES USED OR REGISTERED FOR USE ON A PUBLIC ROAD
ASSEMBLY/INSTALLATION INSTRUCTIONS
 ASSEMBLY/INSTALLATION INSTRUCTIONS AURORA 3000 & 4000 SCORPION TURBO SYSTEM NOTICE: The engine oil must be changed any time the turbocharger is removed from the engine. The passages in the block underneath
INSTALLATION INSTRUCTIONS 97 FORD EXPEDITION
 INSTALLATION INSTRUCTIONS 97 FORD EXPEDITION 1. Read the instructions completely and carefully before you begin. Check the kit for proper contents (refer to the part s list and the picture diagrams). Before
JBR MAZDASPEED
 Page1 james Barone Racing Aftermarket Parts and Accessories JBR 2007 2009 MAZDASPEED 3 Front Mount Intercooler Piping Kit Installation Instructions for TR8 Intercooler Tooling: o Jack, Jack Stands, Ramps
#TL T EA888 GEN 3 FUELING SYSTEM/ INSTALLATION INSTRUCTIONS
 #TL100069 2.0T EA888 GEN 3 FUELING SYSTEM/ INSTALLATION INSTRUCTIONS Notes: These instructions were written for a North American specification MkVII GTI. Other models, like the Golf R, are similar. When
Huron Speed Products Twin Turbo Install Gen 2 CTS-V (09-15)
") Huron Speed Products Twin Turbo Install Gen 2 CTS-V (09-15) 1 2 Remove two bolts in trunk cover with 8mm socket. Pull up on cover to remove. Unscrew net tie down on side cover where battery is located
Huron Speed Products Twin Turbo Install Gen 2 CTS-V (09-15) 1 2 Remove two bolts in trunk cover with 8mm socket. Pull up on cover to remove. Unscrew net tie down on side cover where battery is located
03-04 Mach 1. Hellion Power Systems Mach 1 Kit Instructions
 Hellion Power Systems 03-04 Mach 1 Kit Instructions Part 1 Hellion recommends that the front suspension system be installed either by trained professionals or by 5.Remove rack bolts K-Member Installation
INSTALLATION MANUAL
 315000 INSTALLATION MANUAL EGR & Cooler Race Kit for 2015+ 6.7L Ford Powerstroke WARNING ONLY install this kit if you are using a tuner that disables the EGR sensors & circuit system. Any product that
MAZDASPEED3 Intercooler Instructions
 MAZDASPEED3 Intercooler Instructions Congratulations on your purchase of the COBB Tuning Front Mount Intercooler System for your 2007-2009 Mazdaspeed3. The following instructions should assist you through
HIGH FLOW COLD AIR INTAKE SYSTEM INSTALLATION INSTRUCTIONS D , D A
 HIGH FLOW COLD AIR INTAKE SYSTEM INSTALLATION INSTRUCTIONS D760-0320, D760-0320A 1992-95 325i, is 1995 M3 (3.0L) Parts List: 1 Intake Tube 1 Silicone Hose 1 Air Flow Meter Bracket 1 Hose Clamp (#36z) 1
Intercooler Installation For Ford 7.3L Powerstroke trucks -- Installation Instructions L Ford Powerstroke
 12 March 2010 1042700-Ford 7.3L Intercooler Installation 1 Intercooler Installation For 1999-2003 Ford 7.3L Powerstroke trucks -- Installation Instructions -- 1042700 7.3L Ford Powerstroke PLEASE READ
BD 6.7L Super B Special Turbo Kit For L Dodge -- I n s t a l l a t i o n I n s t r u c t i o n s -- PN#
 28 January 2014 1045140 6.7L Super B Special Turbo Installation (I-00266) 1 BD 6.7L Super B Special Turbo Kit For 2007.5-2012 6.7L Dodge -- I n s t a l l a t i o n I n s t r u c t i o n s -- PN# 1045140
INSTALLATION INSTRUCTIONS
 Equipped with AEM Dryflow Filter No Oil Required! INSTALLATION INSTRUCTIONS PART NUMBER:22-489 2004 MAZDA Miata Mazdaspeed L4-1.8L C.A.R.B. E.O. # D-670 PARTS LIST Description Qty. Part Number Element
GT-R Alpha 10/12 Turbo Kit
 GT-R Alpha 10/12 Turbo Kit Instructions V6 The goal of AMS is to provide the highest quality, best performing products available. By utilizing research and development, and rigorous testing programs AMS
TURBO KIT INSTRUCTIONS
 Revision 12/20/10 TURBO KIT INSTRUCTIONS This turbo kit consists of the necessary parts to upgrade or add a turbo to your 22R/RE/RET. This kit may require some fabrication to address your particular application
2006 Honda Civic SI Supercharger Kit Installation Instruction Kit #
 2006 Honda Civic SI Supercharger Kit Installation Instruction Kit #350-091 3239 MONIER CIRCLE, STE.5 RANCHO CORDOVA, CA 95742 916.635.4550 FAX 916.635.4632 www.ct-engineering.com INS-157 VERSION: 3.25.2009
Huron Speed Products Twin Turbo Install Gen 2 CTS-V (09-15)
") Huron Speed Products Twin Turbo Install Gen 2 CTS-V (09-15) The following install guide is simply that, a guide to help you with installation. It is by no means the exact method to perform installation,
Huron Speed Products Twin Turbo Install Gen 2 CTS-V (09-15) The following install guide is simply that, a guide to help you with installation. It is by no means the exact method to perform installation,