Register your instrument! MiniSpin /MiniSpin plus. Operating manual
|
|
|
- Jocelyn Sharp
- 6 years ago
- Views:
Transcription


1 Register your instrument! Operating manual
2 Operating MiniSpin /MiniSpin see on Fig. Tab. p. p. manual plus Copyright 2015 Eppendorf AG, Germany. All rights reserved, including graphics and images. No part of this publication may be reproduced without the prior permission of the copyright owner. Microtainer is a registered trademark of Becton Dickinson, USA. Eppendorf and the Eppendorf logo are registered trademarks of Eppendorf AG, Germany. MiniSpin is a registered trademark of Eppendorf AG, Germany. Registered trademarks and protected trademarks are not marked in all cases with or in this manual. English Operating (EN) manual /072015
3 Table of contents 3 Table of contents 1 Operating instructions Using this manual Danger symbols and danger levels Danger symbols Danger levels Symbols used Abbreviations used Safety Intended use User profile Information on product liability Application limits Declaration concerning the ATEX directive (94/9/EC) Warnings for intended use Personal injury or damage to the equipment Incorrect handling of the centrifuge Incorrect handling of the rotors Extreme strain on the centrifuging tubes Safety instructions on the device Product description Product overview Delivery package Features Installation Selecting the location Installing the instrument Operation Operating controls Switching on the centrifuge Inserting and loading the rotor Inserting the rotor Loading the rotor Positioning the rotor lid Removing the rotor Centrifuging Closing the centrifuge lid Starting centrifugation Short spin centrifugation : Switching the display between speed and g-force : Centrifuging in continuous operation
4 4 Table of contents 6 Maintenance Prepare cleaning/disinfection Cleaning/disinfection Cleaning and disinfecting the device Cleaning and disinfecting the rotor Decontamination before shipment Troubleshooting General errors Error messages Emergency release Transport, storage and disposal Transport Storage Disposal Technical data Power supply Weight/dimensions Noise level Ambient conditions Application parameters Rotors Rotor F Rotor F PCR Ordering information Centrifuge Accessories Certificates
5 Operating instructions 5 1 Operating instructions 1.1 Using this manual Read this operating manual completely before using the device for the first time. Also observe the instructions for use of the accessories. This operating manual is part of the product. Thus, it must always be easily accessible. Enclose this operating manual when transferring the device to third parties. You will find the current version of the operating manual for all available languages on our webpage under Danger symbols and danger levels The safety instructions in this manual appear with the following danger symbols and danger levels: Danger symbols Biohazard Explosive substances Electric shock Risk of crushing Hazard point Material damage Danger levels DANGER WARNING CAUTION NOTICE Will lead to severe injuries or death. May lead to severe injuries or death. May lead to light to moderate injuries. May lead to material damage.
6 6 Operating instructions 1.3 Symbols used Depiction Meaning 1. Actions in the specified order 2. Actions without a specified order List Text Display text or software text Additional information 1.4 Abbreviations used rcf Relative centrifugal force relative centrifugal force: g-force in m/s 2 rpm Revolutions per minute revolutions per minute
7 Safety 7 2 Safety 2.1 Intended use The MiniSpin/ is used for the separation of aqueous solutions and suspensions of different densities in approved sample tubes. The MiniSpin/ is exclusively intended for use indoors. All country-specific safety requirements for operating electrical equipment in the laboratory must be observed. 2.2 User profile The device and accessories may only be operated by trained and skilled personnel. Before using the device, read the operating manual carefully and familiarize yourself with the device's mode of operation. 2.3 Information on product liability In the following cases, the designated protection of the device may be compromised. Liability for any resulting property damage or personal injury is then transferred to the operator: The device is not used in accordance with the operating manual. The device is used outside of its intended use. The device is used with accessories or consumables which are not recommended by Eppendorf. The device is maintained or repaired by people not authorized by Eppendorf. The user makes unauthorized changes to the device. 2.4 Application limits Declaration concerning the ATEX directive (94/9/EC) DANGER! Risk of explosion. Do not operate the device in areas where work is completed with explosive substances. Do not use this device to process any explosive or highly reactive substances. Do not use this device for processing any substances which could generate an explosive atmosphere. Due to its design and the environmental conditions inside the device, the MiniSpin/ is not suitable for use in a potentially explosive atmosphere. The device may only be used in a safe environment, such as in the open environment of a ventilated laboratory or an extractor hood. The use of substances that may contribute to a potentially explosive atmosphere is not permitted. The final decision on risks associated with the use of such substances lies with the user.
8 8 Safety 2.5 Warnings for intended use Personal injury or damage to the equipment WARNING! Electric shock due to damage to device or mains cable. Only switch on the device if the device and mains cable are undamaged. Only use devices that have been properly installed or repaired. In case of danger, disconnect the device from the mains supply by pulling the power plug from the device or the mains socket or, by using the isolating device intended for this purpose (e.g., emergency stop switch in the laboratory). WARNING! Lethal voltages inside the device. Touching parts which are under high voltage may cause an electric shock. An electric shock injures the heart and causes respiratory paralysis. Ensure that the housing is closed and undamaged. Do not remove the housing. Ensure that no liquid can penetrate into the device. Only authorized service staff may open the device. WARNING! Risk from incorrect supply voltage Only connect the device to voltage sources which correspond to the electrical requirements on the name plate. Only use sockets with a protective earth (PE) conductor and suitable power cable. WARNING! Damage to health due to infectious liquids and pathogenic germs. When handling infectious liquids and pathogenic germs, observe the national regulations, the biological security level of your laboratory, the material safety data sheets, and the manufacturer's application notes. Wear personal protective equipment. For comprehensive regulations about handling germs or biological material of risk group II or higher, please refer to the "Laboratory Biosafety Manual" (source: World Health Organization, Laboratory Biosafety Manual, in its respectively current valid version).
9 Safety 9 WARNING! Risk of injury when opening or closing the centrifuge lid. There is a risk of crushing your fingers when opening or closing the centrifuge lid. When opening or closing the centrifuge lid, do not reach between the lid and device or into the latching mechanism of the lid. Always open the centrifuge lid completely to prevent it from falling. WARNING! Risk of injury from chemically or mechanically damaged accessories. Even minor scratches and cracks can lead to serious internal material damage. Protect all accessory parts from mechanical damage. Inspect the accessories for damage before each use. Replace any damaged accessories. Do not use any accessories whose maximum service life has been exceeded. CAUTION! Risk of burns to the fingers. The base of the centrifuge becomes very hot during the run. Check the temperature at the bottom of the centrifuge before lifting the centrifuge. Only hold the centrifuge at the sides. CAUTION! Poor safety due to incorrect accessories and spare parts. The use of accessories and spare parts other than those recommended by Eppendorf may impair the safety, functioning and precision of the device. Eppendorf cannot be held liable or accept any liability for damage resulting from the use of incorrect or non-recommended accessories and spare parts, or from the improper use of such equipment. Only use accessories and original spare parts recommended by Eppendorf. NOTICE! Damage to device due to spilled liquids. 1. Switch off the device. 2. Disconnect the device from the power supply. 3. Carefully clean the device and the accessories in accordance with the cleaning and disinfection instructions in the operating manual. 4. If a different cleaning and disinfecting method is to be used, contact Eppendorf AG to ensure that the intended method will not damage the device.
10 10 Safety NOTICE! Damage to electronic components due to condensation. Condensate can form in the device after it has been moved from a cool environment to a warmer environment. After installing the device, wait at least for 3 h. Only then connect the device to the mains Incorrect handling of the centrifuge NOTICE! Damage from knocking against or moving the device during operation. If the rotor bangs against the rotor chamber wall, it will cause considerable damage to the device and rotor. Do not move or knock against the device during operation Incorrect handling of the rotors WARNING! Risk of injury from improperly attached rotors and rotor lids. Only centrifuge with rotor and rotor lid firmly tightened. If there are any unusual noises when the centrifuge is started up, the rotor or rotor lid may not be properly attached. Immediately press the start/stop key to stop centrifuging. CAUTION! Risk of injury due to asymmetric loading of a rotor. Load rotors symmetrically with identical tubes. Only load adapters with suitable tubes. Always use the same type of tubes (weight, material/density and volume). Check symmetric loading by balancing the adapters and tubes used with scales. CAUTION! Risk of injury from overloaded rotor. The centrifuge is designed for the centrifugation of material with a maximum density of 1.2 g/ml at maximum speed and filling volume and/or load. Do not exceed the maximum load of the rotor.
11 Safety 11 NOTICE! Damage to rotors from aggressive chemicals. Rotors are high-quality components which withstand extreme stresses. This stability can be impaired by aggressive chemicals. Avoid using aggressive chemicals, including strong and weak alkalis, strong acids, solutions with mercury, copper and other heavy metal ions, halogenated hydrocarbons, concentrated saline solutions and phenol. Due to the manufacturing process, color variations may occur on rotors marked "coated". These color variations do not effect service life or resistance to chemicals Extreme strain on the centrifuging tubes CAUTION! Risk of injury from overloaded tubes. Note the loading limits specified by the tube manufacturer. Only use tubes which are approved by the manufacturer for the required g-force (rcf). NOTICE! Risk from damaged tubes. Damaged tubes must not be used, as this could cause further damage to the device and the accessories and loss of the samples. Before use, visually check all of the tubes for damage. NOTICE! Risk from open tube lids. Open tube lids can brake off during centrifugation and damage the rotor and the centrifuge. Carefully seal all tube lids before centrifuging. NOTICE! Hazard to plastic tubes from organic solvents. The density of plastic tubes is reduced when organic solvents (e.g., phenol, chloroform) are used, i.e. the tubes could become damaged. Observe the manufacturer's specifications for chemical resistance of the tubes.
12 12 Safety NOTICE! Micro test tubes heat up. In uncooled centrifuges, the temperature in the rotor chamber, rotor and sample can increase to above 40 C, depending on the run time, g-force (rcf)/speed and ambient temperature. Please note that this will reduce the resistance to centrifugation of the micro test tubes. Please note the temperature resistance of the samples. 2.6 Safety instructions on the device Symbol Meaning Location Hazard point Rear of the device Observe the operating manual.
13 rcf Product description 13 3 Product description 3.1 Product overview 1 2 time speed x 1000 min start stop short open Monitoring glass 2 Motor Shaft 3 Emergency release (bottom of the device) 4 Control panel 5 Suction foot 6 Name plate (bottom of the device) 7 Mains/power switch 8 Mains/power cord socket
14 14 Product description 3.2 Delivery package 1 or 3.3 Features Centrifuge MiniSpin Centrifuge 1 Rotor F incl. rotor lid 1 Rotor nut 1 Mains/power cord 1 Operating manual Check the delivery for completeness. Check all parts for damage in transit. To safely transport and store the device, keep the transport box and packing material. The high-power and user-friendly microcentrifuges MiniSpin and the are so small that each workstation can be equipped with a "personal" centrifuge. For the MiniSpin and the, 2 rotors are available: Fixed-angle rotor F Capacity: 12 tubes Micro test tubes 0.2 ml to 2.0 ml Microtainers Fixed-angle rotor F PCR Capacity: 16 PCR tubes 0.2 ml PCR tubes PCR strips
15 Installation 15 4 Installation 4.1 Selecting the location NOTICE! If an error occurs, the objects in the immediate proximity of the device will be damaged. In accordance with the recommendations of EN , leave a safety clearance of 30 cm around the device during operation. Please remove all materials and objects from this area. NOTICE! Damage from overheating. Do not install the device near to any heat sources (e.g., heating, drying cabinet). Do not expose the device to direct sunlight. Ensure unobstructed air circulation. Keep free a clearance of at least 30 cm (11.8 in) around all ventilation grilles. Select the device location according to the following criteria: Mains connection as specified on name plate Resonance free table with horizontal even work surface Surrounding area must be well ventilated. The location must be protected against direct sunlight.
16 16 Installation 4.2 Installing the instrument Prerequisites The centrifuge is standing on a suitable lab bench with a smooth surface. The suction feet are fixed to the surface. WARNING! Risk from incorrect supply voltage Only connect the device to voltage sources which correspond to the electrical requirements on the name plate. Only use sockets with a protective earth (PE) conductor and suitable power cable. NOTICE! Damage to electronic components due to condensation. Condensate can form in the device after it has been moved from a cool environment to a warmer environment. After installing the device, wait at least for 3 h. Only then connect the device to the mains. 1. Let the centrifuge warm up to ambient temperature. 2. Connect the centrifuge to the mains and switch it on using the mains/power switch. The display is active. The centrifuge lid opens.
17 Operation 17 5 Operation 5.1 Operating controls Abb. 5-1:Operating controlsminispin/ time speed x 1000 min rpm 8 4 start stop short open Fig. 5-1: Operating controls MiniSpin/ 1 Centrifugation time 2 Centrifuge status The centrifuge lid is open. The bar flashes alternately at the top and bottom: centrifugation in progress. 3 Centrifugation speed MiniSpin: speed (rpm) : speed (rpm) or g-force (rcf) 4 Arrow keys speed Set centrifugation speed. Keep the arrow key pressed: quick setting Change rpm/rcf display (): Press both speed arrow keys. 5 open key Open the centrifuge lid. 6 short key Short run centrifugation 7 start/stop key Start and stop centrifugation. 8 time arrow keys Adjust centrifugation time. Keep the arrow key pressed: quick setting
18 18 Operation 5.2 Switching on the centrifuge Switch the centrifuge on using the mains/power switch at the rear of the device. The lid opens. The display shows the parameters of the last run. 5.3 Inserting and loading the rotor WARNING! Risk of injury from chemically or mechanically damaged accessories. Even minor scratches and cracks can lead to serious internal material damage. Protect all accessory parts from mechanical damage. Inspect the accessories for damage before each use. Replace any damaged accessories. Do not use any accessories whose maximum service life has been exceeded Inserting the rotor 1. Fit the rotor on the motor shaft. 2. Fit the rotor nut on the motor shaft. 3. Rotate the rotor nut clockwise and tighten it Loading the rotor CAUTION! Risk of injury due to asymmetric loading of a rotor. Load rotors symmetrically with identical tubes. Only load adapters with suitable tubes. Always use the same type of tubes (weight, material/density and volume). Check symmetric loading by balancing the adapters and tubes used with scales. 1. Check maximum load (adapter, vessel, and contents) for each rotor bore. 2. Load rotors and adapters only with the tubes intended for them. 3. To ensure symmetrical loading, insert sets of two tubes in opposite bores. Tubes located opposite each other must be of the same type and contain the same filling quantity.
19 Operation Positioning the rotor lid Position the rotor lid on the rotor. The rotor lid audibly engages Removing the rotor 1. Pull up the knob of the rotor lid and remove the rotor lid. 2. Turn the rotor nut counterclockwise and remove it. 3. Remove the rotor. 5.4 Centrifuging WARNING! Risk of injury from improperly attached rotors and rotor lids. Only centrifuge with rotor and rotor lid firmly tightened. If there are any unusual noises when the centrifuge is started up, the rotor or rotor lid may not be properly attached. Immediately press the start/stop key to stop centrifuging Closing the centrifuge lid WARNING! Risk of crushing due to the device lid. When closing the device lid, do not place your finger between the lid and the device, or in the lid locking mechanism. 1. Check the correct attachment of the rotor and rotor lid. 2. Press the centrifuge lid down until it is gripped by the lid latch.
20 20 Operation Starting centrifugation Setting the centrifugation parameters 1. Set the centrifugation time with the time arrow keys. 2. Set the centrifugation speed with the speed arrow keys. Starting the centrifugation run 3. To start the centrifugation run, press the start/stop key. Display during centrifugation The bar in the center of the display flashes alternately at the top and bottom. Remaining cycle time in minutes. The last minute is counted down in seconds. Current speed (rpm) or g-force (rcf) (). During the run, you can change the centrifugation time and the centrifugation speed. The new parameters are adopted immediately Short spin centrifugation MiniSpin: Short run centrifugation at maximum speed (13400 rpm) : The speed of the short run centrifugation can be set. 1. Start short run centrifugation: Keep the short key pressed. The bar in the center of the display flashes alternately at the top and bottom. The cycle time is counted up. 2. Stop short run centrifugation: Release the short key. During the braking process, the elapsed running time flashes on the display. The centrifuge lid opens automatically : Setting the speed of the short spin centrifugation Prerequisites The centrifuge lid is open. Keep the short key pressed until the display changes. 14t: Short run centrifugation at maximum speed (14500 rpm) 1 14t: Short run centrifugation at set speed (rpm) or g-force (rcf) For 1 14t, set the speed (rpm) or g-force (rcf) with the speed arrow key.
21 Operation : Switching the display between speed and g-force Press both speed and arrow keys simultaneously. The display changes from rpm (speed) to rcf (g-force) and vice versa. It is possible to switch the display between speed and g-force during a centrifugation run. For the MiniSpin, you can use the following formula to calculate the g-force for the displayed speed according to DIN : rcf = n 2 r max n: speed in rpm r max : maximum centrifugation radius in cm Example: The maximum centrifugation radius of the rotor F is 6 cm. At a speed of rpm, a maximum g-force of g is reached : Centrifuging in continuous operation Setting up continuous operation 1. In order to centrifuge without any time limits, use the time arrow keys to select the setting oo ( below 15 s or above 99 min). 2. Set the speed (rpm) or the g-force (rcf) with the speed arrow keys. 3. To start the centrifugation run, press the start/stop key. The bar in the center of the display flashes alternately at the top and bottom. The cycle time is counted up. Current speed (rpm) or g-force (rcf). 4. Press the start/stop key to end the centrifugation. During the braking process, the elapsed running time flashes on the display.
22 22 Maintenance 6 Maintenance 6.1 Prepare cleaning/disinfection Clean all accessible surfaces of the device and the accessories at least weekly and when contaminated. Clean the rotor regularly. This way the rotor is protected and the durability is prolonged. Furthermore, observe the notes on decontamination (see Decontamination before shipment on p. 25) when the device is sent to the authorized Technical Service for repairs. The procedure described in the following chapter applies to the cleaning as well as to the disinfection or decontamination. The table below describes the steps required on top of this: Cleaning 1. Use a mild cleaning fluid to clean the accessible surfaces of the device and the accessories. 2. Carry out the cleaning as described in the following chapter. Disinfecting/decontamination 1. Choose the disinfection method which corresponds to the legal regulations and guidelines in place for your range of application. For example, use alcohol (ethanol, isopropanol) or alcohol-based disinfectants. 2. Carry out the disinfection or decontamination as described in the following chapter. 3. Then clean the device and the accessories. If you have any further questions regarding the cleaning and disinfection or decontamination or regarding the cleaning fluid to be used, contact the Eppendorf AG Application Support. The contact details are provided on the back of this manual.
23 Maintenance Cleaning/disinfection DANGER! Electric shock as a result of penetration of liquid. Switch off the device and disconnect the power plug before starting cleaning or disinfection work. Do not allow any liquids to penetrate the inside of the housing. Do not spray clean/spray disinfect the housing. Only plug the device back in if it is completely dry, both inside and outside. NOTICE! Damage from the use of aggressive chemicals. Do not use any aggressive chemicals on the device or its accessories, such as strong and weak bases, strong acids, acetone, formaldehyde, halogenated hydrocarbons or phenol. If the device has been contaminated by aggressive chemicals, immediately clean it by means of a mild cleaning agent. NOTICE! Corrosion from aggressive cleaning agents and disinfectants. Do not use corrosive cleaning agents, aggressive solvents or abrasive polishes. Do not incubate the accessories in aggressive cleaning agents or disinfectants for a longer period of time. NOTICE! Damage from UV and other high-energy radiation. Do not use UV, beta, gamma, or any other high-energy radiation for disinfecting. Avoid storage in areas with strong UV radiation Autoclaving All rotors, rotor lids and adapters can be autoclaved (121 C, 20 min).
24 24 Maintenance Cleaning and disinfecting the device If you have any additional questions on disinfection, decontamination, cleaning and the cleaning agents to be used, please contact Eppendorf AG Application Support. The contact details are provided on the back of this manual. 1. Open the lid. Switch off the device with the mains/power switch. Disconnect the power plug from the power supply. 2. Loosen the rotor nut. To this purpose, loosen the rotor nut by turning it counterclockwise. 3. Remove the rotor. 4. Clean and disinfect all accessible surfaces of the device, including the power cable, using a damp cloth and the recommended cleaning agents. 5. Clean the motor shaft with a soft, dry and lint-free cloth. Do not lubricate the motor shaft. 6. Check the motor shaft for damage. 7. Inspect the device for corrosion and damage. 8. Leave the centrifuge lid open when the device is not being used. 9. Only connect the device to the power supply if it is fully dry inside and out Cleaning and disinfecting the rotor 1. Inspect the rotor and accessories for damage and corrosion. Do not use any damaged rotors or accessories. 2. Clean and disinfect the rotors and accessories with the recommended cleaning agents. 3. Use a bottle brush to clean and disinfect the rotor bores. 4. Rinse the rotors and accessories thoroughly with distilled water. Rinse the rotor bores of fixed-angle rotors particularly thoroughly. Do not immerse the rotor in liquid as liquid can get trapped inside the cavities. 5. Place rotors and accessories on a cloth to dry. Place fixed-angle rotors with the rotor bores facing downwards to allow the bores to also dry. 6. Clean the rotor cone with a soft, dry and lint-free cloth. Do not lubricate the rotor cone. 7. Inspect the rotor cone for damage. 8. Place the dry rotor onto the motor shaft. 9. Tighten the rotor nut firmly by turning it clockwise. 10.Leave the rotor lid open when the rotor is not being used.
25 Maintenance Decontamination before shipment If you are shipping the device to the authorized Technical Service for repairs or to your authorized dealer for disposal please note the following: WARNING! Risk to health from contaminated device 1. Follow the instructions in the decontamination certificate. You find it as a PDF file on our website ( 2. Decontaminate all the parts you would like to dispatch. 3. Include the fully completed decontamination certificate in the packing.
26 26 Troubleshooting 7 Troubleshooting If you cannot remedy an error with the recommended measures, please contact your local Eppendorf partner. The contact addresses can be found on the Internet at General errors Problem Cause Solution No display. No mains connection. Check the mains connection. Check the mains fuse of the laboratory. Power failure. Check the mains connection. Check the mains fuse of the laboratory. The centrifuge Rotor is still running. Wait for the rotor to stop. lid cannot be opened. Error message with locking time. Locking period still running. Wait for the locking time to elapse. The centrifuge cannot be started. Centrifuge lid is not closed. Close the centrifuge lid. Centrifuge shakes when it starts up. 7.2 Error messages Rotor loaded unsymmetrically. 1. Stop the centrifuge and load the rotor symmetrically. 2. Re-start the centrifuge. Key lock after error message If an error message occurs, the keys remain locked as long as the rotor is moving. For some errors, the remaining blocking time and the error message are alternately shown on the display. The blocking time also remains active if the centrifuge is disconnected from the mains/power line. If an error message appears, proceed as follows: Remedy the fault as described in the Remedy" column. Wait for the blocking time to elapse or the rotor to stop. To clear the error message from the display, press the open key.
27 Troubleshooting 27 Problem Cause Solution Er 3.1 Error in speed measuring system. Tighten rotor. Er 3.2 Wait for the blocking time to Er 3.3 elapse. Er 3.4 Press the open key. Er 3.5 Er 6.1 Er 6.2 Er 6.3 Er 6.4 Er 10.0 Er 10.1 Er 10.2 Er 15.1 Er 15.2 Er 16.2 Er 16.3 Er 16.4 Error in the drive electronics. The drive is overheated. Electronics fault. Electronics fault. Repeat the run. If the error message appears again: 1. Switch off centrifuge and wait for 20 s. 2. Switch on the centrifuge. If the error message appears again: Let the drive cool down for at least 15 min. 1. Switch off centrifuge and wait for 20 s. 2. Switch on the centrifuge. 1. Switch off centrifuge and wait for 20 s. 2. Switch on the centrifuge. Int Mains/power failure during a run. Check the power supply. Press the open key. Lid Centrifuge lid will not lock. Press the open key. Try again to close centrifuge lid. Centrifuge lid cannot be released. Switch off centrifuge and wait for 20 s. Switch on the centrifuge. Press the open key. If the error occurs again: 1. Switch off centrifuge. 2. Activate the emergency lid release. Emergency release was actuated during a run. Wait for the rotor to stop. Press the open key.
28 28 Troubleshooting 7.3 Emergency release If the centrifuge lid cannot be opened during a power failure, you can activate the emergency release manually. WARNING! Risk of injury from rotating rotor. If the emergency release of the lid is operated, the rotor may continue rotating for several minutes. Wait until the rotor stop before operating the emergency release. Check the monitoring glass in the centrifuge lid. CAUTION! Risk of burns to the fingers. The base of the centrifuge becomes very hot during the run. Check the temperature at the bottom of the centrifuge before lifting the centrifuge. Only hold the centrifuge at the sides Pull out the mains/power plug and wait for the rotor to stop. 2. Lift up the centrifuge. Use a ball pen to move the disk behind the opening of the bottom panel clockwise until the centrifuge lid opens.
29 Transport, storage and disposal 29 8 Transport, storage and disposal 8.1 Transport Remove the rotor from the centrifuge before transport. Use the original packing for transport. 8.2 Storage 8.3 Disposal Air temperature Relative humidity Atmospheric pressure General transport -25 C 60 C 10 % 75 % 30 kpa 106 kpa Air freight -20 C 55 C 10 % 75 % 30 kpa 106 kpa Air temperature Relative humidity Atmospheric pressure In transport packing -25 C 55 C 10 % 75 % 70 kpa 106 kpa Without transport packing -5 C 45 C 10 % 75 % 70 kpa 106 kpa In case the product is to be disposed of, the relevant legal regulations are to be observed. Information on the disposal of electrical and electronic devices in the European Community: Within the European Community, the disposal of electrical devices is regulated by national regulations based on EU Directive 2012/19/EU pertaining to waste electrical and electronic equipment (WEEE). According to these regulations, any devices supplied after August 13, 2005, in the business-to-business sphere, to which this product is assigned, may no longer be disposed of in municipal or domestic waste. To document this, they have been marked with the following identification: Because disposal regulations may differ from one country to another within the EU, please contact your supplier if necessary.
30 30 Technical data 9 Technical data 9.1 Power supply MiniSpin Mains/power connection 230 V, 50 Hz 60 Hz 120 V, 50 Hz 60 Hz 100 V, 50 Hz 60 Hz 230 V, 50 Hz 60 Hz 120 V, 50 Hz 60 Hz 100 V, 50 Hz 60 Hz Power consumption 60 W 68 W Current consumption 0.45 A (230 V) 0.9 A (120 V) 0.9 A (100 V) Overvoltage category II EMC: Interference emission. (radio interference) EMC: Noise immunity Fuses 1.6 AT (230 V) 3.15 AT (120 V) 3.15 AT (100 V) Degree of pollution Weight/dimensions 0.6 A (230 V) 1.2 A (120 V) 1.2 A (100 V) EN Class B (230 V) EN Class A (120 V), FCC15 Class B (120 V) EN Class A (100 V), FCC15 Class B (100 V) EN category B Dimensions Weight without rotor MiniSpin Width: 22.5 cm (8.86 in) Depth: 24.0 cm (9.45 in) Height: 12.0 cm (4.72 in) 3.7 kg (8.16 lb) 9.3 Noise level The noise level was measured according to (DIN EN ISO 3745) frontally in a sound measuring room with accuracy class 1 at a distance of 1 m from the device and at lab bench height. MiniSpin Noise level < 49 db(a) < 52 db(a)
31 Technical data Ambient conditions Ambience Only for use indoors. Ambient temperature 10 C 40 C Relative humidity 10 % 75 %, non-condensing. Atmospheric pressure 79.5 kpa 106 kpa 9.5 Application parameters MiniSpin Cycle time 15 s 30 min 15 s 99 min unlimited (oo) 15 s 1 min: can be set in increments of 15 s from 1 min: can be set in increments of 1 min Rotational speed 800 rpm rpm 800 rpm rpm can be set in increments of 100 rpm Tolerance at maximum rotational speed: 3 % Relative centrifugal force 100 g g 100 g g can be set in increments of 100 g Maximum load ml Maximum kinetic energy 728 Nm 852 Nm Permitted density of the 1.2 g/ml material for centrifuging (at maximum g-force (rcf) and/or speed (rpm) and maximum load) Tolerance at maximum 13 s rotational speed Deceleration time from 12 s maximum rotational speed
32 32 Technical data 9.6 Rotors Eppendorf centrifuges may only be operated with rotors that are intended for use with the centrifuge. Only use rotors that are intended for use with the centrifuge Rotor F Fixed-angle rotor for 12 tubes Rotor F Maximum g-force: MiniSpin Maximum speed: MiniSpin Maximum load (tubes and contents): g g rpm rpm 12 4 g Tube Tube Adapter Bottom shape Capacity Tubes per adapter/rotor Order no. (international) Tube diameter Maximum g-force: Maximum speed: Radius PCR tube conical MiniSpin 0.2 ml Ø 11 mm MiniSpin 7830 g 9170 g rpm rpm 1/ cm Tube conical MiniSpin 0.4 ml Ø 6 mm MiniSpin g g rpm rpm 1/ cm Tube conical MiniSpin 0.5 ml Ø 6 mm MiniSpin 9840 g g rpm rpm 1/ cm
33 Technical data 33 Tube Tube Adapter Bottom shape Capacity Tubes per adapter/rotor Order no. (international) Tube diameter Maximum g-force: Maximum speed: Radius Microtainers open MiniSpin 0.6 ml Ø 8 mm MiniSpin g g rpm rpm 1/ cm Tube MiniSpin g g 1.5 ml/2.0 ml Ø 11 mm MiniSpin rpm rpm / cm
34 34 Technical data Rotor F PCR Fixed-angle rotor for 16 PCR tubes Rotor F PCR Maximum g-force: Maximum speed: Maximum load (tubes and contents): MiniSpin MiniSpin 9840 g g rpm rpm g (2 3.5 g) Tubes Tube Bottom shape Maximum g-force: Capacity Tube diameter Maximum speed: Tubes per adapter/rotor Centrifugation radius conical MiniSpin 9840 g g 0.2 ml Ø 6 mm MiniSpin rpm rpm / cm PCR strips conical MiniSpin 0.2 ml Ø 6 mm MiniSpin 9840 g g rpm rpm / cm
35 Ordering information Ordering information 10.1 Centrifuge Order no. (International) 10.2 Accessories Order no. (North America) Description Centrifuge MiniSpin incl. rotor F V/50 60 Hz V/50 60 Hz, with US plug V/50 60 Hz Centrifuge incl. rotor F V/50 60 Hz V/50 60 Hz, with US plug V/50 60 Hz Order no. (International) Order no. (North America) Description Rotor F angle 45, 12 places, max. tube diameter 11 mm, incl. rotor lid and rotor nut MiniSpin MiniSpin/ Rotor lid for rotor F stainless steel, with rotor nut Rotor F PCR angle 55, 16 places, max. tube diameter 5 mm, incl. rotor lid (aluminum) MiniSpin/ Rotor lid for rotor F PCR aluminum, with rotor nut Rotor nut for MiniSpin,
36 36 Ordering information Order no. (International) Order no. (North America) Description Adapter used in FA , F , FA , F , F , F , FA , FA Special, FA HS and FA Kit for 1 sample tube (0.5 ml, max. Ø 6 mm) or 1 Microtainer (0.6 ml, max. Ø 8 mm), set of for 1 PCR tube (0.2 ml, max. Ø 6 mm), set of 6 Adapter used in FA , F , F , FA , FA , F , F , F , FA HS, FA Kit and S AT for 1 sample tube (0.4 ml, max. Ø 6 mm), set of 6 Mains/power cord V/50 Hz, Europe V/50 Hz, GB/HK V/50 Hz, CN V/50 Hz, AUS V/50 Hz, ARG
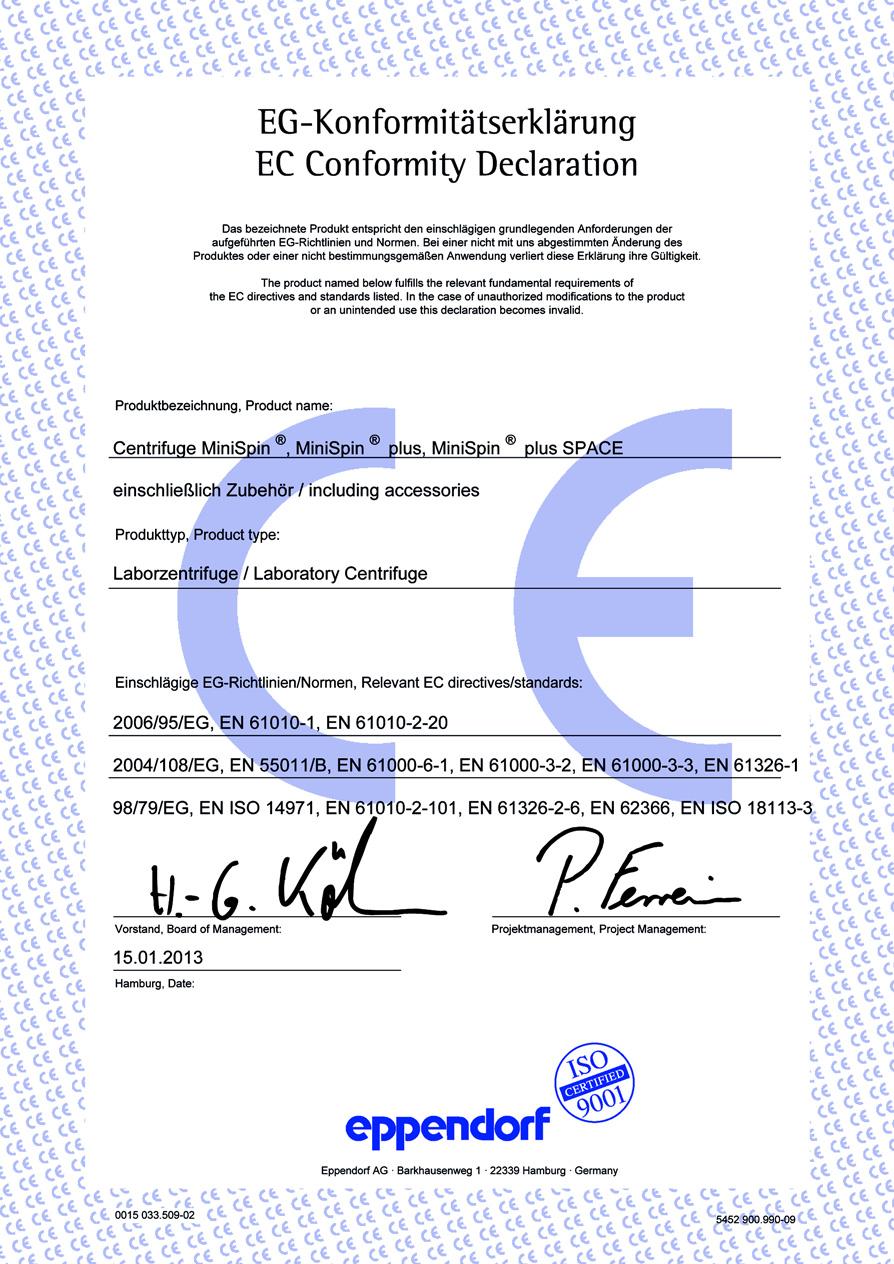
37 Certificates
38
39
40 Evaluate Your Manual Give us your feedback. Your local distributor: Eppendorf AG Hamburg Germany
Register your instrument! HeatSealer S100. Operating manual
 00N) manual Register your instrument! www.eppendorf.com/myeppendorf Operating manual Copyright 2015 Eppendorf AG, Germany. All rights reserved, including graphics and images. No part of this publication
Register your instrument! Eppendorf Reference 2. Operating manual
 Register your instrument! www.eppendorf.com/myeppendorf Operating manual Operating Eppendorf see on Fig. Tab. p. p. manual Reference 2 Copyright 2016 Eppendorf AG, Germany. All rights reserved, including
Register your instrument! Easypet 3. Operating manual
 Register your instrument! www.eppendorf.com/myeppendorf Operating manual Copyright 2016 Eppendorf AG, Germany. All rights reserved, including graphics and images. No part of this publication may be reproduced
Register your instrument! Easypet 3. Operating manual
 N) manual Register your instrument! www.eppendorf.com/myeppendorf Operating manual Copyright 2014 Eppendorf AG, Hamburg. All rights reserved, including graphics and images. No part of this publication
N) manual. Register your instrument! Eppendorf Reference 2. Operating manual
 manual. Register your instrument! Eppendorf Reference 2. Operating manual") erence ual 2 N) manual Register your instrument! www.eppendorf.com/myeppendorf Operating manual Copyright 2016 Eppendorf AG, Germany. All rights reserved, including graphics and images. No part of this
erence ual 2 N) manual Register your instrument! www.eppendorf.com/myeppendorf Operating manual Copyright 2016 Eppendorf AG, Germany. All rights reserved, including graphics and images. No part of this
LIQUID HANDLING TECHNOLOGY. User Manual Bedienungsanleitung
 LIQUID HANDLING TECHNOLOGY User Manual Bedienungsanleitung EC Declaration of Conformity USA Scientific certifies that 7166-0010 ErgoOne FAST has been manufactured and inspected in accordance with the following
Register your instrument! Easypet 3. Operating manual
 N) manual Register your instrument! www.eppendorf.com/myeppendorf Operating manual Copyright 2017 Eppendorf AG, Germany. All rights reserved, including graphics and images. No part of this publication
OPERATIONS MANUAL. Mini Centrifuge Model MCF Certified
 OPERATIONS MANUAL Mini Centrifuge Model MCF-2360 Certified Contents 1. Safety 2 2. Introduction 7 3. Package Contents 7 4. Specifications 8 5. Features 8 6. Parts of the Mini Centrifuge 9 7. Installation
Easypet 3. Operating manual
 Easypet see on Fig. Tab. p. p. 3manual Operating manual Easypet 3 Operating manual 4430 900.019 Copyright 2012 Eppendorf AG, Hamburg. No part of this publication may be reproduced without the prior permission
Instruction Manual. Labnet Spectrafuge 16M Microcentrifuge
 Instruction Manual Labnet Spectrafuge 16M Microcentrifuge Labnet International PO Box 841 Woodbridge, NJ 07095 Phone: 732 417-0700 Fax: 732 417-1750 email: labnet@labnetlink.com Safety Precautions NEVER
3/E3x ual Repeater E3/E3x
 3/E3x ual Repeater E3/E3x N) manual Register your instrument! www.eppendorf.com/myeppendorf Multipette E3/E3x Repeater E3/E3x Operating manual Copyright 2016 Eppendorf AG, Germany. All rights reserved,
N) manual. Register your instrument! Eppendorf Research plus. Operating manual
 manual. Register your instrument! Eppendorf Research plus. Operating manual") earch ual plus N) manual Register your instrument! www.eppendorf.com/myeppendorf Operating manual Copyright 2018 Eppendorf AG, Germany. All rights reserved, including graphics and images. No part of this
earch ual plus N) manual Register your instrument! www.eppendorf.com/myeppendorf Operating manual Copyright 2018 Eppendorf AG, Germany. All rights reserved, including graphics and images. No part of this
Operation Manual Supra R22
 Operation Manual Supra R22 High speed Centrifuge Copyright c 2017 Hanil Scientific Inc. All rights reserved. Contact Us If you have any questions, contact Hanil Scientific Inc. or place of purchase. info@ihanil.com
4 ual Repeater M4. N) manual. Register your instrument! Multipette M4 Repeater M4. Operating manual
 manual. Register your instrument! Multipette M4 Repeater M4. Operating manual") 4 ual Repeater M4 N) manual Register your instrument! www.eppendorf.com/myeppendorf Operating manual Copyright 2018 Eppendorf AG, Germany. All rights reserved, including graphics and images. No part of
4 ual Repeater M4 N) manual Register your instrument! www.eppendorf.com/myeppendorf Operating manual Copyright 2018 Eppendorf AG, Germany. All rights reserved, including graphics and images. No part of
3/E3x ual Repeater E3/E3x
 3/E3x ual Repeater E3/E3x N) manual Register your instrument! www.eppendorf.com/myeppendorf Multipette E3/E3x Repeater E3/E3x Operating manual Copyright 2017 Eppendorf AG, Germany. All rights reserved,
Operating Manual Cellspin
 Operating Manual Cellspin Clinical Centrifuge Date of Purchase Serial No. Place of purchase Copyright 2017 Hanil Scientific Inc. All rights reserved. Contact Us If you have and questions, contact Hanil
XCM12 Mini-Centrifuge
 Multi-speed Digital User Manual v. 1.0 C&A Scientific Disclaimer C & A Scientific owns the copyright of this user manual. No person shall reprint or distribute the contents of this user manual, including
nual k Voltage Stabilizer N) manual New Brunswick Voltage Stabilizer Operating manual
 manual New Brunswick Voltage Stabilizer Operating manual") nual k Voltage Stabilizer N) manual New Brunswick Voltage Stabilizer Operating manual Copyright Copyright 2014 Eppendorf AG, Germany. No part of this publication may be reproduced without the prior permission
nual k Voltage Stabilizer N) manual New Brunswick Voltage Stabilizer Operating manual Copyright Copyright 2014 Eppendorf AG, Germany. No part of this publication may be reproduced without the prior permission
Spectrafuge 24DMicrocentrifuge User Manual C2400 C V C V
 Spectrafuge 24DMicrocentrifuge User Manual C2400 C2400-100V C2400-230V Lit M00013 Rev 3 August 2016 About This Manual This manual is designed to assist you in the optimal usage of your Labnet 24D Microcentrifuge.
It s Your Turn. Eppendorf Centrifuge 5702, 5702 R and 5702 RH
 It s Your Turn Eppendorf Centrifuge 5702, 5702 R and 5702 RH The Eppendorf approach to product development is and has always been about giving you more. More quality, more innovation. All of our centrifuges
Prism Microcentrifuge
 Prism Microcentrifuge User Manual C2400 C2400-100V C2400-230V C2500 C2500-100V C2500-230V Lit M00029 Rev 2 December 2012 Safety Precautions NEVER use the centrifuge in any manner not specified in these
INSTRUCTION MANUAL. CAT Place Table Top Centrifuge
 1 INSTRUCTION MANUAL CAT. 72359-06 6-Place Table Top Centrifuge 2 CONTENTS IMPORTANT SAFETY GUIDELINES PLEASE READ BEFORE USE.. 3 SUPPLIED EQUIPMENT... 5 OPTIONAL ACCESSORIES... 5 SETUP... 5 UNPACKING...
INSTRUCTION MANUAL FOR THE CLINICAL 50 CENTRIFUGE
 INSTRUCTION MANUAL FOR THE CLINICAL 50 CENTRIFUGE 82013-800 January 2006 INDEX PAGE 1. General Information... 2 1.1 Description... 2 1.2 Safety precautions to be observed before operating the centrifuge...
N) manual. Register your instrument! Eppendorf Research plus. Operating manual
 manual. Register your instrument! Eppendorf Research plus. Operating manual") earch ual plus N) manual Register your instrument! www.eppendorf.com/myeppendorf Operating manual Copyright 2017 Eppendorf AG, Germany. All rights reserved, including graphics and images. No part of this
earch ual plus N) manual Register your instrument! www.eppendorf.com/myeppendorf Operating manual Copyright 2017 Eppendorf AG, Germany. All rights reserved, including graphics and images. No part of this
CONTENTS. 3 MAINTENANCE 3.1 Service and Maintenance Maintenance and cleaning Glass breakage Disinfection
 1 PRODUCT DESCRIPTION 1.1 Usage in accordance with safety standards 1.1.1 General Information 1.1.1.1 Hazards and precautions 1.1.1.2 Brief description 1.1.1.3 Safety standards 1.1.1.4 Included items 1.1.1.5
Z100A Clinical Centrifuge
 Z100A Clinical Centrifuge User Manual C0100-A Rev 2 August 2016 About This Manual This manual is designed to assist you in the optimal usage of your Labnet Z100A Clinical Centrifuge. The manual is available
Centrifuge 5415 D / Centrifuge 5415 R
 Centrifuge 5415 D / Centrifuge 5415 R Centrifuge 5415 D / R Tastenkürzel / Shortcuts Task Lid Press Display 5415 R Instruction manual Parameter change during centrifugation closed short > 2 sec Display
anual N) - English MixMate 5353 from serial number 10,000 Service manual - English
 - English MixMate 5353 from serial number 10,000 Service manual - English") al - English ixmate anual N) - English 5353 from serial number 10,000 MixMate 5353 from serial number 10,000 Service manual - English Copyright 2014 Eppendorf AG, Hamburg. All rights reserved, including
al - English ixmate anual N) - English 5353 from serial number 10,000 MixMate 5353 from serial number 10,000 Service manual - English Copyright 2014 Eppendorf AG, Hamburg. All rights reserved, including
Clinispin CT20 User Manual
 Clinispin CT20 User Manual C0060-WOD-230EU Lit M00031 Rev 1 June, 2012 Safety Precautions NEVER NEVER NEVER NEVER NEVER NEVER NEVER NEVER ALWAYS ALWAYS ALWAYS ALWAYS use the centrifuge in any manner not
Frontier TM Centrifuge FC5515 / FC5515R Instruction Manual
 Frontier TM Centrifuge FC555 / FC555R Instruction Manual Front and rear view of the centrifuge FC555 2 3 4 7 5 6 Figure. Front and rear view of the centrifuge FC555R 2 3 7 4 5 6 Figure.2 Centrifuge Lid
SPECTRAFUGE 6C. User Manual C0060 C V
 SPECTRAFUGE 6C User Manual C0060 C0060-230V Lit M00031 Rev 2 August 2016 About This Manual This manual is designed to assist you in the optimal usage of your Labnet Spectrafuge 6C Centrifuge. The manual
3 liter capacity! Reliable Performance. Centrifuge 5804/5804 R and Centrifuge 5810/5810 R
 3 liter capacity! Reliable Performance Centrifuge 5804/5804 R and Centrifuge 5810/5810 R Introducing the Eppendorf 58xx Centrifuge Family Reliable performance The Eppendorf approach to product development
Instruments Centrifugation
 Centrifuges and accessories Eppendorf centrifuges guide Centrifuges Microcentrifuges Application MiniSpin MiniSpin plus 5418 5424 5430 5415 R 5417 R Refrigerated Page 126 126 128 129 131 135 136 Fixed-angle
Operating Instructions CYR52
 BA01300C/07/EN/02.14 71261315 Products Solutions Services Operating Instructions CYR52 Ultrasonic cleaning Document information Warnings The structure, signal words and safety colors of the signs comply
Centrifuge 5415 D / Centrifuge 5415 R
 Centrifuge 5415 D / Centrifuge 5415 R Centrifuge 5415 D / R Tastenkürzel / Shortcuts Task Lid Press Display 5415 R Instruction manual Parameter change during centrifugation closed short > 2 sec Display
materials and workmanship for 2 years. Should the centrifuge require warranty or Phone: or Fax:
 WARRANTY The Drucker Company warranties that this centrifuge is free from defects in materials and workmanship for 2 years. Should the centrifuge require warranty or out-of-warranty service please contact:
NANOPAC-300 & 500 Power Supply. Instruction manual NANOPAC-300 & NANOPAC-500
 NANOPAC-300 & 500 Power Supply Instruction manual NANOPAC-300 & NANOPAC-500 Version 01C Feb 5th, 2014 1 Packing list NANOPAC-300 or 500-1x NANOPAC-300 Power Supply or NANOPAC-500-1x Power Cord - 1x Instruction
Model : LMHS-60 Please read this manual carefully before using the instrument Labnics Equipment
 HIGH SPEED CENTRIFUGES Instruction Manual Model : LMHS-60 Please read this manual carefully before using the instrument Labnics Equipment Before Installation The centrifuge can be damaged if connected
BlueSpin Cryo. (Cat. No. BSD-CRYO)
") BlueLine Instruments for Electrophoresis INSTRUCTION MANUAL BlueSpin Cryo (Cat. No. BSD-CRYO) SERVA Electrophoresis GmbH - Carl-Benz-Str. 7 - D-69115 Heidelberg Phone +49-6221-138400, Fax +49-6221-1384010
BlueLine Instruments for Electrophoresis INSTRUCTION MANUAL BlueSpin Cryo (Cat. No. BSD-CRYO) SERVA Electrophoresis GmbH - Carl-Benz-Str. 7 - D-69115 Heidelberg Phone +49-6221-138400, Fax +49-6221-1384010
Centrifuge 5702 / Centrifuge 5702 R / Centrifuge 5702 RH
 Centrifuge 5702 / Centrifuge 5702 R / Centrifuge 5702 RH Centrifuge 5702 / 5702 R / 5702 RH Tastenkürzel / Shortcuts Task Lid Press Display 5702 Display 5702 R / 5702 RH Instruction manual Parameter change
DM1424 Hematocrit Centrifuge
 DM1424 Hematocrit Centrifuge SCILOGEX, LLC www.scilogex.com Before using centrifuge, please carefully read this user manual for efficient operation and safety. Contents Safety Reminder... 1 1. Specifications...
Overview of the Main Rotors
 210 Sample Handling Centrifuges Overview of the Main Rotors CENTRIFUGES Model Max. capacity Lock Rotor S-4-104 4 x 750 ml aerosol-tight QuickLock Rotor A-4-81 4 x 500 ml aerosol-tight Rotor A-4-62 4 x
Operator's Manual. Storage System. Ultrasound Probe Cabinet. Manufactured by:
 Storage System Ultrasound Probe Cabinet Operator's Manual Manufactured by: CIVCO Medical Solutions 102 First Street South Kalona, IA 52247 USA 319.248.6757 / 800.445.6741 WWW.CIVCO.COM Copyright 2018 All
Instruction Manual for Microlitre Centrifuge Z 160 M
 Instruction Manual for Microlitre Centrifuge Z 160 M Brushless Motor Table of Contents 1. General Information Description Safety Precautions Technical Data Accessories Supplied with Unit Warranty 2. Installation
Centrifuge Operator / Service Manual
 3000 Centrifuge Centrifuge Operator / Service Manual cat.# 26230 & 26231 The Q-sep 3000 centrifuge complies with all requirements of UL standard 3101 20, Can/CSA C22.2 No. 1010.1, and Can/CSA C22.2 No.
Exchange of rollers from the XTS-Mover
 Service documentation for AT901-0050-0550 and AT9011-00x0-0550 Version: Date: 1.0 0.10.017 Table of contents Table of contents 1 Foreword... 5 1.1 Notes on the documentation... 5 1. Documentation issue
N) manual. Register your instrument! Eppendorf Research plus. Operating manual
 manual. Register your instrument! Eppendorf Research plus. Operating manual") search ual plus N) manual Register your instrument! www.eppendorf.com/myeppendorf Operating manual Copyright 2013 Eppendorf AG, Hamburg. No part of this publication may be reproduced without the prior
search ual plus N) manual Register your instrument! www.eppendorf.com/myeppendorf Operating manual Copyright 2013 Eppendorf AG, Hamburg. No part of this publication may be reproduced without the prior
Instruction Manual. Vortex Mixers
 Instruction Manual Vortex Mixers TABLE OF CONTENTS Package Contents............... 1 Warranty............... 1 Installation............... 2 Maintenance & Servicing............... 2 Environmental Conditions...............
Instruction Manual for the Revolutionary Science RS-200 RevSpin Microcentrifuge
 Instruction Manual for the Revolutionary Science RS-200 RevSpin Microcentrifuge REVOLUTIO NARY SCIENCE Manufacturer of Precision Laboratory Equipment Table of Contents Introduction 2 Recommended Safeguards
Toothed belt axis ELGC-TB-KF. Operating instruction [ ]
![Toothed belt axis ELGC-TB-KF. Operating instruction [ ]](/thumbs/83/87984161.jpg "Toothed belt axis ELGC-TB-KF. Operating instruction [ ]") Toothed belt axis ELGC-TB-KF en Operating instruction 8068220 2017-02 [8068222] Original instructions Identification of hazards and instructions on how to prevent them: Danger Immediate dangers which can
Toothed belt axis ELGC-TB-KF en Operating instruction 8068220 2017-02 [8068222] Original instructions Identification of hazards and instructions on how to prevent them: Danger Immediate dangers which can
High Speed Micro-Centrifuge User manual
 High Speed Micro-Centrifuge User manual 400.003.205 Centrifuge Supplied With Rotor 400.003.221 (24 x 1.5ml/2ml) 400.003.210 Refrigerated with Rotor 400.003.221 24x1.5ml/2ml 400.003.220 Rotor 5ml x 18 400.003.221
1580R User s Manual. Multi-Purpose, High Speed Centrifuge. Gyrozen Co., Ltd.
 Multi-Purpose, High Speed Centrifuge 1580R User s Manual Gyrozen Co., Ltd. B Station, 30-12 Gyeryong-ro 141-gil, Yuseoung-gu, Daejeon 305-301, Korea Tel: +82-42-719-8200 Fax: +82-42-826-9848 www.gyrozen.com
Instruction Manual. Labnet Spectrafuge 7M Microcentrifuge
 Instruction Manual Labnet Spectrafuge 7M Microcentrifuge Labnet International PO Box 841 Woodbridge, NJ 07095 Phone: 732 417-0700 Fax: 732 417-1750 email: labnet@labnetlink.com IMPORTANT NOTICE The use
D3024 & D3024R High Speed (Refrigerated) Micro-Centrifuge DLAB Laboratory Instruments Limited
 Micro-Centrifuge DLAB Laboratory Instruments Limited") D3024 & D3024R High Speed (Refrigerated) Micro-Centrifuge DLAB Laboratory Instruments Limited Before using centrifuge, please carefully read this user manual for its efficient operation and safety. USER
D3024 & D3024R High Speed (Refrigerated) Micro-Centrifuge DLAB Laboratory Instruments Limited Before using centrifuge, please carefully read this user manual for its efficient operation and safety. USER
Bio Lion Table Top Centrifuge XC-L5
 Bio Lion Table Top Centrifuge XC-L5 Operation Manual Table of contents Section Specification Page 1 Pictures Page 2-3 Starting Safety information Page 4 Set up Page 5-7 Operation Page 7-8 Troubleshooting
User s Manual Power Supply IM E. 5th Edition
 User s Manual 700938 Power Supply 5th Edition Thank you for purchasing the 700938 Power Supply. This user s manual contains useful information about the instrument s functions and operating procedures
Operating and Installation Instructions Diaphragm Vacuum Pumps and Compressors
 Operating and Installation Instructions Diaphragm Vacuum Pumps and Compressors Type range: UN813.3ANI UN813.4ANI UN813.3ANDCB UN813.4ANDCB UN813.5ANI Fig. 1: UN813.3ANI Fig. 2: UN813.4ANI You have selected
Instruction Manual for the Revolutionary Science RS-102 RevSpin Microcentrifuge
 Instruction Manual for the Revolutionary Science RS-102 RevSpin Microcentrifuge REVOLUTIO NARY SCIENCE Manufacturer of Precision Laboratory Equipment Table of Contents Introduction 2 Recommended Safeguards
k ual I24/24R Benchtop Incubator Shaker N) manual New Brunswick I24/24R Benchtop Incubator Shaker Operating manual
 manual New Brunswick I24/24R Benchtop Incubator Shaker Operating manual") k ual I24/24R Benchtop Incubator Shaker N) manual New Brunswick I24/24R Benchtop Incubator Shaker Operating manual Copyright 2014 Eppendorf AG, Germany. No part of this publication may be reproduced without
k ual I24/24R Benchtop Incubator Shaker N) manual New Brunswick I24/24R Benchtop Incubator Shaker Operating manual Copyright 2014 Eppendorf AG, Germany. No part of this publication may be reproduced without
Centrifuge 5804 / 5804 R / 5810 / 5810 R. Instruction Manual Mode d'emploi succinct Instrucciones breves
 Centrifuge 5804 / 5804 R / 5810 / 5810 R Instruction Manual Mode d'emploi succinct Instrucciones breves Centrifuge 5804 / 5804 R / 5810 / 5810 R Contents Centrifuge 5804 / 5804 R / 5810 / 5810 R Operating
New: 3 liter capacity! Reliable Performance. Centrifuge 5804/5804 R and Centrifuge 5810/5810 R
 New: 3 liter capacity! Reliable Performance Centrifuge 5804/5804 R and Centrifuge 5810/5810 R Introducing the Eppendorf 58xx Centrifuge Family Reliable performance The Eppendorf approach to product development
Type Operating Instructions. Bedienungsanleitung Manuel d utilisation. 2/2-Way Solenoid Valve 2/2-Wege-Magnetventil Électrovanne à 2/2 voies
 Type 5282 2/2-Way Solenoid Valve 2/2-Wege-Magnetventil Électrovanne à 2/2 voies Operating Instructions Bedienungsanleitung Manuel d utilisation 1 OPERATING INSTRUCTIONS The operating instructions contain
Valor 1000W Series Instruction Manual. Serie Valor 1000W Manual de Instrucciones. Série Valor 1000W Guide de I utilisateur
 Valor 1000W Series Instruction Manual Serie Valor 1000W Manual de Instrucciones Série Valor 1000W Guide de I utilisateur Serie Valor 1000W Bedienungsanleitung Serie Valor 1000W Manuale d instruzioni OHAUS
Bio Lion Table Top Centrifuge XC-H165
 Bio Lion Table Top Centrifuge XC-H165 Operation Manual Table of contents Section Specification Page 1 Pictures Page 2-3 Starting Safety information Page 4 Set up Page 5-7 Operation Page 7-8 Troubleshooting
Spindle axis ELGC-BS-KF. Operating instructions [ ]
![Spindle axis ELGC-BS-KF. Operating instructions [ ]](/thumbs/87/97202885.jpg "Spindle axis ELGC-BS-KF. Operating instructions [ ]") Spindle axis ELGC-BS-KF en Operating instructions 8067243 2017-01 [8067245] Original instructions Identification of hazards and instructions on how to prevent them: Danger Immediate dangers which can lead
Spindle axis ELGC-BS-KF en Operating instructions 8067243 2017-01 [8067245] Original instructions Identification of hazards and instructions on how to prevent them: Danger Immediate dangers which can lead
Assembly and Maintenance Manual Type ASNU
 Assembly and Maintenance Manual Type ASNU Hatschekstr.36 69126 Heidelberg Germany Tel +49(0)6221 30470 Fax +49(0)6221 304731 info@stieber.de www.stieber.de Date of issue: 30.05.2018 GB Revision: 0 U:\EngUsers\!ProduktDoku\1AAA_Einbauerklaerung_Wartungsanleitung_Konformitaetserklaerung\1AAA_Wartungsanleitungen\Orginal_Worddatei\_ASNU.docx
624R User s Manual. Compact Bench-Top Refrigerated Centrifuge
 Compact Bench-Top Refrigerated Centrifuge 624R User s Manual Manufacturer: GYROZEN Co., Ltd. 30-12 Gyeryong-ro 141beon-gil, Yuseong-gu, Daejeon 34187, Korea Tel: +82-42-719-8200 Fax: +82-42-826-9848 info@gyrozen.com
USER MANUAL. D2012 High Speed Mini Micro-Centrifuge SCILOGEX, LLC.
 USER MANUAL D2012 High Speed Mini Micro-Centrifuge SCILOGEX, LLC www.scilogex.com Before using centrifuge, please carefully read this user manual for efficient operation and safety. USER MANUAL Contents
FREQUENCY INVERTER INSTALLATION & USER GUIDE
 En FREQUENCY INVERTER INSTALLATION & USER GUIDE Thank you for purchasing our frequency inverter. Please read the manual carefully before installing or using it and keep it for future reference after installation.
Type Operating Instructions. Bedienungsanleitung Manuel d utilisation
 Globe control valve, pneumatically operated Actuator sizes 40 mm - 125 mm, Nominal diameter DN10-65 Kolbengesteuertes Geradsitzventil Antriebsgrößen 40 mm - 125 mm, Nennweiten DN10-65 Vanne à siège droit
OPERATION & MAINTENANCE MANUAL FOR SCEN-206 LED & MULTI-FUNCTION TYPE CENTRIFUGE PLEASE READ THIS MANUAL CAREFULLY BEFORE OPERATION.
 OPERATION & MAINTENANCE MANUAL FOR SCEN-206 LED & MULTI-FUNCTION TYPE CENTRIFUGE PLEASE READ THIS MANUAL CAREFULLY BEFORE OPERATION. M.R.C.LTD. Hagavish 3 st. Israel 58817 Tel: 972 3 5595252, Fax: 972
BT403. A Geno Technology, Inc. (USA) brand name. BT-300 Power Supply. Cat. No. BT
 brand name. BT-300 Power Supply. Cat. No. BT") BT403 A Geno Technology, Inc. (USA) brand name BT-300 Power Supply Cat. No. BT403 1-800-628-7730 1-314-991-6034 info@btlabsystems.com WARNING... 3 SAFETY INFORMATION... 3 ENVIRONMENTAL CONDITIONS... 4
BT403 A Geno Technology, Inc. (USA) brand name BT-300 Power Supply Cat. No. BT403 1-800-628-7730 1-314-991-6034 info@btlabsystems.com WARNING... 3 SAFETY INFORMATION... 3 ENVIRONMENTAL CONDITIONS... 4
Instruction Manual for Compact Centrifuge Z 206 A
 Instruction Manual for Compact Centrifuge Z 206 A Page 1 of 24 INSTRUCTION MANUAL Z 206 A HERMLE Labortechnik GmbH CONTENTS 1 PRODUCT DESCRIPTION 1.1 Usage in accordance with safety standards 1.1.1 General
3. Operating instructions: Minor 200
 1. Technical specifications 3. Operating instructions: Minor 200 Copyright 2015 by Endecotts Ltd. 13 1. Setting up Technical specifications SIEVE SHAKER MODEL: Minor 200 General Information The Minor 200
1236R User s Manual. Multi-Purpose, High Speed Centrifuge
 Multi-Purpose, High Speed Centrifuge 1236R User s Manual Manufacturer: GYROZEN Co., Ltd. 30-12 Gyeryong-ro 141beon-gil, Yuseong-gu, Daejeon, 34187, Korea Tel: +82-42-719-8200 Fax: +82-42-826-9848 info@gyrozen.com
Operation Manual Cole-Parmer MPR16 Multipurpose Refrigerated and MP16 Multipurpose Ambient Centrifuges Models , -25, -50, -55
 Operation Manual Cole-Parmer MPR16 Multipurpose Refrigerated and MP16 Multipurpose Ambient Centrifuges Models 17406-20, -25, -50, -55 CE 1065z76_MAN_Rev.1 2016 Cole-Parmer Instrument Company, LLC Table
USER MANUAL. D3024 & D3024R High Speed (Refrigerated) Micro-Centrifuge SCILOGEX, LLC.
 Micro-Centrifuge SCILOGEX, LLC.") USER MANUAL D3024 & D3024R High Speed (Refrigerated) Micro-Centrifuge SCILOGEX, LLC Before using centrifuge, please carefully read this user manual for efficient operation and safety. USER MANUAL Contents
USER MANUAL D3024 & D3024R High Speed (Refrigerated) Micro-Centrifuge SCILOGEX, LLC Before using centrifuge, please carefully read this user manual for efficient operation and safety. USER MANUAL Contents
Defender 3000 Series Base Instruction Manual
 Defender 3000 Series Base Instruction Manual 99 Washington Street Melrose, MA 02176 Phone 781-665-1400 Toll Free 1-800-517-8431 Visit us at www.testequipmentdepot.com Compliance This product conforms to
Type Operating Instructions. Bedienungsanleitung Manuel d utilisation. 2/2-Way Solenoid Valve 2/2-Wege-Magnetventil Électrovanne à 2/2 voies
 Type 5282 2/2-Way Solenoid Valve 2/2-Wege-Magnetventil Électrovanne à 2/2 voies Operating Instructions Bedienungsanleitung Manuel d utilisation Contents 1 Operating Instructions... 2 2 Authorized use...
Installation, Operating & Maintenance Instructions. UHV gate valve with pneumatic actuator. Series 108 DN mm (I. D. 2½ 8 )
") Installation, Operating & Maintenance Instructions UHV gate valve with pneumatic actuator Series 108 DN 63 200 mm (I. D. 2½ 8 ) This manual is valid for the following product ordering numbers: 108.. -.
Installation, Operating & Maintenance Instructions UHV gate valve with pneumatic actuator Series 108 DN 63 200 mm (I. D. 2½ 8 ) This manual is valid for the following product ordering numbers: 108.. -.
D2012 & D2012 plus High Speed Mini Centrifuge
 D2012 & D2012 plus High Speed Mini Centrifuge DLAB Laboratory Instruments Limited USER MANUAL Before using centrifuge, please carefully read this user manual for its efficient operation and safety. Contents
Operating Manual. Multi Purpose Centrifuge Combi - 514R
 Operating Manual Multi Purpose Centrifuge Combi - 514R Multi Purpose Centrifuge Combi-514R Fig.1 1 2 3 4 5 1 Lid 2 Rotor 3 Control Panel 4 Display Panel 5 Emergency Lid Release 3 Contents 1 Introduction...
PrioVino Premier. Translation of Original Operating Instructions. Status: August First edition January 2018 / PrioVino GmbH
 PrioVino Premier Translation of Original Operating Instructions Status: August 2018 First edition January 2018 / PrioVino GmbH Reprint even in extracts only upon written permission by PrioVino GmbH (ISO
EPS 16 ATEX 1121 X, IECEx EPS X Solenoid coil Type 06xx Magnetspule Typ 06xx Bobine magnétique Type 06xx. Operating Instructions
 , IECEx EPS 16.0053X Solenoid coil Type 06xx Magnetspule Typ 06xx Bobine magnétique Type 06xx Device with II 2G/D Ex approval Geräte mit II 2G/D Ex Zulassung Appareils avec mode de protection II 2G/D Ex
Universal Centrifuge 320/320R
 Pole Ideal Tajhiz Co. Operating Instructions Universal Centrifuge 3/3R www.medpit.com Cat No. 921 Contents 1 Use according to specification 2 Residual risks 3 Technical specifications 4 Notes on safety
Switching DC Power Supply
 99 Washington Street Melrose, MA 02176 Phone 781-665-1400 Toll Free 1-800-517-8431 Visit us at www.testequipmentdepot.com Model 1693, 1694 Switching DC Power Supply INSTRUCTION MANUAL 1 Safety Summary
Assembly and Maintenance Manual Type AS
 Assembly and Maintenance Manual Type AS Hatschekstr.36 69126 Heidelberg Germany Tel +49(0)6221 30470 Fax +49(0)6221 304731 info@stieber.de www.stieber.de Date of issue: 30.05.2018 GB Revision: 0 U:\EngUsers\!ProduktDoku\1AAA_Einbauerklaerung_Wartungsanleitung_Konformitaetserklaerung\1AAA_Wartungsanleitungen\Orginal_Worddatei\_AS.docx
Orbital Shaker-Incubator ES-80
 Orbital Shaker-Incubator For versions: V.2GD V.2GE Contents 1 Safety...3 2 General Information...4 3 Getting Started...5 4 Operation of...6 5 Specifications...8 6 Guarantee and service...9 7 Declaration
Centrifuge 5804 / 5804 R / 5810 / 5810 R
 Centrifuge 5804 / 5804 R / 5810 / 5810 R Centrifuge 5804 / 5804 R / 5810 / 5810 R Inhalt / Contents Centrifuge 5804 / 5804 R / 5810 / 5810 R Bedienungsanleitung.....................................................................
UVR-Mi UV-air flow Cleaner - Recirculator
 UVR-Mi UV-air flow Cleaner - Recirculator Medical Biological Research & Technologies Operating Manual Certificate for versions: V.2AA V.2AB 2 Contents 1. Safety Precautions 2. General Information 3. Getting
MIKRO R HETTICH DATA SHEET MICROLITRE CENTRIFUGES FASTER RESULTS IN MOLECULAR BIOLOGY FEATURES HIGHLIGHTS
 HETTICH DATA SHEET MICROLITRE CENTRIFUGES MIKRO 200 200 R FASTER RESULTS IN MOLECULAR BIOLOGY The MIKRO 200 are amongst the highest-speed microliter centrifuges in their class. s are designed to spin microliter
Mini slide EGSC-BS-KF. Operating instructions b [ ]
![Mini slide EGSC-BS-KF. Operating instructions b [ ]](/thumbs/87/95253800.jpg "Mini slide EGSC-BS-KF. Operating instructions b [ ]") Mini slide EGSC-BS-KF en Operating instructions 8081968 2017-11b [8081970] Translation of the original instructions EGSC-BS-KF-EN Identification of hazards and instructions on how to prevent them: Danger
Mini slide EGSC-BS-KF en Operating instructions 8081968 2017-11b [8081970] Translation of the original instructions EGSC-BS-KF-EN Identification of hazards and instructions on how to prevent them: Danger
FastPrep FP120 Cell Disrupter INSTRUCTION MANUAL
 FastPrep FP120 Cell Disrupter INSTRUCTION MANUAL Applies to FP100, FP120, and FP220 Models Qbiogene, Inc. (North America) 2251 Rutherford Road Carlsbad, CA 92008 Phone (800) 424-6101 Fax (760) 918-9313
Swing Piston Compressors and Vacuum Pumps
 Swing Piston Compressors and Vacuum Pumps NPK 018 AC Pressure NPK 018 DC Pressure NPK 018 AC Vacuum NPK 018 DC Vacuum Operating and Installation Instructions Read and observe these Operating and Installation
UV-cabinet DNA/RNA UVC/T-M-AR
 UV-cabinet DNA/RNA For version V.4GD Contents 1 Safety...4 2 General Information...5 3 Getting Started...6 4 Operation of...7 5 Specifications...9 6 Guarantee and service...10 7 Declaration of Conformity...11
BT508/BT510/BT520/BT521 Battery Analyzer Safety Sheet
 BT508/BT510/BT520/BT521 Battery Analyzer Safety Sheet Go to www.fluke.com to register your product, download manuals, and find more information. A Warning identifies conditions and procedures that are
EPS 16 ATEX 1072 X, IECEx EPS X. Operating Instructions. Solenoid coil Type AC19 Magnetspule Typ AC19 Bobine magnétique Type AC19
 , IECEx EPS 16.0030X Solenoid coil Type AC19 Magnetspule Typ AC19 Bobine magnétique Type AC19 Device with II 2G/D Ex approval Geräte mit II 2G/D Ex Zulassung Appareils avec mode de protection II 2G/D Ex
Installation, Operating and Maintenance Instructions Retractable Door / Art.-Nr.:
 Installation, Operating and Maintenance Instructions Retractable Door 06.2008 / Art.-Nr.: 1 818 024 ENGLISH CONTENTS PAGE 1 SAFETY REQUIREMENTS 3 1.1 Symbols and key words used 3 1.2 Designated use 3 1.3
KeContact P20. User manual
 KeContact P20 User manual Comments to this manual In this manual you will find warnings against possible dangerous situations. The used symbols apply to the following meanings:!! WARNING! Indicates a potentially
Eppendorf Easypet. Operating manual
 Eppendorf Easypet Operating manual 4421 900.090 Copyright 2010 Eppendorf AG, Hamburg. No part of this publication may be reproduced without the prior permission of the copyright owner. eppendorf and Eppendorf