Ford 7.3L Powerstroke Regulated Fuel Return
|
|
|
- Marianna Jenkins
- 6 years ago
- Views:
Transcription
1 Ford 7.3L Powerstroke Regulated Fuel Return
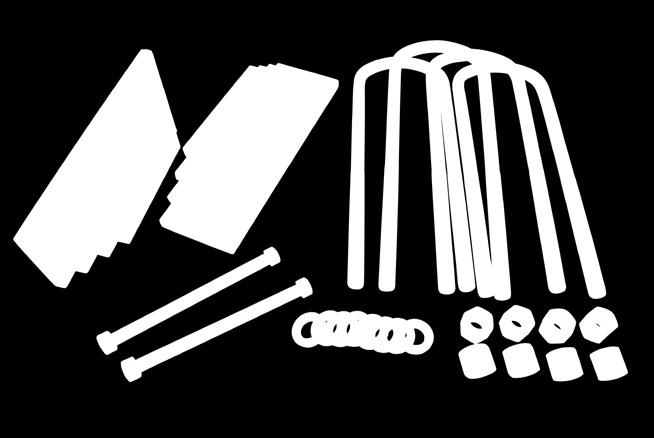
 Filter Block Mounting Bracket Filter Block w/ Three Fittings Filter Fuel Regulator w/ Three Fittings T-Clips 00 PSI Fuel Pressure Gauge /8 NPT-6 450 JIC Fitting (Larger Threads) /8 NPT-6 00 JIC")
 Protective Soft Line Cover /8 NPT Plug Tool I J K L M R N O P Q Note: When tightening all of the soft lines nuts, tighten until a distinct increase in the torque is noticed.")
2 7.3L Regulated Fuel Return A B C D E PART# A B C D E F G H I J K L M N O P Q R S S PACKING LIST: QTY F G H Description Driver Front Soft Line (5.5 ) Passenger Front Soft Line (4.5 ) Filter Block Mounting Bracket Filter Block w/ Three Fittings Filter Fuel Regulator w/ Three Fittings T-Clips 00 PSI Fuel Pressure Gauge /8 NPT JIC Fitting (Larger Threads) /8 NPT-6 00 JIC Fitting (Larger Threads) 3/8 Hex Bolts and Lock Washers M0 Flare Nuts Fuel Regulator Bracket Driver Rear Soft Line (9.5 ) Fuel Supply Soft Line Fuel Return Soft Line Passenger Rear Soft Line (20.5 ) Protective Soft Line Cover /8 NPT Plug Tool I J K L M R N O P Q Note: When tightening all of the soft lines nuts, tighten until a distinct increase in the torque is noticed. Continue tightening an additional /6 of a turn. Loosen the nut one turn then re-tighten it until a distinct increase is noticed once again. Continue tightening an additional /6-/3 of a turn. Recommended Tools: 3/8 Quick Disconnect Tool /2 Breaker Bar Deep Sockets: 0,, 3, 5mm Combination Wrenches: 8, 3, 4, 6, 9mm 9/6, /2", /6 Read all instructions prior to install. Note: Prior to installation, please compare the parts that you have received with the bill of materials provided on this page to assure that you have all the parts necessary for the installation.


3 DIAGRAM A (FRONT SOFT LINES) driver side of fuel filter out passenger side fuel filter out driver side of fuel filter in passenger front fuel port on motor driver front fuel port on motor DIAGRAM B (LINE ROUTING FRONT VIEW) Stainless lines are highlighted for visual assistance.
")
4 DIAGRAM C (REAR HARD AND SOFT LINES) Smaller quick connect (fuel Return) passenger rear fuel port on motor driver rear fuel port on motor passenger side fuel regulator driver side of fuel regulator bottom of fuel regulator DIAGRAM D (LINE ROUTING REAR VIEW)


5 ! CAUTION!!! Never work on a hot vehicle. Serious injury in the form of burns can result if the vehicle has been in use. Allow vehicle to cool prior to installation. Always wear eye protection when working on or under any vehicle. Note: The installation of the regulated fuel return will require a considerable amount of time. We estimate about 5-8 hours installation time. We highly recommend reading through the instructions thoroughly before starting the installation. Take proper precautions for spilt fuel during the installation. Step : Disconnect batteries. Step 2: Using a 3mm deep socket, remove the plastic engine cover. (Image ) Step 3: Using a /2 breaker bar, remove the accessory/fan belt. Step 4: Drain fuel filter bowl by opening the yellow drain valve located on the passenger rear of the filter bowl. (Image 2) Note: The image has the fuel filter cap removed. The fuel will drain out of a hard line under the motor behind the lower alternator. It is recommended to collect all of the fuel to minimize risk of fire. Image 2.5 x.6376 Image Image 2 Step 5: Remove the cap and filter from the filter bowl to ensure all of the fuel has been drained out. Step 6: Using a 6mm wrench, disconnect the fuel return line. Then using a 9mm wrench, disconnect the fuel supply line. (Image 3) Image 3

 Step 8: Carefully disconnect the two air vacuum lines; one is circled in image five. The other goes to the intake tube.")

6 Step 7: Using a 9/6 wrench, disconnect the fuel lines on the passenger side of the fuel bowl. Then using a 3mm wrench, loosen the two bolts securing the fuel filter bowl to the engine. The bolts are located in the front the engine. Disconnect the electrical connector and remove the fuel bowl. (Image 4) Step 8: Carefully disconnect the two air vacuum lines; one is circled in image five. The other goes to the intake tube. (Image 5) Intake side of Turbo Image 4 Image 5 Step 9: Using a 8mm wrench, remove the PCV mount bolts. Then remove the air intake tubes. (Image 6) Image 6 Step 0: Using a mm deep socket, loosen and turn the passenger side charge pipe up and out of the way. It is recommended to plug the hole with a clean rag to keep debris out. (Image 7) Image 7


 Step 4: Using a 3mm wrench and a quick connect tool, remove the bolt securing the fuel")
7 Step : Using a 0mm wrench, disconnect the alternator wire. Then use a 3mm socket to remove the alternator secured by three bolts. (Image 8) Step 2: Cut the zip tie securing the radiator hose in place on the driver side. Then using a 3mm socket, remove the four bolts securing the alternator bracket to the motor. (Image 9) Image 8 Step 3: Remove the two electrical connectors to the air conditioner pump. Then using a 0mm socket, remove the four bolts securing the pump to the motor. Move the pump up and out of the way. (Image 0) Step 4: Using a 3mm wrench and a quick connect tool, remove the bolt securing the fuel supply/return hard lines on the driver front of the motor. Then disconnect the hard lines from the quick connect fittings and remove. (Image ) Image 9 Image 0 Image


8 Step 5: Using 5/8 combination wrench and provided NPT plug tool, remove the two /8 NPT plugs. The plugs are located on the top of the motor; one at the driver rear behind the turbo and one at the passenger front to the right of the AC pump bracket. (Image 2) Step 6: Using a 9/6 and /2 wrench, disconnect and remove the hard lines that supply the engine with fuel. Also remove the check valves on the motor that the hard line connected to. The fuel bowl drain line may be left on the motor. (Image 3) Note: Many of the images have parts such as the charge pipes and electronic components removed. This is for visual assistance of the installation instructions. Step 7: Using a 3mm combination wrench and 0mm deep socket, loosen the Up-pipes going to the turbo by loosening the clamps bolted to the exhaust manifolds. Then using a mm socket, loosen the V-Band Clamp so that the up pipes can be tipped back against the fire wall. (Image 4) Step 8: Install the angled 450 /8 NPT-6 JIC fitting to the driver rear fuel port. Tighten the fitting so that the male flare connection is pointing up and slightly foward so the braided line can be connected to it. (Image 5) Image 2 Image 3 Image 4 Image 5
 Step 20: Install straight 00 /8 NPT-6 JIC fitting and braided line to the driver front fuel port.")


 Step 23: Install the passenger rear soft line to the JIC fitting previously installed to the passenger rear fuel port.")
9 Step 9: Install the straight 00 /8 NPT-6 JIC fitting to the passsenger rear fuel port. (Image 6) Step 20: Install straight 00 /8 NPT-6 JIC fitting and braided line to the driver front fuel port. (Image 7 and Diagrams A&B) Step 2: Install the angled 450 /8 NPT-6 JIC fitting to the passenger front fuel port of the motor. Tighten the fitting so that the male flare connection is pointing up so the braided line can be connected to it. Also connect the stainless braided line to the fitting.(image 8 and Diagrams A&B) Warning: The stainles braided line is very abrasive. We recommend covering it all with the provided protective loom. Image 6 Image 7 Step 22: Install the driver rear soft line to the JIC fitting previously installed to the driver rear fuel port. (See Diagram C&D) Step 23: Install the passenger rear soft line to the JIC fitting previously installed to the passenger rear fuel port. (See Diagram C&D) Image 8 Note: The braided line will be routed under the charge pipes. Step24: Using the supplied 3/8 bolts and lock washers, mount the filter block to the filter bracket. (Image 9) Image 9


 Note: Do not install the fuel pressure gauge until step 3 is complete.")


10 Step 25: Using the supplied M0 nuts and 5mm socket, mount the filter bracket with the filter block to the factory fuel bowl mounting bolts toward the front of the engine. (Image 8) Step 26: Place the stainless braided supply line down through the passageway on the motor. This is where the factory supply and return hard lines ran through. Connect the 900 flare connection to the in port on the sinister fuel filter block. (Circled In Image 8) Note: Do not install the fuel pressure gauge until step 3 is complete. Step 28: Re-install the alternator bracket to the motor with the four factory bolts. Also mount the alternator only using one mounting bolt on the driver side to hold it in place. Image 8 Step 27: Connect the driver front braided line to the filter block making sure the 450 fitting is curving toward the front of the motor. Position the line so that it curves around as shown in diagram B. Tighten both fittings on the line while keeping it oriented in the correct position. Step 29: Using the remaining two alternator bolts. Install the fuel regulator and bracket onto the alternator. (Image 20) Image 20 Step 30: Place the stainless braided fuel return line down along the supply line. Connect the flare fitting to the bottom of the regulator. (Image 2) Image 2

 The larger connection goes to the blue factory line. The smaller connection goes to the grey factory line.")

 Image 23 Note: We recommend a petroleum based lubricant be used for the quick connect fittings.")
11 Step 3: Connect the stainless braided lines coming from the rear fuel ports and connect them to the fittings on the side of the regulator. Also install the fuel pressure gauge onto the regulator. (See Diagram D) Step 32: Connect the stainless braided lines coming off the front fuel ports and connect them to the filter block; the ports are marked OUT. (See Diagram B) The larger connection goes to the blue factory line. The smaller connection goes to the grey factory line. Image 22 Supply Line Return Line Step 33: Lubricate and connect the quick connect fittings that were previously ran to the driver bottom of the motor. The new lines will connect to the fittings that the factory hard lines were removed from. Make sure they are connected properly and the keepers are clipped in place. (Image 22) Image 23 Note: We recommend a petroleum based lubricant be used for the quick connect fittings. Step 34: Prefill the supplied fuel filter with diesel fuel, and install the filter onto the filter block. (Image 23) Image 24 Note: The bracket for the filter block has a locking hinge for easy filter installation and replacement. Tighten the allen bolt to lock the hinge in place. Step 35: Install the oil filled fuel pressure gauge onto the front of the fuel pressure regulator. (Image 24)

12 Step 36: Double check all of your fuel lines are properly tightened. Step 37: Re-install the removed parts following steps -2 in reverse order. Disregard steps 4-7 as these parts will no longer be necessary. Step 38: On top of the fuel regulator, loosen the adjustment screw until there is no spring tension, then tighten it two or three turns. (Image 25) Warning: Do not crank the motor until step 4 is complete. Step 39: While checking for leaks, purge the fuel line by having someone turn the key to the on position for ten seconds then turn the key off. Repeat this process until you don t hear any fuel in the system. Warning: Cycling the fuel with a glow plug out may overload the wiring harness. Step 40: Set the fuel pressure to 65-70psi by tightening the adjustment screw while someone turns the key on and off as in the previous step. Be sure to tighten the locking nut after fuel pressure is set. Step 4: Check and adjust fuel pressure with the engine at operating temp. Your Sinister regulated fuel return is now complete. Image 25 Warning: Due to the harsh enviroment of the engine bay, we ask that the fuel pressure gauge only be used for temporary pressure checks and adjustments. Because of the engine bay conditions, Sinister Diesel cannot warranty pressure gauge malfunctions. We recommend the installation of an in cab fuel pressure gauge also available at Sinister Diesel. Be sure to check the system after the first couple drives to ensure there are no fuel leaks. Also the braided stainless soft lines are highly abrasive. Please cover any areas with the supplied wire loom that may come in contact with any hoses or wires.


13 Sinister Apparel


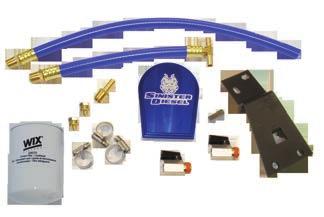

14 Coolant Filter Kit Oil Fill Cap Leveling Kit Fuel Tank Sump
Ford 7.3L Powerstroke Regulated Fuel Return
 Ford 7.3L Powerstroke Regulated Fuel Return ! WARNING REGARDING EMISSIONS LAWS Not legal for sale or use on pollution-controlled motor vehicles anywhere in the United States. Legal ONLY for off-road competition
Ford 6.0L Powerstoke Regulated Fuel Return
 Ford 6.0L Powerstoke Regulated Fuel Return ! WARNING REGARDING EMISSIONS LAWS Not legal for sale or use on pollution-controlled motor vehicles anywhere in the United States. Legal ONLY for off-road competition
DURAMAX LML EGR DELETE
 2011-2012 DURAMAX LML EGR DELETE Sinister Diesel EGR Delete Kit A B C D E F G H PACKING LIST: QTY. A B C D E F G H QTY. 1 4 1 1 1 3 1 4 Description Blue Coolant Hose M8 x 25 Hex Head Bolts Exhaust Block
Powerstroke EGR Delete A B C
 20-203 6.7 Powerstroke EGR Delete A B C D E F G H I J K Part # A B C D E F G H I J K PACKING LIST: QTY. 3 5 2 Description Sensor Bracket Exhaust Blockoff Plate Straights Barbed Brass Fitting 39 5/8 Coolant
6.7L Cummins EGR Delete
 6.7L Cummins EGR Delete H I A B E C D F J K G L PACKING LIST: Part# A B C D E F G H I J K L QTY. 4 Description Coolant Hose Coolant Hose Connector M0 Flange Nut 5/6 Bolts, Nuts, and Flat Washers /4-0 Bolt,
DURAMAX LMM EGR DELETE
 007.5-010 DURAMAX LMM EGR DELETE Duramax LMM EGR Delete B K I J F D G H A C PACKING LIST: E Part # A B C D E F G H I J K QTY. 1 1 1 1 Description Billet Intake Block Off Plate with O-ring Exhaust Block
Dodge Cummins Bypass Oil Filter
 2006-2007 Dodge Cummins Bypass Oil Filter ! DISCLAIMER ) By installing this product onto your vehicle, you assume all risk and liability associated with its use. 2) It is your responsibility to make sure
Ford 7.3L SuperDuty Cold Air Intake
 999.5-2003 Ford 7.3L SuperDuty Cold Air Intake ! DISCLAIMER ) By installing this product onto your vehicle, you assume all risk and liability associated with its use. 2) It is your responsibility to make
Duramax LMM EGR Delete With Intake Tube
 Duramax LMM EGR Delete With Intake Tube PACKING LIST: QTY. 4 2 2 2 Description Intake Charge Pipe w/ O-Ring M8 Flange Nut M8x25 Flange Hex Bolt M0x20 Hex Head Bolts M8x25 Socket Head Bolts M8x20 Hex Head
EXTERNAL OIL FILTER SYSTEM WITH COOLANT FILTER KIT
 EXTERNAL OIL FILTER SYSTEM WITH COOLANT FILTER KIT External Oil Filter with Coolant Filter Kit PACKING LIST: QTY. 4 4 Description Oil Filter Coolant Filter Small Brass 90 Fitting Large Brass 90 Fitting
6.4L EGR Delete With Intake Elbow
 6.4L EGR Delete With Intake Elbow J I E C B F D G H A Part# A B C D E F G H I J PACKING LIST: QTY. 2 4 2 4 2 Description Exhaust Block-Off Plate Exhaust Gasket Coolant Line Plugs Brass Barbed Hose Connector
INSTALLATION GUIDE: EGR Delete Kit Ford 6.7L Powerstroke`
 INSTALLATION GUIDE: EGR Delete Kit 20 203 Ford 6.7L Powerstroke` ! Not legal for sale or use on pollution-controlled motor vehicles anywhere in the United States. Legal ONLY for off-road competition racing
DURAMAX LBZ EGR DELETE
 006-007.5 DURAMAX LBZ EGR DELETE ! WARNING REGARDING EMISSIONS LAWS Not legal for sale or use on pollution-controlled motor vehicles anywhere in the United States. Legal ONLY for off-road competition racing
L CUMMINS COOLANT FILTER KIT
 07.5-12 6.7L CUMMINS COOLANT FILTER KIT ! DISCLAIMER 1) By installing this product onto your vehicle, you assume all risk and liability associated with its use. 2) It is your responsibility to make sure
Dodge 5.9L Cummins Coolant Filter Kit
 2003-2007 Dodge 5.9L Cummins Coolant Filter Kit ! DISCLAIMER ) By installing this product onto your vehicle, you assume all risk and liability associated with its use. 2) It is your responsibility to make
Forbidden Diesel Performance Ford 6.7L Powerstroke EGR Delete Instructions 6.7L EGR DELETE BY FORBIDDEN DIESEL PERFORMANCE. Page 1
 6.7L EGR DELETE BY FORBIDDEN DIESEL PERFORMANCE Page 1 WARNING REGARDING EMISSIONS LAWS Not legal for sale or use on pollution-controlled motor vehicles anywhere in the United States. Legal ONLY for off-road
Ford 6.0L Regulated Return Kit
 2003-2007 Ford 6.0L Regulated Return Kit A. Passenger Rear Return B. Line (Longer w/ 1-90 fitting) C. Driver Rear Return Line (Shorter w/ 1-90 fitting) D. Fuel Return Line (2 female fittings) E. Passenger
FRS/BRZ Air Oil Separator (AOS) Installation Manual
 Installation Manual") FRS/BRZ Air Oil Separator (AOS) Installation Manual Eric Hazen Rev. 2 Overview: Detailed instructions on installing the AOS for the FRS/BRZ/GT86. Difficulty: Beginner Time required: 1-3 hours depending
FRS/BRZ Air Oil Separator (AOS) Installation Manual Eric Hazen Rev. 2 Overview: Detailed instructions on installing the AOS for the FRS/BRZ/GT86. Difficulty: Beginner Time required: 1-3 hours depending
Please call us at Mon-Fri 8am-5pm if you need any additional assistance.
 TM Upgraded 6.0L EGR Cooler R Thank you for purchasing a Sinister Diesel Upgraded EGR Cooler. This EGR cooler is designed to endure years of heavy use.these installation instructions have been written
Ford 6.7 EGR Delete Kit
 Fits: 2011 12 Powerstroke 6.7L Read instructions thoroughly before proceeding! ***This kit may void factory warranty please check with manufacturer.*** ***This kit is intended for off road use only.***
GM 6.6L DURAMAX LLY EGR DELETE
 2004.5-2005 GM 6.6L DURAMAX LLY EGR DELETE ! WARNING REGARDING EMISSIONS LAWS Not legal for sale or use on pollution-controlled motor vehicles anywhere in the United States. Legal ONLY for off-road competition
IAG Air / Oil Separator (AOS) For STi
 For STi") IAG Air / Oil Separator (AOS) For 2008-14 STi Part# IAG-ENG-7000 Tools Required: Ratchet, torque wrench, extensions, needle nose pliers, hose cutter, snips/scissors Sockets: 10mm, 12mm 13mm Wrenches: 10mm,
IAG Air / Oil Separator (AOS) For 2008-14 STi Part# IAG-ENG-7000 Tools Required: Ratchet, torque wrench, extensions, needle nose pliers, hose cutter, snips/scissors Sockets: 10mm, 12mm 13mm Wrenches: 10mm,
DISCLAIMER 1) By installing this product onto your vehicle, you assume all risk and liability associated with its use.
 By installing this product onto your vehicle, you assume all risk and liability associated with its use.") WARNING REGARDING EMISSIONS LAWS Not legal for sale or use on pollution-controlled motor vehicles anywhere in the United States. Legal ONLY for off-road competition racing vehicles and cannot be used on
WARNING REGARDING EMISSIONS LAWS Not legal for sale or use on pollution-controlled motor vehicles anywhere in the United States. Legal ONLY for off-road competition racing vehicles and cannot be used on
Included: 2. Intake Block Off Plates 1. Exhaust Block Off Plate 1. Coolant Hose - Reroutes the EGR Cooler Coolant 12. Pieces of mounting hardware -
 Included: 2. Intake Block Off Plates 1. Exhaust Block Off Plate 1. Coolant Hose - Reroutes the EGR Cooler Coolant 12. Pieces of mounting hardware - Nuts, Bolts, & Washers 2. Hose Clamps 1. Support Bracket
Bypass Oil Filter Kit Dodge/Ram 6.7L Cummins
 I N S TA L L AT I O N GUIDE: Bypass Oil Filter Kit 20 208 Dodge/Ram 6.7L Cummins ! DISCLAIMER ) By installing this product onto your vehicle, you assume all risk and liability associated with its use.
INSTALLATION GUIDE: Coolant Filter Kit Ford 6.0L Powerstroke
 INSTALLATION GUIDE: Coolant Filter Kit 003 007 Ford 6.0L Powerstroke ! DISCLAIMER ) By installing this product onto your vehicle, you assume all risk and liability associated with its use. ) It is your
EGR Delete Kit Dodge 6.7L Cummins
 I N S TA L L AT I O N GUIDE: EGR Delete Kit 200 202 Dodge 6.7L Cummins ! WARNING: EMISSIONS LAWS Not legal for sale or use on pollution-controlled motor vehicles anywhere in the United States. Legal ONLY
Includes: 1. Silicone Hose 2. EGR Block Off Plates 1. Exhaust Block Off Plate 2. Hose Clamps 1. Spacer/Washer 8. Bolts 2. Nuts
 Includes: 1. Silicone Hose 2. EGR Block Off Plates 1. Exhaust Block Off Plate 2. Hose Clamps 1. Spacer/Washer 8. Bolts 2. Nuts WARNING: This product is not legal for sale or use on pollution controlled
Ford 6.4L Powerstroke NEED PHOTO
 I N S TA L L AT I O N GUIDE: Coolant Filter Kit 008 00 Ford 6.4L Powerstroke NEED PHOTO ! DISCLAIMER ) By installing this product onto your vehicle, you assume all risk and liability associated with its
Cackle cure Kit Installation by Pete Cleveland (aka FTE) for Dino Fuel Alternatives
 for Dino Fuel Alternatives") Cackle cure Kit Installation by Pete Cleveland (aka F250_ @ FTE) for Dino Fuel Alternatives March 26, 2007 Test Vehicle: 2002 Ford F250 XLT, 7.3L PowerStroke TurboDiesel, 2WD, Crew Cab, SWB, SRW, 124,000
Cackle cure Kit Installation by Pete Cleveland (aka F250_ @ FTE) for Dino Fuel Alternatives March 26, 2007 Test Vehicle: 2002 Ford F250 XLT, 7.3L PowerStroke TurboDiesel, 2WD, Crew Cab, SWB, SRW, 124,000
This kit may void factory warranty please check with manufacturer.
 Thank you for purchasing a Sinister Manufacturing Company EGR delete kit. Precision manufactured using aircraft quality 304 stainless steel and billet aluminum; this EGR kit is designed to endure years
INSTALLATION GUIDE: Cold Air Intake L Dodge Cummins
 INSTALLATION GUIDE: Cold Air Intake 2007.5 202 6.7L Dodge Cummins B C! DISCLAIMER A ) By installing this product onto your vehicle, you assume all risk and liability associated with its use. D E 2) It
IAG Street Series Air / Oil Separator (AOS) For 2017 WRX
 For 2017 WRX") P IAG Street Series Air / Oil Separator (AOS) For 2017 WRX Part# IAG-ENG-7152 Tools Required: Ratchet, torque wrench, extensions, needle nose pliers, hose cutter, snips/scissors, flathead screwdriver,
P IAG Street Series Air / Oil Separator (AOS) For 2017 WRX Part# IAG-ENG-7152 Tools Required: Ratchet, torque wrench, extensions, needle nose pliers, hose cutter, snips/scissors, flathead screwdriver,
Ford 6.0L Powerstroke Coolant Degas
 2003-2007 Ford 6.0L Powerstroke Coolant Degas ! DISCLAIMER 1) By installing this product onto your vehicle, you assume all risk and liability associated with its use. 2) It is your responsibility to make
This kit may void factory warranty please check with manufacturer.
 Thank you for purchasing a Sinister Manufacturing Company EGR delete kit. Precision manufactured using aircraft quality billet aluminum; this EGR kit is designed to endure years of heavy use. Installing
INSTALLATION GUIDE: CAT Fuel Filter Adapter Dodge 5.9L Cummins
 INSTALLATION GUIDE: CAT Fuel Filter Adapter 004.5 007 Dodge 5.9L Cummins ! DISCLAIMER ) By installing this product onto your vehicle, you assume all risk and liability associated with its use. ) It is
L DURAMAX LBZ EGR DELETE GDP TUNING
 2006-2007.5 6.6L DURAMAX LBZ EGR DELETE GDP TUNING ! WARNING REGARDING EMISSIONS LAWS Not legal for sale or use on pollution-controlled motor vehicles anywhere in the be used on vehicles that are operated
Edelbrock Victor II Intake Manifold. For Chrysler 5.7L (Eagle), 6.1L and 6.4L Gen III HEMI Engines Part #7179
, 6.1L and 6.4L Gen III HEMI Engines Part #7179") For Chrysler 5.7L (Eagle), 6.1L and 6.4L Gen III HEMI Engines PLEASE study these instructions carefully before beginning this installation. You should be familiar with and comfortable working on your
For Chrysler 5.7L (Eagle), 6.1L and 6.4L Gen III HEMI Engines PLEASE study these instructions carefully before beginning this installation. You should be familiar with and comfortable working on your
2014+ Ram 3.0 EcoDiesel EGR Delete
 2014+ Ram 3.0 EcoDiesel EGR Delete Installation Guide WARNING: This product is for competition use only in a sanctioned racing event. NOT FOR USE ON VEHICLES USED OR REGISTERED FOR USE ON A PUBLIC ROAD
Edelbrock Victor II Intake Manifold. For Chrysler 5.7L (Eagle) and 6.1L Gen III HEMI Engines Part #7179
 and 6.1L Gen III HEMI Engines Part #7179") For Chrysler 5.7L (Eagle) and 6.1L Gen III HEMI Engines PLEASE study these instructions carefully before beginning this installation. You should be familiar with and comfortable working on your vehicle.
For Chrysler 5.7L (Eagle) and 6.1L Gen III HEMI Engines PLEASE study these instructions carefully before beginning this installation. You should be familiar with and comfortable working on your vehicle.
Duramax Lift Pump Kit 9-11 PSI Installation Instructions P/N# D
 2001-10 Duramax Lift Pump Kit 9-11 PSI Installation Instructions P/N# 1050320D PLEASE READ ALL INSTRUCTIONS CAREULLY BEORE INSTALLATION Kit Contents 1500365-P2 1500330-D lowmax Lift Pump V3 lowmax Wiring
Industrial Injections Compound Turbo Installation For 6.7L Scorpion
 Industrial Injections Compound Turbo Installation For 6.7L Scorpion Step 1: Whenever you are doing an installation the first thing you should do is unhook the batteries to avoid arcing. You will need an
Included parts: 1 - New Bosch CP3 Pump 1 - HSM Pulley 1 - Serpentine Belt 1 - Pump Brackets/Hardware
 TROUBLESHOOTING: Please read and understand all installation instructions before proceeding with the installation. If you have questions during the installation of this product, please email H&S Motorsports
IAG Street Series Air / Oil Separator (AOS) For WRX
 For WRX") P IAG Street Series Air / Oil Separator (AOS) For 2015-16 WRX Part# IAG-ENG-7152 Tools Required: Ratchet, torque wrench, extensions, needle nose pliers, hose cutter, snips/scissors, flat head screw driver,
P IAG Street Series Air / Oil Separator (AOS) For 2015-16 WRX Part# IAG-ENG-7152 Tools Required: Ratchet, torque wrench, extensions, needle nose pliers, hose cutter, snips/scissors, flat head screw driver,
Includes: 1. Upgraded Tube Type EGR Cooler 2. Silicone Hoses
 Includes: 1. Upgraded Tube Type EGR Cooler 2. Silicone Hoses CAUTION: Never work on a hot vehicle. The hot exhaust system or hot engine can cause serious injury in the form of burns. If the vehicle has
Installation Manual v1.0: Twin CP3 Fuel Injection Kit Dodge 5.9L
 Installation Manual v1.0: Twin CP3 Fuel Injection Kit 2004.5-2007 Dodge 5.9L Figure 1 - Full Kit Photo 25 Figure 2 - Hardware Kit Please read all instructions before installation. This kit is not emissions
Installation Manual v1.0: Twin CP3 Fuel Injection Kit Dodge 6.7L
 04/05/2012 Dodge 2010-2011 6.7L Twin CP3 701-900-2356-INST Installation Manual v1.0: Twin CP3 Fuel Injection Kit 2010-2011 Dodge 6.7L Figure 1 - Full Kit Photo 29 Figure 2 - Hardware Kit (800) 949-60002
EXPANSION TANK PARTS LIST AND INSTALLATION GUIDE
 PARTS LIST AND INSTALLATION GUIDE PARTS LIST 2 PC APPLICATION-SPECIFIC MOUNTING BRACKETS 2 PC BLACK, ANODIZED 6061 ALUMINUM CATCH CANS 4 PC SILICONE HOSES 4 PC PLASTIC BARBED FITTINGS 4 PC WORM-GEAR CLAMPS
IAG Competition Series Air / Oil Separator (AOS) For WRX
 For WRX") P IAG Competition Series Air / Oil Separator (AOS) For 2015-16 WRX Part# IAG-ENG-7252 Tools Required: Ratchet, torque wrench, extensions, needle nose pliers, hose cutter, snips/scissors, flat head screw
P IAG Competition Series Air / Oil Separator (AOS) For 2015-16 WRX Part# IAG-ENG-7252 Tools Required: Ratchet, torque wrench, extensions, needle nose pliers, hose cutter, snips/scissors, flat head screw
8 Zip Tie Zip Tie 1 Union Fitting 1 ½ ½ Union Reducer Fitting Union 1 5/8 ½ (For Plastic Intake Manifold Vehicles)
") P IAG Street Series Air / Oil Separator (AOS) For 2017 STI Part# IAG-ENG-7151 Tools Required: Ratchet, torque wrench, extensions, needle nose pliers, hose cutter, snips/scissors, flat head screw driver,
P IAG Street Series Air / Oil Separator (AOS) For 2017 STI Part# IAG-ENG-7151 Tools Required: Ratchet, torque wrench, extensions, needle nose pliers, hose cutter, snips/scissors, flat head screw driver,
EGR Kit w/ Intake Chevy 6.6L Duramax
 I N S TA L L AT I O N GUIDE: EGR Kit w/ Intake 004.5 005 Chevy 6.6L Duramax ! WARNING: EMISSIONS LAWS Not legal for sale or use on pollution-controlled motor vehicles anywhere in the United States. Legal
Procharger Stage II Intercooled Supercharger System (11-14 GT)
") Procharger Stage II Intercooled Supercharger System (11-14 GT) Installation Time: Approximately one day. Installed on 2012 Mustang GT 5.0/Manual Required Tools 3/8 Socket Set (Standard and Metric) 1/2
Procharger Stage II Intercooled Supercharger System (11-14 GT) Installation Time: Approximately one day. Installed on 2012 Mustang GT 5.0/Manual Required Tools 3/8 Socket Set (Standard and Metric) 1/2
INSTALLATION INSTRUCTIONS DUAL OIL CATCH CAN KIT
 INSTALLATION INSTRUCTIONS DUAL OIL CATCH CAN KIT SUBARU WRX FA20F ENGINE Document: 19-0135 Support: info@radiumauto.com This dual catch can kit installs in the right-hand side of the engine bay and intercepts
INSTALLATION GUIDE: EGR Delete Kit Chevy 6.6L Duramax
 INSTALLATION GUIDE: EGR Delete Kit 004.5 005 Chevy 6.6L Duramax ! WARNING: EMISSIONS LAWS Not legal for sale or use on pollution-controlled motor vehicles anywhere in the United States. Legal ONLY for
INSTALLATION INSTRUCTIONS FUEL RAIL
 INSTALLATION INSTRUCTIONS FUEL RAIL MITSUBISHI EVO X Document# 19-0067 Support: info@radiumauto.com WARNING: DON'T SMOKE OR WORK WITH OPEN SPARKS WHILE WORKING ON THE FUEL SYSTEM PREPARING THE VEHICLE:
IAG Competition Series Air / Oil Separator (AOS) For 2017 STI
 For 2017 STI") P IAG Competition Series Air / Oil Separator (AOS) For 2017 STI Part# IAG-ENG-7251 Tools Required: Ratchet, torque wrench, extensions, needle nose pliers, hose cutter, snips/scissors, flat head screw driver,
P IAG Competition Series Air / Oil Separator (AOS) For 2017 STI Part# IAG-ENG-7251 Tools Required: Ratchet, torque wrench, extensions, needle nose pliers, hose cutter, snips/scissors, flat head screw driver,
BEFORE BEGINNING INSTALLATION
 COMPLETE CHASSIS FUEL LINE KITS For 1996-2000 Honda Civic Equipped with B-Series Engine INSTALLATION INSTRUCTIONS PLEASE study these instructions carefully before beginning this installation. Most installations
CAUTIONS AND WARNINGS
 FIREWALL FORWARD FUEL LINE KITS For 1996-2000 Honda Civic Equipped with B-Series Engine INSTALLATION INSTRUCTIONS PLEASE study these instructions carefully before beginning this installation. Most installations
If there is additional labor or other costs above the 4 hrs labor you must call VMAC for approved coverage
 Installation Manual for the A500027 RAPTAIR MF Dual Air Filter Retrofit Kit Author: Brian Collings Date: 15/07/2014 1900997 - Manual, Installation (A500027) Systems or Parts Affected: D600005BETA01-D600005BETA59
Installation Manual v1.0: 10-Digit P/N: Aurora 3000 Turbo System L Powerstroke Ford
 Installation Manual v1.0: 10-Digit P/N: 202-930-3224 Aurora 3000 Turbo System 99-03 7.3L Powerstroke Ford Please read all instructions before installation. Figure 1 - Full Kit Photo 1. Park the vehicle
Exhaust System Installation for the Mustang GT & Shelby GT500 PN , , , , ,
 Exhaust System Installation for the Mustang GT & Shelby GT500 PN 140370, 140371, 140372, 140410, 140411, 140412 These instructions have been written to help you with the installation of your Borla Performance
IAG Street Series Air / Oil Separator (AOS) For WRX & WRX STI
 For WRX & WRX STI") IAG Street Series Air / Oil Separator (AOS) For 2006-07 WRX & 2004-07 WRX STI Part# IAG-ENG-7100 Tools Required: Ratchet, torque wrench, extensions, needle nose pliers, hose cutter, snips/scissors, flat
IAG Street Series Air / Oil Separator (AOS) For 2006-07 WRX & 2004-07 WRX STI Part# IAG-ENG-7100 Tools Required: Ratchet, torque wrench, extensions, needle nose pliers, hose cutter, snips/scissors, flat
CUSTOM-DIESEL.COM ATTENTION VERY IMPORTANT - PLEASE READ
 ATTENTION VERY IMPORTANT - PLEASE READ IF YOU PURCHASED THIS ITEM FROM EBAY, WE WANT YOU TO KNOW THAT EBAY HAS ALWAYS GIVEN YOU, THE BUYER, THE STRENGTH TO VOICE YOUR OPINION OF EBAY SELLERS BY LEAVING
Cold Air Intake Ford 6.0 Powerstroke
 I N S TA L L AT I O N GUIDE: Cold Air Intake 2003 2007 Ford 6.0 Powerstroke ! DISCLAIMER ) By installing this product onto your vehicle, you assume all risk and liability associated with its use. 2) It
Injectors-Chips-Clutches-Transmissions-Turbos-Engines-Fuel Systems
 Swampʼs Diesel Performance Competition Parts For Your Diesel 304-A Sand Hill Rd. La Vergne, TN 37086 Tel 615-793-5573 or (866) 595-8724/ Fax 615-793-5572 Email: dave@swampsdiesel.com Regulated Fuel Return
Performance Oil Cooler Kit for (C6) Chevrolet Corvette
 Chevrolet Corvette") Performance Oil Cooler Kit for 2005-2013 (C6) Chevrolet Corvette Part No. EC6-600 Made in USA Important: Read these instructions in their entirety prior to installation. Copyright 2008-2018 Improved Racing
Performance Oil Cooler Kit for 2005-2013 (C6) Chevrolet Corvette Part No. EC6-600 Made in USA Important: Read these instructions in their entirety prior to installation. Copyright 2008-2018 Improved Racing
Installation Instructions
 Installation Instructions Transverse K04 Tools Required Jack and jack stands Drain pan for coolant and oil 3" and 6" extensions Channel locks 7mm, 8mm, 10mm, 11mm, 12mm, 13mm, and 16mm sockets Oxygen sensor
Thank you for purchasing the Dezod Motorsports Return Fuel System for your Scion tc.
 Thank you for purchasing the Dezod Motorsports Return Fuel System for your Scion tc. We took much pride in putting together a fuel system that would deliver a maximum amount of fuel as simply as possible
All cores due 30 days after invoice date - no credit after 60 days.
 NO WARRANTY STATEMENT High performance parts & products no warranty policy: The purchaser understands and recognizes that high performance diesel products and services sold by INDUSTRIAL INJECTION SERVICE.
INSTALLATION MANUAL
 315000 INSTALLATION MANUAL EGR & Cooler Race Kit for 2015+ 6.7L Ford Powerstroke WARNING ONLY install this kit if you are using a tuner that disables the EGR sensors & circuit system. Any product that
Installation Manual v2.2: Twin CP3 Fuel Injection Kit Dodge 5.9L
 12/13/11 ATS Twin CP3 Kit 701-900-2272-INST Installation Manual v2.2: Twin CP3 Fuel Injection Kit 2003-2004 Dodge 5.9L Figure 1 - Full Kit Photo 26 Figure 2 - Hardware Kit 1 Please read all instructions
Includes: 1. J-hook Block Off / Coolant Reroute 1. Coolant Hose 1. Turbocharger Up Pipe Block Off Disc 2. Hose clamps
 Includes: 1. J-hook Block Off / Coolant Reroute 1. Coolant Hose 1. Turbocharger Up Pipe Block Off Disc 2. Hose clamps WARNING: This product is not legal for sale or use on pollution controlled vehicles
All cores due 30 days after invoice date - no credit after 60 days.
 NO WARRANTY STATEMENT High performance parts & products no warranty policy: The purchaser understands and recognizes that high performance diesel products and services sold by INDUSTRIAL INJECTION SERVICE.
INSTALLATION INSTRUCTIONS CATCH CAN KIT
 INSTALLATION INSTRUCTIONS CATCH CAN KIT FORD FOCUS Document: 19-0150 Support: info@radiumauto.com STEPS 1-19 COVER THE PCV SIDE CATCH CAN KIT (P/N: 20-0315) STEPS 20-32 COVER THE CRANKCASE CATCH CAN KIT
Exhaust System Installation for Chevrolet Corvette C6 PN and
 Exhaust System Installation for Chevrolet Corvette C6 PN-140128 and 140131 These instructions have been written to help you with the installation of your Borla Performance Exhaust System. Please read this
Irate Diesel Regulated Return install:
 Irate Diesel Regulated Return install: 1. Remove IC piping and intake Y. It may also be easier to remove the Downpipe and turbo to gain access to the back fittings. This will depend upon how much you want
Long Tube Header Installation For Ford Mustang GT
 Long Tube Header Installation For 2005-2008 Ford Mustang GT Precision manufactured using aircraft quality T-304 stainless steel; this system is designed to endure years of heavy use. Installing a Borla
# and # FAST Fuel System Kits
 1 INSTRUCTIONS #307500 and #307501 Fuel System Kits Thank you for choosing products; we are proud to be your manufacturer of choice. Please read this instruction sheet carefully before beginning the installation.
Powerstroke 6.4L EGR Block Kit
 Read instructions thoroughly before proceeding! ***This kit may void factory warranty please check with manufacturer.*** You will need the following tools for this installation: 10mm wrench 13mm wrench
INSTALLATION INSTRUCTIONS Dual Catch Can Kit Subaru Turbo and STi Document# Support:
 INSTALLATION INSTRUCTIONS Dual Catch Can Kit 02-14 Subaru Turbo and 2015+ STi Document# 19-0099 Support: info@radiumauto.com This document covers the installation of a Radium dual catch can kit for the
Huron Speed Products Twin Turbo Install Gen 2 CTS-V (09-15)
") Huron Speed Products Twin Turbo Install Gen 2 CTS-V (09-15) The following install guide is simply that, a guide to help you with installation. It is by no means the exact method to perform installation,
Huron Speed Products Twin Turbo Install Gen 2 CTS-V (09-15) The following install guide is simply that, a guide to help you with installation. It is by no means the exact method to perform installation,
Includes: 1. High Flow Turbo Up-Pipe 1. J-Hook Block Off / Coolant Reroute 1. Coolant Hose 1. EGR Valve Block Off Plate 2. Hose Clamps 4.
 Includes: 1. High Flow Turbo Up-Pipe 1. J-Hook Block Off / Coolant Reroute 1. Coolant Hose 1. EGR Valve Block Off Plate 2. Hose Clamps 4. Bolts & Nuts WARNING: This product is not legal for sale or use
Huron Speed Products Twin Turbo Install Gen 2 CTS-V (09-15)
") Huron Speed Products Twin Turbo Install Gen 2 CTS-V (09-15) 1 2 Remove two bolts in trunk cover with 8mm socket. Pull up on cover to remove. Unscrew net tie down on side cover where battery is located
Huron Speed Products Twin Turbo Install Gen 2 CTS-V (09-15) 1 2 Remove two bolts in trunk cover with 8mm socket. Pull up on cover to remove. Unscrew net tie down on side cover where battery is located
INSTALLATION INSTRUCTIONS CATCH CAN KIT
 INSTALLATION INSTRUCTIONS CATCH CAN KIT FORD FIESTA ST Document: 19-0175 Support: info@radiumauto.com STEPS 1-14 COVER THE PCV SIDE CATCH CAN KIT (P/N: 20-0377) STEPS 15-35 COVER THE CRANKCASE CATCH CAN
Owner smanual. Banks Monster-Ram Intake and Grid Heater Delete Kit. For Racing Only Ram 6.7L Pickup Trucks. with Installation Instructions
 with Installation Instructions Owner smanual Banks Monster-Ram Intake and Grid Heater Delete Kit For Racing Only 2007-2017 Ram 6.7L Pickup Trucks THIS MANUAL IS FOR USE WITH SYSTEM 42788, 42788-PC, 42790,
2016+ NISSAN TITAN XD
 PARTS LIST AND PARTS INCLUDED 1PC MISHIMOTO INTERCOOLER 2PC SILICONE BOOTS WITH DURACORE TECHNOLOGY 4PC CONSTANT-TENSION T-BOLT CLAMPS 2PC ALUMINUM SPACERS MOUNTING HARDWARE CAUTION Never work on the cooling
Wrenches: ⅞, 8mm, 10mm, 13mm, 19mm P. allen, Other: Electrical Tape
 IAG Street Series Air / Oil Separator (AOS) For 2008-14 STI Part# IAG-ENG-7100 Tools Required: Ratchet, torque wrench, extensions, needle nose pliers, hose cutter, snips/scissors, flat head screw driver,
XDP Complete EGR Race Track Kit w/up-pipe. Item Number: XD144
 XDP Complete EGR Race Track Kit w/up-pipe Item Number: XD144 PACKING LIST: 2 - Lined 3/4" SS Hose Clamp 1-3/4 Silicone Hose 1 - XDP Engraved EGR Valve Block-Off Plate with O-ring 1 - EGR Cooler Block-Off
Owner smanual. Banks Monster-Ram Intake and Grid Heater Delete Kit. For Racing Only Ram 6.7L Pickup Trucks. with Installation Instructions
 with Installation Instructions Owner smanual Banks Monster-Ram Intake and Grid Heater Delete Kit For Racing Only 2007-2017 Ram 6.7L Pickup Trucks THIS MANUAL IS FOR USE WITH SYSTEM 42788, 42788-PC, 42790,
Header Installation For Jeep Wrangler
 Header Installation For 2007-2008 Jeep Wrangler Precision manufactured using high quality austenitic stainless steel; this system is designed to endure years of heavy use. Installing a Borla Performance
MAZDASPEED3 Intercooler Instructions
 MAZDASPEED3 Intercooler Instructions Congratulations on your purchase of the COBB Tuning Front Mount Intercooler System for your 2007-2009 Mazdaspeed3. The following instructions should assist you through
INSTALLATION INSTRUCTIONS CATCH CAN KIT
 INSTALLATION INSTRUCTIONS CATCH CAN KIT FORD FOCUS Document: 19-0150 Support: info@radiumauto.com STEPS 1 TO 19 COVER THE PCV SIDE CATCH CAN KIT (P/N: 20-0315) STEPS 20-32 COVER THE CRANKCASE CATCH CAN
INSTALLATION AND USER MANUAL
 INSTALLATION AND USER MANUAL SDKIT-730 & SDKIT-734 100% Bolt-On 150 PSI Train Horn System for 2011-2015 F-250 & F-350 Super Duty P/N SDKIT-730 P/N SDKIT-734 Thank you for purchasing a Kleinn Air Horns
AEROMOTIVE Part # Generic Fuel System Kit INSTALLATION INSTRUCTIONS
 AEROMOTIVE Part # 17242 Generic Fuel System Kit INSTALLATION INSTRUCTIONS CAUTION: Installation of this product requires detailed knowledge of automotive systems and repair procedures. We recommend that
INSTALLATION INSTRUCTIONS AIR/OIL SEPARATOR KIT
 INSTALLATION INSTRUCTIONS AIR/OIL SEPARATOR KIT 2015+ SUBARU WRX (LHD ONLY) Document: 19-0136 Support: info@radiumauto.com This document covers the installation of the Radium brake master cylinder brace
Step 6: Remove and save the MAP sensor for later use. Step 7: Remove the passenger side intercooler pipe and the EGR intake manifold.
 LBZ Twin kit Install Step 1: Disconnect both batteries. Step 2: Drain coolant and oil also remove passenger side inner fender. Step 3: Remove intake box and piping. (Remove and save the MAF sensor in the
Long Tube Header Installation For Dodge Challenger SRT-8 & R/T, Charger SRT-8 & R/T, Magnum SRT-8 & R/T & Chrysler 300 SRT-8 & 300C
 Long Tube Header Installation For 2005-2008 Dodge Challenger SRT-8 & R/T, Charger SRT-8 & R/T, Magnum SRT-8 & R/T & Chrysler 300 SRT-8 & 300C Precision manufactured using high quality austenitic stainless
IAG Street Series Air / Oil Separator (AOS) For WRX
 For WRX") IAG Street Series Air / Oil Separator (AOS) For 2008-14 WRX Part# IAG-ENG-7100 Tools Required: Ratchet, extensions, needle nose pliers, hose cutter, snips/scissors, flat head screw driver, hose clamping
IAG Street Series Air / Oil Separator (AOS) For 2008-14 WRX Part# IAG-ENG-7100 Tools Required: Ratchet, extensions, needle nose pliers, hose cutter, snips/scissors, flat head screw driver, hose clamping
PowerMax Diesel Upgrade For Cummins Engines
 PowerMax Diesel Upgrade For Cummins Engines 00.5-007.5 Dodge Ram With Cummins 5.9L Item 3 4 5 6 7 8 9 0 3 4 5 6 7 8 Parts List Description Turbocharger Ancillary kit 773069- (includes) Installation Instructions
AEROMOTIVE Part # HP Hot Rod EFI Kit INSTALLATION INSTRUCTIONS
 AEROMOTIVE Part # 17150 700HP Hot Rod EFI Kit INSTALLATION INSTRUCTIONS CAUTION: Installation of this product requires detailed knowledge of automotive systems and repair procedures. We recommend that