Irontite Products Inc. Irontite by Kwik-Way & Irontite by Kwik-Way of Canada, Ltd. (319) FAX (319)
|
|
|
- Sheena O’Connor’
- 6 years ago
- Views:
Transcription


1 Parts & Instruction Manual Irontite Products Inc. Irontite by Kwik-Way & Irontite by Kwik-Way of Canada, Ltd PO BOX 9877, (Main) Cedar Rapids, Iowa (EST) USA (319) FAX (319)
2 Page 2
3 INDEX Cummins Engines Engine identification by injector sleeves Injector sleeve removal tools Casting area repair tools Injector sleeve installation tools Komatsu Engines Casting area repair tools Injector sleeve removal and installation tools GM Detroit Diesel Engines Casting area repair tools Injector sleeve removal and installation tools Caterpillar Engines Pre-combustion area repair tools and materials 3114/3116/3126 and 3176/3196 engine injector sleeve tools Mack Engines Mack 2-valve engine Mack grooving tool Mack 3-valve engines Navistar/International Engines Navistar/International 817 engines Navistar/International 239, 466 and 7.3 power stroker engines Miscellaneous Tools Irontite Products Inc. Page


4 Cummins Diesel Engines The Irontite tools and processes relating to heavy duty diesel engines are related primarily to the injector sleeve areas of the respective engines. To some extent, especially with respect to the tools, the engines of a company may fit into designated categories. With respect to the Cummins Engines, they are grouped as follows: 220 series 250 and L-10 series C&J series Small V series Which respective series can be identified by the respective configuration of the injector sleeve and the following respective engine identifying numbers: series engines using this sleeve have bored of 4-7/8 and 5-1/8 and include: NHD 180 NHE 195 NH 220 NT and L-10/M-11 engines using this sleeve with a 5-1/2 bore include: NH 230 NTC 400 NHC 250 NTA 370 NTC 250 NT 380 Super 250 NTA 400 Super 250/270 NTA 420 NT 270 NT 855 NT 270 V 903 NTC 290 V NT 310 V 785 NTC NTC 350 VT 1710 N C&J series engines using this sleeve have bores of 4-1/8 and 4-7/6 and include: JN 130 JNF 130 C 160 CF 160 CR 160 C 175 C 180 C 190 CS 195 JS 6 JNS 6 JT Small V series engines using this sleeve have a 4-5/8 bore and include: V6 140 V8E 170 V8 185 V 352 V 378 V 470 V 470 V 504 V 555 VT 555 V8 210 L-10/M11 series with 5-1/2 bore that use this sleeve include: O-Rings L L L L-10 BC IV Formula Irontite Products Inc. Page


5 Cummins diesel engine servicing and service tools 1 Injector sleeve removal tools 2 Casting repair of injector seat area 3 Injector sleeve installation and replacement 4 Miscellaneous Cummins injector servicing tools The Irontite injector servicing tools for use with the Cummins engines are necessarily designed to services a specific series of Cummins engines. A few of the tools are interchangeable, but in general the dimensions of the tools for servicing one specific series of engines are not right for servicing engines of a different series. Accordingly, it is important when ordering tools to identify them with the series of the engine to be serviced. Sleeve removal tools - Cummins The sleeve removal tools consist of two mandrels, each with tapered end, and a removal tool body with buttress threads at one end. The mandrel is positioned up in the used sleeve with the tapered end down. The removal tool body is brought up into the sleeve with the tapered end of the mandrel in the tool. As the mandrel is forced down, the buttressed threads on the tool expand and grab a hold on the sleeve, continue to press down on the mandrel and pull out the sleeve. The use of a press on the mandrel is recommended. Complete Removal Tools for 220 series engine for 250 and L-10 engines for C&J series engine for small V series engine Mandrel Tool Body Mandrels for 220, 250 and L-10 engines for C&J and small V engines Tool bodies for 220 series engine for 250, L-10 and small V engines and Komatsu 155/455 engines for C&J series engine Injector sleeve removal tools complete tool and L-10 complete tool C&J complete tool small V complete tool Extra tool bodies for 220 series for 250, L-10 and SmV series for C&J series Extra mandrels for 220, 250 and L-10 series for C&J and SmV series Irontite Products Inc. Page
 Drill Bushing 414-6112-10 407-5310-80 449-6933-30 220 Series 414-6113-10 250 Series 414-6113-12 L-10 Series 414-6113-16 C & J Series 414-6113-15 SmV Series 414-6113-18 End Facing Counterbore")
 Casting Seat Cutter Gauges Casting Seat Cutter 433-6991-00 For 220 And 250: 414-6111-20 For L-10 Series: 414-6111-26 For C&J Series: 414-6111-25 For 220, 250 And")
6 CASTING SEAT REPAIR TOOLS - Cummins Casting seat repair tools for rebuilding the casting injector seat Combination Counterbore And Tapered Reamer (All Series) Tapered Tap (All Series) Tap Driver (All Series) Drill Bushing Series Series L-10 Series C & J Series SmV Series End Facing Counterbore (All Series) Driving Arbor (All Series) Tapered Plugs (All Series) Taper Length Drill For 220, 250 And L-10 Series: For C&J And Small V Series: Gauge Finger (All Series) Casting Seat Cutter Gauges Casting Seat Cutter For 220 And 250: For L-10 Series: For C&J Series: For 220, 250 And L-10 Series: For C&J And Small V Series: Counterbore Pilots For 220, 250 And L-10: Guide Bushings Counterbore Pilots For C&J And SmV: For 220 Series : For 250 And SmV Series: For L-10 Series: For C&J Series: For SmV Series: Irontite Products Inc. Page
7 CASTING SEAT REPAIR TOOLS Cummins Series Kit L-10 Series Kit Casting Seat Cutter Gauge w/handle Casting Seat Cutter Gauge w/ Handle Counterbore And Tapered Reamer (Carbide) Counterbore And Tapered Reamer (Carbide) Tapered Tap Tapered Tap Tap Driver (7/8 splt slv #3MT) Tap Driver (7/8 splt slv #3MT) Tapered Plugs (5) Tapered Plugs (5) Drill Bushing Drill Bushing /16 Tapered Length Drill /16 Tapered Length Drill End Facing Counterbore End Facing Counterbore Counterbore Pilot Counterbore Pilot Driving Arbor Driving Arbor Guide Bushing Guide Bushing Seat Cutter (Carbide) 220/250/L Seat Cutter (Carbide) 220/250/L Gauge Finger Gauge Finger /8 HEX Key /8 HEX Key Tool Box Tool Box Series Kit Small V Series Kit Casting Seat Cutter Gauge W/Handle Casting Seat Cutter Gauge W/ Handle Counterbore And Tapered Reamer (Carbide) Counterbore And Tapered Reamer (Carbide) Tapered Tap Tapered Tap Tap Driver (7/8 splt slv #3MT) Tap Driver (7/8 splt slv #3MT) Tapered Plugs (5) Tapered Plugs (5) Drill Bushing Drill Bushing /16 Tapered Length Drill ½ Taper Length Drill (C&J/SmV) End Facing Counterbore End Facing Counterbore Counterbore Pilot Counterbore Pilot Driving Arbor Driving Arbor Guide Bushing Guide Bushing Seat Cutter (Carbide) 220/250/L Seat Cutter (Carbide) C&J/SmV Gauge Finger Gauge Finger /8 HEX Key /8 Hex Key Tool Box Tool Box C&J Series Kit Casting Seat Cutter Gauge W/Handle Counterbore And Tapered Reamer (Carbide) Tapered Tap Tap Driver (7/8 splt slv #3MT) Tapered Plugs (5) Drill Bushing ½ Tapered Length Drill (C&J/SmV) End Facing Counterbore Guide Bushing Seat Cutter (Carbide)-C&J/SmV Gauge Finger /8 HEX Key Tool Box Irontite Products Inc. Page
8 CASTING SEAT REPAIR TOOLS - Cummins Combination C&J And Small V Series Kit Combination 220/250 Series Kit Casting Seat Cutter W/Gauge Handle Casting Seat Cutter Gauge W/Gauge Handle Casting Seat Cutter Gauge W/Handle Counterbore And Tapered Reamer (Carbide) Counterbore And Tapered Reamer Tapered Tap (Carbide) Tapered Tap Tap Driver Tap Driver Tapered Plugs (5) Tapered Plugs (5) Drill Bushing Drill Bushing Drill Bushing Drill Bushing Taper Length Drill Taper Length Drill End Facing Counterbore End Facing Counterbore Counterbore Pilot Counterbore Pilot Driving Arbor Driving Arbor Guide Bushing Guide Bushing Guide Bushing Guide Bushing Seat Cutter (Carbide) Seat Cutter (Carbide) Gauge Finger Gauge Finger /8 Hex Key /8 HEX Key Tool Box Tool Box Combination Kit For All Five Series Seat Cutter Gauge W/Handle Seat Cutter Gauge W/Handle Seat Cutter Gauge W/Handle Seat Cutter Gauge W/Handle Counterbore And Tapered Reamer (Carbide) Tapered Tap Tap Driver Tapered Plugs (5) Drill Bushing Drill Bushing Drill Bushing Drill Bushing Drill Bushing Taper Length Drill Taper Length Drill End Facing Counterbore Counterbore Pilot Counterbore Pilot Driving Arbor Guide Bushing Guide Bushing Guide Bushing Guide Bushing Seat Cutter (Carbide) Seat Cutter (Carbide) Gauge Finger /8 HEX Key Tool Box Irontite Products Inc. Page
9 INSTALLATION OF NEW INJECTOR SLEEVES - Cummins Sleeve installation tools for installing new Cummins injector sleeves Sleeve Drive-In Tools For 220 Series Sleeve Drive-In Tools For 250 Series Sleeve Drive-In Tools For L-10 Series Sleeve Drive-In Tools For C&J Series Sleeve Drive-In Tools For SmV Series Sleeve Roll-in Tools Regular 220 Series Sleeve Roll-In Tools Regular C&J Series Sleeve Roll-In Tools With Spring Tension: Spring Tension Sleeve Roll-In Tools For 250 And L-10 Series Spring Tension Sleeve Roll-In Tools For Small V Series Driving Arbor (All Series) Gauge Finger (All Series) Guide Bushings Sleeve Seat Cutters , 250 And L-10 Series For C&J Series For SmV Series Series Sleeve Seat 250 Cutters And SmV Series L-10 And C&J Series Injector Sleeve Seat Cutter Gauges Flat Top Protrusion Gauges For 220 And 250 Series For Early For Late For C&J Series For L-10 Series For SmV Series And 250 Series For Early For Late For C&J Series For L-10 Series For SmV Series Complete Kits Complete Kit For 220 Series Complete Kit For 250 Series Complete Kit For M-11 Series Complete Kit For C&J And SmV Series Complete Kit For L-10 Series Complete Kit For C&J Series Complete Kit For Smv Series Complete Kit For All Five Series Irontite Products Inc. Page
10 OPTIONAL HEAD SERVICING TOOLS - Cummins Cylinder head grooving tool For regrooving the face of the head after it has been resurfaced, a head grooving tool with 3 sizes of pilots and extra tool fits are available Complete Tool /8 Pilot /16 Pilot ½ Pilot Tool Bit In addition, as a convenience, tool bits for the ST 913 grooving tool are available: Irontite leak detector To pressure test injector holes for leaks after new injector sleeves have been installed, Irontite has leak detectors for the several series of engine heads For 220 Series For 250 And SmV Series For L10 Series For C&J Series SLEEVE INSTALLATION TOOLS - Cummins series kit C&J series kit Drive-In Tool Drive-In Tool Roll-In Tool Roll-In Tool Driving Arbor Driving Arbor Guide Bushing Guide Bushing Seat Cutter (Carbide) Seat Cutter (Carbide) Seat Cutter Gauge w/handle Seat Cutter Gauge w/handle Gauge Finger Gauge Finger Tip Protrusion Gauge Tip Protrusion Gauge series kit Small V Series Kit Drive-In Tool Drive-In Tool Roll-In Tool w/tension Spring Roll-In Tool w/tension Spring Driving Arbor Driving Arbor Guide Bushing Guide Bushing Seat Cutter (Carbide) Seat Cutter (Carbide) Seat Cutter Gauge w/handle Seat Cutter Gauge w/handle Gauge Finger Gauge Finger Tip Protrusion Gauge Tip Protrusion Gauge L10 series kit Drive-In Tool Roll-In Tool w/tension Spring Driving Arbor Guide Bushing Seat Cutter (Carbide) Seat Cutter Gauge w/handle Gauge Finger Tip Protrusion Gauge Irontite Products Inc. Page
11 SLEEVE INSTALLATION TOOLS Cummins M-11 series kit All 5 series kit Drive-In Tool (220) Drive-In Tool (220) Drive-In Tool (250) Drive-In Tool (250) Roll-In Tool Drive-In Tool (L-10) Roll-In Tool w/tension Spring Drive-In Tool (C&J) Driving Arbor Drive-In Tool (SmV) Guide Bushing (220) Roll-In Tool (220& 250) Guide Bushing (250) Roll-In Tool w/tension Spring Seat Cutter (Carbide) Roll-In Tool (C&J& SmV) Seat Cutter Gauge w/handle Roll-In Tool w/tension Spring Gauge Finger Driving Arbor Tip Protrusion Gauge Guide Bushing (220) (220/250) Tip Protrusion Gauge (L-10) Guide Bushing (250& SmV) C&J/SmV series Guide Bushing (L-10& C&J) Drive-In Tool Seat Cutter (Carbide)(L-10) Drive-In Tool Seat Cutter (Carbide)(C&J) Roll-In Tool Seat Cutter (Carbide)(SmV) Roll-In Tool w/tension Spring Seat Cutter Gauge w/handle (220 & 250) Driving Arbor Seat Cutter Gauge w/handle (C&J) Guide Bushing (C&J) Seat Cutter Gauge w/handle (L- 10) Guide Bushing (SmV) Seat Cutter Gauge w/handle (SmV) Seat Cutter (Carbide)(C&J) Gauge Finger Seat Cutter (Carbide)(SmV) Tip Protrusion Gauge (220& 250) Seat Cutter Gauge w/handle Tip Protrusion Gauge(C&J) (C&J) Seat Cutter Gauge w/handle Tip Protrusion Gauge (SmV) (SmV) Gauge Finger Tip Protrusion Gauge (L-10) Tip Protrusion Gauge (C&J) Tip Protrusion Gauge (SmV) Irontite Products Inc. Page
12 Miscellaneous Cummins head servicing tool and materials Head Grooving Tools Cummins Injector Sleeves Complete Tools For 220 Series /8 Pilot For 250 And L -10 Series (Std.) /16 Pilot For C&J Series ½ Pilot For Small V Series Tool Bit O-Rings For 250, L10 And Small V Series Sleeves Tool Bit For Cummins St 913 Grooving Tool Cummin Leak Detectors For 220 Series Special Gauges For Cummins 903 Engine Heads For 250 And SmV Series Early 903 W/Handle For L-10 Series Late 903 W/Handle For C&J Series Cummins 250 Roll In Tool Tension Spring Special Unit Tools Complete Tension Spring Unit Special Pilot For Use When End Facing Off H-2 Plugs Parallels (Pair) Torque Wrench Adapter Irontite Products Inc. Page

13 KOMATSU ENGINES TOOLS FOR REPAIRING INJECTOR SEAT AREAS OF KOMATSU ENGINE HEADS For repairing the injector hole areas of the Komatsu and diesel engine heads, Irontite has available the following tools: Flat Tip Protrusion Gauge Combination Counterbore And Tapered Reamer Tapered Tap Tap Driver Tapered Plugs Guide Bushing Gauge Finger Seat Cutter Gauge Driving Arbor 10mm Taper Length Drill Casting Seat Cutter Drill Bushing End Facing Counterbore With Pilot Complete Kit: Irontite Products Inc. Page
 407-5310-80 Tapered H Tap")
 433-6991-00 Gauge Finger 467-1611-08 1/8 HEX Key 467-1950-50 Tool Box KOMATSU 125 ENGINE SLEEVE REMOVAL AND INSTALLATION")

14 CASTING SEAT REPAIR TOOLS - Komatsu Injector Sleeve Removal Tools For And Heads Casting Injector Seat Repair Tools For And Heads Complete Tool Complete Kit Extra Mandrel Casting Seat Cutter Gauge W/Handle Extra Tool Body Combination Counterbore And Tapered Reamer (Carbide) Tapered H Tap Tap Driver Tapered H Plugs (5) Drill Bushing MM Drill End Facing Counterbore Cutter Counterbore Pilot Guide Bushing Driving Arbor Casting Seat Cutter (Carbide) Gauge Finger /8 HEX Key Tool Box KOMATSU 125 ENGINE SLEEVE REMOVAL AND INSTALLATION TOOLS Special Tap Sleeve Remover Sleeve Drive-In Tool Special Sleeve Tip Roll-In Tool (With Thrust Drive And Tip Cage With Rollers) Standard Sleeve Roll- In Tool Sleeve Seat Cutter Sleeve Seat Cutter Gauge With Guide Bushing Gauge Finger : Complete Kit Irontite Products Inc. Page
, and thread the puller screw into the threads on the inside of the sleeve. Get a good grip on the sleeve. 3.")
, until the sleeve bottoms in the injector hole. 2.")
15 INJECTOR SLEEVE REMOVAL AND INSTALLATION Removal of old injector sleeve 1. Using the special metric tap, ( ). Thread the upper part of the inside of the old sleeve. 2. Assemble the sleeve remover, ( ), and thread the puller screw into the threads on the inside of the sleeve. Get a good grip on the sleeve. 3. Turn the puller nut against the thrust bearing and washers, and, in turn, against the puller cap, and pull out the old sleeve. Installation of the new sleeve 1. Drive the new sleeve down into the injector hole with the sleeve drive-in tool, ( ), until the sleeve bottoms in the injector hole. 2. Using the special sleeve tip roll-in tool, ( ), roll out the end of the sleeve against the injector hole. It may be desirable to use a drill motor in rolling out this tip roll-in tool. 3. Now, using the standard sleeve roll-in tool, ( ), roll out the upper end of the sleeve. 4. Then, for a second time, using the sleeve tip roll-in tool, (624243), roll out the tip of the sleeve again. 5. Using the sleeve guide bushing and the sleeve seat cutter, ( and ), with the seat cutter gauge, ( ) and the gauge finger in place, cut the seat in the bottom of the sleeve. Cut until the dimensional pilot on the seat cutter stops the cutter at the top of the gauge. The sleeve is now ready for use in the normal manner. TOOLS FOR REMOVING AND INSTALLING INJECTOR SLEEVES IN KOMATSU AND HEADS For removing and installing injector sleeves in Komatsu and diesel engine heads, Irontite has designed the following tools: Sleeve removal tools Tool Body Tool Mandrel Drive-In Tool Roll-In Tool Sleeve Seat Cutter Guide Bushing Seat Cutter Gauge Gauge Finger Tip Protrusion Gauge : Complete Tool : Complete Set (Including Sleeve Removal And Installation Tools) Irontite Products Inc. Page

 down into the sleeve and then tap the inside of the sleeve about ½ deep. b.")
16 Injector sleeve tools for Komatsu 170 engines Injector Sleeve 1-1/4 Piloted Tap Removal Tool w/puller Screw, Cup And Nut Driving Arbor Sleeve Drive-In Tool Sleeve Nose Roll-In Tool Long Thin Roll-In Tool Standard Roll-In Tool Sleeve Seat Cutter Guide Bushing Cutter Gauge Gauge Finger With Gauge Tip Protrusion Gauge Injector sleeve installation instructions for Komatsu 170 engines 1. Removing the old injector sleeve a. Insert the pilot end of the special tap ( ) down into the sleeve and then tap the inside of the sleeve about ½ deep. b. Now screw the stem of the remover ( ) into the threaded sleeve and turn the nut on the remover until the sleeve remover pulls out the sleeve. 2. Installing the new injector sleeve a. Clean out the inside of the injector hole and replace the o-ring. b. Position the new injector sleeve in the injector hole and drive it down to the bottom of the casting, using the drive-in tool ( ). c. Now roll in the injector sleeve. Here the sleeve roll-in process involves three separate roll-in tools and four distinct steps. d. First, start with the nose roll-in tool ( ) with the rollers tapered to fit the tapered end of the sleeve. When using this roll-in tool, slowly turn the hand knob to give the sleeve the necessary downward thrust. Use care to not overroll the sleeve. e. Next, using the long thin roll-in tool ( ), roll out the short flat end of the sleeve just below the tapered part of the sleeve. Reverse the tool to roll it back out. f. Now go back to the nose roll-in tool ( ) and use it to smooth out the inside of the lower end of the sleeve. Irontite Products Inc. Page
17 g. Use the standard roll-in tool ( ) at this point to toll out the upper portion of the sleeve. Then reverse the tool and remove it from the injector hole. h. It is now in order to cut the seat in the new sleeve. 3. Install the seat cutter gauge to guide the seat cutter a. Attach the gauge finger ( ) to the head with the smooth measuring surface directly below the injector hole. b. Place the gauge ( ) on the gauge finger with the thicker part of the gauge directly below the injector hole. 4. Cut the seat in the newly installed sleeve a. Using the guide bushing ( ), the sleeve seat cutter ( ) and the driving arbor ( ) install the sleeve cutter in the sleeve in the injector hole and cut the bottom of the sleeve until the end of the pilot on the cutter bottoms on the thicker surface of the cutter gauge. b. At this point the seat cutter should have cut the inside of the sleeve so that it is smooth. If the inside of the sleeve is not yet smooth, then move the thinner part of the gauge over directly under the injector hole and cut the seat a bit deeper to smooth it out. However, do not cut the seat to the point that the end of the cutter pilot is below the lower part of the gauge. To do so would protrude the ultimate injector tip too far into the injector hole. The injector tip should not protrude more than.224 beyond the surface of the head. SLEEVE REMOVAL AND INSTALLATION TOOLS- Komatsu Injector Sleeve Removal And Installation Tools For Komatsu 125 Engines Injector Sleeve Removal And Installation Tools For And Heads Complete Kit Complete Kit Special Tap Sleeve Removal Tool Removal Tool Drive-In Tool Drive-In Tool Roll-In Tool Special Sleeve Tip Roll-In Guide Bushing Too Standard Sleeve Roll-In Seat Cutter (Carbide) Tool Guide Bushing Seat Cutter Gauge W/ Handle Sleeve Seat Cutter Gauge Finger Seat Cutter Gauge Tip Protrusion Gauge w/handle Gauge Finger Injector sleeve for Komatsu 170 engines Injector Sleeves Complete Kit Injector Sleeve For /4 Piloted Tap And Engines Injector Sleeve For 170 Engines Sleeve Removal Tool W/Puller Screw, Cap And Nut Sleeve Drive-In Tool Sleeve Nose Roll-In Tool Long Thin Roll-In Tool Standard Roll-In Tool Guide Bushing Sleeve Seat Cutter Driving Arbor Seat Cutter Gauge W/Handle Gauge Finger Tip Protrusion Gauge Tool Box Irontite Products Inc. Page


18 GM DETROIT DIESEL 53, 71 AND 92 ENGINES INJECTOR SEAT AREA REPAIR TOOLS The tools shown here are designed for use in rebuilding the injector seat areas of GMC 53, 71 and 92 engine heads when the injector area has developed cracks or requires rebuilding due to successive resurfacing of the face of the head or for other reasons. Gauge Taper Length Drill Drill Bushing Combination Counterbore And Tapered Reamer End Facing Counterbore Tapered Tap Tap Driver Tapered Plugs Driving Arbor Seat Cutter Seat Cutter With Gauge Finger GMC Countersink : Complete Kit for GMC 53, 71 & 92 Irontite Products Inc. Page

19 CERTAIN GM DETROIT DIESEL 71 AND 92 ENGINES WATER DIRECTOR REPLACEMENT For some of the 71 series engines and the early 92 series engines it is necessary to replace the larger 2- piece water director with a smaller one-piece director. For this replacement Irontite has the following tools available. G-Oversize Tap End Facing Counterbore Installation Tool Special Size Drilled Plug (GO Short) End Facing Counterbore With Special Pilot One-Piece Water Directors CASTING REPAIR TOOLS GM Detroit Diesel Injector Sleeve Removal Tool For 53, 71, 92 And 8.2 Series Heads Casting Injector Seat Repair Tools For 53, 71 And 92 Series Sleeve Remover Complete Kit Casting Seat Cutter Gauge w/handle Water Director Replacement Tools For Some 71 And 92 Series Engines Combination Counterbore And Tapered Reamer (Carbide) G Oversize Tapered Tap Tapered G Tap Special G Oversize Short Tap Driver Plug End Facing Counterbore Tapered G Plugs (5) Special Pilot For Drill Bushing Counterbore Installation Tool /32 HSS Drill Water Director End Facing Counterbore Cutter Counterbore Pilot Driving Arbor Guide Bushing Seat Cutter (Carbide) Gauge Finger GMC Countersink /8 HEX Key Irontite Products Inc. Page


 430-6495-71 430-6495-32")
20 Tools for removing and installing new injector sleeves GM Detroit Diesel 53, 71 and 92 Engine Sleeve Removal Tool Injector Hole Countersink Standard Sleeve Installing Tool Alternate Sleeve Installing Tool Pilot Dowel Tip Reamer Flaring Stud End Facer Sleeve Seat Cutter Gauge Gauge Finger Sleeve Seat Cutter Pilot Optional Sleeve Body Reamer Reamer Regular Injector Sleeves Thick Nose Injector Sleeves Injector Sleeve O- Ring (Buna) Injector Sleeve O- Ring (Viton) Irontite Products Inc. Page


21 TOOLS FOR REMOVING AND INSTALLING INJECTOR SLEEVES GM Detroit Diesel 8.2 Engines Flat Tip Protrusion Gauge Sleeve Removal Tool Button Hook Pick Sleeve Installation Tool Sleeve Tip Expander Sleeve Tip Reamer Driver For Tip Reamer Sleeve End Facer Injector Sleeve Viton O-Ring Sleeve Seat Cutter Seat Cutter Gauge Gauge Finger GMC 8.2 Complete Kit: Irontite Products Inc. Page


22 Injector sleeve tools for GM Detroit diesel series 50 and 60 engines Sleeve Remover Sleeve Installation Tool Injector Sleeve With O ring Flaring Stud Tip Reamer Sleeve End Facer Guide Bushing Assembly Seat Cutter Cutter Driver Seat Cutter Gauge Gauge Finger Tip Protrusion Gauge : GMC 50/60 Complete Kit Irontite Products Inc. Page
23 DETROIT DIESEL 50 AND 60 ENGINES Replacing a worn injector sleeve 1. Removing the worn injector sleeve a. With the sleeve remover ( ) knock the worn injector sleeve out of the injector sleeve hole and carefully clean out the injector hole before installing the new sleeve. 2. Installing the new injector sleeve in the injector hole a. With the o-ring in place on the sleeve, place the sleeve over the pilot ( ) onto the end of the installation tool ( ). Install the installation tool down into the injector hole and tap it to make sure that the sleeve has bottomed in the injector hole. Then lock the installation tool body clamp ( ) and the locking clamp bolt. b. Remove the pilot at the end of the installation tool and install the flaring stud ( ) in the end of the tool. The tip of the sleeve may be tight and it may be necessary to thread the flaring stud up through the tip of the sleeve. Continue torqueing the flaring stud up, using about 30 foot/pounds of torque, until the end of the sleeve is fully flared. Grease or anti-seize on the threads of the flaring stud may be helpful in flaring out the end of the sleeve. c. When the sleeve has been fully flared out, remove the flaring stud and then remove the installation tool to prepare the sleeve for cutting the seat. 3. Preparing the sleeve for cutting the seat a. Install the guide bushing ( ) in the injector hole and hold it in position with the guide bushing clamp ( ) locking the position clamp tightly with the locking bolt, using, if necessary, as much as 8 to 10 foot/pounds of torque on the clamp locking bolt. With the reamer driver assembly ( includes reamer ) down in the guide bushing, ream out the bottom end of the injector sleeve. b. Now face off the bottom end of the sleeve with the sleeve end facer ( ). 4. Cutting the seat in the new injector sleeve a. First install the gauge finger ( ) on the head with the smooth face of the gauge finger directly below the injector hole. Then position the seat cutter gauge ( ) on the smooth face of the gauge finger directly below the injector hole. b. Using the seat cutter ( ) with the driving arbor ( ) down through the guide bushing into the injector hole, cut the seat in the bottom of the sleeve until the pilot on the end of the seat cutter stops on the surface of the cutter gauge ( ). When cutting the seat run the cutter at about 200 RPM. As a further check on the depth of the seat in the sleeve, remove the seat cutter from the guide bushing and place the tip protrusion gauge ( ) down into the injector seat. The tip of the protrusion gauge should be short of the surface of the head by.000 to.008. Irontite Products Inc. Page
24 SLEEVE INSTALLATION TOOLS - Gm Detroit Diesel Engines Sleeve removal and installation tools for 53, 71 and 92 series engines Sleeve removal and installation tools for 8.2 series engines Complete Kit Complete Kit Sleeve Remover Sleeve Remover GMC Countersink Button-Hook Pick STD. Sleeve Inst. Tool (With Pilot And Dowel Pin ) Sleeve Installation Tool (W/Flange And Snap Ring And Bolts) Tip Reamer MM Bolts (2) Flaring Stud Tip Expander End Facer Tip Reamer Sleeve Seat Cutter Driver For Tip Reamer (Carbide) Seat Cutter Gauge /32 HEX Key W/Handle Gauge Finger End Facer /8 HEX Key Sleeve Seat Cutter (Carbide) Alternate Sleeve Installation Seat Cutter Gauge w/handle Tool With No-Stretch Adjustable Stop Nut Gauge Finger Optional Sleeve Body Reamer (With Pilot And Tip Reamer ) Tip Protrusion Gauge Tip Reamer For Sleeve Injector sleeves Body Reamer Injector Sleeve 8.2 OEM Optional Sleeve Set Seat Viton O-Ring Cutter For Thicker Sleeves (Carbide) Injector Sleeve: 60 Series w/o- Ring Injector sleeves Sleeve removal and installation tools for 50 and 60 series engines Standard Sleeves Complete Kit Heavy Duty Sleeves Sleeve Removal Tool Buna O-Rings Sleeve Installation Tool Assembly w/tool Pilot Viton O-Rings Flaring Stud Guide Bushing Assembly Tip Reamer Driver Assembly Sleeve End Facer Gauge Finger Seat Cutter Gauge W/Handle Driving Arbor Seat Cutter (Carbide) Tip Protrusion Gauge FOR CASTING REPAIR OR RMOVAL AND INSTALLATION TOOLS NOT LISTED, CALL THE FACTORY OR SALES OFFICE FOR INFORMATION ON PARTS AND AVAILABILITY. Irontite Products Inc. Page

 tighten the worn injector sleeve tight into position, Then with the modified plug tap (437-5331-36) and the tap guide bushing (437-6551-40) thread the upper")

25 CATERPILLAR INJECTOR SEAT REPAIR TOOLS CATERPILLAR ENGINES INJECTOR SLEEVE REMOVAL AND INSTALLATION TOOLS Sleeve Puller Clamp Plug Tap Guide Bushing Roll-In Tool Modified Plug Tap Tip Expander Driver Sleeve Hammer Assembly Assembled Sleeve Puller Sleeve Seat Cutter Seat Cutter Guide Bushing Tip Expander CATERPILLAR 3114/3316/3126 ENGINES INJECTOR SLEEVE REMOVAL AND INSTALLATION 1. Removal of worn injector sleeve a. First, with the sleeve clamp ( ) tighten the worn injector sleeve tight into position, Then with the modified plug tap ( ) and the tap guide bushing ( ) thread the upper end of the worn sleeve. b. With the assembled sleeve puller ( ) thread the threaded puller screw ( ) into the threaded end of the sleeve. Release the sleeve clamp by unscrewing the nut at the bottom end of the clamp. Then activate the assembled sleeve puller by turning the sleeve puller nut to pull the worn sleeve out of the injector hole. c. Very carefully clean out the injector hole. Make sure to clean out any small rings of copper that may still be in the injector hole. 2. Installing the replacement injector sleeve a. First, brush the outside of the injector sleeve and the inside of the injector hole with a light coating of ceramic seal ( ). b. Tap the new sleeve lightly to make sure that it is down flush with the bottom of the injector hole. c. With the roll-in tool ( ) operating at about 50/100 RPM and the rollers covered with light oil all of the time, let the tool feed on itself all of the way to the bottom of the sleeve. This should expand the larger end of the sleeve. d. Now, using the slide hammer assembly ( ) with the tip expander driver ( ) and the tip expander ( ) tap the driver until the tip expander bottoms on the bottom of the new of the injector sleeve. Then withdraw the expanding unit. This Irontite Products Inc. Page
 and the cutter guide bushing (437-6553-66), keeping the cutter well oiled and running at about 100 RPM, cut the injector seat no further than cleaning up")


, supported by the tap guide bushing (437-6571-30), thread the upper end ½ or so of the inside of the sleeve. b. Remove the sleeve clamp and install the sleeve remover mandrel (437-6571-50) into the sleeve from the top side of the head.")
26 should expand the smaller end of the replacement sleeve. It may be helpful to use antiseize compound on the expander tip. 3. Cutting the seat in the newly installed sleeve a. Using the sleeve seat cutter ( ) and the cutter guide bushing ( ), keeping the cutter well oiled and running at about 100 RPM, cut the injector seat no further than cleaning up the seat area or until the cutter stops on the guide bushing. CATERPILLER DIESEL ENGINES Tools for injector sleeve replacement in caterpillar 3176/3196 engines Sleeve Clamp Plug Tap Guide Bushing Plug Tap Threaded Sleeve Puller Sleeve Drive-In Tool Sleeve Roll-In Tool Sleeve Flaring Tool With Stud Sleeve Seat Cutter & Guide Bushing Sleeve Hammer Tool Assy Threaded Sleeve Removal Tool Sleeve Removal Tool Complete Kit: Caterpillar injector sleeve servicing 1. Removing the worn injector sleeve a. First lock the worn injector sleeve in tight, using the sleeve clamp ( ), so that the sleeve will not turn. Using the 1-7/16-12 plug tap ( ), supported by the tap guide bushing ( ), thread the upper end ½ or so of the inside of the sleeve. b. Remove the sleeve clamp and install the sleeve remover mandrel ( ) into the sleeve from the top side of the head. Now screw the threaded remover ( ) into the sleeve. A hydraulic press is needed to press the mandrel and remove the sleeve. c. With the wire brush, clean out the injector hole, be sure to clean the copper bits out of all the grooves in the seat. 2. Installing the replacement sleeve a. Brush the cleaned-out injector seat area with the Irontite ceramic seal and then insert the replacement injector sleeve down into the injector hole. Irontite Products Inc. Page
27 b. Using the sleeve drive-in tool ( ), drive in the sleeve in until it bottoms on the injector hole. c. With the new sleeve in place, roll out the upper portion of the sleeve with the sleeve rollin tool ( ). For the roll out process use a seat and guide machine operating at about 50/110 RPM and keep the rollers covered with a light oil at all times. In the process let the roll-in tool feed on itself all the way to the bottom of the sleeve. Then reverse the tool and remove it from the injector hole. d. Now attach the sleeve flaring tool ( ), with the sleeve tip expander ( ), to the end of the slide hammer shaft (699510), with the slide hammer weight ( ), drive the sleeve flaring tool until the sleeve tip expander bottoms on the injector area. Then withdraw the sleeve flaring tool. 3. Cutting the seat in replacement sleeve a. Using the sleeve seat cutter ( ) and the cutter guide bushing ( ) keeping the cutter well oiled and running at about 100 ROM, cut the injector seat no further than cleaning up the seat area or until the cutter stops on the guide bushing. CATERPILLAR INJECTOR SLEEVE SERVICING Medium Duty Diesel Engine Caterpillar Sleeve Removal And Installation Tools Caterpillar 3176/3196 Sleeve Removal And Installation Tools Complete Kit Complete Kit Sleeve Clamp Sleeve Clamp Plug Tap 1-3/ Plug Tap 1-7/ Plug Tap Guide Bushing Plug Tap Guide Bushing Sleeve Puller Threaded Sleeve Puller Sleeve Hammer Tool Assembly (Incl. Slide Hammer Shaft , Slide Hammer Stop , And Slide Hammer Weight ) Sleeve Hammer Tool Assembly (Incl. Slide Hammer Shaft , Slide Hammer Stop , And Slide Hammer Weight ) Tip Expander Sleeve Puller Mandrel Tip Expander Driver Sleeve Drive-In Tool Sleeve Roll-In Tool Sleeve Tip Expander Sleeve Seat Cutter Sleeve Tip Expander Driver Seat Cutter Guide Bushing Sleeve Roll-In Tool Sleeve Seat Cutter Sl. Seat Cutter Guide Bushing Irontite Products Inc. Page

28 MACK 2-VALVE DIESEL ENGINES Area of Mack 2-valve engines, including #465, 673, 675, 711, 864 and #865 Leveling Guide Bushing Hold Down Clamp Head Leveling Tools Leveling Pilot / / /16 Alternate Piloted Drills To Counterbore Area Hole Straight Shank Morse Taper Shank Tapered G Reamer Tapered G Tap Tap Driver Tapered G Plug Drill Bushing Letter W Drill End Facing Counterbore With Pilot Counterbore Stop Collar Optional Positioning Legs Intake Side Exhaust Side # #673, 675 and # # Complete Kit Irontite Products Inc. Page


29 MACK 2-VALVE ENGINE INJECTOR SLEEVE REMOVAL AND INSTALLATION TOOLS 7/8-14 Plug Tap Sleeve Removal Tool Sleeve Drive-In Tool MACK GROOVING TOOL Irontite has developed an easy to use head grooving tool for cutting grooves in mack heads after they have been resurfaced Complete Tool With 1 Tool Bit: For Series E9-EM 998 And EM 400 And E7 4-Valve Heads For Series E6 EM 998 And EM 350, 673, 675 And For Series E7-250/425 Hp For Series 865 & Cylinder 2-Valve Irontite Products Inc. Page
30 ENGINE CASTING REPAIR TOOLS Mack Diesel Injector Seat Area Casting Repair Tools For 2-Valve Engines Listed Below: Optional Legs For Positioning The Injector Hole In Vertical Position Complete Kit For #465 Heads (IN) Leveling Guide Bushing For #465 Heads (EX) Hold Down Clamp For 673, 675 And 711 Heads (IN) /8 Leveling Pilot For 673, 675 And 711 Heads (EX) Leveling Pilot For 865 Heads (IN) /32 Leveling Pilot For 865 Heads (EX) /16 Leveling Pilot For 864 Heads (IN) Straight Shank Piloted Drill For 864 Heads (EX) OR Morse Taper Piloted Drill Mack 2-Valve Engine Injector Sleeve Removal And Installation Tools Tapered G Reamer Complete Kit Tapered G Tap /8-14 Plug Tap Tapered G Plugs (5) Sleeve Removal Tool Tap Driver Sleeve Drive-In Tool Drill Bushing W Taper Length Drill Mack Head Grooving Tool /16 Straight Shank Counterbore (With Built-In Pilot) Complete Tool (Including Tool Bit ) Stop Collar Tool Bits For Grooving Tool /8 HEX Wrench For Series E9-EM 400 And EM998 8 Cyl. 4 Valve For 673, 675 And Cyl. 2 Valve And Series E6-EM 300 And EM 350-6cyl 4 Valve For Series E HP 6 Cyl. 4 Valve For 865 And 866 8cyl. 2 Valve FOR CASTING REPAIR OR REMOVAL AND INSTALLATION TOOLS NOT LISTED, CALL THE FACTORY OR SALES OFFICES FOR INFORMATION ON PARTS AND AVAILABILITY. Irontite Products Inc. Page


 Irontite Products Inc.")
31 NAVISTAR-INTERNATIONAL 239/259 ENGINES Navistar-international 239/259 injector sleeve removal and installing tools Removal Tool Sleeve Drive-In Tool Sleeve Roll In Tool Injector Sleeve Complete Kit: Includes Removal Tool, Drive In Tool and Roll In Tool 239/259 Injector Sleeve Tools Injector Sleeves Complete Kit Includes: For 239 And 259 Engines Removal Tool, Drive-In Tool And Roll-In Tool Removal Tool Sleeve Drive-In Tool Sleeve Roll-In Tool NAVISTAR-INTERNATIONAL 466 ENGINES Navistar-International 466 Injector Sleeve Removal And Installation Tools Removal Tool Drive In Tool Roll In Tool Injector Sleeve Complete Kit: Includes Removal Tool, Drive In Tool and Roll In Tool 466 Injector Sleeve Tools Injector Sleeves Complete Kit Includes: Removal Tool, Drive-In Tool And Roll-In Tool Removal Tool Drive-In Tool Roll-In Tool For 466 And 360 Heads (Also Fits 414 And 436) Irontite Products Inc. Page
32 SPECIAL NOTE about the use of 466 sleeve removal and installation tools: The Navistar-international 466 sleeve removal and installation tools work equally well with the 466 and the 360, 414 and 436 Navistar-International engines. NAVISTAR-INTERNATIONAL 7.3 POWER STROKER, 466E and 530E ENGINES Navistar-International 7.3 Power-Stroker Injector Sleeve Removal And Installation Tools Removal Tool Installation Tool Sleeves Complete Kit: Includes Removal Tool, Drive-In Tool and Roll-In Tool 466 Injector Sleeve Tools Injector Sleeves Complete Kit Includes: For 7.3 Power Stroker Heads Removal Tool, Drive-In Tool And Roll-In Tool Removal Tool Drive-In Tool Irontite Products Inc. Page


33 MISCELLANEOUS DIESEL TOOLS Split sleeve tap drivers Tap size O.D.M.T ¾ # /8 # /8 # #4 Extension adapter sleeve Inside M T Outside MT Length #2 #3 4-1/ #2 # #3 #4 5-1/ #4 #3 9-1/2 I D L adapters Inside M T Outside Dia #2 IDL #3 IDL Bridgeport and D C M adapters Inside MT Outside Dia #2 7/ /8 R8 COLLET Crossover guide pins Large End For Cummins For Cummins For caterpillar Split sleeve tap drivers Tap Size O.D. M.T. of driver ¾ # /8 # /8 # #4 Irontite Products Inc. Page
34 Adapter Sleeves M T inside M T outside Length #2 #3 4-1/ #2 # #3 #4 5-1/ #4 #3 9-1/2 I D L Adapters #2 M T Inside I D L Outside #3 M T Inside I D L Outside D C M Adapters Adapter R8 7/8 Round Collet Crossover Guide Pins Large End For Cummins For Cummins For Caterpillar Irontite Products Inc. Page
35 Page 35
36 Irontite by Kwik-Way: Irontite Products Inc FAX: Page 36
Copyright (c) 2017 by Irontite Products Inc. rev
 2017 by Irontite Products Inc. rev") Copyright (c) 2017 by Irontite Products Inc. rev. 170725 Cummins Diesel Engines Casting Seat Repair Tools SERIES KITS Assure all the right tools for any series you need. Each series has a kit with tools
Copyright (c) 2017 by Irontite Products Inc. rev. 170725 Cummins Diesel Engines Casting Seat Repair Tools SERIES KITS Assure all the right tools for any series you need. Each series has a kit with tools
Manufacturers of Kwik-Way, Van Norman, and Irontite Brand Products
 Cedar Rapids, IA 1-800-553-5953 Cleveland, OH 1-800-321-7520 Manufacturers of Kwik-Way, an Norman, and Irontite Brand Products Irontite Products tnc., P.O, Box 9877, Cedar Rapids, Iowa 52409 +1-319-377-9421
CUMMINS ISX / QSX INJECTOR CASTING REPAIR TOOLING
 DESCRIPTION PART # The Complete ISX / QSX Casting Repair Kit with Toolbox 450-6110-60 Above Kit includes the following: Enlarging Counter Bore Cutter 434-6513-20 Counter Bore Pilot (2) 416-6156-62 J-Tapered
Section 4 - Level 3 Group 2
 Page 4-1 Section 4 - Level 3 Group 2 This section contains major component rebuild tools for the Cylinder Head Group family. See below for a general description of contents for this grouping of tools.
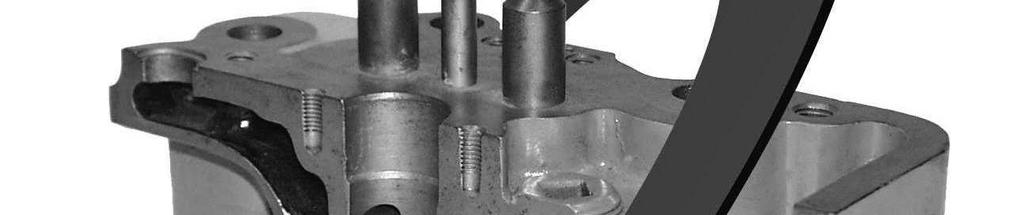
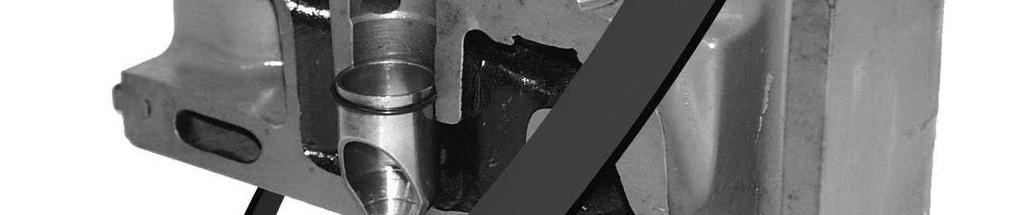
OVERHAUL. 1. REMOVE W/HEAD TAPER SCREW PLUG NO.2 (a) Using a socket hexagon wench 10, remove the taper screw plug and gasket.
 Using a socket hexagon wench 10, remove the taper screw plug and gasket.") 14138 ENGINE MECHANICAL OVERHAUL 140Q703 1. REMOVE W/HEAD TAPER SCREW PLUG NO.2 (a) Using a socket hexagon wench 10, remove the taper screw plug and gasket. A62890 2. REMOVE VALVE LIFTER (a) Remove the
14138 ENGINE MECHANICAL OVERHAUL 140Q703 1. REMOVE W/HEAD TAPER SCREW PLUG NO.2 (a) Using a socket hexagon wench 10, remove the taper screw plug and gasket. A62890 2. REMOVE VALVE LIFTER (a) Remove the
OVERHAUL. 1. REMOVE VALVE LIFTER HINT: Arrange the valve lifter in the correct order.
 ENGINE MECHNICL 1473 OVERHUL 1415F02 1. REMOVE VLVE LIFTER HINT: rrange the valve lifter in the correct order. 75601 SST Wooden Block 75602 2. REMOVE VLVE HINT: rrange the valves, inner compression springs,
Maintenance Information
 Form 16573321 Edition 1 July 2004 Air Grinder Series 61H Maintenance Information Save These Instructions Always wear eye protection when operating or performing maintenance on this tool. Always turn off
Maintenance Information
 16575243 Edition 2 October 2013 Air Screwdrivers 1R Series Maintenance Information Save These Instructions Product Safety Information WARNING Failure to observe the following warnings, and to avoid these
Maintenance Information
 16573321 Edition 3 February 2014 Air Grinder Series 61H Maintenance Information Save These Instructions Product Safety Information WARNING Failure to observe the following warnings, and to avoid these
EM 128 2UZ-FE ENGINE MECHANICAL ENGINE UNIT INSPECTION
 128 2UZ-FE ENGINE MECHANICAL ENGINE UNIT INSPECTION HINT: Thoroughly clean all parts to be assembled. Before installing the parts, apply new engine oil to all sliding and rotating surfaces. Replace all
CYLINDER HEAD ASSY (1MZ FE)
") OVERHAUL 1. REMOVE W/HEAD STRAIGHT SCREW PLUG NO.1 14209 1405K01 Using a 14 mm straight hexagon wrench, remove the screw plug. 2. REMOVE W/HEAD STRAIGHT SCREW PLUG NO.2 Using a 14 mm straight hexagon wrench,
OVERHAUL 1. REMOVE W/HEAD STRAIGHT SCREW PLUG NO.1 14209 1405K01 Using a 14 mm straight hexagon wrench, remove the screw plug. 2. REMOVE W/HEAD STRAIGHT SCREW PLUG NO.2 Using a 14 mm straight hexagon wrench,
CLEANING, INSPECTION AND REPAIR. Valve Spring Compressor (Part No. HD-34736B) Figure Compressing Valve Springs
 Figure Compressing Valve Springs") b0134x3x 5694 8 7 12 10 1 6 13 11 Valve Spring Compressor (Part No. HD-34736B) 9 Figure 3-11. Compressing Valve Springs 5 14 4 3 2 15 2767a 1. Right crankcase half 2. Pin (2) 3. O-ring (2) 4. Plate 5.
b0134x3x 5694 8 7 12 10 1 6 13 11 Valve Spring Compressor (Part No. HD-34736B) 9 Figure 3-11. Compressing Valve Springs 5 14 4 3 2 15 2767a 1. Right crankcase half 2. Pin (2) 3. O-ring (2) 4. Plate 5.
CYLINDER HEAD OVERHAUL
 ENGINE OVERHAUL PROCEDURES - GENERAL INFORMATION -2011 Mercedes-... Page 1 of 20 CYLINDER HEAD OVERHAUL * PLEASE READ THIS FIRST * Examples used in this article are general in nature and do not necessarily
1989 Jeep Cherokee. STEERING COLUMN' '1989 STEERING Jeep Steering Columns STEERING COLUMN STEERING Jeep Steering Columns
 STEERING COLUMN 1989 STEERING Jeep Steering Columns DESCRIPTION All models use collapsible steering columns. All columns have integral ignition switch and locking device. Optional tilt wheel is available
3.2 DRIVE TORQUE HUB. Roll, Leak and Brake Testing SECTION 3 - CHASSIS & TURNTABLE. 3-2 JLG Lift
 3.2 DRIVE TORQUE HUB Roll, Leak and Brake Testing 10 LUG PATTERN Torque-Hub units should always be roll and leak tested before disassembly and after assembly to make sure that the unit's gears, bearings
Super EZ Chain Saw UT Page 1 of 18 Tools And Accessories
 Super EZ Chain Saw UT-10440 Page 1 of 18 Tools And Accessories Super EZ Chain Saw UT-10440 Page 2 of 18 Tools And Accessories 24299 24299 ANVIL- Crankshaft installation 24304 24304 BIT- #2 pozidrive 24295
Keyed Industrial Chucks Keyless Industrial Chucks Rubber-Flex Collet Chucks Arbors
 Keyed Industrial Chucks... 1244 Keyless Industrial Chucks... 1248 Rubber-Flex Collet Chucks... 1250 Arbors... 1252 Sleeves, Sockets & Ejecting Drifts... 1255 Portable Tool Chucks... 1256 Special Purpose
Taper shank arbors for drill chucks
 KD Taper shank arbors for drill chucks Taper shank arbors KD Tool group A04 Type 236 Taper shank arbors with drill chuck taper DIN 238 completely hardened and ground Item no. Morse taper DIN 228 B Hole
V/VT-378, V/VT-504, and V/VT-555 Engines
 V/VT-378, V/VT-504, and V/VT-555 Engines Service Manual Service Manual THIS IS A MANUAL PRODUCED BY JENSALES INC. WITHOUT THE AUTHORIZATION OF CUMMINS OR IT S SUCCESSORS. CUMMINS AND IT S SUCCESSORS ARE
Maintenance Information
 45528270 Edition 1 June 2007 Barring Motor T480 Series Maintenance Information Save These Instructions WARNING Always wear eye protection when operating or performing maintenance on this Barring Motor.
Super EZ Chain Saw UT Page 1 of 19 Carburetor
 Super EZ Chain Saw UT-10580 Page 1 of 19 Carburetor Super EZ Chain Saw UT-10580 Page 2 of 19 Carburetor 1 93203A 1 /P Repair Kit Includes items 1-16. 2 93203A 1 /P Repair Kit Includes items 1-16. 3 93203A
G W DISCONTINU. SERVICE TOOLS for COMPANIES, INC. HEAVY DUTY TRUCK TRANSMISSIONS AXLES TIMING BLOCKS gwtoolco.com
 G & TOOL W SERVING THE GEAR INDUSTRY OVER 45 YEARS COMPANIES, INC. SERVICE TOOLS for HEAVY DUTY TRUCK TRANSMISSIONS AXLES (FULLER T-9824) G-38: INPUT SHAFT BEARING PULLER Countershaft Front Bearings (#81007)
SHOVEL HEAD. Extreme Duty Replacement Valves Valves Guides Valves Seals. Compression Release Valves. Valves Spring kits SHOVEL HEAD
 Extreme Duty Replacement Valves Valves Guides Valves Seals Valves Spring kits Compression Release Valves AV&V Extreme Duty Replacement Valves These superb valves feature the highest flow level on the market.
Tube Installation.
 Tube Installation www.elliott-tool.com Tube Installation Table of Contents Page Tube Installation 2 Tube Hole Gauges 4 Tube Sheet Hole Brushes 5 Grooving (Serrating) Tools 6 Tube Auger / End Prep 7 Hand
CONTINENTAL ENGINE PARTS Tel: Fax: CONTINENTAL ENGINE PARTS: F226/F227
 CONTINENTAL ENGINE PARTS Tel: 713-864-7084 Fax: 713-864-5190 CONTINENTAL ENGINE PARTS: F226/F227 BORE: 3.3125" 6 Cyl Gas NOTES: Flat Head Engine / Listing Also Includes F6226, PF226 Engine Models APPLICATION:
Maintenance Information
 04581245 Edition 2 May 2014 Air Grinder, Die Grinder and Sander Series G2 (Angle) Maintenance Information Save These Instructions Product Safety Information WARNING Failure to observe the following warnings,
1998 Saab 900 SE ENGINES Saab 2.0L & 2.3L 4-Cylinder
 Removal & Installation See VALVE SPRINGS under CYLINDER HEAD under OVERHAUL. CAMSHAFT Removal 1. Rotate crankshaft until "0" mark on flywheel aligns with timing mark on flywheel cover. Remove inspection
Maintenance Information
 16605958 Edition 2 May 2014 Air Percussive Rivet Buster Models 9001 and 11001 Maintenance Information Save These Instructions Product Safety Information WARNING Failure to observe the following warnings,
Installation Manual TWM Performance Short Shifter Cobalt SS/SC, SS/TC, HHR SS, Ion Redline and Saab 9-3
 Page 1 Installation Manual TWM Performance Short Shifter Cobalt SS/SC, SS/TC, HHR SS, Ion Redline and Saab 9-3 Please Note: It is preferable to park on a flat surface, as you will have to engage and disengage
26/01/2017 3GR-FSE ENGINE MECHANICAL: ENGINE UNIT: DISASSEMBLY; 2006 MY GS300 [01/ ]
![26/01/2017 3GR-FSE ENGINE MECHANICAL: ENGINE UNIT: DISASSEMBLY; 2006 MY GS300 [01/ ]](/thumbs/85/92233007.jpg "26/01/2017 3GR-FSE ENGINE MECHANICAL: ENGINE UNIT: DISASSEMBLY; 2006 MY GS300 [01/ ]") Last Modified: 8-24-2016 6.6 A Doc ID: RM000000T4X000X Model Year Start: 2006 Model: GS300 Prod Date Range: [01/2005 - ] Title: 3GR-FSE ENGINE MECHANICAL: ENGINE UNIT: DISASSEMBLY; 2006 MY GS300 [01/2005
Last Modified: 8-24-2016 6.6 A Doc ID: RM000000T4X000X Model Year Start: 2006 Model: GS300 Prod Date Range: [01/2005 - ] Title: 3GR-FSE ENGINE MECHANICAL: ENGINE UNIT: DISASSEMBLY; 2006 MY GS300 [01/2005
Maintenance Information
 16606022 Edition 3 May 2014 Air Drill 728 Series Maintenance Information Save These Instructions Product Safety Information WARNING Failure to observe the following warnings, and to avoid these potentially
Maintenance Information
 80234313 Edition 1 June 2006 Air Grinder, Die Grinder, Sander and Belt Sander Series G1 (Angle) Maintenance Information Save These Instructions WARNING Always wear eye protection when operating or performing
$1.00 FOR THE TQIO/RCIO
 $1.00 FOR THE TQIO/RCIO m mm HDBBYSHOP Champion Jay Halsey has an impressive track record. One of Jay's advantages is a whisper smooth tranny thanks to his dad, Jim. Now you can build a Halsey transmission!
TWIST DRILLS AND COUNTERBORES
 TWIST DRILLS 827 TWIST DRILLS AND COUNTERBORES Twist drills are rotary end-cutting tools having one or more cutting lips and one or more straight or helical flutes for the passage of chips and cutting
The EPA07 Series 60 Workshop Manual has been revised. Listed in Table 1 are the revisions.
 NUMBER: 08 60-6 S.M. REF.: 2.3.1 and 2.3.2 ENGINE: EPA07 Series 60 DATE: September 2008 SUBJECT: E3 INJECTOR TUBE PUBLICATION: DDC-SVC-MAN-0005 The EPA07 Series 60 Workshop Manual has been revised. Listed
REPAIR MANUAL URW SERIES. URW-6, 8, 9, 10 & 12 Series Repair Manual
 REPAIR MANUAL URW SERIES URW-6, 8, 9, 10 & 12 Series Repair Manual Contents Page 1. Tools Needed for Repair 1 2. Disassembly and Reassembly of the Cam Casing 2-4 3. Disassembly and Reassembly of the Gear
Maintenance Information
 16572679 Edition 2 May 2014 Air Drill QP Series Maintenance Information Save These Instructions Product Safety Information WARNING Failure to observe the following warnings, and to avoid these potentially
CP-1, CP-2, CP-2L & CPD-2 Series Overhaul
 Replacement of Mechanical Seals for CM, CMU, CS and CSU Series Pumps Installation Instructions Form No. F-1031 Section 5013 Issue Date 03/01/85 Rev. Date 02/08/11 CP-1, CP-2, CP-2L & CPD-2 Series Overhaul
Valvetrain, servicing
 Page 1 of 51 15-32 Valvetrain, servicing Note: Cylinder heads with small cracks between the valve seats that are less than 0.3 mm (0.012 in.) wide and/or between one valve seat and only the first 4 threads
DRIVE AXLE Nissan 240SX DESCRIPTION & OPERATION AXLE RATIO & IDENTIFICATION AXLE SHAFT & BEARING R & I DRIVE SHAFT R & I
 DRIVE AXLE 1990 Nissan 240SX 1990 DRIVE AXLES Rear Axle - R200 240SX, 300ZX DESCRIPTION & OPERATION The axle assembly is a hypoid type gear with integral carrier housing. The pinion bearing preload adjustment
SDS Continental O-200 Installation Manual Aug. 4/17
 SDS Continental O-200 Installation Manual Aug. 4/17 This manual covers the steps to install the SDS EM-5 fuel injection and ignition system components on O-200 engines. Hall Sensor and Bracket Install
ENGINE MECHANICAL EM SECTION CONTENTS
 ENGINE MECHANICAL EM SECTION CONTENTS INTAKE MANIFOLD...EM-2 Component Parts Location...EM-2 Removal and Installation...EM-3 Inspection...EM-3 EXHAUST MANIFOLD...EM-4 Component Parts Location...EM-4 Removal
Mitre Band Saw. Installation and Operating Instructions Note: Not all saw parts are shown in this booklet. Replaceable Aluminum Saw Table
 P ARTS C ATALOG 2G PARTS CATALOG Drive Wheel End Pulley Box Speed Reducer M FG. COMPANY, INC. Mitre Band Saw Installation and Operating Instructions Note: Not all saw parts are shown in this booklet Motor
20 Water Pumps 20 1 Part Number Index General Information
 Water Pump Catalog Caterpillar Cummins Detroit Diesel Ford General Motors Mack Mercedes Navistar Thermo-King/Isuzu Volvo Innovative Vehicle Solutions Important Notice The products described within this
155 CARTRIDGE SINGLE SEAL
 MECHANICAL SEAL INSTALLATION INSTRUCTIONS 155 CARTRIDGE SINGLE SEAL SEAL INSTALLATION Preparation Determine if the pump is in good condition. A. Check the shaft or sleeve. 1. Remove all burrs and sharp
DELCO 42MT BREAKDOWN
 J&N UNIT # JanNco # OE PART # LESTER # VOLT ROTATION TEETH LEVER HSG GEAR OD 410-12056 410-12056R 1990344 6370 24 CW 11 Right Aligned 2.2 410-12057 410-12057R 1990337 6352 12 CW 11 Left Aligned 2.2 410-12058
Maintenance Information
 80234313 Edition 2 May 2014 Air Grinder, Die Grinder, Sander and Belt Sander Series G1 (Angle) Maintenance Information Save These Instructions Product Safety Information WARNING Failure to observe the
INSTALL MANUAL. FOR ON LINE ORDERING- E Commerce Visit Our Website
 INSTALL MANUAL FOR ON LINE ORDERING- E Commerce Visit Our Website WWW.PRESSUREGUARD.COM Contact Information Technical Support: Chris@pressureguard.com Sales Support: Sales@pressureguard.com By Phone: 615-227-6024
OVERHAUL 1. REMOVE OIL FILLER CAP SUB ASSY. 2. REMOVE CYLINDER HEAD COVER SUB ASSY (a) Remove the 10 bolts, 2 nuts, cylinder head cover and gasket.
 Remove the 10 bolts, 2 nuts, cylinder head cover and gasket.") 144 ENGINE MECHANICAL OVERHAUL 1. REMOVE OIL FILLER CAP SUBASSY 1410H01 2. REMOVE CYLINDER HEAD COVER SUBASSY (a) Remove the 10 bolts, 2 nuts, cylinder head cover and gasket. A11090 3. REMOVE CAMSHAFT
144 ENGINE MECHANICAL OVERHAUL 1. REMOVE OIL FILLER CAP SUBASSY 1410H01 2. REMOVE CYLINDER HEAD COVER SUBASSY (a) Remove the 10 bolts, 2 nuts, cylinder head cover and gasket. A11090 3. REMOVE CAMSHAFT
GROUP 6 CLUTCH CONTENTS SPECIFICATIONS
 GROUP 6 CLUTCH CONTENTS Page CLUTCH 6-1 Specifications.... 1 Transmission Main Drive Pinion Pilot Bushing... 5 Special Tools. 1 Clutch Release Bearing 6 Torque Reference 1 Torque Shaft and Bearings...
Removing and installing cylinder head
 31 30 29 28 27 26 25 24 23 22 1 2 3 11 12 10 4 9 5 6 7 8 Removing and installing cylinder head Checking compression pressure page 15-24. Notes: When installing a replacement cylinder head with a mounted
d -2,5 26,5 mm D -3,4 33 mm L mm; МК D mm L mm D mm L mm
 KAMAZ Publicly Traded Company Repair and Tooling Plant Tool making 2018 Twist drills Auger drills Drills with a thickened core Centre drills Twist step drills Solid carbide drills Inserted-blade drills
Maintenance Information
 16575219 Edition 4 October 2013 Air Screwdrivers QP1P, QP1S and QP1T Series Maintenance Information Save These Instructions Product Safety Information WARNING Failure to observe the following warnings,
Tube Remover and Installer. and Installer Used for servicing Ford systems produced after Screen Extractor. Ford Aerostar Expansion
 gauges A/C FLUSH KIT Easy-to-use system removes refrigerant oil, moisture contaminants from system components lines during retrofitting compressor replacement. Kit includes rubber-tipped flush gun, canister
OVER THE KNUCKLE 1-TON STEERING INSTALLATION INSTRUCTIONS
 OVER THE KNUCKLE 1-TON STEERING INSTALLATION INSTRUCTIONS TOOLS NEEDED Grinder with cutoff wheel, sawzall, cutting torches, or a plasma cutter Welder (for optional sway bar mounts) Hand drill with a ½
UOW Series Repair Manual UOW-11 & UOW-T60 Series
 UOW Series Repair Manual UOW-11 & UOW-T60 Series 100000 SE Pine St., Portland, OR 97216 800-852-1368 503-254-6600 www.aimco-global.com Contents Page 1. Tools Needed for Repair 2 2. Disassembly and Reassembly
General Safety and Maintenance Manual. Output. Type 0.9 H.P.675 W. (L) Lever or (K) Safety Lever R.P.M. (18000PM is standard)
 Lever or (K) Safety Lever R.P.M. (18000PM is standard)") HENRY TOOLS Industrial Airtools at Work General Safety and Maintenance Manual SUPER EXTENDED LENGTH DIE GRINDER FEATURING FRONT END DOUBLE ROW BEARINGS FOR SUPPORT. Multiple accessory mounting is possible
HENRY TOOLS Industrial Airtools at Work General Safety and Maintenance Manual SUPER EXTENDED LENGTH DIE GRINDER FEATURING FRONT END DOUBLE ROW BEARINGS FOR SUPPORT. Multiple accessory mounting is possible
TRANSMISSION 6.7 GENERAL HOME. See Figure The transmission is a five-speed constantmesh type housed in an extension of the crankcase.
 TRANSMISSION 6.7 GENERAL See Figure 6-45. The transmission is a five-speed constantmesh type housed in an extension of the crankcase. Mainshaft Neutral Mainshaft st Gear b06x6x Countershaft 4 Out 5 Countershaft
In-Line Positive Feed Tools
 In-Line Positive Feed Tools ADVANCED DRILLING EQUIPMENT SP-1300-1-EN-0806-.25M 1-1 Introduction In-Line Positive Feed Tools How Positive Feed Drills Operate Our in-line positive feed drills use two interconnected
Tubing Cutters No. 101 Tubing Cutter Spare Cutter Wheel NOTE: Order parts by Catalog Number only. DO NOT order by Reference Number. Ref.
 No. 0 Tubing Cutter Wheel Housing 0 Cutter Wheel Pin and Clip (Incl. Ref. No. ) E Cutter Wheel Stop Pin 0 Roll () Roller Pin () 0 Screw w/washer Knob Retaining Ring 0 Feed Screw Thrust Washer Roll Housing
CLUTCH CONTENTS SERVICE DIAGNOSIS. (a) Worn or damaged disc assembly. (b) Grease or oil on disc facings. (c) Improperly adjusted cover assembly.
 Worn or damaged disc assembly. (b) Grease or oil on disc facings. (c) Improperly adjusted cover assembly.") CLUTCH CONTENTS -GROUP 6 Page CLUTCH HOUSING ALIGNMENT... 6 CLUTCH PEDAL FREE PLAY 1 CLUTCH RELEASE BEARING 5 CLUTCH RELEASE FORK... 5 CLUTCH SERVICING 2 PILOT BUSHING CRANKSHAFT TO TRANSMISSION DRIVE
CLUTCH CONTENTS -GROUP 6 Page CLUTCH HOUSING ALIGNMENT... 6 CLUTCH PEDAL FREE PLAY 1 CLUTCH RELEASE BEARING 5 CLUTCH RELEASE FORK... 5 CLUTCH SERVICING 2 PILOT BUSHING CRANKSHAFT TO TRANSMISSION DRIVE
krais.com Product Catalog 2018 Tube&Pipe Professional Tools
 krais.com Product Catalog 2018 Tube&Pipe Professional Tools Original Manufacturer of the Products 2 Index KRAIS TUBE & PIPE TOOLS IMPORTANT! Due to constant improvement of products presented in this catalog,
SERVICE MANUAL. PVR15-Manifold Series Pump. J Design Series INSTALLATION. Ordering Code PVR15 - _ RM - _ - - J
 SERVICE MANUAL PVR15-Manifold Series Pump Installation, Startup, Operating Instructions, Parts Pages, Repair Procedures J Design Series This service manual applies to products with Ordering Codes like
Self-Adjust Clutch Installation Guide
 Self-Adjust Clutch Installation Guide 0 STOP! READ CAREFULLY BEFORE INSTALLING CLUTCH This clutch must be installed by a qualified installer. Improper installation or failure to replace or resurface the
OVERHAUL 3. REMOVE EXHAUST VALVE
 OVERHUL ENGINE MECHNICL CYLINDER HED SSY (2UZFE) HINT: Thoroughly clean all parts to be assembled. efore installing the parts, apply new engine oil to all sliding and rotating surfaces. Replace all gaskets,
1984 Dodge W250 PICKUP
 1984 Dodge W250 PICKUP Submodel: Engine Type: V8 Liters: 5.2 Fuel Delivery: CARB Fuel: GAS Dana 44 MODELS THROUGH 1984 2. Raise and safely support the vehicle, then remove the wheel hub and bearings as
DART Aluminum FORD 351 Small Block Technical Notes
 DART Aluminum FORD 351 Small Block Technical Notes Deck Height 9.200 Cleveland 9.500 Windsor Bore 4.00 or 4.125 unfinished Main Bearing Size Cleveland 2.749 Weight. 9.200 91 lb / 9.500 93 lb Maximum bore
Output 0.9 H.P. (675 W) 9000 to R.P.M (11000rpm is standard)
 9000 to R.P.M (11000rpm is standard)") HENRY TOOLS Industrial Airtools at Work General Safety and Maintenance Manual COLLET SPINDLE SHOWN Model Number Exhaust Direction Throttle Type 44RAE Side (L) Lever or (K) Safety Lever Speed 9000 to 11000
HENRY TOOLS Industrial Airtools at Work General Safety and Maintenance Manual COLLET SPINDLE SHOWN Model Number Exhaust Direction Throttle Type 44RAE Side (L) Lever or (K) Safety Lever Speed 9000 to 11000
OVERHAUL 1. REMOVE CYLINDER BLOCK WATER DRAIN COCK SUB ASSY
 1416 OVERHAUL 1. REMOVE CYLINDER BLOCK WATER DRAIN COCK SUBASSY 140RL01. INSPECT CONNECTING ROD THRUST CLEARANCE (a) Using a dial indicator, measure the thrust clearance while moving the connecting rod
225 CARTRIDGE DUAL SEAL
 225 CARTRIDGE DUAL SEAL MECHANICAL SEAL INSTALLATION INSTRUCTIONS PREPARATION 1 2 500.010" 0,25 mm 3 4.32 µ" 0,8 µm R a 1000 + ±.001".002" 0,025mm 0,050mm CAUTIONS These instructions are general in nature.
1988 Chevrolet Pickup V SUSPENSION - FRONT (4WD)' 'Front Suspension - "V" Series 1988 SUSPENSION - FRONT (4WD) Front Suspension - "V" Series
' 'Front Suspension - V Series 1988 SUSPENSION - FRONT (4WD) Front Suspension - V Series") 1988 SUSPENSION - FRONT (4WD) Front Suspension - "V" Series DESCRIPTION NOTE: Vehicle serial numbers used in this article has been abbreviated for common reference to Chevrolet and GMC models. Chevrolet
1988 SUSPENSION - FRONT (4WD) Front Suspension - "V" Series DESCRIPTION NOTE: Vehicle serial numbers used in this article has been abbreviated for common reference to Chevrolet and GMC models. Chevrolet
STEERING AND SUSPENSION section 2
 STEERING AND SUSPENSION section TRRT-PC piece Track Rod Removal Tool Kit Quality, kit designed for easy removal and installation of ball joints on track rods. Knurled handle provides extra grip and three
CUTTING TOOLS 5/64 27/64 3/32 7/16 7/64 29/64 1/8 15/32 9/64 31/64 5/32 1/2 11/64 3/16 3/16 13/64 13/64 7/32 7/32 15/64 15/64 1/4 1/4 17/64 17/64 9/32
 JOBBER LENGTH NITRO DRILL BITS 135 SPLIT POINT MADE IN USA 10601 1/16 10623 13/32 10602 5/64 10624 27/64 10603 3/32 10625 10604 7/64 10626 29/64 10605 1/8 10627 15/32 10606 9/64 10628 31/64 10607 5/32
ULTRALITE SPACEMATIC. Nutplate Drillmotor II/IIB DRILLING MACHINES
 SPACEMATIC TM ULTRALITE DRILLING MACHINES Nutplate Drillmotor II/IIB One hand operation to locate, drill and countersink both rivet holes in a single 4 second operation. Tool is easily converted from one
Skirted GEN III - Technical Notes
 DART Skirted GEN III - Technical Notes Deck Height... 9.240-9.450 STD or Raised cam, 9.750 9.950 Raised cam only Bore... 4.000 & 4.125 Main Bearing Size... LS-1 (2.558" 2.559") Weight... 115lbs 4.125 and
CYLINDER HEAD. Cylinder Head Assembly. Sized for Print VALVES
 CYLINDER HEAD Cylinder Head Assembly VALVES DISASSEMBLY 1. Using a tool remove the cylinder head bolts in the order shown in the illustration. 2. Using the special tool (09222-28000, 09222-28100), remove
Live and Dead Centres
 s w i t z e r l a n d Live and Dead Centres 1. Live-Centres 1.1 Main-Line ROTOR Main-Line, the approved top of the range for lathes and grinding machines. Very precise and robust construction. Made for
1 of 11 11/6/2016 5:32 AM
 1 of 11 11/6/2016 5:32 AM REMOVAL RELATED PARTS 1) Remove intake manifold. 2) Remove bolt which installs A/C compressor bracket on cylinder head. (With A/C model) 3) Remove camshafts. CYLINDER HEAD 1)
THIS PRODUCT IS FOR PROFESSIONAL LABORATORY USE ONLY USER'S MANUAL. WELLS ENGINE UNIT 230 VOLT Product No. U905, U906, U907, U908
 DENTAL, INC. TECHNICAL BULLETIN U807-022510 5860 FLYNN CREEK ROAD READ ALL INSTRUCTIONS P.O. BOX 106 BEFORE PROCEEDING COMPTCHE, CALIFORNIA, U.S.A. 95427 SAVE THIS FOR FUTURE REFERENCE THIS PRODUCT IS
Terminology. There must be a better way to build a chuck. -A.I. Jacobs, Jacobs. Chuck. Chucks and Keys. Toolholders
 Jacobs It s hard to believe that a set of bruised knuckles was the impetus for one of the most significant industrial advancements in the 20th Century. Arthur Irving Jacobs was never one for leaving things
TRANSMISSION PARTS Instructions
 TRANSMISSION PARTS Instructions Sure Cure Kit Part No. SC-4T65E GM 4T65-E Valve Body Parts Boost Valve Kit 84754-30K Patent No. 6,832,632 TCC Apply Valve Kit 84754-43K Patent No. 7,100,753 TCC Regulated
Installation Manual v1.0: Aurora Plus Turbo Kit ( ) 5.9L Dodge. Please read all instructions before installation.
 5.9L Dodge. Please read all instructions before installation.") Installation Manual v1.0: Aurora Plus - 4000 Turbo Kit (2003-2007) 5.9L Dodge Please read all instructions before installation. Figure 1: Aurora Plus - 4000 Kit Contents 1 Figure 2: Aurora Plus Hardware
Installation Manual v1.0: Aurora Plus - 4000 Turbo Kit (2003-2007) 5.9L Dodge Please read all instructions before installation. Figure 1: Aurora Plus - 4000 Kit Contents 1 Figure 2: Aurora Plus Hardware
Magnesium Option, Late Model Front Seal, Viton, P/N 67256V Rear Seal, Viton, P/N 67257V Shifter Installed Heat Treated Yoke, P/N
 DESCRIPTION OPTION Magnesium Option, Late Model 80100L Front Seal, Viton, P/N 67256V 80109 Rear Seal, Viton, P/N 67257V 80110L Shifter Installed 80112L Heat Treated Yoke, P/N 62946-6 80119-6 Heat Treated
MANUAL TRANSAXLE Return to Main Table of Contents
 MANUAL TRANSAXLE Return to Main Table of Contents GENERAL... 2 MANUAL TRANSAXLE CONTROL... 12 SHIFT LEVER ASSEMBLY... 14 MANUAL TRANSAXLE... 15 MANUAL TRANSAXLE ASSEMBLY... 17 FIFTH SPEED SYNCHRONIZER
Toolholder Bushings TYPE C. Note: Special bore sizes made to order. TYPE Z 3 Lengths Available
 Toolholder ushings TYPE C This CNC Type C ushing is designed for universal use on all CNC turning machines. To adapt a wide variety of oring ars, Drills, Reamers and Shank type tools. Precision machine
Carrier Transicold Diesel Engine CT4-91-TV (V1505) Service Parts List Rev A
 Service Parts List Rev A") Carrier Transicold Diesel Engine CT--TV (V0) Service Parts List -0 Rev A Service Parts List DIESEL ENGINE CT--TV (V0) CONTENTS INTRODUCTION... REPLACEMENT ENGINE PART NO.... ORDERING INSTRUCTIONS... GENERAL
Carrier Transicold Diesel Engine CT--TV (V0) Service Parts List -0 Rev A Service Parts List DIESEL ENGINE CT--TV (V0) CONTENTS INTRODUCTION... REPLACEMENT ENGINE PART NO.... ORDERING INSTRUCTIONS... GENERAL
CRANKSHAFT & MAIN BEARINGS
 CRANKSHAFT & MAIN BEARINGS * PLEASE READ THIS FIRST * REMOVAL Ensure all main bearing caps are marked for location on cylinder block. Some main bearing caps have an arrow stamped on them. The arrow must
HKS 700E. Service Manual June Ver. 2.04
 HKS 700E Service Manual 009 June Ver..04 HKS CO.,LTD 78 KITAYAMA FUJINOMIYA SHIZUOKA JAPAN 48-09 TEL +8(0)544-54-78 FAX +8(0)544-54-40 hks_aviation@hks-power.co.jp http://www.hks-power.co.jp/hks_aviation/
INSTALLATION, OPERATING AND MAINTENANCE INSTRUCTIONS D SERIES TABLE OF CONTENTS
 INSTALLATION, OPERATING AND MAINTENANCE INSTRUCTIONS D SERIES GENERAL INFORMATION TERMS CONCERNING SAFETY UNPACKING INSTALLATIONS VALVE MAINTENANCE TABLE OF CONTENTS VALVE DISASSEMBLY AND REASSEMBLY PLUG
Installation Instructions COMPETITION/PLUS SHIFTER Ford Mustang MT82 6-Speed Manual Transmission Catalog#
 Installation Instructions COMPETITION/PLUS SHIFTER 2015-2017 Ford Mustang MT82 6-Speed Manual Transmission Catalog# 3916037 Rev. 00 WORK SAFELY! For maximum safety, perform this installation on a clean,
Clutch Installation Guide
 Clutch Installation Guide 0 STOP! READ CAREFULLY BEFORE INSTALLING CLUTCH This clutch must be installed by a qualified installer. Improper installation or failure to replace or resurface the flywheel,
TRANSMISSIONS MANUAL
 DMR-5023 Stick shift pilot bearing. Knurled for sure fit, self aligning for perfect fit and smooth running and shift. Fits ant GM manual stick transmission crank. Allows GM transmission in Ford cars. DMR-5022
Hard Seat Fluid Pressure Regulator
 Instruction Sheet P/N 04742-02 Description The Nordson hard seat fluid pressure regulator is designed for use with abrasive coatings. The regulator body is constructed of stainless steel with a nickel-plated
DART Aluminum FORD 351 Small Block Technical Notes
 DART Aluminum FORD 351 Small Block Technical Notes Deck Height 9.200 & 9.500 Bore 4.00 or 4.125 unfinished Main Bearing Size 302 (2.249 ) or 351C (2.749 ) Weight. 9.200 91 lb / 9.500 93 lb Maximum bore
Injector Extraction Kit for the M9R / M9T
 Work Instructions Injector Extraction Kit for the M9R / M9T 60385095 Tensile Force Limiter 60385229 page 1 of 40 page 2 of 40 Safety notice Important! Be sure to read these instructions before assembling,
Boston Gear ORC Series
 Boston Gear ORC Series Trig-O-Matic Overload Release Clutches Installation and Maintenance Instructions Doc. No. ORC Series Model S www.bostongear.com ORC SERIES TRIG-O-MATIC OVERLOAD RELEASE CLUTCHES
13. CRANKCASE/CRANKSHAFT/BALANCER/PISTON/CYLINDER
 13. CRANKCASE/CRANKSHAFT/BALANCER/PISTON/CYLINDER COMPONENT LOCATION 13-2 SERVICE INFORMATION 13-3 TROUBLESHOOTING 13-4 CRANKCASE SEPARATION 13-5 CRANKSHAFT 13-7 MAIN JOURNAL BEARING 13-9 CRANKPIN BEARING
HENRY TOOLS. General Safety and Maintenance Manual MODELS 4402-RAS 4402-RASK 4402-RASC
 HENRY TOOLS Industrial Airtools at Work General Safety and Maintenance Manual K C Model Number 4402RAS 4402RAC Exhaust Direction Front or Side Throttle Type (L) Lever or (K) Safety Lever Speed 13500 R.P.M.
2.4.2 Removal of the Injector Tube and O-ring
 SERIES 60 SERVICE MANUAL 2.4.2 Removal of the Injector Tube and O-ring When removing an injector tube, use J 33880-4, part of J 33880 and J 5286-5. 1. Remove, disassemble, and clean the cylinder head.
CONTINUOUS FLIGHT AUGERS AND BITS
 CONTINUOUS FLIGHT AUGERS AND BITS Hex-Tube Augers Available in Hole Sizes 2½ (6 mm) through 12 (05 mm) Hex Sized 1 / 16, 1 1 / 8, 1 5 / 8 and 2 (20.6 mm, 29 mm, 1 mm and 50.8 mm) Field replacement shank