64-67 Chevelle. Power Rack & Pinion Cradle Kit
|
|
|
- Cynthia Holt
- 6 years ago
- Views:
Transcription


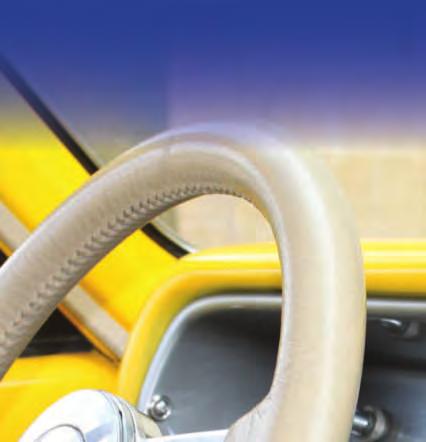
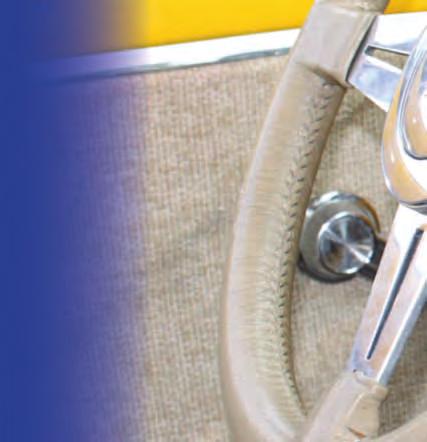
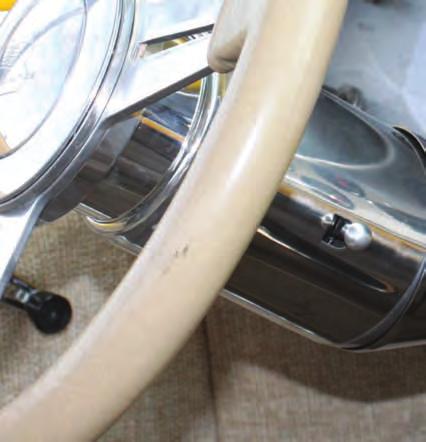

1 64-67 Chevelle Power Rack & Pinion Cradle Kit
2 64-67 Chevelle Note: For safety disconnect battery cables and ensure that the vehicle is properly supported by jack stands. Before painting or powder coating of the cradle, we recommend that you pre-fit the entire system to ensure proper fitment for your application. Note: Before installation make sure the rack is centered by turning the input shaft to the right until it stops. Next turn the input shaft back the left counting the number of revolutions until you reach the stop. Then go back half the number of revolutions. the Rack should now be centered in its travel. Inventory pg 2 Electrical System Verification pg 4 Removal of Factory Steering pg 5-6 Installation of: Rack and Cradle pg 7-8 Flaming River Tilt Column pg 9-0 Electrical System Notes pg Universal Joint and Steering pg 2 Shaft Installation Power Steering Pump Installation pg 3 Power Steering Bleeding Procedure pg 4 WARRANTY DISCLAIMER: Flaming River s Limited Warranty Flaming River warrants its products to be free from defects in material and workmanship for a period of one () year after the date of purchase, except that: All steering columns are warranted for a period of three (3) years from the date of purchase. The Big Switch (part number FR005) is warranted for a period of three (3) years from the date of purchase, provided that it is not mounted with a steel bracket and provided further that it is adequately protected from environmental conditions. All electrical products other than the Big Switch are warranted for a period of ninety (90) days from the date of purchase. Flaming River s warranty liability is limited to the replacement of defective products. Flaming River is not liable for any labor costs associated with any warranty claim, or for any incidental or consequential damages. Improper installation, abuse, racing, and/or modification of the products voids this warranty. No warranty of merchantability or fitness for a particular purpose is made by Flaming River with respect to any of its products. Warnings and Recommendations It is the customer s responsibility to determine the suitability of a given Flaming River product for the customer s uses. Likewise, it is the customer s responsibility to install a Flaming River product. Contact the vehicle manufacturer whenever installing a switch to confirm the appropriateness of using such a switch and the recommended placement of the switch on the vehicle. Use qualified chassis specialists for the installation of all steering related components. Be aware that the installation of certain Flaming River products may adversely impact a manufacturer s warranty with respect to certain vehicles and other manufactured goods. Flaming River will repair or replace any product found to be defective in material or workmanship. Improper installation, abuse, racing and/or modification VOID WARRANTY. Flaming River is not responsible for any labor costs associated with any warranty.
3 Part Number Description Qty BOLT-3/8-6X.25 BOLT-7/6-4X4.5 FR62 FR64 FR789P FR80-2 FR850 FR920 FR934 FR FR SS FR200CH FR208 FRPMPSB-V NUT-3/8-6 NUT-7/6-4 WASH-3/8 WASH-7/6 Bracket, Support Bearing Sway Bar Power Rack and Cradle Assembly Screw, 3/8-6 x.25 Hex HD 7/6-4 Grade 8 Bolt 4.5 Long Power Steering Pump Bracket, SB Remote Reservior, Power Steering FR Power x 3/4 DD U-Joint 3/4 ID Support Bearing 8 3/4 DD Shaft 3/4 DD x 3/4 DD Chrome Moly U-Joint DD x 3/4 DD Chrome Moly U-Joint 28 Paintable Floor Shift Tilt Column (Paintable Column Kit) 28 Polished Floor Shift Tilt Column (Polished Column Kit) GM A-Body Floor Mount Female Wiring Adapter Power Steering Pump with V-Belt Pulley Nylock Lock Nut 3/8-6 Nylock Lock Nut 7/6-4 3/8 Flat Washer 7/6 Flat Washer


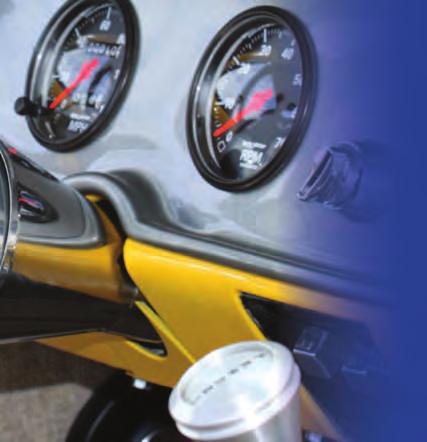
4 Chevelle Cradle and Shaft Assembly 3


 Before disassembly measure from zirc to zirc on the outer tie rod ends. Write this dimension down for future reference.")
5 Color Verification To Be Completed Before Disassembly Before disconnecting the turn signal connector, verify the factory wiring colors and turn signal operation. The use of a wiring diagram is recommended. This will be used when connecting the new Flaming River Steering Column. Brake Light Switch Right Rear Turn Signal Left Rear Turn Signal Turn Signal Power Hazard Power Right Front Turn Signal Left Front Turn Signal Horn Original System Removal ) For safety, disconnect your battery. 2) Before disassembly measure from zirc to zirc on the outer tie rod ends. Write this dimension down for future reference. Before disassembly measure from zirc to zirc on the outer tie rod ends 3) Disconnect the wiring at the steering column under the dash. 4


6 Original System Removal 4) Remove the bolts retaining the dash bezel, column dash mounting bracket and floor mounting plate. Dash Mounting Bracket Dash Bezel Floor Mounting Bracket 5) Remove the bolt that retains the rag joint to the factory steering box. Spread the flange and then slide the shaft off of the steering box and remove the column assembly from the car. 7) Remove the bolts that hold the steering box to the frame, and then remove the box from the car. 5
")


 the sway")


7 Original System Removal 8) Remove the bolts that hold the idler arm bracket to the frame, remove the outer tie rod ends from the spindle arms, then remove the steering linkage from the car. 9) Remove the bolts that hold the sway bar bracket to the frame and the pin and remove the factory sway bar from the vehicle. 6


 To install the")


8 Flaming River Rack and Pinion Installation ) Install the rack and pinion cradle by sliding it into place between the frame rails. Using the new hardware, install the three (3) 7/6 bolts on the drivers side using the original holes from the steering gear box. On the passenger side use the two (2) 3/8 bolts were the idler arm was mounted. Tighten the 7/6 bolts and nuts to ft lbs. and the 3/8 bolts and nuts to ft. lbs.. Driver Side Mounting Passenger Side Mounting 2) To install the Flaming River rack and travel bar system, position the rack into place, then install and the rack to the cradle using the mounting brackets provided. Note: The locking set screw and the mounting cap bolts can be loosened to adjust the pinion angle which will aid in u-joint alignment. Driver Side Mounting Rack & Pinion Mounting Brackets 7 Passenger Side Mounting


9 Flaming River Rack and Pinion Installation 3) Install the OEM inner tie rod end into the Flaming River Travel Bar. Note: If using the original parts some adjustment of the tie rod assembly may be required when connecting the to the spindle arm and the travel bar. OEM Inner Tie Rod End Travel Bar 4) To install the outer tie rod end into the spindles you must load the front suspension. Securely place jack stands under the lower control arms and lowering the car onto the jack stands. Make sure that your wheels are centered, then install the outer tie rod into the spindle arms and tighten the castle nuts to 30-40ft lbs. Make sure to install the cotter pins through the castle nut and tie rod end and bend the tabs over. Rack & Cradle Installed In Car 8

10 Flaming River Rack and Pinion Installation 5) Install the new Flaming River sway bar into the vehicle by using the factory sway bar bushings and sway bar pins. Tighten to factory torque specs. Note: The Flaming River Sway bar has been designed to use the factory sway bar bushings and pins. When installing the new sway bar we recommend also replacing the bushings (MOOG K8266) and sway bar pins (MOOG K5227). New Sway Bar 9

 Slide new tilt column")

11 Flaming River Tilt Column Installation ) Install the new Flaming River tilt column into the factory dash mounting bracket.. OEM Column Dash Mount 2) Slide new tilt column through the split ring of the new aluminum floor mount and then tighten the dash and floor mounts. Split Ring Column Tube 0


12 Flaming River Tilt Column Installation 4) Replace the factory dash bezel using the screws that were removed earlier. Connecting the Electric System Wiring Circuit Brake Light Switch Right Rear Turn Signal Left Rear Turn Signal Turn Signal Power Hazard Power Right Front Turn Signal Left Front Turn Signal Horn Vehicle Wiring Reference Color Verification from column disassembly. Pin Location P N M L K J H G Column Wiring White Green Yellow Purple Brown Blue Light Blue Black
 Using a 3/4 wooden dowel rod, mock up the steering shaft to obtain the correct shaft lengths and u-joint angle.")
 Remove the shafts and using a /4 drill bit, dimple each mark left by the set screws. 5) Re-install the shafts and u-joints using a red thread locker on the set screw threads.")
13 Universal Joint Installation ) Install the support bearing and bracket, with the bend facing towards the outside of the car, onto the rear control arm mounting bolt. 2) Using a 3/4 wooden dowel rod, mock up the steering shaft to obtain the correct shaft lengths and u-joint angle. 3) Once the correct shaft lengths are obtained, install shafts and u-joints snugging down each set screw so that it leaves a mark in the shaft. 4) Remove the shafts and using a /4 drill bit, dimple each mark left by the set screws. 5) Re-install the shafts and u-joints using a red thread locker on the set screw threads. Tighten each set screw to 25 ft.. lbs. and then tighten all jam nuts securely. ** We recommend that you regularly inspect the u-joint set screws for tightness.** Dimple Support Bearing & Bracket 2


14 Power Steering Pump Bracket Included in the FR60 kit is a ½ feed line that connects from the remote reservoir to the power steering pump. This is attached using the 2 stainless steel hose clamps. The 3/8 Double Crimped Pressure Line will attach the pressure port of the power steering pump and to the pressure side of your steering gear. AN fittings with o-rings are included to complete the installation. The single crimped 3/8 line is used for the return line from the steering gear to the reservoir. This will attach to the steering gear to the reservoir using a AN Fitting and the ¼ NPT barbed fitting with a stainless steel hose clamp. Custom length hose kits can be ordered from Flaming River by providing a drawing with dimensions. When cutting the stainless steel hose it is easier to use a chop saw or cut off wheel. Wrap the hose in black electrical tape and cutting through the tape to help avoid fraying. You may need to use a side cutter to trim any frayed stainless steel line. The lines can be installed to the 90 degree fittings loose until to ensure proper line routing. To tighten, hold the line itself and tighten the fittings to 0-2 ft. lbs. Note: Over crimping or kinking the line my cause damage to the Teflon liner and voids warranty. Power Steering Lines (FR60 Not included in Kit) Note: If you are not using FR60 P/S Line Kit you must order FRM4x6AN & FRM6x6AN AN Fittings for the rack. 3
 WITH THE ENGINE OFF - Rotate the steering wheel lock to lock 20-25 times, while rotating the wheel have someone monitor the fluid level and fill as necessary.")
15 ) Raise the front wheels off the ground and support the vehicle on jack stands. 2) Turn the steering wheel to the left lock and fill the reservoir and let the vehicle sit for 2 minutes. 3) WITH THE ENGINE OFF - Rotate the steering wheel lock to lock times, while rotating the wheel have someone monitor the fluid level and fill as necessary. 4) Top off fluid 5) WITH THE ENGINE RUNNING - Rotate the steering wheel lock to lock times, while rotating the wheel have someone monitor the fluid level and fill as necessary. 6) Lower the vehicle 7) Top off fluid Power Steering Bleeding Procedure 8) WITH THE ENGINE RUNNING - Rotate the steering wheel lock to lock times, while rotating the wheel have someone monitor the fluid level and fill as necessary. Install your power steering lines to the correct pressure or return ports. If using a stainless steel line kit, follow the instructions provided with your kit. FR60 Stainless Steel Line Kit is available Separately. Note: If using the original power steering pump, you must first flush the pump of any power steering fluid. Contaminated power steering fluid may cause damage to the new rack and pinion. Note: If the power steering fluid is foamy, let the vehicle sit for 0 minutes and then repeat the bleeding procedure. Note: Trapped air in the system will cause a milky appearance in the fluid. Trapped air will also cause the fluid level to rise in the reservoir when the engine is not running. 4
58-62 Impala. Rack & Pinion Cradle Kit
 58-62 Impala Rack & Pinion Cradle Kit 58-62 Impala Note: For safety disconnect battery cables and ensure that the vehicle is properly supported by jack stands. Before painting or powder coating of the
Flaming River Ind. 800 Poertner Dr Berea, OH Chevelle/ El Camino Rack and Pinion Conversion Kit
 Flaming River Ind. 800 Poertner Dr Berea, OH 44017 800-648-8022 64-67 Chevelle/ El Camino Rack and Pinion Conversion Kit For safety, disconnect battery cables and ensure that vehicle is properly supported
Flaming River Ind. 800 Poertner Dr Berea, OH Chevy C-10 Rack and Pinion Conversion Kit
 Flaming River Ind. 800 Poertner Dr Berea, OH 44017 800-648-8022 67-72 Chevy C-10 Rack and Pinion Conversion Kit For safety, disconnect battery cables and ensure that vehicle is properly supported by jack
Flaming River Ind. 800 Poertner Dr Berea, OH Impala Rack and Pinion Conversion Kit
 Flaming River Ind. 800 Poertner Dr Berea, OH 44017 800-648-8022 58-64 Impala Rack and Pinion Conversion Kit For safety, disconnect battery cables and ensure that vehicle is properly supported by jack stands.
Flaming River Ind. 800 Poertner Dr Berea, OH Thunderbird Rack and Pinion Conversion Kit
 Flaming River Ind. 800 Poertner Dr Berea, OH 44017 800-648-8022 55-57 Thunderbird Rack and Pinion Conversion Kit Thunderbird Rack & Pinion System Note: For safety, disconnect battery cables and ensure
Flaming River Ind. 800 Poertner Dr Berea, OH Impala/Caprice Rack and Pinion Conversion Kit
 Flaming River Ind. 800 Poertner Dr Berea, OH 44017 800-648-8022 65-66 Impala/Caprice Rack and Pinion Conversion Kit For safety, disconnect battery cables and ensure that vehicle is properly supported by
Flaming River Ind. 800 Poertner Dr Berea, OH Comet/Falcon Rack and Pinion Conversion Kit
 Flaming River Ind. 800 Poertner Dr Berea, OH 44017 800-648-8022 60-65 Comet/Falcon Rack and Pinion Conversion Kit For safety, disconnect battery cables and ensure that vehicle is properly supported by
65-70 Mustang. Rack and Pinion Conversion Kit
 65-70 Mustang Rack and Pinion Conversion Kit Mustang Rack & Pinion System Note: For safety, disconnect battery cables and ensure that the vehicle is properly supported by jack stands. Before painting or
Flaming River Ind. 800 Poertner Dr Berea, OH Mustang Rack and Pinion Conversion Kit
 Flaming River Ind. 800 Poertner Dr Berea, OH 44017 800-648-8022 65-70 Mustang Rack and Pinion Conversion Kit Mustang Rack & Pinion System Note: For safety, disconnect battery cables and ensure that the
68-72 Chevelle/El Camino. Rack and Pinion Conversion Kit
 68-72 Chevelle/El Camino Rack and Pinion Conversion Kit For safety, disconnect battery cables and ensure that vehicle is properly supported by jack stands. NOTE: Hoses (FR16) Pump Mounting Brackets (FR1612
Flaming River Ind. 800 Poertner Dr Berea, OH Chevelle/El Camino Rack and Pinion Conversion Kit
 Flaming River Ind. 800 Poertner Dr Berea, OH 44017 800-648-8022 68-72 Chevelle/El Camino Rack and Pinion Conversion Kit For safety, disconnect battery cables and ensure that vehicle is properly supported
Flaming River Ind. 800 Poertner Dr Berea, OH Camaro Rack and Pinion Conversion Kit
 Flaming River Ind. 800 Poertner Dr Berea, OH 44017 800-648-8022 67-69 Camaro Rack and Pinion Conversion Kit For safety, disconnect battery cables and ensure that vehicle is properly supported by jack stands.
INDEX. NOTE: Part number ES381RL Camaro Outer Tie Rod Ends must be used with this rack and pinion kit.
 INDEX NOTE: Before beginning you must first measure the width of your front end from LEFT outer tie rod end zirc to the RIGHT outer tie rod end zirc to determine the overall width of your front end. Write
73-87 Chevy C-10 Rack and Pinion Conversion Kit
 73-87 Chevy C-10 Rack and Pinion Conversion Kit For safety, disconnect battery cables and ensure that vehicle is properly supported by jack stands. NOTE: Power Steering Line Kit (FR1610) is sold separately
Index. Page Number Section
 S H O C K S Index Page Number Section 1-4 GM Front Coil Over Installation 5-7 Front Smooth Body Shock Installation 7-8 Rear Smooth Body Shock Installation 8-11 Custom Coil Over Installation 12 Tuning and
Ford Torino Small Block Rack Kit Instructions
 1968-69 Ford Torino Small Block Rack Kit Instructions 8012290-01 Unisteer offers a limited warranty against all manufacturer defects of their kits and supplied parts. Unisteer will not honor any warranty
67-70 Cougar Rack Kit Instructions # &
 67-70 Cougar Rack Kit Instructions # 8011950-01 & 8011940-01 Unisteer offers a limited warranty against all manufacturer defects of their kits and supplied parts. Unisteer will not honor any warranty on
Ford Fairlane Rack & Pinion Kit Instructions #
 1963-1965 Ford Fairlane Rack & Pinion Kit Instructions # 8011570 Unisteer offers a limited warranty against all manufacturer defects of their kits and supplied parts. Unisteer will not honor any warranty
Ford Full-Size Rack & Pinion Kit Instructions #
 1949-1951 Ford Full-Size Rack & Pinion Kit Instructions # 8011660 Unisteer offers a limited warranty against all manufacturer defects of their kits and supplied parts. Unisteer will not honor any warranty
G-Body Rack & Pinion Kit Instructions
 1977-82 G-Body Rack & Pinion Kit Instructions 8012400-01 Unisteer offers a limited warranty against all manufacturer defects of their kits and supplied parts. Unisteer will not honor any warranty on any
Electro Wizard Battery Disconnect Switch
 TM Electro Wizard Battery Disconnect Switch FR1051 Mounting Diagram Positive disconnection, 12V GROUNDED SOLENOID (power supply coil negative) FR1051 Technical Specifications Positive disconnection, 12V
WHEEL DRIVE GM S-SERIES TRUCKS & SUV S ( 82-95) & ( 96-04) &
 & ( 96-04) &") 1982-2004 2-WHEEL DRIVE GM S-SERIES TRUCKS & SUV S ( 82-95) 8000990-01 & 8000990-02 ( 96-04) 8001020-01 & 8001020-02 Unisteer offers a limited warranty against all manufacturer defects of their kits and
1982-2004 2-WHEEL DRIVE GM S-SERIES TRUCKS & SUV S ( 82-95) 8000990-01 & 8000990-02 ( 96-04) 8001020-01 & 8001020-02 Unisteer offers a limited warranty against all manufacturer defects of their kits and
NOTICE- THIS K-MEMBER REQUIRES THE USE OF COIL OVER SUSPENSION. K-MEMBER WILL NOT WORK WITH FACTORY STYLE SPRINGS.
 Technical Support Line: (952) 985-5675 Email: Info@QA1.net 21730 Hanover Ave. Lakeville, MN 55044 www.qa1.net INSTALLATION INSTRUCTIONS MUSTANG K-MEMBER P/N MUK11, MUK12, MUK13 NOTICE- THIS K-MEMBER REQUIRES
60-72 Chevrolet C10 Power Rack & Pinion Kit Instructions # , , &
 60-72 Chevrolet C10 Power Rack & Pinion Kit Instructions # 8011740-01, 8011900-01, & 8011920-01 Unisteer offers a limited warranty against all manufacturer defects of their kits and supplied parts. Unisteer
INSTALLATION INSTRUCTIONS QA1 P/N x400, x500, x600, x400, x500, x F100 Front Coil-over Suspension System
 INSTALLATION INSTRUCTIONS QA1 P/N 52620-x400, 52620-x500, 52620-x600, 52621-x400, 52621-x500, 52621-x600 65-72 F100 Front Coil-over Suspension System TOOLS AND SUPPLIES REQUIRED Floor Jack Two (2) Jack
INSTALLATION MANUAL TOYOTA TACOMA 5 SUSPENSION SYSTEM PART # 54900
 PART NUMBER : 54900 1996 2004 TOYOTA TACOMA 5 SUSPENSION SYSTEM PARTS LIST: Part # Description Qty. 55900-01 Driver Side Spindle 1 55900-02 Passenger Side Spindle 1 54900-01 Rear brake proportioning valve
*USE ONLY POWER STEERING FLUID IN SYSTEM. DO NOT USE ATF. YOU MUST USE THE SUPPLIED HEADERS, MODIFY EXHAUST PIPES, AND WELD FLANGES.
 1949-1951 Ford Full-Size Rack & Pinion Kit Instructions # 8011660 Full refund will NOT be granted to any kits that are damaged, scratched, or altered in any fashion. *USE ONLY POWER STEERING FLUID IN SYSTEM.
INSTALLATION MANUAL TOYOTA TUNDRA 5 SUSPENSION SYSTEM PART # 55905
 PART NUMBER : 55905 1999 2003 TOYOTA TUNDRA 5 SUSPENSION SYSTEM PARTS LIST: Part # Description Qty. 55900-01 Driver Side Spindle 1 55900-02 Passenger Side Spindle 1 55905-03 Rear brake proportioning valve
SPECIAL TOOLS REQUIRED:
 INSTALLATION INSTRUCTIONS FOR 2010-15 TOYOTA 4RUNNER WITH XREAS SUSPENSION 3 SUSPENSION LIFT KIT PART NUMBER 432X WARNING!!! READ AND UNDERSTAND ALL INSTRUCTIONS BEFORE PROCEEDING. MAKE SURE THAT YOU HAVE
67-69 Camaro / Nova Power Rack & Pinion # ,
 67-69 Camaro / 68-74 Nova Power Rack & Pinion # 8010540-01, 8010540-02 Unisteer offers a limited warranty against all manufacturer defects of their kits and supplied parts. Unisteer will not honor any
Equipped with AEM Dryflow Filter No Oil Required! INSTALLATION INSTRUCTIONS PART NUMBER:
 Equipped with AEM Dryflow Filter No Oil Required! INSTALLATION INSTRUCTIONS PART NUMBER:21-8125 2011-2012 Ford F150 V8 5.0L * NOTE: Legal in California only for racing vehicles which may never be used
05 12 TOYOTA TACOMA 2WD
 MAXTRAC SUSPENSION 4030 E LEAVERTON CT ANAHEIM, CA 92807 714 630 0363 WWW.MAXTRACSUSPENSION.COM SALES@MAXTRACSUSPENSION.COM PRODUCT: PARTS LIST K756864 6" LIFT KIT 05 12 TOYOTA TACOMA 2WD QTY SPINDLE,
INSTALLATION INSTRUCTIONS FOR FORD 4WD SUPER DUTY F /2 COIL SPRING SUSPENSION SYSTEM
 INSTALLATION INSTRUCTIONS FOR 2005-07 FORD 4WD SUPER DUTY F250-350 4 1/2 COIL SPRING SUSPENSION SYSTEM Requires the following parts (sold separately) for a complete installation: KIT PART NUMBER (6345
INSTALLATION INSTRUCTIONS
 Equipped with AEM Dryflow Filter No Oil Required! INSTALLATION INSTRUCTIONS PART NUMBER: 21-8304 1991-1995 JEEP Wrangler L4-2.5L C.A.R.B. E.O. # D-670 * NOTE: Legal in California only for racing vehicles
PARTS LIST INCLUDED IN KIT TORQUE SPECIFICATIONS PRODUCT SAFETY LABEL MUST BE INSTALLED INSIDE CAB IN PLAIN VIEW OF ALL OCCUPANTS.
 INSTALLATION INSTRUCTIONS FOR 2010-15 TOYOTA 4RUNNER SR5 AND SPORT (Non-Air Leveling & Non-X-REAS) AND FOR 2010-14 TOYOTA FJ CRUISER 2WD & 4WD 3 SUSPENSION LIFT KIT PART NUMBER 432 WARNING!!! READ AND
Part # Description Qty Inspected By Rack & Pinion Pump Kit Remote Reservoir Line Kit Shaft Kit
 58-62 Corvette Power Rack & Pinion Kit Instructions # 8011530 Unisteer offers a limited warranty against all manufacturer defects of their kits and supplied parts. Unisteer will not honor any warranty
Steeroids INSTALLATION INSTRUCTIONS Camaro, Nova
 Doc #780-65547 Rev 11.2012 Steeroids INSTALLATION INSTRUCTIONS 1967-1969 Camaro, 1968-1974 va 1 PRESSURE HOSE 1 RETURN HOSE 2 ROD ENDS W/ STUDS 1 RACK AND PINION 1 ADAPTER BRACKET FASTENERS U-JOINT ASSEMBLY
RHINO SUSPENSION SYSTEM INSTALLATION INSTRUCTIONS
 PARTS INCLUDED: 2 FRONT UPPER A-ARMS 2 FRONT LOWER A-ARMS 2 UNI-BALL JOINTS 2 UNI-BALL JOINT STUDS 2 UNI-BALL JOINT CAPS 2 RETAINING RINGS 1 FRONT SHOCK ASSEM. 2 DELRON STEERING STOPS 2 SHOCK MOUNT SPACERS
Equipped with AEM Dryflow Filter No Oil Required! INSTALLATION INSTRUCTIONS PART NUMBER:
 Equipped with AEM Dryflow Filter No Oil Required! INSTALLATION INSTRUCTIONS PART NUMBER: 21-490B (Blue Finish) 21-490C (Gun Metal Grey Finish) 21-490P (Vacuum Metalized Chrome-VMC) 21-490R (Red Finish)
TRANS-AM POWER RACK AND PINION INSTALLATION INSTRUCTION MANUAL
 1970-81 TRANS-AM POWER RACK AND PINION INSTALLATION INSTRUCTION MANUAL 8011160-01 & 8011110-01 Unisteer offers a limited warranty against all manufacturer defects of their kits and supplied parts. Unisteer
WARNING!!! READ AND UNDERSTAND ALL INSTRUCTIONS BEFORE PROCEEDING. MAKE SURE THAT YOU HAVE ALL TOOLS AND PARTS BEFORE BEGINNING THE INSTALLATION.
 INSTALLATION INSTRUCTIONS FOR 2007-2015 JEEP JK 3 SUSPENSION LIFT SYSTEM PART NUMBER 587 WARNING!!! READ AND UNDERSTAND ALL INSTRUCTIONS BEFORE PROCEEDING. MAKE SURE THAT YOU HAVE ALL TOOLS AND PARTS BEFORE
(WILL NOT FIT VEHICLES WITH X-REAS SUSPENSION)
") 2003-2016 TOYOTA 4RUNNER/2007-2014 FJ CRUISER 4WD INSTRUCTIONS 3 SUSPENSION LIFT KIT P/N 40021 (WILL NOT FIT VEHICLES WITH X-REAS SUSPENSION) WARNING!!!! PRODUCT SAFETY LABEL MUST BE INSTALLED INSIDE THE
2003-2016 TOYOTA 4RUNNER/2007-2014 FJ CRUISER 4WD INSTRUCTIONS 3 SUSPENSION LIFT KIT P/N 40021 (WILL NOT FIT VEHICLES WITH X-REAS SUSPENSION) WARNING!!!! PRODUCT SAFETY LABEL MUST BE INSTALLED INSIDE THE
WARNING!!! READ AND UNDERSTAND ALL INSTRUCTIONS BEFORE PROCEEDING. MAKE SURE THAT YOU HAVE ALL TOOLS AND PARTS BEFORE BEGINNING THE INSTALLATION.
 INSTALLATION INSTRUCTIONS FOR 2005-2015 TOYOTA TACOMA 4 X 4 AND PRERUNNER, 2003-2015 4RUNNER, 2007-2014 FJ CRUISER 1.5" FRONT LEVELING KIT PART NUMBER 415 WARNING!!! READ AND UNDERSTAND ALL INSTRUCTIONS
,
 UNISTEER Performance Products 67-69 Camaro/ 68-74Nova Power Rack & Pinion 8010540-01, 8010540-02 (OPTIONAL -02 CHROME KIT SHOWN ABOVE) ALTHOUGH THIS KIT IS FAIRLY SIMPLE TO INSTALL SOME MODIFICATIONS ARE
INSTALLATION INSTRUCTIONS FOR 2016 TOYOTA TACOMA 4 X 4 AND PRE RUNNER 3 SUSPENSION LIFT KIT PART NUMBER
 INSTALLATION INSTRUCTIONS FOR 2016 TOYOTA TACOMA 4 X 4 AND PRE RUNNER 3 SUSPENSION LIFT KIT PART NUMBER 427 WARNING!!! READ AND UNDERSTAND ALL INSTRUCTIONS BEFORE PROCEEDING. MAKE SURE THAT YOU HAVE ALL
SCION xb L4-2.4L
 Equipped with AEM Dryflow Filter No Oil Required! INSTALLATION INSTRUCTIONS PART NUMBER: 21-577 2008-2012 SCION xb L4-2.4L AEM Induction Systems 1 (800) 992-3000 WWW: http://www.aemintakes.com PARTS LIST
INSTALLATION INSTRUCTIONS FOR FORD 4WD SUPER DUTY 2-1/2 SUSPENSION SYSTEM
 INSTALLATION INSTRUCTIONS FOR 1999-2004 FORD 4WD SUPER DUTY 2-1/2 SUSPENSION SYSTEM Requires the following parts for a complete installation: Front Leaf Springs P/N 60SD25 Vehicle specific Box Kit depending
FRONT DRIVELINE MODIFICATION MAY BE NECESSARY!!!!
 INSTALLATION INSTRUCTIONS FOR 2009 DODGE 2500/3500 4WD & 1500 Mega Cab 6 SUSPENSION SYSTEM PART NUMBER 7206 Requires the following parts (sold separately) for a complete installation: Front Coil Spring
Steeroids Installa on Instruc ons Part Number(s): Mustang
: Mustang") Parts and finishes may vary from those shown. 1 PRESSURE HOSE 1 PASSENGER S BRACKET 1 RETURN HOSE FASTENERS Part Number(s): 84510-84569 1965-1970 Mustang 1 RACK AND PINION WITH 2 CLAMPS 1 TIE ROD BRACKET
Parts and finishes may vary from those shown. 1 PRESSURE HOSE 1 PASSENGER S BRACKET 1 RETURN HOSE FASTENERS Part Number(s): 84510-84569 1965-1970 Mustang 1 RACK AND PINION WITH 2 CLAMPS 1 TIE ROD BRACKET
58-62 Corvette Manual Rack & Pinion Kit Instructions #
 58-62 Corvette Manual Rack & Pinion Kit Instructions # 8001550 Unisteer offers a limited warranty against all manufacturer defects of their kits and supplied parts. Unisteer will not honor any warranty
INSTALLATION INSTRUCTIONS 64 ½ - 70 SUPERRIDE II INDEPENDENT FRONT SUSPENSION BX-350 FOR COYOTE AND MOD ENGINES
 INSTALLATION INSTRUCTIONS 64 ½ - 70 SUPERRIDE II INDEPENDENT FRONT SUSPENSION BX-350 FOR COYOTE AND MOD ENGINES Please read these instructions completely before starting your installation. Assemble suspension
INSTALLATION INSTRUCTION 89400
 INSTALLATION INSTRUCTION 89400 FOR RANCHO SUSPENSION SYSTEM RS66400B: 2012 RAM 1500 4WD. READ ALL INSTRUCTIONS THOROUGHLY FROM START TO FINISH BEFORE BEGINNING INSTALLATION Rev B IMPORTANT NOTES! WARNING:
Flaming River Ind. 800 Poertner Dr Berea, OH FR1057 Watch Dog Automatic Battery Disconnect Switch
 Flaming River Ind. 800 Poertner Dr Berea, OH 44017 800-648-8022 FR1057 Watch Dog Automatic Battery Disconnect Switch Table of Contents Introduction...pg 3 Mounting and Dimensions...pg 4 Mechanical Fixation...pg
Equipped with AEM Dryflow Filter No Oil Required! INSTALLATION INSTRUCTIONS PART NUMBER: DS (Plastic Intake Tube)
") Equipped with AEM Dryflow Filter No Oil Required! INSTALLATION INSTRUCTIONS PART NUMBER:21-8126DS (Plastic Intake Tube) 2011-2014 Ford F150 V6 3.5L ECOBOOST C.A.R.B. E.O. D-670-19 AEM Induction Systems
Equipped with AEM Dryflow Filter No Oil Required! INSTALLATION INSTRUCTIONS PART NUMBER:21-8126DS (Plastic Intake Tube) 2011-2014 Ford F150 V6 3.5L ECOBOOST C.A.R.B. E.O. D-670-19 AEM Induction Systems
4" Oval Nerf Bar. Part No. A1003S/B. PARTS LIST: Qty Part Description Qty Part Description
 ` 4" Oval Nerf Bar Part No. A1003S/B Fits: 2007 - Current Chevrolet Silverado 1500/2500/3500 Crew Cab 2007 - Current GMC Sierra 1500/2500/3500 Crew Cab REMOVE CONTENTS FROM BOX. VERIFY ALL PARTS ARE PRESENT.
Technical Support Line: (952) Hanover Ave. Lakeville, MN
 Hanover Ave. Lakeville, MN") Technical Support Line: (952) 985-5675 Email: Sales@QA1.net 21730 Hanover Ave. Lakeville, MN 55044 www.qa1.net INSTALLATION INSTRUCTIONS QA1 1967-1979 Mopar A-Body Rear 6 link Conversion System QA1 p/n
Technical Support Line: (952) 985-5675 Email: Sales@QA1.net 21730 Hanover Ave. Lakeville, MN 55044 www.qa1.net INSTALLATION INSTRUCTIONS QA1 1967-1979 Mopar A-Body Rear 6 link Conversion System QA1 p/n
&
 UNISTEER Performance Products 1968-72 CHEVROLET CHEVELLE POWER RACK AND PINION KIT INSTALLATION INSTRUCTION MANUAL 8010700-01 & 8010700-02 Thank you for purchasing Unisteer Performance Products for your
Equipped with AEM Dryflow Filter No Oil Required! INSTALLATION INSTRUCTIONS
 Equipped with AEM Dryflow Filter No Oil Required! INSTALLATION INSTRUCTIONS PART NUMBER: 21-448 2005 CHEVROLET Cavalier Ecotec L4-2.2L SEE * NOTE 2005 PONTIAC Sunfire L4-2.2L C.A.R.B. E.O. # D-392-28 2003-2004
INSTALLATION INSTRUCTIONS FOR FORD 4WD SUPER DUTY 6 SUSPENSION SYSTEM
 INSTALLATION INSTRUCTIONS FOR 1999-2004 FORD 4WD SUPER DUTY 6 SUSPENSION SYSTEM Requires the following parts for a complete installation: Front Leaf Springs P/N 60SD6 Hardware Kit P/N 6000H Vehicle specific
INSTALLATION INSTRUCTION Rev A
 INSTALLATION INSTRUCTION 88587 Rev A FOR RANCHO SUSPENSION SYSTEM RS6587B: 2009 DODGE RAM 1500 READ ALL INSTRUCTIONS THOROUGHLY FROM START TO FINISH BEFORE BEGINNING INSTALLATION IMPORTANT NOTES! WARNING:
INSTALLATION INSTRUCTIONS
 Equipped with AEM Dryflow Filter No Oil Required! INSTALLATION INSTRUCTIONS PART NUMBER:21-8011 1996-1999 Chevrolet C1500 V8-5.0L C.A.R.B. E.O. # D-392-19 1996-1999 Chevrolet C1500 V8-5.7L C.A.R.B. E.O.
INSTALLATION INSTRUCTIONS `64 ½ - 70 MUSTANG, HEIDTS IFS, PRO-G GEN II P/N: MTF-201
 INSTALLATION INSTRUCTIONS `64 ½ - 70 MUSTANG, HEIDTS IFS, PRO-G GEN II P/N: MTF-201 Please read these instructions completely Before starting your installation. Assemble suspension on vehicle before powder-coating
Installation Notes: #86000-R Race Series +3.5 L/T Kit
 159 North Maple St. Unit J, CORONA CA 92880 P. 951-737-9682 F. 951-737-9006 WWW.CHAOSFAB.COM Installation Notes: #86000-R Race Series +3.5 L/T Kit Factory manual is recommended for removal and re-installation
INSTALLATION INSTRUCTION 88581
 INSTALLATION INSTRUCTION 88581 FOR RANCHO SUSPENSION SYSTEM RS6581B: DODGE RAM READ ALL INSTRUCTIONS THOROUGHLY FROM START TO FINISH BEFORE BEGINNING INSTALLATION Rev C IMPORTANT NOTES! WARNING: This suspension
INSTALLATION INSTRUCTIONS PART NUMBER:
 Equipped with AEM Dryflow Filter No Oil Required! INSTALLATION INSTRUCTIONS PART NUMBER: 21-488 2006-2008 MAZDA 3 L4 2.3L SEE * NOTE 2004-2008 MAZDA 3 L4 2.0L SEE * NOTE 2004-2005 MAZDA 3 L4 2.3L C.A.R.B.
INSTALLATION INSTRUCTIONS PART NUMBER:
 Equipped with AEM Dryflow Filter No Oil Required! INSTALLATION INSTRUCTIONS PART NUMBER: 24-6110 2003-2006 HONDA Accord V6-3.0L C.A.R.B. E.O. # D-670 Excludes 2006 MY LEV II SULEV 6HNXV03.0WMC model year
USE THE PARTS LIST BELOW TO MAKE SURE YOUR KIT IS COMPLETE BEFORE INSTALLATION. IF ANY PIECES ARE MISSING, PLEASE CONTACT:
 1962-1967 Chevy Nova Pro-Touring Front Suspension Installation Instructions Tech line: 1-855-693-1259 www.totalcostinvolved.com Read and understand these instructions before starting any work! USE THE
Detroit Speed, Inc. C2/C3 SpeedRay Front Suspension Corvette P/N: &
 Detroit Speed, Inc. C2/C3 SpeedRay Front Suspension 1963-82 Corvette P/N: 032072 & 032073 The Detroit Speed Inc. Corvette SpeedRay front suspension improves handling and ride quality by utilizing Detroit
Installation Instructions PowerBoard Automatic Retracting Running Board
 Installation Instructions PowerBoard Automatic Retracting Running Board Vehicle Application Dodge Ram Quad Cab Pickup 2002-2008 : 75101-15 Dodge Ram Mega Cab Pickup 2006-2009 : 75118-15 www.bestop.com
GM C10 Street Grip
 Part # 11365010/11365110-1973-1987 GM C10 StreetGrip Front Components 11369590 Delrin Control Arm Bushings 11369300 Drop Spindles 11362350/11362351 Front CoilSpring Kit 11369515 Front HQ Series Shocks
Rear Sway Bar for XC90 ( ) 2.5T and T6 ipd mounting kit SBK42
 2.5T and T6 ipd mounting kit SBK42") Dedicated to improving vehicle fun, safety & performance Installation Instructions Rear Sway Bar for XC90 (2003-0) 2.5T and T6 ipd mounting kit SBK2 PI-298 08/06 Thank you for purchasing this anti-sway
Dedicated to improving vehicle fun, safety & performance Installation Instructions Rear Sway Bar for XC90 (2003-0) 2.5T and T6 ipd mounting kit SBK2 PI-298 08/06 Thank you for purchasing this anti-sway
INSTALLATION INSTRUCTIONS
 Equipped with AEM Dryflow Filter No Oil Required! INSTALLATION INSTRUCTIONS PART NUMBER: 21-703C (Gun Metal Grey Finish) 21-703P (Vacuum Metalized Chrome - VMC) 2011-2013 FORD Fiesta L4-1.6L C.A.R.B. E.O.
INSTALLATION MANUAL 4.5 I.F.S. SUSPENSION CURR. FORD F150 W/4.2 OR 4.6 LITER PART # 24940
 INSTALLATION MANUAL 4.5 I.F.S. SUSPENSION 1997- CURR. FORD F150 W/4.2 OR 4.6 LITER PART # 24940 SJ101402 PART NUMBER : 24940 1997 CURR. FORD F150 W/4.2 OR 4.6 LITER 4.5 SUSPENSION SYSTEM WITH FRONT SPINDLES
Equipped with AEM Dryflow Filter No Oil Required! INSTALLATION INSTRUCTIONS PART NUMBER: DS
 Equipped with AEM Dryflow Filter No Oil Required! INSTALLATION INSTRUCTIONS PART NUMBER:21-8126DS 2011-2013 Ford F150 V6 3.5L ECOBOOST * NOTE: Legal in California only for racing vehicles which may never
INSTALLATION INSTRUCTIONS PART NUMBER:
 Equipped with AEM Dryflow Filter No Oil Required! The installation of this AEM intake system requires some modification to the vehicle s inner fender. A specialized power tool will be needed to modify
Alignment Spec. Power Rack & Pinion: 5 degrees positive Camber 0 degrees Toe-In 1/32
 333-TCIE237 1967-1969 Chevy Camaro Front Suspension 1968-1972 Chevy Nova Front Suspension 1967-1969 Pontiac Firebird Front Suspension 1-800-984-6259 www.totalcostinvolved.com 1967-1969 Chevy Camaro Front
INSTRUCTIONS PART NUMBER:
 Equipped with AEM Dryflow Filter No Oil Required! INSTALLATION INSTRUCTIONS PART NUMBER: 21-477 2006-2007 SUBARU Impreza WRX H4 2.5L Turbo C.A.R.B. E.O. # D-670-15 2004-2007 SUBARU Impreza WRX STi H4 2.5L
Equipped with AEM Dryflow Filter No Oil Required!
 Equipped with AEM Dryflow Filter No Oil Required! INSTALLATION INSTRUCTIONS PART NUMBER: 21-491B (Blue Finish) 21-491C (Gun Metal Grey Finish) 21-491P (Vacuum Metalized Chrome-VMC) 21-491R (Red Finish)
2236 Sway Bar Installation Instructions
 2236 Sway Bar Installation Instructions Thank you for your purchase of this Hotchkis Performance product. Your stabilizer bar set was designed with the performance and durability you ve come to expect
2. Remove front wheels.
 1 PARTS DIAGRAM 2 Installation Instructions: (PASSENGER SIDE) 1. Place jack under center of RUV front end and lift until front wheels clear the ground. Be careful to support the RUV properly so that it
Installation manual. 4.5 suspension system June 2007 Dodge Ram 2500 / Part # Part # Important customer information:
 Installation manual 4.5 suspension system 2003 - June 2007 Dodge Ram 2500 / 3500 Part # 34003 sj11407rev.03 Part # 34003 2003 - June 2007 Dodge Ram 2500 / 3500 4.5 suspension system Part # Description
INSTALLATION INSTRUCTIONS
 Equipped with AEM Dryflow Filter No Oil Required! INSTALLATION INSTRUCTIONS PART NUMBER:21-8402 1999-2004 TOYOTA Tacoma V6-3.4L C.A.R.B. E.O. # D-670 1999-2002 TOYOTA 4Runner V6-3.4L C.A.R.B. E.O. # D-670
INSTALLATION INSTRUCTIONS FOR FORD 4WD SUPER DUTY F COIL SPRING SUSPENSION SYSTEM
 INSTALLATION INSTRUCTIONS FOR 2008-10 FORD 4WD SUPER DUTY F250-350 6 COIL SPRING SUSPENSION SYSTEM Requires the following parts (sold separately) for a complete installation: KIT PART NUMBER (6860) REQUIRES
INSTALLATION INSTRUCTIONS
 Equipped with AEM Dryflow Filter No Oil Required! INSTALLATION INSTRUCTIONS PART NUMBER: 21-685 2006-2011 HONDA Civic SI L4-2.0L SEE * NOTE * NOTE: Legal in California only for racing vehicles which may
INSTALLATION INSTRUCTIONS
 Equipped with AEM Dryflow Filter No Oil Required! INSTALLATION INSTRUCTIONS PART NUMBER: 21-8028 2010 CHEVROLET Camaro V6-3.6L SEE * NOTE * NOTE: Legal in California only for racing vehicles which may
Installation manual. 4 suspension system Chevy or GMC WD. Part # Part # Important customer information:
 Installation manual 4 suspension system 2014-2018 Chevy or GMC 1500 4WD Part # 14059 sj09052013rev.01 Part # 14059 2014-2018 Chevy or GMC 1500 4WD 4 suspension system Part # Description Qty. 14056-01 Upper
Note: The transmission mount just happened to be upside down in this picture. (c) 2015 Total Cost Involved Engineering, Inc. All Rights Reserved.
 2015 Total Cost Involved Engineering, Inc. All Rights Reserved.") 1970-1981 Chevy Camaro & Pontiac Firebird Custom IFS Installation Instructions 1-855-693-1259 www.totalcostinvolved.com CHECK ALL PARTS INCLUDED IN THIS KIT TO THE PARTS LIST BEFORE INSTALLATION. IF ANY
1970-1981 Chevy Camaro & Pontiac Firebird Custom IFS Installation Instructions 1-855-693-1259 www.totalcostinvolved.com CHECK ALL PARTS INCLUDED IN THIS KIT TO THE PARTS LIST BEFORE INSTALLATION. IF ANY
INSTALLATION INSTRUCTIONS PART NUMBER C (Gun Metal Gray Finish)
") Equipped with AEM Dryflow Filter No Oil Required! INSTALLATION INSTRUCTIONS PART NUMBER 21-765C (Gun Metal Gray Finish) 2014-16 MAZDA 3 2.0L *Manual Transmission Only 1 ITEM NO. PART NUMBER DESCRIPTION
Equipped with AEM Dryflow Filter No Oil Required! INSTALLATION INSTRUCTIONS PART NUMBER 21-765C (Gun Metal Gray Finish) 2014-16 MAZDA 3 2.0L *Manual Transmission Only 1 ITEM NO. PART NUMBER DESCRIPTION
INSTALLATION MANUAL 4 I.F.S. SUSPENSION SYSTEM CHEVY / GMC LUG PART # 14810
 INSTALLATION MANUAL 4 I.F.S. SUSPENSION SYSTEM 1988-1998 CHEVY / GMC 1500 6 LUG PART # 14810 Sj051904rev.03 PART NUMBER : 14810 1988-1998 CHEVY / GMC 1500 6 LUG 4 SUSPENSION SYSTEM WITH FRONT SPINDLES
INSTALLATION MANUAL 4 I.F.S. SUSPENSION CURR. CHEVY SUBURBAN / YUKON XL (WITH 5 LINK REAR END) PART # 14965
 PART # 14965") PART NUMBER : 14965 2000 CURR. SUBURBAN W/ REAR COIL SPRINGS 4 SUSPENSION SYSTEM WITH FRONT SPINDLES PARTS LIST: Part # Description Qty. C4I1SN-07 Passenger Side Differential Drop 1 C4I1SN-23 Driver Side
PART NUMBER : 14965 2000 CURR. SUBURBAN W/ REAR COIL SPRINGS 4 SUSPENSION SYSTEM WITH FRONT SPINDLES PARTS LIST: Part # Description Qty. C4I1SN-07 Passenger Side Differential Drop 1 C4I1SN-23 Driver Side
INSTALLATION INSTRUCTIONS
 Equipped with AEM Dryflow Filter No Oil Required! INSTALLATION INSTRUCTIONS PART NUMBER: 21-696 2009-2010 DODGE Challenger V6-3.5L SEE * NOTE * NOTE: Legal in California only for racing vehicles which
Installation Manual Ram x4 5 performance kit with radius. Part # 35125
 Part # 35125 2014-2018 Ram 3500 4x4 5 performance kit with radius arms Part # Description Qty. 35135-01 driver side radius arm 1 35135-02 passenger side radius arm 1 35130-03 driver side front coil spacer
Installation Manual Ram x4 5 Lift w/ radius arm drop brackets Part # 35120
 Part # 35120 2014-2018 Ram 3500 4x4 5 Lift w/ radius arm drop brackets Part # Description Qty. 35130-01 driver side radius arm bracket 1 35130-02 passenger side radius arm bracket 1 35130-03 driver side
Dec 1, 2017 ATS AFX Spindle Installation Instructions
 Dec 1, 2017 ATS AFX Spindle Installation Instructions 1 P a g e The following instructions are intended for professional installers and are guidelines only. Speedtech Performance assumes NO responsibility
BMK-30. Heavy-Duty By-Pass Filtration System Installation and Servicing Instructions
 BMK-30 Heavy-Duty By-Pass Filtration System Installation and Servicing Instructions IMPORTANT NOTICE Read all instructions completely before attempting to install this unit. Improper installation could
INSTALLATION INSTRUCTIONS PART NUMBER:
 Equipped with AEM Dryflow Filter No Oil Required! INSTALLATION INSTRUCTIONS PART NUMBER: 21-8207 2005 DODGE Durango V8-5.7L See * NOTE 2004 DODGE Durango V8-5.7L C.A.R.B. E.O. # D-670 * NOTE: Legal in
INSTALLATION INSTRUCTIONS PART NUMBER:
 Equipped with AEM Dryflow Filter No Oil Required! INSTALLATION INSTRUCTIONS PART NUMBER: 41-1404 2008-2011 SCION XD L4-1.8L LEGAL IN CALIFORNIA ONLY FOR RACING VEHICLES WHICH MAY NEVER BE USED, REGISTERED
Installation Instructions PowerBoard Automatic Retracting Running Board
 Installation Instructions PowerBoard Automatic Retracting Running Board Vehicle Application Dodge Ram Quad Cab Pickup 2002-2008 : 75101-15 Dodge Ram Quad Cab Pickup, 2500 / 3500 / HD 2003-2009 : 75101-15
Installation manual 3 suspension system Toyota Tacoma 4 x 4 & PreRunner Part # sj rev.03
 Part #: 52904 1995-2004 Toyota Tacoma 4 x 4 & PreRunner 3 suspension system Parts list: Part # Description Qty. 52904-01 Rear brake proportioning valve bracket 1 52907-02 Front pre load spacer 2 52904-03
NOTE: IF RUNNING FACTORY RANGER 900 ALUMINUM WHEELS OR AFTERMARKET ALUMINUM WHEELS THEN SPACERS ARE NOT REQUIRED.
 780 Professional Dr. North, Shreveport, LA. 318-524-2270 Polaris 900 XP Ranger Lift Kit Installation Instructions Read before Installation This product is designed for use on ATVs and/or RUVs to increase