How to replace your Turbo Actuator Step by Step
|
|
|
- Silas Beasley
- 6 years ago
- Views:
Transcription

1 How to replace your Turbo Actuator Step by Step Special thanks to other forum members who have previously dealt with this problem! Old By Chirpz New
2 Your Turbo is a lot tougher than the electric actuator motor that controls its vanes. The Turbo Actuator (TA) is a small servo motor a little smaller than your fist and it sits in front and to the left of the turbo, to the left of the black air intake tube. How do you know your TA is bad? In my case, the car went into limp mode one day, the lightening bolt on the dash was flashing, AND I got a P0299 code which means Turbo Under Boost. Although the code was sticky and remained until I cleared it, the other symptoms were intermittent. I could drive several days sometimes, then suddenly, limp mode and lightening bolt. Shutting off the engine would sometimes make it go away for a while. Other times it would remain persistent until the next day. If you take your Jeep to the dealer, they will charge you about $130 just to look at it and determine the problem. Then they may tell you that you need a new turbo and the price tag for that job is in excess of $7,000. They will NOT replace just TA nor will they sell you one, nor will they say, Your TA is bad. It is easy to replace the TA so I am surprised that the dealer does not offer this as an option. If you let them replace your turbo, they will pull your engine to do the job. That can't be good. So... you have to decide... should I risk $300 and a few hours in order to possibly save $6,700? In my case, it was an easy decision. Although my turbo is still covered under extended warranty, I really did not want them to pull my engine which could lead to other problems. So, Let's go... replace the sucker yourself.
 It also helps to have a small stool to stand")
3 Tools Screw Driver 1/4 drive ratchet 10mm socket 10mm box end wrench Magnet on a stick Right angled pick (not pictured) It also helps to have a small stool to stand on.
4 Get on the computer and order a new TA from XsBoost. This is their URL or call them at Wait for it to arrive and compare it to your actuator just to be sure.
5 Ok... here we go. Disconnect the Negative cable from your battery. Remove the engine cover. To remove it, remove the oil fill cap, then remove 2 10mm bolts. Lift front and pull it slightly forward and off. I recommend that you do not replace this cover when done. Leave it off so all your electronic parts can operate cooler. Locate your TA and compare it with the one that you obtained from XsBoost. Make sure they look the same and that the little knob at the end of the control arm is pointing the correct direction away from the TA body. Cut up some small rags and stuff them all around the working area to prevent the small bolts from dropping out of site when you fumble them. Leave no hole unplugged.

6 Turbo Actuator (TA) Elephant hose Mod Turbo Engine

7 Top View EHM Turbo Actuator


8 Remove the fresh air intake. Loosen two screws and remove one bolt, then wiggle it off. Be careful to keep foreign objects from entering your turbo. Bolt Screws
9 Remove engine cover bracket. I chose to leave mine off. Bolt Bolt

10 Remove the turbo heat shield. 3 bolts hold it on. Be gentle. It will wiggle out of there if you work at it. 2 bolts 1 bolt


11 Turbo heat shield Engine cover bracket

12 Unplug the TA. On each side of the plug there is a small clip. Depress the clips one at a time if necessary and wiggle the plug off. Don't damage the clips. Bend other cable out of the way. Clips Plug

13 Use the mirror to view the circlip that holds the turbo vane control arm onto the TA arm. You do not need pliers to remove it. I used a small pick tool, sort of like the pick that a dentist uses to pick at your teeth. You can buy a set of picks at Napa. It is just a sharp piece of stiff wire bent at a right angle with a loop or a handle on it. You could make one. Touch your magnet to the circlip as your pull the clip off using your pick. Hopefully the magnet will catch the clip as it slides off. Circlip

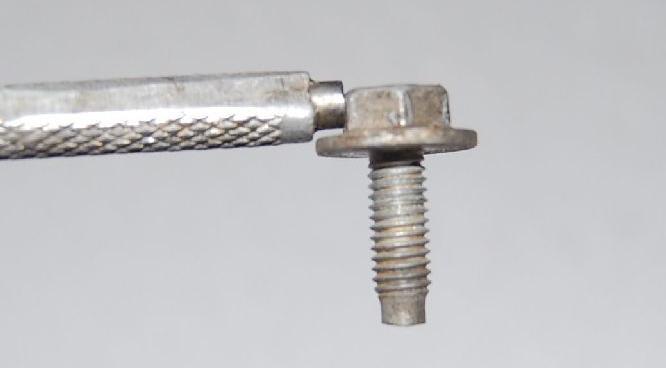
14 Use the magnet to help remove and replace the circlip Use the magnet to help remove and replace the small bolts.

15 Remove the three bolts that hold the TA. It is a tight squeeze. I managed to do it with the ratchet. Just before each bolt comes out touch the magnet to it to prevent dropping. Remove the TA. Bolts There is a 4th bolt that looks like it must be removed if you do, its ok...just replace it later. It is actually part of the hanger bracket.

16 Gently grasp the control arm and observe how it works the turbo vane shaft. Work it up and down to make sure that it works freely. Mine was a little stiff because it was a cold day but after a few gentle wiggles it was operating the vanes smoothly. Gently move it the full stroke several times. When done, lean the arm back out of the way. Control arm

17 This shot shows the turbo with the TA removed. Observe the position of the 3 bolts. You can also see the 4th bolt that you do not have to remove. Notice that my turbo is not dripping with oil because I use the elephant hose mod. Bolt holes 4th bolt Clean Turbo Swirl motor is buried down there

18 HINT: The top bolt is difficult to remove because the TA arm is in the way. If your TA is still working a little, replace the battery cable and turn ON the ignition without starting the engine. The TA arm will move UP and out of the way enough to remove the bolt. In my case the arm remained UP when I turned the ignition off. LED work light Arm in UP position
19 Reverse the procedure to install the new TA. Use the magnet to help you position each bolt, then start them with your fingers while the magnet holds them in place. Replace all three bolts but DO NOT tighten them yet. With the TA loose, attach the control arm. Mine was very difficult to slip back on. I had to leave the TA loose and I had to turn on the ignition. Be careful not to damage the fragile control arm. Don't force it!! Use the magnet to hold the clip in place and then push it on with the screw driver or if your magnet is stout, push it on with the magnet. Remove all the RAGS!!! Remove the battery cable and plug in the TA. Tighten all the bolts. Replace the turbo heat shield. If you like, replace the engine cover bracket. I left mine off. Replace the fresh air intake. Replace the battery cable. Clear the codes with a scanner. Crank the engine Smile and pat your wallet.
Changing the Struts on a WK Jeep CRD
 Changing the Struts on a WK Jeep CRD Step by Step By Chirpz Disclaimer: I do not claim that this procedure is the right way or even the best way to change your struts. This is what I did after reading
Installing Rear Brake Pads on a WK Jeep
 Installing Rear Brake Pads on a WK Jeep Step by Step By Chirpz Disclaimer: I do not claim that this procedure is the right way or even the best way to change your rear brake pads. This is what I did after
Ford Racing BOSS 302 Engine Oil Cooler (11-14 GT)
") Tools needed: 14mm hex socket 7mm socket/wrench 8mm socket/wrench Ford Racing BOSS 302 Engine Oil Cooler (11-14 GT) 10mm socket (for airbox removal) ¾ inch or 19mm wrench Torque wrench Appropriate ratchets
Tools needed: 14mm hex socket 7mm socket/wrench 8mm socket/wrench Ford Racing BOSS 302 Engine Oil Cooler (11-14 GT) 10mm socket (for airbox removal) ¾ inch or 19mm wrench Torque wrench Appropriate ratchets
Tools needed: Here is a pic of the shift kit I used. It is a Transgo brand and as you can see, it just a bag full of springs and one valve.
 Before installing a shift kit, be sure the transmission is in good operating order. If your transmission is making noises, slipping, shifting bad or the fluid looks brown or smells burnt, take the transmission
How to install the Barnett clutch and the stronger Oil Pump Drive Gear
 How to install the Barnett clutch and the stronger Oil Pump Drive Gear Written by WildFred I m from Germany so please excuse my English and the spelling. The following procedure is a combination of the
1.6 HDI or TDCI (up to 2010) Turbo and injector upgrade
 Turbo and injector upgrade") 1.6 HDI or TDCI (up to 2010) Turbo and injector upgrade The 1.6 90 and 110 16v engines are the same apart from the turbo charger and the injectors. The injectors both use the same body however the 110
1.6 HDI or TDCI (up to 2010) Turbo and injector upgrade The 1.6 90 and 110 16v engines are the same apart from the turbo charger and the injectors. The injectors both use the same body however the 110
Superior Wheel Installation Guide (No Turbo removal)
") Superior Wheel Installation Guide (No Turbo removal) This is the process used to install the Turbo Wheel without having to remove the Turbo from your Engine. It should take a maximum of 5 hours. Tools:
Superior Wheel Installation Guide (No Turbo removal) This is the process used to install the Turbo Wheel without having to remove the Turbo from your Engine. It should take a maximum of 5 hours. Tools:
Mercedes Diesel Valve Adjustment Procedure
 1 of 30 5/30/2008 12:58 PM Home Cars for sale Trucks for sale Where we are Links to other diesel sites About us Why diesel? Diesel Videos How they work How they sound FAQ Dodge Diesel Maintenance tips,
In an effort to do a comprehensive 67,500 mile service article, this is what we found:
 UNDERHOOD Perform Service at 67,500 miles Let s break the service down into its three components: Part 1: Change the crankcase vent (CCV) filter Part 2: Remove and clean the exhaust gas recirculation (EGR)
This is a guide to assist you adjust the valve clearance on a 2l V6 MIVEC engine found in a Mitsubishi FTO GPX
 Adjusting the valve clearance on a 2L V6 FTO engine This is a guide to assist you adjust the valve clearance on a 2l V6 MIVEC engine found in a Mitsubishi FTO GPX Disclaimer: This guide is to assist you
Another CJ picture guide to replacing the key cylinder in a non-tilt steering column
 Another CJ picture guide to replacing the key cylinder in a non-tilt steering column by John Strenk Well I'm sure it's happened to all of us one time or another. You park your jeep and go to turn off your
Another CJ picture guide to
 Another CJ picture guide to replacing the key cylinder in a non-tilt steering column by John Strenk Well I'm sure it's happened to all of us one time or another. You park your jeep and go to turn off your
Disco 3 Clock Spring / Rotary Coupler replacement
 Disco 3 Clock Spring / Rotary Coupler replacement I recently had to change my Clock spring and thought some folks may find it helpful to see what it entailed. I did lots of reading around but couldn t
Troubleshooting Guide for Limoss Systems
 Troubleshooting Guide for Limoss Systems NOTE: Limoss is a manufacturer and importer of linear actuators (motors) hand controls, power supplies, and cables for motion furniture. They are quickly becoming
Spikes-Spider Hub Installation
 Spikes-Spider Hub Installation The instructions that are provided with the Spikes Spiders are pretty good. I've created this page for two reasons: to show those that are thinking of buying a set exactly
Troubleshooting Guide for Okin Systems
 Troubleshooting Guide for Okin Systems More lift chair manufacturers use the Okin electronics system than any other system today, mainly because they re quiet running and usually very dependable. There
2001 BMW X5 4.4i. Fuel Filter Replacement
 P P 2001 BMW X5 4.4i Fuel Filter Replacement Symptoms for Replacement: OBDII code P0171, Lean Bank1, which could be a bad or dirty MAF sensor Sluggish engine performance including hesitation with Wide
Depress each tab as you pull the bezel off. The bezels are tight. L.H. shown.
 2013-2014 Ford Mustang V6 & Boss 302 Lower Valance Fog Light Kit Parts List: Quantity: Tool List: Fog light & bulb with bracket 2 Flat head & Phillips screwdriver Black bezels 2 Ratchet & Socket set OR
 Special Tools Needed: DrVanos.com Stage I Installation Instructions Camshaft locking tool TDC Crank pin Sprocket turning tool Tool rental is available with the purchase of a vanos kit *See website for
2001 V70 T5 ETM Removal and Cleaning Directions
 2001 V70 T5 ETM Removal and Cleaning Directions Howard Cheng howardc64@gmail.com 10/24/05 Version 1.4 Read this before you start I performed this ETM cleaning because I had gotten 2 reduced performance
IAG Air / Oil Separator (AOS) For STi
 For STi") IAG Air / Oil Separator (AOS) For 2008-14 STi Part# IAG-ENG-7000 Tools Required: Ratchet, torque wrench, extensions, needle nose pliers, hose cutter, snips/scissors Sockets: 10mm, 12mm 13mm Wrenches: 10mm,
IAG Air / Oil Separator (AOS) For 2008-14 STi Part# IAG-ENG-7000 Tools Required: Ratchet, torque wrench, extensions, needle nose pliers, hose cutter, snips/scissors Sockets: 10mm, 12mm 13mm Wrenches: 10mm,
BEW engine timing belt replacement procedure from MOGolf (as demonstrated on a 2004 Jetta).
.") BEW engine timing belt replacement procedure from MOGolf (as demonstrated on a 2004 Jetta). Based on the procedure published by Volkswagen, but modified for the "average" shadetree mechanic. Some special
BEW engine timing belt replacement procedure from MOGolf (as demonstrated on a 2004 Jetta). Based on the procedure published by Volkswagen, but modified for the "average" shadetree mechanic. Some special
Connecting the rear fog light on the A4 Jetta, while keeping the 5 Light Mod
 Connecting the rear fog light on the A4 Jetta, while keeping the 5 Light Mod DISCLAIMER: I'm human and make mistakes. If you spot one in this how to, tell me and I'll fix it This was done on my 99.5 Jetta.
Fitting the Bell Auto Services (B-A-S) TDV6 EGR Blanking Kit to a 2006 model Discovery 3 TDV6 HSE
 TDV6 EGR Blanking Kit to a 2006 model Discovery 3 TDV6 HSE") Fitting the Bell Auto Services (B-A-S) TDV6 EGR Blanking Kit to a 2006 model Discovery 3 TDV6 HSE Before I describe how I did this, I must first thank other members of the Disco3.co.uk forum (namely J,moore
Fitting the Bell Auto Services (B-A-S) TDV6 EGR Blanking Kit to a 2006 model Discovery 3 TDV6 HSE Before I describe how I did this, I must first thank other members of the Disco3.co.uk forum (namely J,moore
Adjusting Carbs For Re-Jetting (Procedure written for an Intruder 1500 LC) NEWLY UPDATED: APRIL 2003
 NEWLY UPDATED: APRIL 2003") SECTION ONE: Get Prepared - Tools Adjusting Carbs For Re-Jetting (Procedure written for an Intruder 1500 LC) NEWLY UPDATED: APRIL 2003 Courtesy of: Half-Crazy Get a manual impact driver (the kind you hit
SECTION ONE: Get Prepared - Tools Adjusting Carbs For Re-Jetting (Procedure written for an Intruder 1500 LC) NEWLY UPDATED: APRIL 2003 Courtesy of: Half-Crazy Get a manual impact driver (the kind you hit
Prius XM Radio Installation Instructions. Eddie Bell
 2004-2005 Prius XM Radio Installation Instructions By Eddie Bell www.metrotpn.com 1 Let me begin by saying this is an easy but time consuming job. Set aside a few hours of your time for the install. If
ENG-16, Turbocharger Replacement (Including Tips on K27 Turbocharger Installation)
") ENG-16, Turbocharger Replacement (Including Tips on K27 Turbocharger Installation) Introduction Replacing the turbocharger on a 951 is not extremely difficult. However, it is very tedious because there
ENG-16, Turbocharger Replacement (Including Tips on K27 Turbocharger Installation) Introduction Replacing the turbocharger on a 951 is not extremely difficult. However, it is very tedious because there
UrS6 Brake Servo Replacement Douglas Fifield July 2006
 UrS6 Brake Servo Replacement Douglas Fifield (douglas.fifield@gmail.com) July 2006 This write-up covers the replacement of the brake servo on a 95.5 S6. The master cylinder remained intact and connected,
Improving the gearshift feel in an SW20.
 Improving the gearshift feel in an SW20. Part one In 3 parts. The SW20 gearshift can be often be greatly improved by eliminating play in the shift linkages, and this article covers three areas that need
Saab 9-3 Krona Downpipe Installation Instructions. What's Included:
 www.kronaperformance.com 2003-2010 Saab 9-3 Krona Downpipe Installation Instructions What's Included: (1) 3 stainless downpipe (with or without catalyst) (1) 3-2.5 stainless downpipe adapter pipe (1) Turbo
The drawings are all available from the author or from the host websight. You will find these pictures and descriptions to be most helpful.
 Last Revision: 10JA2010 1969 THRU 1976 GM A & F-CAR STANDARD (NON-ADJUSTABLE) STEERING COLUMN DISASSEMBLY & REPAIR INSTRUCTIONS PAPER #1 Disassembly and Repair Instructions Addressed in this Paper Degree
DrVanos.com Stage II Installation Instructions. Tool rental is available with the purchase of a vanos kit *See website for more info*
 DrVanos.com Stage II Installation Instructions Special Tools Needed: Camshaft locking tool TDC Crank pin Sprocket turning tool Tool rental is available with the purchase of a vanos kit *See website for
How to replace Air Filter and Serpentine Belt in less than one hour on a Porsche S
 How to replace Air Filter and Serpentine Belt in less than one hour on a Porsche 997.1 3.8S How to replace your Air Filter cartridge and serpentine belt on a 997.1 3.8S engine in less than one hour. Disclaimer:
Fitting Instructions For The TDV6 EGR Blanking Kit To A 2006 Model Discovery 3 TDV6 GHSE
 Part Number DA1112 Fitting Instructions For The TDV6 EGR Blanking Kit To A 2006 Model Discovery 3 TDV6 GHSE You do this modification at your own risk. Britpart won t be held responsible for what is written
DDMWorks Race Intake for Mazda Miata
 DDMWorks Race Intake for 1999-2005 Mazda Miata f This DDMworks Race Intake improves your Mazda Miata by supplying your engine with cold pressurized air for it to breathe in through a free flowing filter
Ball Joint Replacement for 2005 F L SuperDuty SRW, 4x4 with ESOF
 Ball Joint Replacement for 2005 F-250 6.0L SuperDuty SRW, 4x4 with ESOF Parts required: two 5C3Z-4A322-AA = hub / steering knuckle o-ring (my originals were yellow, the replacements are black) two AC3Z-1S175-A
Honda Civic Oil Change
 1988-1991 Honda Civic Oil Change Change the oil in your '88-'91 Honda Civic to improve engine performance and longevity. Written By: Phillip Takahashi ifixit CC BY-NC-SA www.ifixit.com Page 1 of 13 INTRODUCTION
what you need to do is hit the taper housing as hard as you can with your hammers AT THE SAME TIME and at a slight angle, what will happen is you
 first things first, get the car on axle stands and the wheels off. Open the bonnet to let more light through to the area in which you'll be working. The following guide shows the passenger side being done
1 of 2 9/4/ :27 AM
 Ford Mustang IAC IAB - Solving your idle problems http://www.muscularmustangs.com/iac.php 1 of 2 9/4/2010 10:27 AM Solving idle problems part 1 - Cleaning your IAC Does your idle rise and fall over and
3/8 Universal Joint Phillips Head Screwdriver
 Magnetic retrieval tool Pliers 1/4 Ratchet Drive T-35 Torx Socket 3/8 Ratchet Drive 5mm Allen Head Socket Torque Wrench 7-3/8 Drive Extension Flat Head Screwdriver 10mm Socket 8mm Socket 3/8 Universal
List of parts needed below. Tools needed
 1 BMW 645 Coolant leak repair (Cap with Seal Repair and Expanding Coolant Pipe Installation w Pics) By Michael R. Brown (Estimated time to complete the job is 6-8 hrs) List of parts needed below. BMW PART
upper and lower ball joints ( I went with Moog from rockauto.com): two K80026 and two K8607T
: two K80026 and two K8607T") Parts required: two 5C3Z*4A322*AA = hub / steering knuckle o-ring two AC3Z*1S175*A = updated axle shaft "dust seal" two 5C3Z*3254*A = steering knuckle / axle shaft seal upper and lower ball joints ( I
Parts required: two 5C3Z*4A322*AA = hub / steering knuckle o-ring two AC3Z*1S175*A = updated axle shaft "dust seal" two 5C3Z*3254*A = steering knuckle / axle shaft seal upper and lower ball joints ( I
W C-230 Kompressor Sports Sedan 1.8l Thermostat Replacement & Antifreeze flush
 W203 2003 C-230 Kompressor Sports Sedan 1.8l Thermostat Replacement & Antifreeze flush First, I have to thank everyone who has contributed to the MBworld.org forums without you; I would not have gotten
Ford Racing Performance Improvement Intake Manifold (96-04 GT) Time Necessary: Approximately 4 hours
 Time Necessary: Approximately 4 hours") Ford Racing Performance Improvement Intake Manifold (96-04 GT) Time Necessary: Approximately 4 hours Tools Required: Ratchet and socket set Torque wrench Large adjustable wrench Needle nose pliers A dozen
Ford Racing Performance Improvement Intake Manifold (96-04 GT) Time Necessary: Approximately 4 hours Tools Required: Ratchet and socket set Torque wrench Large adjustable wrench Needle nose pliers A dozen
C&L Cold Air Intake (05-09 V6) - Installation Instructions
 - Installation Instructions") C&L Cold Air Intake (05-09 V6) - Installation Instructions The below installation instructions work for the following products: C&L Cold Air Intake (05-09 V6) Please read through the instructions carefully
C&L Cold Air Intake (05-09 V6) - Installation Instructions The below installation instructions work for the following products: C&L Cold Air Intake (05-09 V6) Please read through the instructions carefully
Audi A8 Transmission Service By Barry Lenoble and Paul Waterloo
 Page 1 of 18 Technical & Maintenance Upgrades & Style Used A8 Buyer's Checklist Marketplace On Track Gallery Links Contact Home Audi A8 Transmission Service By Barry Lenoble and Paul Waterloo Background
Volvo 850 Radiator Replacement Jason Reed 29 March 2013
 This write up covers removing and replacing the radiator on a 97 855 GLT wagon with light pressure turbo and automatic transmission. This car has 162K miles. The radiator, which was original, developed
Fanatec GT3RS V1 to GT3RS V2 Tutorial
 Fanatec GT3RS V1 to GT3RS V2 Tutorial by Roy Visser 1 How to update your Fanatec GT3RS V1 wheel to a GT3RS V2 wheel Welcome to this guided and detailed tutorial for upgrading your Fanatec GT3RS V1 wheel
Installation Manual TWM Performance Short Shifter Cobalt SS/SC, SS/TC, HHR SS, Ion Redline and Saab 9-3
 Page 1 Installation Manual TWM Performance Short Shifter Cobalt SS/SC, SS/TC, HHR SS, Ion Redline and Saab 9-3 Please Note: It is preferable to park on a flat surface, as you will have to engage and disengage
1464. Interior Installation. Cover Rear Seat Support Cut the vinyl to approximately the size of the rear seat support.
 Chapter 37 (Video Clip 37) - Interior Installation 1464. Interior Installation Cover Rear Seat Support 1465. Cut the vinyl to approximately the size of the rear seat support. 1466. Make a dry fit of the
Replacing MK4 Golf/Jetta radiator mounts in-car
 Replacing MK4 Golf/Jetta radiator mounts in-car This is a guide to replacing the radiator mounts in a MK4 Golf/Jetta. This involves moving the core support to the service position which allows you to do
M V Intake Manifold INSTRUCTION SHEET
 Please visit www.fordracingparts.com for the most current instruction information.!!! PLEASE READ ALL OF THE FOLLOWING INSTRUCTIONS CAREFULLY PRIOR TO INSTALLATION. AT ANY TIME YOU DO NOT UNDERSTAND THE
There is hence three things you can do - add oil, adjust the temp that the clutch begins to engage, or do both.
 As most of you may be aware, I have been doing a lot of research lately on our cooling system in the 80's including the fact that we have a dead spot on the OEM temp gauge which prompted me to not rely
Subaru Front Mount Intercooler Kit STI Subaru Front Mount Intercooler Kit STI
 Subaru Front Mount Intercooler Kit STI 2008-2014 715500 Subaru Front Mount Intercooler Kit STI 2008-2014 Congratulations on your purchase of the Subaru Front Mount Intercooler Kit STI 2008-2014. The following
Brake System Rebuilding the brake calipers
 Page 1 of 39 Brake System Rebuilding the brake calipers Written by the backyard hack mechanic Sean750 Document history: # 14 Jan 2004 added pictures of rear caliper rebuild kit # 13 Nov 2004 added more
Okay! In starters sorry about my bad english hope you understand at least some of this stuff what i m writing about!
 ------------------------------------------------------------------- Okay! In starters sorry about my bad english hope you understand at least some of this stuff what i m writing about! This guides meaning
2014+ Ram 3.0 EcoDiesel EGR Delete
 2014+ Ram 3.0 EcoDiesel EGR Delete Installation Guide WARNING: This product is for competition use only in a sanctioned racing event. NOT FOR USE ON VEHICLES USED OR REGISTERED FOR USE ON A PUBLIC ROAD
Tru-Billet Climate Control Knob Installation Instructions
 P/N S197-525-07 2007-08 Tru-Billet Climate Control Knob Installation Instructions Thank you for your purchase of SilverHorse Racing products. Please read all directions before beginning the installation.
Rear Wheel Removal (by BassCliff)
") Rear Wheel Removal (by BassCliff) Hello to my GS riding friends! After picking up a nail in my rear tire (while on the freeway at 75mph!) I thought I would take a few pictures to help illustrate the rear
Rear Wheel Removal (by BassCliff) Hello to my GS riding friends! After picking up a nail in my rear tire (while on the freeway at 75mph!) I thought I would take a few pictures to help illustrate the rear
This is what we are trying to create in the steps below
 You will need: (1) Some 3/4 aluminium or steel flat bar (+/- 1 foot) (2) About 12 of 3 Aluminium or steel tubing. (2) Piece of 3X3 silicone hose and 2 hose clamps (3) 1 K&N (or similar) high flow filter
How to Replace the B2 Piston Bore Seal
 Page 1 Home Cars for sale Trucks for sale Where we are Links to other diesel sites About us Why diesel? Diesel Videos How they work How they sound FAQ Dodge Diesel Maintenance tips, parts and DIY DVD's
At Mark's suggestion I thought I'd write this up so future Coupe lovers can have as much fun* as I did with this job.
 At Mark's suggestion I thought I'd write this up so future Coupe lovers can have as much fun* as I did with this job. My enormous thanks to forum members, particularly glorfindel, for their advice when
H31 BOOSTER REBUILD & MASTER CYLINDER
 2010 1991 BMW 750iL George Fontes gajfontes@yahoo.com H31 BOOSTER REBUILD & MASTER CYLINDER Rebuild hydraulic booster and replace Master Cylinder. Page 1 of 16 Master Cylinder Removal & Brake Booster Rebuild
*Some speedometers have these additional electronic connections. If yours does, then remove the smaller slotted screws shown.
 www.odometergears.com 1981-1985 240 Cable-Driven Speedometers (NOT for 1986 and later electronic units) http://www.davebarton.com/240-odometer-repair.html For this set of instructions below, I will not
BODY-24, Late Model 944 ( and Newer) Dash Replacement
 Dash Replacement") BODY-24, Late Model 944 (1985.5 and Newer) Dash Replacement Introduction Replacing the dash in a late model 944 is not overly difficult. However, it is very tedious and a lot of patience is required. It's
BODY-24, Late Model 944 (1985.5 and Newer) Dash Replacement Introduction Replacing the dash in a late model 944 is not overly difficult. However, it is very tedious and a lot of patience is required. It's
Kodak 750H Carousel Projector Repair
 Kodak 750H Carousel Projector Repair An AT YOUR OWN RISK PROJECT by Klaus Wolter, Rev B, 3-26-2016 Here I documen the repair of my 750H carousel. A common problem with this projector, and all of the projectors
Intake Manifold Spacers. For the Porsche 928
 The following photos and instructions are to install the 928 Motorsports, LLC. Intake Manifold Spacers For the 1987-1995 Porsche 928 Questions? Call our toll free number 877-FOR-928M or send an e-mail
Heater Core Replacement
 Heater Core Replacement Ok, I just finished replacing the heater core in my dad's '94 840Ci. While this is fresh in my mid I thought I would outline the procedure, I'm going from memory here, so I will
OEM Cruise Control Installation in GMC/Chevy NBS trucks
 OEM Cruise Control Installation in 99-02 GMC/Chevy NBS trucks May 2008 ~ Rampage_Rick Having just installed factory cruise control in my 00 Sierra, I thought I d share the fun. I followed the steps outlined
Raxiom Factory GPS Rear Back-up Camera Kit (07-17 Wrangler)
") Raxiom Factory GPS Rear Back-up Camera Kit (07-17 Wrangler) Installation Time: 2.5-3Hrs Tools Required: 7mm Socket & Driver 10mm Socket 10mm Open end wrench Knife / Razor blade Zip-ties Wire Cutters Needle
Raxiom Factory GPS Rear Back-up Camera Kit (07-17 Wrangler) Installation Time: 2.5-3Hrs Tools Required: 7mm Socket & Driver 10mm Socket 10mm Open end wrench Knife / Razor blade Zip-ties Wire Cutters Needle
Installation Guide for Rough Country 2.5 inch Lift Kit w/o Shocks (07-15 Wrangler JK) Item # J10212
 Item # J10212") Installation Guide for Rough Country 2.5 inch Lift Kit w/o Shocks (07-15 Wrangler JK) Item # J10212 Installation Time: 3 Hours Tools Required: Jack (2 helps, but not needed) Jack stands(2 3-ton, 2 2-ton)
Installation Guide for Rough Country 2.5 inch Lift Kit w/o Shocks (07-15 Wrangler JK) Item # J10212 Installation Time: 3 Hours Tools Required: Jack (2 helps, but not needed) Jack stands(2 3-ton, 2 2-ton)
Aamir_bt The legend..
 Aamir_bt The legend.. How to do timing on a 4XE1-W (DOHC) engine. well i decided to to a write up for DOHC timing since there was only the SOHC written up, and i had to do a timing belt on my stylus anyways,
YOUR CAR's COOLANT MUST BE COLD TO DO THIS. DON'T BE STUPID AND SCALD YOURSELF.
 I just read through the service manual, checked out Billman's recommendations, and tackled the coolant change on my 2003 s2000. I'm not a mechanic by trade but have done valve adjustments, head gaskets,
LABOUR ESTIMATE GUIDE
 INSTALLATION INSTRUCTIONS FOR 2001-2005 Audi A4 1.8T These instructions are applicable to vehicles equipped with either manual or automatic transmissions Thank you for choosing to purchase a Carbonio Intake
We thank you for purchasing a manual petcock conversion kit from Murphs!
 We thank you for purchasing a manual petcock conversion kit from Murphs! The first step is removing the gas tank from the bike. We suggest running the tank down to reserve before removal, both for the
COLD AIR INTAKE INSTALLATION INSTRUCTIONS PART NUMBER D A. APPLICATION: E36/7 M-Roadster or M-Coupe 3.
 COLD AIR INTAKE INSTALLATION INSTRUCTIONS PART NUMBER D760-0323A APPLICATION: 1998-00 E36/7 M-Roadster or M-Coupe 3.2 Liter PARTS LIST Air Filter Assembly 3 1/2" Tube Intake Shield Silicone Hose Airflow
Door Panel Removal & Window Stop Adjustment
 Door Panel Removal & Window Stop Adjustment By: Jeff Wolford Disclaimer: This is simply an article of how I fixed my car. I m not responsible if you break, scratch, or mess up anything following my example.
K6JRF's Page formerly W6FZC
 K6JRF's Page formerly W6FZC My Mercedes Benz S500 Coupe (Updated: Nov 9, 2004) Analyze and Troubleshoot "Check Engine" MIL and Electronic Control Units (ECU)! Seat Belt Extender About one month ago, the
By AM Customer: Dean Smith, Aug. 8, 2014.
 Ford Racing Bullitt Axle-Back Exhaust (05-09 GT, GT500) By AM Customer: Dean Smith, Aug. 8, 2014. Tools for the Job: 13mm Wrench 13mm Socket 15mm Socket 15mm Deep Socket Ratchet(s) [I used a bigger one
Procharger Stage II Intercooled Supercharger System (11-14 GT)
") Procharger Stage II Intercooled Supercharger System (11-14 GT) Installation Time: Approximately one day. Installed on 2012 Mustang GT 5.0/Manual Required Tools 3/8 Socket Set (Standard and Metric) 1/2
Procharger Stage II Intercooled Supercharger System (11-14 GT) Installation Time: Approximately one day. Installed on 2012 Mustang GT 5.0/Manual Required Tools 3/8 Socket Set (Standard and Metric) 1/2
Cold Air Intake Installation Instructions
 Page 1/5 3.04 INS262 BAVARIAN AUTOSPORT Cold Air Intake Installation Instructions NOTE: Throughout the instructions the term AFM is used. It refers to the Air Flow Meter which is located between the engine
The Sands Mechanical Museum
 The Sands Mechanical Museum How to Change Your Oil It is more difficult to change the oil in a Lotus Elise because the oil plug and filter are difficult to access. They are located behind an access panel.
Volvo 1800 Dash Pad Replacement
 Volvo 1800 Dash Pad Replacement (courtesy of John Garden State Chapter Volvo Club America) Reupholstering the dash Well it has been some time since I have been online in the forum. Winter is a quite time
Rear Shock Replacement 2007 Honda Accord
 P a g e 1 Rear Shock Replacement 2007 Honda Accord This is step-by-step documentation for replacing the rear shock absorbers in a 2007 Honda Accord. Hopefully it will be of use to you if you are about
4 pieces of silicone hose Unless you have AEM then you have 2 2.5, 1 3, and 1 3.5
 The parts in your kit: 3 pieces of Mandrel-Bent Aluminized Tubing: 1 Straight 1 45 degree bend with straight section 1 curved section 4 pieces of silicone hose 1 2.5 1 3.5 2 3 Unless you have AEM then
The drawings are all available from the author or from the host websight. You will find these pictures and descriptions to be most helpful.
 Last Revision: 09JA2010 1969 THROUGH 1976 GM A & F-CAR TILT STEERING COLUMN DISASSEMBLY & REPAIR INSTRUCTIONS PAPER #1 Disassembly and Repair Instructions Addressed in this Paper Degree of Difficulty Page
TCI Trans-Scat
 Page 1 of 5 Return to Instruction Sheet index TCI 350000 Trans-Scat Installation Instructions For TURBO HYDRAMATIC 350 This kit will allow you to reprogram your transmission to meet your driving needs
Remove the 3-11mm nuts holding mirror on. Don t drop the nuts!
 2005-2012 Ford Mustang Puddle Lamp Kit Parts List: Quantity: Tool List: LED Lamps 2 Flat head screwdriver Seals 2 Ratchet & Socket set OR Nuts 2 Adjustable Wrench Wiring harness 1 Drill & 11/16 th bit
Spark Plug replacement on VW 2.0L engine with AEG code
 Spark Plug replacement on VW 2.0L engine with AEG code This is document is an attempt to describe and illustrate to some extent the process of replacing the spark plugs on a Volkswagen 2.0L engine with
Turboback Exhaust
 501301 Turboback Exhaust 2014+ Ford Fiesta ST 501200 High Flow Catted Downpipe Page 2 501100 Catback Exhaust System Page 10 501200 High Flow Catted Downpipe 2014+ Ford Fiesta ST Congratulations on your
Tools Required. Metric Wrench Set Screwdriver Set Metric Socket Set Pliers Heavy duty hydraulic Jack and Car Stands Box knife or similar Hacksaw WD40
 Subaru 2004+ Legacy GT & Outback XT For JDM 2.0 twinscroll turbo and USDM 2.5 turbo models Front Mount Intercooler Fitting Instructions PN# LEG-1348-000 You are now the proud owner of a highly tested and
1986 Rear Disk Brake Upgrade. All hard lines mounted to the rear axle with mounting screws. 1/4" fittings
 1986 Rear Disk Brake Upgrade Being well prepared for a project of this size is the key to success. I thought I was well prepared by doing a lot of research and getting all of the required parts before
Traditional method Oil Change Instructions For VW 1.9 TDI
 Traditional method Oil Change Instructions For VW 1.9 TDI Created by DeafBug This document provides instructions on changing the oil and filter on a VW 1.9 TDI engines. All the pictures here are taken
FITTING OIL TEMP AND PRESSURE GUAGES
 FITTING OIL TEMP AND PRESSURE GUAGES this guide is of reference to fitting an oil temp and pressure sender/ sensor into a sandwich plate- not the sump plug temp sensor (although it wouldn't be much different
OIL COOLER KIT INSTALLATION INSTRUCTIONS PART NUMBER D E92 335is (N54 engine) with BMW M-Technic bumper and with stock oil cooler
 with BMW M-Technic bumper and with stock oil cooler") OIL COOLER KIT INSTALLATION INSTRUCTIONS PART NUMBER D570-0923 APPLICATION: 2011 E92 335is (N54 engine) with BMW M-Technic bumper and with stock oil cooler Congratulations for being selective enough to
OIL COOLER KIT INSTALLATION INSTRUCTIONS PART NUMBER D570-0923 APPLICATION: 2011 E92 335is (N54 engine) with BMW M-Technic bumper and with stock oil cooler Congratulations for being selective enough to
2017+ L5P Duramax 3 ½ Down Pipe & EGR Fix Kit
 2017+ L5P Duramax 3 ½ Down Pipe & EGR Fix Kit Covers installation of PN s: WCF100630, WCF100829 Note: This Kit is for off road competition use only! Off Road Competition Use Tuning & Exhaust System is
Ford Super Duty 5.4L Spark Plug Change F250 4x4 XLT Sport Crew Cab
 1 of 32 Ford Super Duty 5.4L Spark Plug Change 2004 F250 4x4 XLT Sport Crew Cab Back to 2004 F250 Main Page Click Here for a PDF version of this article At close to 100k miles, I figured it was time for
Intake Installation Instructions P/N 9046 (red filter) - P/N 9046B (blue filter) P/N 9046K (black filter)
 - P/N 9046B (blue filter) P/N 9046K (black filter)") Intake Installation Instructions P/N 9046 (red filter) - P/N 9046B (blue filter) P/N 9046K (black filter) Year/Make/Model/Engine 2012-17 Ford Focus 2.0L Parts List 1- Intake tube 1- Heat shield, Side 1-
Intake Installation Instructions P/N 9046 (red filter) - P/N 9046B (blue filter) P/N 9046K (black filter) Year/Make/Model/Engine 2012-17 Ford Focus 2.0L Parts List 1- Intake tube 1- Heat shield, Side 1-
Ford 8, 9 Small Bearing Installation Instructions Rear Disc Conversion
 Ford 8, 9 Small Bearing Installation Instructions Rear Disc Conversion This kit is for Ford 9 rear axles with the small (2.835 ) style bearing and Ford 8 rear ends. This kit is designed to work with axles
PA Performance High Torque Starter Solenoid Installation Instructions
 PA Performance High Torque Starter Solenoid Installation Instructions Introduction: If you are having issues with your starter related to your solenoid, the PA Performance High Torque Starter Solenoid