Installation Instructions For: Part Number CDK1 for Some K20 and K24 engines into Honda Accord
|
|
|
- Cuthbert Johns
- 6 years ago
- Views:
Transcription

1 Installation Instructions For: Part Number CDK1 for Some K20 and K24 engines into Honda Accord Hasport Performance mounts are the result of extensive research and engineering. All mounts are designed with up to date solid modeling software. Each mount is constructed of lightweight 6061-T6-billet aluminum and CNC machined in our state of the art machining facility. Hasport Performance motor mounts control engine movement, transferring more power to the wheels. All mounts and brackets have a limited lifetime warranty against any defects. Complete warranty information is available at Please read all instructions before proceeding with the installation CDK1 INSTALLATION INSTRUCTIONS WARNING: The instructions here, deal only with the installation of the engine and transmission using Hasport s CDK1 mount kit. There are no instructions for hooking up Air Conditioning, Power Steering, Wiring, Emissions Equipment, Exhaust or other peripherals. Please read through the entire instructions before attempting this engine swap. List of Parts included in this kit: Quantity Description 1 Billet Aluminum Right-hand Engine Mount 1 Billet Aluminum Left-hand Transmission Mount 1 Billet Aluminum Rear Engine Mount 1 Steel Right Engine Mount Bracket 1 Steel Left Transmission Bracket 1 Steel Rear Transmission Bracket 1 Left Mount and Bracket Hardware 1 Right Mount and Bracket Hardware 1 Rear Mount and Bracket Hardware
2 Extra Tools Required for this Swap Center Punch, Electric Hand Drill, 1/8 Drill Bit, 3/8 Pilot Point Drill Bit, Die Grinder Please read all instructions before proceeding with the installation This is a complicated engine swap requiring modifications to the chassis. If you have never performed an engine swap before, Hasport recommends that you have this swap performed by a competent shop. These instructions pertain ONLY to the ENGINE MOUNTING of a K-Series motor into a Accord chassis. There are still many other parts that will be needed for proper operation. These parts are under development by Hasport and other companies. Our kit will allow the mounting of certain K-series engines. These engines include the US Spec 2003 up Accord K24A4, Element K24A4, TSX K24A2 and Accord Euro K20A and K24A. A manual transmissions from the 03-up US market Accord, the Accord Euro and Acura TSX must also be used. The shift cables from these same models will need to be used. The kit will not work with Civic or RSX K-series transmissions. It is important to remember that engine swaps are not legal in all states or countries. It's best to check local laws regarding engine swaps before proceeding. A general list of additional parts needed for the K-Series swap in the Accord is listed below. Quantity Description 1 Hasport CDK1 Bolt In Mount Kit (This Kit) 1 Manual Transmission Intermediate Shaft (from K-series powered Civic, RSX, Accord or RSX) 1 Hasport Performance CDK-series Swap Axles (when ordering give the intermediate shaft information) 1 K-Series Engine from an Accord, TSX, Element, or Accord Euro R complete with alternator 1 K24 Transmission from Accord or Acura TSX RSX or Civic Si K-Series ECU and engine harness RSX or Civic Si Radiator and radiator fan shroud 1 K-Series Swap header Things you should know about this swap A lot of the issues in the following section are covered in the June 2006 issue of Honda Tuning Magazine in an article titled Swap Accordingly by Time Kelly. 1. Ground clearance The K24 engine is a tall engine, it is 2 inches taller than the H22 and as much as 4 inches taller than some of the F-series single cam engines. Although the Hasport engine mounts hold the engine very close to the hood ground clearance is still less than it would be with an F or H-series engine. If your car is very low, this could result in damage to the oil pan during normal driving. 2. Power Steering The Accord power steering hose will not work with the K24 power steering pump. New power steering hoses need to be made and the reservoir will need to be relocated. 3. AC To retain AC, you will need an RSX or EP3 AC compressor and have custom AC lines made to fit the car. The TSX compressor can be used also, but the air compressor s thermal protection circuit will need to be converted from 3 wire to 1 wire type found on the RSX and EP3. On top of custom AC lines, you will also need an aftermarket front crossmember. The stock front crossmember won t allow you to mount the K-series compressor. 4. Shift mechanism The TSX and Accord shift mechanism and cables are needed to operate the TSX and Accord K- series transmissions. 5. Cooling The Accord s stock radiator has the outlets in the wrong location for easy use with the K24. It can be used with custom hoses. You can use the EP3 radiator by relocating the bottom mounts and making new top brackets. If you choose this route, you can also use the Accord condensor fan, it bolts to the EP3 radiator. For the radiator cooling fan take the stock Accord fan and blade and transfer it to an EP3 radiator fan shroud. 6. Clutch Actuation The Accord clutch master will operate the K-series slave cylinder. You will need some custom lines to make the connection. 7. Fuel Line The K-series engine s fuel pressure regulator is located in the fuel tank on the K-series powered cars. You will need to add a fuel pressure regulator along with some custom fuel lines.
 1. Discharge R134A from AC system.")


3 8. Exhaust The K-series swap header from Hasport made by DC Sports will bolt up to the stock exhaust. To do this you will need to remove the stock catalytic converter though. Modifications to the exhaust need to be made to retain the catalytic converter. Removing the Engine: (Save all Bolts, You May Need One!) 1. Discharge R134A from AC system. Disconnect the hoses from the compressor. You will be removing the compressor with the engine. (Have a professional evacuate your system.) 2. Follow the Accord Service Manual instructions for removing the engine. Although the Service Manual shows a hoist being used and lifting the engine out of the top, this process can be simplified if you have access to a chassis lift. With the lift, you can use a flat surface at least 10 inches tall to support the engine from underneath while unbolting it from the vehicle. After it is unbolted use the lift to raise the chassis off the engine. One key point to pay attention to, is to remove the front suspension crossmember and radius rods. It s impossible to remove or install the new engine from the bottom with the crossmember and radius rods in place. It is a good idea to also remove the radiator and fans for extra working room. Preparing the Engine Bay: 1. The major change to the engine bay is the installation of the new passenger side engine bracket from Hasport. It will replace the current right-hand transmission bracket in the car. 2. To make removing the existing transmission bracket easier, you will need these tools: Center punch 1/8 inch drill bit 3/8 inch or larger pilot point drill bit 3. Begin by center punching all the spot welds on the mount. This is so the drill bit won t drift when drilling. Next use the 1/8 inch drill to drill a hole approximately 3/16 inches deep. This will prevent the pilot point drill from drifting. Don t worry if you drill completely through the sheet metal. Now use the pilot point drill to drill a hole as deep as the bracket sheetmetal is thick.


4 4. There will probably be a few small welds on the edges of the mount bracket too. Use a die grinder to remove them. 5. A chisel and hammer can now be used to finish removing the bracket. Once it is off use the die grinder with a sanding wheel to remove any excess material left over. 6. Place the Hasport engine bracket on the frame rail. To align it properly look down the top and line up the hole shown with the bolt-hole on the rail. Using one of the battery tray bolts bolt the bracket into place. Tighten the bolt finger tight. This will locate the Hasport engine bracket in the proper location. Outline the bracket and it s holes where they come in contact with the frame rail. The paint around the markings should be removed before welding the bracket to the frame rail to insure a good weld. The holes are for rosette welds, which are stronger than simply welding along the edge of the bracket. Because of the age of the CD Accords, there may be an issue with your particular car s straightness. It is a good idea to not weld in the bracket at this time, but to leave it loose until you fit the new engine in for the first time. During initial fitting, you can see if any minor adjustments need to be made to the right-hand brackets location. Once you have determined the engine fits properly, then you can tack weld the bracket while the engine is in. then remove the engine and finish welding the bracket into the framerail. 7. The engine bracket comes sand blasted and ready to paint. If you would like the bracket to match the color of your car, you can find information on your chassis s color on a sticker on the driver s side doorjamb. With this information you can go to most any automotive paint store and get the correct color mixed and put into a spray can.


5 9. Get the three 10mm x 45mm Hex bolts and 10mm washers from the rear mount hardware bag. 10. At this time install the new Hasport rear engine mount on the rear engine crossmember. Torque the bolts to 43 ft-lb 11. If you are installing the engine from the bottom, you can install the left-hand mount at this time. Use the original bolt for the Accord mount for the new K-series mount. Prepping the Motor: 1. If your K24 is from an Accord or TSX you will need to replace the bracket on the timing chain cover and replace it with a bracket form the CRV. The two shorter bolts will be reused. These are two parts you will need, they are available from either Hasport Performance or your Honda dealership. The part numbers for the bracket and bolt are: Engine Side Mounting Bracket PPA-000 Bolt (10x85) PPA-000 Install the new bracket in the position of the old bracket.


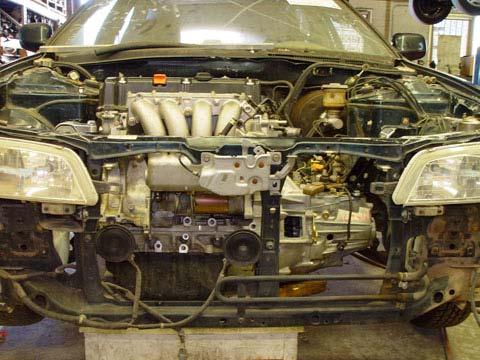
6 2. Next we will install the rear engine bracket. Grab the four 12mm x 35mm hex bolts and 12 mm washers. The bracket will use two holes on the transmission and two on the engine. Torque the bolts to 43 ft-lbs. To make it easier to bring the engine in from the bottom, the bracket can be installed once the engine is in the car. It is suggested that you test fit the bracket while the engine is out of the car first so you can see what is involved in bolting it place. It is much easier to see what tools are required and which holes will be used. 3. Next we will install the left-hand transmission bracket. You will need One 12mm x 30mm hex bolt One 12mm x 40mm hex bolt Three 12mm washers One 10mm x 30mm flange bolt or 10mm x 30mm hex bolt with 10mm washer The bracket will use two holes large 12mm holes on top of the transmission and one 10mm hole on the end of the transmission. Torque the 12mm bolts to 43 ft-lbs and the 10mm bolt to 28 ft-lbs. Installing the Motor: 1. Installing from the bottom Place the engine and transmission on an engine stand or cart positioned under the vehicle. Make the engine as level as possible on the cart, this will aid installation. Installing from the top Attach the engine to a hoist keeping it as level as possible, this will aid installation. 2. Lower the car or the engine slowly taking care not to hit the engine on the way down. Keep close watch on the VTEC solenoid on the rear of the engine and the clutch actuator fork and slave cylinder on the front of the transmission. You may need to twist the engine while lowering the car to avoid contact. This is a two-person job.


7 3. Gather up the hardware for the individual mounts and put them within easy reach of the different mounts. The mounts will be bolted up in this order: 1. Rear 2. Left-hand 3. Right-hand Once all the mounts are bolted up they should be tightened in the same order to a torque of 43 ft-lbs. Rear mount hardware Left-hand mount hardware Right-hand mount hardware 4. Once the rear bracket is level with the rear engine mount slide the bracket over the mount and install the 12mm x 100mm bolt. Use a 12mm washer on each side with the 12mm nylon lock nut. 5. Connect the left-hand mount to the bracket using the two 12mm x 50mm hex bolts and 12mm nylon lock nuts. Use washers on top and bottom of the bolts. Tighten the bolts snuggly. 6. Bolt the right-hand mount to the engine bracket using the two 12mm x 40mm bolts with 12mm washers. Now bolt the mount into the bracket with the 12mm x 120mm bolt the two 12mm washers and 12mm nylon lock nut. Now you can go back and torque all the mount bolts to the recommended 43 lbs-ft.
8 Fini
HASPORT PERFORMANCE BBK1
 HASPORT PERFORMANCE Installation Instructions For: Part Number BBK1 for some K20 and K24 engines into 1992-1996 Honda Prelude Hasport Performance mounts are the result of extensive research and engineering.
Installation Instructions For: Part Number EGJ1 for J-series V6 engines into Honda Civic, Del Sol And Acura Integra
 Installation Instructions For: Part Number EGJ1 for J-series V6 engines into 1992-1995 Honda Civic, 1994-1997 Del Sol And 1994-2001 Acura Integra Hasport Performance mounts are the result of extensive
Please read all instructions before proceeding with the installation DA1K1 & DA2K1
 Installation Instructions For: Part Number DA1K1 and DA2K1 for K-series engines used with the RSX or Civic Si Transmission into 1990-1993 Acura Integra Hasport Performance mounts and mount kit accessories
HASPORT PERFORMANCE EGH3
 HASPORT PERFORMANCE Installation Instructions For: Part Number EGH3 for H22, H23 and F22 engines with Prelude Transmissions into 1992-1995 Honda Civic, 1994-1997 Del Sol And 1994-2001 Acura Integra Hasport
HASPORT PERFORMANCE EFJ1
 HASPORT PERFORMANCE Installation Instructions For: Part Number EFJ1 for J-series V6 engines into 1988-1991 Honda Civic and CR-X Hasport Performance mounts are the result of extensive research and engineering.
Installation Instructions For: Part Number GDK20 for K20 engines and GDK24 for K24 engines into 2007 Honda Fit
 Installation Instructions For: Part Number GDK20 for K20 engines and GDK24 for K24 engines into 2007 Honda Fit Hasport Performance mounts are the result of extensive research and engineering. All mounts
Installation Instructions For: Part Number EGK Honda Civic, Del Sol & Integra
 HASPORT PERFORMANCE Installation Instructions For: Part Number EGK1 1992-1995 Honda Civic, 1993-1997 Del Sol & 1994-2001 Integra HASPORT PERFORMANCE Inc. 4046 East Winslow Ave. Phoenix, AZ 85040 Phone:
Installation Instructions For: Part Number EFK1 K-series Mount Kit for Civic and CR-X
 HASPORT PERFORMANCE Installation Instructions For: Part Number EFK1 K-series Mount Kit for 1988 1991 Civic and CR-X HASPORT PERFORMANCE Inc. 2849 S. 44 th St. Phoenix, AZ 85040 Phone: (602) 470-0065 Fax:
Installation Instructions For: Part Number EKK Honda Civic
 HASPORT PERFORMANCE Installation Instructions For: Part Number EKK1 1996-2000 Honda Civic HASPORT PERFORMANCE Inc. 4046 East Winslow Ave. Phoenix, AZ 85040 Phone: (602) 470-0065 Fax: (602) 470-0516 www.hasport.com
HASPORT PERFORMANCE EFH1
 HASPORT PERFORMANCE Installation Instructions For: Part Number EFH1 1988-1991 Honda Civic/CRX Hasport Performance mounts are the result of extensive research and engineering. All mounts are designed with
HASPORT PERFORMANCE FG4STK
 HASPORT PERFORMANCE Installation Instructions For: Part Number FG4STK stock replacement mounts for 2012 up Honda Civic Si Hasport Performance mounts and mount kit accessories are designed in house using
Hybrid Racing Racing Performance Air Intake System Acura RSX Type S
 Hybrid Racing Racing Performance Air Intake System 02-06 Acura RSX Type S This is a step by step guide on how to install the Hybrid Racing Performance Air Intake System on the 02-06 Acura RSX Type S. Written
Installation Instructions for Part #: KIM01 K20A/A2/A3/Z1 Throttle Body To RBC/RRB/RBB Intake Manifold Adapter
 Installation Instructions for Part #: KIM01 K20A/A2/A3/Z1 Throttle Body To RBC/RRB/RBB Intake Manifold Adapter This adapter provides the SOLUTION for directly bolting up a 02-06 RSX-S/ITR or 02-05 Civic
JK V8 HEMI BUILDER KIT Overview
 JK V8 HEMI BUILDER KIT Overview Installation Guide 5.7L & 6.1L HEMI 2007-2008 JK - SWB, LWB Page 1 of 1 Congratulations on purchasing your AEV HEMI JK Installation kit. These instructions have been written
Installation Instructions for Part #: KIM01 K20A/A2/A3/Z1 Throttle Body To RBC/RRB/RBB Intake Manifold Adapter
 Installation Instructions for Part #: KIM01 K20A/A2/A3/Z1 Throttle Body To RBC/RRB/RBB Intake Manifold Adapter This adapter provides the SOLUTION for directly bolting up a 02-06 RSX-S/ITR or 02-05 Civic
Instant Chat off the main page of Or simply call our tech team at
 FRONT MOUNT INTERCOOLER 2015+ WRX 2017-07-07 Thank you for purchasing this PERRIN product for your car! Installation of this product should only be performed by persons experienced with installation of
ADVANCE ADAPTERS INC. P/N: VORTEC GEN. III V8 SQ. BOLT TJ WRANGLER MOTOR MOUNTS (WITH A/C)
") Paso Robles, CA 93447 PAGE 1 OF 6 Telephone: (800) 350-2223 Fax: (805) 238-4201 Page Rev. Date: 04-16-14 KIT CONSISTS OF: No. Qty Part No. Description 1. 2 713092A BOLT SLEEVE 2. 4 713092B GEN 3 MOTOR
Paso Robles, CA 93447 PAGE 1 OF 6 Telephone: (800) 350-2223 Fax: (805) 238-4201 Page Rev. Date: 04-16-14 KIT CONSISTS OF: No. Qty Part No. Description 1. 2 713092A BOLT SLEEVE 2. 4 713092B GEN 3 MOTOR
INSTALLATION INSTRUCTIONS
 INSTALLATION INSTRUCTIONS 6525 REAR AXLE FLIP & HANGER KIT 5 OR 6 INCH LOWERING 14&UP CHEVROLET SILVERADO / GMC SIERRA 1500 Thank you for being selective enough to choose our high quality BELLTECH PRODUCT.
Installation Instructions for Part #: KRB01 Radiator and Reserve Tank Relocation Kit for K-Powered Civics
 Installation Instructions for Part #: KRB01 Radiator and Reserve Tank Relocation Kit for K-Powered 1992-1995 Civics This kit provides the SOLUTION for mounting a factory or factory replacement radiator
1501 Industrial Way N., Toms River, NJ Fax: PACKING LIST MUSTANG LONG TUBE HEADERS (M30000)
") 2/18/04 1501 Industrial Way N., Toms River, NJ 08755 732-349-2109 Fax:732-244-0867 ADVANCED - Installation requires professional-type tools and advanced automotive-service skills. If you lack experience
2/18/04 1501 Industrial Way N., Toms River, NJ 08755 732-349-2109 Fax:732-244-0867 ADVANCED - Installation requires professional-type tools and advanced automotive-service skills. If you lack experience
06-11 Civic Si / EM1 Clutch Master Cylinder
 06-11 Civic Si / EM1 Clutch Master Cylinder Upgrade This guide will show you how to install the EM1 CMC upgrade kit in a 2006-2011 Honda Civic Si. Written By: Hybrid Racing 2017 guides.hybrid-racing.com/
99-00 Civic EK K-Series Swap Conversion Wiring Harness V 4.0 Installation Manual
 99-00 Civic EK K-Series Swap Conversion Wiring Harness V 4.0 Installation Manual This guide walks you through the steps to install your Hybrid Racing K-Series swap conversion harness for 99-00 Civic. Written
HEIDTS RF-110. INSTALLATION INSTRUCTIONS Fairlane Comet Rear 4-Link
 HEIDTS RF-110 INSTALLATION INSTRUCTIONS 66-67 Fairlane 66-67 Comet Rear 4-Link Please read these instructions completely before starting your installation. Remember the basic rule for a successful installation:
Installation Guide for the TJ LCG PRO Suspension System (Low Center of Gravity) Available 4 or 5
 Available 4 or 5") INSTALLATION GUIDE Installation Guide for the TJ LCG PRO Suspension System (Low Center of Gravity) Available 4 or 5 Take every precaution to make this installation a safe procedure. Make safety the number
INSTALLATION GUIDE Installation Guide for the TJ LCG PRO Suspension System (Low Center of Gravity) Available 4 or 5 Take every precaution to make this installation a safe procedure. Make safety the number
/3500 Dodge 5 Long Arm Kit
 92138800A 03-07 2500/3500 Dodge 5 Long Arm Kit Thank you for choosing Rough Country Suspension for your Off Road needs. Rough Country recommends a certified technician installs this system. In addition
Thank you for purchasing a Borla Performance Stainless Steel Header.
 Thank you for purchasing a Borla Performance Stainless Steel Header. Precision manufactured using aircraft quality T-304 stainless steel; these headers are designed to endure years of heavy use. Installing
INSTALLATION GUIDE Canted Billet 4-Bar, 4x2 Rear Frame
 INSTALLATION GUIDE 7154 Canted Billet 4-Bar, 4x2 Rear Frame Description: Non-application specific, weld-in, 4 x 2 rear frame for use with Chassisworks 6241 billet aluminum suspension links. IMPORTANT:
2010 Camaro SS/V Underbody Brace Installation Instructions
 2010 Camaro SS/V6 20104 Underbody Brace Installation Instructions Thank you for your purchase of this Hotchkis Performance product. Your Underbody Brace set was designed with the performance and durability
Procharger Stage II Intercooled Supercharger System (11-14 GT)
") Procharger Stage II Intercooled Supercharger System (11-14 GT) Installation Time: Approximately one day. Installed on 2012 Mustang GT 5.0/Manual Required Tools 3/8 Socket Set (Standard and Metric) 1/2
Procharger Stage II Intercooled Supercharger System (11-14 GT) Installation Time: Approximately one day. Installed on 2012 Mustang GT 5.0/Manual Required Tools 3/8 Socket Set (Standard and Metric) 1/2
07-11 GM 1500 Pickup, Avalanche, Yukon, Tahoe, Suburban Front 2.5 Kit
 92130500 07-11 GM 1500 Pickup, Avalanche, Yukon, Tahoe, Suburban Front 2.5 Kit Thank you for choosing Rough Country for all your suspension needs. Rough Country recommends a certified technician install
POWER RACK AND PINION STEERING INSTALLATION
 by Randy Irwin 1955-57 POWER RACK AND PINION STEERING INSTALLATION Randy Irwin - Technical Writer Randy has been involved in the Chevy parts business for over 25 years. He is a wizard at creating, making
Part # Description Qty Inspected By Rack & Pinion Pump Kit Remote Reservoir Line Kit Shaft Kit
 58-62 Corvette Power Rack & Pinion Kit Instructions # 8011530 Unisteer offers a limited warranty against all manufacturer defects of their kits and supplied parts. Unisteer will not honor any warranty
LPE C5 Battery Relocation Kit
 LPE C5 Battery Relocation Kit The LPE C5 Corvette battery relocation kit improves vehicle weight distribution by moving weight to the rear of the vehicle. The improved weight distribution increases traction
Porsche 928 with 16v LH-Jetronic Fuel System
 Porsche 928 with 16v LH-Jetronic Fuel System Toll-Free Tech Hot Line: 877-FOR-928M 877-367-9286 Please do not copy this manual and give copies to your friends. Our ability to bring you this supercharger
2017+ L5P Duramax 3 ½ Down Pipe & EGR Fix Kit
 2017+ L5P Duramax 3 ½ Down Pipe & EGR Fix Kit Covers installation of PN s: WCF100630, WCF100829 Note: This Kit is for off road competition use only! Off Road Competition Use Tuning & Exhaust System is
BRZ/FR-S 3.00 Cold Air Intake
 BRZ/FR-S 3.00 Cold Air Intake Thank you for purchasing this PERRIN product for your car! Installation of this product should only be performed by persons experienced with installation of aftermarket performance
Sikky LSx BMW E30 Mount Kit Installation Guide
 Sikky LSx BMW E30 Mount Kit Installation Guide *This kit requires you to run aftermarket eyeball arms or control arm bushings and an E36 steering rack* 1- Remove stock motor, rad, and all attached hoses.
Detroit Speed, Inc. Second Generation Camaro/Firebird Mini-Tub Kit Camaro/Firebird P/N: ,
 Detroit Speed, Inc. Second Generation Camaro/Firebird Mini-Tub Kit 1970-1981 Camaro/Firebird P/N: 041222, 041223 The Detroit Speed Second Generation Camaro/Firebird Rear Mini-Tub Kit is designed to accommodate
RHINO SUSPENSION SYSTEM INSTALLATION INSTRUCTIONS
 PARTS INCLUDED: 2 FRONT UPPER A-ARMS 2 FRONT LOWER A-ARMS 2 UNI-BALL JOINTS 2 UNI-BALL JOINT STUDS 2 UNI-BALL JOINT CAPS 2 RETAINING RINGS 1 FRONT SHOCK ASSEM. 2 DELRON STEERING STOPS 2 SHOCK MOUNT SPACERS
08-09 F250 8 SUSPENSION KIT
 92159200 08-09 F250 8 SUSPENSION KIT Thank you for choosing Rough Country for your suspension needs. Rough Country recommends a certified technician installs this system. In addition to these instructions,
Detroit Speed, Inc. Mini-Tub Kit Chevy Nova, Oldsmobile Omega, Pontiac Ventura P/N: &
 Detroit Speed, Inc. Mini-Tub Kit 1968-74 Chevy Nova, Oldsmobile Omega, Pontiac Ventura P/N: 041207 & 041208 Item Component Quantity 1 DSE Mini Tubs 1968-74 X-Body 2 2 Rear Upper Shock Crossmember 1 3 Upper
Installations Instructions for Maier Racing Front Coilover Kit MS Ford Mustang
 22215 Meekland Avenue Hayward, CA 94541 Phone: (510) 581-7600 Fax: (510) 581-2406 Installations Instructions for Maier Racing Front Coilover Kit MS-02-001 1964-1973 Ford Mustang Contents Front Coilover
Ford Mustang GT Long Tube Header Installation
 2005-2006 Ford Mustang GT Long Tube Header Installation Precision manufactured using aircraft quality T-304 stainless steel; this system is designed to endure years of heavy use. Installing a Borla Performance
2007 Shelby GT500 Long Tube Headers Installation
 2007 Shelby GT500 Long Tube Headers Installation Precision manufactured using aircraft quality T-304 stainless steel; this system is designed to endure years of heavy use. Installing a Borla Performance
GM F-BODY DUAL EXHAUST SYSTEM RHKR (304SS) & RHKR (409SS) RHKR (304SS) & RHKR (409SS)
 & RHKR (409SS) RHKR (304SS) & RHKR (409SS)") 1982-92 GM F-BODY DUAL EXHAUST SYSTEM 70501326-RHKR (304SS) & 70501426-RHKR (409SS) 70501339-RHKR (304SS) & 70501439-RHKR (409SS) Installation Instructions NOTE: Does not fit 1991-92 Pontiac Trans Am/GTA
1982-92 GM F-BODY DUAL EXHAUST SYSTEM 70501326-RHKR (304SS) & 70501426-RHKR (409SS) 70501339-RHKR (304SS) & 70501439-RHKR (409SS) Installation Instructions NOTE: Does not fit 1991-92 Pontiac Trans Am/GTA
PRODUCT USE INFORMATION
 9RC61000 Jeep YJ Body Lift Thank you for choosing Rough Country for all your suspension needs. This body lift fits both manual and Automatic equipped vehicles!!! Refer to last page of this Instruction
97-06 JEEP TJ/LJ LONG ARM UPGRADE KIT
 921663U00 97-06 JEEP TJ/LJ LONG ARM UPGRADE KIT Thank you for choosing Rough Country for your suspension needs. This kit is an upgrade kit only. This kit includes frame mounting points and adjustable long
INSTRUCTION G-Comp Rear Suspension: Chevy Camaro. Kit Contents:
 INSTRUCTION 350-700 G-Comp Rear Suspension: 70-81 Chevy Camaro Speedway Motors, Inc. 2017 Kit Contents: 350700.1 G-Comp Crossmember & Chassis Brace 350700.2 G-Comp Rear Crossmember Assembly 350700.3 G-Comp
/3500 Dodge 5 Long Arm Kit
 92137900A 11-12 2500/3500 Dodge 5 Long Arm Kit Thank you for choosing Rough Country Suspension for your Off Road needs. Rough Country recommends a certified technician installs this system. In addition
Mtd kit: Honda Engine Conversions for classic minis. mtd installation manual For Classic minis
 Mtd kit: Honda Engine Conversions for classic minis mtd installation manual For Classic minis 1959 2001 Dear Customer, We welcome you to the Honda Powered Mini World. Thank you and Congratulations for
Jeep Grand Cherokee ZJ 4 Suspension Kit
 92168800 Jeep Grand Cherokee 93-98 ZJ 4 Suspension Kit Thank you for choosing Rough Country for all your suspension needs. Rough Country recommends a certified technician install this system. In addition
Long Tube Header Installation For Ford Mustang GT
 Long Tube Header Installation For 2005-2008 Ford Mustang GT Precision manufactured using aircraft quality T-304 stainless steel; this system is designed to endure years of heavy use. Installing a Borla
Slide the billet aluminum cap over the bushing and secure with the 3/8-16 x 2 1/2 socket head allen and locknuts provided.
 Slide the billet aluminum cap over the bushing and secure with the 3/8-16 x 2 1/2 socket head allen and locknuts provided. Put the urethane bushings into the upper antiroll-bar-link eyebolt. Coat the bushings
WJ 6.5" Long Travel PART #: RK-605LT-WJ APPLICATION: WJ
 Rusty s Off-Road Products 7161 Steele Station Road Rainbow City, AL 35906 Phone: (256) 442-0607 FAX: (256) 442-0017 Web Site: www.rustysoffroad.com WJ 6.5" Long Travel PART #: RK-605LT-WJ APPLICATION:
HP10220 KIT. See application guide for proper fitment.
 HP10220 KIT Dodge Dakota* (2WD/4WD) * 2005 All Dodge Dakotas 2006 - All Dodge Dakotas except Night Runner and R/T sub models 2007 - All Dodge Dakotas except SXT and TRX4 sub models 2008 - All Dodge Dakotas
Dodge 5 Lift Kit Thank you for choosing Rough Country Suspension for your Off Road needs.
 *1368BAG4* 1368BAG4 921368200 2014-16 2500 Dodge 5 Lift Kit Thank you for choosing Rough Country Suspension for your Off Road needs. Rough Country recommends a certified technician installs this system.
Part number SP Honda Civic Si
 Part number SP1576 2002-05 Honda Civic Si 1- One piece Cold air intake 1-3 Injen filter (#1014) 1-60 deg. 2 7/8 x 3 (#3007) Silicone elbow 1-1525 sensor grommet (#6014) 2- Power-band.362.048 (#4004) 1-
/3500 Dodge 5 Lift Kit Drop Brackets
 923913000A 2003-07 2500/3500 Dodge 5 Lift Kit Drop Brackets Thank you for choosing Rough Country Suspension for your Off Road needs. Rough Country recommends a certified technician installs this system.
MGB Alternator Conversion Installation Instructions For MGA & 1962 to 1967 MGB
 MGB Alternator Conversion Installation Instructions For MGA & 1962 to 1967 MGB PART# 130-078, 130-088, 130-098 440 Rutherford St. Goleta, CA 93117 1-800-642-8295 FAX 805-692-2525 www.mossmotors.com Scan
HP10207 KIT. Ram WD*
 HP10207 KIT Ram 1500 4WD* (For 2WD call customer service 800.663.0096 for assistance) * See application guide for proper fitment. Use the most advanced air springs on the market to eliminate your vehicle
9th Gen Honda Civic INSTALLATION GUIDE Civic, Civic Si Kit Civic Si Kit Front Application
 9th Gen Honda Civic 2012-15 Civic, 2012-13 Civic Si Kit 78526 2014+ Civic Si Kit 78556 Front Application INSTALLATION GUIDE For maximum effectiveness and safety, please read these instructions completely
97-06 JEEP TJ 3 1/4 PROGRESSIVE COIL/SPACER KIT
 92PERF1641 97-06 JEEP TJ 3 1/4 PROGRESSIVE COIL/SPACER KIT Thank you for choosing Rough Country for your suspension needs. Rough Country recommends a certified technician installs this system. In addition
Part # 6695S. Read all instructions carefully before attempting installation.
 Corporate Office: PerTronix Inc. 440 E. Arrow Highway, San Dimas, California 91773 * Phone 909.599.5955 FAX 909.599.6424 Installation Instructions and Warranty Information 2007-10 5.4 Ford Mustang Shelby
Kit No KIT FITS 2" & 4" DROPS
 Kit No 59104 KIT FITS 2" & 4" DROPS NOTE: If the bottom of the frame to the leaf spring is 70 or less, we do not fit your application Please read these instructions completely before proceeding with installation
EG / DC2 Conversion Harness
 EG / DC2 Conversion Harness Part # KTH-EG-DC2 Applications: 1992-1995 EG Civic / 1994-2001 DC2 Integra Important NOTE: Please read all instructions very carefully as K-Tuned are not responsible for any
Kits Installation Guide. Dodge/RAM WD and 4WD
 S E R I E S TM Installation Guide Dodge/RAM 1500 2WD and 4WD Kits 57370 88370 89370 For maximum effectiveness and safety, please read these instructions completely before proceeding with installation.
FORD F150/BRONCO CLASS II INSTALLATION INSTRUCTIONS
 FORD F50/BRONCO 80-96 CLASS II INSTALLATION INSTRUCTIONS Before beginning the installation, read these instructions and the enclosed driver s WARNING NOTICE thoroughly and completely. Also affix the WARNING
INSTALLATION INSTRUCTIONS CHEVY C-10 4-Link Rear End
 INSTALLATION INSTRUCTIONS 73-87 CHEVY C-10 4-Link Rear End Please read these instructions completely before starting your installation. Assemble suspension on vehicle before powder-coating to ensure proper
Installation Instructions for TJ Jeep s Fiberglass Replacement Bodies and Parts
 Installation Instructions for 1997-2006 TJ Jeep s Fiberglass Replacement Bodies and Parts Getting started: We recommend that you take pictures as you dismantle your Jeep. These pictures will help you when
INSTALLATION INSTRUCTIONS
 INSTALLATION INSTRUCTIONS --1075 North Ave. Sanger, CA 93657-3539 local: 559-875-0222 fax: 559-876-2259 toll free: 800-445-3767-- 6522 REAR AXLE FLIP & SHACKLE KIT 07-UP CHEVROLET 1500 REGULAR CAB ONLY
1964 1/2-70 Mustang Torque Arm Rear Suspension Installation Instructions
 1964 1/2-70 Mustang Torque Arm Rear Suspension Installation Instructions 1-800-984-6259 www.totalcostinvolved.com Version 2 (c) 2008 Total Cost Involved Engineering, Inc. All Rights Reserved. Page 1 of
2013-UP 3500 Dodge 5 Lift Kit SRW
 92369200 2013-UP 3500 Dodge 5 Lift Kit SRW Thank you for choosing Rough Country Suspension for your Off Road needs. Rough Country recommends a certified technician installs this system. In addition to
This suspension system was developed using a Maximum tire size of 33 X 12.5 with a 17 x 9 aftermarket wheel with 4 1/2-5 backspacing..
 92174700 Thank you for choosing Rough Country for your suspension needs. 2005-15 TACOMA 6 Kit Rough Country recommends a certified technician install this system. In addition to these instructions, professional
Thank you for purchasing a Borla Performance Cat-Back Exhaust System.
 Thank you for purchasing a Borla Performance Cat-Back Exhaust System. Precision manufactured using aircraft quality T-304 stainless steel; this system is designed to endure years of heavy use. Installing
ZJ 4-Link Rear Long Arm Upgrade Instructions
 Parts Checklist: Instructions Iron Rock Off Road logo decal (Qty: 1) Rock-Link decal 13287 (2) ironrockoffroad.com Decal (1) Crossmember 99118 (1) 3/16 steel brake line tubing (5 feet) Coil spring retainer
Air Commander
 EASYSTREET Air Commander www.airliftcompany.com MN-507 (03206) ECN 3921 Please read these instructions completely before proceeding with installation. The oil level in the compressor must be checked BEFORE
FORD SuperRail Mounting Kit #3111
 FORD SuperRail Mounting Kit #3111 #3100 SuperGlide (12K) Gross Trailer Weight (Maximum) Vertical Load Weight (Max. Pin Weight) 12,000 lbs. 3,000 lbs. Installation Instructions SPECIFICATIONS Fits 2001-2003
DrVanos.com Stage II Installation Instructions. Tool rental is available with the purchase of a vanos kit *See website for more info*
 DrVanos.com Stage II Installation Instructions Special Tools Needed: Camshaft locking tool TDC Crank pin Sprocket turning tool Tool rental is available with the purchase of a vanos kit *See website for
Chrysler A-Body Tubular A-Arms Installation Instructions A-ARM INSTALLATION
 1967-1976 Dodge Demon 1112 67-72 Chrysler A-Body Tubular A-Arms Installation Instructions Thank you for your purchase of this Hotchkis Performance product. Your A-Arm set was designed with the performance
Kit No Please read these instructions completely before proceeding with installation. Air Spring Kit Parts List. Attaching Hardware
 Kit No. 57340 MN-431 (02409) NPR 4796 Please read these instructions completely before proceeding with installation by www.airliftcompany.com Air Spring Kit Parts List A B1 B2 Item Description Quantity
99-04 GT. Hellion Power Systems Mustang GT Kit Instructions
 Hellion Power Systems 99-04 Mustang GT Kit Instructions Part 1 Hellion recommends that the front suspension system be installed either by trained professionals or by 5.Remove rack bolts K-Member Installation
Jeep Wrangler TJ 4.0 LITER Installation instructions
 www.jeepair.com 2002-2004 Jeep Wrangler TJ 4.0 LITER Installation instructions Kit Information These directions are for 2002-2006 model Jeep Wranglers. After 1994 every vehicle was designed for R134a refrigerant.
09-12 Dodge 4WD Leveling Kit
 9235900 09-12 Dodge 4WD 1500 2.5 Leveling Kit Thank you for choosing Rough Country for all your suspension needs. DOES NOT FIT TRX PACKAGE VEHICLES!! Rough Country recommends a certified technician install
1501 Industrial Way N., Toms River, NJ Fax: PACKING LIST MUSTANG GT LONG TUBE HEADERS (M30000)
") ADVANCED - Installation requires professional-type tools and advanced automotive-service skills. If you lack experience with internal engine modifications, an Advanced installation is probably beyond your
ADVANCED - Installation requires professional-type tools and advanced automotive-service skills. If you lack experience with internal engine modifications, an Advanced installation is probably beyond your
Important information about your new a/c system. Please read the following directions prior to installing this a/c system.
 PAGE 1 Important information about your new a/c system. Please read the following directions prior to installing this a/c system. PN s: CK-7586258, CK-758642, CK-7586304, CK7586SBC, CK-7486NC Jeep CJ Series
JEEP JK 4 LONGARM. Tools Needed: Thank you for choosing Rough Country for your suspension needs.
 921786000 Thank you for choosing Rough Country for your suspension needs. JEEP JK 4 LONGARM Rough Country recommends a certified technician install this system. In addition to these instructions, professional
Installation Instructions
 Installation Instructions Important INSTALLATION REQUIRES WELDING to the unibody chassis by a qualified welder or metal fabricator. A bolt-on installation is not possible for this product. CHECK STEERING
CHEVY/GMC SuperRail Mounting Kit #4428
 CHEVY/GMC SuperRail Mounting Kit #4428 #4100 SuperGlide (16K) #4400 SuperGlide (20K) Gross Trailer Weight (Maximum) Vertical Load Weight (Max. Pin Weight) 16,000 lbs. 4,000 lbs. Gross Trailer Weight (Maximum)
THY-376Y1 / THY-376Y1-S CHEVROLET CAMARO / Z-28 PARTS INCLUDED HARDWARE INCLUDED TOOLS REQUIRED WARRANTY NOTES
 B Y S U M M I T I N D U S T R I E S PARTS INCLUDED HARDWARE INCLUDED TOOLS REQUIRED 1 - Right side header 1 - Left side header 1 - Hot air pickup 2 - Reducers 2 - Header gaskets 2 - Conical gaskets 12-3/8-16
DODGE. 12K Custom SuperRail Mounting Kit #3122. Gross Trailer Weight (Maximum)...12,000 lbs. Vertical Load Weight (Max. Pin Weight)...3,000 lbs.
...12,000 lbs. Vertical Load Weight (Max. Pin Weight)...3,000 lbs.") DODGE 12K Custom SuperRail Mounting Kit #3122 Gross Trailer Weight (Maximum)...12,000 lbs. Vertical Load Weight (Max. Pin Weight)...3,000 lbs. Installation Instructions SPECIFICATIONS Fits 2009-2018 Dodge1500
DODGE 12K Custom SuperRail Mounting Kit #3122 Gross Trailer Weight (Maximum)...12,000 lbs. Vertical Load Weight (Max. Pin Weight)...3,000 lbs. Installation Instructions SPECIFICATIONS Fits 2009-2018 Dodge1500
*1224BAG1* WD GM KNUCKLE KIT
 92122400A *1224BAG1* Thank you for choosing Rough Country for your suspension needs. 2014-15 4WD GM 1500 5 KNUCKLE KIT Rough Country recommends a certified technician install this system. In addition to
1996+ Yamaha G16 / G22 Yamaha G29/YDRA Drive
 Vegas Carts & Performance 2995 Coleman St North Las Vegas, NV 89032 702-530-7753 VegasCarts.com 625cc Big Block Installation Instructions 1996+ Yamaha G16 / G22 Yamaha G29/YDRA Drive Revised 8/6/2018 1
KJ Jeep TJ/LJ Rock Krusher 3 Coil Spring Spacer Lift Kit with shocks DO NOT COMBINE WITH ANY OTHER SUSPENSION KIT
 KJ09126 1997-2006 Jeep TJ/LJ Rock Krusher 3 Coil Spring Spacer Lift Kit with shocks DO NOT COMBINE WITH ANY OTHER SUSPENSION KIT www.daystarweb.com Phoenix, AZ 85043 Tools required Description: Qty. Standard
Trucks with a mass damper on the front diff, the damper will have to be removed.
 922912000B *1291BAG6* 1291BAG6 Thank you for choosing Rough Country for your suspension needs. Rough Country recommends a certified technician install this system. In addition to these instructions, professional
Part # Chevy Level 2 Air Suspension Package One Piece Frame
 350 S. St. Charles St. Jasper, In. 47546 Ph. 812.482.2932 Fax 812.634.6632 www.ridetech.com Part # 11020299 55-57 Chevy Level 2 Air Suspension Package One Piece Frame Front Components: 1 11013001 Master
FRONT FENDERS WITH FACTORY INNER FENDERS JEEP WRANGLER TJ/LJ/YJ/CJ7 INSTALLATION INSTRUCTIONS
 FRONT FENDERS WITH FACTORY INNER FENDERS JEEP WRANGLER TJ/LJ/YJ/CJ7 INSTALLATION INSTRUCTIONS TOOLS NEEDED 13mm socket 5/32 Allen head 5/16 wrench or socket 7/16 wrench or socket 7/32 Allen head 5/8 wrench
JBA Cat4ward Shorty Header Install (05-10 Mustang GT and Bullitt)
") JBA Cat4ward Shorty Header Install (05-10 Mustang GT and 08-09 Bullitt) Installation Time: 6-8 Hours (Depending on Tools and Help) Tools Required: 8mm Socket 10 mm Socket 13mm Socket 15mm Deep Socket Ratchet
JBA Cat4ward Shorty Header Install (05-10 Mustang GT and 08-09 Bullitt) Installation Time: 6-8 Hours (Depending on Tools and Help) Tools Required: 8mm Socket 10 mm Socket 13mm Socket 15mm Deep Socket Ratchet
Detroit Speed, Inc. QUADRA Link Rear Suspension Nova P/N:
 Detroit Speed, Inc. QUADRA Link Rear Suspension 1968-1974 Nova P/N: 041704 The Detroit Speed Inc., QUADRA Link rear suspension system is a great way to upgrade from an original leaf spring rear suspension.
Installation Instructions and Warranty Information
 Corporate Office: PerTronix Inc. 440 E. Arrow Highway, San Dimas, California 91773 * Phone 909.599.5955 FAX 909.599.6424 Installation Instructions and Warranty Information 6695S 2007-14 5.4/5.8 Ford Mustang
baseplate Hyundai Tucson & Kia Sportage
 , Rev 3 08/16 baseplate 9518277 Hyundai Tucson & Kia Sportage Pin height - 17-1/4 Centers - 20 4 8 3 15. 13 5 2 14 11 1 6 12 7 9 10 ITEM PART # QTY DESCRIPTION 1 00007 4.3125NC HEX NUT 2 00059 4.375 FLATWASHER