DAVIES, CRAIG PROPRIETARY LIMITED A.B.N A.C.N MELBOURNE AUSTRALIA
|
|
|
- Julianna York
- 5 years ago
- Views:
Transcription
 AND OPTIONS FOR PUMP CONTROL Congratulations")
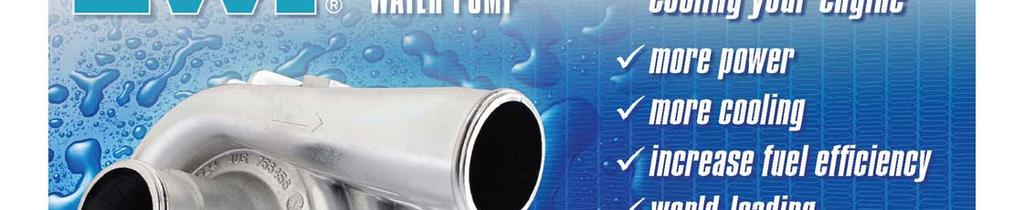
1 DAVIES, CRAIG PROPRIETARY LIMITED A.B.N A.C.N MELBOURNE AUSTRALIA 77 Taras Avenue P.O. Box 363 Altona North Vic 3025 Australia Phone: +61(0) Fax: +61(0) Web: ISO 9001 Lic No 4528 Standards Australia EWP v INSTALLATION INSTRUCTIONS DAVIES, CRAIG EWP (ELECTRIC WATER PUMP) AND OPTIONS FOR PUMP CONTROL Congratulations on your purchase of the Davies, Craig EWP which is designed to replace or supplement the existing belt driven mechanical water pump of your engine. Your EWP has very high flow capacity and has the advantage of running at a speed independent of the engine speed. The EWP can also be set to continue running after a hot engine shut down to prevent damaging heat soak. When your EWP is used to replace the mechanical pump, you will notice an increase in engine power and torque, especially at high engine speeds. Automatic gear changes, both up and down, will be smoother. PLEASE READ THESE INSTRUCTIONS IN THEIR ENTIRETY BEFORE YOU START WORK ALSO NOTE THAT THE EWP IS A CIRCULATION PUMP IDEAL FOR CLOSED CIRCUIT OPERATION SIMILAR TO AN AUTOMOTIVE COOLING SYSTEM. IT IS NOT A SELF-PRIMING PUMP AND THEREFORE WILL NOT OPERATE WITHOUT A POSITIVE HEAD IN AN OPEN SYSTEM. EWP COMPONENTS: No. Description Qty. 1. EWP Pump Assy Wiring harness with 10A fuse 1 3. Rubber Sleeves 2 4. Hose Clamps 2 HARDWARE COMPONENTS: No. Description Qty. 5. Hardware bag --Relay 1 --Scotch lock 1 --Ring Terminal 1 --Self Tapper SECTION ONE: INSTALLING THE EWP The EWP 115 is best fitted in the lower radiator hose connecting the radiator to the existing mechanical water pump housing and let the hose hold the weight of the pump and it will dampen from vibration too. Check the area for available space and shape of the hose. The section of radiator hose connected to the radiator must be connected to the inlet of the electric pump and the section of radiator hose connected to the original pump/engine block must be connected to the outlet of the electric water pump. The pump inlet is in the centre of the pump. The EWP should be positioned as low as possible to maximise the gravity feed from the radiator and prevent air entering the pump. Alternatively, it can be fitted in the upper hose, but in 4
2 this case the coolant level must be maintained and now the section of radiator hose connected to the top of the radiator must be connected to the outlet of the electric pump and the section of radiator hose connected to the engine block must be connected to the inlet of the electric water pump. The pump can be installed in any orientation but to assist air bleeding try to mount the outlet pointing upwards. 2. Add the rubber sleeves if necessary (Item No 3) to the inlet and outlet, if required, to suit your particular hose diameter. If you need more thickness still, contact Davies, Craig and we will ship, free of charge same day, sleeves to suit 2 (50mm) internal diameter hose. 3. Cut out the required section of the radiator hose. Connect the pump inlet and outlet to the appropriate hoses. Connect the pump inlet and outlet to the appropriate hoses ensuring that the pump is oriented in the BEST CORRECT ORIENTATION as shown in Fig 1, page 6 BLEEDING THE EWP during bleeding. Ensure hose clamps are tight. Do not bleed the EWP until you install the pump control option and disable the mechanical pump SECTION TWO: OPTIONS FOR PUMP CONTROL 1. With Davies, Craig Thermal Switch, P/No: 0401: Combine the EWP with a thermal switch when the EWP is used as a booster pump to the existing mechanical pump to fix an overheating cooling system. With the thermal switch connected to the battery, the EWP will run on after a hot engine shut down, eliminating heat soak. Leave the thermostat in place, but make sure the EWP runs only when the thermostat is open. OR 3. Continuous running: Wire the pump direct to the ignition for maximum cooling (race vehicles, very hot climates). This option requires the removal of the Engine thermostat and the mechanical pump impeller or pump belt. This option may also be used for road cars with the thermostat in place with a small hole (suggest 5mm), allowing a small amount of flow to circulate even when the thermostat is closed. OPTION 1: REPLACING THE MECHANICAL PUMP WITH THE EWP AND EWP DIGITAL CONTROLLER. This option will allow adjustment of the engine operating temperature. Lower engine temperature for an increase in power or raise it for better fuel efficiency. MODIFYING EXISTING PUMP 1. Remove the engine thermostat from the thermostat housing. 2. Refer to the Controller Instructions for details of the controller sensor installation. 3. Re-fit the thermostat housing without the thermostat ensuring that there is no damage to the thermostat housing gasket. Then either: 1. Remove the existing belt driven water pump. 2. Pull the pump impeller off the belt driven pump shaft. (NOTE: You may need to drill holes through the impeller close to the drive shaft to make it easier to remove.) Be careful not to damage the seal or bearing when removing the impeller. Alternatively, remove vanes from impeller. 3. Re-fit the belt driven water pump housing without the impeller ensuring that there is no damage to the water pump gasket and the pump seal is still retained. Re-fit the water pump belt and tighten to manufacturer s specifications. Or: 2
3 By-pass the belt-drive on the water-pump, if possible, by installing a shorter belt that omits the pump pulley. This option is not possible if the pulley drives a belt-driven fan unless you replace the fan with a Davies, Craig Thermatic Fan. For example: BEFORE Water Pump Pulley AFTER Water Pump Pulley Alternator Pulley Crank Alternator Pulley Crank OPTION 2: USING THE EWP TO BOOST THE COOLING SYSTEM WHEN REQUIRED WITH AN ON/OFF THERMAL SWITCH. This option when combined with a Davies, Craig Thermal Switch, P/No: 0401 will turn the EWP on at the temperature you set, to give an added boost to an overheating cooling system. INSTALLING THERMAL SWITCH (Refer wiring diagram 2) USE DAVIES CRAIG PART NO 0409 TO INSTALL THE SENSOR OR 1. When the engine is cold remove the top radiator hose at the radiator end. 2. Mount the thermal switch on the right angle bracket with the two small self-tapping screws provided. Mount the bracket beside the radiator with the two large self-tapping screws so that the copper bulb will reach the top radiator ferrule (pipe) and so that the switch is available for adjustment. RADIATOR TOP TANK THERMAL SWITCH INSTALLATION Pump actuation line RUBBER SEAL 3. Lay the rubber seal along the radiator ferrule and place a section of the copper capillary of the thermal switch down the groove in the rubber seal. Keep the copper capillary loosely coiled and prevent sharp bends. Pass the copper bulb at the end of the capillary down over the radiator inlet ferrule so that it protrudes no more than a few inches into the radiator hose. You may choose to use insulation tape to hold the seal in place while the hose is refitted. Replace radiator hose; position hose clamp across centre of seal with the clamp screw on the opposite side to the capillary. A good silicon type sealant may be used if there is a persistent leak. 4. Connect the pump wiring harness to the pump. Connect the green wire from the relay to the thermal switch. Connect the grey wire provided with the thermal switch to battery positive. 5. Bleed the EWP. Refer to BLEEDING THE EWP on page 6. After bleeding the EWP continue on with the next stage. RUNNING THE EWP 3
4 Start engine to confirm no leakage at radiator hose or sensor and re-torque radiator hose clamps. Monitor the engine temperature, which should take slightly longer than usual to reach steady state. Adjust the thermal switch dial to turn the EWP on at the temperature desired. With the thermal switch connected directly to the battery, after a hot shut down, the pump will continue to run and prevent engine heat soak. Re-tighten the clamps after a few hours running at temperature and again after 20 hours running. Check for leaks. WIRING DIAGRAM 2: EWP WITH THERMAL SWITCH - P/NO: 0401: RELAY & LOOM FROM PUMP PACKAGING PUMP MOTOR THERMAL SWITCH Green Red Blue + _ Blue Earth FUSE BATTERY Black OPTION 3: CONTINUOUS RUNNING (Recommended for race vehicles, very hot climates, and cars running on LPG.) This option will provide maximum cooling from the pump under all conditions without controller or switch. This method may be used for road vehicles that are not suited to the EWP Digital Controller and engines that run on LPG. Road vehicles choosing this method should retain the thermostat in position with a hole in it (suggest 5mm) to ensure a small amount of flow through the cooling and heating systems at all times. MODIFYING EXISTING PUMP 1. Either: 1. Remove the existing belt driven water pump. 2. Pull the pump impeller off the pump shaft. (NOTE: You may need to drill holes through the impeller close to the drive shaft to make it easier to remove.) Alternatively, remove vanes from impeller. 3. Re-fit the water pump housing without the impeller ensuring that there is no damage to the water pump gasket and the pump seal is still retained. Re-fit the water pump belt and tighten to manufacturer s specifications. Or: 1. By-pass the belt drive on the water-pump (if possible) by installing a shorter belt that omits the pump pulley. (Refer example diagram in option 1.) And: a. Remove the thermostat from the thermostat housing. b. Re-fit the thermostat housing ensuring that there is no damage to the thermostat-housing gasket. 2. Connect the Pump wiring harness and relay. (Refer wiring diagram 3) 3. Bleed the EWP. Refer to BLEEDING THE EWP on page 6. After bleeding the EWP continue on with the next stage. 4
5 RUNNING THE EWP Start engine to confirm no leakage at radiator hose and re-torque radiator hose clamps. Monitor the engine temperature, which should take longer than usual to reach steady state. If the ignition is left on (or if a turbo timer is connected) after a hot shut down, the pump will continue to run and stop engine heat soak. Retighten the hose clamps after a few hours running at temperature and again after 20 hours running. Check for leaks. NB: The heater circuit may take longer than normal to warm up. WIRING DIAGRAM 3: EWP CONTINUOUS RUNNING: RELAY & LOOM FROM PUMP PACKAGING +VE IGNITION SOURCE PUMP MOTOR Green Red + _ Blue Earth FUSE BATTERY Black BLEEDING THE EWP Ensure the EWP is orientated correctly as shown below before continuing and hose clamps are tight. NOTE: This orientation is a temporary requirement for the purpose of bleeding the pump and ensuring there is no air entrapped within the seal housing of the pump. The pump can be set-up in another orientation upon completion of the bleeding procedure. INLET AIR POCKET INLET FIGURE 1: BEST ORIENTATION FIGURE 2: INCORRECT ORIENTATION 5
6 1. Fill up the cooling system with appropriate coolant. 2. Do not run the engine but hardwire the pump direct to the battery so that the pump runs at full power. 3. With the radiator cap off, run the pump for 5-10 minutes to ensure that there is no air trapped in the cooling system. Fill with coolant as the air is removed from the system. 4. Once all air is removed from the cooling system replace the radiator cap and reconnect the pump to your original controlling method. NOTE: Loosening the hose clamps can change the pump orientation and rotating pump to desired position. If leakage occurs from hoses during re-positioning, the coolant level must be topped up. Ensure that hose clamps are tight. These installation instructions will suit most situations but there are conditions of engine design, environment, and the kind of motoring involved, which may call for other arrangements not described here. Advice is available from Davies, Craig and we would very much appreciate your feedback. If you encounter any difficulties during the installation and require further assistance, please contact Davies, Craig on +61 (0) WARNINGS Use of the EWP after removing the pump impeller or deleting the mechanical pump pulley from the belt system will increase maximum engine speed. Running an engine at higher speeds than normal may affect other engine components. Do not run pump dry as seal damage may occur and your warranty will be void. Engine temperature must be monitored closely at all times but especially immediately after installation and until pump operation and capacity have been proved. The EWP can handle most rust particles and sludge found in cooling systems but large rust particles should be flushed from the radiator before the EWP is installed. Some vehicles may require special bleeding procedures to remove air from the cooling system not described here. The EWP must be completely flooded with coolant at all times to achieve the life specification of the EWP and to preserve warranty. Do not use the vehicle s engine management system or wiring connected to the vehicle s engine management system as an ignition source because it may cause failure of the management system and/or the electrical system. The ignition source must be a steady positive supply of 10-27V DC. Vehicles with both heater circuit inlet (return) and outlet ports in the mechanical pump housing will suffer reduced heater performance unless the heater returns position is relocated (suggest top radiator hose). The cooling system should have antifreeze in accordance to the vehicle manufacturer s specification. The EWP is a circulation pump ideal for closed circuit operation found in an automotive cooling system. It is not a self-priming pump and therefore will not operate well without a positive head in an open system The impeller tip clearance is very tight for maximum efficiency, and may when new actually scrape the pump housing causing a slight noise. The impeller will bed in over time and the noise cease. EWP Installation Recommendations To ensure maximum life and optimum performance from your new EWP, Davies, Craig recommends: If an EWP is installed on a vehicle which is kept in storage for more than 3 months, for example. a show or race-car, it is advised that the pump be operated for approximately 5mins constant running every month. This will minimise the build up of any sediment in the EWP and also lubricate all parts within the pump. 6
7 It is recommended that the cooling system is flushed every 6 months or 10,000kms to remove any built up sediment in the cooling system. WARRANTY We warrant that for a period of two years or 2000 hours continuous running (whichever is the lesser) from the date of purchase, we shall carry out, free of cost, any repairs that are reasonably necessary to correct any fault in the operation of your Electric Water Pump provided that such a fault is directly attributable to a defect in the workmanship or materials used in the manufacture of the part(s) and is not due to installation other than described in these instructions. Labour and consequential costs are excluded DAVIES, CRAIG PTY. LTD. 20/10/2009 WARRANTY REGISTRATION Part number 8026 Electric Water Pump, EWP v Name: Address: Post Code: Purchased From: Date: Fitted to vehicle: Year: Comments: Mail to: Davies,Craig Pty Ltd, P O Box 363, Altona North, Victoria, Australia 3025 OR REGISTER ON-LINE AT 7


8 8
EWP 110 INSTALLATION INSTRUCTIONS
 PTY. DAVIES, CRAIG LTD. A.B.N. 71 004 918 825 A.C.N. 004 918 825 MELBOURNE AUSTRALIA EWP 110 INSTALLATION INSTRUCTIONS DAVIES, CRAIG EWP (ELECTRIC WATER PUMP) AND OPTIONS FOR PUMP CONTROL Congratulations
ELECTRIC WATER PUMP (EWP ) KIT INSTALLATION INSTRUCTIONS
 KIT INSTALLATION INSTRUCTIONS") 77 Taras Avenue P.O. Box 363 Altona North Vic 3025 Australia Phone: +61(0)3 9369 1234 Fax: +61(0)3 9369 3456 info@daviescraig.com.au ELECTRIC WATER PUMP (EWP ) KIT INSTALLATION INSTRUCTIONS EWP80, EWP115,
77 Taras Avenue P.O. Box 363 Altona North Vic 3025 Australia Phone: +61(0)3 9369 1234 Fax: +61(0)3 9369 3456 info@daviescraig.com.au ELECTRIC WATER PUMP (EWP ) KIT INSTALLATION INSTRUCTIONS EWP80, EWP115,
INSTALLATION INSTRUCTIONS
 PART NO. 8060 - EWP 150 (12V) ALLOY ELECTRIC WATER PUMP INSTALLATION INSTRUCTIONS PLEASE READ THESE INSTRUCTIONS IN THEIR ENTIRETY BEFORE YOU START WORK THE EWP IS A CIRCULATION PUMP IDEAL FOR CLOSED CIRCUIT
ELECTRIC WATER PUMP (EWP ) & LCD EWP /FAN CONTROLLER INSTALLATION INSTRUCTIONS. EWP80, EWP115, EWP130, & EWP150 Combo Packs
 & LCD EWP /FAN CONTROLLER INSTALLATION INSTRUCTIONS. EWP80, EWP115, EWP130, & EWP150 Combo Packs") 77 Taras Avenue PO Box 363 Altona North, Vic 3025 Australia Phone: +61(0)3 9369 1234 Fax: +61(0)3 9369 3456 E-mail: info@daviescraig.com.au Web: www.daviescraig.com.au ELECTRIC WATER PUMP (EWP ) & LCD
77 Taras Avenue PO Box 363 Altona North, Vic 3025 Australia Phone: +61(0)3 9369 1234 Fax: +61(0)3 9369 3456 E-mail: info@daviescraig.com.au Web: www.daviescraig.com.au ELECTRIC WATER PUMP (EWP ) & LCD
LCD EWP /FAN DIGITAL CONTROLLER Installation Instructions
 77 Taras Avenue P.O. Box 363 Altona North Vic 3025 Australia Phone: +61(0)3 9369 1234 Fax: +61(0)3 9369 3456 Email: info@daviescraig.com.au Web: www.daviescraig.com.au LCD EWP /FAN DIGITAL CONTROLLER Installation
Part No EWP & FAN DIGITAL CONTROLLER INSTRUCTIONS
 77 Taras Avenue P.O. Box 363 Altona North Vic 3025 Australia Phone: +61(0)3 9369 1234 Fax: +61(0)3 9369 3456 Email: info@daviescraig.com.au Web: www.daviescraig.com.au Part No. 8020 - EWP & FAN DIGITAL
PLEASE READ THESE INSTRUCTIONS CAREFULLY BEFORE BEGINNING INSTALLATION. FAILURE TO COMPLY MAY VOID DAVIES, CRAIG WARRANTY.
 PTY. DAVIES, CRAIG LTD. A.B.N. 71 004 918 825 A.C.N. 004 918 825 MELBOURNE AUSTRALIA 77 Taras Avenue P.O. Box 363 Altona North, Vic 3025 Australia Phone: +61(0)3 9369 1234 Fax: +61(0)3 9369 3456 E-mail:
Davies Craig THERMACTIC FANS 1
 Davies Craig THERMACTIC FANS 1 Thermatic Fans The continued influx of SUVs, the downsizing of passenger motor vehicles and the global pressure on car manufacturers to reduce fuel consumption has led to
Max. Current. 3 V - 15 V DC 10 Amps. 20 V - 27 V DC 5.5 Amps. 3 V - 15 V DC 10 Amps. 20 V - 27 V DC 5,5 Amps. 3 V - 15 V DC 10 Amps
 Pump Summary At a glance Pump Model Operating Volage Max. Current Max Flow Rate Opertating Temperature Page EWP 150 12 Volt (#8060) 24 Volt (#8061) 3 V - 15 V DC 10 Amps 20 V - 27 V DC 5.5 Amps 150 L/min
Electric Water Pump (EWP )
") Electric Water Pump (EWP ) The revolutionary range of Davies, Craig s patented Electric Water Pumps are performance accessories suitable for most makes of engines. There are two models available: the EWP
Electric Water Pump (EWP ) The revolutionary range of Davies, Craig s patented Electric Water Pumps are performance accessories suitable for most makes of engines. There are two models available: the EWP
ELECTRIC FAN. As a primary cooling source electric fans provide:
 ELECTRIC FANS The introduction of front wheel drive and down sizing of vehicles, has led to the rapid growth of electric fans for engine cooling. An efficient and economical method of automotive cooling,
Electric Water Pumps
 Electric Water Pumps Pump Summary At a glance Pump Model Max Flow Rate Operating Voltage Max. Current Operating Temperature Page No. EWP 150 150 L/min 39.63 US gal/min 150 L/min 39.63 US gal/min 12 Volt
HOLLEY LS-SWAP WATER PUMPS WATER PUMP INSTALLATION INSTRUCTIONS FOR GM LS-ENGINE APPLICATIONS:
 HOLLEY LS-SWAP WATER PUMPS WATER PUMP INSTALLATION INSTRUCTIONS FOR GM LS-ENGINE APPLICATIONS: Holley LS- Swap cast water pumps are designed for street/performance applications and provide optimum performance
Digital Controller 12 volt only
 Digital Controller 12 volt only Part #8020 For optimum control of Electric Water Pumps. Suits Davies, Craig EWP 80, EWP 115, EBP and Thermatic Fans. The updated Digital Controller now has two specific
WATER PUMP INSTALLATION INSTRUCTIONS WEIAND WATER PUMPS ACTION PLUS & TEAM G APPLICATIONS FOR SMALL BLOCK & BIG BLOCK CHEVROLETS
 WATER PUMP INSTALLATION INSTRUCTIONS WEIAND WATER PUMPS ACTION PLUS & TEAM G APPLICATIONS FOR SMALL BLOCK & BIG BLOCK CHEVROLETS APPLICATIONS: Weiand Action Plus aluminum water pumps are designed for street/performance
Antifreeze Type SYC1025 (Long life coolant) Mixing ratio (water:antifreeze) Cooling fan module Type Electric Capacity
 Mixing ratio (water:antifreeze) Cooling fan module Type Electric Capacity") 152000 083 1. SPECIFICATION Unit Description Specification Cooling system Type Water cooling, forced circulation Coolant Capacity approx. 8.5 L Radiator Core size 555W x 582.4H x 27T (over 326,250mm2)
152000 083 1. SPECIFICATION Unit Description Specification Cooling system Type Water cooling, forced circulation Coolant Capacity approx. 8.5 L Radiator Core size 555W x 582.4H x 27T (over 326,250mm2)
Installation Instructions
 2011-2013 LML DURAMAX COMPOUND-ADD 2011-2015 LML A Duramax TURBO KIT Add INSTALL A Turbo INSTRUCTIONS Compound Kit Installation Instructions 1-800-955-0476 - www.industrialinjection.com - info@industrialinjection.com
2015+ SUBARU STI FRONT-MOUNT INTERCOOLER PARTS LIST AND INSTALLATION GUIDE INSTALL DIFFICULTY DISCLAIMER CAUTION INSTALL PROCEDURE TOOLS NEEDED
 PARTS LIST AND PARTS INCLUDED 1PC ALUMINUM INTAKE PIPE 1PC BAR-AND-PLATE INTERCOOLER 1PC STEEL CRASH BAR W/ MOUNTING HARDWARE 2PC HOT-SIDE INTERCOOLER PIPES 2PC COLD-SIDE INTERCOOLER PIPES 1PC BPV FLANGE
BD Dual Transmission Cooler Dodge (68RFE, 518, 47RH, 47RE & 48RE) Ford (5R110) & Chevy (Allison 1000) Transmissions
 Ford (5R110) & Chevy (Allison 1000) Transmissions") 7 March 2018 1030606-DS Dual Transmission Cooler Instruction Manual (I-00214) 1 DOWNLOAD COLOR INSTALL MANUALS AT dieselperformance.com BD Dual Transmission Cooler Dodge (68RFE, 518, 47RH, 47RE & 48RE)
7 March 2018 1030606-DS Dual Transmission Cooler Instruction Manual (I-00214) 1 DOWNLOAD COLOR INSTALL MANUALS AT dieselperformance.com BD Dual Transmission Cooler Dodge (68RFE, 518, 47RH, 47RE & 48RE)
Rotrex C-type Superchargers. Setup and maintenance
 Rotrex C-type Superchargers Setup and maintenance Index Welcome 3 Key points 4 Lubrication system 5 Routing of oil lines 6 Connecting the parts 6 Initial start up 9 Oil level check and maintenance 10 Testing
EMS Installation Instructions
 EMS Installation Instructions The EMS1 and EMS2 are functionally identical and, as such, their installation is identical. Both EMS versions use the same connector as follows: EMS1 Walk-through video on
Transmission Oil Coolers Ultra-Cool & Hydra-Cool
 Transmission Oil Coolers Ultra-Cool & Hydra-Cool Power Steering Oil Cooler Thermatic Fans Transmission Oil Cooler Selection Vehicle Type Year of Manufacture APPLICATION Engine Capacity Medium Duty Part
WARNING. Murphy W-Series Engine Panels General Installation Instructions. Installation Accessories
 Murphy W-Series Engine Panels General Installation Instructions WS-93002N Revised 08-02 Section 30 (00-02-0191) Read the following information before installing. These installation instructions are typical
26 - COOLING SYSTEM CONTENTS ENGINE COOLING - DESCRIPTION... 3 ENGINE COOLING - OPERATION... 9 COOLING SYSTEM FAULTS... 1
 26 - COOLING SYSTEM CONTENTS Page LAND ROVER V8 DESCRIPTION AND OPERATION ENGINE COOLING - DESCRIPTION... 3 ENGINE COOLING - OPERATION... 9 FAULT DIAGNOSIS COOLING SYSTEM FAULTS... 1 REPAIR COOLANT - DRAIN
C40008 & C40009 EXHAUST BRAKES
 EXHAUST BRAKES C40008 & C40009 1995 2003 Ford F250 / F350 7.3 L Powerstroke Diesel with manual transmissions 1995 1998 Ford F250 / F350 7.3 L Powerstroke Diesel with automatic transmission* *Requires the
Specialist Components. SPi 5 Port EFI Kit
 Specialist Components SPi 5 Port EFI Kit Version 1.1 Sept 2012 Congratulations on the purchase of your SPi 5 port EFI Kit! Kit Content:- Alloy inlet manifold gasflowed to suit 45/50mm throttle body Injector
Step 6: Remove and save the MAP sensor for later use. Step 7: Remove the passenger side intercooler pipe and the EGR intake manifold.
 LBZ Twin kit Install Step 1: Disconnect both batteries. Step 2: Drain coolant and oil also remove passenger side inner fender. Step 3: Remove intake box and piping. (Remove and save the MAF sensor in the
Official Powerdyne Model BD Supercharger and Kit Limited Warranty
 Official Powerdyne Model BD Supercharger and Kit Limited Warranty Powerdyne Automotive Products Inc. warrants your new Powerdyne model BD Supercharger and installation kit to be free of defects in workmanship
V1 Truck Manifold Turbo Kit for F-body
 V1 Truck Manifold Turbo Kit for 98-02 F-body Prep: -Remove all A/C Components, Alternator and brackets, tensioner, front bumper, front bumper foam, and front bumper support. Remove radiator and cooling
1992 Toyota Cressida
 Monday, May 16, 2016 5:32:47 PM Page 13 2005 Mitchell Repair Information Company, LLC. Fig. 7: Exploded View Of Typical Cylinder Head & Components Fig. 8: Cylinder Head Bolt Removal Sequence Monday, May
WARNING. Murphy W-Series Engine Panels General Installation Instructions. Installation Accessories
 Murphy W-Series Engine Panels General Installation Instructions WS-93002N Revised 04-06 Section 30 (00-02-0191) Read the following information before installing. These installation instructions are typical
ENGINE COOLING SYSTEM
 B ENGINE A SECTION ENGINE COOLING SYSTEM CO C D CONTENTS E PRECAUTIONS... 2 Precautions for Supplemental Restraint System (SRS) AIR BAG and SEAT BELT PRE-TEN- SIONER... 2 Precautions for Liquid Gasket...
Information Booklet WW20072
 Information Booklet WW20072 Included in the box 1 x Information Booklet 1 x Electrical Kit 1 x Water Watch Unit 1 x Water Watch Equipped Sticker 1 x Warning Sticker Bracket kits & instructions supplied
Includes: 1. High Flow Turbo Up-Pipe 1. J-Hook Block Off / Coolant Reroute 1. Coolant Hose 1. EGR Valve Block Off Plate 2. Hose Clamps 4.
 Includes: 1. High Flow Turbo Up-Pipe 1. J-Hook Block Off / Coolant Reroute 1. Coolant Hose 1. EGR Valve Block Off Plate 2. Hose Clamps 4. Bolts & Nuts WARNING: This product is not legal for sale or use
ENGINE COOLING GROUP CONTENTS GENERAL INFORMATION SERVICE SPECIFICATIONS COOLANT SEALANT THERMOSTAT...
 14-1 GROUP 14 CONTENTS GENERAL INFORMATION 14-2 SERVICE SPECIFICATIONS 14-2 COOLANT 14-3 SEALANT 14-3 DIAGNOSIS 14-3 INTRODUCTION 14-3 TROUBLESHOOTING STRATEGY 14-3 SYMPTOM CHART 14-3 SYMPTOM PROCEDURES
CARTRIDGE REPLACEMENT MANUAL
 CARTRIDGE REPLACEMENT MANUAL Aquavalve Series: 200/400 600/430 700/Shiraz 605/405 609/409 Opto Thermo Quartz Thermo Axis Thermo Aquatique Colt Dream Hydramax Aquamixa Series: 300/310 CONTENTS General Notes
ENGINE COOLING GROUP CONTENTS GENERAL INFORMATION SERVICE SPECIFICATIONS COOLANT SEALANT THERMOSTAT...
 14-1 GROUP 14 CONTENTS GENERAL INFORMATION 14-2 SERVICE SPECIFICATIONS 14-2 COOLANT 14-3 SEALANT 14-3 DIAGNOSIS 14-3 INTRODUCTION 14-3 TROUBLESHOOTING STRATEGY 14-3 SYMPTOM CHART 14-3 SYMPTOM PROCEDURES
Cut zip ties and remove 2 plastic wiring harness brackets.
 TROUBLESHOOTING: Please read and understand all installation instructions before proceeding with the installation. Included parts: 1 - New Bosch Cp3 Pump 1 - HSM Pulley 1 - Serpentine Belt 1 - Pump Bracket/
COOLING SYSTEM. Return to Main Table of Contents
 COOLING SYSTEM Return to Main Table of Contents GENERAL... 2 COOLING SYSTEM... 7 RADIATOR... 9 ENGINE COOLANT PUMP... 12 THERMOSTAT... 14 ENGINE COOLANT TEMPERATURE SENDER &, SENSOR... 15 ENGINE COOLANT
Installation Manual v2.2: Twin CP3 Fuel Injection Kit Dodge 5.9L
 12/13/11 ATS Twin CP3 Kit 701-900-2272-INST Installation Manual v2.2: Twin CP3 Fuel Injection Kit 2003-2004 Dodge 5.9L Figure 1 - Full Kit Photo 26 Figure 2 - Hardware Kit 1 Please read all instructions
Installation Manual v1.0: Force Cool Kit Dodge with NV4500/NV4500HD/NV5600 Manual Transmissions. Please read all instructions before installation.
 Installation Manual v1.0: Force Cool Kit Dodge with NV4500/NV4500HD/NV5600 Manual Transmissions Please read all instructions before installation. Figure 1 - Force Cool Kit Note: Use Teflon sealing tape
Consists of. Date:17/02/2011 Page 1/8
 Consists of 470518 Qty. Product 4 1 DEFA Termina - interior heater with holder 1 1 DEFA Futura - time program controller/timer 3 1 DEFA MultiCharger 1203 - battery charger/relay 6 1 DEFA Extension cable
BD Venom Dual Fuel F O R D 6. 7 L P O W E R S T R O K E Installation Instructions
 U 21 March 2017 (1050470) Venom Dual Fuel Kit (I-00390) 1 DOWNLOAD ENHANCED INSTALL MANUALS AT dieselperformance.com BD Venom Dual Fuel 2 0 1 1-2 0 1 6 F O R D 6. 7 L P O W E R S T R O K E Installation
LML 3 Y-Bridge Kit or High Flow Intake Bundle Package
 2011-2016 LML 3 Y-Bridge Kit or High Flow Intake Bundle Package Covers installation of PN s: WCF100607, WCF100691, WCF100716, & WCF100353 Note: This Kit is for off road competition use only! Overview-
BD Venom Dual Fuel F O R D 6. 7 L P O W E R S T R O K E Installation Instructions
 U 30 January 2017 (1050470) Venom Dual Fuel Kit (I-00390) 1 DOWNLOAD ENHANCED INSTALL MANUALS AT dieselperformance.com BD Venom Dual Fuel 2 0 1 1-2 0 1 4 F O R D 6. 7 L P O W E R S T R O K E Installation
BLACKBIRD INSTALLATION SUPPLEMENT
 BLACKBIRD INSTALLATION SUPPLEMENT FOR 2003-7 FORD 6.0 LITER DIESEL SINGLE ALTERNATOR F-350, F-450, F-550, EXCURSION VERSION 7-07 Parts Description Blackbird Wiring Manual Installation Supplement 6.0 Liter
Installation Manual v1.1: Piece Pulse Flow Exhaust Manifold, Stock Replacement L Cummins
 Installation Manual v1.1: 204-927-2326 2-Piece Pulse Flow Exhaust Manifold, Stock Replacement 2007.5-2016 6.7L Cummins Please read all instructions before installation. We suggest purchasing new gaskets
About this catalogue:
 Issue date: 10/11 If you can t find what you re looking for in this catalogue, or need more information, please visit the Davies, Craig website. As well as full product details, the site is constantly
Cooling system Type Water cooling, forced circulation Coolant Capacity Approx. 8.0 ~ 8.5 L
 211201 083 1. SPECIFICATION Description Specification Cooling system Type Water cooling, forced circulation Coolant Capacity Approx. 8.0 ~ 8.5 L Radiator Core size 740W X 378.9H X 27T Flow type Cross flow
All cores due 30 days after invoice date - no credit after 60 days.
 NO WARRANTY STATEMENT High performance parts & products no warranty policy: The purchaser understands and recognizes that high performance diesel products and services sold by INDUSTRIAL INJECTION SERVICE.
Included parts: 1 - New Bosch CP3 Pump 1 - HSM Pulley 1 - Serpentine Belt 1 - Pump Bracket/ Hardware STEP 1
 TROUBLESHOOTING: Please read and understand all installation instructions before proceeding with the installation. If you have questions during the installation of this product, please contact H&S Motorsports
(905)
") (905)953-9260 Marc@M-Tuned.com Coolant Reroute Kit *Professional Installation Recommended but not required 1) Disconnect Negative Terminal from Battery in trunk. 2) Drain Coolant from your cooling system.
(905)953-9260 Marc@M-Tuned.com Coolant Reroute Kit *Professional Installation Recommended but not required 1) Disconnect Negative Terminal from Battery in trunk. 2) Drain Coolant from your cooling system.
Installation and Operating Instructions for Davey HM Series Pressure Systems with Pressure Switch
 Davey Repair or Replacement Guarantee In the unlikely event in Australia or New Zealand that this Davey product develops any malfunction within two years of the date of original purchase due to faulty
Installation Instructions
 Installation Instructions for 15912 to 15916 Electric Fuel Pumps & Fuel Pressure Regulators Installation Instructions WARNING! These instructions must be read and fully understood before beginning the
BD Dual Transmission Cooler Dodge (68RFE, 518, 47RH, 47RE & 48RE) Ford (5R110) & Chevy (Allison 1000) Transmissions
 Ford (5R110) & Chevy (Allison 1000) Transmissions") 8 January 2013 1030606-DS Dual Transmission Cooler Instruction Manual 1 BD Dual Transmission Cooler Dodge (68RFE, 518, 47RH, 47RE & 48RE) Ford (5R110) & Chevy (Allison 1000) Transmissions P/N# P/N# 1030606-DS-1/2
8 January 2013 1030606-DS Dual Transmission Cooler Instruction Manual 1 BD Dual Transmission Cooler Dodge (68RFE, 518, 47RH, 47RE & 48RE) Ford (5R110) & Chevy (Allison 1000) Transmissions P/N# P/N# 1030606-DS-1/2
M-Tuned reroute kit XX
 M-Tuned reroute kit 14-161XX Manufactured and designed by: *Professional Installation Recommended but not required 1) Disconnect the negative terminal from the battery in the trunk. 2) Drain the coolant
Tri-Spark Ignition System Installation Triple Cylinder TRI-0001
 Tri-Spark Ignition System Installation Triple Cylinder TRI-0001 There are potentially lethal high voltages produced at the ignition coils and spark plugs, therefore every precaution must be taken to prevent
M-TUNED COOLANT RE-ROUTE KIT
 M-TUNED COOLANT RE-ROUTE KIT Part # MC-RR-216, MC-RR-218 Applications: 90-93 Miata 1.6L B6 94-97 Miata 1.8L BP More detailed instructions: http://www.etdracing.com/m-tuned/reroute.pdf 1) Disconnect Negative
2013 Kia Optima L4-2.0L Turbo
 1 of 13 5/29/2016 11:34 AM 2013 Kia Optima L4-2.0L Turbo Vehicle» Engine, Cooling and Exhaust» Engine» Service and Repair» Removal and Replacement Removal CAUTION: Use fender covers to avoid damaging painted
XRT300 AND XRT350 BA XR6 TURBO UPGRADE KIT FITTING INSTRUCTIONS
 XRT300 AND XRT350 BA XR6 TURBO UPGRADE KIT FITTING INSTRUCTIONS The use of NFU (No Further use) and REUSE (Re Use) relates to the individual parts storage when performing the upgrade. Also note that all
BLACKBIRD INSTALLATION SUPPLEMENT
 BLACKBIRD INSTALLATION SUPPLEMENT FOR 2003-7 FORD 6.0 LITER DIESEL F-SERIES DUAL ALTERNATOR VERSION 10/07 Blackbird Installation Supplement for Ford 6.0. Liter Dual Alternator Parts included in the 6.0
To the Fitter: Ensure all relevant personnel read the points listed below and that a copy is passed on to the end user.
 WATERMASTER SYSTEM Read carefully before installation and use. To the Fitter: Ensure all relevant personnel read the points listed below and that a copy is passed on to the end user. To the User: Read
1901 Thermostatic Shower Mixer
 1901 Thermostatic Shower Mixer (Universal Valve with Adjustable Riser, Surface Mounted Valve with Rigid Riser or Recessed Valve with Fixed Head) Fitting Instructions & Contents List Before starting any
FREE $15 Gift Card for every $100 spent on Ship To Home orders. Find Out How
 1 of 29 10/12/2011 5:05 PM FREE $15 Gift Card for every $100 spent on Ship To Home orders. Find Out How Ford Ranger/Explorer/Mountaineer 1991-1999 Intake Manifold REMOVAL & INSTALLATION Print The engines
INSTALLATION INSTRUCTIONS
 INSTALLATION INSTRUCTIONS Part# 22-2719 Complete Mounting System for Dual Viair Compressors For the most up-to-date instructions please visit www.updownair.com www.updownair.com 833-226-4863 I M P O R
A Division of Thiessen Products, Inc.
 The JIMS FORCEFLOW CYLINDER HEAD COOLER is designed for Twin Cam Models 1999 to present. Also fits all JIMS Twin Cam Race Engines. NOTE: These instructions show the installation of this product on a 2012
BOOSTER CABLES 1000 AMP Intelli-Check II
 BOOSTER CABLES 1000 AMP Intelli-Check II 1/4V SURGE PROTECTED SUITABLE FOR 4-8 CYLINDER COMMERCIAL, CONSTRUCTION & EARTH MOVING VEHICLES BATTERY CONDITION CHECK REVERSE POLARITY PROTECTED CHARGE CHECK
Cut zip ties and remove 2 plastic wiring harness brackets.
 TROUBLESHOOTING: Please read and understand all installation instructions before proceeding with the installation. If you have questions during the installation of this product, please email H&S Motorsports
PRXB EXHAUST BRAKE HIGH PERFORMANCE
 HIGH PERFORMANCE PRXB EXHAUST BRAKE C44059, C4406, C44063, C44065 APPLICATION 994-2002 DODGE RAM AUTOMATIC TRUCKS EQUIPPED WITH 47RE TRANSMISSIONS WITH 5.9L, 24 VALVE CUMMINS DIESEL ENGINES GETTING STARTED
INSTALLATION, OPERATION & MAINTENANCE INSTRATIONS
 INSTALLATION, OPERATION & MAINTENANCE INSTRATIONS (27/6/13) Contents 1. GENERAL DESCRIPTION... 2 2. RECEIPT AND PREPARATION... 2 3. INSTALLATION... 2 3.1. REMOVAL OF ACCESS PANEL... 2 3.2. FIXING A PLINTH...
PRXB EXHAUST BRAKE MAXIMUM EXHAUST FLOW DESIGN
 MAXIMUM EXHAUST FLOW DESIGN PRXB EXHAUST BRAKE C44072/C44073/C44074/C44075/C44076 APPLICATION: 994-2002 DODGE RAM TRUCKS W/5.9L CUMMINS DIESEL ENGINES WITH MANUAL & AUTOMATIC TRANSMISSIONS STOCK DODGE
Scion FR-S ZN6. GTX2867R Gen2 (Internal Wastegate) Installation Instructions GPP P/N #
 Installation Instructions GPP P/N #") TURBO KIT Scion FR-S ZN6 Subaru BRZ ZC6 GTX2867R Gen2 (Internal Wastegate) Installation Instructions GPP P/N # 11518000 Vehicle Type Chassis Code Engine Code Transmission Model Year Scion FR-S DBA-ZN6
TURBO KIT Scion FR-S ZN6 Subaru BRZ ZC6 GTX2867R Gen2 (Internal Wastegate) Installation Instructions GPP P/N # 11518000 Vehicle Type Chassis Code Engine Code Transmission Model Year Scion FR-S DBA-ZN6
GROUP CONTENTS GENERAL DESCRIPTION RADIATOR SPECIAL TOOL THERMOSTAT ENGINE COOLING DIAGNOSIS...
 14-1 GROUP 14 CONTENTS GENERAL DESCRIPTION 14-2 SPECIAL TOOL 14-2 ENGINE COOLING DIAGNOSIS 14-3 INTRODUCTION 14-3 TROUBLESHOOTING STRATEGY 14-3 SYMPTOM CHART 14-3 SYMPTOM PROCEDURES 14-4 ON-VEHICLE SERVICE
Installation and Operating Instructions for Davey HS20-65Y2 Multistage Pump
 Installation and Operating Instructions for Davey HS20-65Y2 Multistage Pump NOTE: Prior to installation remove the red transport plugs & associated seals from the suction and/or discharge ports. WARNING:
High Flow Remote Oil Thermostat 165 F
 High Flow Remote Oil Thermostat 165 F Part No. FSM-165 Made in USA Important: Read these instructions in their entirety prior to installation. Rev 160323 Application Notes The FSM series thermostat is
INSTALLATION INSTRUCTIONS 97 FORD EXPEDITION
 INSTALLATION INSTRUCTIONS 97 FORD EXPEDITION 1. Read the instructions completely and carefully before you begin. Check the kit for proper contents (refer to the part s list and the picture diagrams). Before
Jacobsen 600, Ransomes 700 Series
 Jacobsen 600, Ransomes 700 Series Soft Side/ROPS Parts List & Mounting Instructions Jodale Perry Printed: 2001/11 Standard Parts List Qty Description Photo L&R Rear Mounting Brackets L&R Front Mounting
WARNING: ALWAYS relieve fuel pressure before disconnecting any fuel related component. DO NOT allow fuel to contact engine or electrical components.
 4.0L V8 - VINS [K,U] Selected Block 1990 Lexus LS 400 For Lextreme Powertrain 2020 S. Hacienda Blvd. # D Hacienda Heights California 91745 Copyright 1998 Mitchell Repair Information Company, LLC Friday,
BD Transmission Cooler Dodge (68RFE, 518, 47RH, 47RE & 48RE) Ford (All) & Chevy (Allison) Transmissions
 Ford (All) & Chevy (Allison) Transmissions") 20 September 2012 1030606 Transmission Cooler Instruction Manual 1 BD Transmission Cooler Dodge (68RFE, 518, 47RH, 47RE & 48RE) Ford (All) & Chevy (Allison) Transmissions P/N# 1030606-5/16 P/N# 1030606-3/8
20 September 2012 1030606 Transmission Cooler Instruction Manual 1 BD Transmission Cooler Dodge (68RFE, 518, 47RH, 47RE & 48RE) Ford (All) & Chevy (Allison) Transmissions P/N# 1030606-5/16 P/N# 1030606-3/8
Installation and Commissioning of Auxiliary Power Unit
 Models PC6012 PC6013 PC6014 PC6015 PC6022 PC6023 PC6024 Installation and Commissioning of Auxiliary Power Unit 30-871-21 Rev. E Warning & Cautions Vehicles with longer wheel bases should have the APU mounted
SECTION 1D1 M162 ENGINE COOLING
 SECTION 1D1 M162 ENGINE COOLING CAUTION: Disconnect the negative battery cable before removing or installing any electrical unit or when a tool or equipment could easily come in contact with exposed electrical
SERVICE SCHEDULE. Zero-Turn Mowers
 SERVICE SCHEDULE Zero-Turn Mowers OWNER & MOWER DETAILS Mr/Mrs/Ms: Given Names: Surname: Address: Suburb: State: Postcode: Telephone: Email: Model No.: Serial No.: Engine Model/Type/Code: DEALER DETAILS
INSTALLATION AND OPERATING INSTRUCTIONS I INSTALLATION AND OPERATING INSTRUCTIONS. Viron CL Series Viron Cartridge Filter Cartridge Filter
 INSTALLATION AND OPERATING INSTRUCTIONS I INSTALLATION AND OPERATING INSTRUCTIONS Viron CL Series Viron Cartridge Filter Cartridge Filter Bolero ND Cleaner INSTALLATION AND OPERATING INSTRUCTIONS Melbourne:
WPS-104 Heater Installation Instructions For 500EFI, 700 XP, & Crew Applications
 WPS-104 Heater Installation Instructions For 500EFI, 700 XP, & Crew Applications ORDER OF INSTALLATION FOR A COMPLETE ENCLOSURE OF A RANGERWARE WPS (Weather Protection System) IS AS FOLLOWS: 1. Heater
Includes: 1. J-hook Block Off / Coolant Reroute 1. Coolant Hose 1. Turbocharger Up Pipe Block Off Disc 2. Hose clamps
 Includes: 1. J-hook Block Off / Coolant Reroute 1. Coolant Hose 1. Turbocharger Up Pipe Block Off Disc 2. Hose clamps WARNING: This product is not legal for sale or use on pollution controlled vehicles
Not required for most applications. Not required for most applications. High pressure ( provided) High pressure ( provided)
 High pressure ( provided)") ELECTRIC FUEL PUMPS P/N 12-801-1, 712-801-1, 12-802-1, 12-802-2, 712-802-1, 12-812, 12-815-1, & 712-815-1 FUEL PRESSURE REGULATORS P/N 12-500, 12-501, 12-803, 12-803BP, 12-804, & 15812NOS Installation
ELECTRIC FUEL PUMPS P/N 12-801-1, 712-801-1, 12-802-1, 12-802-2, 712-802-1, 12-812, 12-815-1, & 712-815-1 FUEL PRESSURE REGULATORS P/N 12-500, 12-501, 12-803, 12-803BP, 12-804, & 15812NOS Installation
Warning. Document ref: A October 2015
 Sentry Door Curtain Installation, Operation & Maintainance Instructions Dunham-Bush Ltd, Downley Road, Havant, Hampshire, P09 2JD Tel. 023 9247 7700 Email. info@dunham-bush.co.uk Document ref: 128-000-001-A
IAG Street Series Air / Oil Separator (AOS) For WRX
 For WRX") P IAG Street Series Air / Oil Separator (AOS) For 2015-16 WRX Part# IAG-ENG-7152 Tools Required: Ratchet, torque wrench, extensions, needle nose pliers, hose cutter, snips/scissors, flat head screw driver,
P IAG Street Series Air / Oil Separator (AOS) For 2015-16 WRX Part# IAG-ENG-7152 Tools Required: Ratchet, torque wrench, extensions, needle nose pliers, hose cutter, snips/scissors, flat head screw driver,
Shotgun Double Barrel HPFP install guide
 Shotgun Double Barrel HPFP install guide Thank you for your purchase of the VTT Shotgun Double Barrel HPFP upgrade! First thing to do when you open your box is to make sure all parts are in their respective
Installation Manual For ISB5.9/ISB02 Engines
 Installation Manual For ISB5.9/ISB02 Engines Table of Contents 1. Installation of the E Brake Assembly...3 2. Pneumatic Group Installation...5 3. Installation of the Controls...7 4. Final Test...11 Application
Holley GM BBC Single-Plane EFI Intake Manifold Kits
 Holley GM BBC Single-Plane EFI Intake Manifold Kits 300-561 Oval Port, 4150 Flange 300-562 Oval Port, 4500 Flange 300-563 Rectangular Port, 4150 Flange 300-564 Rectangular Port, 4500 Flange INSTALLATION
AEROMOTIVE Part # Subaru Fuel Rails for Top Feed Injectors WRX & STI INSTALLATION INSTRUCTIONS
 AEROMOTIVE Part # 14135 Subaru Fuel Rails for Top Feed Injectors 02-14 WRX & 07-14 STI INSTALLATION INSTRUCTIONS CAUTION: Installation of this product requires detailed knowledge of automotive systems
SS1135HF Jeep KJ Cherokee CRDI4 2.8Litre-I4 Diesel Engine
 SS1135HF Jeep KJ Cherokee CRDI4 2.8Litre-I4 Diesel Engine Parts List 23/2/2010 ITEM PART NO DESCRIPTION QTY 1 965-133-000 BODY - SNORKEL (SS1130HF) 1 2 000-135-800 3 ½" AIR RAM ASSEMBLY 1 3 965-032-000
MAINTENANCE MANUAL FOR THERMOSTATIC TEMPERATURE REGULATING VALVE TRAC STYLE P
 MANUAL NUMBER P-EFS-1 MAINTENANCE MANUAL FOR THERMOSTATIC TEMPERATURE REGULATING VALVE TRAC STYLE P TRAC Regulator Company Inc. 160 South Terrace Avenue Mount Vernon, New York USA 10550-2408 Phone: (914)
ELECTRIC FUEL PUMPS P/N , , & FUEL PRESSURE REGULATOR P/N
 ELECTRIC FUEL PUMPS P/N 80000100, 80000101, & 80000102 FUEL PRESSURE REGULATOR P/N 80000103 Installation Instructions 199R10583 These instructions must be read and fully understood before beginning the
GENERAL SPECIFICATIONS 25-2 GENERAL. Water cooling, forced circulation with electric fan
 COOLING SYSTEM GENERAL 2 COOLING SySTEM 8 RADIATOR 10 RADIATOR FAN MOTOR ASSY 12 WATER PUMP 14 THERMOSTAT 16 WATER HOSE AND PiPE 17 WATER TEMPERATURE GAUGE UNIT AND SENSOR 18 GENERAL GENERAL Y25CAOA SPECIFICATIONS
Installation Manual v1.0: MST Turbo Kit ( ) 5.9L Dodge. Please read all instructions before installation.
 5.9L Dodge. Please read all instructions before installation.") Installation Manual v1.0: MST Turbo Kit (2003-2007) 5.9L Dodge Please read all instructions before installation. Figure 1: MST Kit Contents Figure 2: MST Hardware Kit Please make sure all of the components
Installation Manual v1.0: MST Turbo Kit (2003-2007) 5.9L Dodge Please read all instructions before installation. Figure 1: MST Kit Contents Figure 2: MST Hardware Kit Please make sure all of the components
Toggle Button Kit. Installation Instructions
 Toggle Button Kit Installation Instructions Thank you for choosing the Double Apex Toggle Button kit. If you have any questions about the installation please do not hesitate to email us at support@doubleapex.co.
* PLEASE READ INSTRUCTIONS PRIOR TO INSTALLATION
 XDP 6.0L Complete EGR Delete Kit w/up-pipe Item Number: XD169 PACKING LIST: 2 - Lined 3/4" Hose Clamps, 1-180 Coolant Tube, 1-3/4 Silicone Hose, 1 - Stainless Steel Up-pipe 1 - EGR Valve Block-Off Plate,
Shotgun Single Barrel HPFP install guide
 Shotgun Single Barrel HPFP install guide Thank you for your purchase of the VTT Shotgun Single Barrel HPFP upgrade! First thing to do when you open your box is to make sure all parts are in their respective